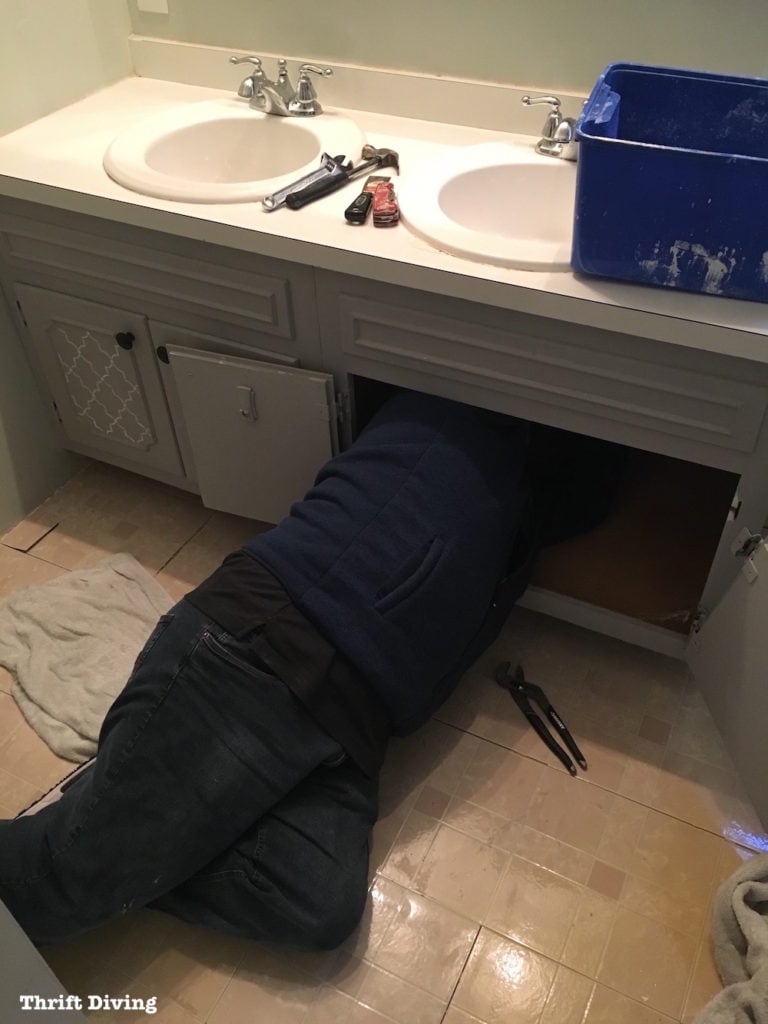
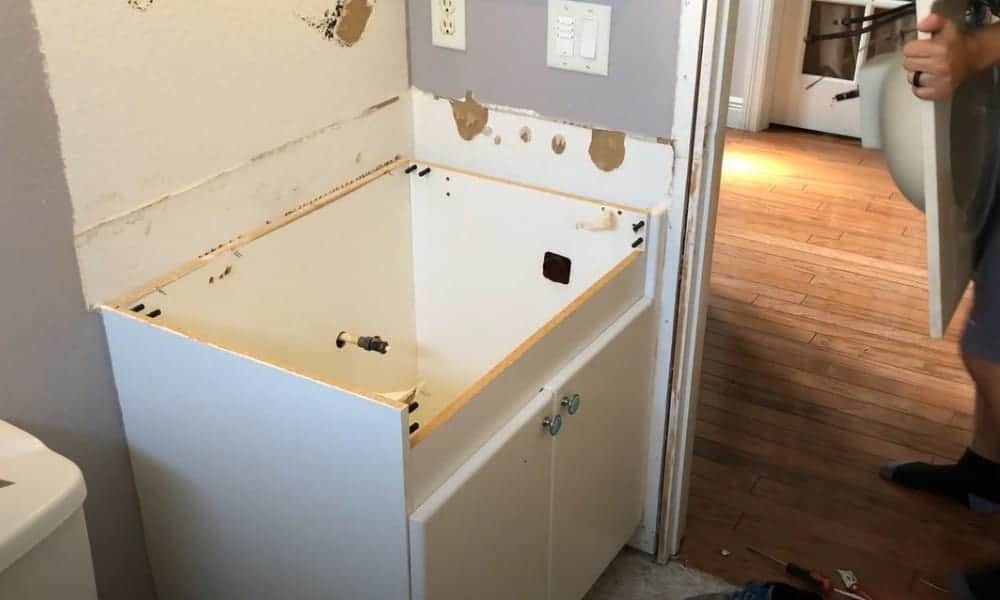
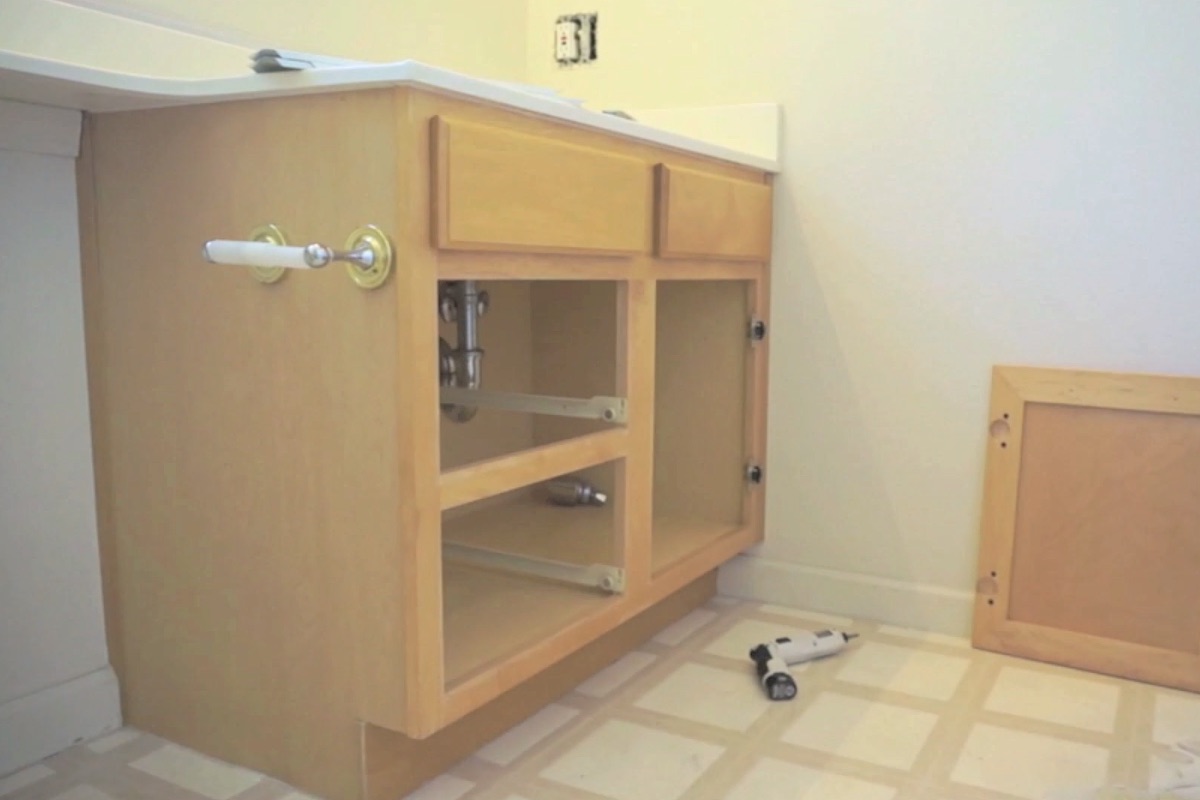
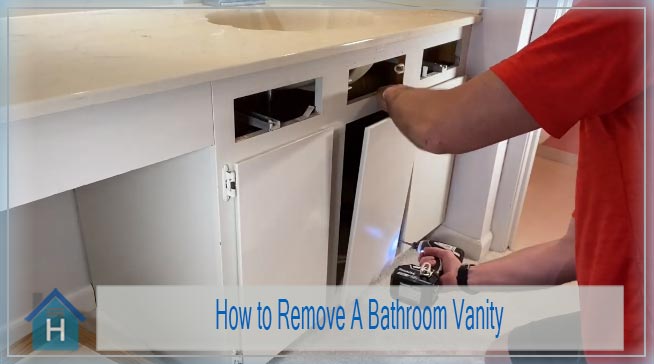
If you're looking to update your bathroom or just need to replace your old vanity and sink, you may be wondering how to go about removing them. It may seem like a daunting task, but with the right tools and some simple steps, you can have your old bathroom vanity and sink removed in no time. First, make sure you have all the necessary tools on hand. This includes a screwdriver, a wrench, pliers, and a utility knife. You may also need a pry bar if your vanity is secured to the wall. Next, turn off the water supply to your bathroom. This is an important step to ensure that you don't have any leaks or water damage during the removal process. If your bathroom has a separate shut-off valve for the vanity, you can simply turn it off. Otherwise, you will need to turn off the main water supply to your house. Once the water is shut off, you can begin removing the vanity. Start by disconnecting the plumbing. Use your wrench to loosen and remove the nuts and bolts that connect the water supply lines to the sink. Then, use your pliers to loosen and remove the drainpipe from the sink. Next, you will need to remove the vanity top. This may require some force if it is caulked or glued in place. Use your utility knife to carefully cut through any caulk or adhesive and then gently pry the top off the vanity. Now it's time to remove the vanity from the wall. If your vanity is secured with screws, use your screwdriver to remove them. If it is secured with nails, you may need to use your pry bar to carefully remove the vanity from the wall. Once the vanity is free from the wall, you can remove it from the bathroom. This may require some assistance if it is heavy or bulky.How to Remove a Bathroom Vanity and Sink


How to Remove a Bathroom Vanity and Sink


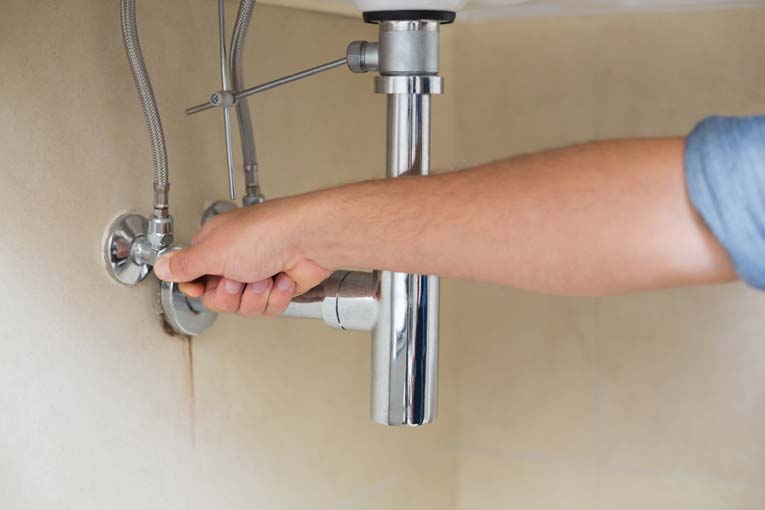
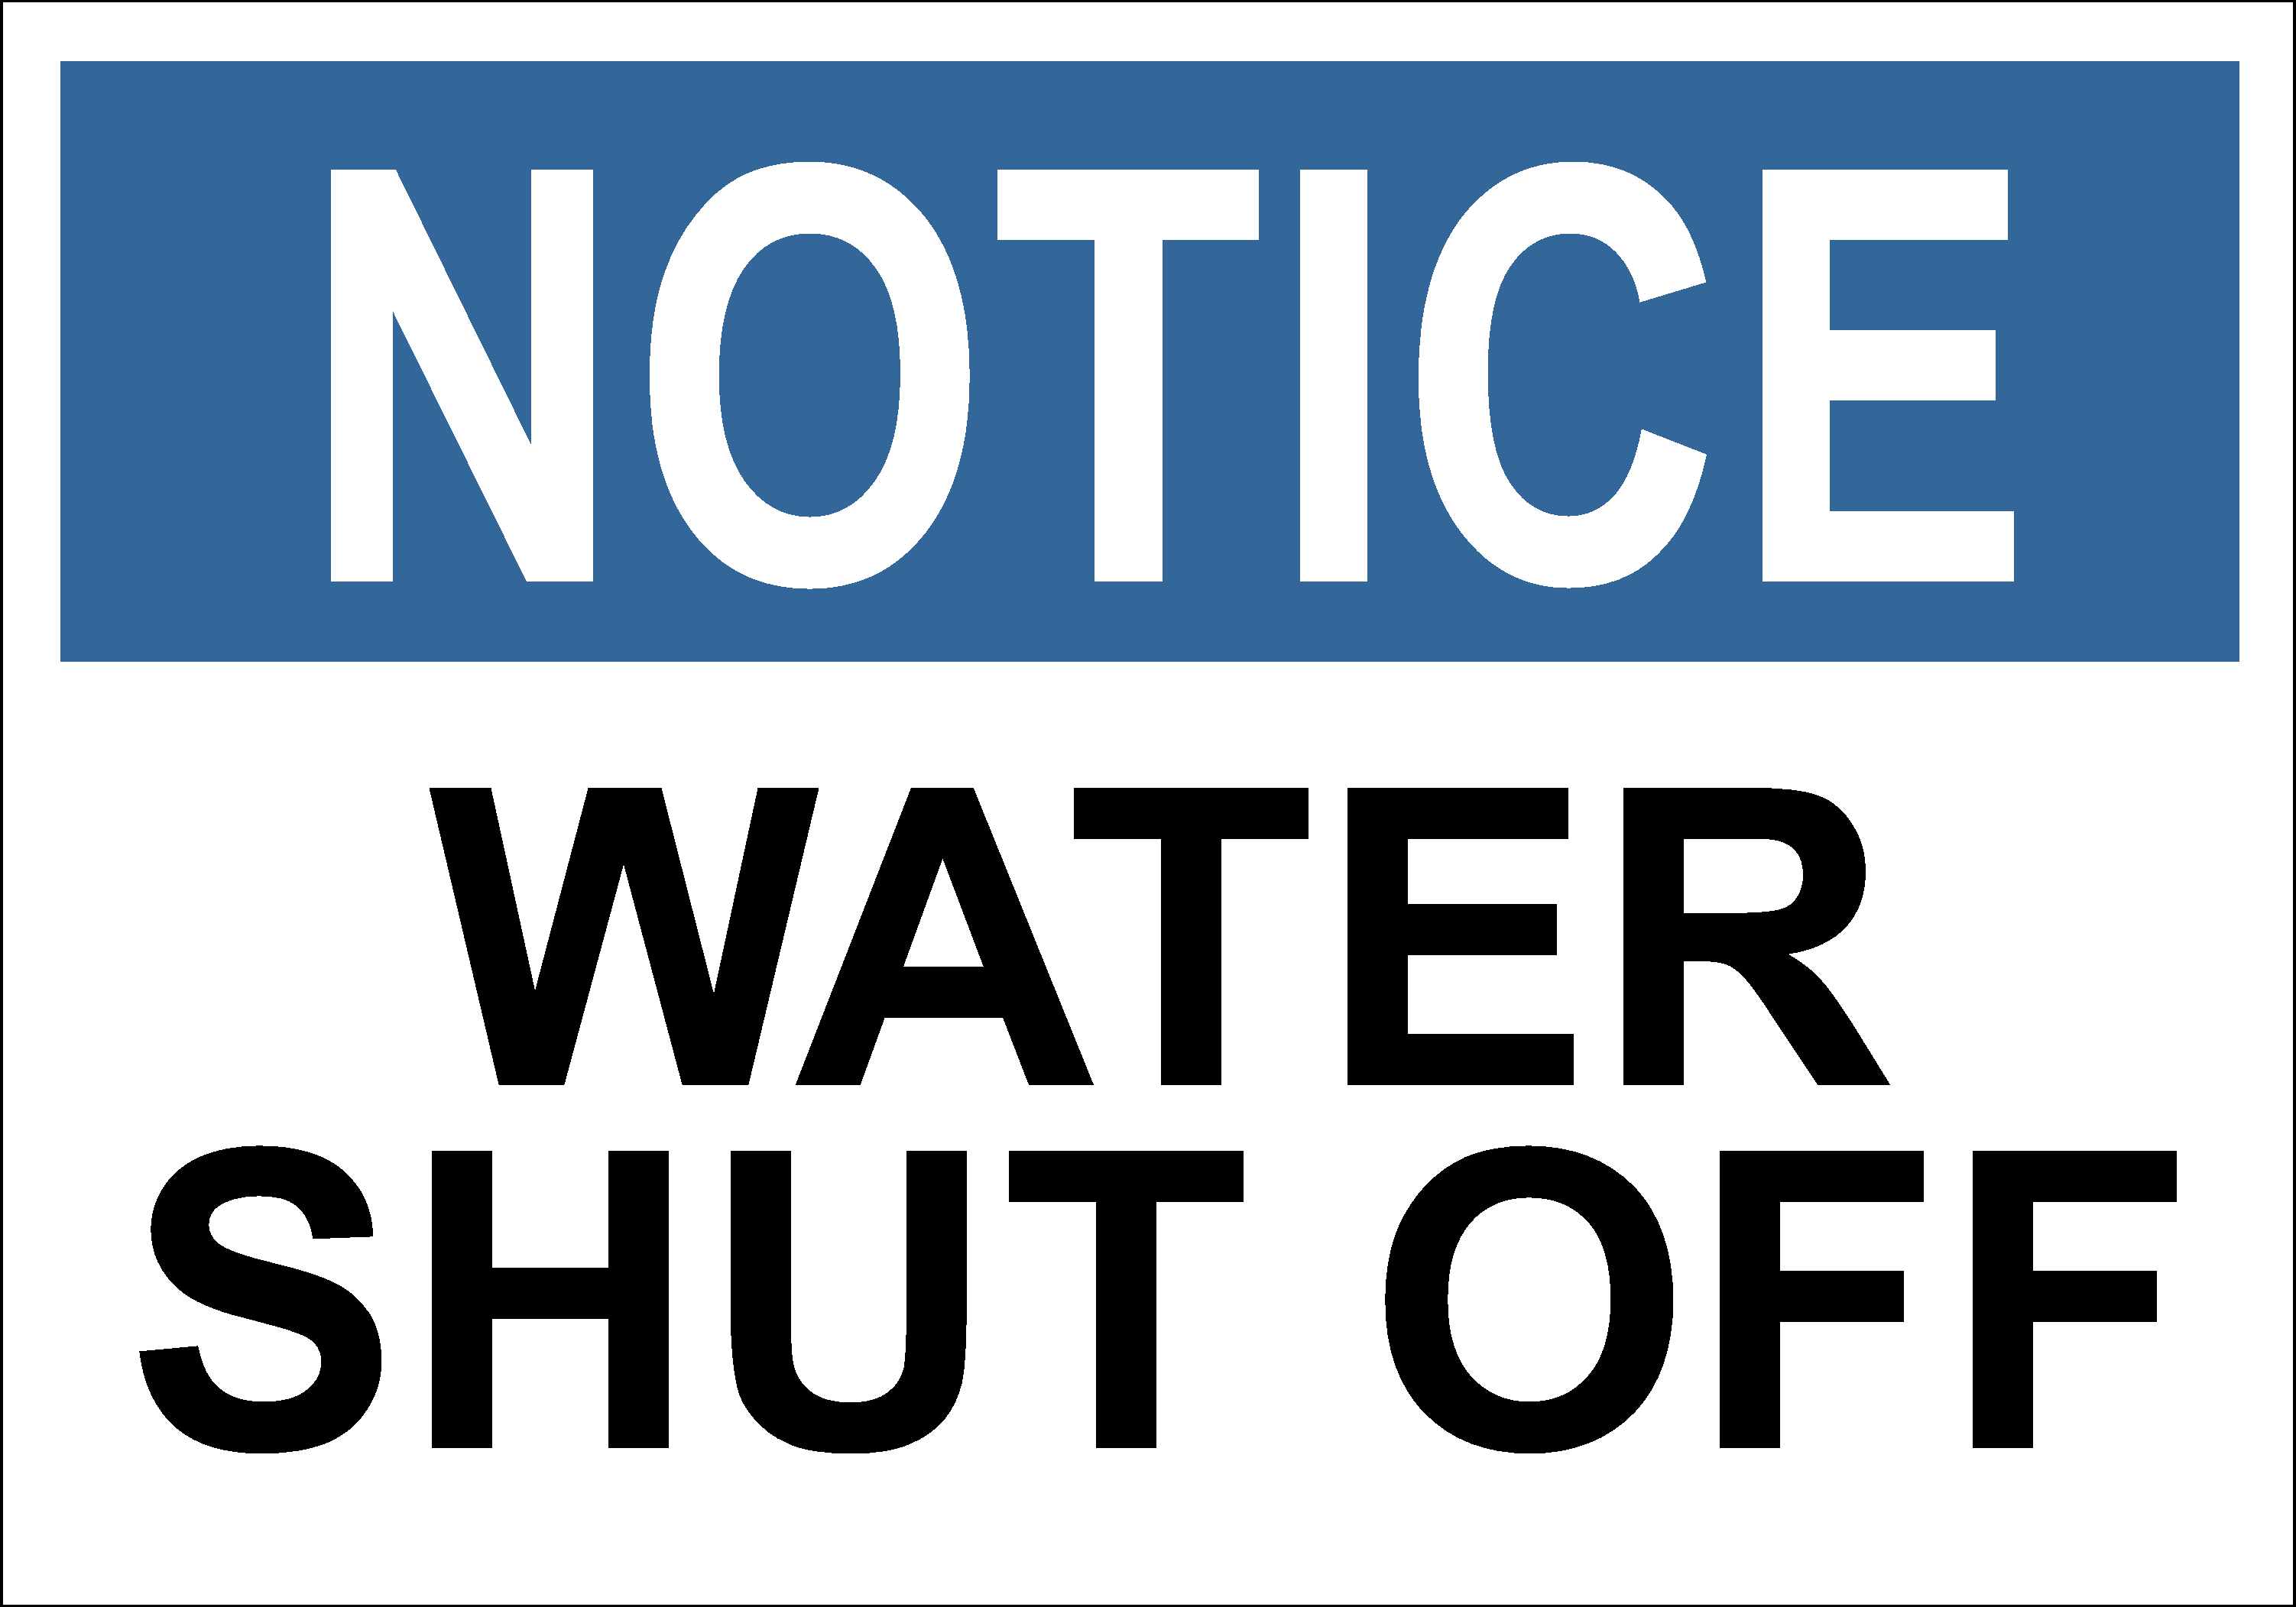
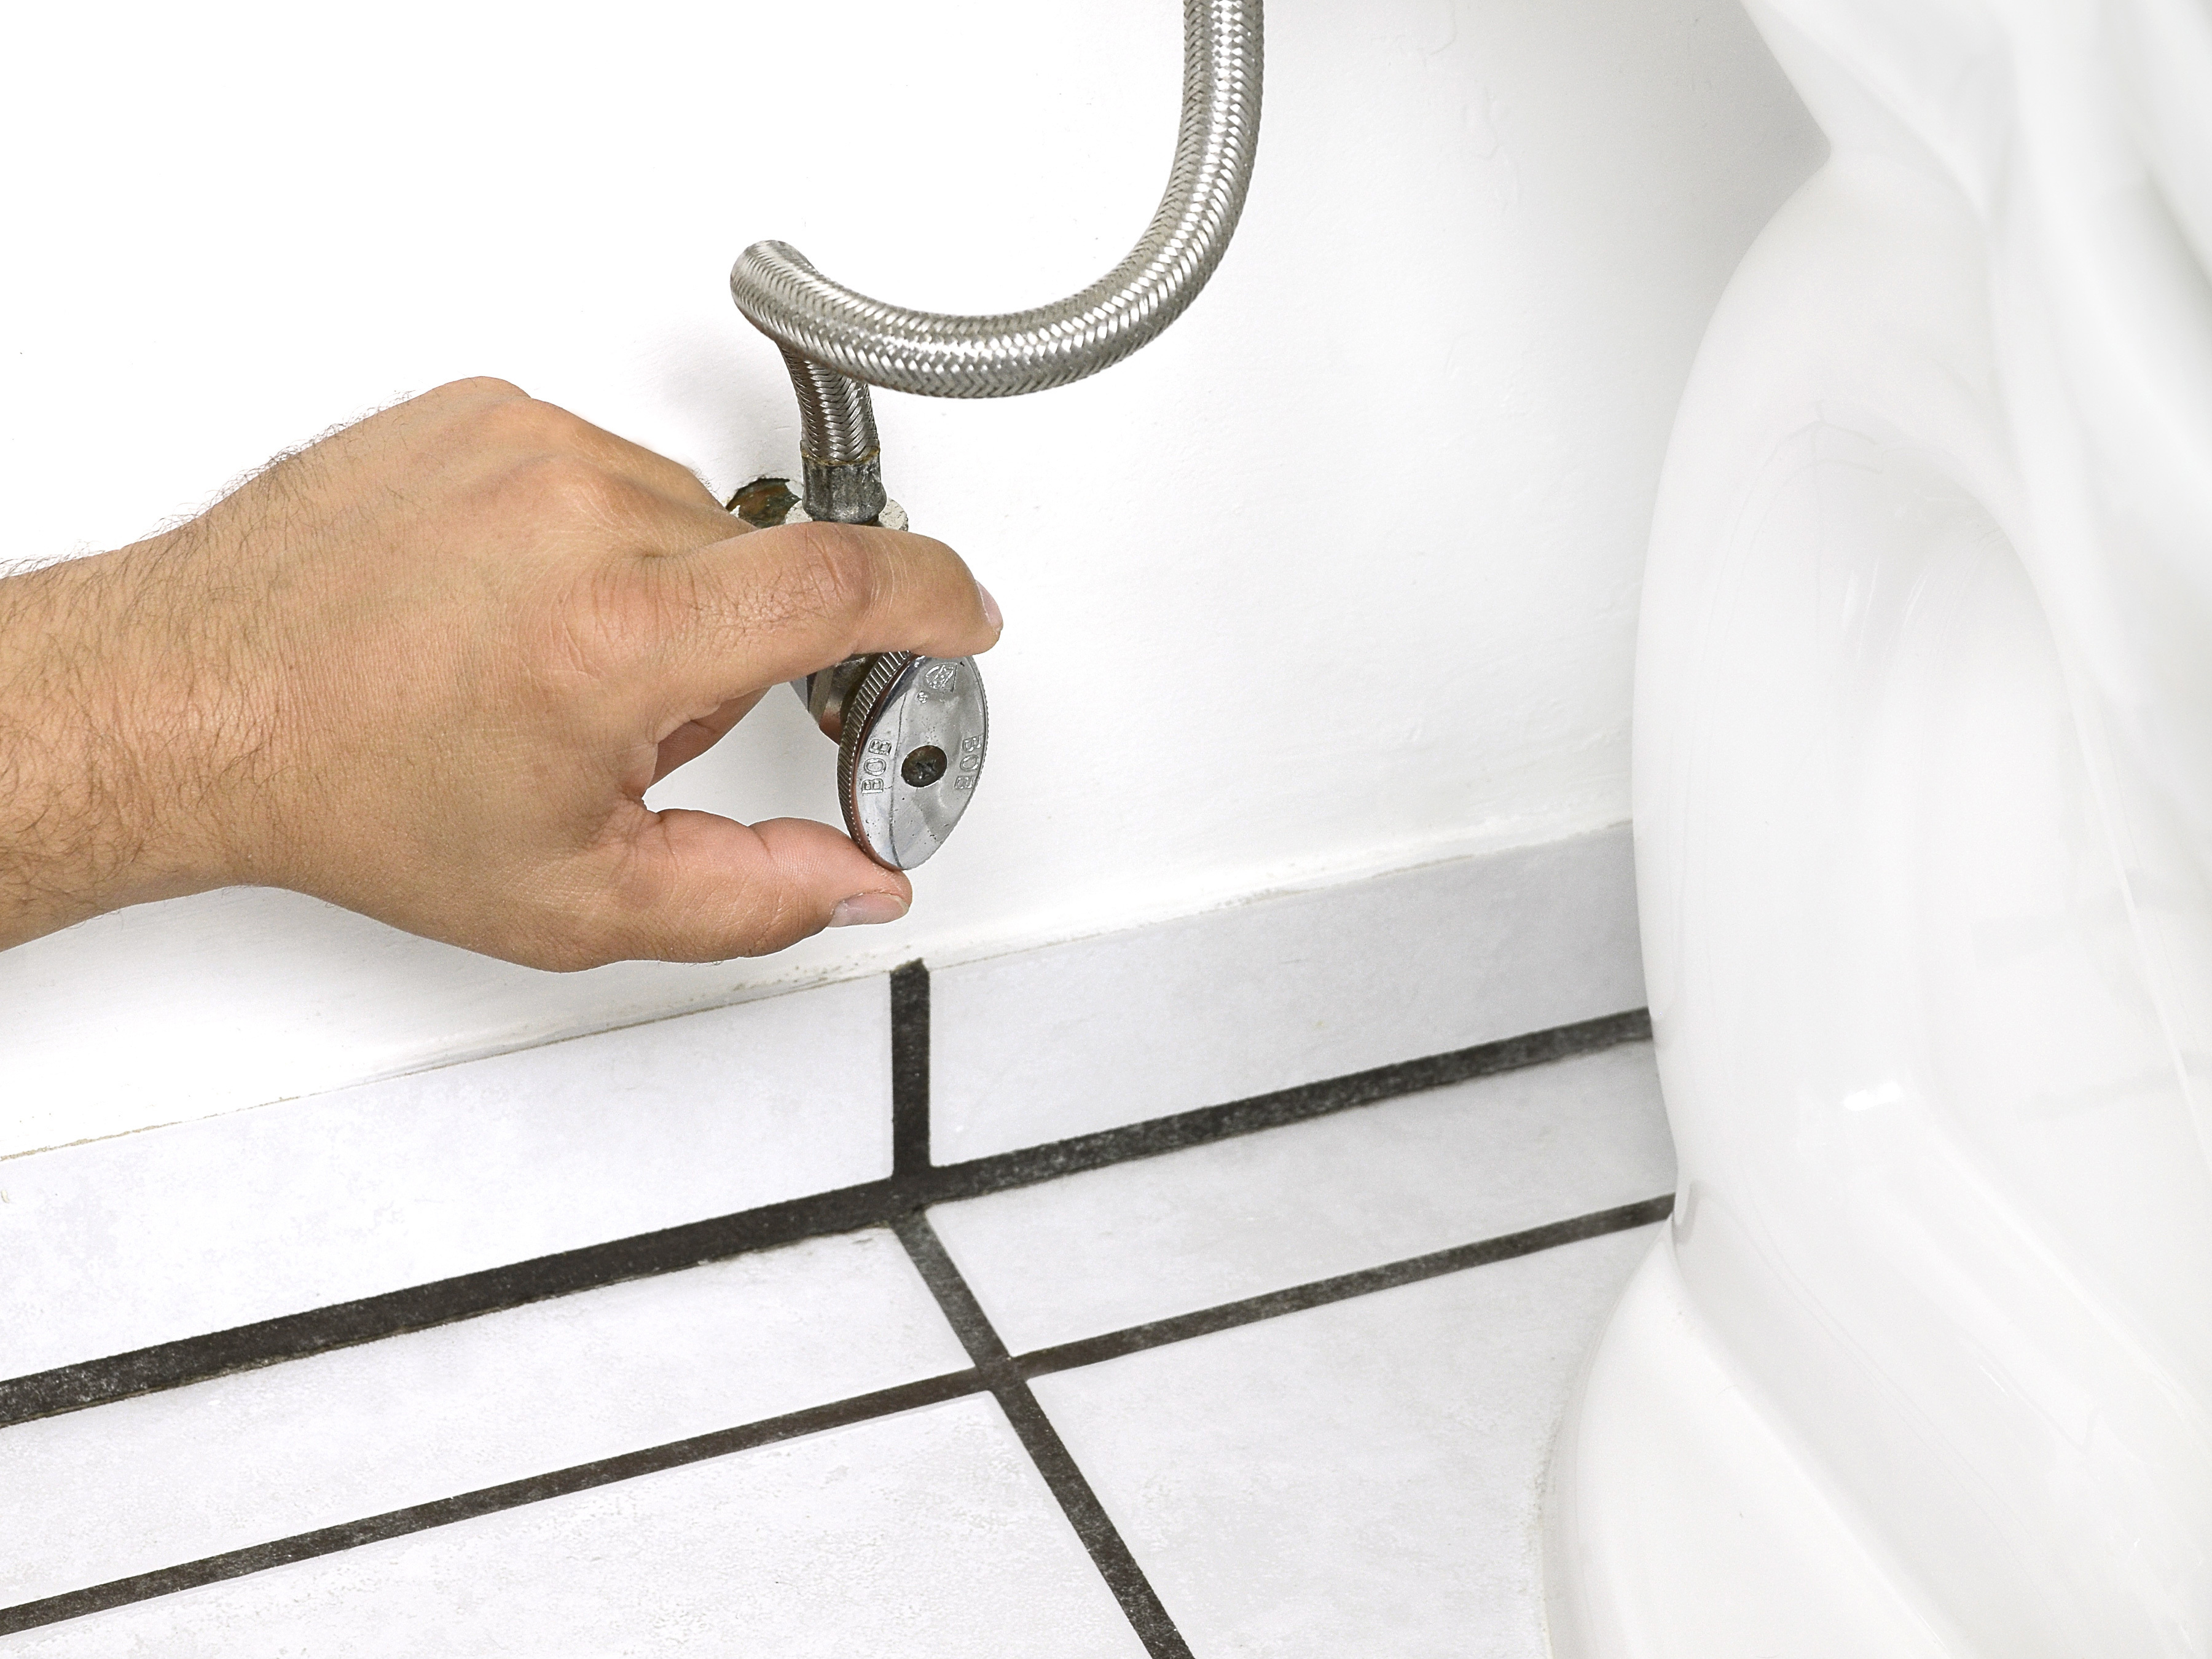
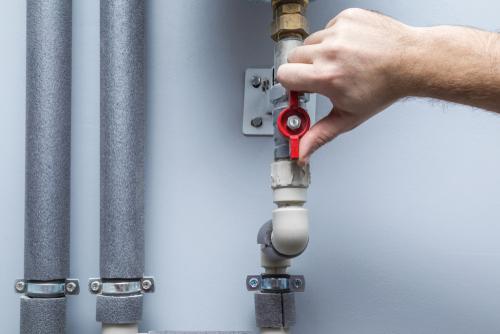
Shutting off the water supply to a bathroom vanity is an important step in the removal process. It ensures that you won't have any water leaks or damage during the process. Follow these simple steps to shut off the water to your vanity. If your bathroom has a separate shut-off valve for the vanity, you can simply turn it off. This valve is typically located under the sink, behind the vanity. Turn it clockwise to shut off the water supply. If your bathroom does not have a separate shut-off valve, you will need to turn off the main water supply to your house. This valve is typically located near your water meter or where the main water line enters your house. Use a wrench to turn the valve clockwise and shut off the water.How to Shut Off Water to a Bathroom Vanity
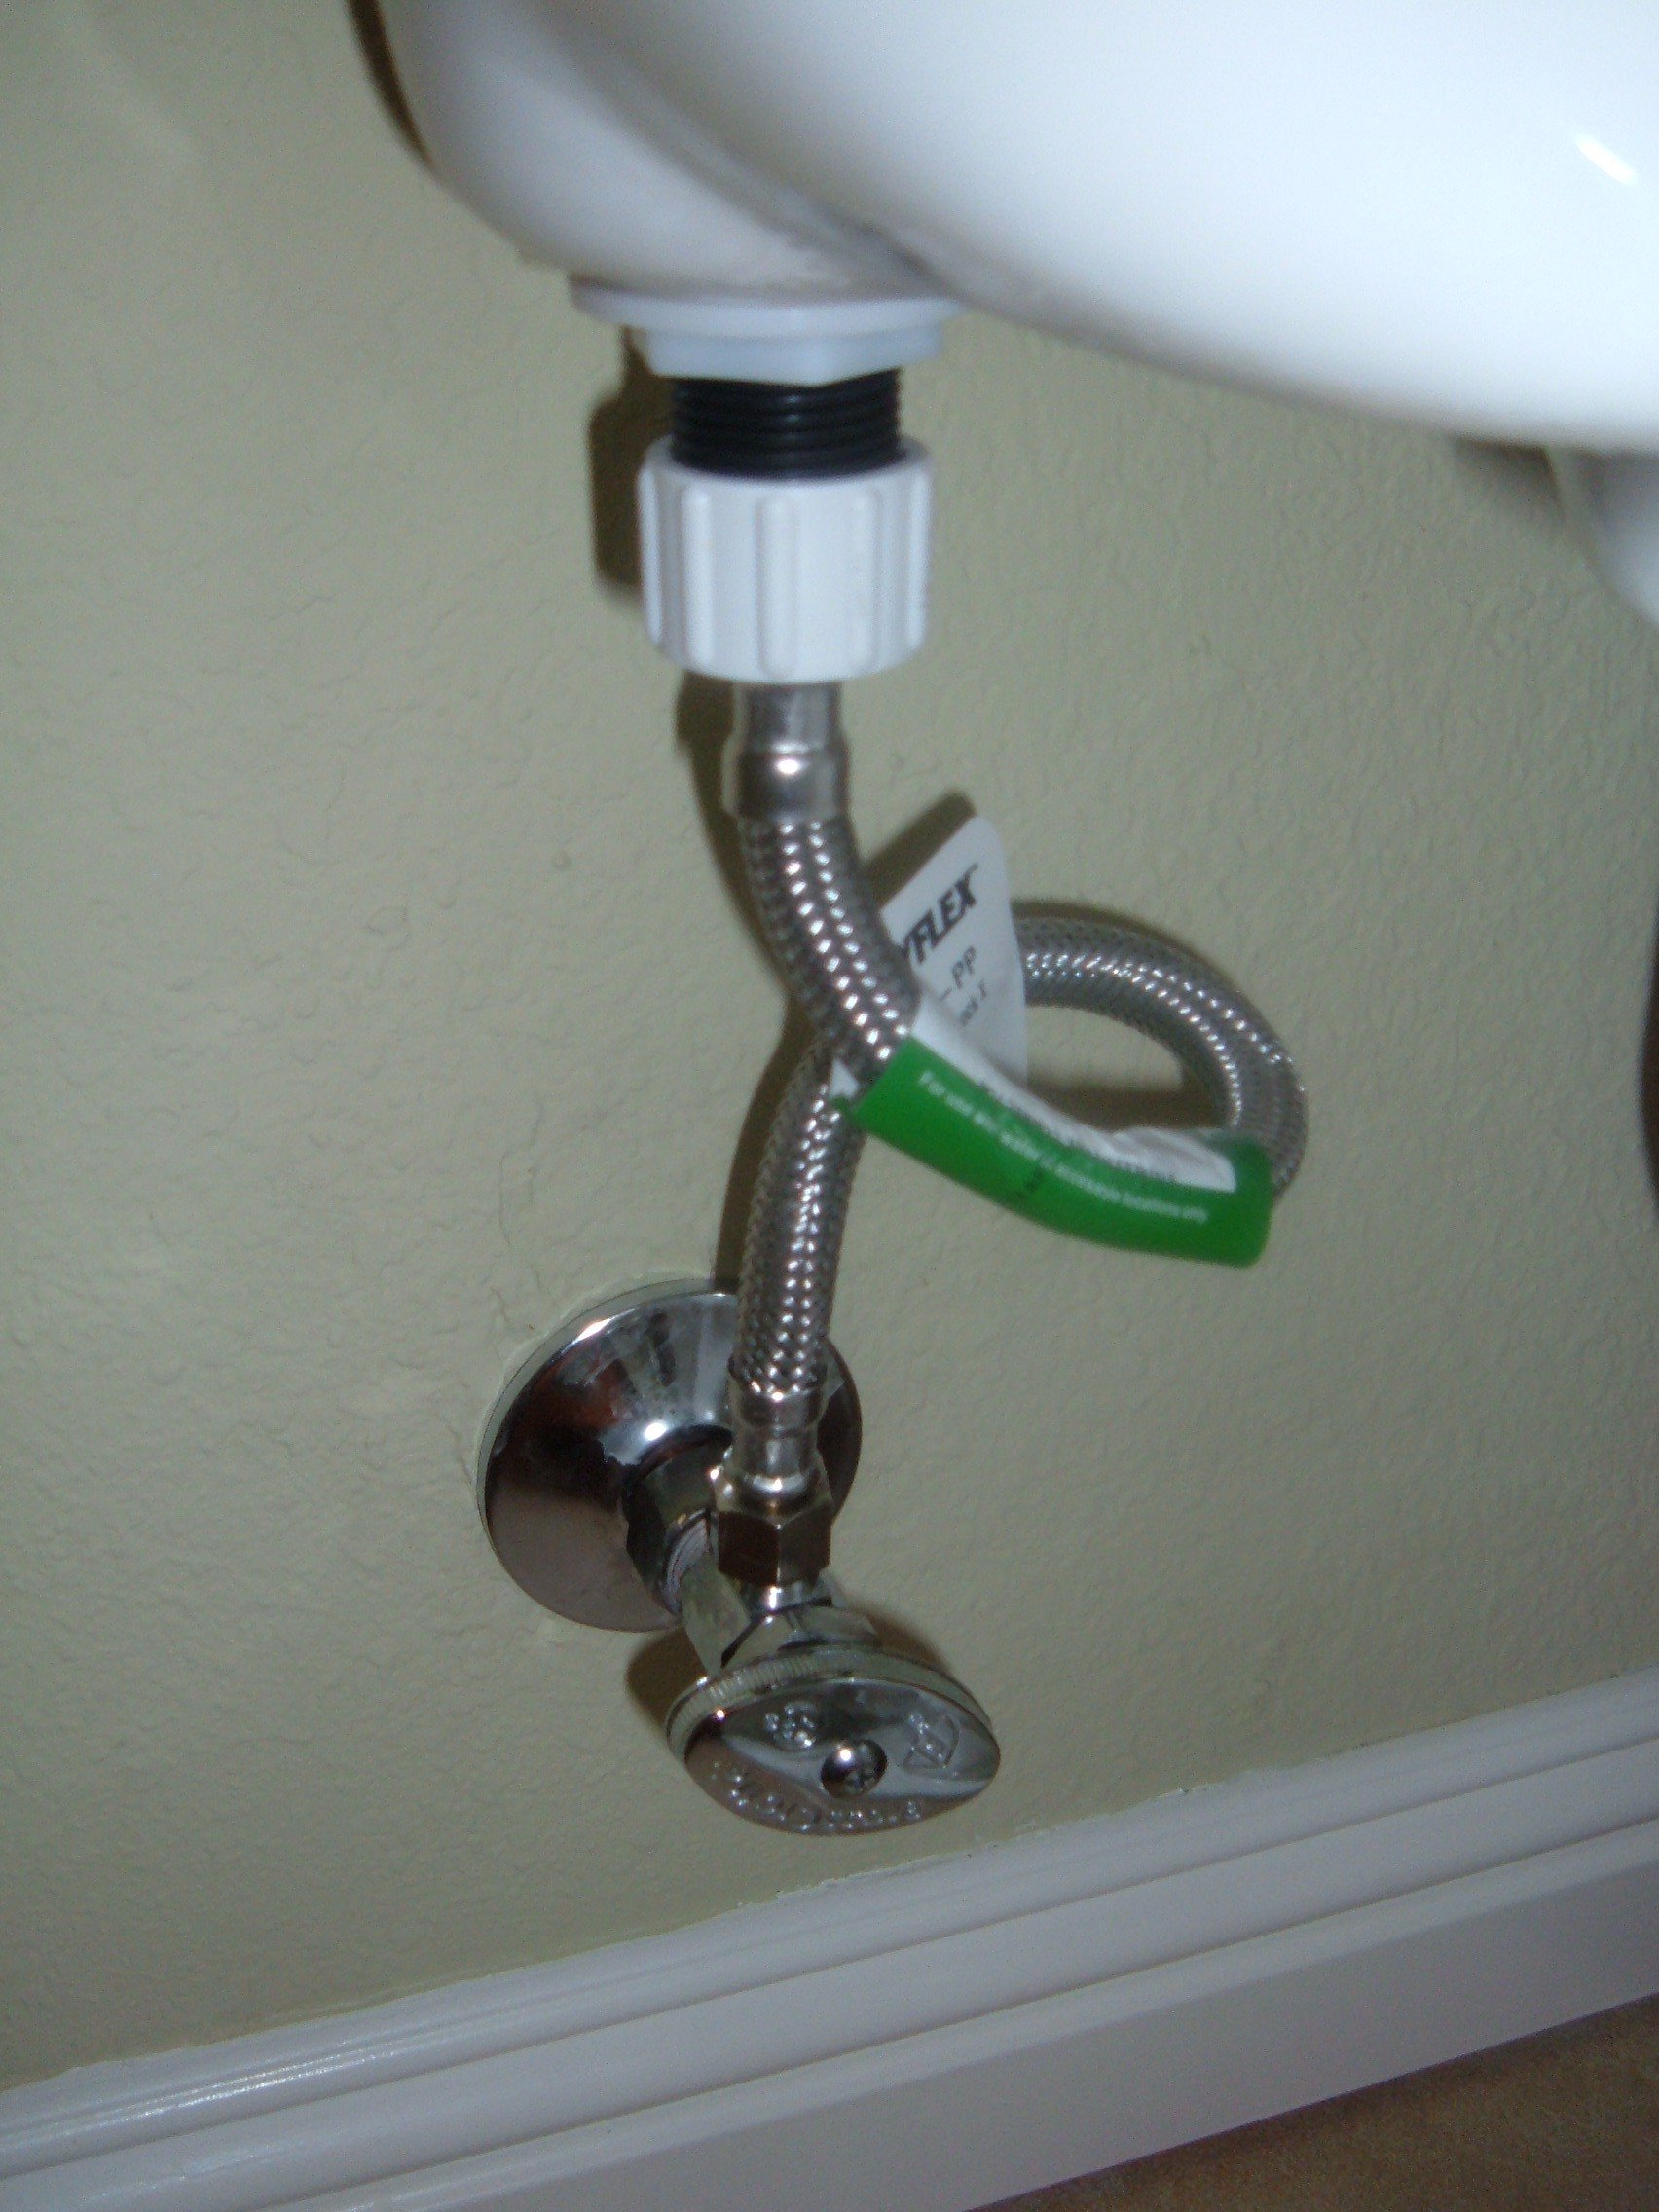

How to Shut Off Water to a Bathroom Vanity


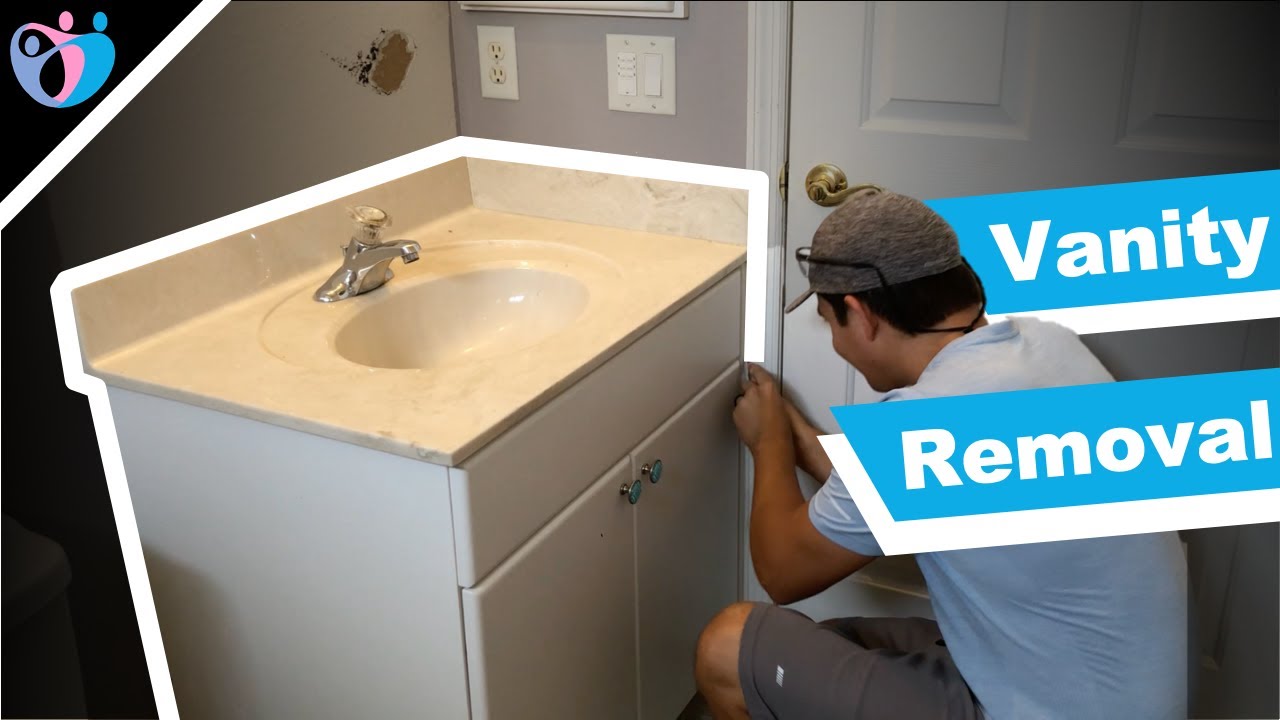
Removing a bathroom vanity may seem like a daunting task, but with the right tools and some simple steps, you can have it done in no time. Follow this step-by-step guide to removing your old bathroom vanity. Step 1: Gather all necessary tools, including a screwdriver, wrench, pliers, utility knife, and pry bar (if needed). Step 2: Turn off the water supply to your bathroom. If your vanity has a separate shut-off valve, use it. Otherwise, turn off the main water supply to your house. Step 3: Disconnect the plumbing. Use your wrench to loosen and remove the nuts and bolts that connect the water supply lines to the sink. Then use your pliers to loosen and remove the drainpipe from the sink. Step 4: Remove the vanity top. Use your utility knife to cut through any caulk or adhesive and then gently pry the top off the vanity. Step 5: Remove the vanity from the wall. If it is secured with screws, use your screwdriver to remove them. If it is secured with nails, use your pry bar to carefully remove the vanity from the wall. Step 6: Remove the vanity from the bathroom. You may need some assistance if it is heavy or bulky.Step-by-Step Guide to Removing a Bathroom Vanity


Step-by-Step Guide to Removing a Bathroom Vanity


Before removing a bathroom vanity, it's important to shut off the water supply to prevent any potential leaks or damage. Here's how to shut off the water supply to your vanity. If your bathroom has a separate shut-off valve for the vanity, you can simply turn it off. This valve is typically located under the sink, behind the vanity. Turn it clockwise to shut off the water supply. If your bathroom does not have a separate shut-off valve, you will need to turn off the main water supply to your house. This valve is typically located near your water meter or where the main water line enters your house. Use a wrench to turn the valve clockwise and shut off the water.Shutting Off Water Supply to a Vanity

Shutting Off Water Supply to a Vanity


If you're planning on updating your bathroom or just need to replace your old vanity and sink, you may be wondering how to remove them and shut off the water supply. Here's a quick and easy guide to removing a bathroom vanity and shutting off the water. Step 1: Gather all necessary tools, including a screwdriver, wrench, pliers, utility knife, and pry bar (if needed). Step 2: Turn off the water supply to your bathroom. If your vanity has a separate shut-off valve, use it. Otherwise, turn off the main water supply to your house. Step 3: Disconnect the plumbing. Use your wrench to loosen and remove the nuts and bolts that connect the water supply lines to the sink. Then use your pliers to loosen and remove the drainpipe from the sink. Step 4: Remove the vanity top. Use your utility knife to cut through any caulk or adhesive and then gently pry the top off the vanity. Step 5: Remove the vanity from the wall. If it is secured with screws, use your screwdriver to remove them. If it is secured with nails, use your pry bar to carefully remove the vanity from the wall. Step 6: Remove the vanity from the bathroom. You may need some assistance if it is heavy or bulky.Removing a Vanity and Shutting Off Water


Removing a Vanity and Shutting Off Water


Removing a bathroom vanity and shutting off the water supply may seem like a daunting task, but with the right tools and some simple steps, you can do it yourself. Here's a guide to removing a vanity and shutting off the water supply to your bathroom. Step 1: Gather all necessary tools, including a screwdriver, wrench, pliers, utility knife, and pry bar (if needed). Step 2: Turn off the water supply to your bathroom. If your vanity has a separate shut-off valve, use it. Otherwise, turn off the main water supply to your house. Step 3: Disconnect the plumbing. Use your wrench to loosen and remove the nuts and bolts that connect the water supply lines to the sink. Then use your pliers to loosen and remove the drainpipe from the sink. Step 4: Remove the vanity top. Use your utility knife to cut through any caulk or adhesive and then gently pry the top off the vanity. Step 5: Remove the vanity from the wall. If it is secured with screws, use your screwdriver to remove them. If it is secured with nails, use your pry bar to carefully remove the vanity from the wall. Step 6: Remove the vanity from the bathroom. You may need some assistance if it is heavy or bulky.DIY Bathroom Vanity Removal and Water Shutoff


DIY Bathroom Vanity Removal and Water Shutoff


If you're looking to update your bathroom or just need to replace your old vanity and sink, you may be wondering how to go about removing them. Luckily, there's a quick and easy way to remove a bathroom vanity without any hassle. Step 1: Gather all necessary tools, including a screwdriver, wrench, pliers, utility knife, and pry bar (if needed). Step 2: Turn off the water supply to your bathroom. If your vanity has a separate shut-off valve, use it. Otherwise, turn off the main water supply to your house. Step 3: Disconnect the plumbing. Use your wrench to loosen and remove the nuts and bolts that connect the water supply lines to the sink. Then use your pliers to loosen and remove the drainpipe from the sink. Step 4: Remove the vanity top. Use your utility knife to cut through any caulk or adhesive and then gently pry the top off the vanity. Step 5: Remove the vanity from the wall. If it is secured with screws, use your screwdriver to remove them. If it is secured with nails, use your pry bar to carefully remove the vanity from the wall. Step 6: Remove the vanity from the bathroom. You may need some assistance if it is heavy or bulky.Quick and Easy Way to Remove a Bathroom Vanity


Quick and Easy Way to Remove a Bathroom Vanity


If you're planning on renovating your bathroom and need to remove the vanity and sink, you'll need to shut off the water supply first. Here's how to do it. If your bathroom has a separate shut-off valve for the vanity, you can simply turn it off. This valve is typically located under the sink, behind the vanity. Turn it clockwise to shut off the water supply. If your bathroom does not have a separate shut-off valve, you will need to turn off the main water supply to your house. This valve is typically located near your water meter or where the main water line enters your house. Use a wrench to turn the valve clockwise and shut off the water.Shutting Off Water to a Vanity for Renovation

Shutting Off Water to a Vanity for Renovation


If you're looking to update your bathroom or just need to replace your old vanity and sink, you may be wondering how to go about removing them. Here's a step-by-step tutorial for removing a vanity and turning off the water supply. Step 1: Gather all necessary tools, including a screwdriver, wrench, pliers, utility knife, and pry bar (if needed). Step 2: Turn off the water supply to your bathroom. If your vanity has a separate shut-off valve, use it. Otherwise, turn off the main water supply to your house. Step 3: Disconnect the plumbing. Use your wrench to loosen and remove the nuts and bolts that connect the water supply lines to the sink. Then use your pliers to loosen and remove the drainpipe from the sink. Step 4: Remove the vanity top. Use your utility knife to cut through any caulk or adhesive and then gently pry the top off the vanity. Step 5: Remove the vanity from the wall. If it is secured with screws, use your screwdriver to remove them. If it is secured with nails, use your pry bar to carefully remove the vanity from the wall. Step 6: Remove the vanity from the bathroom. You may need some assistance if it is heavy or bulky.Removing a Bathroom Vanity and Turning Off Water


Removing a Bathroom Vanity and Turning Off Water
Removing a bathroom vanity and shutting off the water supply may seem like a daunting task, but with the right tools and some simple steps, you can have it done in no time. Here's a step-by-step tutorial for removing a vanity and shutting off the water supply. Step 1: Gather all necessary tools, including a screwdriver, wrench, pliers, utility knife, and pry bar (if needed). Step 2: Turn off the water supply to your bathroom. If your vanity has a separate shut-off valve, use it. Otherwise, turn off the main water supply to your house. Step 3: Disconnect the plumbing. Use your wrench to loosen and remove the nuts and bolts that connect the water supply lines to the sink. Then use your pliers to loosen and remove the drainpipe from the sink. Step 4: Remove the vanity top. Use your utility knife to cut through any caulk or adhesive and then gently pry the top off the vanity. Step 5: Remove the vanity from the wall. If it is secured with screws, use your screwdriver to remove them. If it is secured with nails, use your pry bar to carefully remove the vanity from the wall. Step 6: Remove the vanity from the bathroom. You may need some assistance if it is heavy or bulky.Step-by-Step Tutorial for Removing a Vanity and Shutting Off Water


Step-by-Step Tutorial for Removing a Vanity and Shutting Off Water


Why It's Important to Remove Bathroom Vanity Water Shutoff

Protect Your Home from Water Damage
 When it comes to house design, the bathroom is often overlooked but it plays a crucial role in the overall functionality and aesthetics of a home. One of the most important components in a bathroom is the vanity, which not only serves as a storage solution but also houses the plumbing for the sink. However, over time, the water shutoff valves connected to the vanity can become worn out and corroded, leading to potential water leaks and damage to your home.
Removing the bathroom vanity water shutoff
is essential for preventing costly water damage to your home. If left unchecked, a leaking shutoff valve can cause mold growth, rotting of wood, and damage to surrounding walls and floors. This not only affects the structural integrity of your home but also poses health risks to you and your family. By regularly maintaining and replacing the water shutoff, you can avoid these potential hazards and keep your home safe and dry.
When it comes to house design, the bathroom is often overlooked but it plays a crucial role in the overall functionality and aesthetics of a home. One of the most important components in a bathroom is the vanity, which not only serves as a storage solution but also houses the plumbing for the sink. However, over time, the water shutoff valves connected to the vanity can become worn out and corroded, leading to potential water leaks and damage to your home.
Removing the bathroom vanity water shutoff
is essential for preventing costly water damage to your home. If left unchecked, a leaking shutoff valve can cause mold growth, rotting of wood, and damage to surrounding walls and floors. This not only affects the structural integrity of your home but also poses health risks to you and your family. By regularly maintaining and replacing the water shutoff, you can avoid these potential hazards and keep your home safe and dry.
Ensure Smooth Functioning of Your Plumbing
 Apart from preventing water damage, removing the bathroom vanity water shutoff also ensures the smooth functioning of your plumbing. A faulty shutoff valve can disrupt the water flow to your sink, causing inconvenience and frustration. It may also lead to low water pressure, making it difficult to perform everyday tasks like washing your hands or brushing your teeth.
Regularly removing and replacing the water shutoff valve
ensures that your plumbing is working properly and efficiently. This not only saves you from potential headaches but also helps you save on your water bill by preventing any wastage due to leaks or low water pressure.
Apart from preventing water damage, removing the bathroom vanity water shutoff also ensures the smooth functioning of your plumbing. A faulty shutoff valve can disrupt the water flow to your sink, causing inconvenience and frustration. It may also lead to low water pressure, making it difficult to perform everyday tasks like washing your hands or brushing your teeth.
Regularly removing and replacing the water shutoff valve
ensures that your plumbing is working properly and efficiently. This not only saves you from potential headaches but also helps you save on your water bill by preventing any wastage due to leaks or low water pressure.
Improve the Aesthetics of Your Bathroom
 In addition to functionality, the bathroom vanity also plays a significant role in the aesthetics of your bathroom. A worn-out or corroded water shutoff valve can be an eyesore, taking away from the overall design of your bathroom. By removing and replacing the outdated shutoff valve, you can instantly improve the appearance of your bathroom and give it a fresh, updated look.
Upgrading to a newer, more modern water shutoff valve
not only enhances the visual appeal of your bathroom but also adds value to your home. So, if you're looking to sell your home or simply want to give your bathroom a makeover, removing the old water shutoff valve is a crucial step in the process.
In addition to functionality, the bathroom vanity also plays a significant role in the aesthetics of your bathroom. A worn-out or corroded water shutoff valve can be an eyesore, taking away from the overall design of your bathroom. By removing and replacing the outdated shutoff valve, you can instantly improve the appearance of your bathroom and give it a fresh, updated look.
Upgrading to a newer, more modern water shutoff valve
not only enhances the visual appeal of your bathroom but also adds value to your home. So, if you're looking to sell your home or simply want to give your bathroom a makeover, removing the old water shutoff valve is a crucial step in the process.
Conclusion
 As you can see, removing the bathroom vanity water shutoff is not just a simple maintenance task but an important step in protecting your home and improving its overall functionality and design. So, make sure to regularly check and replace the water shutoff valve to avoid any potential water damage, ensure smooth plumbing, and enhance the aesthetics of your bathroom.