Are you tired of dealing with a faulty plastic kitchen sink diverter? This essential piece of your sink may become clogged or worn out over time, affecting the flow and temperature of your water. But fear not, removing a plastic kitchen sink diverter is a relatively simple DIY task that can save you time and money. Follow these 10 easy steps to remove your plastic kitchen sink diverter and get your sink back to working like new.How to Remove a Plastic Kitchen Sink Diverter


How to Remove a Plastic Kitchen Sink Diverter


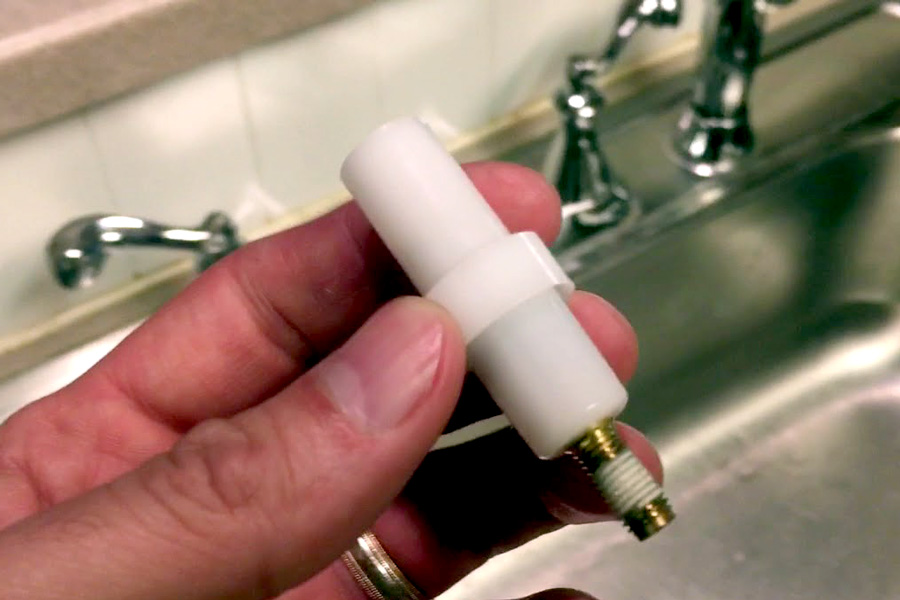
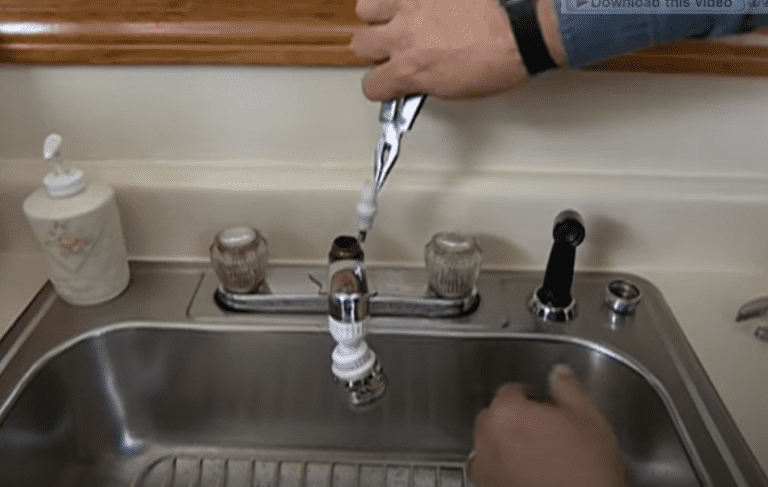
Step 1: Before you begin, make sure to shut off the water supply to your sink. You can do this by turning off the water valves located under the sink or by turning off the main water supply to your house. Step 2: Next, remove any items from your sink and place a towel or bucket underneath the sink to catch any water that may leak out. Step 3: Locate the plastic kitchen sink diverter, which is usually located near the base of the faucet. It may be covered by a small cap or collar. Step 4: Using a wrench or pliers, carefully unscrew the cap or collar covering the diverter. Be sure to protect the finish of your sink by wrapping the wrench or pliers with a cloth. Step 5: Once the cap or collar is removed, you will see the diverter. Carefully remove it from the sink by pulling it straight up. Step 6: If the diverter is stuck, you can use a pair of pliers to gently wiggle it loose. Just be careful not to damage the diverter or the surrounding parts. Step 7: Once the diverter is removed, clean it thoroughly with warm, soapy water to remove any debris or buildup. You can also use a small brush to clean inside the diverter. Step 8: While the diverter is out, take the opportunity to clean the area where it sits in the sink. Use a toothbrush or small brush to remove any dirt or grime. Step 9: If your plastic kitchen sink diverter is damaged or worn out, now is the time to replace it with a new one. You can purchase a new diverter at most hardware or home improvement stores. Step 10: Once you have a new or cleaned diverter, simply place it back into the sink and secure it with the cap or collar. Turn the water supply back on and test your sink to ensure the diverter is working properly.10 Steps to Remove a Plastic Kitchen Sink Diverter


10 Steps to Remove a Plastic Kitchen Sink Diverter


Removing a plastic kitchen sink diverter may seem like a daunting task, but with the right tools and knowledge, it can be done in no time. Follow these steps to safely and effectively remove your plastic kitchen sink diverter and get your sink back to optimal functioning.Removing a Plastic Kitchen Sink Diverter: A Step-by-Step Guide


Removing a Plastic Kitchen Sink Diverter: A Step-by-Step Guide


Why spend money on a plumber when you can easily remove a plastic kitchen sink diverter yourself? With just a few tools and some basic knowledge, you can save time and money by tackling this DIY task on your own.DIY: Removing a Plastic Kitchen Sink Diverter


DIY: Removing a Plastic Kitchen Sink Diverter


Sometimes, even the simplest tasks can come with their own set of challenges. Here are some tips and tricks to keep in mind when removing a plastic kitchen sink diverter: 1. Protect the finish of your sink: When using tools to remove the diverter, be sure to wrap them in a cloth to avoid damaging the finish of your sink. 2. Clean the diverter and surrounding area: Taking the time to thoroughly clean the diverter and the area where it sits in the sink can prevent future issues and help it function properly. 3. Use caution when removing a stuck diverter: If the diverter is stuck, use gentle pressure and avoid using excessive force to prevent damage.Removing a Plastic Kitchen Sink Diverter: Tips and Tricks


Removing a Plastic Kitchen Sink Diverter: Tips and Tricks


With these easy-to-follow steps and tips, removing a plastic kitchen sink diverter can be a simple and stress-free process. Don't let a faulty diverter slow you down, take control and get your sink back to working like new.The Easy Way to Remove a Plastic Kitchen Sink Diverter


The Easy Way to Remove a Plastic Kitchen Sink Diverter

While removing a plastic kitchen sink diverter may seem like a straightforward task, there are some common mistakes that can cause bigger issues. Here are some mistakes to avoid when removing a plastic kitchen sink diverter: 1. Forgetting to shut off the water supply: Before beginning the process, always remember to turn off the water supply to your sink to avoid any accidents. 2. Using excessive force: Using too much force when trying to remove a stuck diverter can result in damage to the diverter or surrounding parts. 3. Not cleaning the diverter and surrounding area: Neglecting to clean the diverter and the area where it sits in the sink can cause buildup and lead to future issues.Removing a Plastic Kitchen Sink Diverter: Common Mistakes to Avoid


Removing a Plastic Kitchen Sink Diverter: Common Mistakes to Avoid


Before you begin, make sure you have the necessary tools to safely and effectively remove your plastic kitchen sink diverter: 1. Wrench or pliers: These tools will be used to remove the cap or collar covering the diverter. 2. Cloth: Wrapping your tools in a cloth will help protect the finish of your sink. 3. Small brush: This can be used to clean the diverter and the area where it sits in the sink.Removing a Plastic Kitchen Sink Diverter: Tools You'll Need

Removing a Plastic Kitchen Sink Diverter: Tools You'll Need

While removing a plastic kitchen sink diverter is a relatively simple task, it's important to take some safety precautions to avoid any accidents or injuries. Here are some safety precautions to keep in mind: 1. Turn off the water supply: Always remember to shut off the water supply to your sink before starting the process. 2. Protect the finish of your sink: Wrapping your tools in a cloth and using gentle pressure can help prevent damage to the finish of your sink. 3. Use caution when handling the diverter: The diverter may be sharp or have small parts, so handle it with care to avoid injury.Removing a Plastic Kitchen Sink Diverter: Safety Precautions to Take
Removing a Plastic Kitchen Sink Diverter: Safety Precautions to Take


If you encounter any issues while removing your plastic kitchen sink diverter, here are some troubleshooting tips to help you out: 1. Diverter won't budge: If the diverter is stuck, try using a pair of pliers to gently wiggle it loose. 2. Diverter is damaged or worn out: If your diverter is too damaged to be cleaned, it's time to replace it with a new one. 3. Water is leaking from the sink: If you notice any leaks after removing the diverter, double check that it is properly in place and secured with the cap or collar.Removing a Plastic Kitchen Sink Diverter: Troubleshooting Common Issues
Removing a Plastic Kitchen Sink Diverter: Troubleshooting Common Issues


Why Removing a Plastic Kitchen Sink Diverter is Essential for Your House Design

The Importance of a Functioning Kitchen Sink Diverter
 A kitchen sink diverter is a small but crucial component of your kitchen sink. It controls the flow of water between the faucet and the sprayer, allowing you to switch between the two with ease. But when this diverter is made of plastic, it can become a source of frustration and inconvenience.
Plastic kitchen sink diverters are prone to breakage and can cause water pressure issues
. This not only affects the functionality of your sink, but it can also lead to more serious problems such as leaks and water damage.
Moreover, plastic diverters can look cheap and out of place in a well-designed kitchen.
A kitchen sink diverter is a small but crucial component of your kitchen sink. It controls the flow of water between the faucet and the sprayer, allowing you to switch between the two with ease. But when this diverter is made of plastic, it can become a source of frustration and inconvenience.
Plastic kitchen sink diverters are prone to breakage and can cause water pressure issues
. This not only affects the functionality of your sink, but it can also lead to more serious problems such as leaks and water damage.
Moreover, plastic diverters can look cheap and out of place in a well-designed kitchen.
The Benefits of Removing a Plastic Kitchen Sink Diverter
 By removing a plastic kitchen sink diverter, you can
improve the overall aesthetic of your kitchen
. You can replace it with a high-quality metal diverter that not only looks sleek and modern but also adds value to your kitchen.
Additionally,
metal diverters are more durable and less likely to break
, ensuring that your sink remains fully functional for years to come. This eliminates the need for frequent repairs or replacements, saving you time and money in the long run.
By removing a plastic kitchen sink diverter, you can
improve the overall aesthetic of your kitchen
. You can replace it with a high-quality metal diverter that not only looks sleek and modern but also adds value to your kitchen.
Additionally,
metal diverters are more durable and less likely to break
, ensuring that your sink remains fully functional for years to come. This eliminates the need for frequent repairs or replacements, saving you time and money in the long run.
The Process of Removing a Plastic Kitchen Sink Diverter
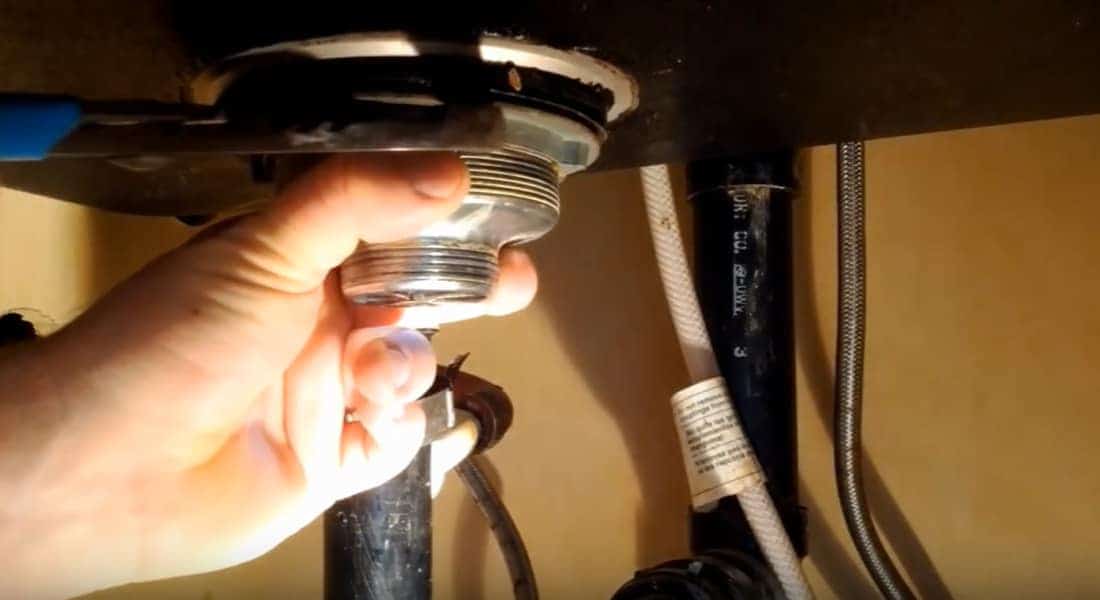
 Removing a plastic kitchen sink diverter may seem like a daunting task, but it can be done with the right tools and steps. First, turn off the water supply to your sink and drain any remaining water. Then, using a wrench, unscrew the plastic diverter from the faucet. Next, clean the opening where the diverter was attached and
replace it with the new metal diverter
by screwing it into place. Finally, turn the water supply back on and test the new diverter to ensure it is functioning properly.
Removing a plastic kitchen sink diverter may seem like a daunting task, but it can be done with the right tools and steps. First, turn off the water supply to your sink and drain any remaining water. Then, using a wrench, unscrew the plastic diverter from the faucet. Next, clean the opening where the diverter was attached and
replace it with the new metal diverter
by screwing it into place. Finally, turn the water supply back on and test the new diverter to ensure it is functioning properly.
In Conclusion
 Removing a plastic kitchen sink diverter is a simple yet crucial step in achieving a well-designed and functional kitchen
. It not only improves the appearance of your sink, but it also prevents potential problems and adds value to your home. So don't hesitate to make this small but impactful change for a better house design.
Removing a plastic kitchen sink diverter is a simple yet crucial step in achieving a well-designed and functional kitchen
. It not only improves the appearance of your sink, but it also prevents potential problems and adds value to your home. So don't hesitate to make this small but impactful change for a better house design.