How to Reinstall a Panel Under a Kitchen Sink
If you're looking to give your kitchen a quick and cost-effective update, reinstalling the panel under your kitchen sink is a great place to start. This often overlooked area can easily become dirty, damaged, or outdated, making your entire kitchen look less than stellar. But don't worry, with a few simple steps, you can have your kitchen sink panel looking brand new in no time.


How to Reinstall a Panel Under a Kitchen Sink


Steps to Reinstall a Panel Under a Kitchen Sink
Before you begin, make sure you have all the necessary tools and materials on hand. You'll need a screwdriver, measuring tape, hammer, nails, sandpaper, cleaning supplies, and a replacement panel if needed. Once you have everything you need, follow these steps:
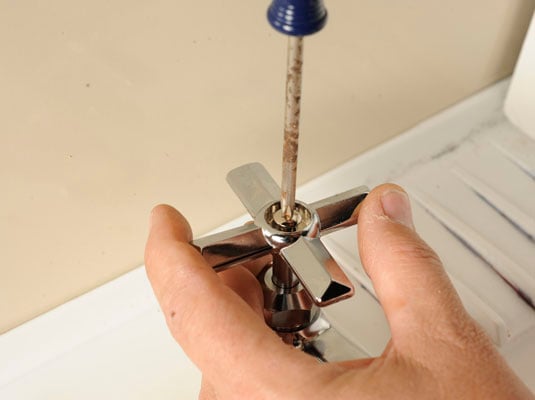
1. Remove the old panel: Use a screwdriver to remove the screws holding the old panel in place. If there are any stubborn screws, try using a hammer to gently tap them loose. Once the panel is free, carefully remove it and set it aside.
2. Clean the area: With the panel removed, take the opportunity to thoroughly clean the area. Use a mild cleaner and warm water to remove any dirt, grime, or grease buildup. You can also lightly sand the area to smooth out any imperfections.
3. Measure the space: Use a measuring tape to determine the size of the opening where the panel will go. If your old panel was damaged and you don't have a replacement, you can use these measurements to purchase a new one.
4. Cut the panel: If you need to cut the panel to fit, use a saw or utility knife to carefully make the necessary cuts. Be sure to wear protective gloves and goggles when cutting to avoid injury.
5. Install the panel: Once your panel is the correct size, it's time to install it. Use a hammer and nails to secure the panel in place. Make sure it is flush against the surrounding cabinets and walls.
6. Finishing touches: If needed, paint or stain the panel to match your kitchen's decor. You can also add trim pieces for a more polished look.


Steps to Reinstall a Panel Under a Kitchen Sink


Reinstalling a Panel Under a Kitchen Sink: A Step-by-Step Guide
Now that you know the basic steps, let's dive into the details of each one.
Removing the old panel: Before you begin, make sure you have a safe and clear workspace. Use a screwdriver to remove the screws holding the panel in place. If there are any stubborn screws, try using a hammer to gently tap them loose. Once the panel is free, carefully remove it and set it aside. Be sure to properly dispose of the old panel.
Cleaning the area: Once the old panel is removed, take the opportunity to thoroughly clean the area. Use a mild cleaner and warm water to remove any dirt, grime, or grease buildup. You can also lightly sand the area to smooth out any imperfections. This will ensure a clean and smooth surface for your new panel.
Measuring the space: Use a measuring tape to determine the size of the opening where the panel will go. This will ensure that your new panel fits properly and looks seamless with the rest of your kitchen cabinets.
Cutting the panel: If you need to cut the panel to fit, measure and mark the necessary cuts before using a saw or utility knife to carefully make them. Be sure to wear protective gloves and goggles when cutting to avoid injury.
Installing the panel: Once your panel is the correct size, it's time to install it. Use a hammer and nails to secure the panel in place. Make sure it is flush against the surrounding cabinets and walls. You can also use wood glue for added stability.
Finishing touches: If needed, paint or stain the panel to match your kitchen's decor. You can also add trim pieces for a more polished look. This is also a great time to replace any outdated hardware, such as handles or knobs.


Reinstalling a Panel Under a Kitchen Sink: A Step-by-Step Guide


DIY: Reinstalling a Panel Under a Kitchen Sink
Reinstalling a panel under a kitchen sink is a relatively simple DIY project that can easily be completed in a day. By following the steps outlined above, you can save yourself time and money by not having to hire a professional.
Additionally, you have the freedom to choose the perfect panel for your kitchen without having to worry about extra costs or scheduling conflicts. So why not give it a try and see the dramatic difference it can make in your kitchen?

DIY: Reinstalling a Panel Under a Kitchen Sink


Reinstalling a Panel Under a Kitchen Sink: What You Need to Know
Before you begin your project, there are a few things you should keep in mind:
1. Take accurate measurements: The key to a successful panel installation is accurate measurements. Be sure to measure the opening where the panel will go, as well as the panel itself, to ensure a perfect fit.
2. Choose the right panel: If you need to replace your old panel, make sure you choose one that is similar in style and material to your existing cabinets. This will create a cohesive look in your kitchen.
3. Use the right tools: Having the right tools on hand will make your project much easier and more efficient. Make sure you have a hammer, screwdriver, measuring tape, and any other necessary tools before you begin.

Reinstalling a Panel Under a Kitchen Sink: What You Need to Know


Reinstalling a Panel Under a Kitchen Sink: Tips and Tricks
Here are a few tips and tricks to help you achieve the best results:
- If your panel is in good condition, you can simply paint or stain it to give it a fresh look instead of replacing it entirely.
- If you want to add a decorative touch, consider using a peel-and-stick wallpaper or contact paper to cover your panel. Just make sure it is waterproof and can withstand moisture from the sink.
- If you're installing a larger panel, consider using additional supports, such as L-brackets, to ensure it stays securely in place.


Reinstalling a Panel Under a Kitchen Sink: Tips and Tricks
Reinstalling a Panel Under a Kitchen Sink: Common Mistakes to Avoid
While reinstalling a panel under a kitchen sink may seem like a straightforward task, there are a few common mistakes that can easily be avoided:
- Not taking accurate measurements: As mentioned before, accurate measurements are crucial for a successful installation. Make sure you measure multiple times to ensure accuracy.
- Forgetting to clean the area: It may be tempting to skip this step, but a dirty or uneven surface will affect how well your panel fits and looks. Take the time to properly clean and smooth the area beforehand.
- Using the wrong tools: Using the wrong tools can not only make your project more difficult, but it can also lead to injury. Make sure you have the necessary tools for the job.

Reinstalling a Panel Under a Kitchen Sink: Common Mistakes to Avoid


Reinstalling a Panel Under a Kitchen Sink: Tools and Materials You'll Need
Before you get started, make sure you have the following tools and materials on hand:
- Screwdriver
- Hammer
- Measuring tape
- Nails
- Sandpaper
- Cleaning supplies
- Replacement panel (if needed)
Reinstalling a Panel Under a Kitchen Sink: Tools and Materials You'll Need
Reinstalling a Panel Under a Kitchen Sink: Troubleshooting Common Issues
If you encounter any issues during your panel installation, here are a few troubleshooting tips:
- If the panel is too small, use wood filler or caulk to fill in any gaps and create a seamless look.
- If the panel is too large, carefully trim it down using a saw or utility knife.
- If the panel is uneven, use shims to level it out before securing it in place.

Reinstalling a Panel Under a Kitchen Sink: Troubleshooting Common Issues


Reinstalling a Panel Under a Kitchen Sink: Professional vs. DIY
While it is definitely possible to reinstall a panel under a kitchen sink yourself, you may want to consider hiring a professional if:
- You don't have the necessary tools or skills for the job.
- Your panel is part of a larger kitchen renovation project.
- You're not confident in your ability to measure and cut the panel accurately.
However, if you have the tools and skills, and your panel installation is a standalone project, DIY is a great option to save money and add a personal touch to your kitchen.
In conclusion, reinstalling a panel under a kitchen sink is a simple and cost-effective way to give your kitchen a fresh new look. With the right tools, materials, and know-how, you can easily complete this DIY project in a day. So why not give it a try and see the difference it can make in your kitchen? Remember to measure accurately, use the right tools, and don't be afraid to get creative with your panel choice. Happy renovating!

Reinstalling a Panel Under a Kitchen Sink: Professional vs. DIY


Reinstall Panel Under Kitchen Sink: A Necessary Step in Organizing Your Kitchen

When it comes to house design, the kitchen is often considered the heart of the home. It's where we cook and gather with family and friends, making it a central hub for daily activities. However, with all the cooking and cleaning that takes place in the kitchen, it's no surprise that it can quickly become cluttered and disorganized. That's why it's important to have a functional and well-organized kitchen, starting with the panel under the kitchen sink .
Why is the panel under the kitchen sink important?
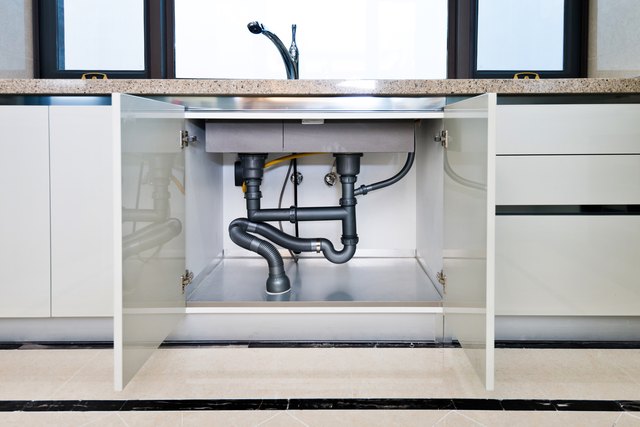
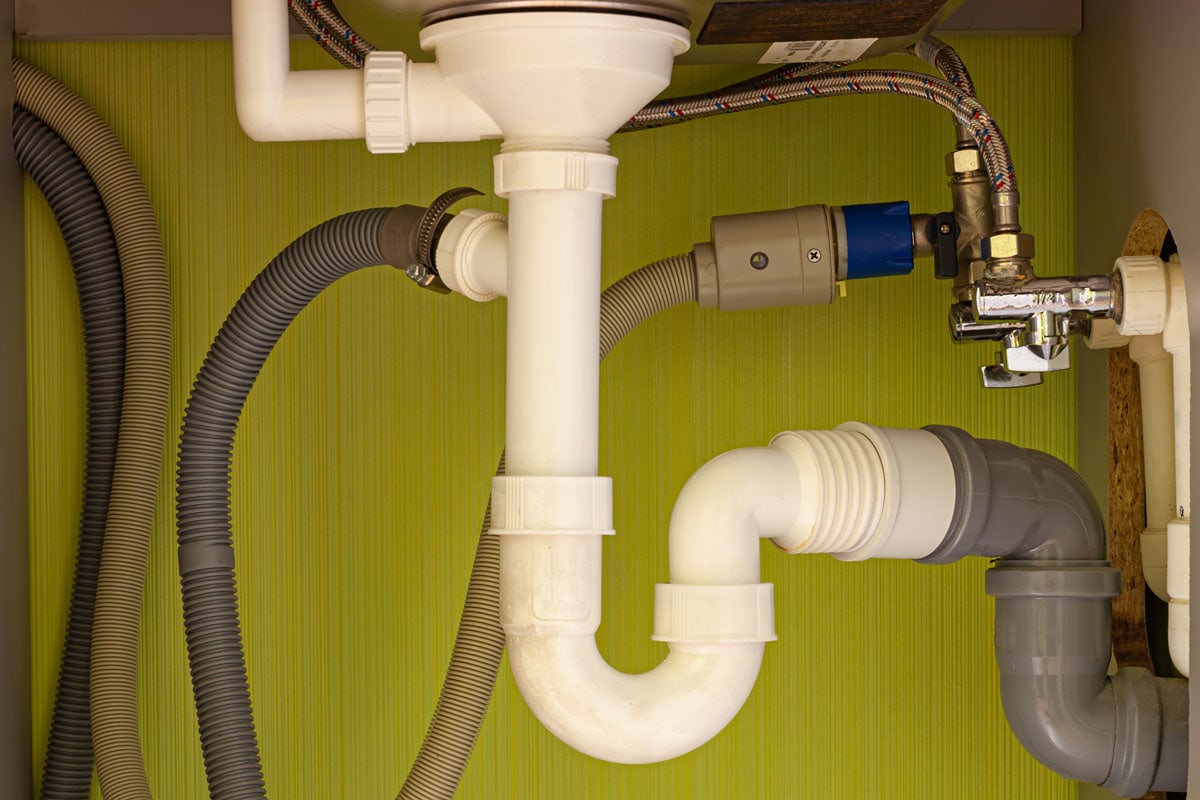
The panel under the kitchen sink may seem like a small and insignificant part of the kitchen, but it actually plays a crucial role in keeping your kitchen organized and functional. This panel is typically used to cover the plumbing and pipes under the sink, providing a clean and tidy appearance. It also helps protect these important components from damage and prevents leaks from spreading to the rest of the kitchen.
The benefits of reinstalling the panel under the kitchen sink
If you've ever taken a peek under your kitchen sink, you may have noticed that the panel is often missing or damaged. This may not seem like a big deal, but it can actually have several negative effects on your kitchen. For one, without the panel, it can be difficult to access the plumbing and pipes for any necessary repairs. It also creates a potential safety hazard, especially for households with young children or pets. Additionally, a missing panel can lead to water damage, mold growth, and unpleasant odors in your kitchen.
By reinstalling the panel under the kitchen sink , you can avoid these issues and improve the overall functionality and appearance of your kitchen. It creates a barrier between the plumbing and the rest of the kitchen, preventing any potential leaks or spills from causing damage. It also helps maintain a clean and organized space, making it easier to find and access cleaning supplies and other items stored under the sink.
How to reinstall the panel under the kitchen sink

If you're ready to tackle this project and improve the functionality of your kitchen, here's a step-by-step guide to reinstalling the panel under the kitchen sink :
- Start by cleaning the area under your sink, removing any clutter or debris.
- Measure the dimensions of the opening where the panel will go, taking into account any pipes or other obstacles.
- Using these measurements, cut a piece of wood or other sturdy material to fit the opening.
- Secure the panel in place using screws or adhesive, making sure it is level and properly aligned.
- Allow the adhesive to dry, if necessary, before adding any finishing touches, such as paint or stain.
With the panel under the kitchen sink reinstalled, you can now enjoy a cleaner, safer, and more organized kitchen. It may seem like a small and simple task, but it can make a big difference in the overall functionality and appearance of your kitchen. So don't hesitate to take the time to reinstall this important element in your kitchen design.