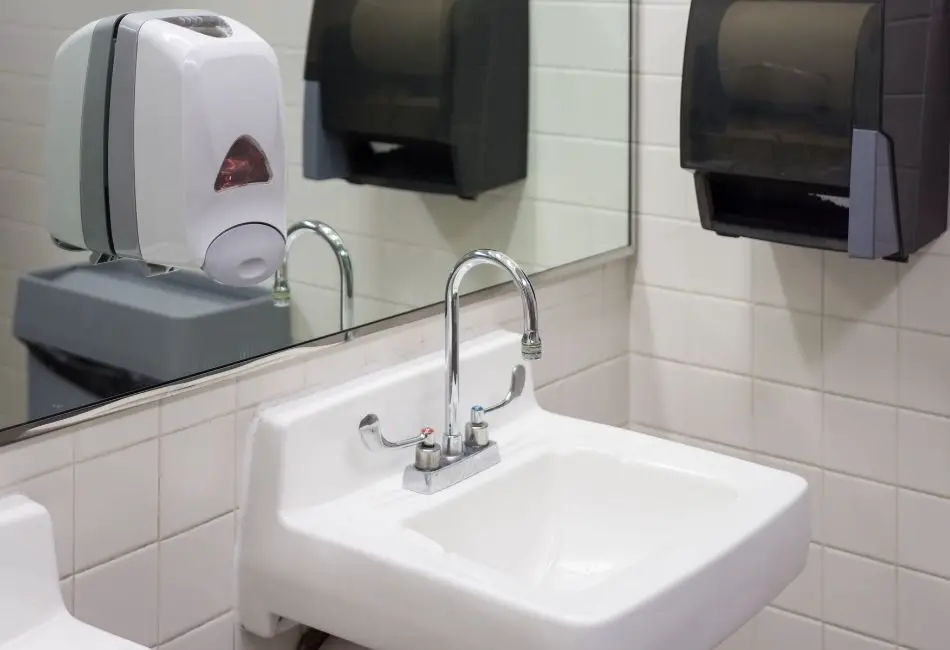
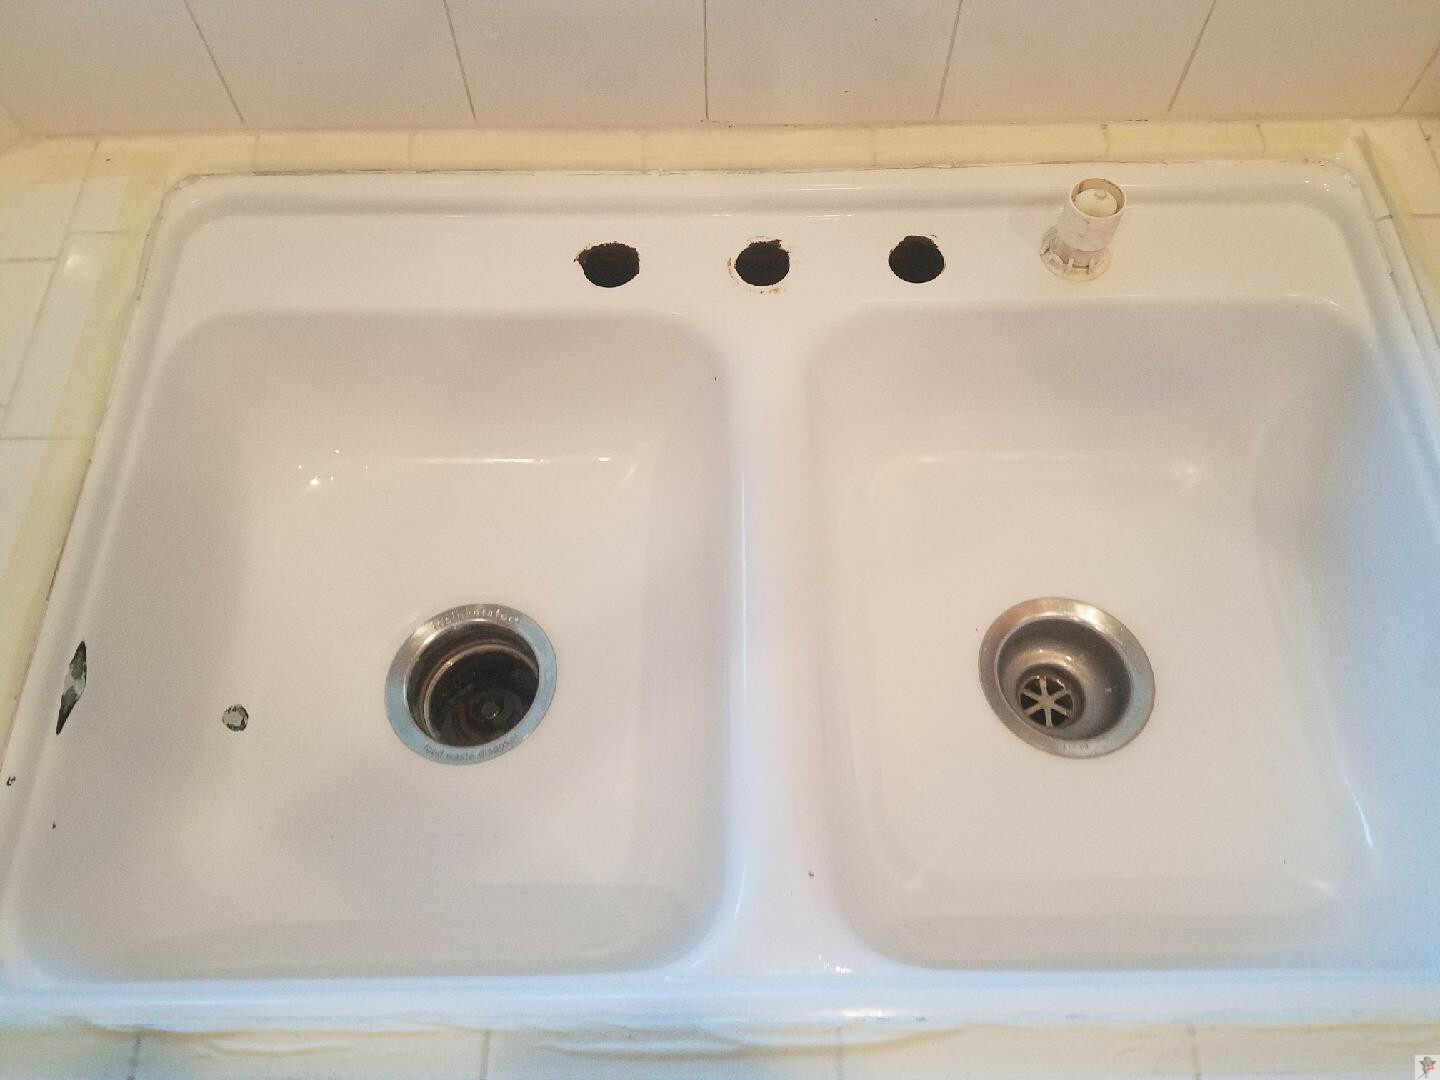
Are you tired of looking at your old, stained porcelain kitchen sink? Instead of replacing it, consider reglazing it for a fresh and updated look. Not only is it a more cost-effective solution, but it also allows you to customize the color and finish of your sink. With a little bit of time and effort, you can easily reglaze your porcelain sink and give it a brand new look. Here's how you can do it yourself.Porcelain Sink Reglazing: How You Can Do It Yourself


Porcelain Sink Reglazing: How You Can Do It Yourself


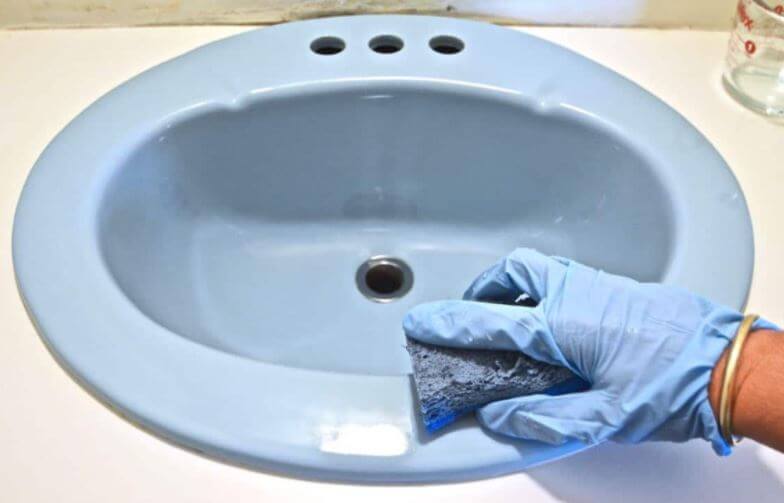
Before you start the reglazing process, it's important to properly prepare your sink. Start by cleaning the sink with a non-abrasive cleaner and then sanding the surface with a fine grit sandpaper. This will help the new glaze adhere better to the sink. Next, apply a bonding agent to the surface of the sink and let it dry completely. Once the bonding agent is dry, it's time to start the reglazing process. Using a paintbrush or a spray gun, apply the reglazing product in thin, even coats. Be sure to follow the manufacturer's instructions for drying times in between coats. You may need to apply multiple coats to achieve your desired finish. Once the final coat is dry, your sink will have a smooth and shiny new surface.How to Reglaze a Porcelain Sink


How to Reglaze a Porcelain Sink


Reglazing a porcelain sink is a DIY project that can save you hundreds of dollars compared to replacing the sink. However, it's important to note that it can be a messy and time-consuming process. Be sure to gather all of the necessary materials and follow the instructions carefully to ensure the best results. Additionally, be prepared for some downtime for your sink. Depending on the reglazing product used, it may need up to 48 hours to fully cure before it can be used again. Plan accordingly and have alternate options for washing dishes and using the sink during this time.DIY: How to Reglaze a Porcelain Sink


DIY: How to Reglaze a Porcelain Sink


If you're new to reglazing, here's a step-by-step guide to help you through the process: 1. Clean the sink thoroughly with a non-abrasive cleaner. 2. Sand the surface with a fine grit sandpaper. 3. Apply a bonding agent and let it dry completely. 4. Apply the reglazing product in thin, even coats, following the manufacturer's instructions. 5. Let the final coat dry for the recommended time. 6. Enjoy your newly reglazed porcelain sink!Step-by-Step Guide to Reglazing a Porcelain Sink


Step-by-Step Guide to Reglazing a Porcelain Sink


When it comes to reglazing a porcelain sink, there are many products on the market to choose from. Some popular options include Rust-Oleum Specialty Tub and Tile Refinishing Kit, Homax Tough as Tile Tub & Sink Refinishing Kit, and BathWorks DIY Bathtub & Tile Refinishing Kit. Be sure to read reviews and do your research to find the best product for your specific sink and needs. You may also want to consult with a professional for product recommendations and tips.Best Products for Reglazing a Porcelain Sink


Best Products for Reglazing a Porcelain Sink


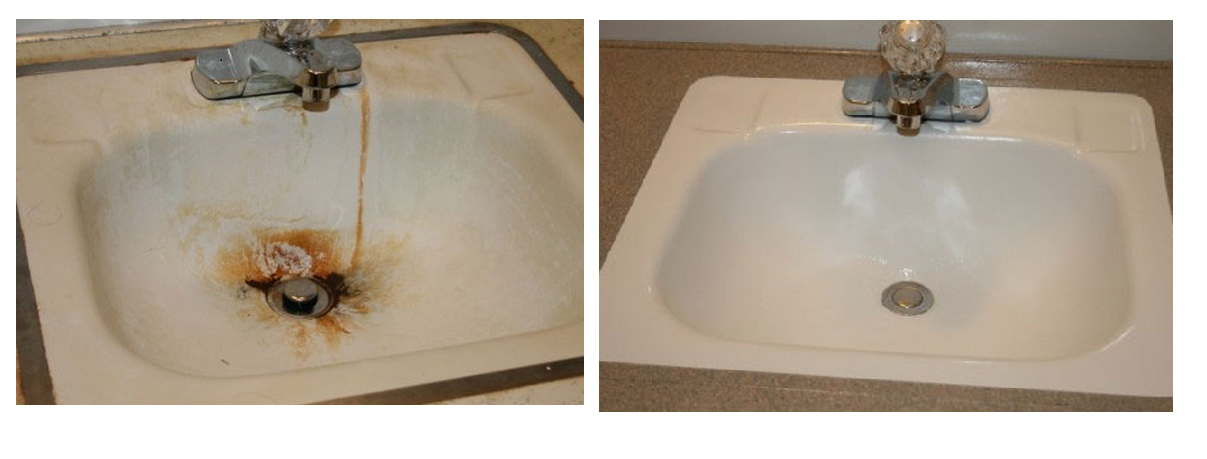
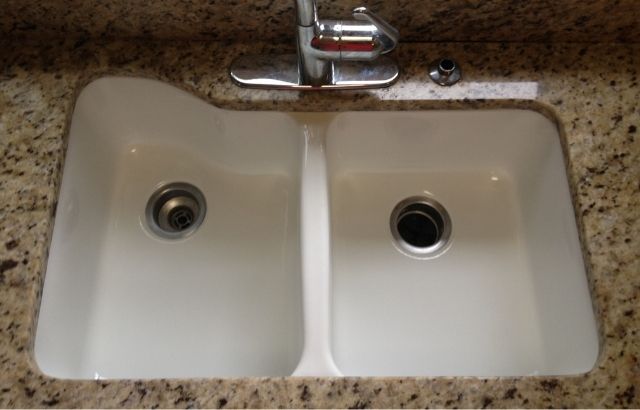
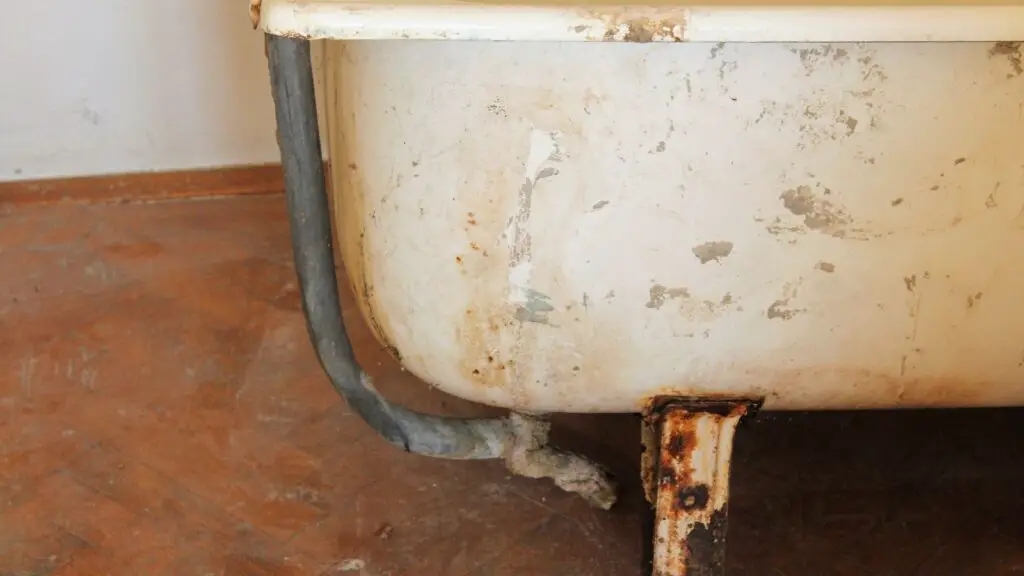
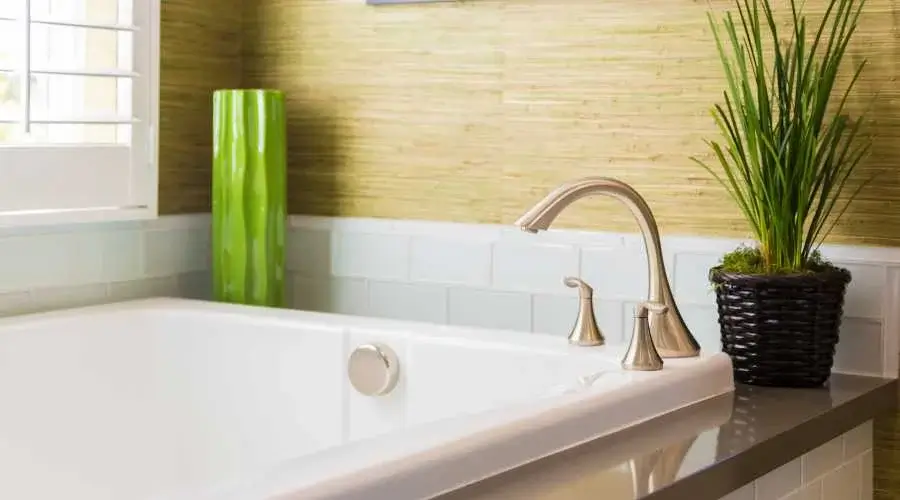
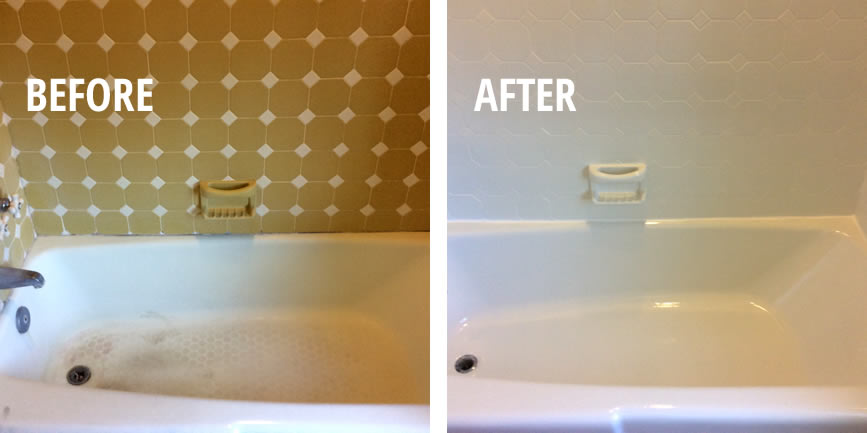
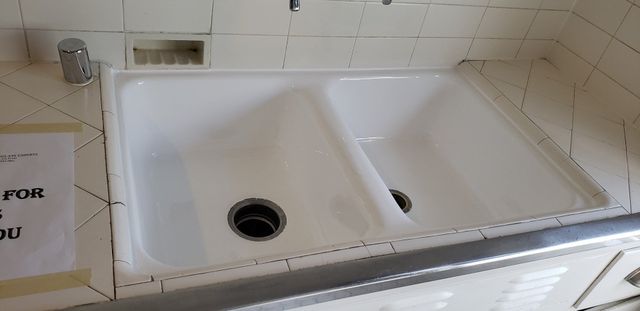
Reglazing a porcelain sink not only gives it a new look, but it can also restore its functionality. Over time, porcelain sinks can become stained, chipped, and scratched, making them difficult to clean and use. Reglazing can cover up these imperfections and give your sink a smooth and shiny surface once again. Additionally, reglazing can also help protect your sink from future damage and extend its lifespan. With proper care and maintenance, a reglazed porcelain sink can last for many years to come.How to Restore a Porcelain Sink with Reglazing
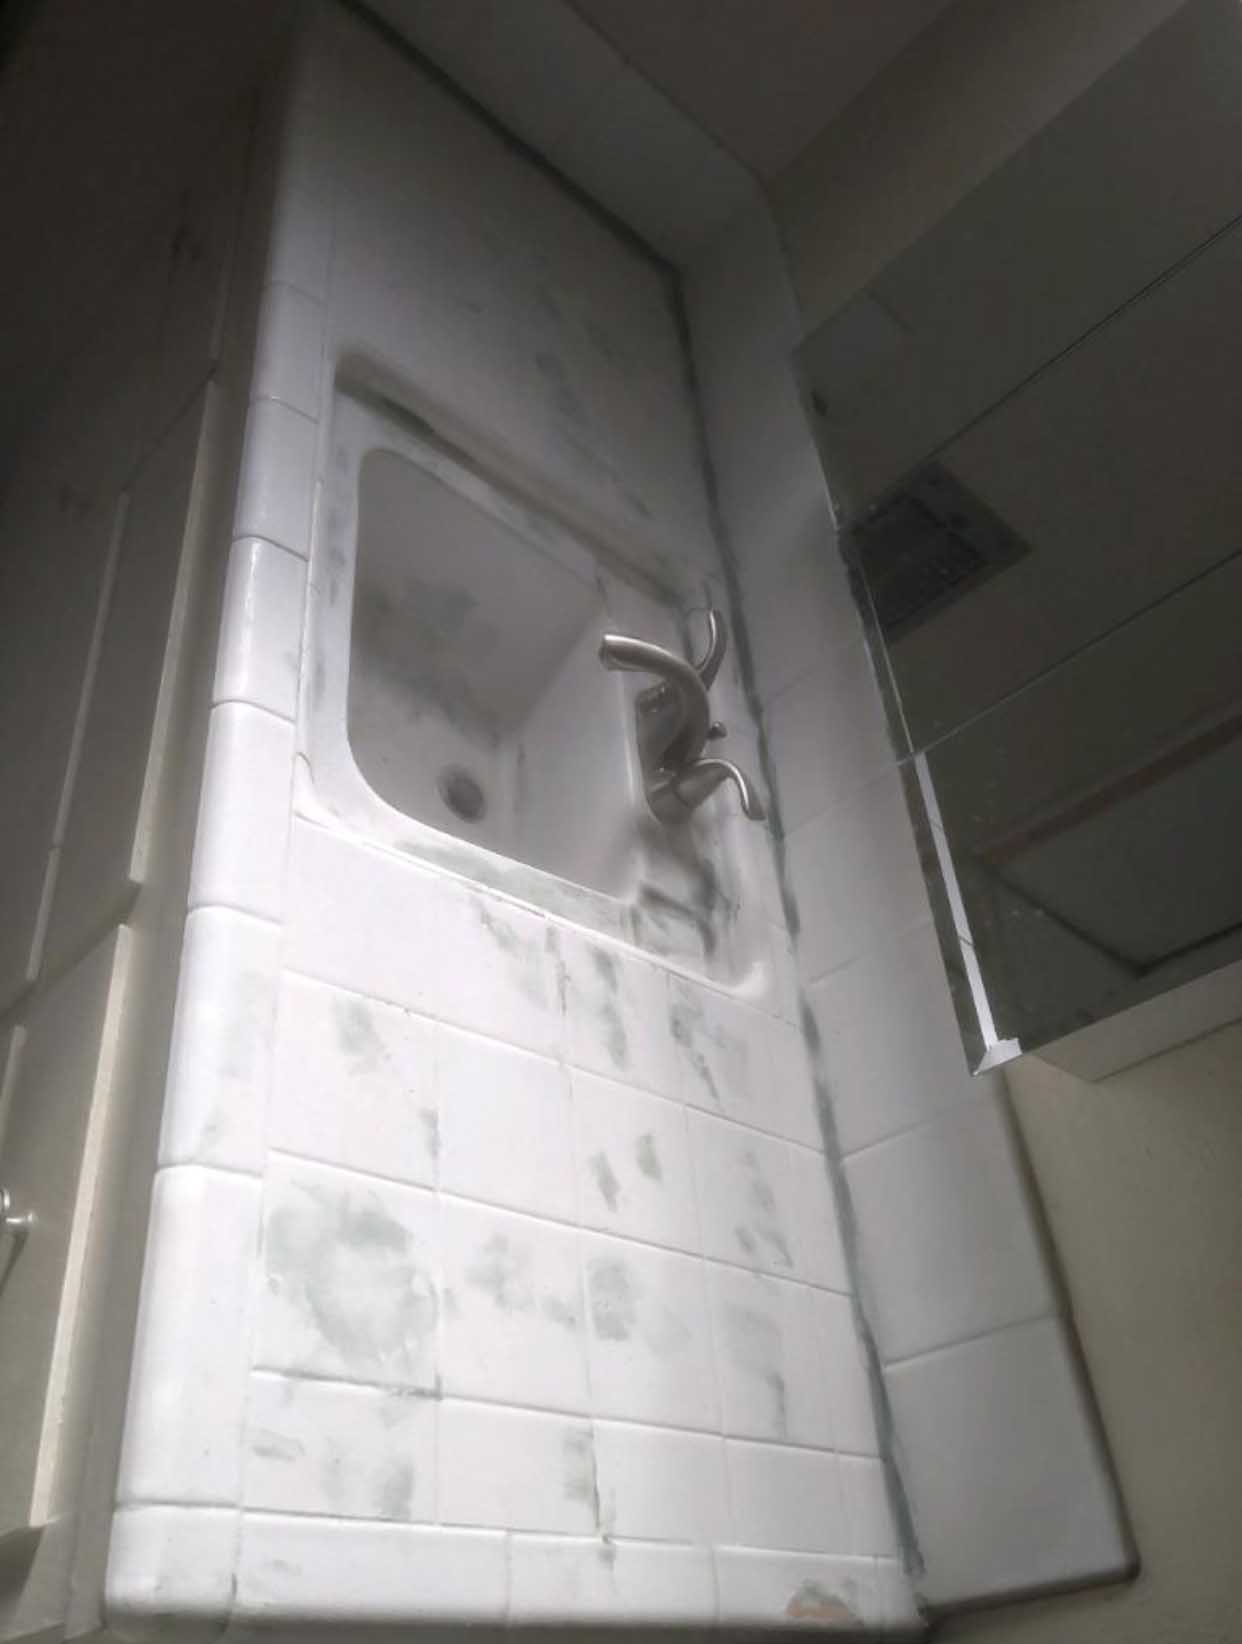
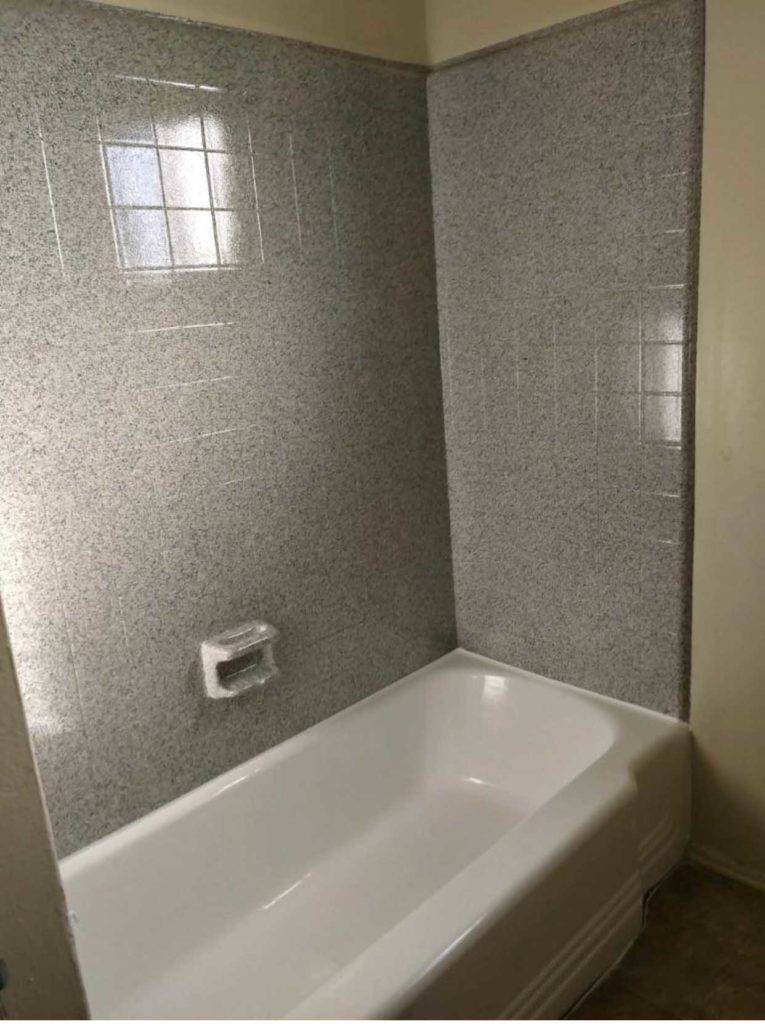

How to Restore a Porcelain Sink with Reglazing


As with any home improvement project, there are pros and cons to reglazing a porcelain sink. Some of the main pros include cost-effectiveness, customization options, and the ability to restore functionality. On the other hand, some cons may include the mess and downtime during the process, as well as the potential for the reglazing to chip or peel over time. Consider these factors and your specific sink's condition before deciding if reglazing is the right choice for you.Porcelain Sink Reglazing: Pros and Cons
Porcelain Sink Reglazing: Pros and Cons


To ensure a successful reglazing project, here are a few tips to keep in mind: 1. Properly clean and prepare the sink before starting the reglazing process. 2. Use the recommended products and follow the manufacturer's instructions carefully. 3. Apply thin and even coats of reglazing product to avoid drips and bubbles. 4. Allow enough drying time between coats and before using the sink again. 5. Use caution when using the sink after reglazing, as the surface may be slippery.Tips for a Successful Porcelain Sink Reglazing Project


Tips for a Successful Porcelain Sink Reglazing Project


The cost of reglazing a porcelain sink can vary depending on the size of the sink, the condition of the sink, and the reglazing product used. On average, it can cost anywhere from $100 to $300. This is significantly less than the cost of replacing a sink, which can range from $500 to $1,500. Keep in mind that hiring a professional to reglaze your sink can also increase the cost. However, if you're not confident in your DIY skills or have a particularly difficult sink to reglaze, it may be worth the extra cost for a professional job.How Much Does it Cost to Reglaze a Porcelain Sink?


How Much Does it Cost to Reglaze a Porcelain Sink?


The decision between hiring a professional or doing it yourself ultimately depends on your budget, skill level, and the condition of your sink. If you have a small budget and some DIY experience, reglazing your sink yourself can be a great option. However, if you have a larger budget and want a flawless finish, hiring a professional may be the best choice. Consider the pros and cons of each option and do your research to determine which is the best fit for your specific situation.Professional vs DIY: Which is Better for Reglazing a Porcelain Sink?


Professional vs DIY: Which is Better for Reglazing a Porcelain Sink?


:max_bytes(150000):strip_icc()/steam-cleaning-professional-vs-diy-2908776-hero-24ffd77737924bca908036dabcdcbbad.jpg)


Benefits of Reglazing Your Porcelain Kitchen Sink

Save Money and Time
 Reglazing your porcelain kitchen sink
is a cost-effective alternative to completely replacing it. A new porcelain sink can cost hundreds of dollars, not to mention the added expense of hiring a professional to install it. By
reglazing
your existing sink, you can save money on purchasing a new one and avoid the hassle of removing and installing a new sink. Additionally, the process of
reglazing
is much quicker than replacing a sink, allowing you to have a fresh and updated sink in just a few hours.
Reglazing your porcelain kitchen sink
is a cost-effective alternative to completely replacing it. A new porcelain sink can cost hundreds of dollars, not to mention the added expense of hiring a professional to install it. By
reglazing
your existing sink, you can save money on purchasing a new one and avoid the hassle of removing and installing a new sink. Additionally, the process of
reglazing
is much quicker than replacing a sink, allowing you to have a fresh and updated sink in just a few hours.
Extend the Lifespan of Your Sink
 Porcelain sinks
are known for their durability and longevity. However, over time, they may start to lose their shine and become dull or discolored.
Reglazing
can help restore your sink to its original condition, making it look brand new again. This not only improves the appearance of your sink, but it also extends its lifespan. By
reglazing
your sink, you can avoid the need for a costly replacement and continue to enjoy its functionality for many more years.
Porcelain sinks
are known for their durability and longevity. However, over time, they may start to lose their shine and become dull or discolored.
Reglazing
can help restore your sink to its original condition, making it look brand new again. This not only improves the appearance of your sink, but it also extends its lifespan. By
reglazing
your sink, you can avoid the need for a costly replacement and continue to enjoy its functionality for many more years.
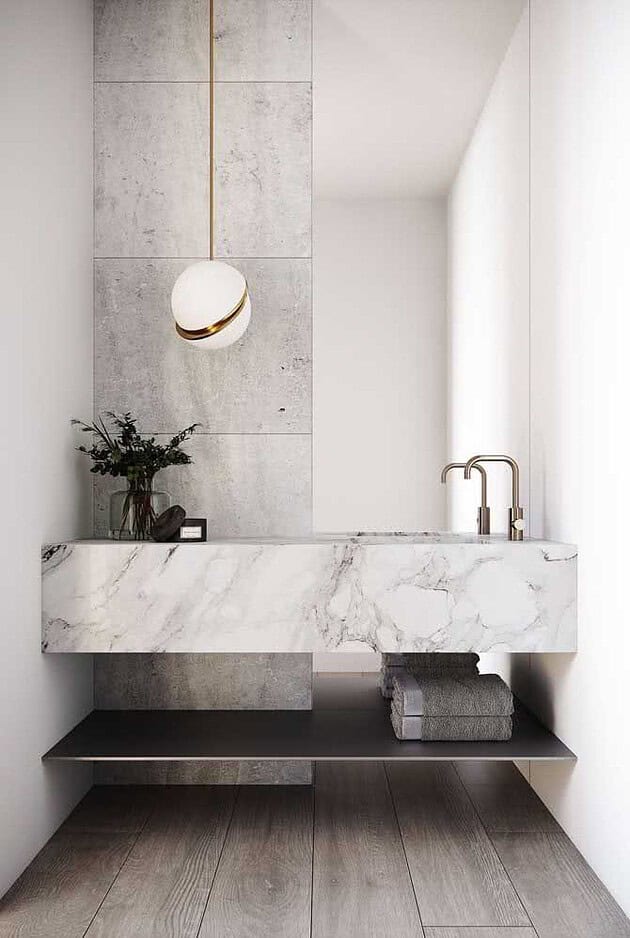
Customize Your Sink
 One of the great advantages of
reglazing
your porcelain kitchen sink is the ability to customize its appearance. You can choose from a variety of colors and finishes to match your kitchen's overall design aesthetic. Whether you want a sleek and modern look or a classic and traditional feel,
reglazing
allows you to achieve the desired look for your sink. This level of customization is not possible with a new sink, making
reglazing
a great option for homeowners looking to update their kitchen's design.
Overall,
reglazing
your porcelain kitchen sink is a cost-effective and efficient way to give your kitchen a fresh and updated look. It not only saves you money and time but also extends the lifespan of your sink and allows for customization options. Next time you're considering replacing your old porcelain sink, give
reglazing
a try and see the amazing results it can provide.
One of the great advantages of
reglazing
your porcelain kitchen sink is the ability to customize its appearance. You can choose from a variety of colors and finishes to match your kitchen's overall design aesthetic. Whether you want a sleek and modern look or a classic and traditional feel,
reglazing
allows you to achieve the desired look for your sink. This level of customization is not possible with a new sink, making
reglazing
a great option for homeowners looking to update their kitchen's design.
Overall,
reglazing
your porcelain kitchen sink is a cost-effective and efficient way to give your kitchen a fresh and updated look. It not only saves you money and time but also extends the lifespan of your sink and allows for customization options. Next time you're considering replacing your old porcelain sink, give
reglazing
a try and see the amazing results it can provide.