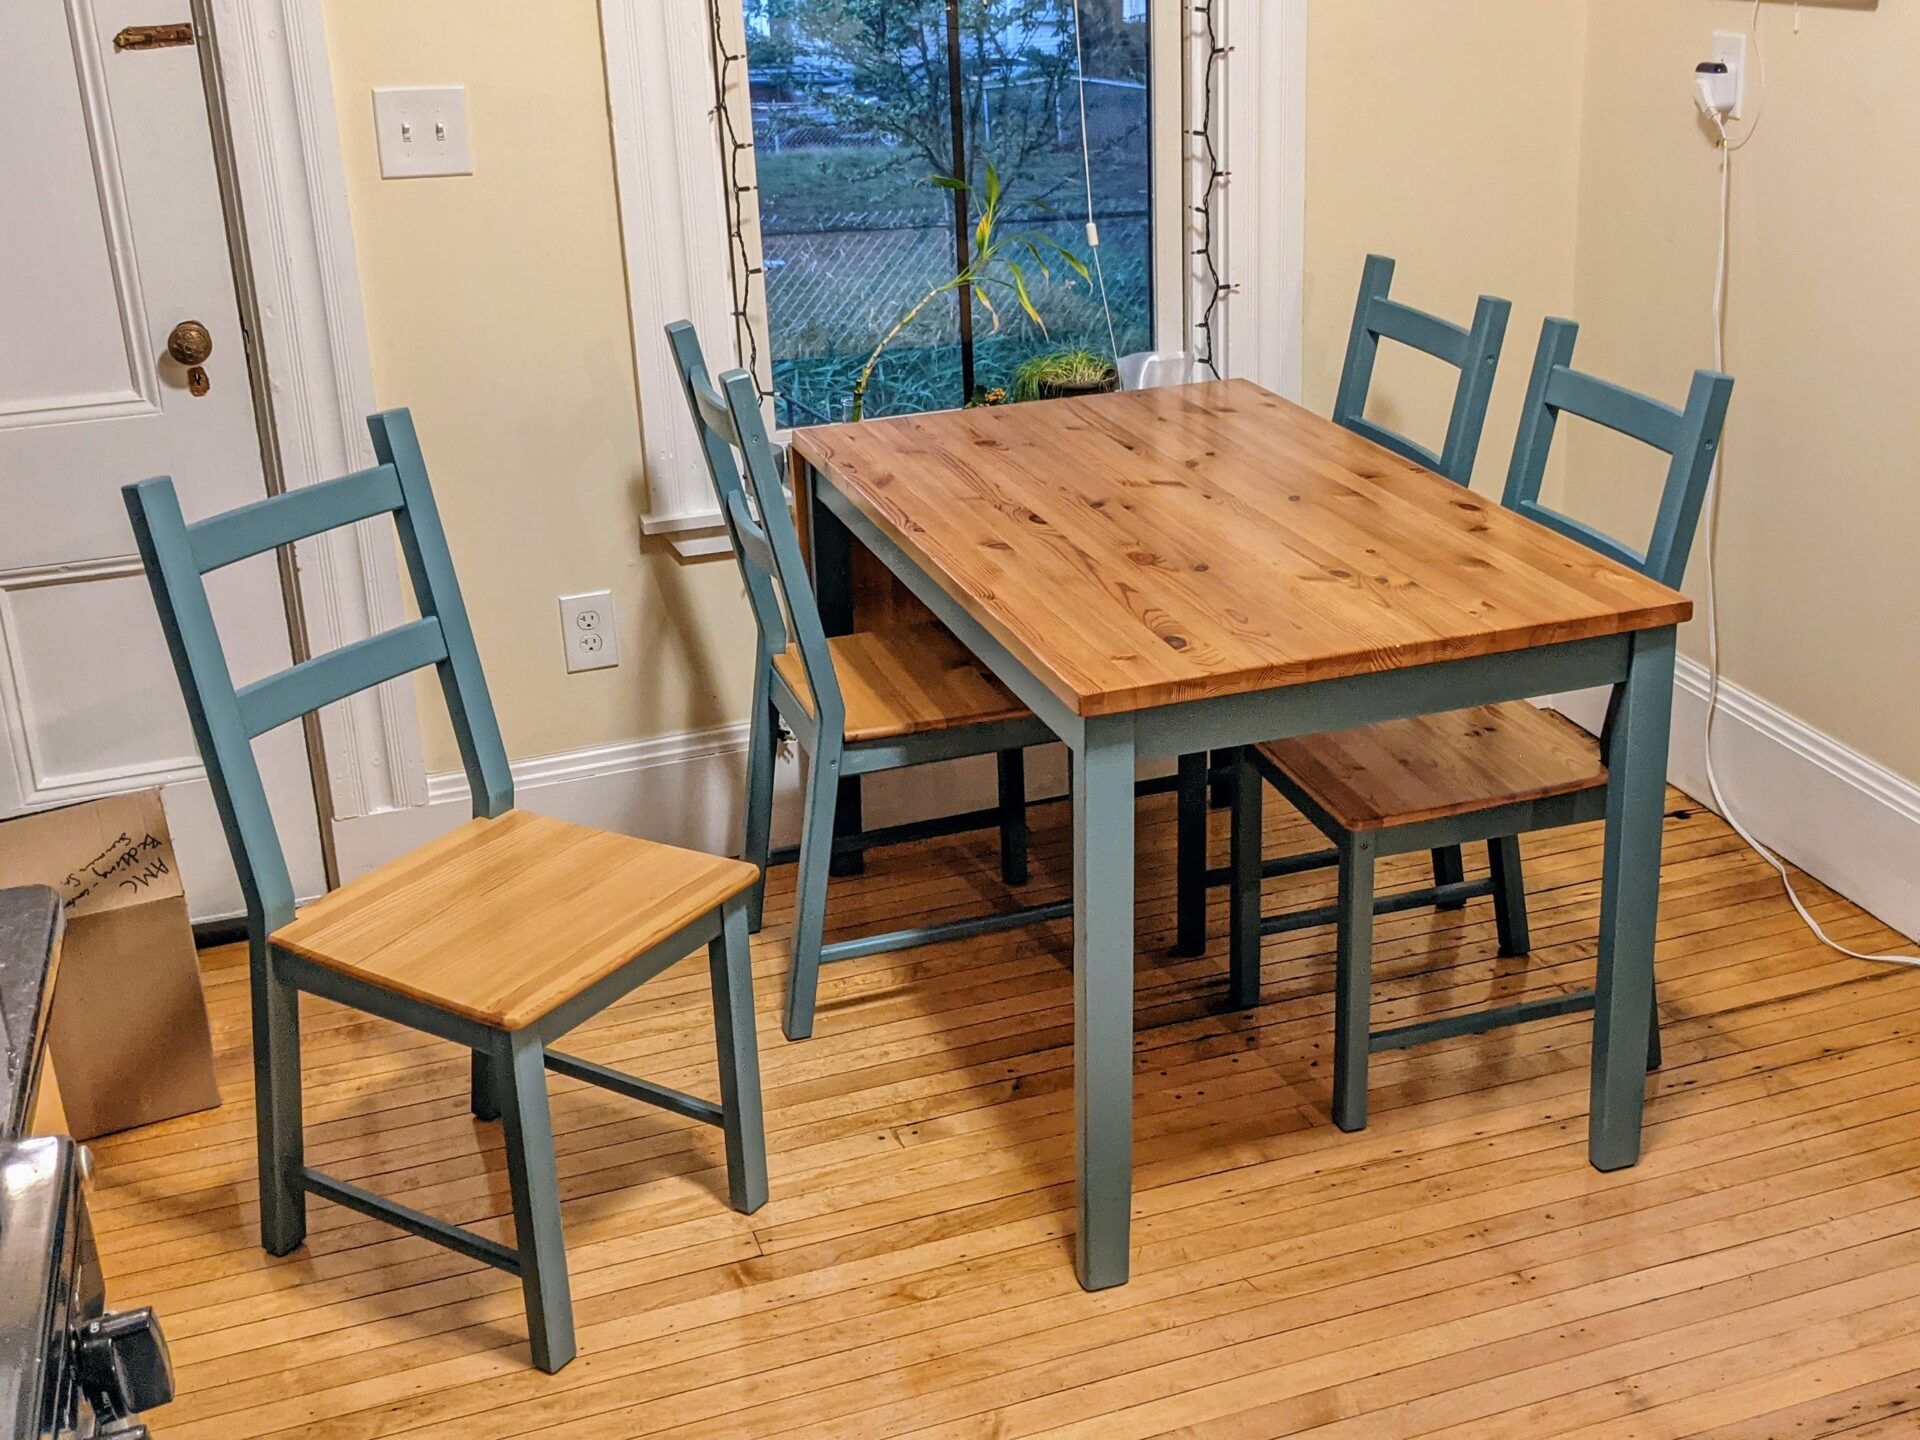
Refinishing your IKEA kitchen table is a great way to give it a new look and prolong its lifespan. Whether you want to update the color, repair scratches and dents, or simply freshen up the surface, refinishing is a budget-friendly and satisfying DIY project. With the right tools and techniques, you can transform your plain IKEA kitchen table into a statement piece that reflects your personal style. Here's a step-by-step guide on how to refinish an IKEA kitchen table.How to Refinish an IKEA Kitchen Table


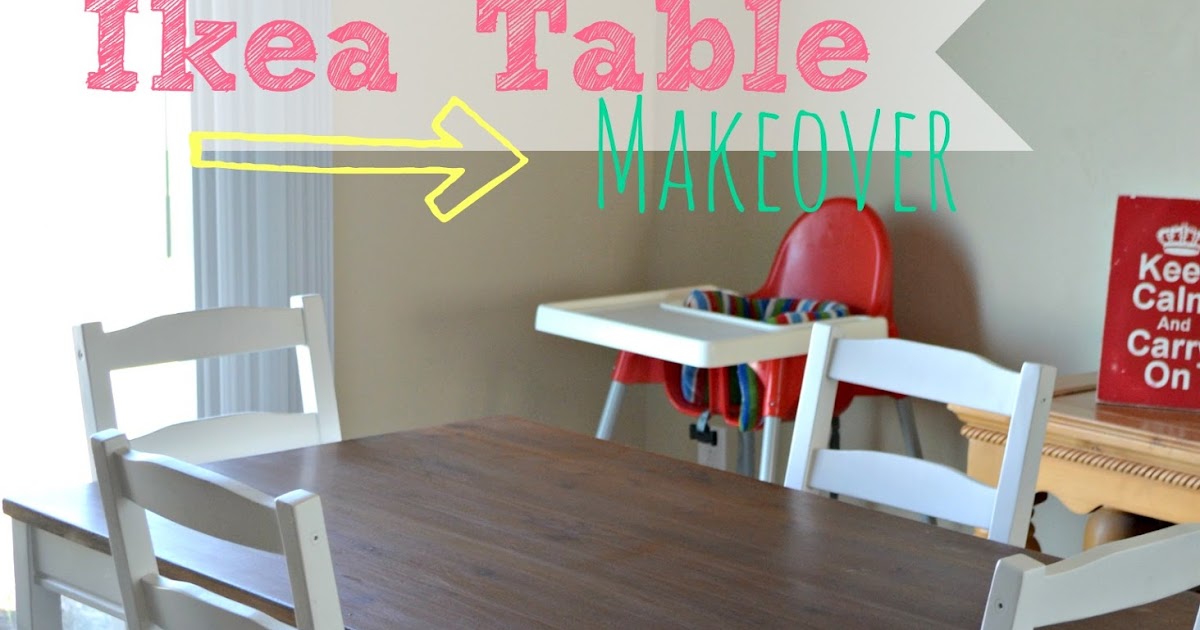
How to Refinish an IKEA Kitchen Table


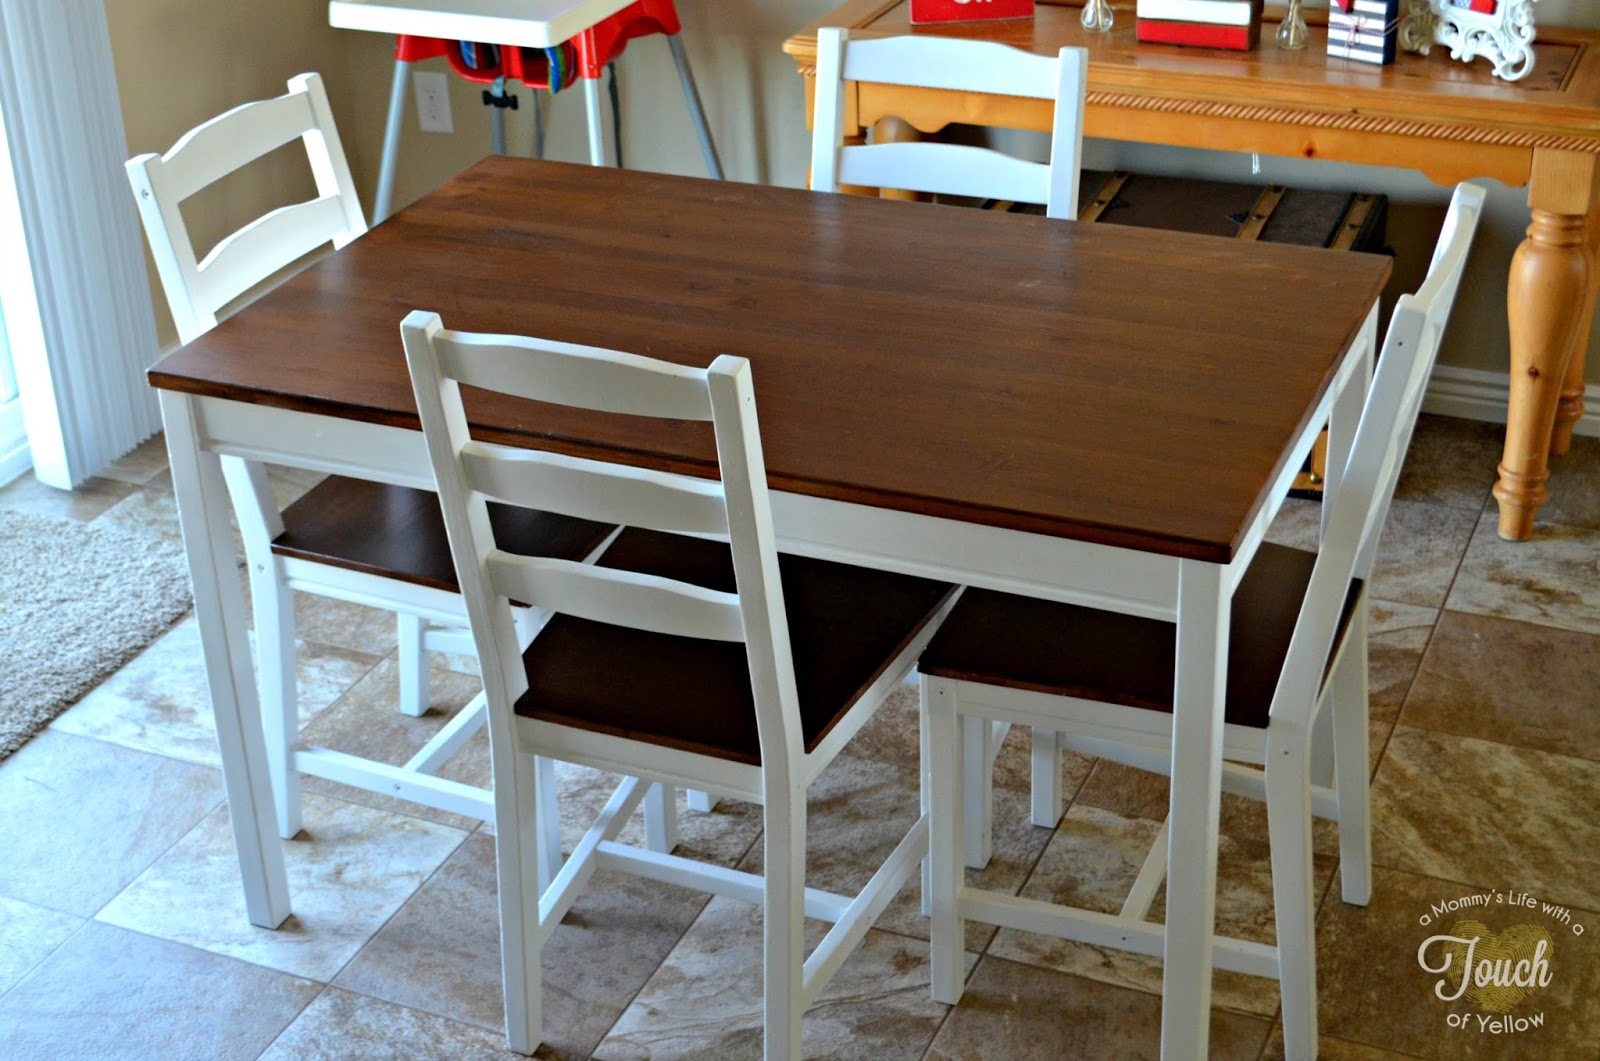
Step 1: Prepare your workspace and gather your materials. You will need sandpaper, wood stain or paint, paintbrushes, a drop cloth, and protective gear such as gloves and a mask. Step 2: Remove any hardware or accessories from the table, such as knobs and screws. Cover the surrounding area with a drop cloth to protect it from dust and debris. Step 3: Sand the table's surface with a medium-grit sandpaper to remove the existing finish and create a smooth and even surface. Be sure to sand in the direction of the wood grain to avoid damaging the surface. If your table has intricate details, you can use a sanding sponge or a small piece of sandpaper to reach those areas. Step 4: After sanding, wipe away any dust with a clean cloth or vacuum the surface. This will ensure a clean and smooth surface for the new finish. Step 5: Now, it's time to apply the new finish. You can choose to use wood stain or paint, depending on the look you want to achieve. If you're using wood stain, apply it with a brush or a clean cloth, following the direction of the wood grain. For paint, use a brush or roller to apply thin and even coats, allowing each coat to dry completely before applying the next one. Step 6: Once the new finish has dried, you can add a protective coat of varnish or sealer to prevent wear and tear. Apply it with a brush, and let it dry completely before using the table.Refinishing an IKEA Kitchen Table: A Step-by-Step Guide


Refinishing an IKEA Kitchen Table: A Step-by-Step Guide


/cabinet-refacing-demystified-1822044v2-29c0506ee7014a54a7473d9a5d85b149.jpg)
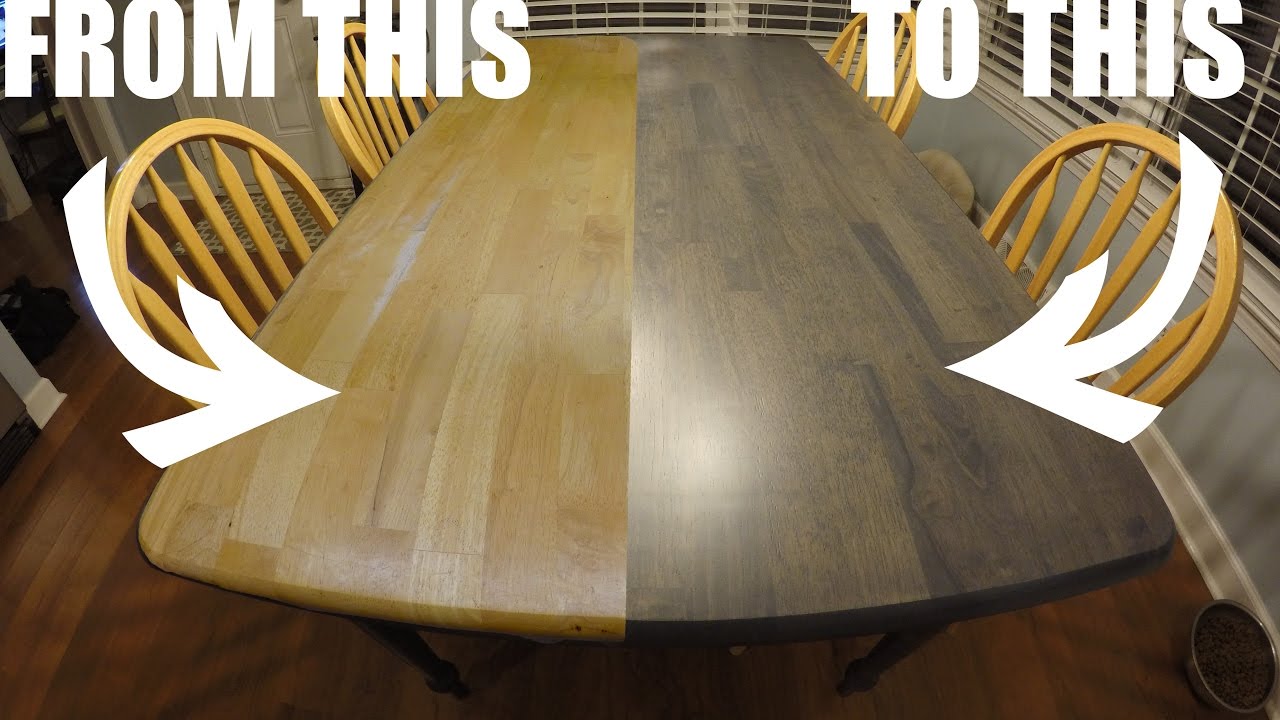
If you're on a budget, refinishing your IKEA kitchen table yourself is a great way to save money. With a little bit of time and effort, you can achieve professional-looking results. Here are some tips and tricks for a successful DIY refinishing project. Tip 1: Choose the right finish. When it comes to refinishing, you have a variety of options to choose from, such as paint, wood stain, or even a combination of both. Consider the style of your kitchen and the look you want to achieve before deciding on the finish. Tip 2: Don't skip the sanding. Sanding is an essential step in refinishing as it prepares the surface for the new finish. It helps to remove any imperfections, smooth out the surface, and allows the new finish to adhere better. Tip 3: Use quality materials. Invest in good quality wood stain, paint, and brushes for a professional-looking finish. Cheap materials may save you money upfront, but they can result in a subpar finish and cost you more in the long run. Tip 4: Take your time. Refinishing a kitchen table is not a quick task, and rushing through the process can lead to mistakes and a less-than-perfect finish. Take your time and follow each step carefully for the best results.DIY IKEA Kitchen Table Refinishing


DIY IKEA Kitchen Table Refinishing


:max_bytes(150000):strip_icc()/ikea-extendable-table-00c70054d56a45f891211e440907a13c-72b3714d3e1948e7b7f57b17bdc8d3c1.png)


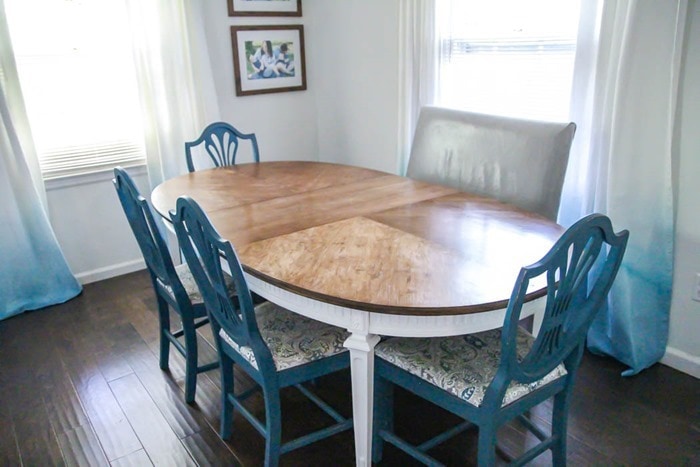
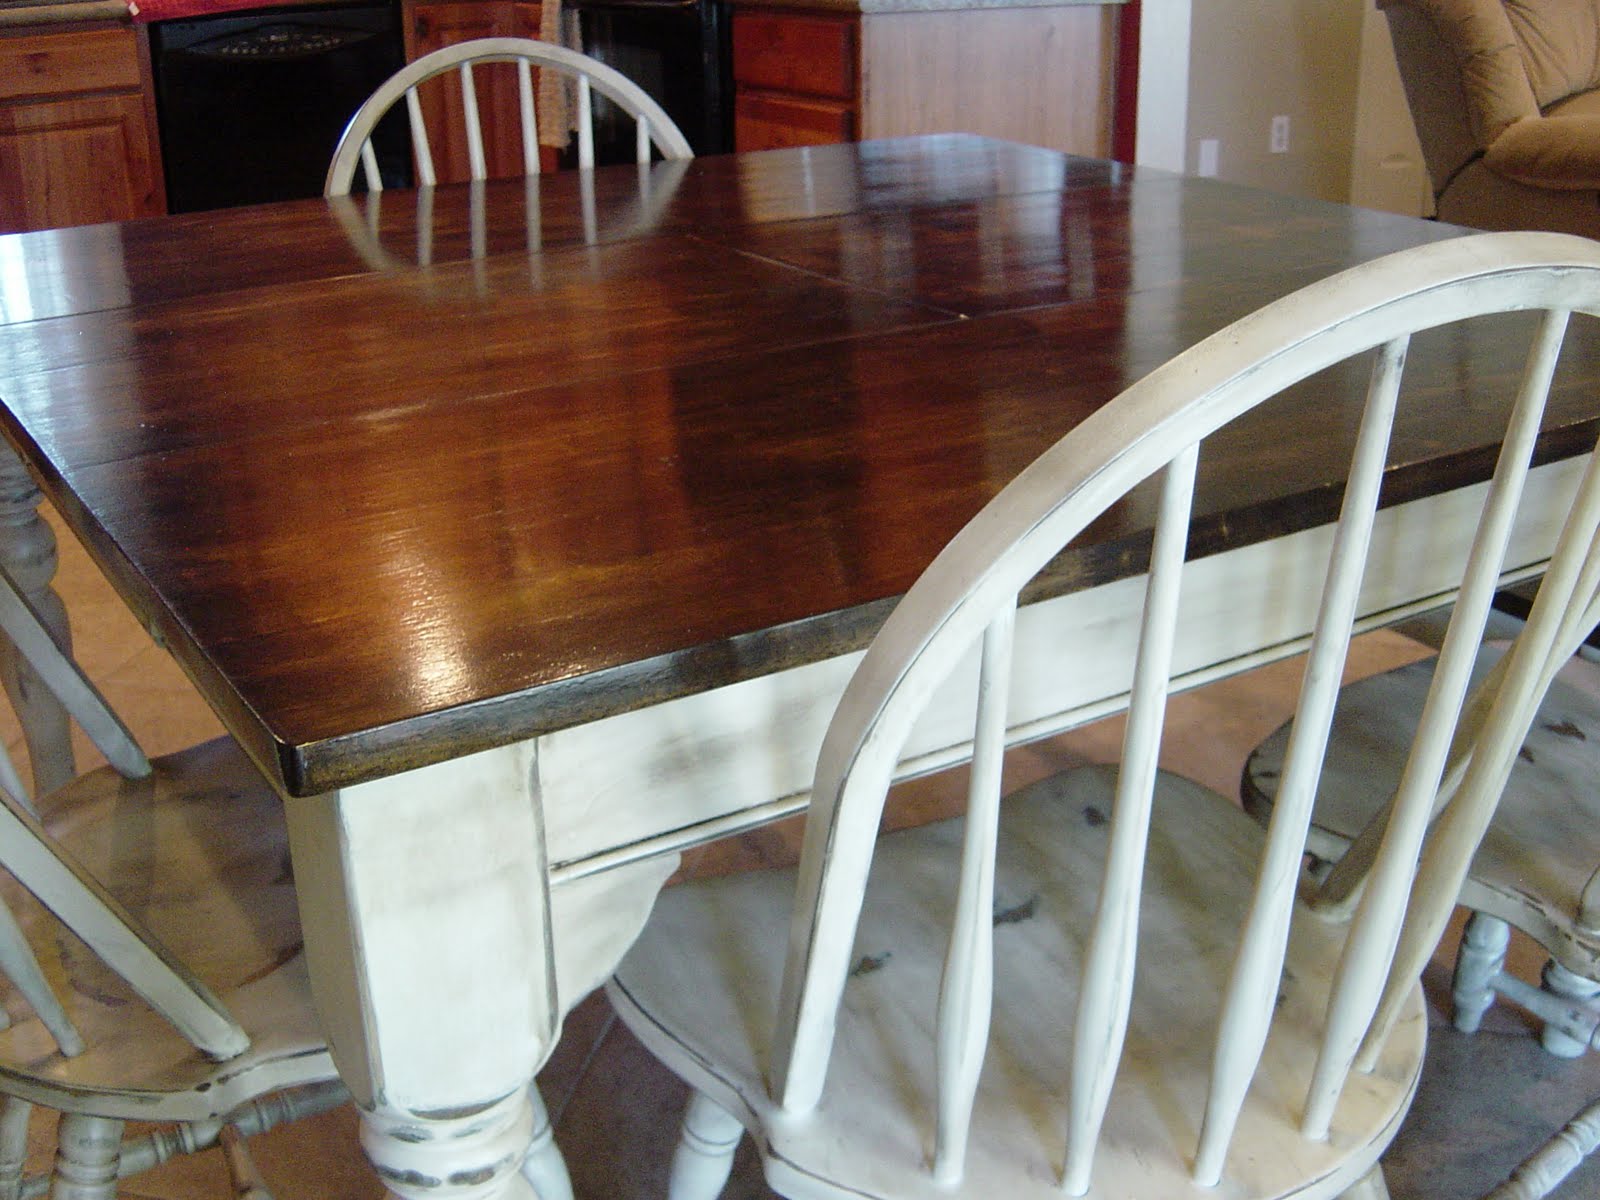
If you're looking to give your IKEA kitchen table a unique and personalized touch, here are some ideas to inspire you. Idea 1: Add a pop of color by painting the table legs in a bold hue. This will add a fun and playful element to your kitchen décor. Idea 2: Create a distressed look by sanding the edges and corners of the table after staining or painting. This will give your table a rustic and vintage vibe. Idea 3: Use stencils to create a pattern or design on the table's surface. This is a great way to add a unique and personalized touch to your table. Idea 4: Add a metallic touch by using gold or silver leaf on the table's edges or legs. This will give your table a chic and glamorous look.Transform Your IKEA Kitchen Table with These Refinishing Ideas

Refinishing an IKEA Kitchen Table: Tips and Tricks


Before you start refinishing your IKEA kitchen table, there are a few things you should keep in mind. 1. Know the type of wood: IKEA kitchen tables are usually made of pine, which is a softwood. This means it can be easily scratched and dented, so be careful when sanding and using any tools on the surface. 2. Test the finish: Before applying the new finish to the entire table, it's essential to test it on a small, inconspicuous area first. This will help you determine if you like the color and if it will adhere well to the wood. 3. Protect the surrounding area: Refinishing can be a messy process, so it's essential to protect the surrounding area with a drop cloth or plastic sheeting to prevent any damage or stains. 4. Allow for drying time: Each coat of finish needs to dry completely before applying the next one. Rushing the process can result in a tacky or uneven finish.Refinishing an IKEA Kitchen Table: What You Need to Know


Transform Your IKEA Kitchen Table with These Refinishing Ideas
:max_bytes(150000):strip_icc()/ikea-extendable-table-00c70054d56a45f891211e440907a13c-72b3714d3e1948e7b7f57b17bdc8d3c1.png)


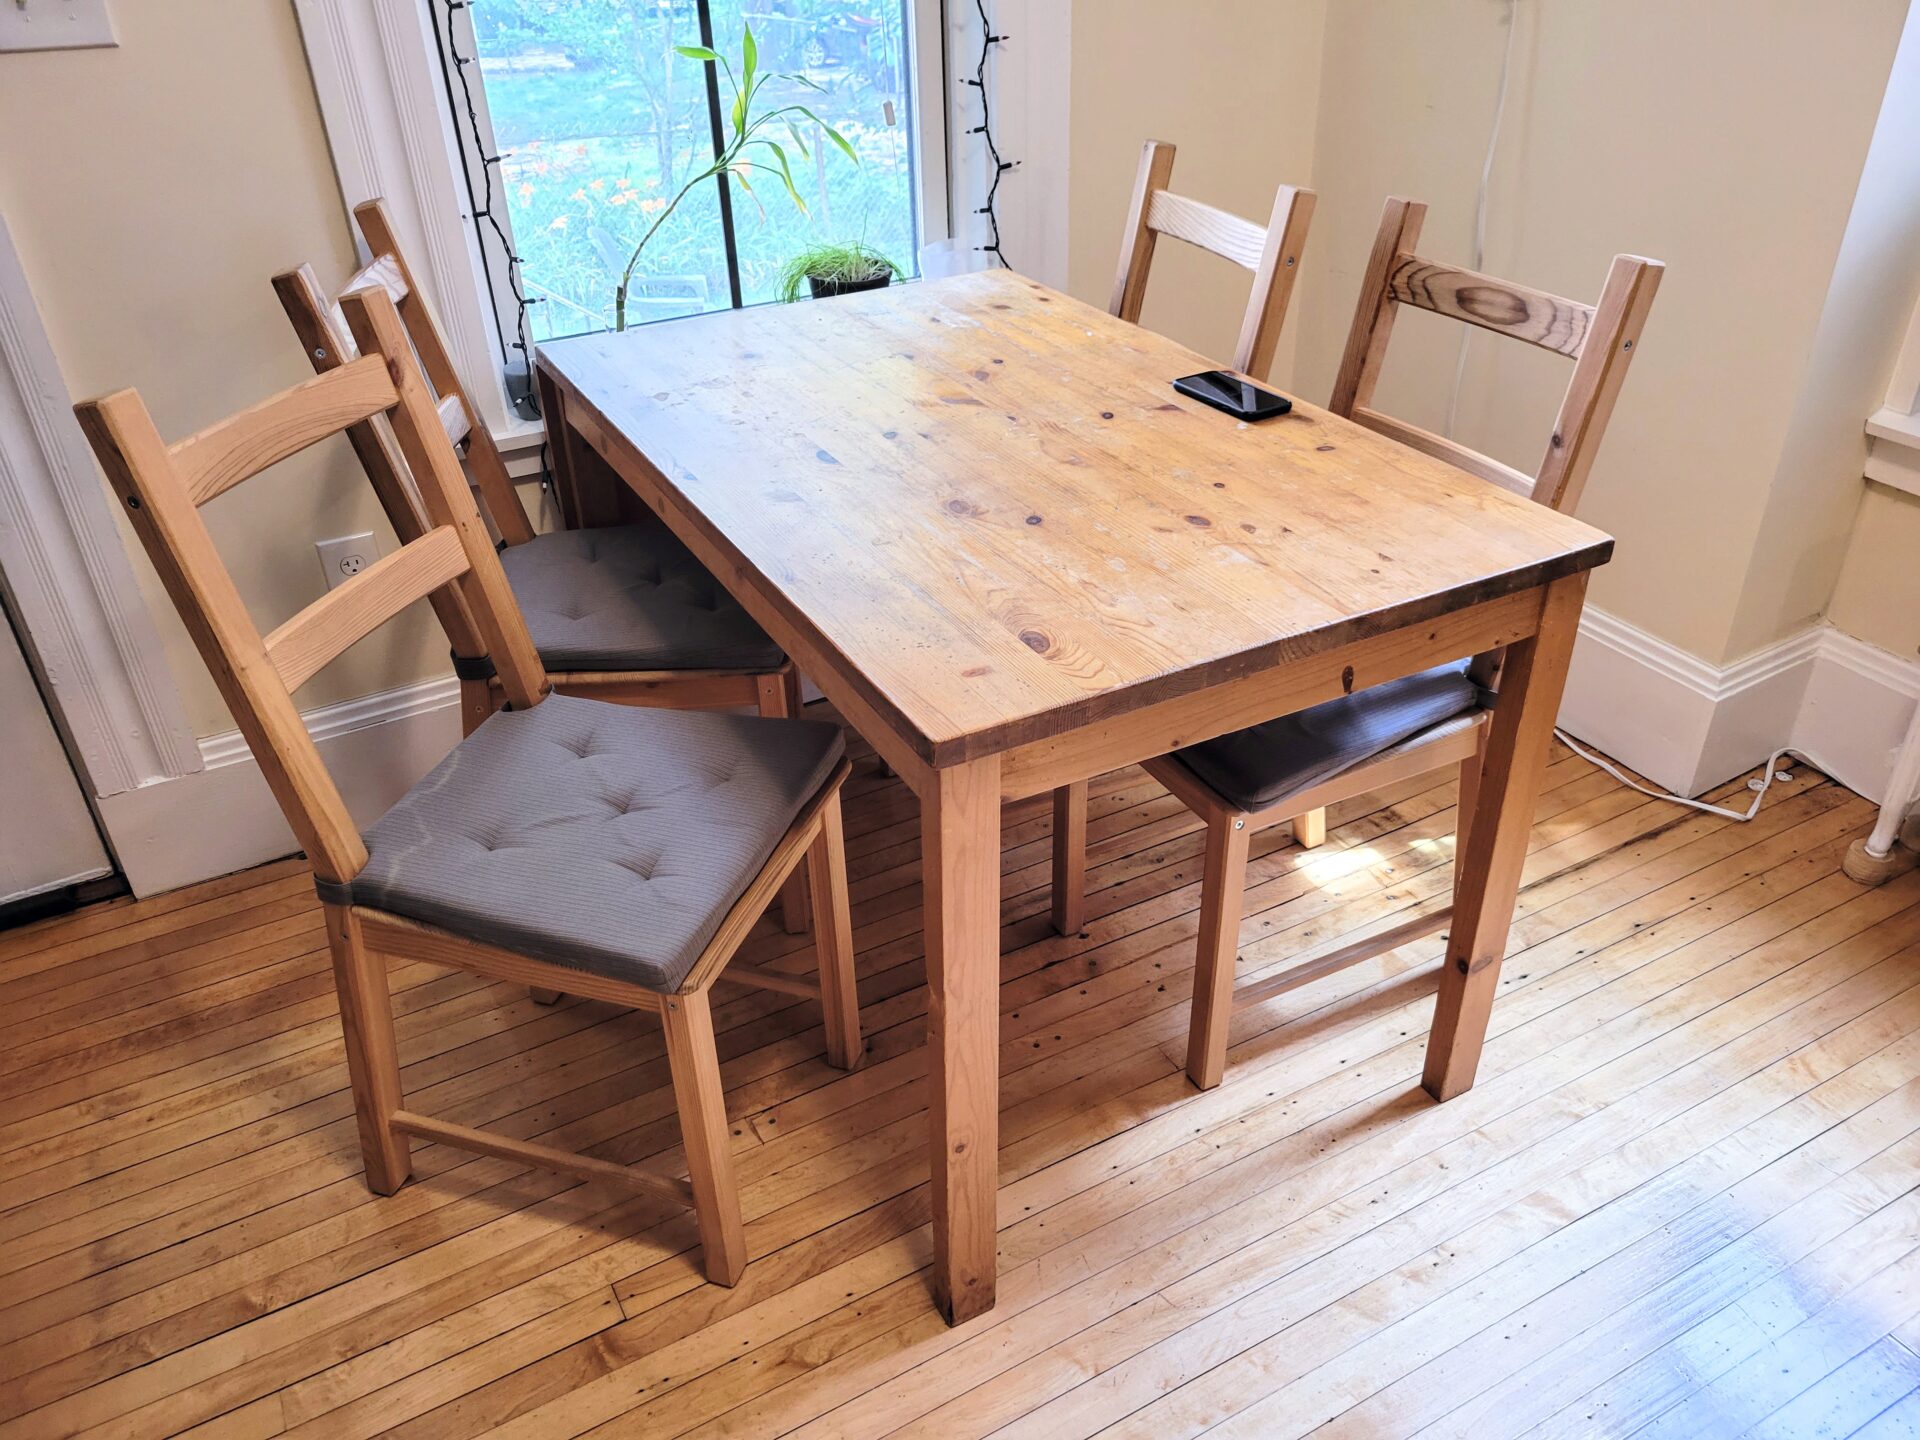
Refinishing your IKEA kitchen table doesn't have to break the bank. Here are some budget-friendly ways to give your table a new look. 1. Use leftover paint: If you have leftover paint from a previous project, you can use it to refinish your table. This way, you save money and also create a cohesive look in your kitchen. 2. Opt for a natural finish: Instead of using wood stain or paint, you can choose to leave your table's surface in its natural state. This will highlight the beauty of the wood and give your table a rustic and organic look. 3. Shop secondhand: If you're looking for a unique and affordable table, consider shopping secondhand. You can find a vintage or solid wood table that you can easily refinish to fit your style.Easy and Affordable Ways to Refinish Your IKEA Kitchen Table


Refinishing an IKEA Kitchen Table: What You Need to Know

If you're new to refinishing, here are some tips to help you get started. 1. Research: Before starting the project, do some research on the type of wood and the finish you want to use. Watch tutorials and read articles to familiarize yourself with the process. 2. Take your time: As mentioned earlier, refinishing takes time and patience. Don't rush through the process, and be prepared to make mistakes along the way. It's all a part of the learning process. 3. Practice: If you're unsure about a certain technique or finish, practice on a scrap piece of wood before applying it to your table. This will help you perfect your skills and avoid any costly mistakes.Refinishing Your IKEA Kitchen Table: A Beginner's Guide


Easy and Affordable Ways to Refinish Your IKEA Kitchen Table


Refinishing your IKEA kitchen table may seem like a simple task, but there are some common mistakes that can hinder your results. Here are some mistakes to avoid. 1. Skipping the sanding: As mentioned earlier, sanding is an essential step in refinishing. Skipping this step can result in a poor finish and cause the new finish to peel or chip. 2. Using the wrong tools: Using the wrong tools can damage the table's surface or result in an uneven finish. Make sure to use the appropriate tools for each step of the refinishing process. 3. Not protecting the surface: Refinishing can be a messy process, and it's essential to protect the surrounding area to prevent any damage or stains.Refinishing an IKEA Kitchen Table: Common Mistakes to Avoid


Refinishing Your IKEA Kitchen Table: A Beginner's Guide


With these tips and ideas, you can easily refinish your IKEA kitchen table and give it a new lease on life. Whether you want to add a pop of color, create a distressed look, or keep it simple and natural, refinishing is a fun and budget-friendly way to update your kitchen décor. So, get your tools ready and start transforming your plain IKEA kitchen table into a statement piece that reflects your personal style.From Drab to Fab: Refinishing Your IKEA Kitchen Table


Refinishing an IKEA Kitchen Table: Common Mistakes to Avoid

The Benefits of Refinishing Your IKEA Kitchen Table

Enhance the Aesthetics of Your Kitchen
 One of the main reasons to refinish your IKEA kitchen table is to enhance the overall aesthetics of your kitchen. Over time, the surface of your table may become scratched, stained, or faded, giving it a worn-out appearance. By refinishing it, you can restore its original beauty and make it look brand new again. This will not only improve the overall look of your kitchen, but it will also make it a more inviting and enjoyable space for you and your family to gather and spend time in.
Save Money
 Refinishing your IKEA kitchen table is also a cost-effective option compared to buying a brand new one. By simply sanding down the surface and applying a fresh coat of paint or stain, you can transform your table into a like-new piece of furniture. This is a great option for those on a budget or for those who want to update their kitchen without spending a significant amount of money.
Customize to Your Style
 Another benefit of refinishing your IKEA kitchen table is that you can customize it to your personal style and taste. With a variety of paint colors and stains available, you can choose the perfect shade to match your kitchen decor. You can also add unique details such as distressing or stenciling to make your table one-of-a-kind and reflect your personal style.
Extend the Lifespan of Your Table
 Refinishing your IKEA kitchen table can also help extend its lifespan. By regularly refinishing it, you can protect the surface from damage and wear and tear, making it last longer. This is especially important for families with young children who may be prone to spills and accidents. With proper maintenance and refinishing, your IKEA kitchen table can last for many years to come.
Conclusion
 In conclusion, refinishing your IKEA kitchen table is a great way to enhance the aesthetics of your kitchen, save money, customize to your style, and extend the lifespan of your table. With a little bit of time and effort, you can transform your old, worn-out table into a beautiful and functional piece of furniture that will bring joy to your kitchen for years to come. So why wait? Grab your sandpaper and paintbrush and give your IKEA kitchen table a makeover today.