When it comes to installing a new kitchen sink, one of the most important factors to consider is the drain height. The standard kitchen sink drain height is crucial for proper drainage and to ensure that your sink is functioning correctly. In this article, we will discuss everything you need to know about the standard kitchen sink drain height and how to install it correctly.Standard Kitchen Sink Drain Height
The drain height of your kitchen sink is essential for several reasons. First and foremost, it ensures that wastewater can flow smoothly from the sink to the sewer or septic system. If the drain height is too high or too low, it can lead to clogs and backups, causing inconvenience and potential damage to your plumbing system. Additionally, the drain height also plays a role in the overall aesthetic of your kitchen. A sink with a drain that is too high or too low can look awkward and out of place. Therefore, it is essential to get the drain height right to ensure both functionality and visual appeal.Why is the Drain Height Important?
The standard kitchen sink drain height is typically determined by the height of your countertop. The drain should be positioned at a height that allows for proper water flow while also ensuring that the sink is not too high or too low. Generally, the drain should be installed at a height of 18 inches from the floor. However, this can vary depending on the height of your countertop and personal preference.How to Determine the Standard Kitchen Sink Drain Height
Installing a kitchen sink drain is not as complicated as it may seem. With the right tools and a bit of know-how, you can easily install a new drain or replace an old one. Here's a step-by-step guide on how to install a kitchen sink drain: Step 1: Gather all the necessary tools and materials, including a sink drain, plumber's putty, adjustable wrench, and plumber's tape. Step 2: Begin by removing the old drain if you are replacing it. Loosen the slip nuts and remove the tailpiece and drain trap. Step 3: Apply plumber's putty around the underside of the new drain flange. Place the flange into the drain hole and press down firmly to create a tight seal. Step 4: Place the rubber gasket and cardboard friction ring onto the flange from under the sink. Thread the lock nut onto the drain from under the sink and tighten it with an adjustable wrench. Step 5: Connect the tailpiece to the strainer and the drain trap using slip nuts. Use plumber's tape on the threaded connections to ensure a tight seal. Step 6: Turn on the water and check for any leaks. Adjust the drain height if necessary.How to Install a Kitchen Sink Drain
Tip 1: It is always a good idea to have an extra set of hands to help with the installation process, especially when it comes to tightening hard-to-reach connections. Tip 2: Make sure to check the manufacturer's instructions for specific guidelines on installing your particular sink drain. Tip 3: If you are unsure about installing a kitchen sink drain yourself, it is best to hire a professional plumber to ensure the job is done correctly.Additional Tips for Installing a Kitchen Sink Drain
The standard kitchen sink drain height is a crucial factor in the functionality and appearance of your kitchen sink. It is essential to get it right to avoid any potential plumbing issues and to ensure that your sink looks and works as it should. With the tips and steps outlined in this article, you can confidently install a new kitchen sink drain or replace an old one yourself.In Conclusion
Why the Height of Kitchen Sink Wall Drains Matters in House Design
/how-to-install-a-sink-drain-2718789-hero-24e898006ed94c9593a2a268b57989a3.jpg)
The Importance of Proper Drainage in Kitchen Design
The Ideal Height for Kitchen Sink Wall Drains
 So, what is the ideal height for a kitchen sink wall drain?
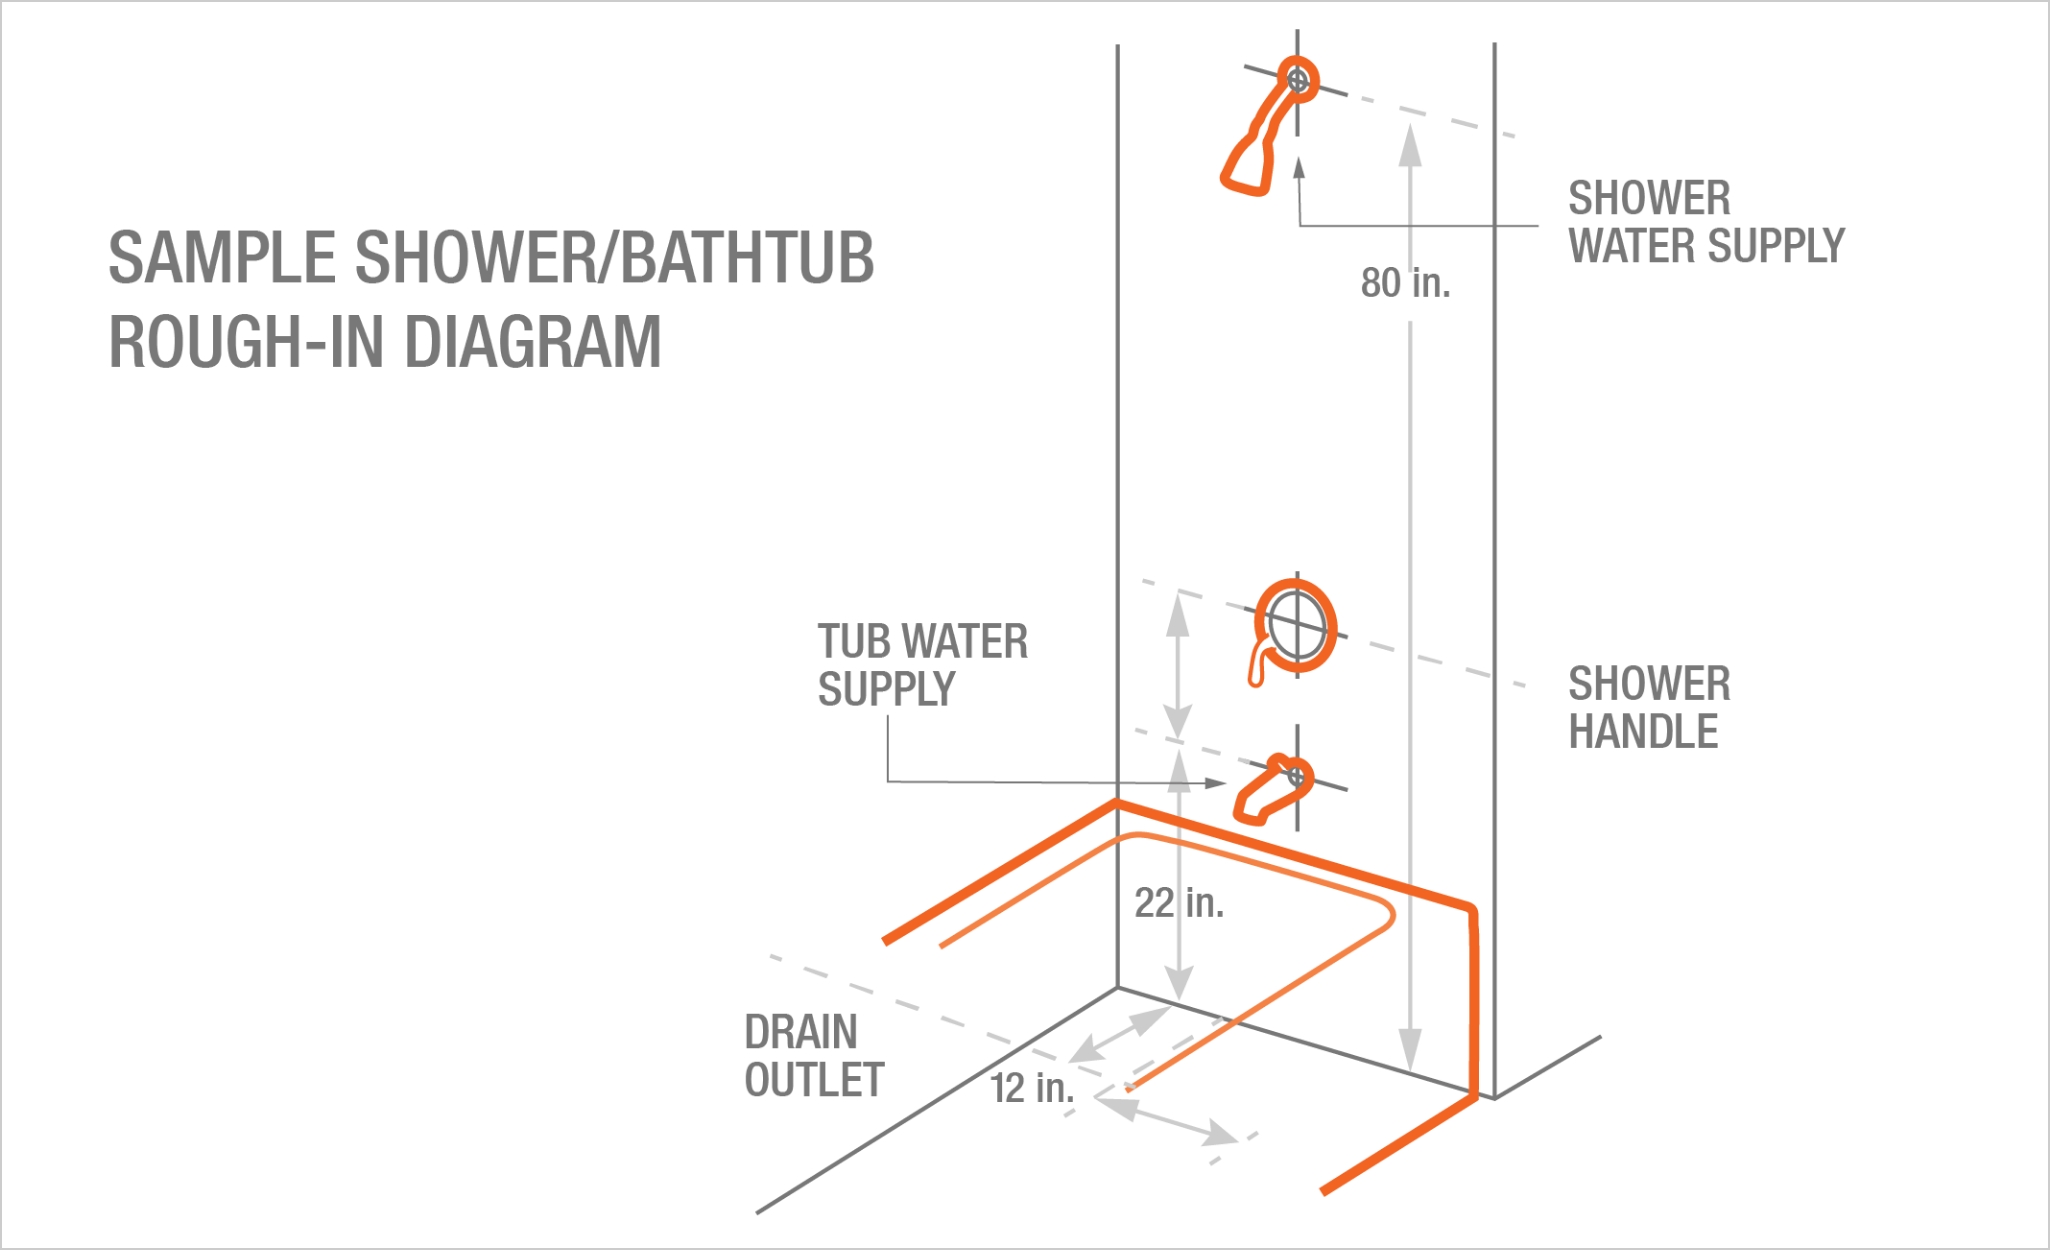
According to building codes and industry standards, the recommended height for a kitchen sink wall drain is between 18 and 24 inches above the finished floor.
This allows for proper slope and drainage, as well as enough clearance for the trap and plumbing connections.
However, the height of the drain may need to be adjusted based on the specific layout and design of your kitchen.
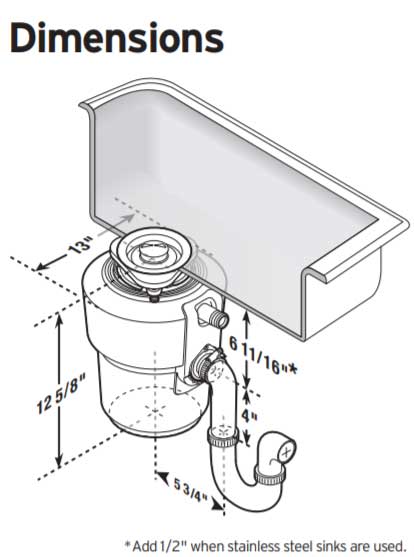
For example, if you have a deep sink or a garbage disposal, the drain may need to be higher to accommodate these features. It's important to consult with a professional plumber to determine the best height for your specific kitchen design.
The Impact of Incorrect Drain Height
 What happens if the height of your kitchen sink wall drain is not properly adjusted?
First and foremost, it can lead to drainage issues and potential water damage.
If the drain is too high, water may not flow properly and could pool in the sink or spill onto the counter. If the drain is too low, water may not drain effectively, resulting in clogs and slow draining.
Incorrect drain height can also affect the aesthetic of your kitchen.
If the drain is too high, it may be visible and disrupt the clean lines of your backsplash. If it's too low, it may be hidden by the sink and create an unbalanced look.






/how-to-install-a-sink-drain-2718789-hero-b5b99f72b5a24bb2ae8364e60539cece.jpg)


:max_bytes(150000):strip_icc()/how-to-install-a-sink-drain-2718789-hero-24e898006ed94c9593a2a268b57989a3.jpg)


