Installing a tile-in kitchen sink is a great way to add a stylish and functional element to your kitchen. It may seem like a daunting task, but with the right tools and knowledge, you can easily tackle this project on your own. In this guide, we will go through the step-by-step process of installing a tile-in kitchen sink.1. How to Install a Tile-In Kitchen Sink


1. How to Install a Tile-In Kitchen Sink


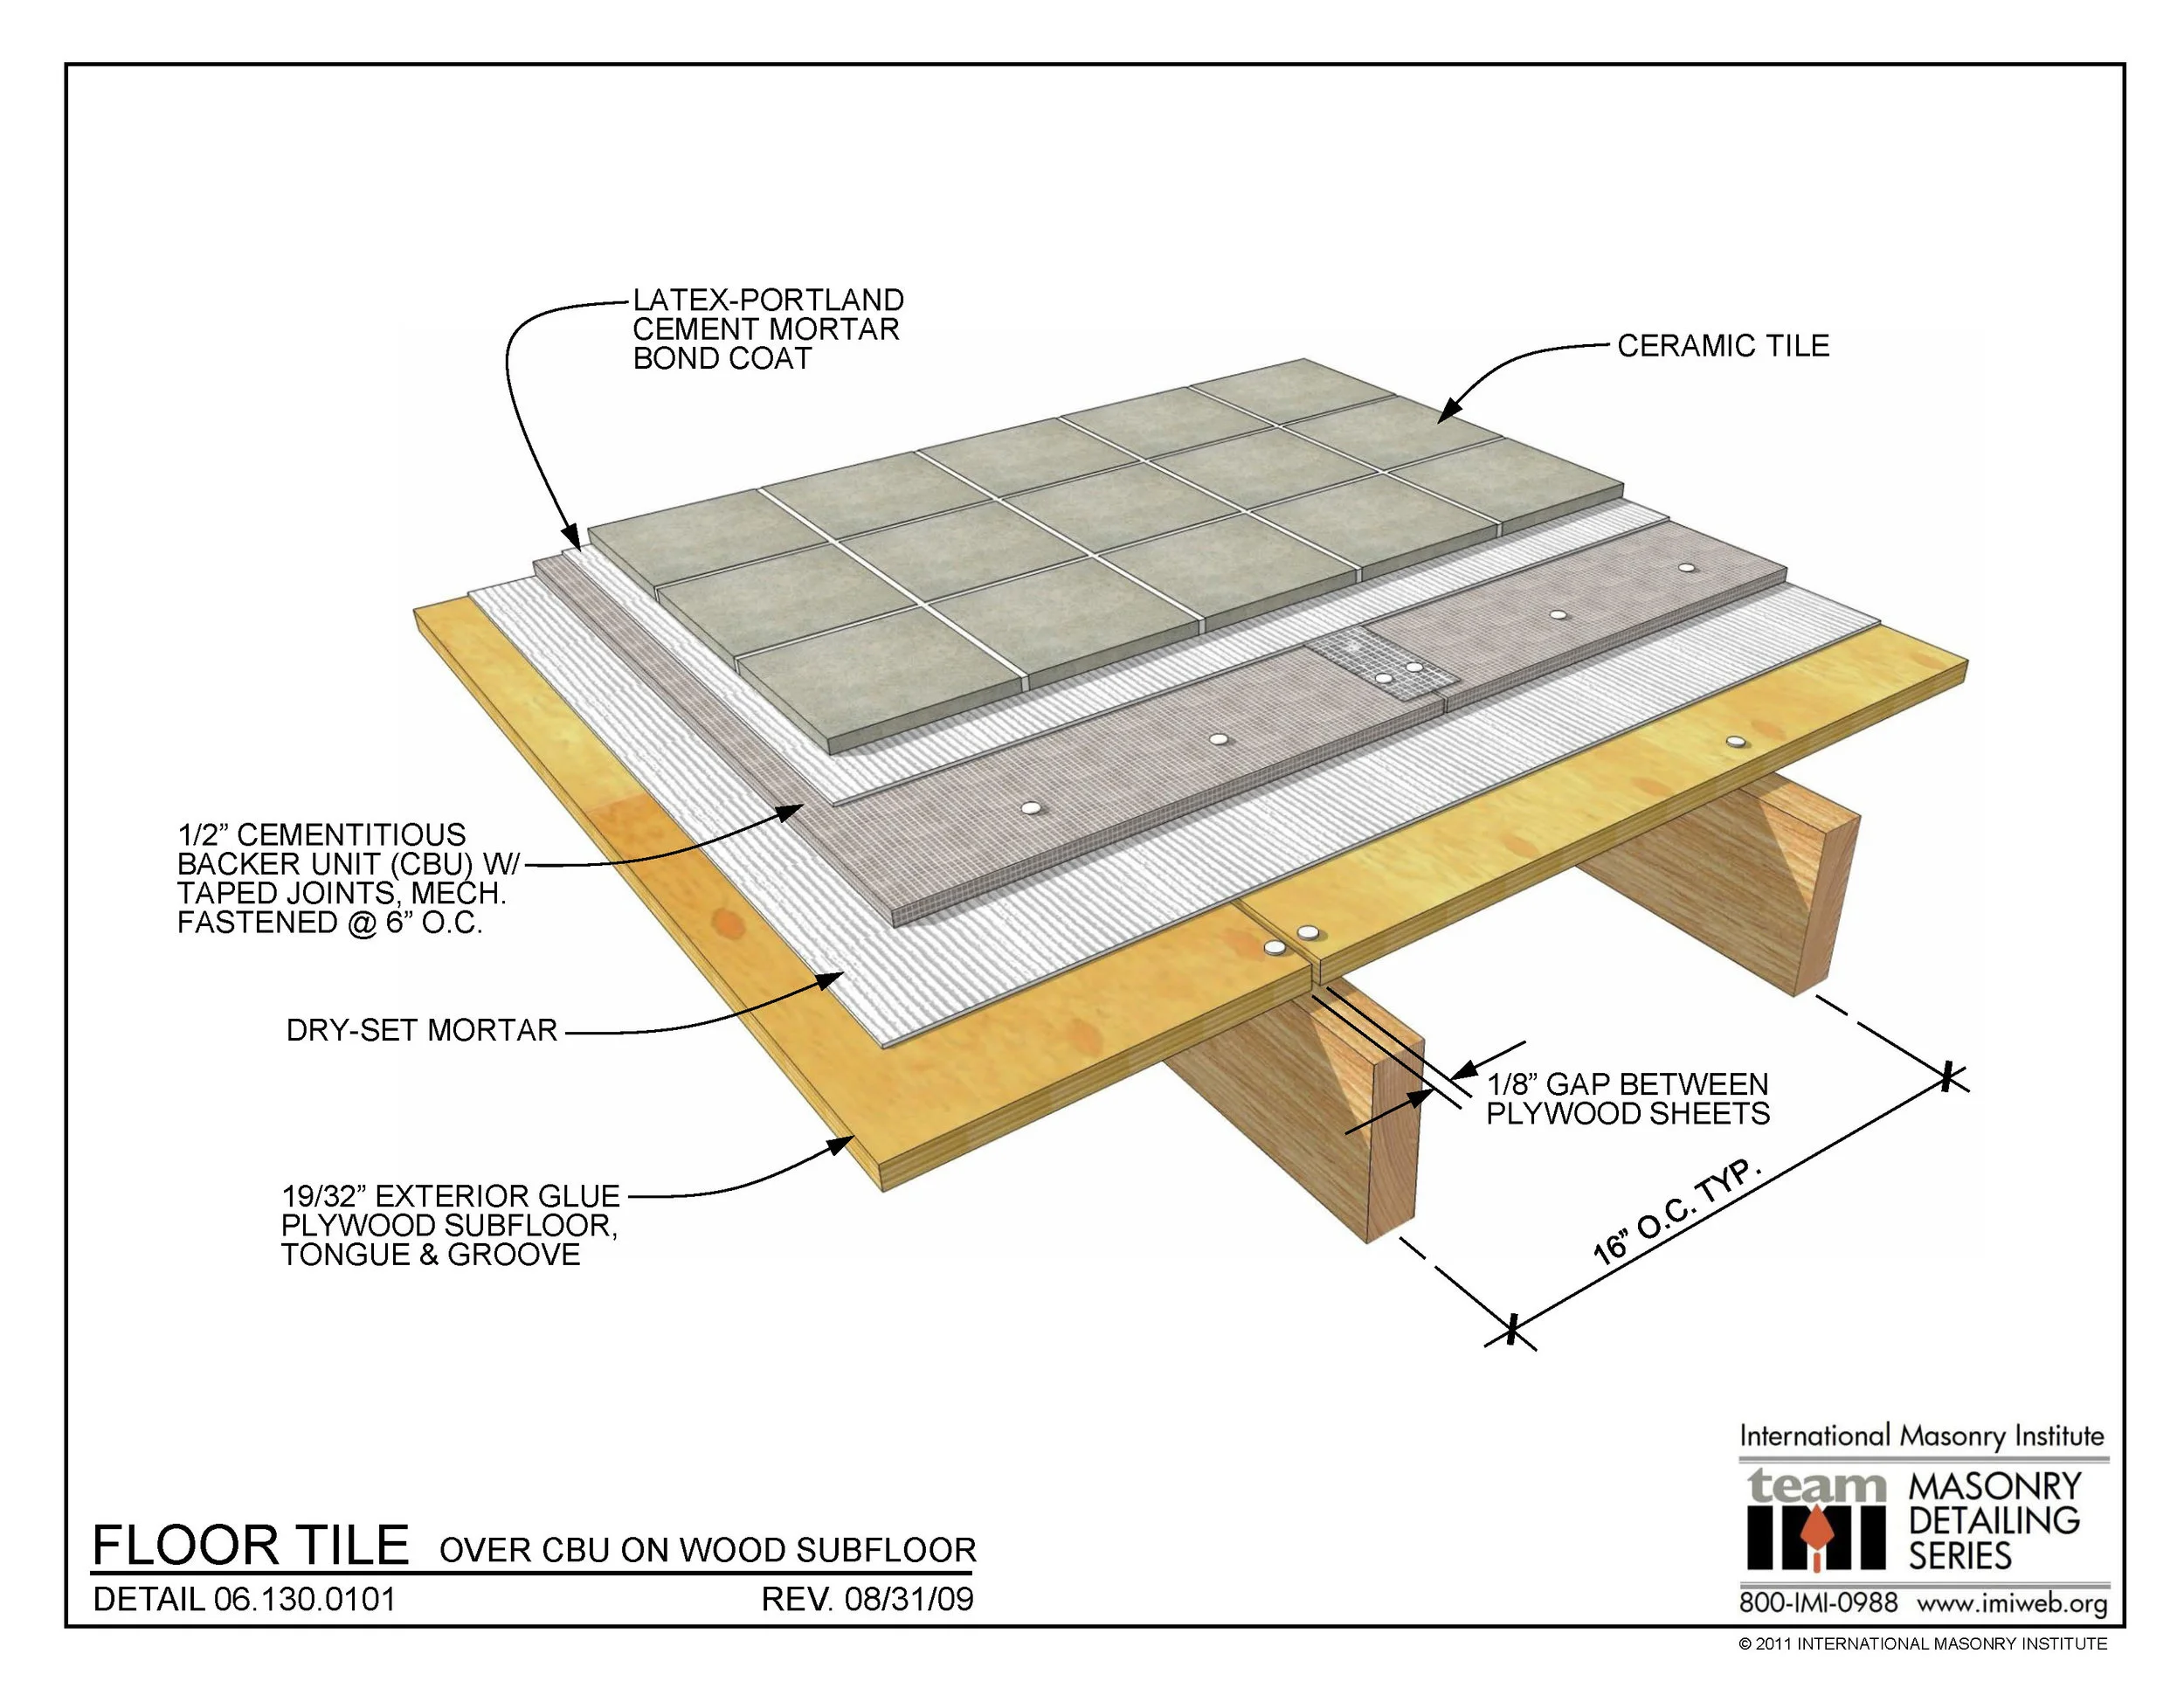
Before beginning the installation process, make sure you have all the necessary tools and materials. These include a tile-in kitchen sink, tile adhesive, grout, trowel, sponge, tile cutter, and a level. Once you have everything ready, follow these steps: Step 1: Measure and Cut the Tiles Start by measuring the area where the sink will be installed. Use these measurements to cut the tiles to the appropriate size. Make sure to leave enough space for the sink to fit in securely. Step 2: Prepare the Sink Before installing the sink, make sure to clean it thoroughly to remove any dirt or debris. Apply a small amount of silicone caulk around the edge of the sink to create a watertight seal. Step 3: Apply Tile Adhesive Using a trowel, spread a layer of tile adhesive on the surface where the sink will be placed. Make sure the adhesive is evenly spread and covers the entire area. Then, press the sink into place and use a level to ensure it is straight. Step 4: Add Grout Once the sink is secured in place, use a sponge to apply grout around the edges. This will help to fill in any gaps and create a seamless look. Wipe away any excess grout with a damp cloth.2. Step-by-Step Guide for Installing a Tile-In Kitchen Sink


2. Step-by-Step Guide for Installing a Tile-In Kitchen Sink


Installing a tile-in kitchen sink can be a fun and rewarding DIY project. Not only will you save money on hiring a professional, but you will also have the satisfaction of completing the project yourself. Follow these simple steps for a successful installation: Step 1: Gather Your Tools Make sure you have all the necessary tools and materials before starting the installation process. This includes a tile-in kitchen sink, tile adhesive, grout, trowel, sponge, tile cutter, and a level. Step 2: Prepare the Area Clean the area where the sink will be installed and make sure it is free of any debris. This will ensure a smooth and secure installation. Step 3: Install the Sink Follow the steps outlined in the previous section to install the sink. Make sure to use a level to ensure it is straight and secure. Step 4: Apply Grout Use a sponge to apply grout around the edges of the sink. Wipe away any excess grout with a damp cloth for a clean finish.3. DIY Tile-In Kitchen Sink Installation Tutorial


3. DIY Tile-In Kitchen Sink Installation Tutorial
/how-to-install-a-sink-drain-2718789-hero-24e898006ed94c9593a2a268b57989a3.jpg)


Here are some helpful tips to keep in mind when installing a tile-in kitchen sink: - Measure twice, cut once. It's important to get accurate measurements to ensure the sink fits properly. - Use a level to ensure the sink is straight and level. - Apply a small amount of silicone caulk around the edge of the sink for a watertight seal. - Use tile spacers for a professional-looking finish. - Clean and dry the area thoroughly before applying grout.4. Tips for Installing a Tile-In Kitchen Sink

4. Tips for Installing a Tile-In Kitchen Sink


Installing a tile-in kitchen sink may seem straightforward, but there are some common mistakes that can be easily avoided. These include: - Not using a level to ensure the sink is straight and level. - Not properly preparing the area before installation. - Using too much or too little adhesive. - Not using tile spacers, resulting in uneven tiles. - Not wiping away excess grout, resulting in a messy finish.5. Common Mistakes to Avoid When Installing a Tile-In Kitchen Sink


5. Common Mistakes to Avoid When Installing a Tile-In Kitchen Sink


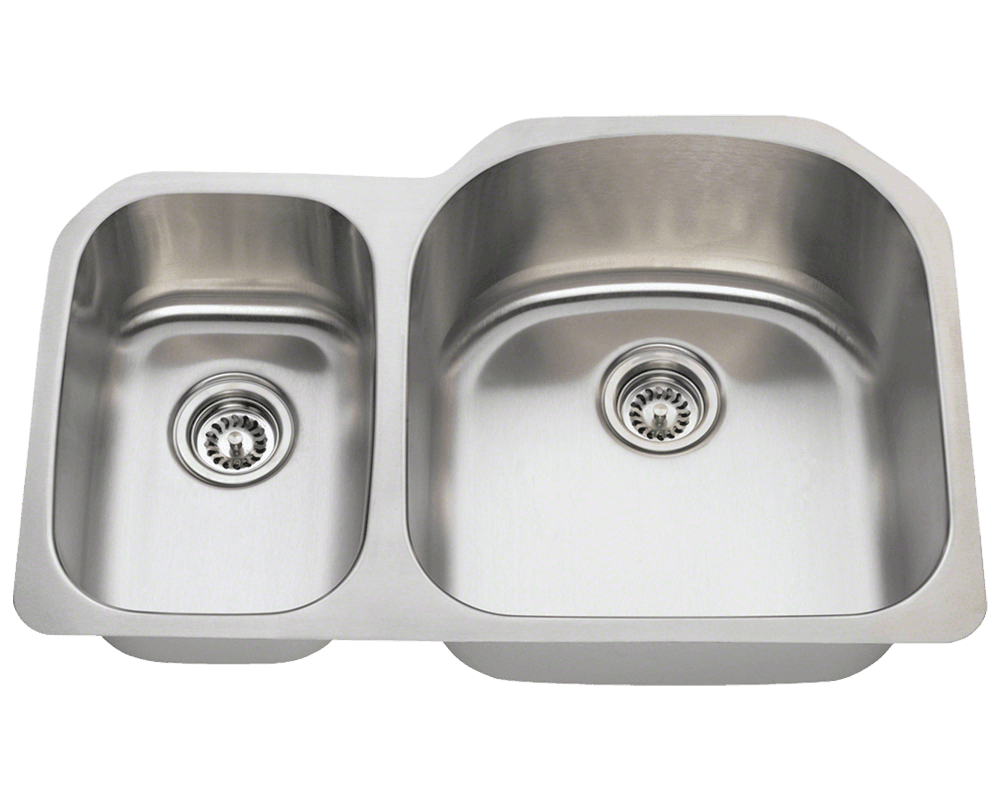
To successfully install a tile-in kitchen sink, you will need the following tools and materials: - Tile-in kitchen sink - Tile adhesive - Grout - Trowel - Sponge - Tile cutter - Level6. Tools and Materials Needed for Installing a Tile-In Kitchen Sink


6. Tools and Materials Needed for Installing a Tile-In Kitchen Sink

As with any home improvement project, there are pros and cons to installing a tile-in kitchen sink. Here are some to consider: Pros: - Adds a stylish and unique element to your kitchen. - Can be a cost-effective option compared to other types of sinks. - Can be installed as a DIY project. Cons: - Requires precise measurements and cutting of tiles. - Can be more difficult to clean and maintain compared to other types of sinks. - May not be suitable for all types of countertops.7. Pros and Cons of Installing a Tile-In Kitchen Sink


7. Pros and Cons of Installing a Tile-In Kitchen Sink


Measuring and cutting tiles for a tile-in kitchen sink can be a bit tricky, but with some practice and patience, you can achieve a professional-looking result. Here are the steps to follow: Step 1: Measure the Area Measure the area where the sink will be installed and mark the measurements on the tiles. Make sure to leave enough space for the sink to fit in securely. Step 2: Cut the Tiles Using a tile cutter, carefully cut the tiles according to the measurements. Make sure to cut them slightly smaller than the measured area to allow for a snug fit. Step 3: Dry Fit the Tiles Before applying adhesive, dry fit the tiles to make sure they fit properly. Make any necessary adjustments before moving on to the next step.8. How to Measure and Cut Tiles for a Tile-In Kitchen Sink


8. How to Measure and Cut Tiles for a Tile-In Kitchen Sink


While installing a tile-in kitchen sink may seem straightforward, there are some common issues that may arise. Here are some tips for troubleshooting these issues: - If the sink is not level, use shims to adjust it. - If the tiles do not fit properly, double check your measurements and make necessary adjustments. - If there are gaps between the sink and the tiles, use caulk to fill them in.9. Troubleshooting Common Issues During Tile-In Kitchen Sink Installation


9. Troubleshooting Common Issues During Tile-In Kitchen Sink Installation


Deciding whether to hire a professional or tackle the installation yourself can be a tough decision. Here are some factors to consider: Professional Installation: - May result in a more polished and precise finish. - Can save you time and effort. - May be necessary if you are not confident in your DIY skills. DIY Installation: - Can save you money on labor costs. - Can be a fun and rewarding project. - Allows for more customization and personalization.10. Professional vs. DIY: Which is the Best Option for Installing a Tile-In Kitchen Sink?


10. Professional vs. DIY: Which is the Best Option for Installing a Tile-In Kitchen Sink?


Choosing the Right Tile-In Kitchen Sink for Your Home

Why Tile-In Sinks are a Popular Choice
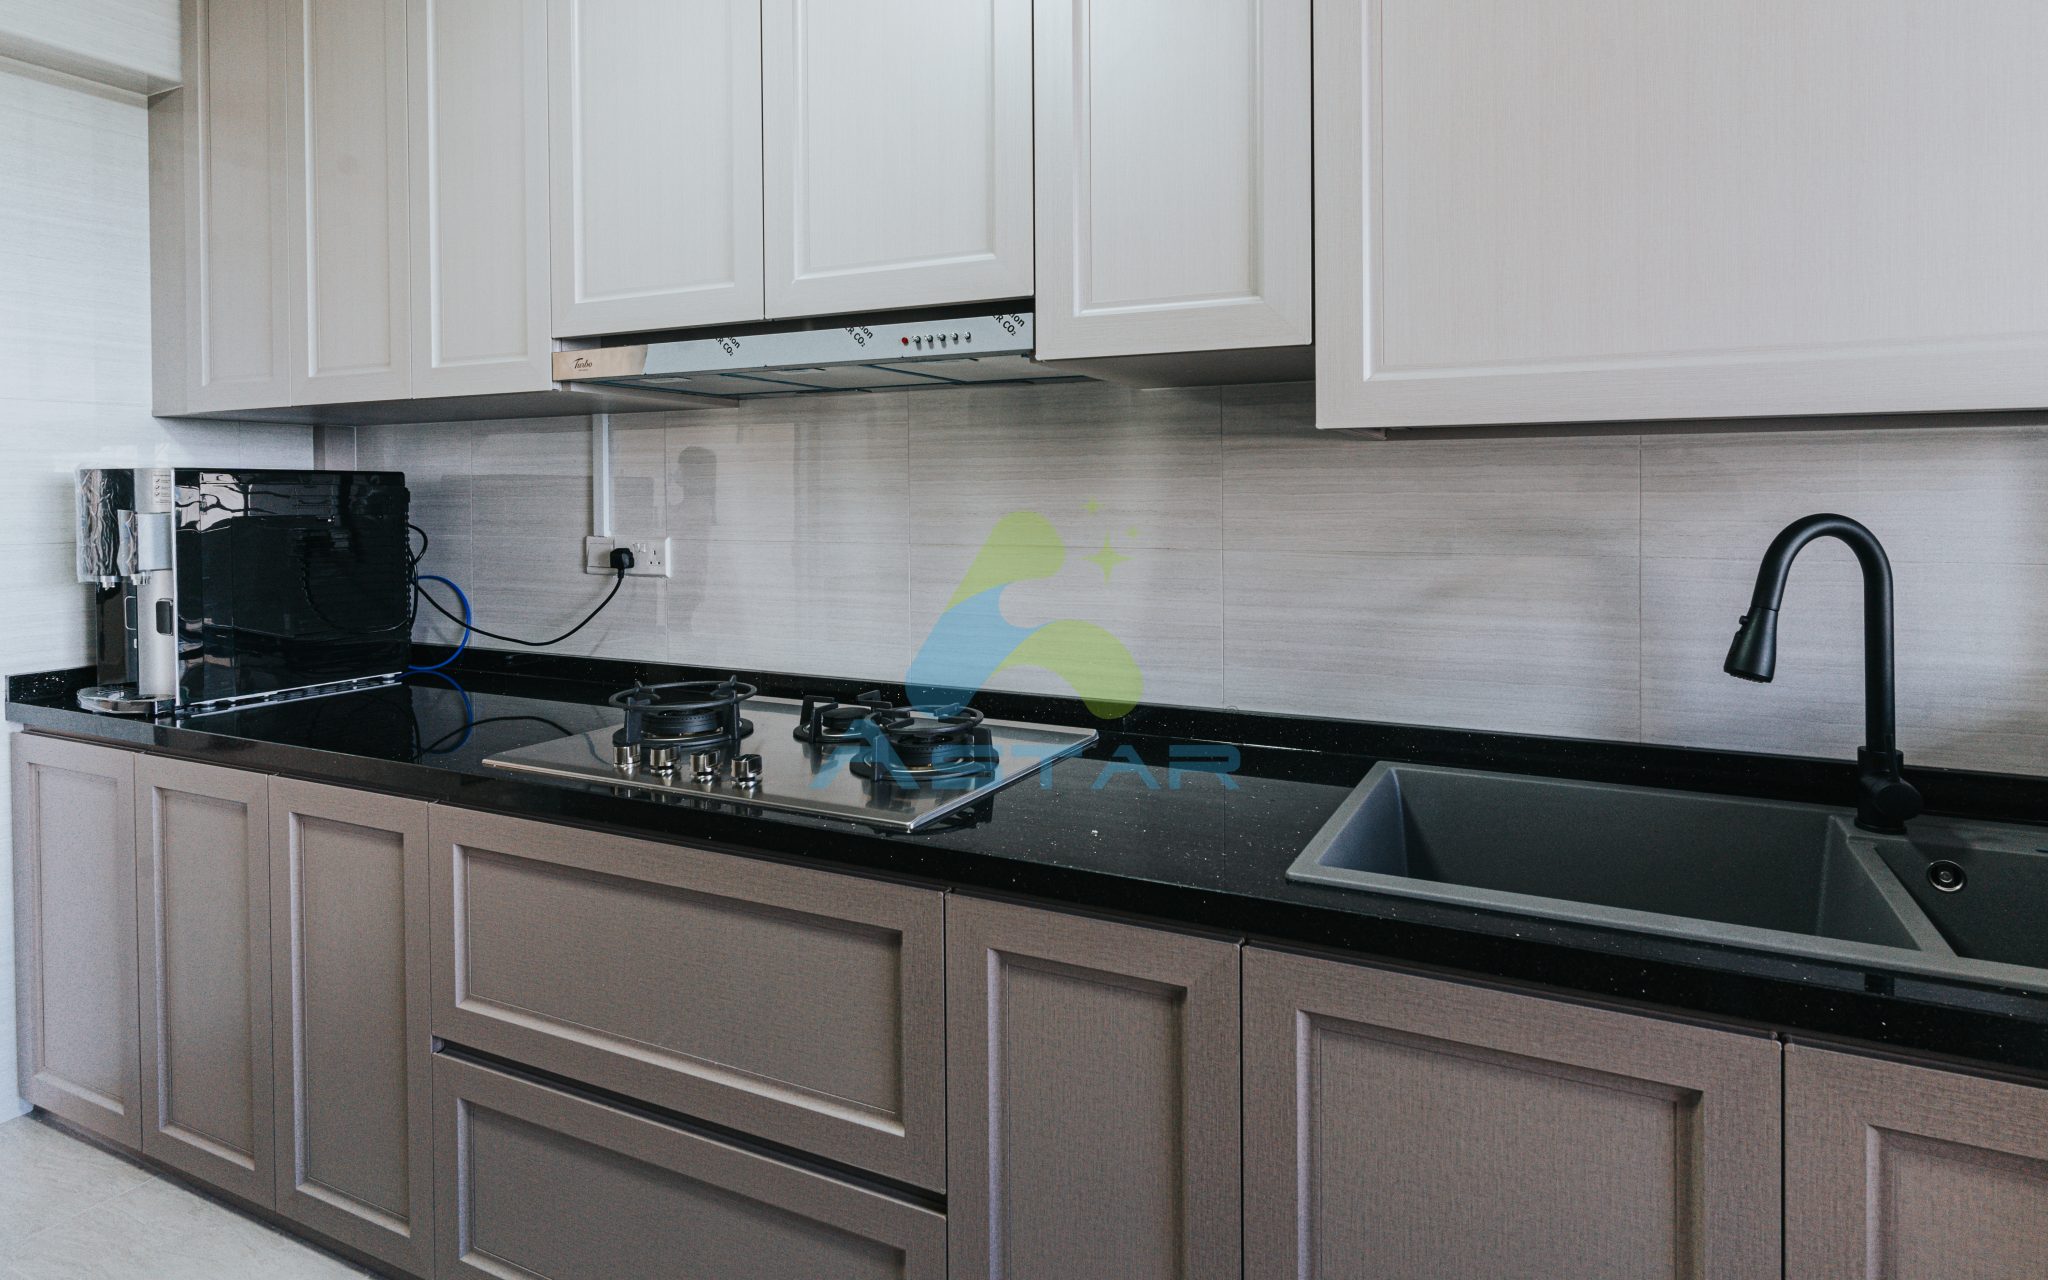
 Tile-in kitchen sinks have become a popular choice for homeowners due to their durability, practicality, and aesthetic appeal. Unlike traditional top-mounted sinks, tile-in sinks are installed flush with the countertop, creating a seamless and streamlined look. This also makes them easier to clean and maintain, as there are no edges or crevices for dirt and grime to accumulate. Additionally, tile-in sinks are compatible with a variety of materials such as granite, marble, and quartz, making them a versatile choice for any kitchen design.
Factors to Consider Before Installation
 When choosing a tile-in kitchen sink, there are a few important factors to consider. First, consider the size and shape of the sink. Measure the space available in your kitchen and determine the size and shape that will fit best. It's also important to choose a sink that complements the overall design and style of your kitchen. Consider the material, color, and finish of the sink to ensure it blends seamlessly with your existing decor.
Installation Process
 Installing a tile-in kitchen sink may seem like a daunting task, but with the right tools and instructions, it can be a relatively simple process. Start by cutting a hole in the countertop where the sink will be placed. Next, apply a thin layer of silicone adhesive around the edges of the sink and carefully place it into the hole, pressing down firmly to ensure a tight seal. Allow the adhesive to dry completely before installing the tiles around the sink, making sure to leave a small gap between the sink and the tiles for caulk. Once the tiles are in place, fill in the gaps with caulk and allow it to dry before using the sink.
Featured Keywords: tile-in kitchen sink, popular choice, durability, practicality, aesthetic appeal, top-mounted sinks, flush, streamlined, versatile, size, shape, complement, material, installation process, silicone adhesive, caulk
Installing a tile-in kitchen sink may seem like a daunting task, but with the right tools and instructions, it can be a relatively simple process. Start by cutting a hole in the countertop where the sink will be placed. Next, apply a thin layer of silicone adhesive around the edges of the sink and carefully place it into the hole, pressing down firmly to ensure a tight seal. Allow the adhesive to dry completely before installing the tiles around the sink, making sure to leave a small gap between the sink and the tiles for caulk. Once the tiles are in place, fill in the gaps with caulk and allow it to dry before using the sink.
Featured Keywords: tile-in kitchen sink, popular choice, durability, practicality, aesthetic appeal, top-mounted sinks, flush, streamlined, versatile, size, shape, complement, material, installation process, silicone adhesive, caulk