How to Install a Kitchen Sink Sprayer
If you're tired of constantly reaching for the faucet to rinse off dishes or fruits and vegetables, it may be time to install a kitchen sink sprayer. Not only does it make cleaning and rinsing tasks easier, but it also adds a modern touch to your kitchen sink. Plus, with the right tools and a little bit of DIY know-how, you can easily install a new kitchen sink sprayer in no time. Follow this step-by-step guide to learn how.


How to Install a Kitchen Sink Sprayer


/25089301983_c5145fe85d_o-58418ef15f9b5851e5f392b5.jpg)

Installing a Kitchen Sink Sprayer
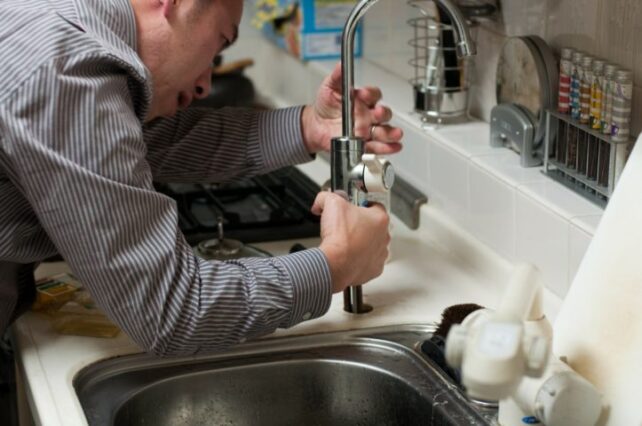
Installing a kitchen sink sprayer may seem like a daunting task, but it's actually a simple and straightforward process. Before you get started, make sure you have all the necessary tools and materials, including a new sprayer, adjustable wrench, plumber's tape, and a bucket or towel to catch any water. It's also important to turn off the water supply to your sink before beginning any installation.


Installing a Kitchen Sink Sprayer
:max_bytes(150000):strip_icc()/installing-a-kitchen-sink-sprayer-2718817-03-514088ddb922466eb3d4cd73f3aa85f4.jpg)
/sink-with-running-water-1033950126-25ffe2e2b2d0412083668d9cd791085e.jpg)

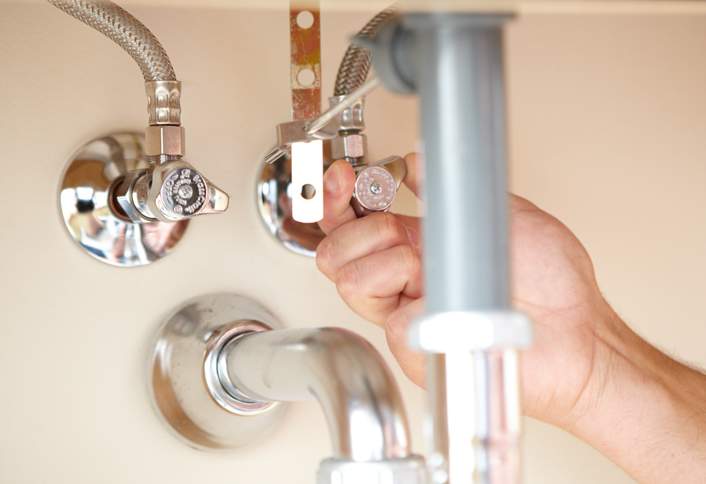
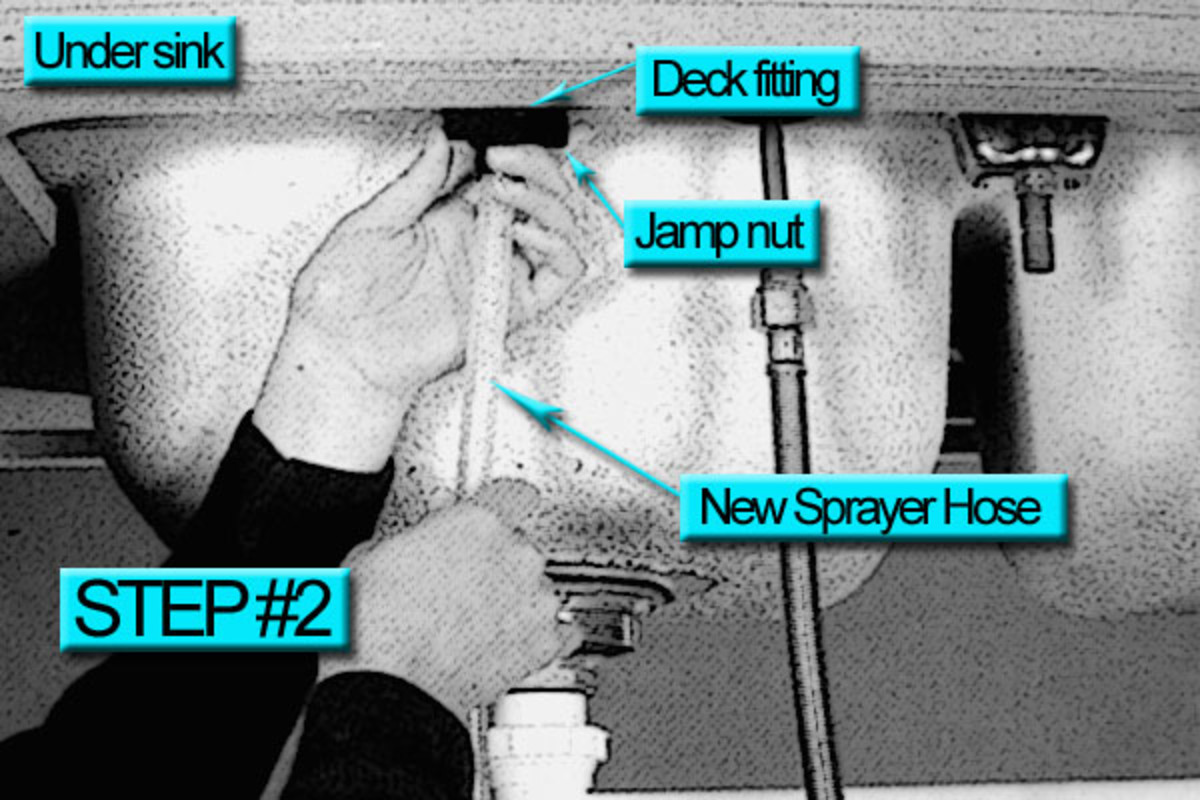
Step-by-Step Guide for Installing a Kitchen Sink Sprayer
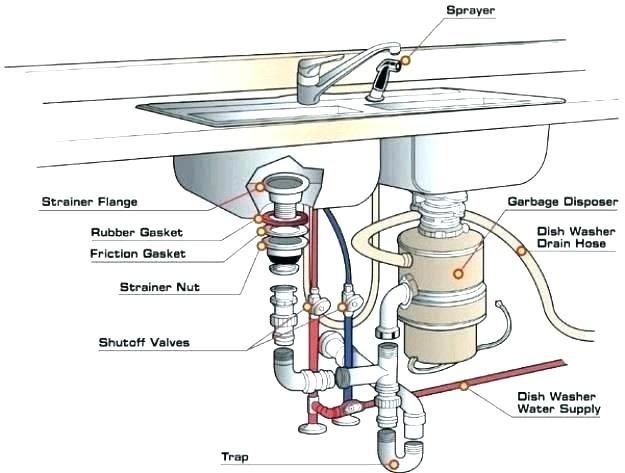
Step 1: Start by removing the old sprayer, if you have one. Using an adjustable wrench, loosen and disconnect the sprayer hose from the water supply under the sink. Then, unscrew the mounting nut that secures the sprayer to the sink. Once removed, carefully pull out the old sprayer and set it aside.
Step 2: Next, install the mounting nut for the new sprayer onto the sink. Make sure it is tight enough to hold the sprayer in place.
Step 3: Take the new sprayer and attach the sprayer hose to the water supply under the sink. Use plumber's tape to ensure a tight and leak-free connection.
Step 4: Once the hose is securely connected, insert the sprayer head through the mounting nut and attach it to the hose. Make sure it is tightened properly.
Step 5: Turn the water supply back on and test the new sprayer. If there are any leaks, simply tighten the connections again.


Step-by-Step Guide for Installing a Kitchen Sink Sprayer


DIY: Installing a New Kitchen Sink Sprayer
Installing a new kitchen sink sprayer is a simple and rewarding DIY project that can be done in just a few easy steps. Not only does it save you money from hiring a professional, but it also gives you the satisfaction of completing a home improvement project on your own. Plus, with the added convenience of a sprayer in your sink, you'll wonder why you didn't do it sooner.


DIY: Installing a New Kitchen Sink Sprayer


:max_bytes(150000):strip_icc()/installing-a-kitchen-sink-sprayer-2718817-02-01cfd18f0299484c910d4e6a50af463e.jpg)
Easy Steps for Installing a Kitchen Sink Sprayer
Installing a kitchen sink sprayer may seem intimidating, but with the right tools and a little bit of effort, it can be done in just a few easy steps. Follow this guide to make the process as smooth and hassle-free as possible.


Easy Steps for Installing a Kitchen Sink Sprayer


Installing a New Kitchen Sink Sprayer: A Beginner's Guide
If you're new to DIY projects, installing a new kitchen sink sprayer may seem like a daunting task. However, with the right guidance and proper tools, even beginners can successfully complete this project. Just follow these simple steps and you'll have a new sprayer installed in no time.

Installing a New Kitchen Sink Sprayer: A Beginner's Guide


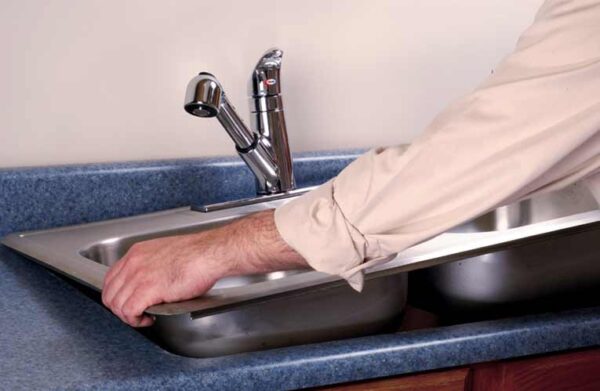
Tools and Materials Needed for Installing a Kitchen Sink Sprayer
Before you begin installing a kitchen sink sprayer, make sure you have all the necessary tools and materials. This includes a new sprayer, adjustable wrench, plumber's tape, and a bucket or towel to catch any water. Having everything you need on hand will make the process much easier and quicker.


Tools and Materials Needed for Installing a Kitchen Sink Sprayer
:max_bytes(150000):strip_icc()/installing-a-kitchen-sink-sprayer-2718817-10-97f444c05010478ab573882b372f1fc3.jpg)

:max_bytes(150000):strip_icc()/installing-a-kitchen-sink-sprayer-2718817-hero-2b7047468d594da6be2494ba0eebb480.jpg)

:max_bytes(150000):strip_icc()/installing-a-kitchen-sink-sprayer-2718817-07-362bee47568f48bab7f3bdff600e4092.jpg)
Common Mistakes to Avoid When Installing a Kitchen Sink Sprayer
While installing a kitchen sink sprayer may seem like a simple task, there are a few mistakes that many people make during the process. These mistakes can lead to leaks and other issues, so it's important to know what to avoid. For example, make sure to use plumber's tape to secure the connections and don't over-tighten any nuts or bolts.

Common Mistakes to Avoid When Installing a Kitchen Sink Sprayer


Tips and Tricks for Installing a Kitchen Sink Sprayer
To make the installation process even easier, here are a few tips and tricks to keep in mind. First, make sure to turn off the water supply before beginning any installation. This will prevent any accidental leaks or water damage. Also, be sure to test the sprayer after installation to check for any leaks or issues.


Tips and Tricks for Installing a Kitchen Sink Sprayer
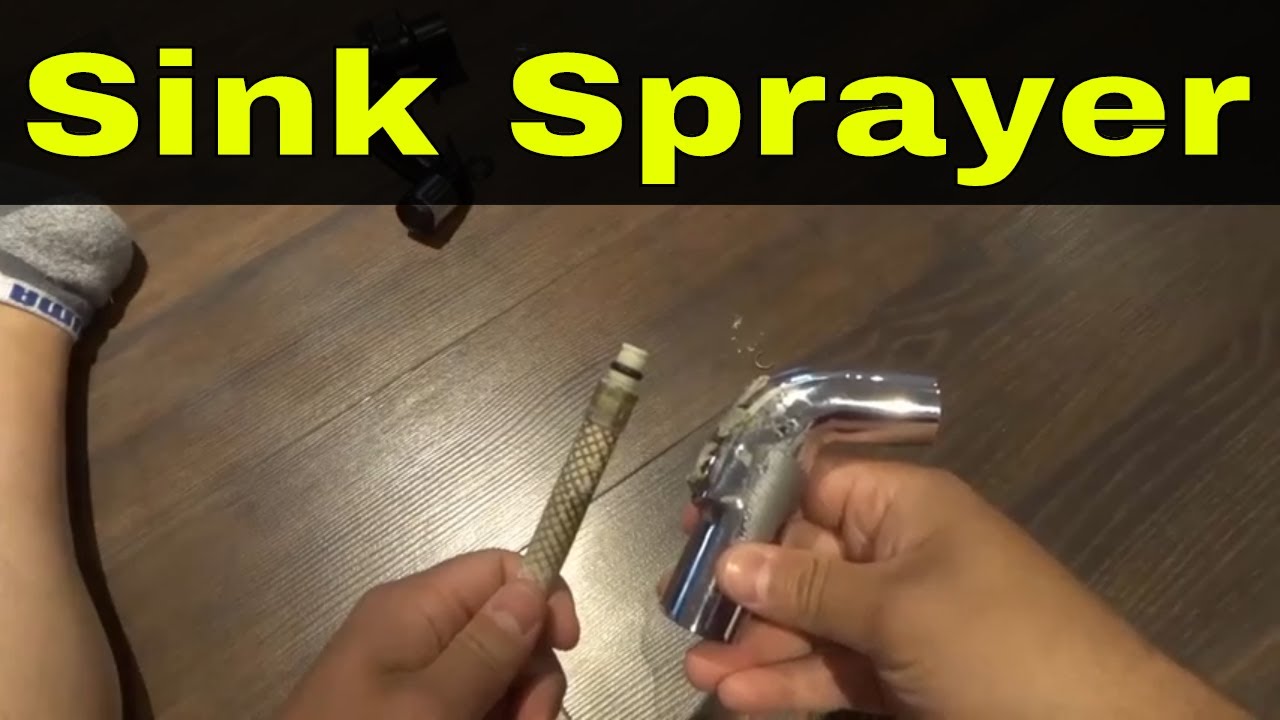
Video Tutorial: How to Install a Kitchen Sink Sprayer
If you're a visual learner, there are plenty of helpful video tutorials available online that can guide you through the process of installing a kitchen sink sprayer. These videos can be a great resource for seeing the steps in action and ensuring that you're completing the installation correctly.

Video Tutorial: How to Install a Kitchen Sink Sprayer

Why You Should Consider Installing a New Kitchen Sink Sprayer

Efficiency and Convenience
 One of the main reasons to consider installing a new
kitchen sink sprayer
is for its efficiency and convenience. Traditional
sink sprayers
are usually attached to the main faucet, making it difficult to reach certain areas of the sink. This can be especially frustrating when trying to clean large pots and pans or bulky items. With a separate
kitchen sink sprayer
, you can easily maneuver it to reach all corners of your sink, making cleaning a breeze.
One of the main reasons to consider installing a new
kitchen sink sprayer
is for its efficiency and convenience. Traditional
sink sprayers
are usually attached to the main faucet, making it difficult to reach certain areas of the sink. This can be especially frustrating when trying to clean large pots and pans or bulky items. With a separate
kitchen sink sprayer
, you can easily maneuver it to reach all corners of your sink, making cleaning a breeze.
Improved Aesthetics
 Aside from its practical benefits, a new
kitchen sink sprayer
can also improve the overall aesthetics of your kitchen. There are many modern and stylish designs to choose from, including sleek and minimalist options, as well as more traditional and ornate styles. You can also choose from a variety of finishes, such as chrome, brushed nickel, or oil-rubbed bronze, to match your existing fixtures and create a cohesive look in your kitchen.
Aside from its practical benefits, a new
kitchen sink sprayer
can also improve the overall aesthetics of your kitchen. There are many modern and stylish designs to choose from, including sleek and minimalist options, as well as more traditional and ornate styles. You can also choose from a variety of finishes, such as chrome, brushed nickel, or oil-rubbed bronze, to match your existing fixtures and create a cohesive look in your kitchen.
Increase Home Value
 If you're considering selling your home in the future, installing a new
kitchen sink sprayer
can be a worthwhile investment. Many homebuyers are looking for modern and updated features in the kitchen, and a separate
sink sprayer
can be a desirable addition. It can also give the impression that your kitchen is well-maintained and up-to-date, potentially increasing the value of your home.
If you're considering selling your home in the future, installing a new
kitchen sink sprayer
can be a worthwhile investment. Many homebuyers are looking for modern and updated features in the kitchen, and a separate
sink sprayer
can be a desirable addition. It can also give the impression that your kitchen is well-maintained and up-to-date, potentially increasing the value of your home.
Easy Installation
 Installing a new
kitchen sink sprayer
may seem like a daunting task, but it's actually quite simple. Most
sink sprayer
kits come with easy-to-follow instructions and can be installed in just a few simple steps. If you're unsure, you can always hire a professional plumber to do the installation for you. With a new
kitchen sink sprayer
in place, you can enjoy its benefits and the feeling of accomplishment from completing a DIY home project.
In conclusion, installing a new
kitchen sink sprayer
can bring many benefits to your kitchen. From increased efficiency and convenience to improved aesthetics and potential home value, it's a small change that can make a big impact. Consider upgrading your
sink sprayer
today and see the difference it can make in your daily life.
Installing a new
kitchen sink sprayer
may seem like a daunting task, but it's actually quite simple. Most
sink sprayer
kits come with easy-to-follow instructions and can be installed in just a few simple steps. If you're unsure, you can always hire a professional plumber to do the installation for you. With a new
kitchen sink sprayer
in place, you can enjoy its benefits and the feeling of accomplishment from completing a DIY home project.
In conclusion, installing a new
kitchen sink sprayer
can bring many benefits to your kitchen. From increased efficiency and convenience to improved aesthetics and potential home value, it's a small change that can make a big impact. Consider upgrading your
sink sprayer
today and see the difference it can make in your daily life.