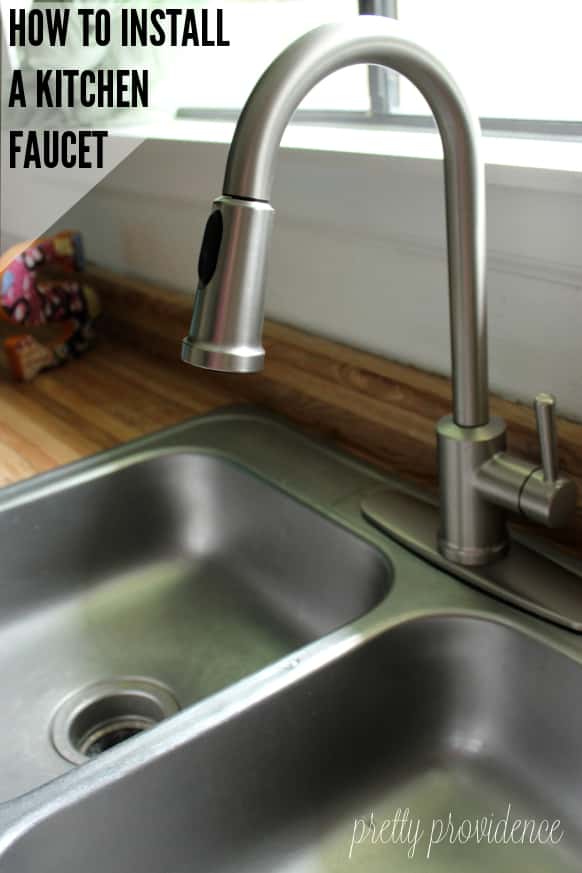
Installing a new kitchen faucet can seem like a daunting task, but with the right tools and instructions, it can be a simple and rewarding DIY project. A new faucet can update the look of your kitchen and improve the functionality of your sink. In this guide, we will walk you through the step-by-step process of installing a kitchen faucet on your sink.How to Install a Kitchen Faucet

How to Install a Kitchen Faucet


Before you begin, make sure to read the instructions that came with your new faucet. Each model may have specific steps or tools required for installation. It's also a good idea to have a helper to assist you with this project, as some steps may require an extra set of hands.How to Install a Kitchen Sink Faucet


How to Install a Kitchen Sink Faucet


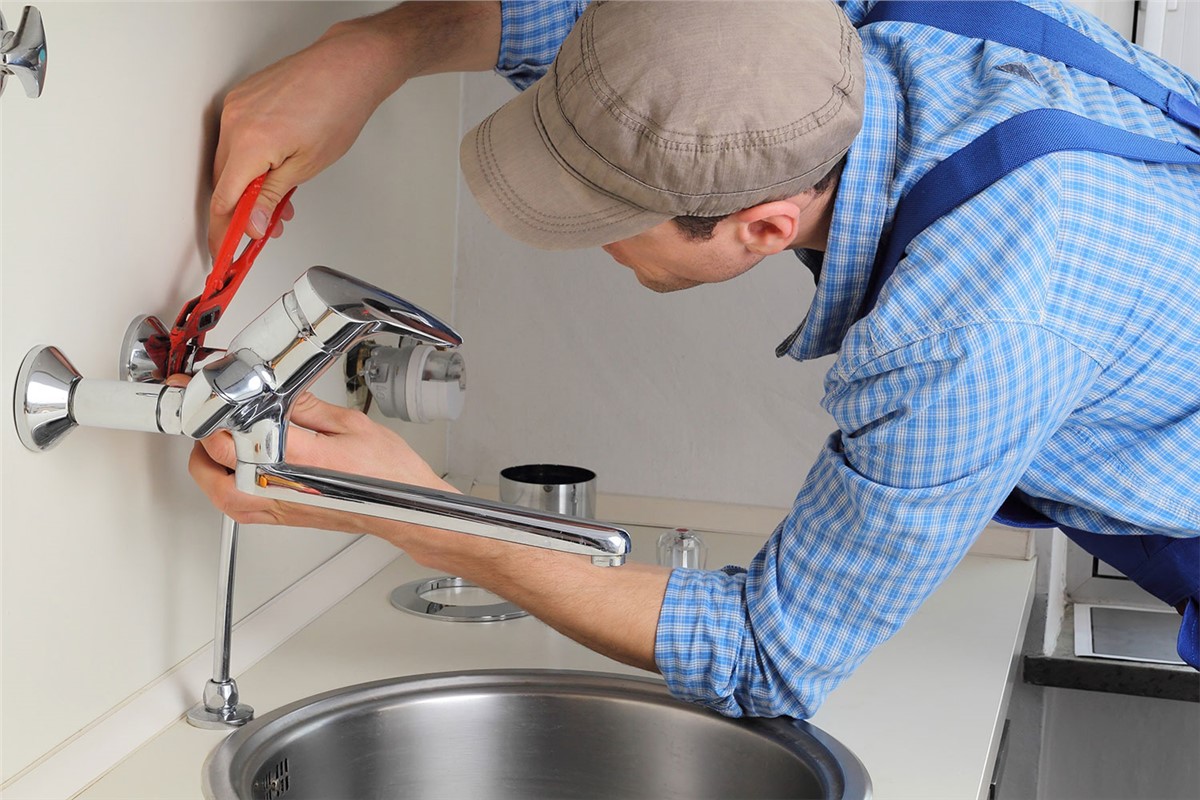
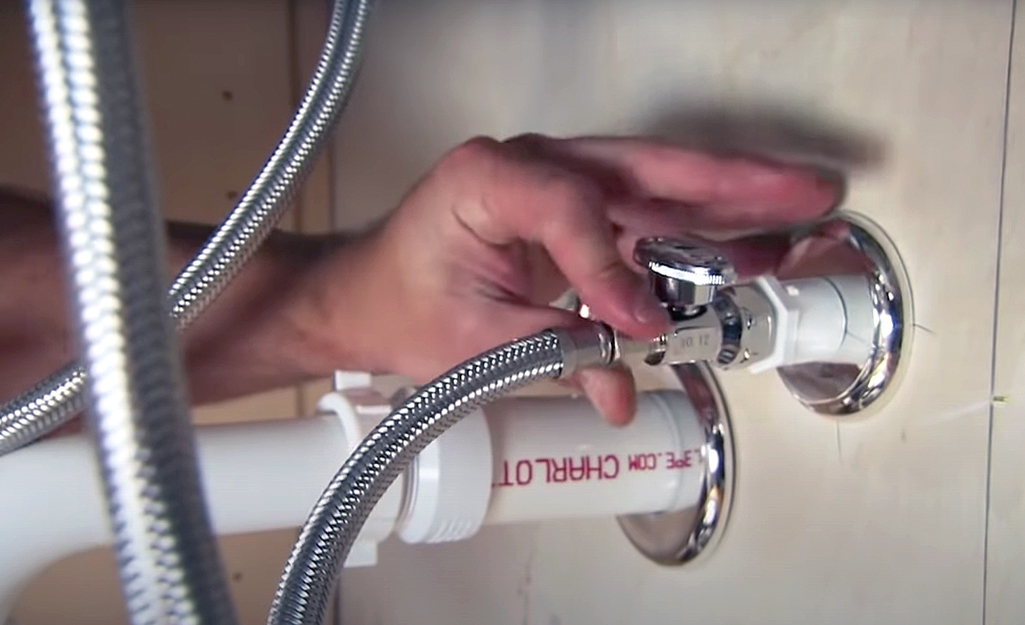
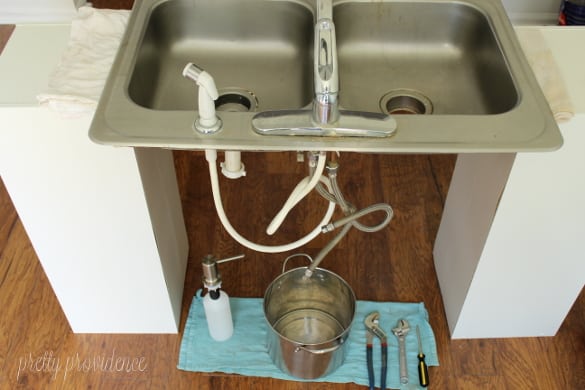
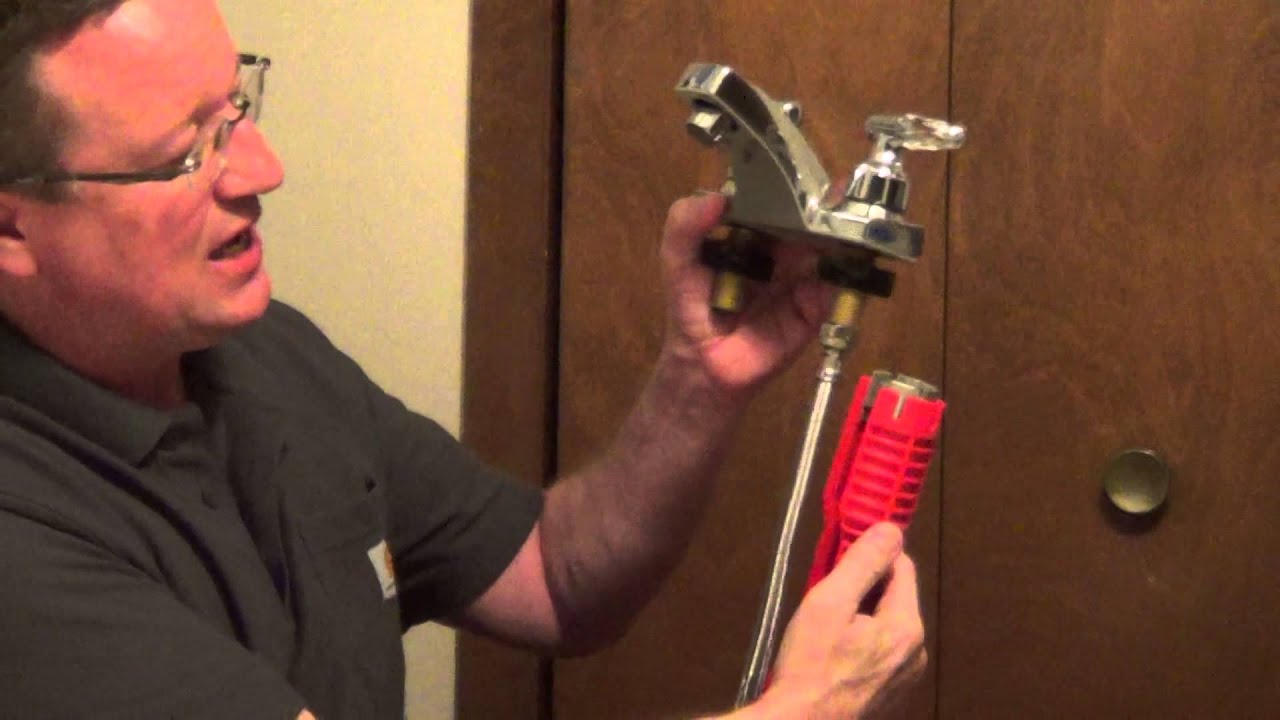
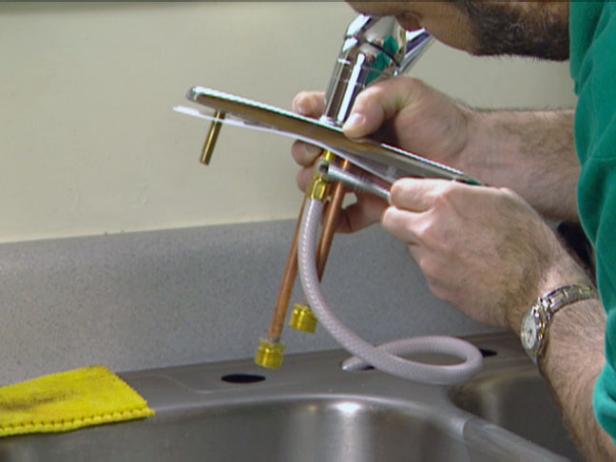
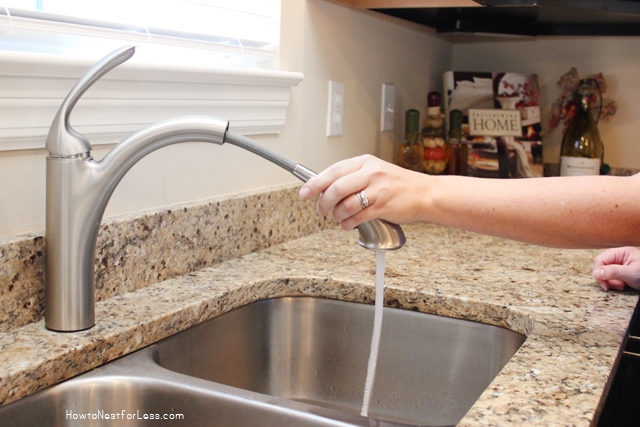
Step 1: Start by turning off the water supply to your sink. You can usually find the shut-off valves under the sink or behind the cabinet. Turn both the hot and cold water valves to the off position. Step 2: Next, remove the old faucet by loosening the nuts and bolts that hold it in place. You may need a wrench or pliers for this step. Once the old faucet is removed, clean the area on the sink where the new faucet will be installed. Step 3: Take your new faucet and place the base over the holes on your sink. Some faucets may require a gasket or plumber's putty to create a seal between the faucet and sink. Follow the manufacturer's instructions for this step. Step 4: Secure the faucet in place by tightening the mounting nuts and bolts. Be careful not to over tighten, as this can damage the faucet or sink. Step 5: Next, attach the water supply lines to the corresponding valves under the sink. Make sure the connections are tight, but again, be careful not to over tighten. Step 6: Once the water supply lines are connected, turn the water back on and check for any leaks. If you notice any, tighten the connections as needed. Step 7: Finally, attach any additional components, such as a sprayer or soap dispenser, according to the manufacturer's instructions.Step-by-Step Guide for Installing a Kitchen Faucet


Step-by-Step Guide for Installing a Kitchen Faucet

:max_bytes(150000):strip_icc()/installing-a-moen-kitchen-faucet-2718847-07-1f27cf0de8b541f285e702fa58592819.jpg)

/installing-a-moen-kitchen-faucet-2718847-05-18a8625ea2ea4e04a984f3df633399cc.jpg)
Installing a new kitchen faucet is a great DIY project for those with some basic plumbing skills. It can save you money on hiring a professional and give you a sense of accomplishment. However, if you are not comfortable with plumbing or have a complicated faucet design, it's best to leave the installation to a professional.DIY Kitchen Faucet Installation


DIY Kitchen Faucet Installation

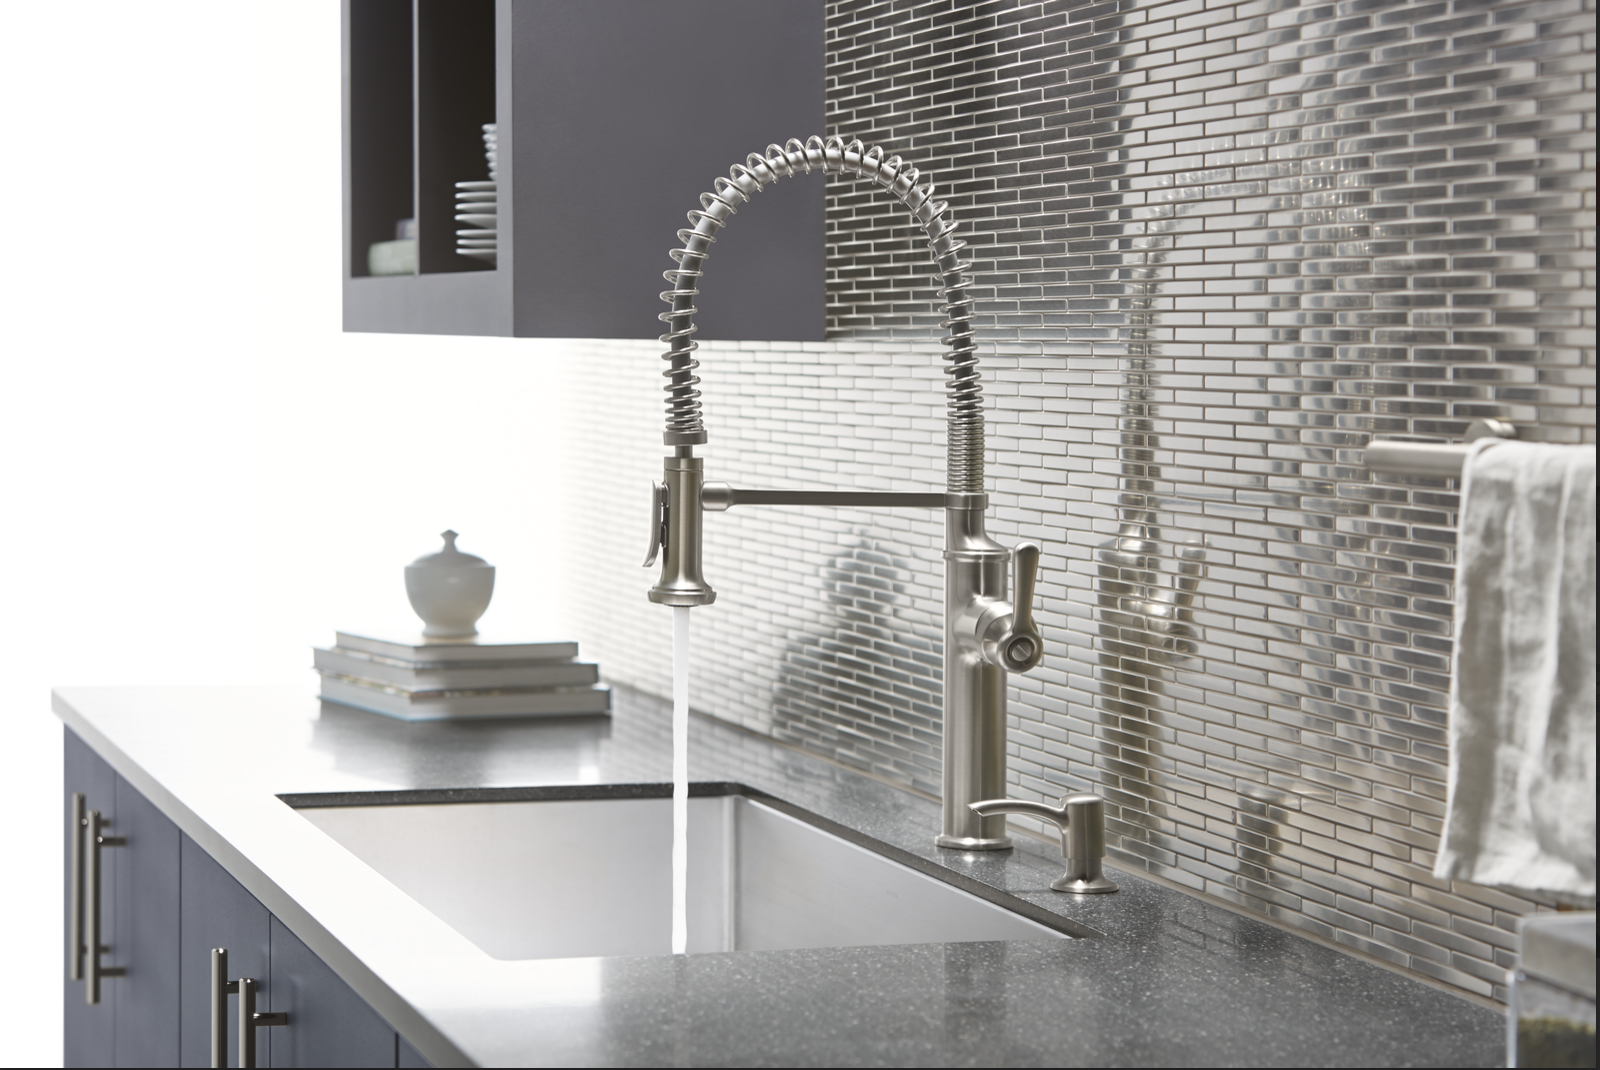


Installing a new faucet on your kitchen sink can be a quick and easy way to update the look of your kitchen. With a variety of styles and finishes available, you can find a faucet that not only looks great but also meets your functional needs. Just make sure to follow all instructions carefully and take your time to ensure a successful installation.Installing a New Faucet on Your Kitchen Sink


Installing a New Faucet on Your Kitchen Sink


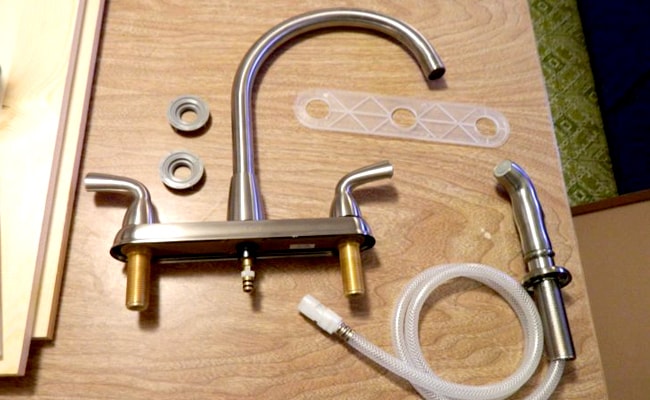
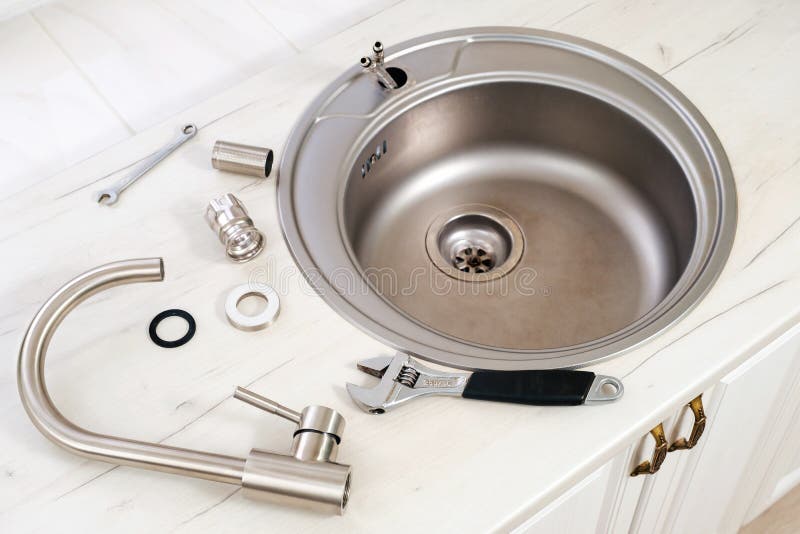
Faucet kit (includes faucet, supply lines, and mounting hardware)Tools and Materials Needed for Installing a Kitchen Faucet
Wrench or pliers
Gasket or plumber's putty (if required)
Bucket or towel (to catch any water)


Tools and Materials Needed for Installing a Kitchen Faucet


Read the instructions carefully and have all necessary tools and materials ready before starting the installation.Tips for Installing a Faucet on a Kitchen Sink
Have a helper on hand to assist with the installation.
Take your time and be patient. Rushing can lead to mistakes and potential damage.
If you are unsure about any steps or encounter any difficulties, consult a professional plumber.


Tips for Installing a Faucet on a Kitchen Sink


Not turning off the water supply before beginning the installation.Common Mistakes to Avoid When Installing a Kitchen Faucet
Not following the manufacturer's instructions or skipping steps.
Over tightening connections, which can lead to damage or leaks.
Not checking for leaks after turning the water back on.


Common Mistakes to Avoid When Installing a Kitchen Faucet


If you already have a kitchen faucet installed and want to replace it with a new one, the process is similar to installing a new faucet. Follow the steps outlined above, but before securing the new faucet, remove the old one by loosening the mounting nuts and disconnecting the water supply lines. Then, continue with the installation of the new faucet.How to Remove and Replace a Kitchen Faucet

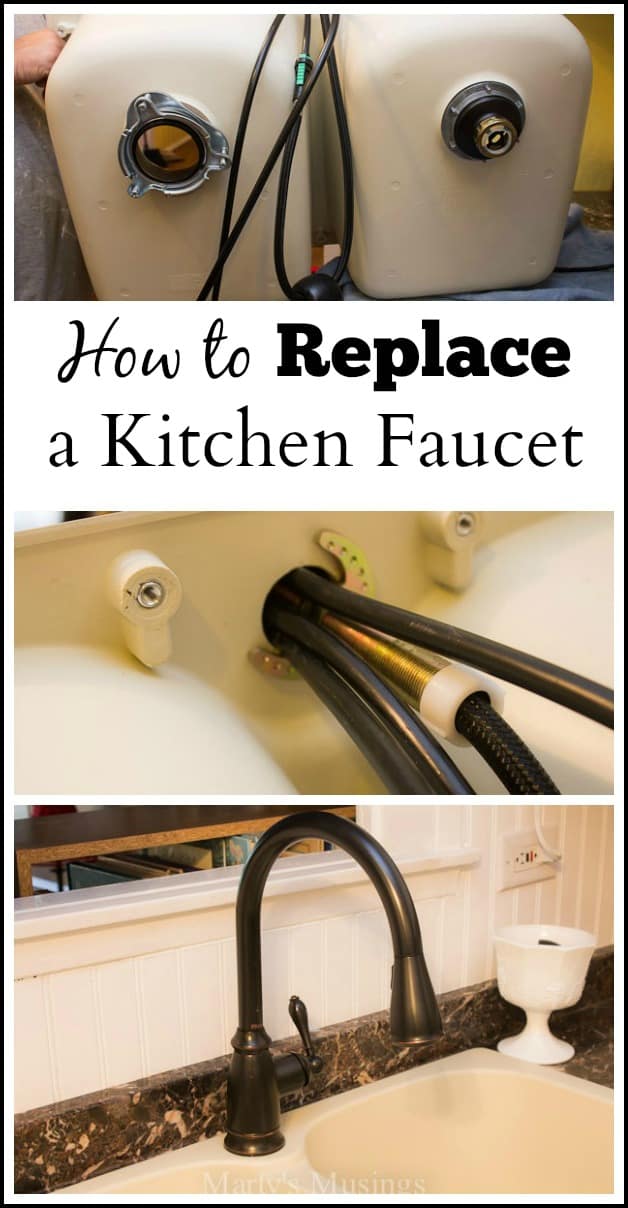

How to Remove and Replace a Kitchen Faucet


If you are a visual learner, there are many helpful video tutorials available online that can guide you through the process of installing a kitchen faucet. These can be especially helpful for more complicated faucet designs. With this step-by-step guide, you can confidently install a new kitchen faucet on your sink and give your kitchen a quick and easy update. Just remember to take your time, follow instructions carefully, and don't be afraid to ask for help if needed. Happy DIY-ing!Video Tutorial: Installing a Kitchen Faucet on Your Sink


Video Tutorial: Installing a Kitchen Faucet on Your Sink


Adding the Finishing Touch: Installing a Faucet on Your Kitchen Sink

Gather Your Tools and Materials
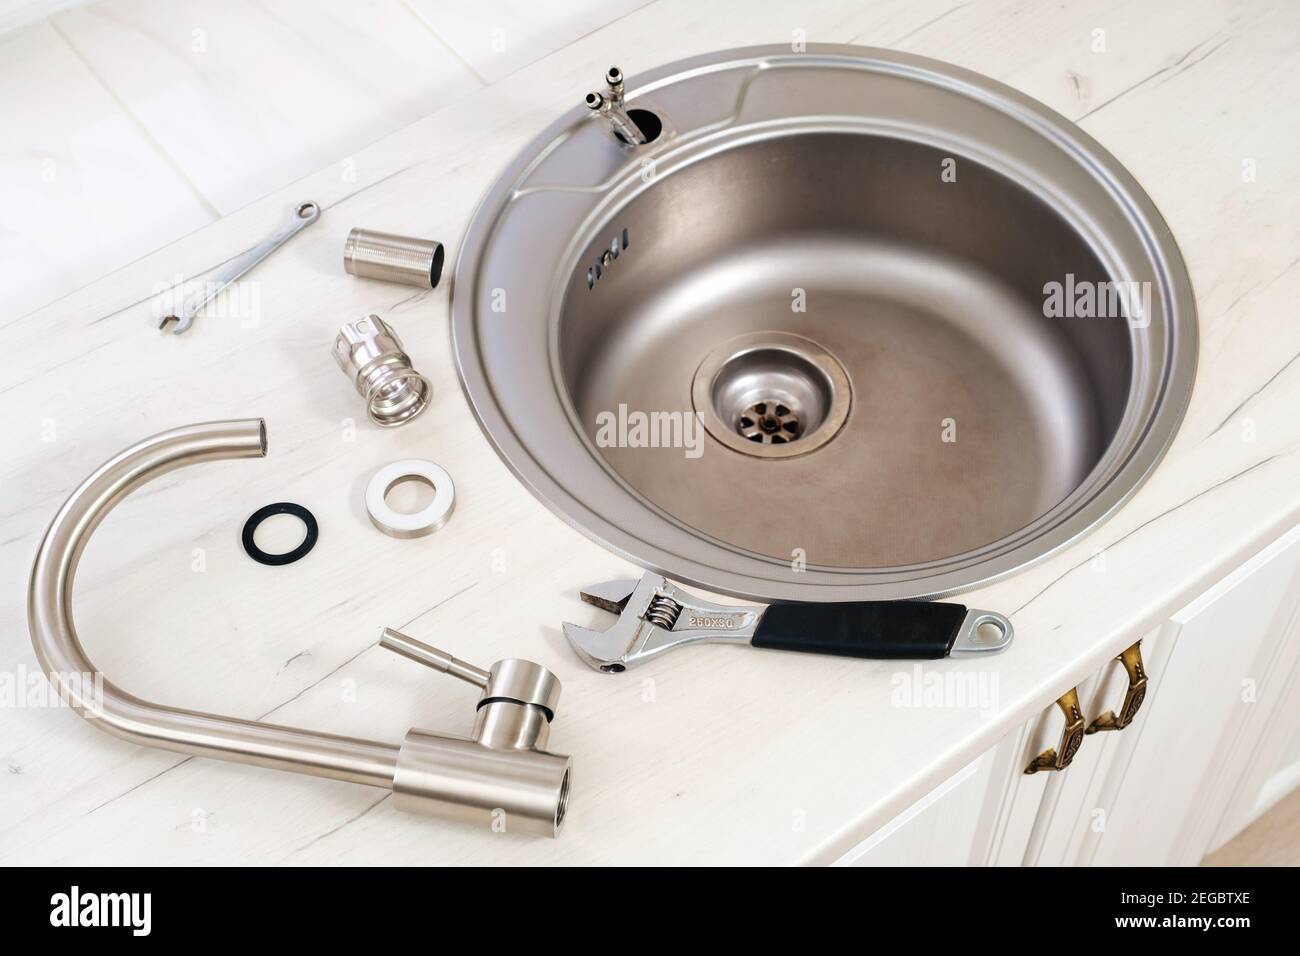
 Before you begin installing a faucet on your kitchen sink, make sure you have all the necessary tools and materials. You will need a pair of pliers, an adjustable wrench, Teflon tape, a screwdriver, and a new faucet that fits your sink.
Preparing the Sink
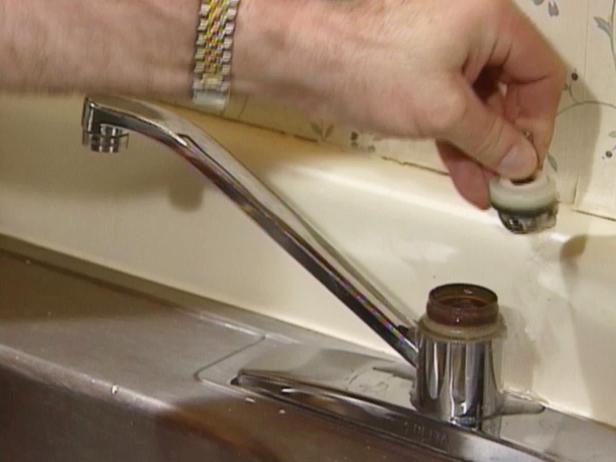
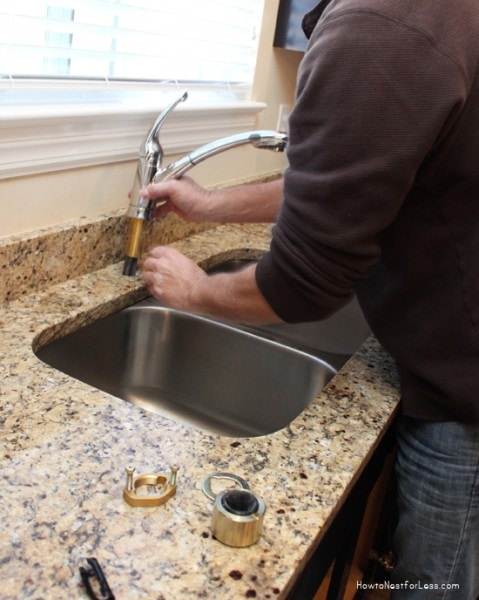
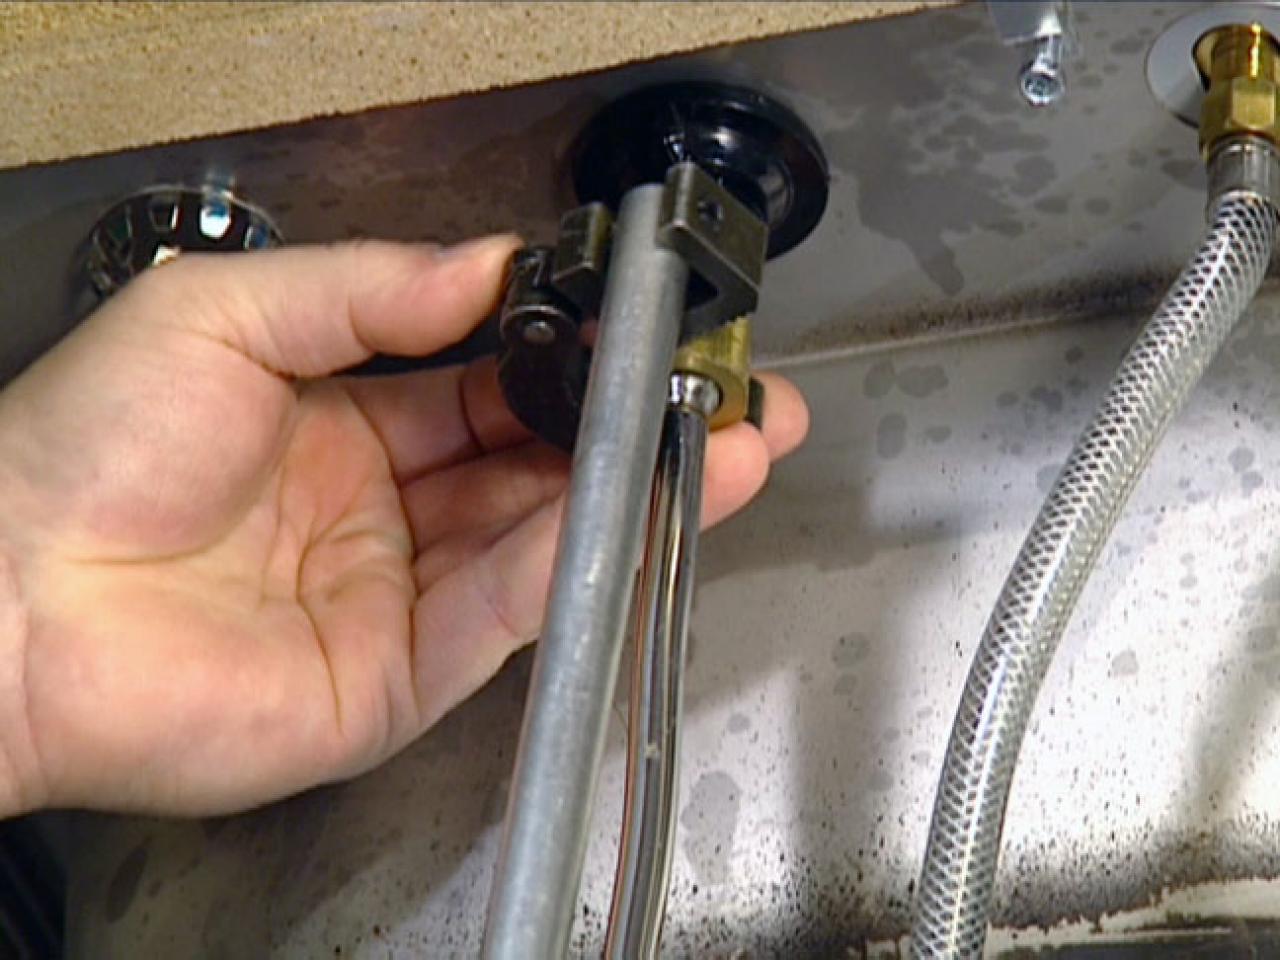 The first step in installing a faucet on your kitchen sink is to prepare the sink by removing the old faucet. Turn off the water supply and place a bucket under the sink to catch any remaining water. Use your adjustable wrench to disconnect the water supply lines and remove the old faucet.
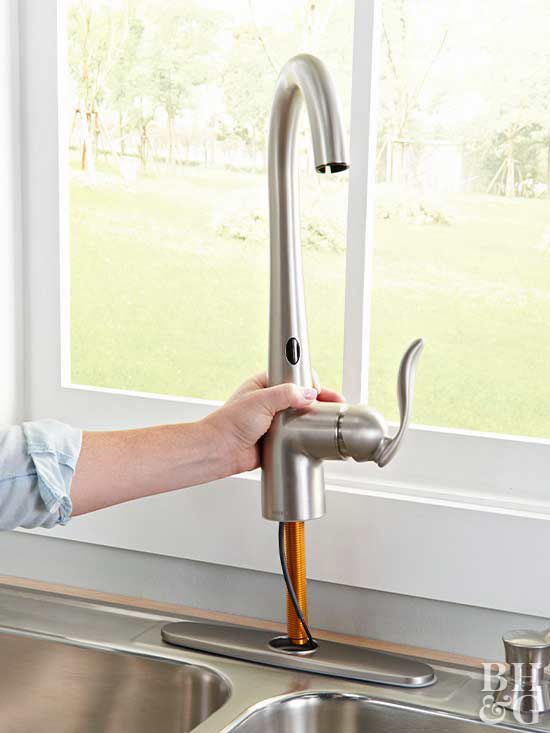
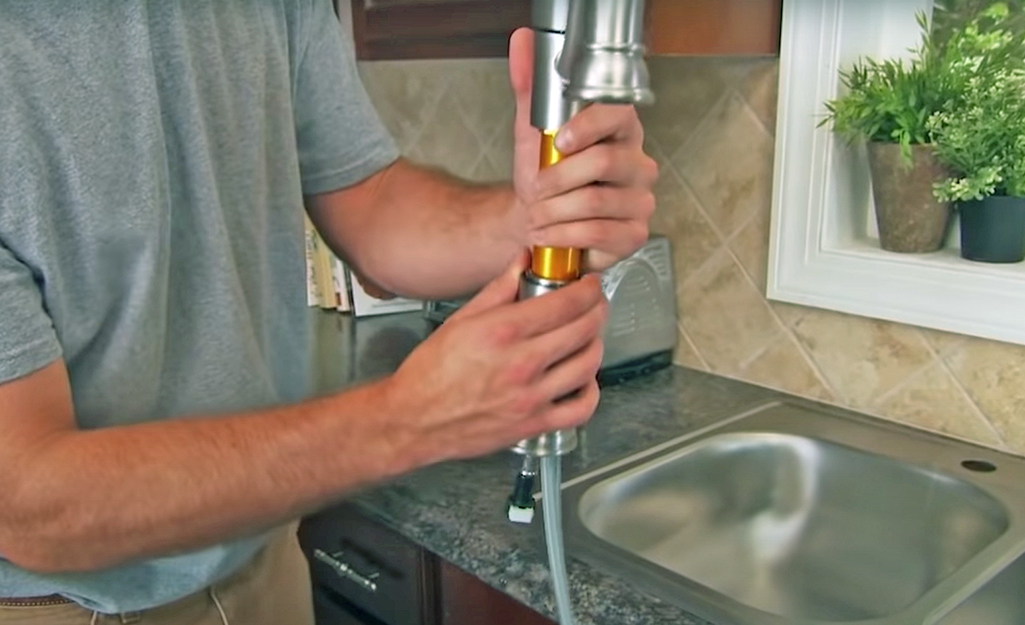
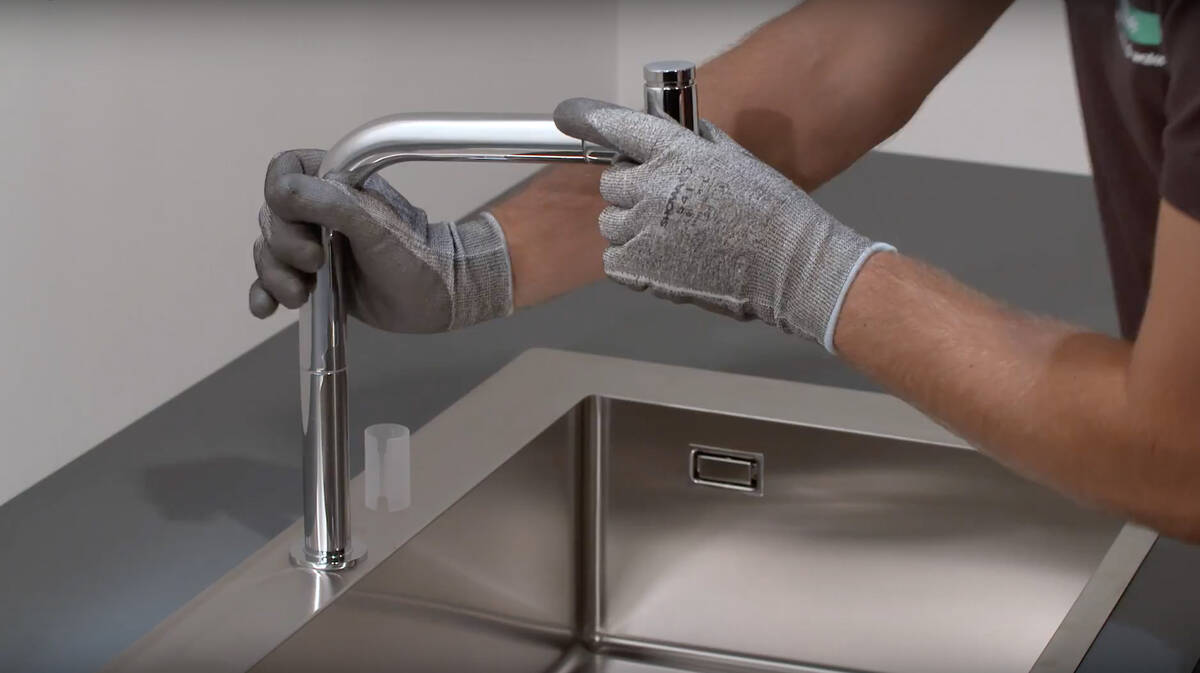
Install the New Faucet
 Once the old faucet is removed, clean the area around the holes in the sink where the new faucet will be installed. Apply a thin layer of
Teflon tape
to the threads of the faucet to ensure a tight seal. Place the faucet into the holes in the sink and secure it from underneath with the mounting nuts provided.
Once the old faucet is removed, clean the area around the holes in the sink where the new faucet will be installed. Apply a thin layer of
Teflon tape
to the threads of the faucet to ensure a tight seal. Place the faucet into the holes in the sink and secure it from underneath with the mounting nuts provided.
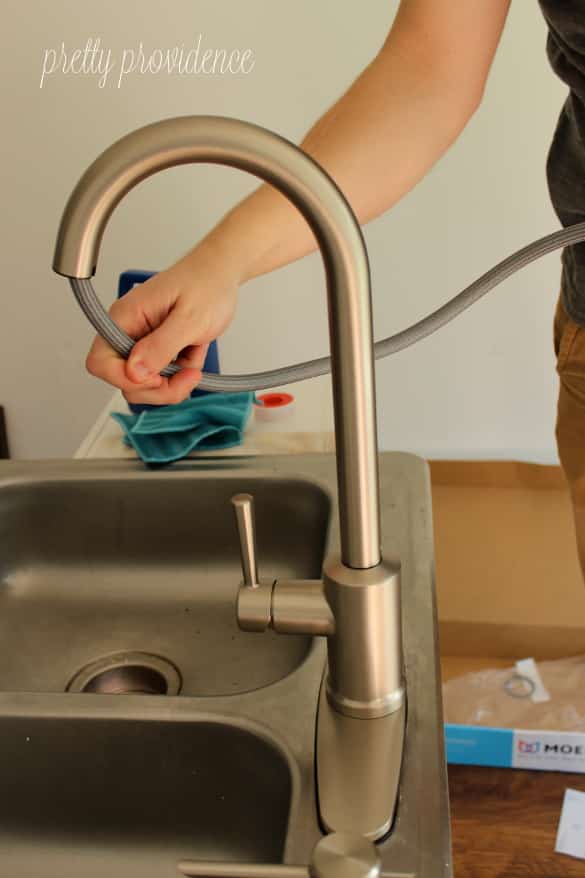
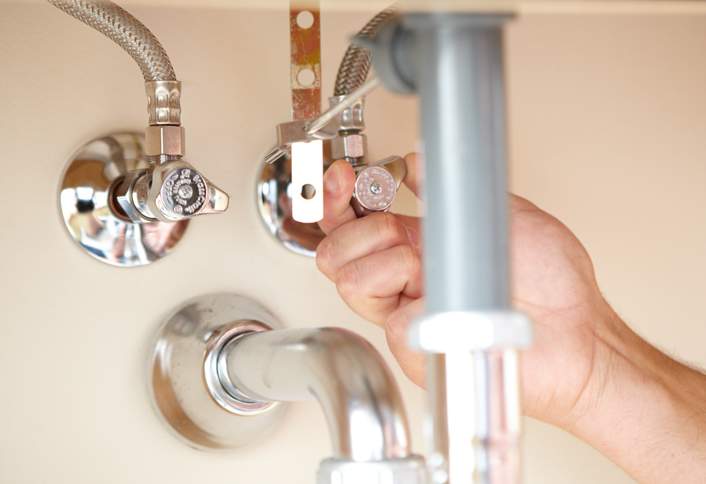
Connect the Water Supply Lines
 Using your adjustable wrench, connect the water supply lines to the corresponding hot and cold water inlets on the faucet. Make sure the connections are tight to avoid any leaks.
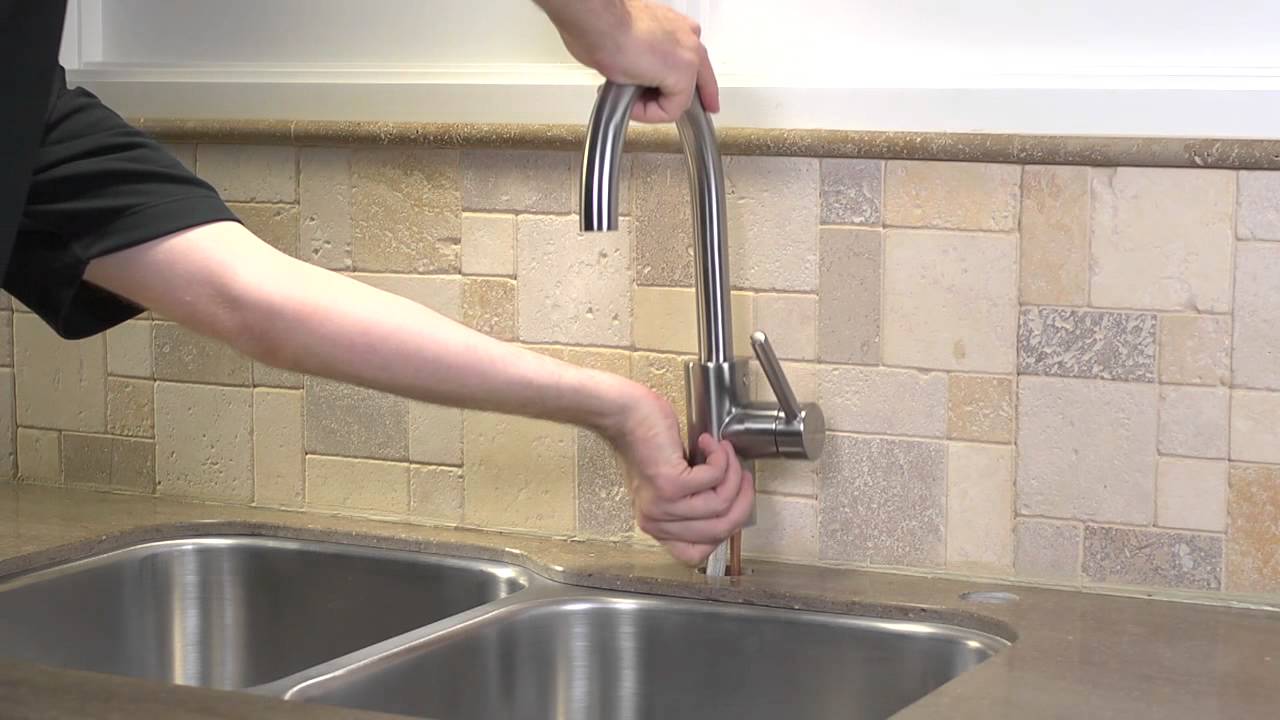
Test Your New Faucet
 Before fully installing the faucet, turn the water supply back on and test the new faucet. Check for any leaks and make sure the water flow is working properly.
Finishing Touches
 Once your new faucet is installed and tested, you can add the finishing touches. If your new faucet came with a sprayer, connect it to the faucet according to the manufacturer's instructions. Use your pliers to tighten any loose connections and wipe down the faucet to remove any fingerprints or smudges.
Enjoy Your New Kitchen Sink Faucet
 Congratulations, you have successfully installed a new faucet on your kitchen sink! With proper installation, your new faucet should provide you with years of use and enhance the overall look of your kitchen. Remember to regularly check for any leaks and make repairs as needed to keep your faucet in top condition.