If you've recently purchased the Emliviar 6-Light Kitchen Island Lighting, congratulations on your new stylish addition to your home! Now comes the fun part - installing it. While the task may seem daunting at first, with the right tools and instructions, you can have your new lighting set up in no time. Follow our step-by-step guide for a hassle-free installation process.1. Emliviar 6-Light Kitchen Island Lighting Installation Guide


1. Emliviar 6-Light Kitchen Island Lighting Installation Guide


Before you begin, make sure you have all the necessary tools on hand. These may include a ladder, screwdriver, wire stripper, and electrical tape. Once you have everything you need, follow these simple steps: Step 1: Start by turning off the power to the area where you will be installing the lighting. This can be easily done by flipping the switch in the circuit breaker box. Step 2: Next, you will need to assemble the lighting fixture. Lay out all the pieces and follow the instructions provided in the manual. Make sure to tighten all screws and secure all connections. Step 3: Once the fixture is assembled, you can attach it to the ceiling. Use a ladder to reach the desired height and have someone hold the fixture for you while you secure it in place using the screws provided. Step 4: After the fixture is securely attached, it's time to connect the wiring. Start by stripping the ends of the wires and twisting them together. Use electrical tape to secure the connection. Step 5: Carefully tuck the wiring into the ceiling junction box and attach the fixture cover. Step 6: Finally, you can turn the power back on and test the lighting. If everything is working correctly, you are all set!2. Step-by-Step Instructions for Installing Emliviar 6-Light Kitchen Island Lighting


2. Step-by-Step Instructions for Installing Emliviar 6-Light Kitchen Island Lighting


If you're new to DIY projects, installing lighting fixtures may seem overwhelming. However, with the right guidance, even beginners can successfully install the Emliviar 6-Light Kitchen Island Lighting. Here are some tips to help you get started: Tip #1: Before you begin, read through the instruction manual carefully. This will give you a better understanding of the installation process and help you avoid any mistakes. Tip #2: Always make sure to turn off the power before working with any electrical wiring. This will ensure your safety throughout the installation process. Tip #3: If you're unsure about any steps, don't hesitate to call a professional for assistance. It's always better to be safe than sorry when it comes to electrical work.3. How to Install Emliviar 6-Light Kitchen Island Lighting: A Beginner's Guide


3. How to Install Emliviar 6-Light Kitchen Island Lighting: A Beginner's Guide


Installing your own lighting can be a great way to save money and add a personal touch to your home. With the Emliviar 6-Light Kitchen Island Lighting, you can easily create a stylish and functional space in your kitchen. Follow our DIY guide for a successful installation: Step 1: Assemble the lighting fixture according to the instructions provided in the manual. Step 2: Turn off the power to the area where you will be installing the lighting. Step 3: Attach the fixture to the ceiling using the screws provided. Step 4: Connect the wiring, making sure to secure the connections with electrical tape. Step 5: Test the lighting to ensure it is working properly.4. DIY: Installing Emliviar 6-Light Kitchen Island Lighting in Your Home

4. DIY: Installing Emliviar 6-Light Kitchen Island Lighting in Your Home

:max_bytes(150000):strip_icc()/Modern-kitchen-chandelier-4TVGHvS-a8h8WCHSsZBqR2-94728c1b59d146b8b8d01266f5ef4665.jpg)
While installing the Emliviar 6-Light Kitchen Island Lighting may seem like a straightforward process, here are some tips and tricks to help make the task even easier: Tip #1: Before installing the lighting, make sure to choose the right location. This will not only affect the overall look of the room but also the functionality of the lighting. Tip #2: Use a ladder to reach the desired height when attaching the fixture to the ceiling. Tip #3: If the wiring is too short, you can use a wire connector to extend it.5. Tips and Tricks for Installing Emliviar 6-Light Kitchen Island Lighting


5. Tips and Tricks for Installing Emliviar 6-Light Kitchen Island Lighting


If you're still feeling unsure about the installation process, don't worry. Our ultimate guide has got you covered. Follow our step-by-step instructions and handy tips to have your new Emliviar 6-Light Kitchen Island Lighting up and running in no time.6. The Ultimate Guide to Installing Emliviar 6-Light Kitchen Island Lighting

6. The Ultimate Guide to Installing Emliviar 6-Light Kitchen Island Lighting
With the Emliviar 6-Light Kitchen Island Lighting, installation doesn't have to be a complicated task. With our detailed guide and helpful tips, you can have your new lighting set up in just a few simple steps. Enjoy the beauty and functionality of this stylish lighting in your home.7. Emliviar 6-Light Kitchen Island Lighting: Installation Made Easy
7. Emliviar 6-Light Kitchen Island Lighting: Installation Made Easy

As with any DIY project, there are some common mistakes that can occur during the installation process. Here are some things to keep in mind to avoid any mishaps: Mistake #1: Skipping the instruction manual. Always make sure to read through the manual before starting the installation process. Mistake #2: Not turning off the power. This can not only be dangerous but also damage the lighting fixture. Mistake #3: Not securing the wiring properly. This can lead to a faulty connection and potentially cause a fire hazard.8. Common Mistakes to Avoid When Installing Emliviar 6-Light Kitchen Island Lighting


8. Common Mistakes to Avoid When Installing Emliviar 6-Light Kitchen Island Lighting


When it comes to lighting, location is key. The right placement can make all the difference in the overall look and functionality of the room. Here are some factors to consider when choosing the perfect spot for your Emliviar 6-Light Kitchen Island Lighting: Factor #1: The size and layout of your kitchen. This will help determine the best spot for the lighting to provide optimal illumination. Factor #2: The style of your kitchen. The lighting should complement the overall aesthetic of the room. Factor #3: The height of your ceiling. Make sure to choose a location that allows for adequate clearance for the fixture.9. How to Choose the Right Location for Installing Emliviar 6-Light Kitchen Island Lighting


9. How to Choose the Right Location for Installing Emliviar 6-Light Kitchen Island Lighting


If you encounter any issues during the installation process, don't panic. Here are some troubleshooting tips to help you solve common problems: Issue #1: The wiring is too short. Use a wire connector to extend the wiring. Issue #2: The fixture is not level. Adjust the screws and make sure all connections are secure. Issue #3: The lighting is flickering. This can be caused by loose connections or faulty wiring. Check all connections and replace any damaged wiring. With our comprehensive guide and helpful tips, you can easily install the Emliviar 6-Light Kitchen Island Lighting in your home. Enjoy the beauty and functionality of this stylish lighting in your kitchen.10. Troubleshooting Tips for Installing Emliviar 6-Light Kitchen Island Lighting
10. Troubleshooting Tips for Installing Emliviar 6-Light Kitchen Island Lighting


Installing Emliviar 6-Light Kitchen Island Lighting: A Game-Changer for Your Home Design

Why Lighting is Important in House Design
 Lighting is a crucial element in house design that often gets overlooked. Not only does it serve a practical purpose of illuminating a space, but it also has a significant impact on the overall look and feel of a room. The right lighting can transform a dull and boring space into a warm, inviting, and stylish one. That's why it's important to choose the right lighting fixtures for your home, and
Emliviar 6-Light Kitchen Island Lighting
could be just the game-changer you need.
Lighting is a crucial element in house design that often gets overlooked. Not only does it serve a practical purpose of illuminating a space, but it also has a significant impact on the overall look and feel of a room. The right lighting can transform a dull and boring space into a warm, inviting, and stylish one. That's why it's important to choose the right lighting fixtures for your home, and
Emliviar 6-Light Kitchen Island Lighting
could be just the game-changer you need.
The Benefits of Emliviar 6-Light Kitchen Island Lighting
 Emliviar 6-Light Kitchen Island Lighting
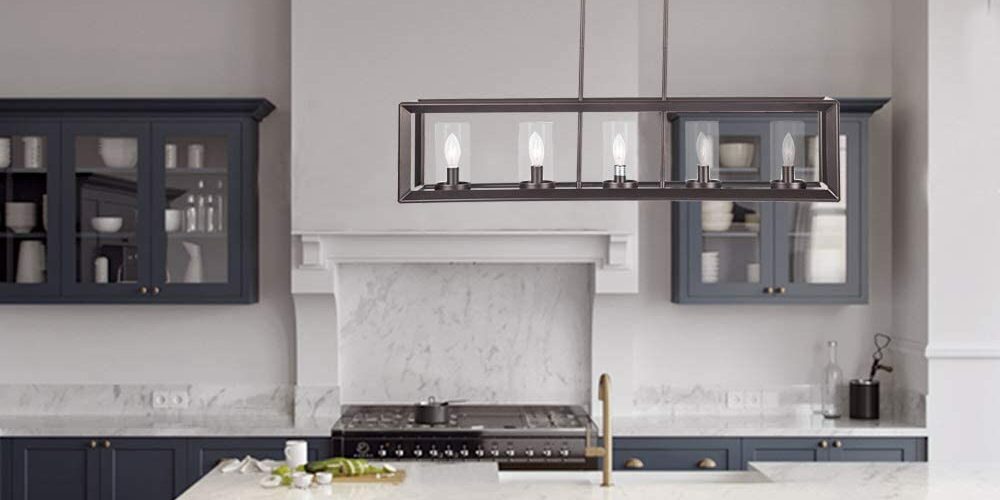
is a versatile and stylish lighting fixture that can elevate the design of any kitchen. With its sleek and modern design, it adds a touch of sophistication and elegance to the space. The six lights provide ample illumination, making it perfect for both task lighting and ambient lighting. This means you can use it to brighten up your kitchen while cooking or to create a cozy and intimate atmosphere for a dinner party.
Emliviar 6-Light Kitchen Island Lighting
is a versatile and stylish lighting fixture that can elevate the design of any kitchen. With its sleek and modern design, it adds a touch of sophistication and elegance to the space. The six lights provide ample illumination, making it perfect for both task lighting and ambient lighting. This means you can use it to brighten up your kitchen while cooking or to create a cozy and intimate atmosphere for a dinner party.
How to Install Emliviar 6-Light Kitchen Island Lighting
 Installing
Emliviar 6-Light Kitchen Island Lighting
is a simple and straightforward process that can be done by anyone with basic DIY skills. The fixture comes with all the necessary hardware and instructions, making it easy to install. Before you begin, make sure to turn off the power to the area where you will be installing the light. Then, follow the step-by-step instructions provided, and you'll have your new kitchen island lighting up and running in no time.
Installing
Emliviar 6-Light Kitchen Island Lighting
is a simple and straightforward process that can be done by anyone with basic DIY skills. The fixture comes with all the necessary hardware and instructions, making it easy to install. Before you begin, make sure to turn off the power to the area where you will be installing the light. Then, follow the step-by-step instructions provided, and you'll have your new kitchen island lighting up and running in no time.
Final Thoughts
 In conclusion,
Emliviar 6-Light Kitchen Island Lighting
is a must-have for any homeowner looking to add a touch of style and functionality to their kitchen. Its sleek design, ample illumination, and easy installation make it a game-changer for house design. So, if you're ready to elevate your kitchen's look and feel, consider investing in this fantastic lighting fixture. Trust us, you won't regret it.
In conclusion,
Emliviar 6-Light Kitchen Island Lighting
is a must-have for any homeowner looking to add a touch of style and functionality to their kitchen. Its sleek design, ample illumination, and easy installation make it a game-changer for house design. So, if you're ready to elevate your kitchen's look and feel, consider investing in this fantastic lighting fixture. Trust us, you won't regret it.