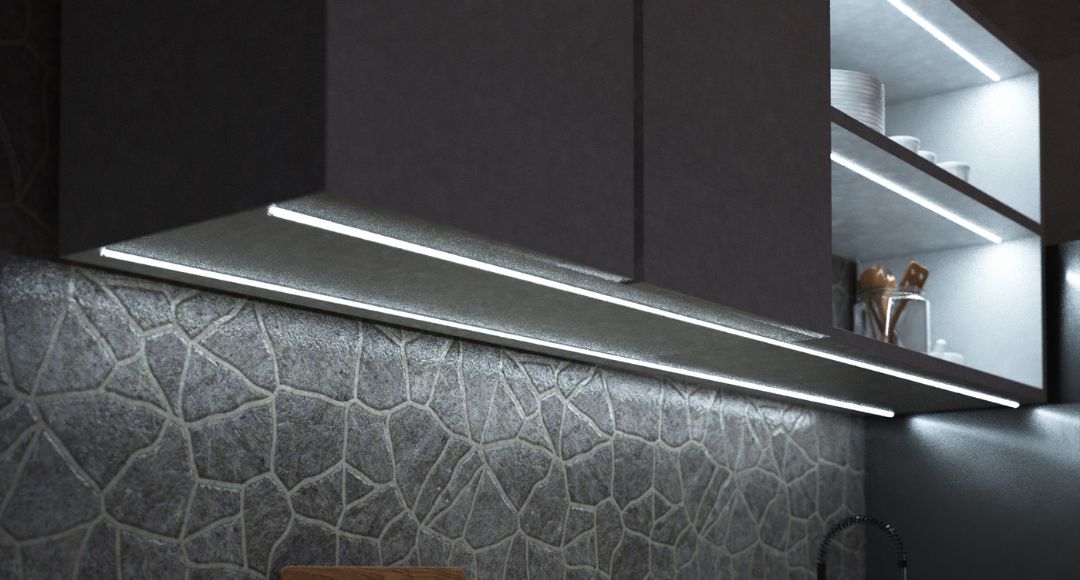
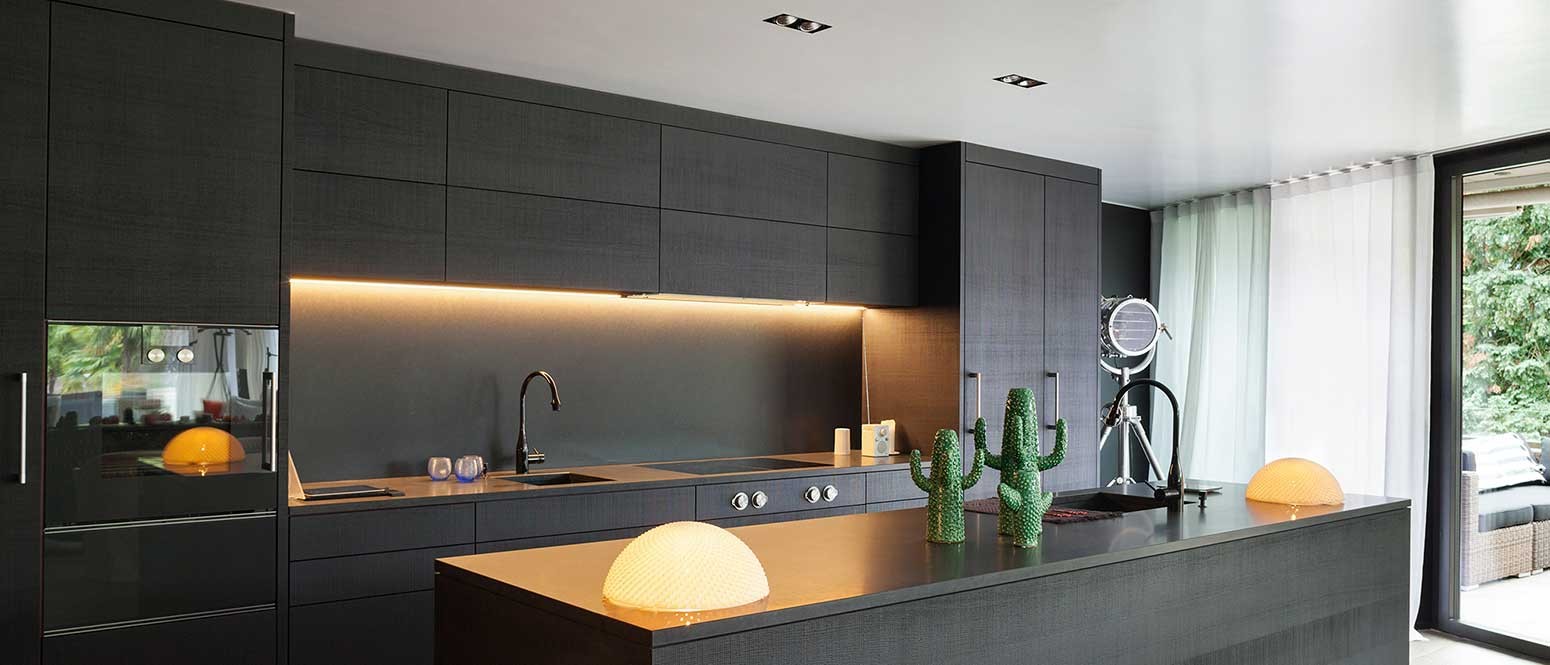
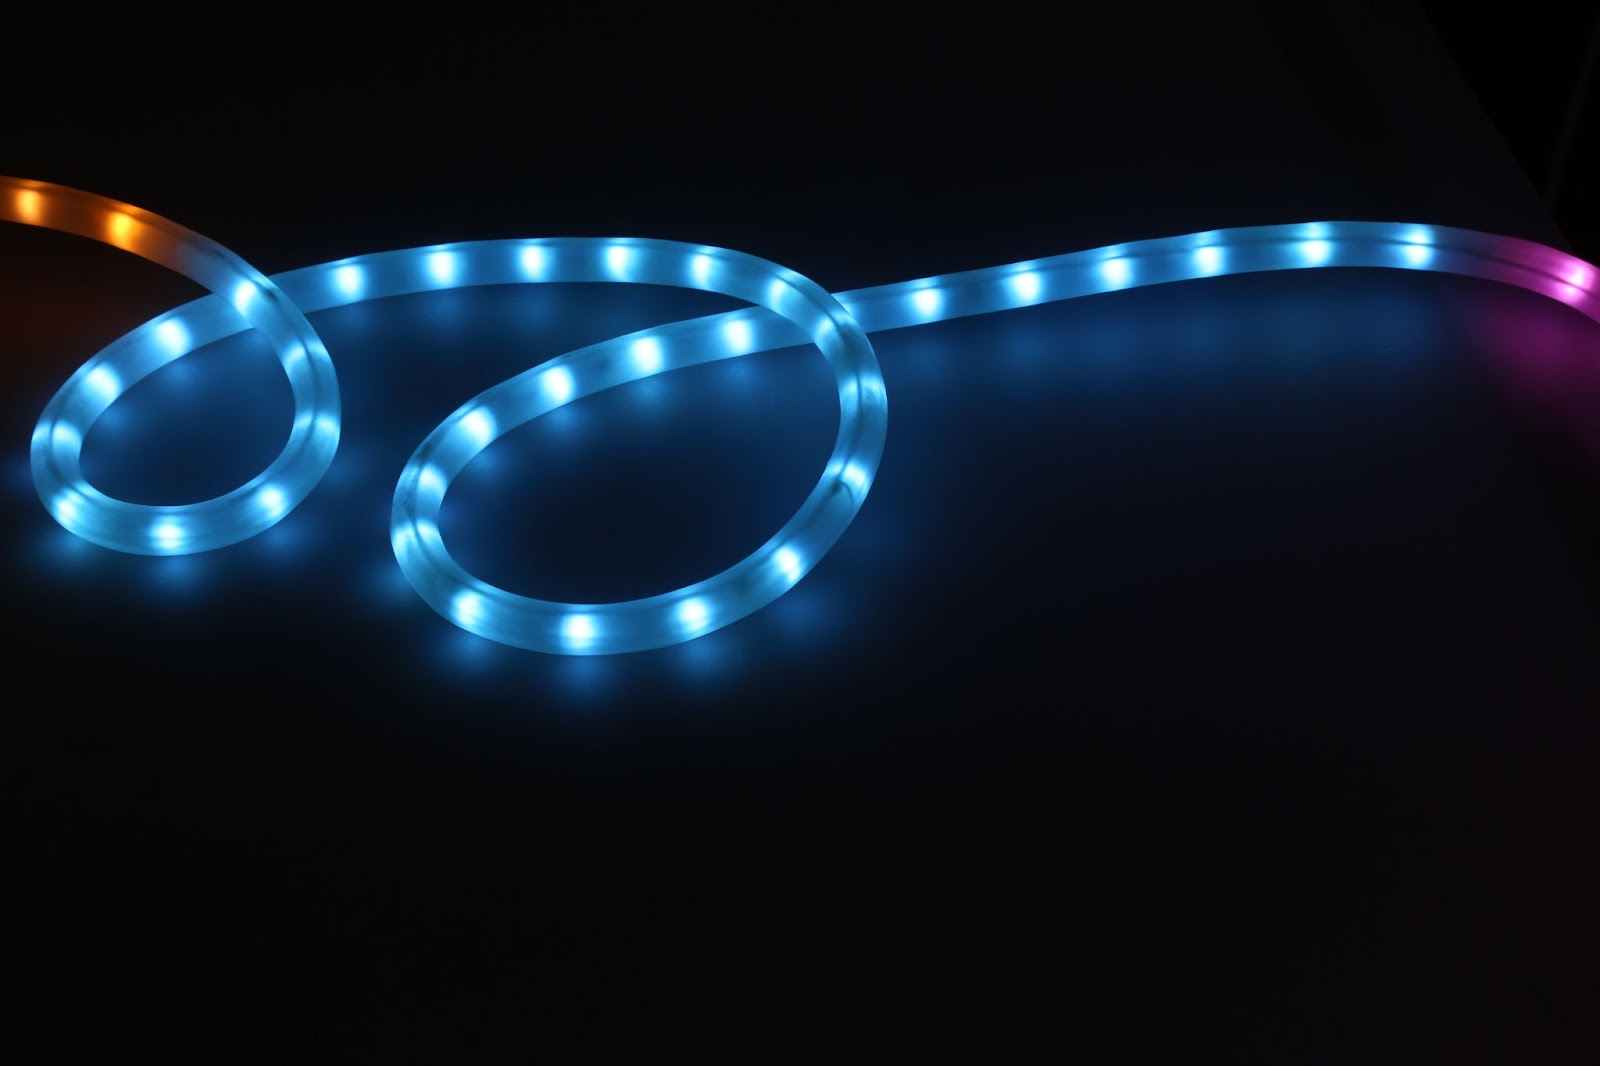
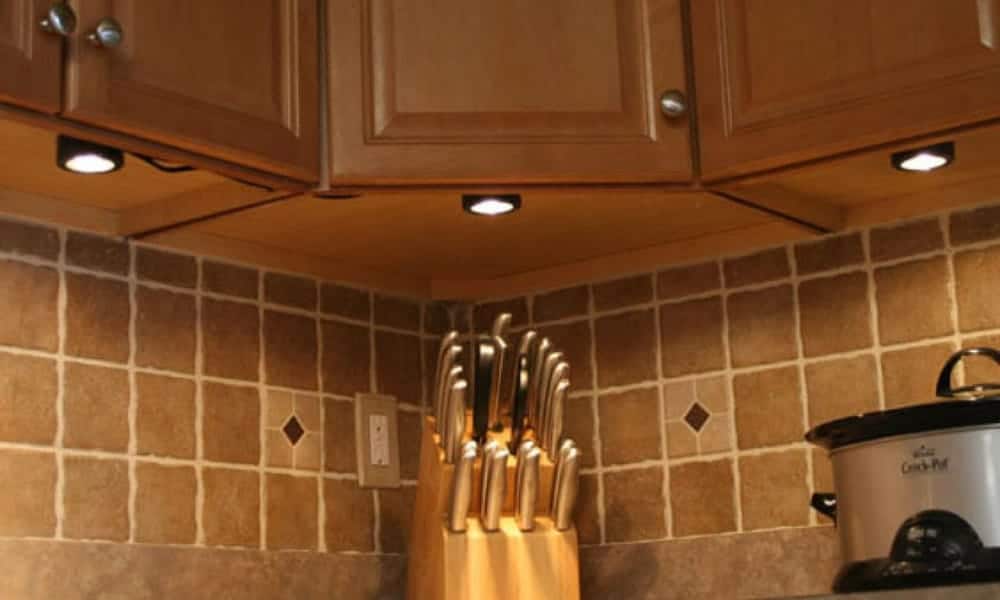
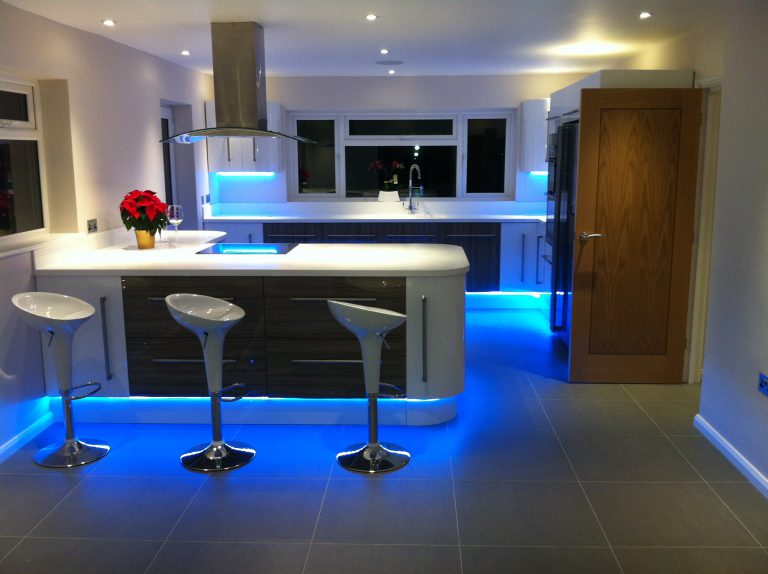
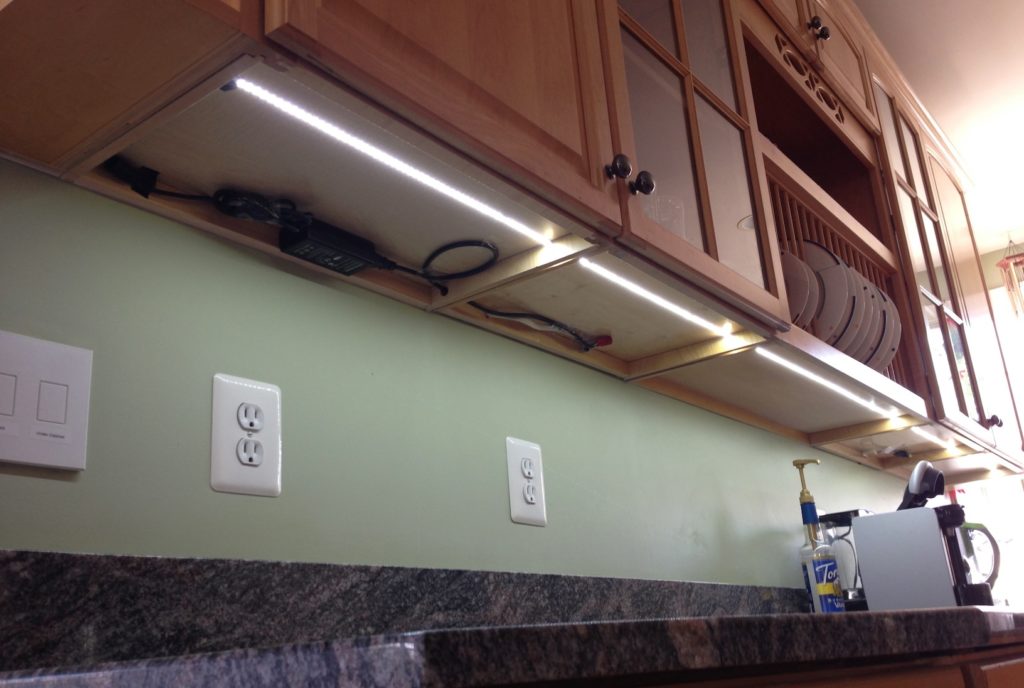
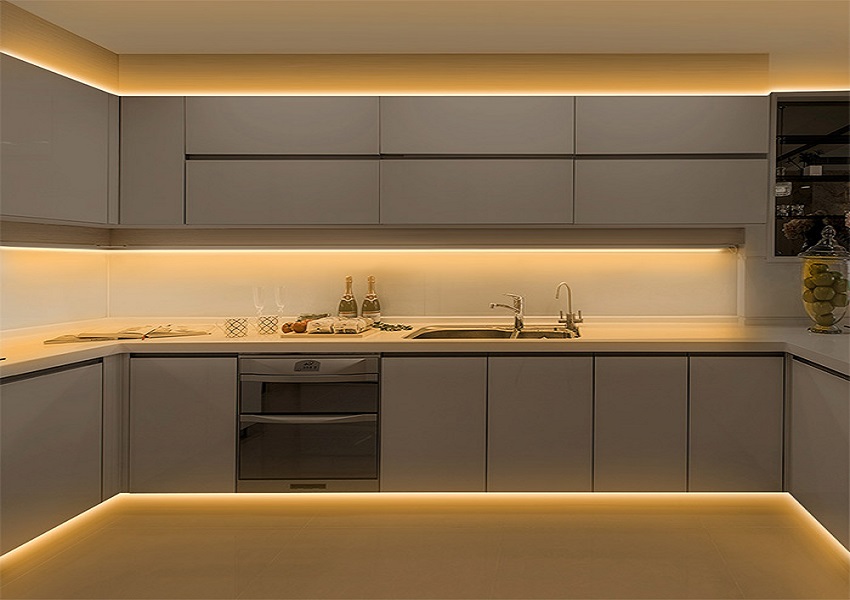
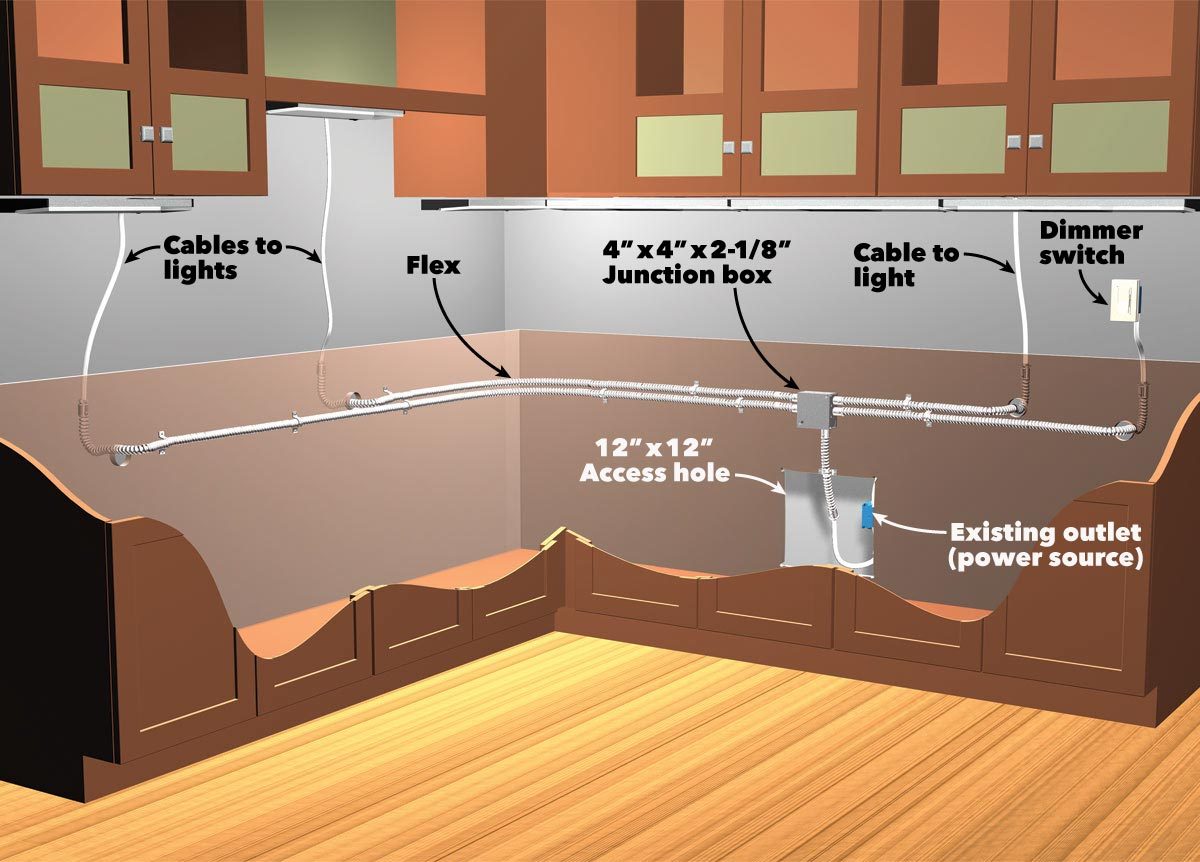
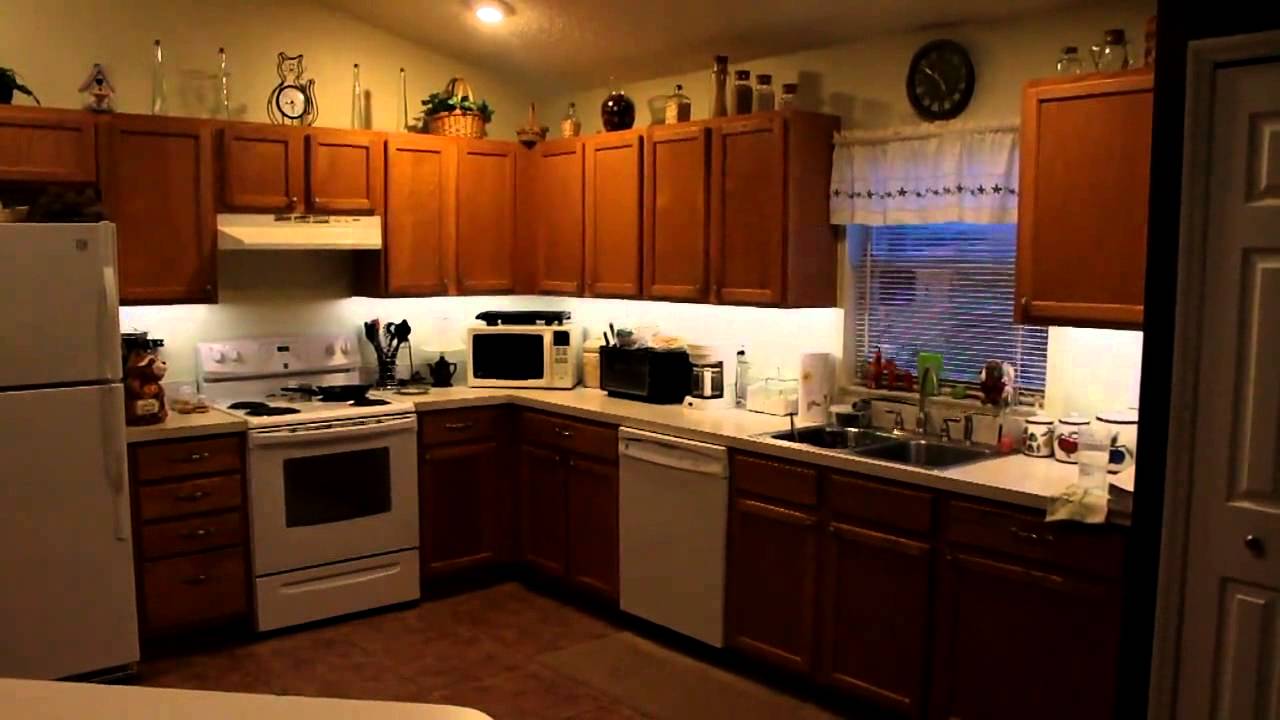
Adding LED strip lights under your kitchen cabinets can provide both functional and aesthetic benefits. These lights can help illuminate your countertops for easier food preparation and also add a modern touch to your kitchen design. Here's how to install them yourself: Step 1: Measure the length of your cabinets - accurately measuring the length of your cabinets will help you determine how many LED strip lights you will need. Make sure to also measure the distance between your cabinets and the wall to determine how much space you have to work with. Step 2: Gather your materials - you will need LED strip lights, a power adapter, a power supply, a remote control (if your lights come with one), and adhesive tape or clips to secure the lights. Step 3: Clean the surface - before applying the LED strip lights, make sure to thoroughly clean the surface of your cabinets. This will ensure that the adhesive tape or clips will stick properly. Step 4: Install the lights - carefully place the LED strip lights along the underside of your cabinets, using the adhesive tape or clips to secure them in place. Make sure to connect the lights to the power supply and adapter, following the manufacturer's instructions. Step 5: Test the lights - once everything is connected, test the lights to make sure they are working properly. If you have a remote control, use it to adjust the brightness and color of the lights. Step 6: Conceal the wires - to give your kitchen a clean and polished look, you can conceal the wires by tucking them into the gap between the cabinets and the wall or using wire clips to secure them along the bottom of the cabinets. Step 7: Enjoy your new LED lighting - with your LED strip lights installed, you can now enjoy a well-lit and stylish kitchen space.1. How to Install LED Strip Lights Under Kitchen Cabinets


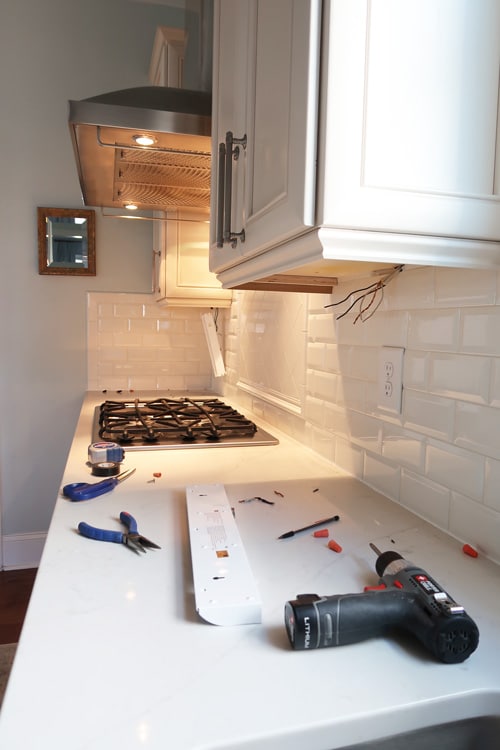
1. How to Install LED Strip Lights Under Kitchen Cabinets


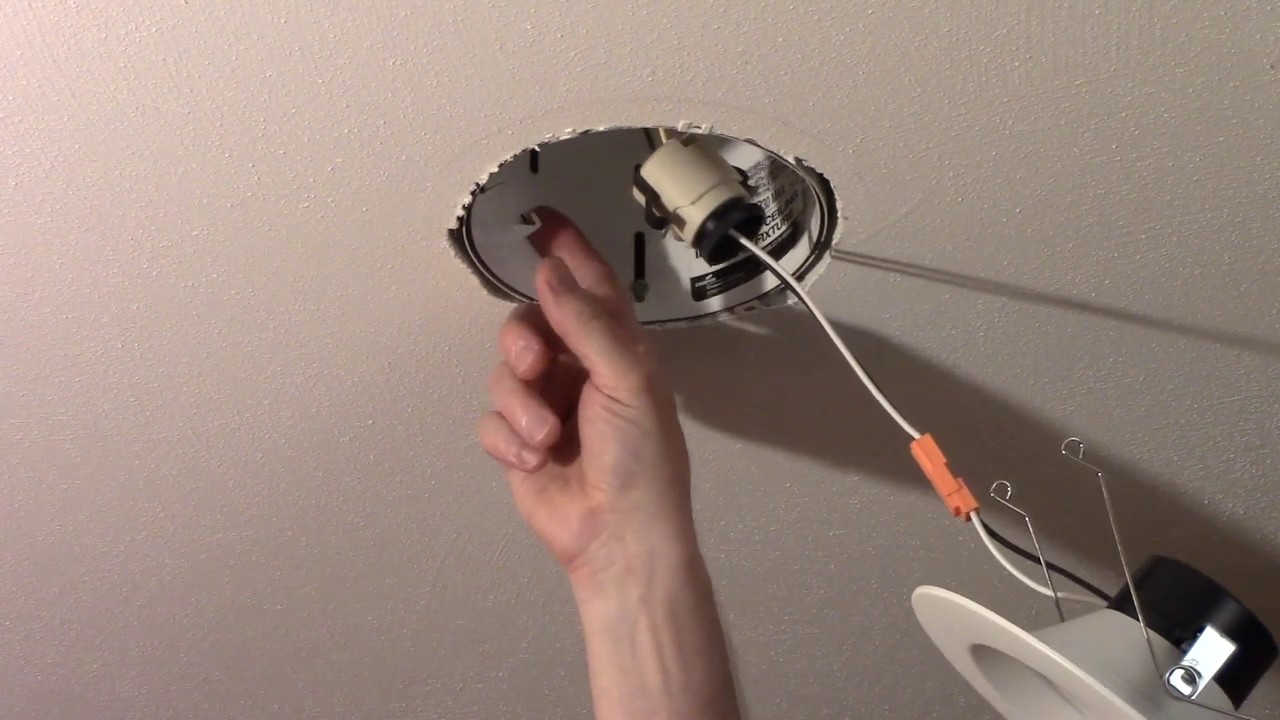
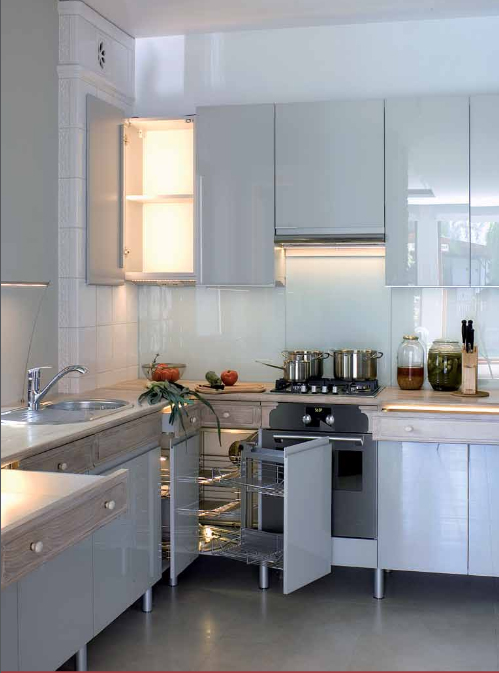
Recessed lighting is a popular choice for kitchens due to its sleek and modern appearance. If you're looking to upgrade your kitchen lighting, here's how you can install LED recessed lights yourself: Step 1: Determine your layout - decide where you want to place your recessed lights and how many you will need. A general rule of thumb is to have one light for every four square feet of ceiling space. Step 2: Gather your materials - you will need LED recessed lights, a power drill, a ladder, and a junction box if your lights require one. Step 3: Turn off the power - before starting any electrical work, make sure to turn off the power to the room where you will be installing the lights. Step 4: Mark the locations - use a pencil to mark where you want to install your recessed lights on the ceiling. Make sure to measure and mark the distance between each light to ensure they are evenly spaced. Step 5: Cut the holes - using a power drill and a hole saw attachment, carefully cut holes in the ceiling at the marked locations. Make sure to follow the manufacturer's instructions for the size of the holes. Step 6: Install the lights - carefully place the lights into the holes, following the manufacturer's instructions. If your lights require a junction box, make sure to install it before securing the light in place. Step 7: Connect the wiring - using wire nuts, connect the wiring from the lights to the power source. Make sure to follow the manufacturer's instructions and use caution when working with electricity. Step 8: Test the lights - once everything is connected, turn the power back on and test the lights to make sure they are working properly. Step 9: Adjust the trim - if your recessed lights come with trim pieces, you can adjust them to achieve the desired look and angle of light. Step 10: Enjoy your new LED recessed lighting - with your new LED recessed lights installed, you can now enjoy a bright and modern kitchen space.2. DIY Kitchen Lighting Upgrade: How to Install LED Recessed Lights


2. DIY Kitchen Lighting Upgrade: How to Install LED Recessed Lights


/installing-led-retrofit-bulb-into-ceiling-fixture-184968332-8bd1cdb942e0465db4b4dec251f7df9d.jpg)
LED lights are a popular choice for kitchens due to their energy efficiency and versatility. Here's a step-by-step guide on how to install LED lights in your kitchen: Step 1: Determine your lighting needs - before purchasing LED lights, consider the different areas in your kitchen that may need lighting. This can include under cabinets, above the sink, or over the kitchen island. Step 2: Choose the right type of LED lights - there are various types of LED lights available, such as strip lights, puck lights, and tape lights. Consider the size and layout of your kitchen to determine which type would work best. Step 3: Gather your materials - you will need LED lights, a power supply, a remote control (if applicable), and any necessary accessories, such as adhesive tape or clips. Step 4: Plan the installation - carefully measure and plan where you want to install your LED lights. This will help you determine how many lights you will need and where to place them for optimal lighting. Step 5: Install the lights - follow the manufacturer's instructions to install the lights, making sure to properly connect them to the power supply and any necessary accessories. Step 6: Test the lights - once everything is installed, test the lights to make sure they are working properly. If you have a remote control, use it to adjust the brightness and color of the lights. Step 7: Conceal the wires - to achieve a clean and seamless look, you can conceal the wires by tucking them into gaps or using wire clips to secure them along the walls or cabinets. Step 8: Enjoy your new LED lighting - with your LED lights installed, you can now enjoy a well-lit and stylish kitchen space.3. Step-by-Step Guide: Installing LED Lights in Your Kitchen


3. Step-by-Step Guide: Installing LED Lights in Your Kitchen


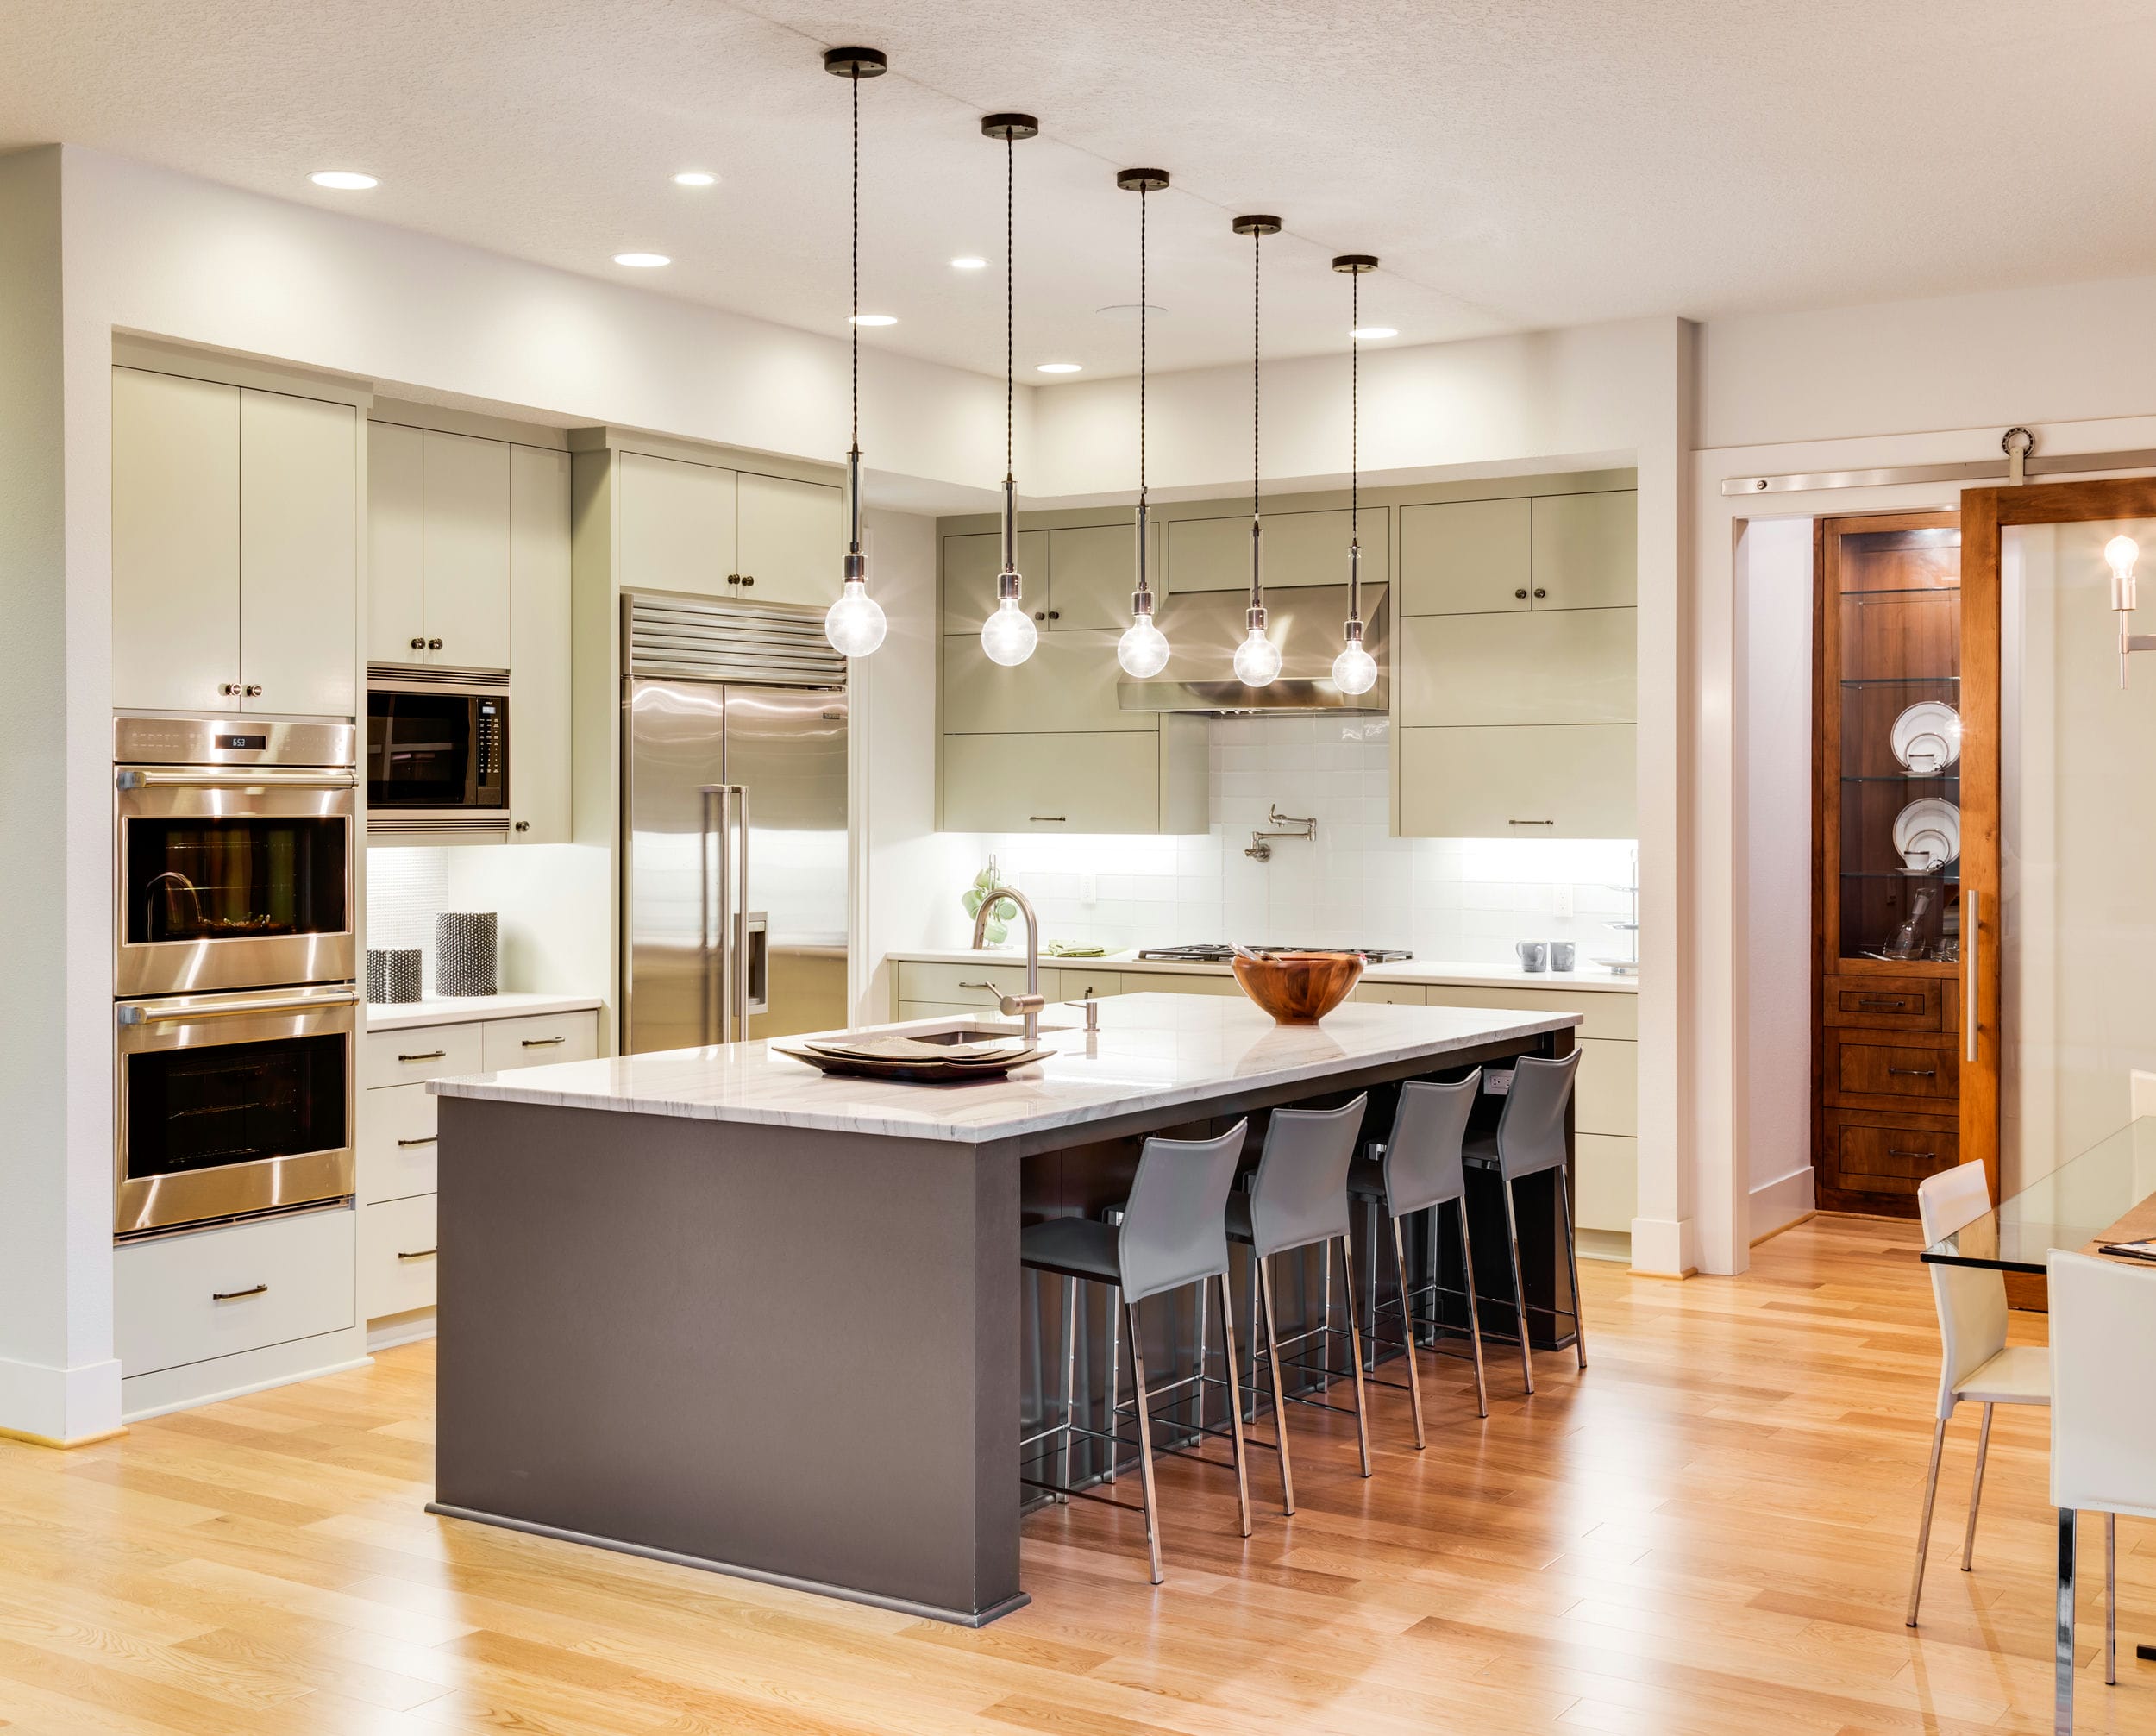
LED lighting is becoming increasingly popular among homeowners, and for good reason. Here are some of the benefits of installing LED lighting in your kitchen: Energy efficiency: LED lights are more energy-efficient than traditional incandescent or fluorescent lights, helping you save on your energy bills. Long lifespan: LED lights have a longer lifespan than traditional lights, lasting up to 50,000 hours or more. This means you won't have to replace them as often, saving you time and money. Customizable lighting: LED lights come in a variety of colors and can be dimmed or adjusted to your desired brightness, allowing you to create the perfect ambiance in your kitchen. Low heat emission: LED lights emit very little heat, making them a safer option for your kitchen, especially when installed under cabinets or in tight spaces. Easy installation: With the right tools and instructions, installing LED lights in your kitchen can be a DIY project, saving you money on installation costs.4. The Benefits of Installing LED Lighting in Your Kitchen


4. The Benefits of Installing LED Lighting in Your Kitchen


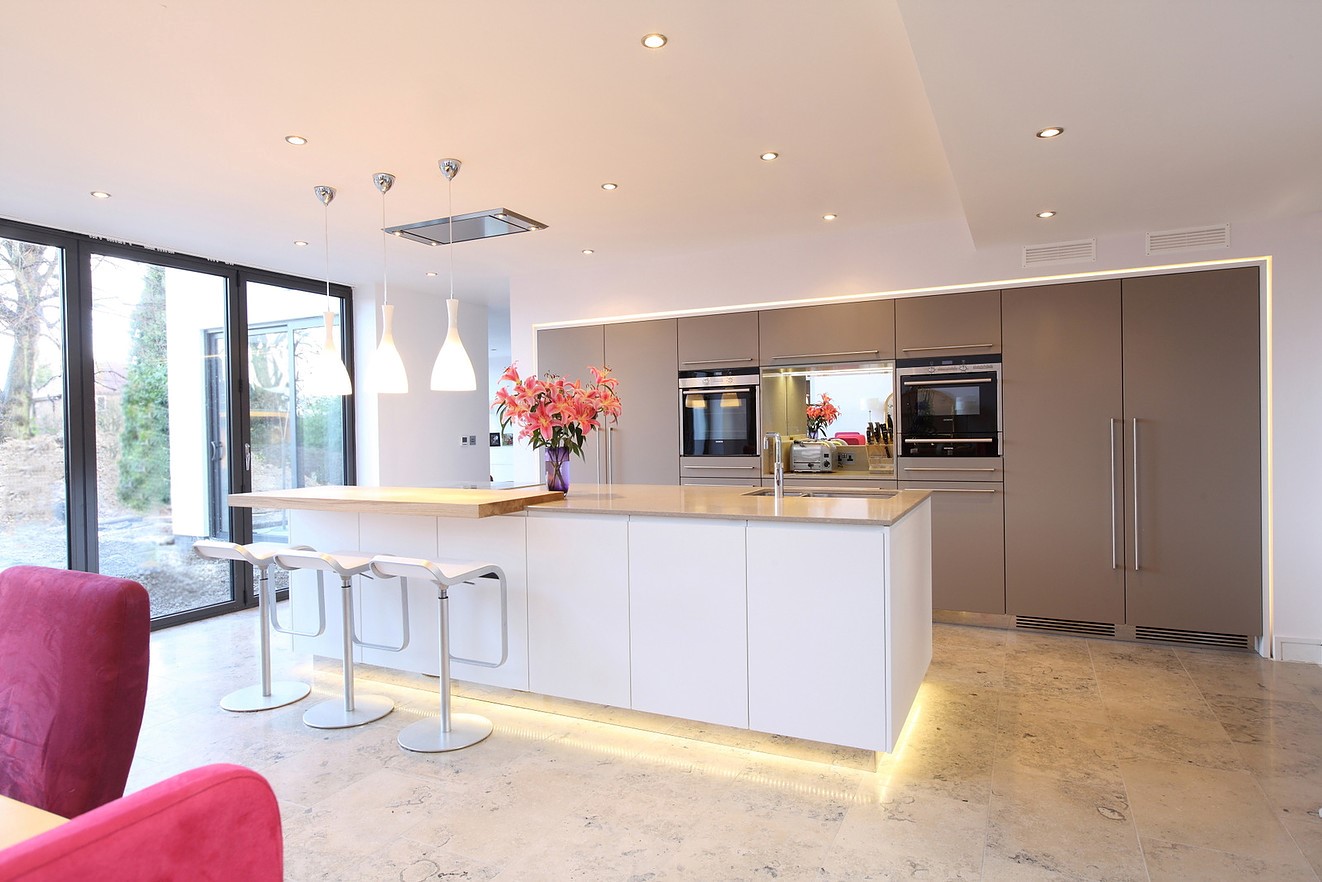


LED puck lights are a popular choice for under-cabinet lighting in kitchens due to their compact size and versatility. Here's how to choose and install LED puck lights for your kitchen: Step 1: Determine the number of lights needed - to achieve proper lighting, consider the size and layout of your kitchen to determine how many puck lights you will need. As a general rule, one puck light is needed for every 12 inches of cabinet space. Step 2: Choose the color temperature - LED puck lights come in various color temperatures, including warm white, cool white, or daylight. Consider the overall color scheme of your kitchen to determine which temperature would work best. Step 3: Gather your materials - you will need LED puck lights, a power supply, a remote control (if applicable), and any necessary accessories, such as adhesive tape or clips. Step 4: Plan the installation - carefully measure and plan where you want to install your puck lights. Make sure to also consider the placement of the power supply and how to conceal the wires. Step 5: Install the lights - follow the manufacturer's instructions to install the lights, making sure to properly connect them to the power supply and any necessary accessories. Step 6: Test the lights - once everything is installed, test the lights to make sure they are working properly. If you have a remote control, use it to adjust the brightness and color of the lights. Step 7: Conceal the wires - to achieve a clean and seamless look, you can conceal the wires by tucking them into gaps or using wire clips to secure them along the walls or cabinets. Step 8: Enjoy your new LED puck lights - with your new puck lights installed, you can now enjoy a well-lit and stylish kitchen space.5. How to Choose and Install LED Puck Lights for Your Kitchen


5. How to Choose and Install LED Puck Lights for Your Kitchen


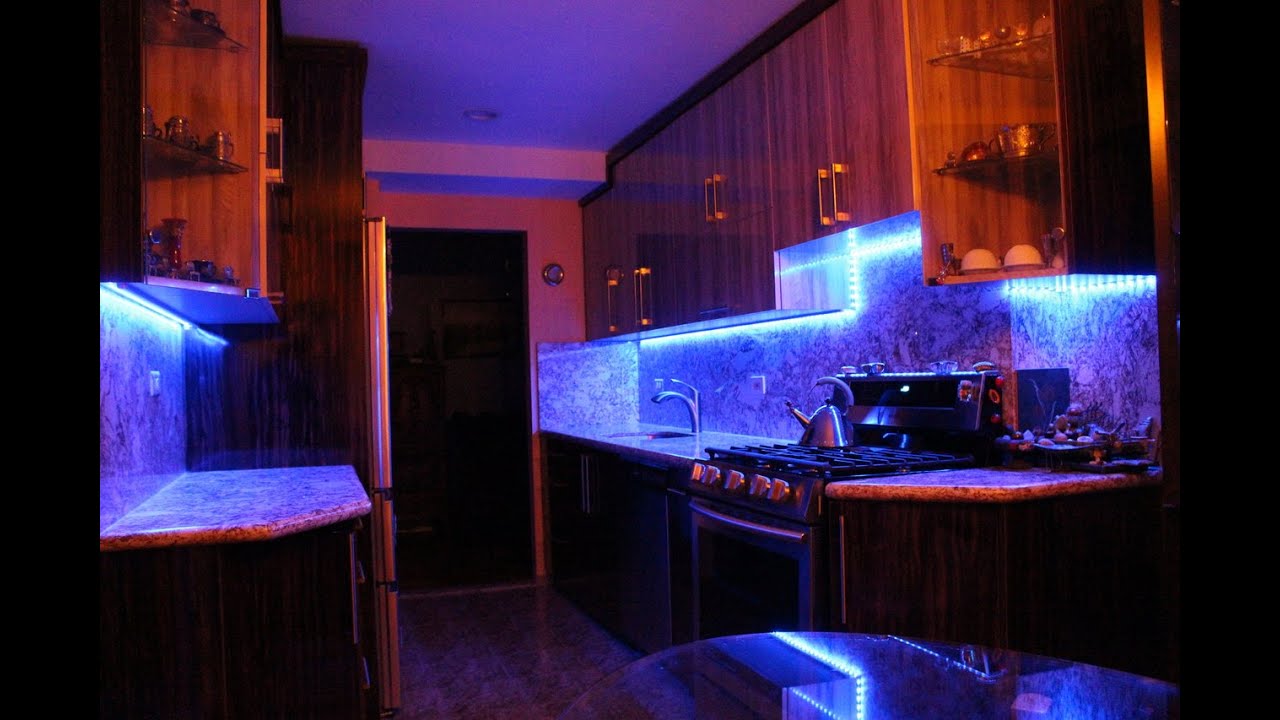
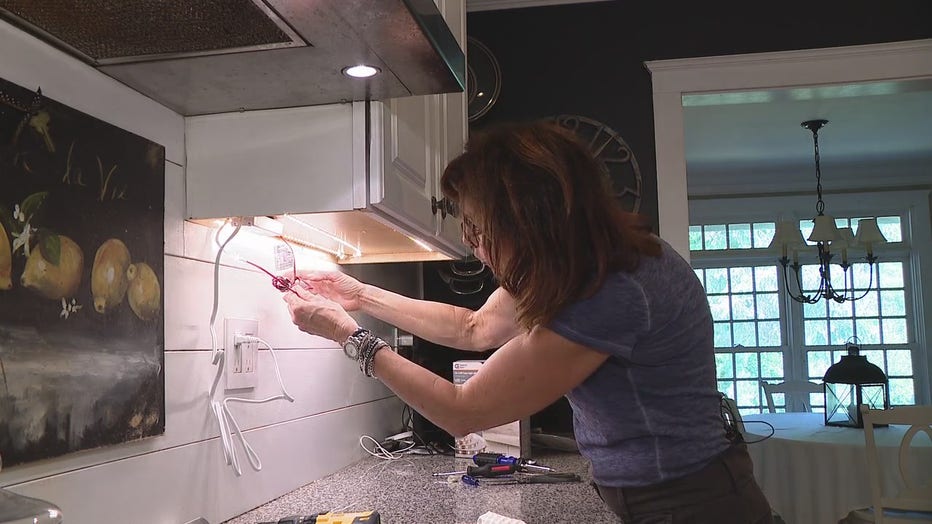
LED tape lighting, also known as LED strip lighting, is a versatile and cost-effective option for adding ambient or task lighting in your kitchen. Here's a beginner's guide on how to install LED tape lighting in your kitchen: Step 1: Determine the length needed - measure the length of the area where you want to install the LED tape lighting. You can also cut the tape to fit your desired length. Step 2: Choose the color temperature - LED tape lighting comes in various color temperatures, including warm white, cool white, or daylight. Consider the overall color scheme of your kitchen to determine which temperature would work best. Step 3: Gather your materials - you will need LED tape lighting, a power supply, a remote control (if applicable), and any necessary accessories, such as adhesive tape or clips. Step 4: Plan the installation - carefully measure and plan where you want to install the tape lighting. Make sure to also consider the placement of the power supply and how to conceal the wires. Step 5: Install the lights - carefully place the tape lighting along the desired area, using the adhesive tape or clips to secure them in place. Make sure to connect the lights to the power supply and adapter, following the manufacturer's instructions. Step 6: Test the lights - once everything is connected, test the lights to make sure they are working properly. If you have a remote control, use it to adjust the brightness and color of the lights. Step 7: Conceal the wires - to achieve a clean and seamless look, you can conceal the wires by tucking them into gaps or using wire clips to secure them along the walls or cabinets. Step 8: Enjoy your new LED tape lighting - with your new tape lighting installed, you can now enjoy a well-lit and stylish kitchen space.6. Installing LED Tape Lighting in Your Kitchen: A Beginner's Guide


6. Installing LED Tape Lighting in Your Kitchen: A Beginner's Guide


Installing LED lighting in your kitchen can be a simple and cost-effective way to upgrade your space. Here are some top tips to keep in mind when installing LED lights: Choose the right type of lighting: Consider the different types of LED lighting, such as strip lights, recessed lights, and puck lights, and choose the type that will best suit your lighting needs and kitchen design. Measure and plan: Accurate measurements and planning can ensure that you have enough lights and that they are evenly spaced for optimal lighting. Follow the manufacturer's instructions: Make sure to carefully read and follow the manufacturer's instructions when installing LED lights to ensure they are properly connected and installed. Use caution with electricity: If you are not comfortable working with electricity, it is best to hire a professional to install your LED lights. If you choose to DIY, make sure to turn off the power and take necessary safety precautions. Consider the color temperature: LED lights come in a variety of color temperatures, so consider the overall color scheme of your kitchen to determine which temperature would work best. Conceal wires: To achieve a clean and polished look, make sure to conceal any wires by tucking them into gaps or using wire clips to secure them along the walls or cabinets.7. Top Tips for Installing LED Lighting in Your Kitchen


7. Top Tips for Installing LED Lighting in Your Kitchen


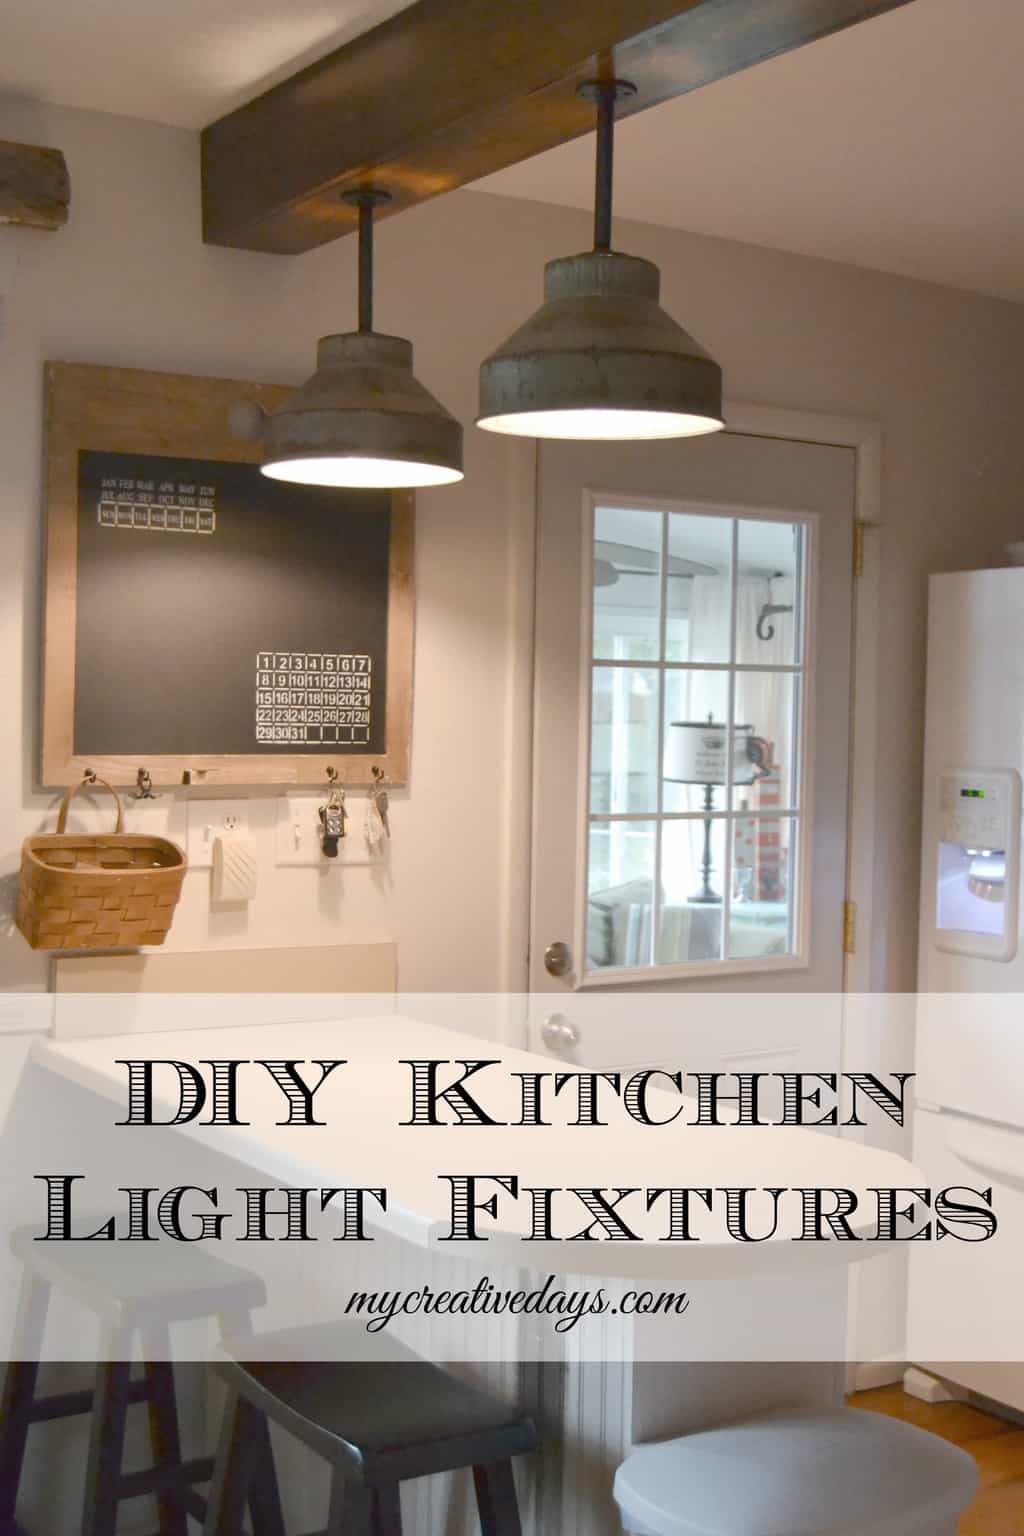
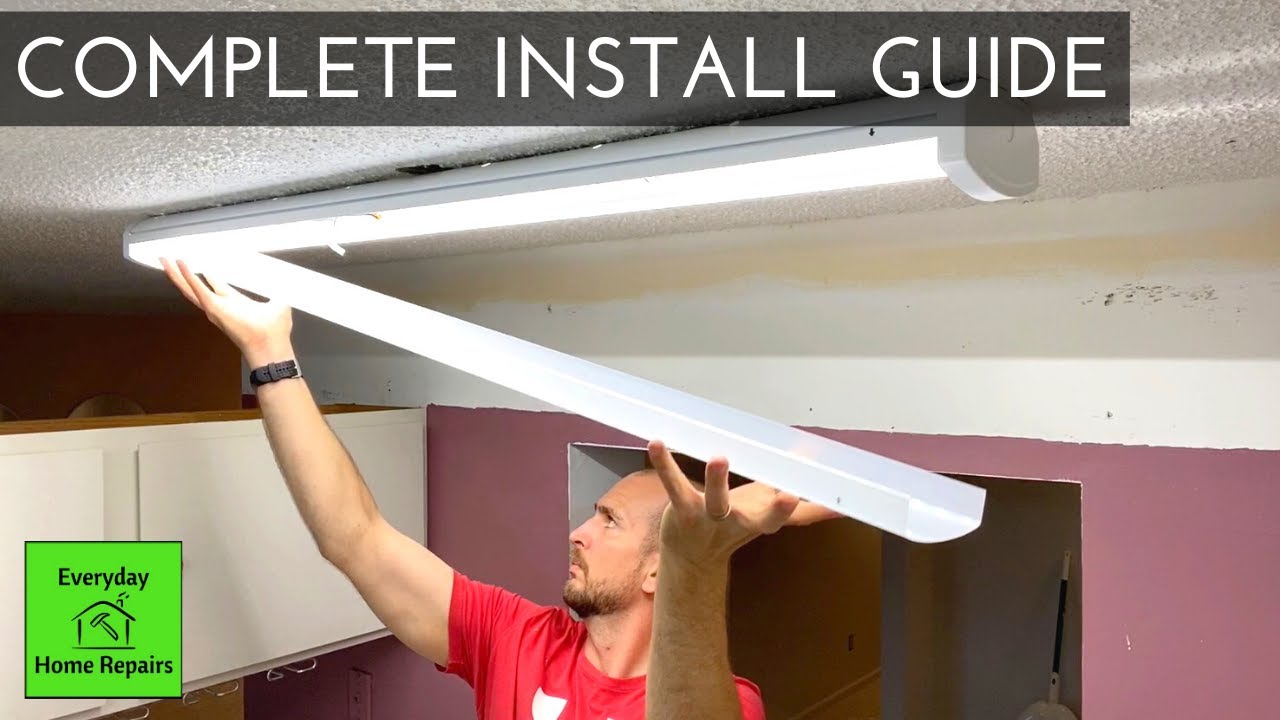
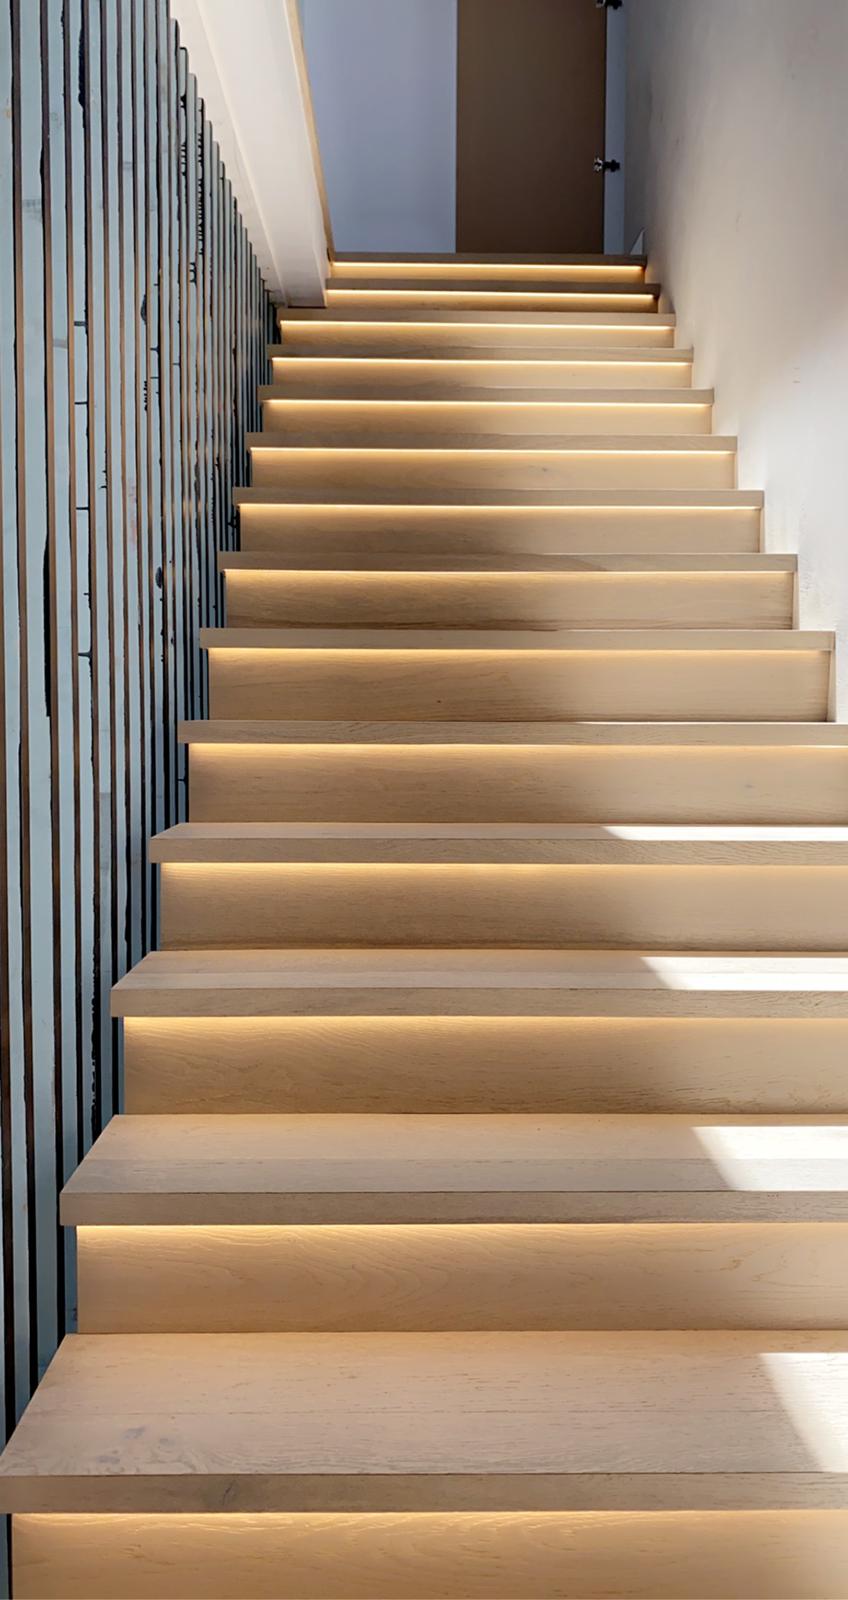
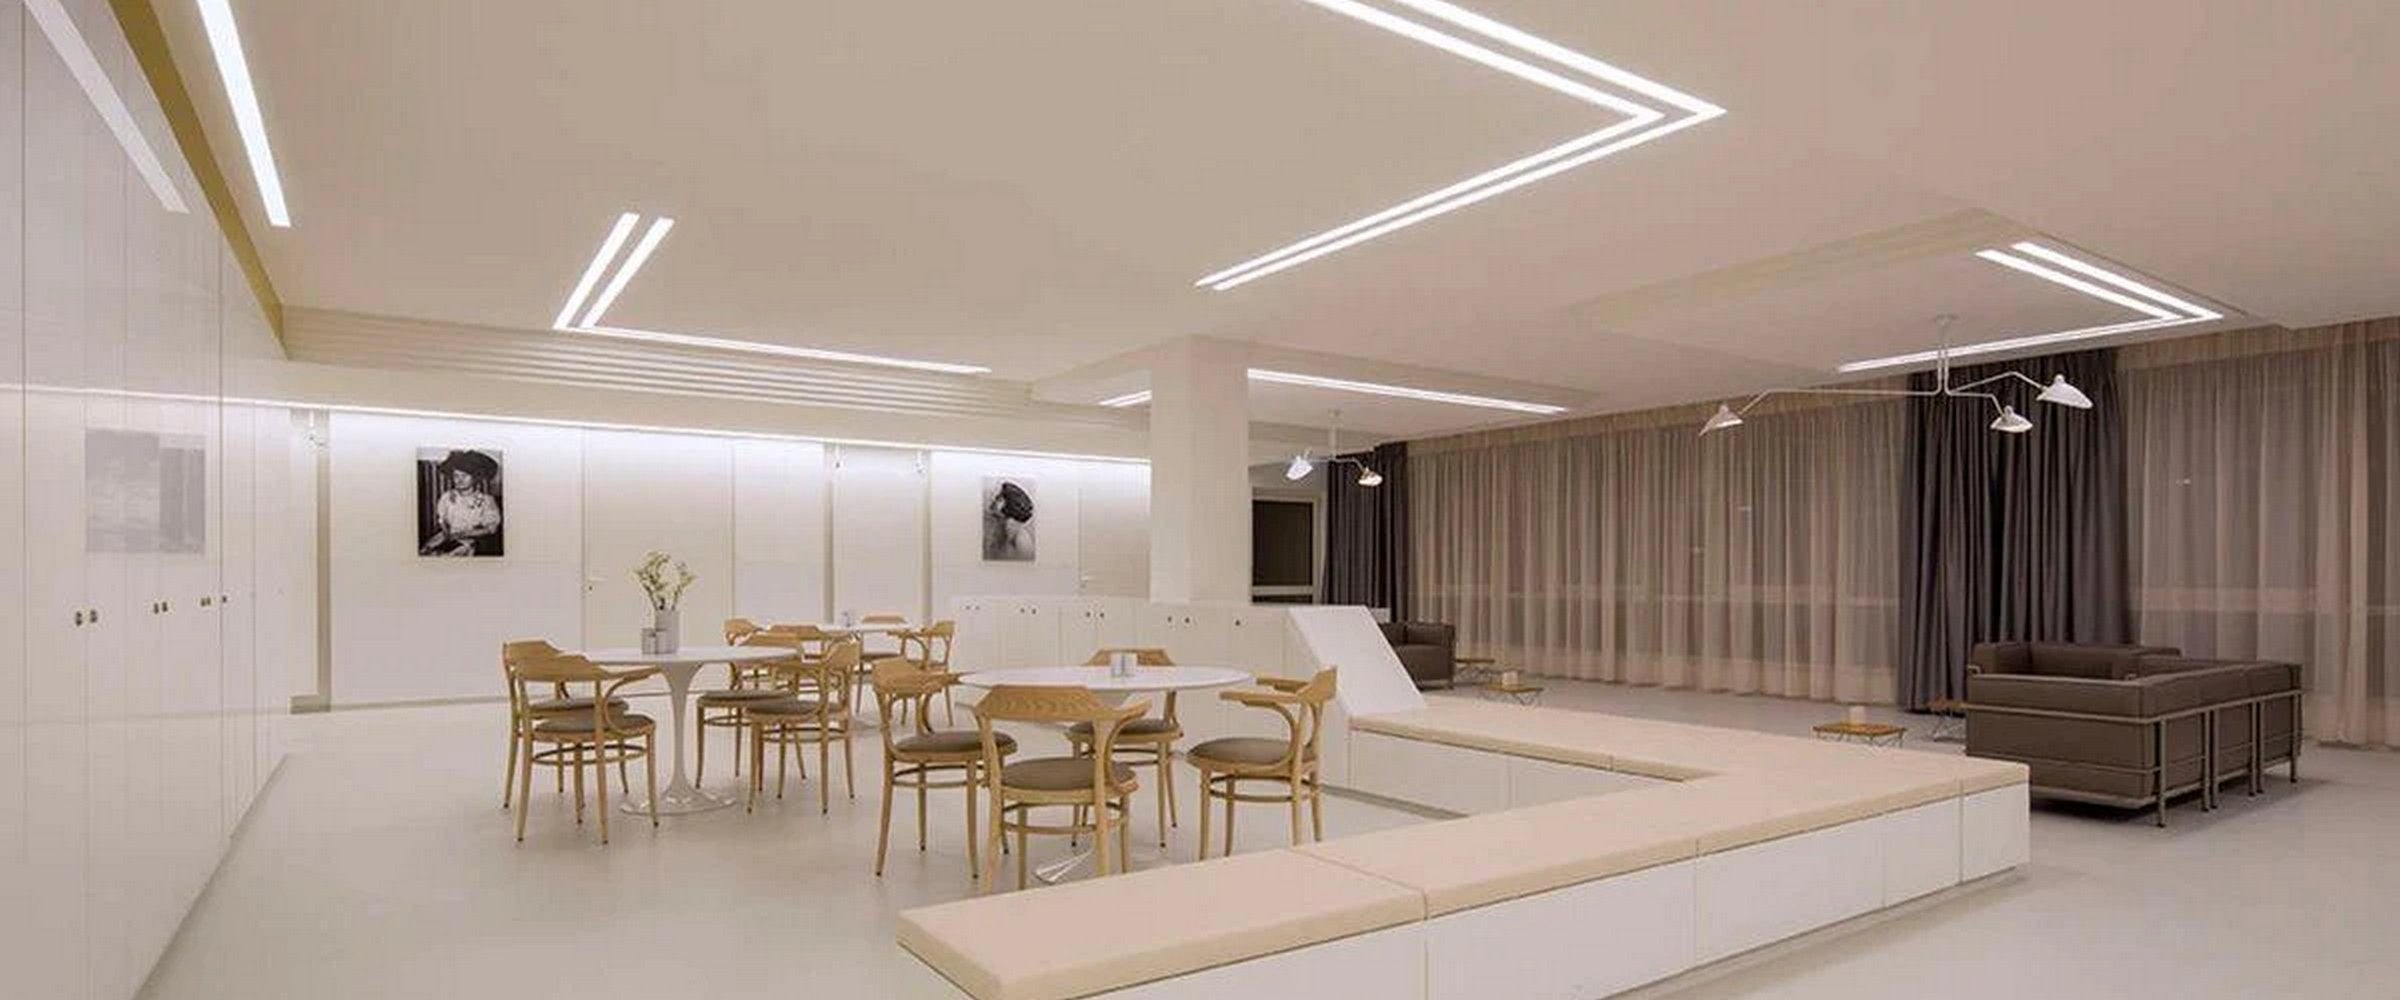
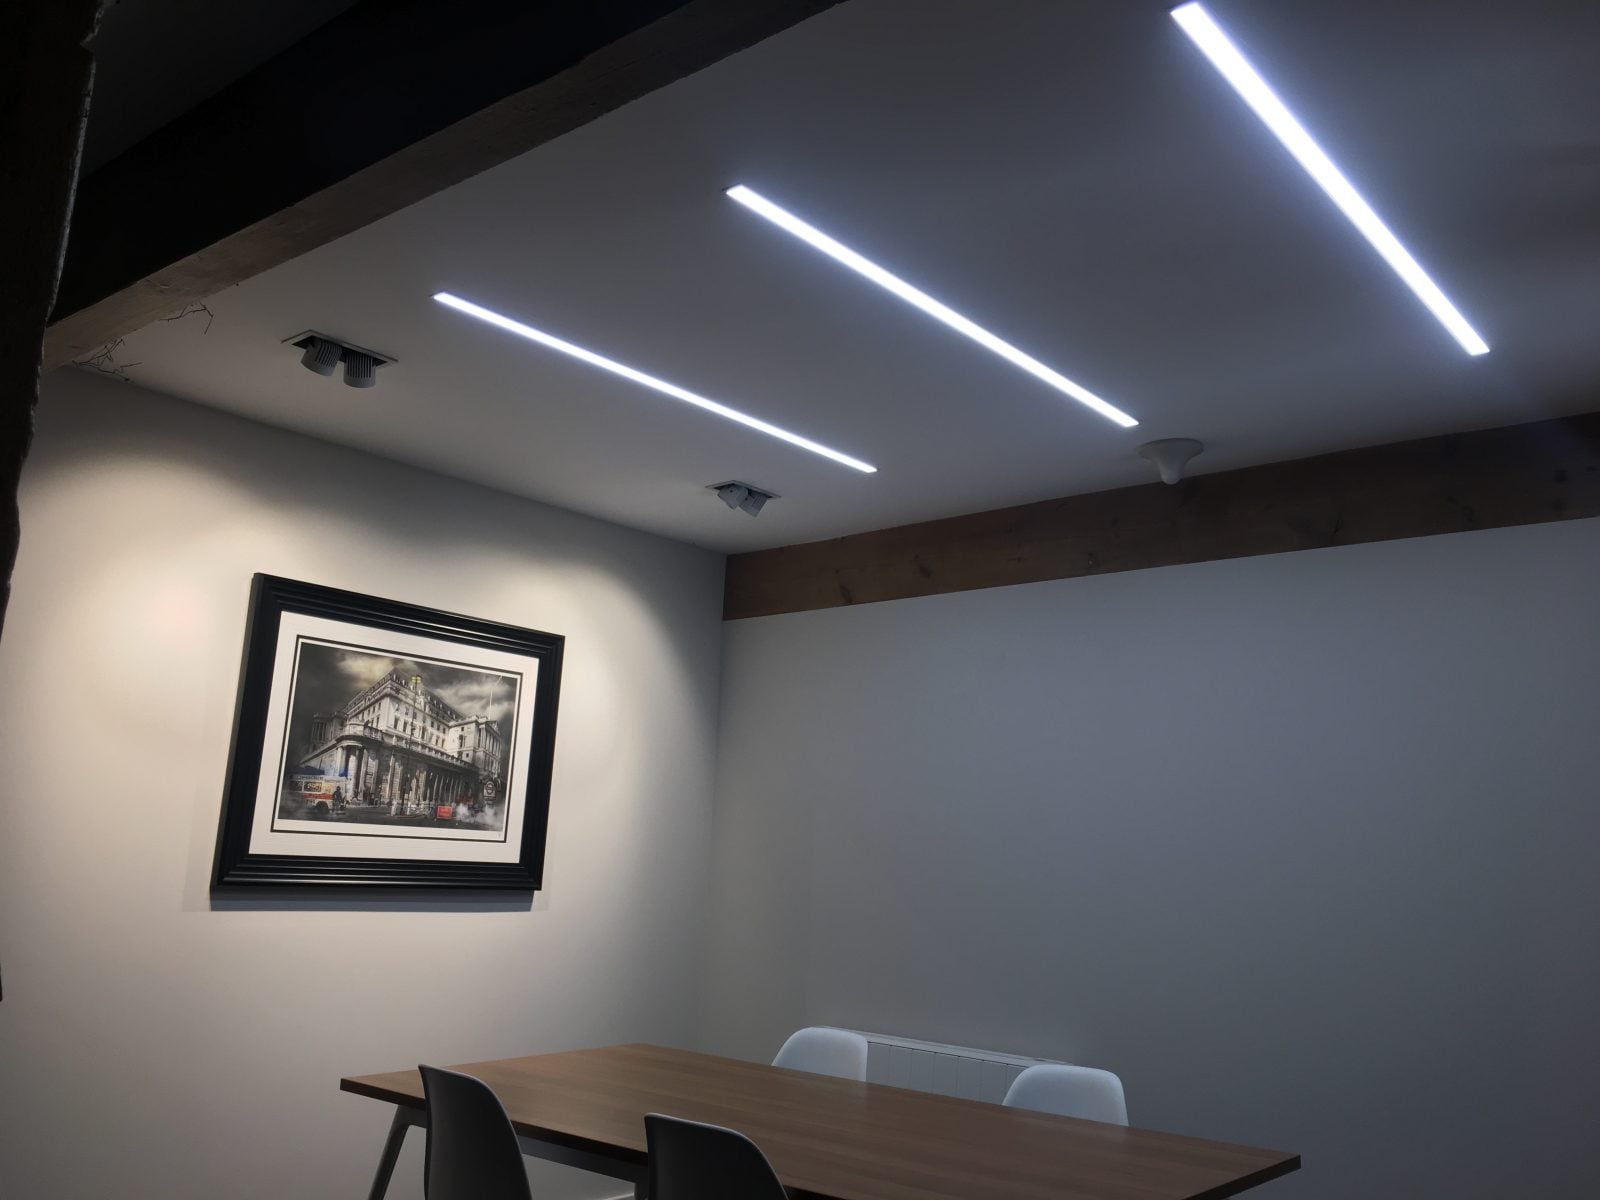
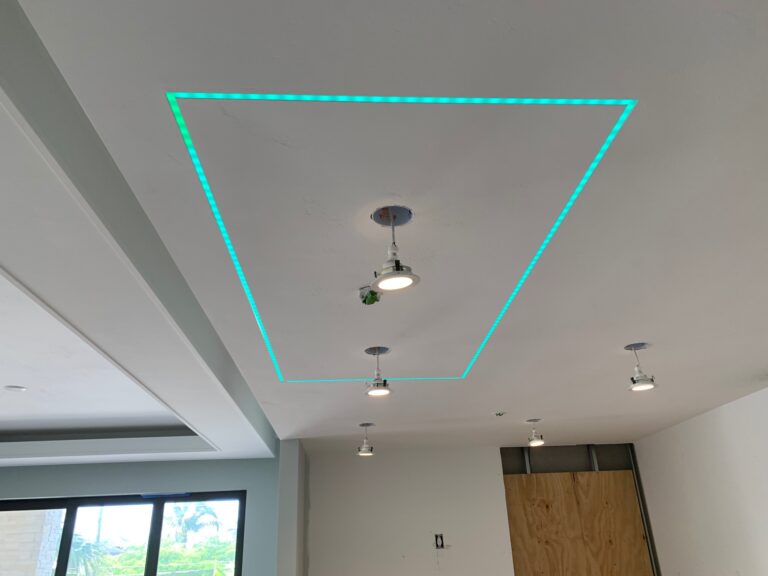
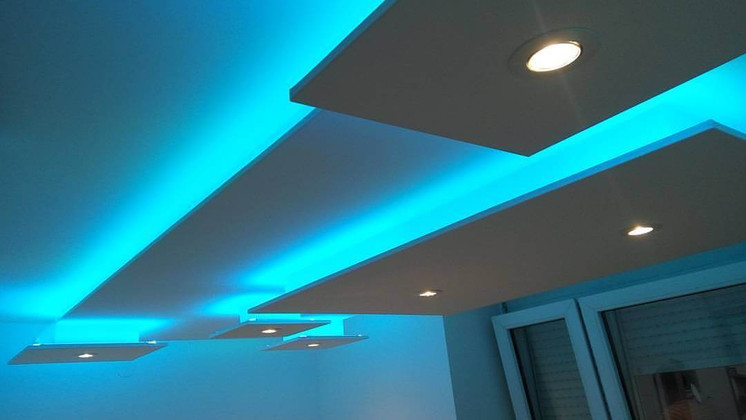
Installing LED strip lights in your kitchen ceiling can add a modern and stylish touch to your space. Here's how to install them yourself: Step 1: Measure the length of your ceiling - accurately measuring the length of your ceiling will help you determine how many LED strip lights you will need. Make sure to also measure the distance between each light for even spacing.8. How to Install LED Strip Lights in Your Kitchen Ceiling


8. How to Install LED Strip Lights in Your Kitchen Ceiling


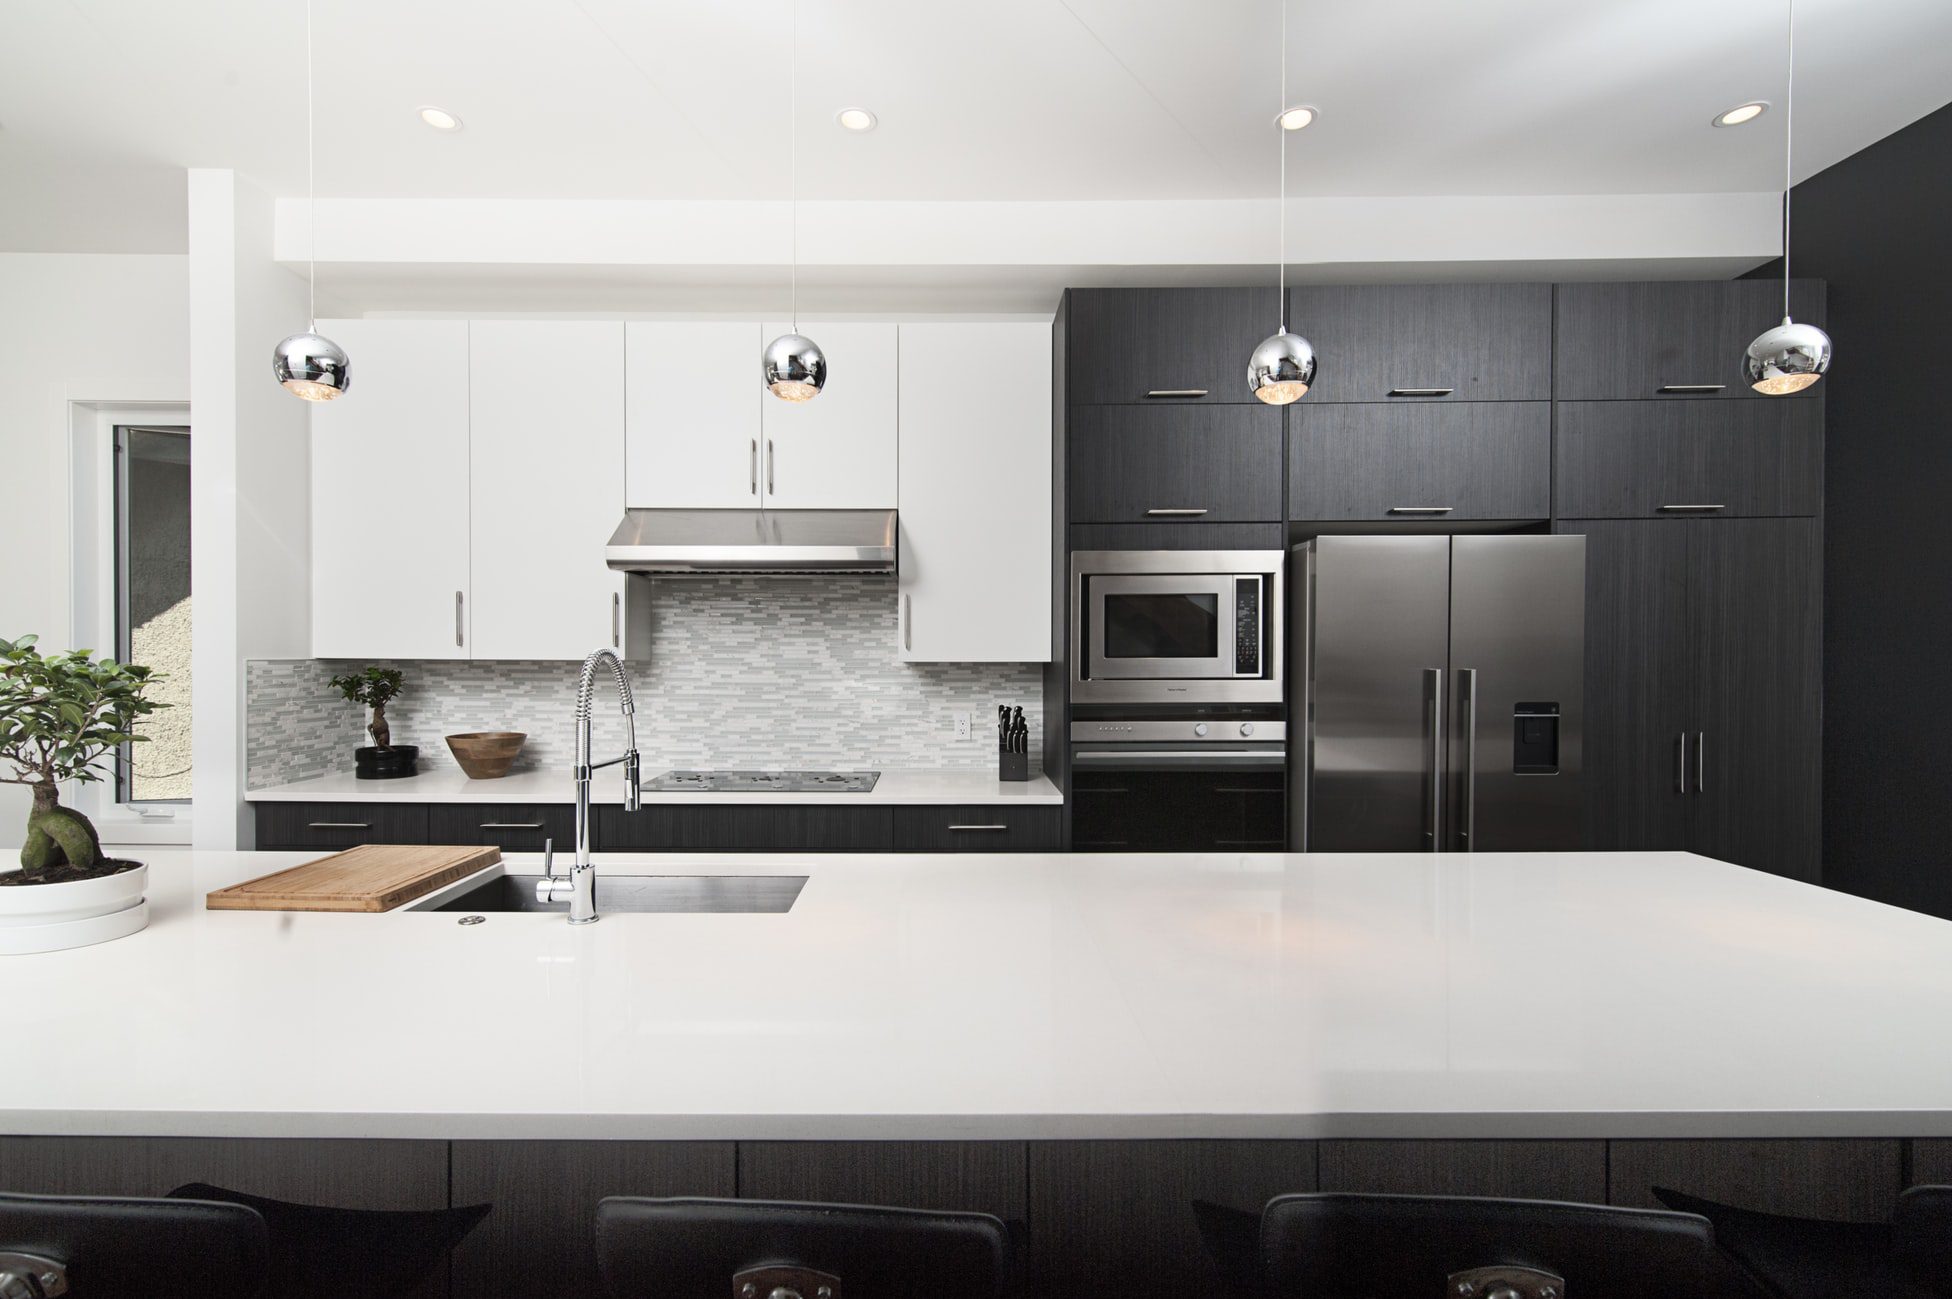
Enhance Your Kitchen Design with LED Lighting

Why LED Lighting is the Perfect Choice for Your Kitchen
 When it comes to designing your dream kitchen, lighting plays a crucial role in creating the perfect atmosphere. And with the rise of energy-efficient and long-lasting
LED lighting
, homeowners now have a better option for illuminating their homes. Not only do they provide bright and clear lighting, but they also offer a range of benefits that make them the ideal choice for your kitchen.
One of the main advantages of
LED lighting
is its energy efficiency. LED lights use significantly less electricity compared to traditional incandescent or fluorescent lights, resulting in lower energy bills. This means you can leave your
kitchen LED lights
on for longer periods without worrying about racking up a hefty electricity bill. Additionally, LED lights have a longer lifespan, saving you money in the long run as you won't have to replace them as often.
When it comes to designing your dream kitchen, lighting plays a crucial role in creating the perfect atmosphere. And with the rise of energy-efficient and long-lasting
LED lighting
, homeowners now have a better option for illuminating their homes. Not only do they provide bright and clear lighting, but they also offer a range of benefits that make them the ideal choice for your kitchen.
One of the main advantages of
LED lighting
is its energy efficiency. LED lights use significantly less electricity compared to traditional incandescent or fluorescent lights, resulting in lower energy bills. This means you can leave your
kitchen LED lights
on for longer periods without worrying about racking up a hefty electricity bill. Additionally, LED lights have a longer lifespan, saving you money in the long run as you won't have to replace them as often.
Creating the Perfect Ambiance for Your Kitchen
 Aside from their practical benefits, LED lights also offer a wide range of customization options to suit your personal style and kitchen design. With
color-changing LED lights
, you can create a warm and inviting atmosphere for family dinners, or a more vibrant and energetic ambiance for entertaining guests. You can also choose from a variety of
LED strip lights
to highlight specific areas or features in your kitchen, such as under cabinets or above the kitchen island.
Moreover, LED lights come in a variety of shapes and styles, making it easy to incorporate them into your kitchen design. From recessed lights for a sleek and modern look, to pendant lights for a more traditional feel, there are endless options to choose from. You can even opt for
smart LED lights
that can be controlled through a smartphone or home automation system, giving you full control over the lighting in your kitchen.
Aside from their practical benefits, LED lights also offer a wide range of customization options to suit your personal style and kitchen design. With
color-changing LED lights
, you can create a warm and inviting atmosphere for family dinners, or a more vibrant and energetic ambiance for entertaining guests. You can also choose from a variety of
LED strip lights
to highlight specific areas or features in your kitchen, such as under cabinets or above the kitchen island.
Moreover, LED lights come in a variety of shapes and styles, making it easy to incorporate them into your kitchen design. From recessed lights for a sleek and modern look, to pendant lights for a more traditional feel, there are endless options to choose from. You can even opt for
smart LED lights
that can be controlled through a smartphone or home automation system, giving you full control over the lighting in your kitchen.
Installing LED Lighting in Your Kitchen
 Now that you know the benefits of
LED lighting
for your kitchen, it's time to consider the installation process. While it may seem daunting, installing
kitchen LED lights
is actually quite simple. You can easily replace your existing light fixtures with LED ones, or hire a professional electrician for a more extensive installation. With proper installation, your LED lights will provide bright and long-lasting illumination for all your kitchen activities.
In conclusion,
LED lighting
is the perfect choice for enhancing your kitchen design. Not only do they offer energy efficiency and customization options, but they also provide a warm and inviting ambiance for your kitchen. So why wait? Upgrade your kitchen with
LED lighting
today and see the difference it makes.
Now that you know the benefits of
LED lighting
for your kitchen, it's time to consider the installation process. While it may seem daunting, installing
kitchen LED lights
is actually quite simple. You can easily replace your existing light fixtures with LED ones, or hire a professional electrician for a more extensive installation. With proper installation, your LED lights will provide bright and long-lasting illumination for all your kitchen activities.
In conclusion,
LED lighting
is the perfect choice for enhancing your kitchen design. Not only do they offer energy efficiency and customization options, but they also provide a warm and inviting ambiance for your kitchen. So why wait? Upgrade your kitchen with
LED lighting
today and see the difference it makes.