Are you looking to revamp your kitchen table but don't want to spend a fortune on a new one? Why not try a DIY tile kitchen table top! Not only is it budget-friendly, but it also adds a unique and personal touch to your space. Follow these 12 easy steps to create a stunning tiled table top that will impress your guests and elevate your dining experience.How to Tile a Table Top: 12 Steps (with Pictures) - wikiHow


How to Tile a Table Top: 12 Steps (with Pictures) - wikiHow


The key to a successful DIY tile table top is using the right materials. For this project, we recommend using Merola Tiles, available at The Home Depot. These high-quality tiles come in a variety of designs and colors, making it easy to find the perfect fit for your kitchen table. Plus, they are durable and easy to clean, making them ideal for a busy dining area.DIY Tile Tabletop: Using Merola Tiles - The Home Depot


DIY Tile Tabletop: Using Merola Tiles - The Home Depot


Start by measuring your table to determine how many tiles you will need. Be sure to account for any overlapping or spacing between the tiles. Next, clean the surface of your table and sand it down to create a smooth and even base for the tiles to adhere to.Step 1: Measure and Prep the Table


DIY Tile Tabletop: Using Merola Tiles - The Home Depot


In addition to the Merola Tiles, you will also need tile adhesive, grout, a trowel, spacers, a sponge, and a tile cutter (if necessary). These materials can also be found at The Home Depot, making it a convenient one-stop-shop for all your DIY needs.Step 2: Gather Materials


DIY Tile Tabletop: Using Merola Tiles - The Home Depot


Before applying the adhesive, lay out the tiles on your table to get a feel for the placement and pattern. This will also give you an idea of how many tiles you will need to cut to fit around the edges.Step 3: Lay Out the Tiles


DIY Tile Tabletop: Using Merola Tiles - The Home Depot


Using a trowel, apply a layer of tile adhesive to the table surface. Be sure to work in small sections to prevent the adhesive from drying out too quickly.Step 4: Apply Adhesive
DIY Tile Tabletop: Using Merola Tiles - The Home Depot
Begin placing the tiles onto the adhesive, using spacers to create an even gap between each tile. Press down firmly to ensure the tiles are securely in place.Step 5: Place Tiles

DIY Tile Tabletop: Using Merola Tiles - The Home Depot

If necessary, use a tile cutter to cut tiles to fit around the edges of the table. This may require some trial and error to get the perfect fit.Step 6: Cut and Fit Tiles
DIY Tile Tabletop: Using Merola Tiles - The Home Depot


Allow the adhesive to dry completely before moving on to the next step. This may take a few hours, so be patient.Step 7: Let Adhesive Dry
DIY Tile Tabletop: Using Merola Tiles - The Home Depot

Once the adhesive is dry, remove the spacers from between the tiles.Step 8: Remove Spacers


DIY Tile Tabletop: Using Merola Tiles - The Home Depot
Enhance Your Kitchen with a DIY Tile Table Top

Transform Your Kitchen into a Stylish and Functional Space
 The kitchen is often considered the heart of the home, where families gather to cook, eat, and spend quality time together. As one of the most used rooms in the house, it's important to not only have a functional kitchen, but also a stylish one that reflects your personal taste and design aesthetic. One way to achieve this is by creating a DIY tile kitchen table top, which not only adds a unique touch to your kitchen, but also serves as a practical and durable surface for all your cooking and dining needs.
DIY
(do-it-yourself) projects have become increasingly popular in recent years, and for good reason. They not only allow you to save money, but also give you the opportunity to personalize and customize your home according to your own preferences. A DIY tile kitchen table top is a perfect project for those looking to revamp their kitchen without breaking the bank.
Tile
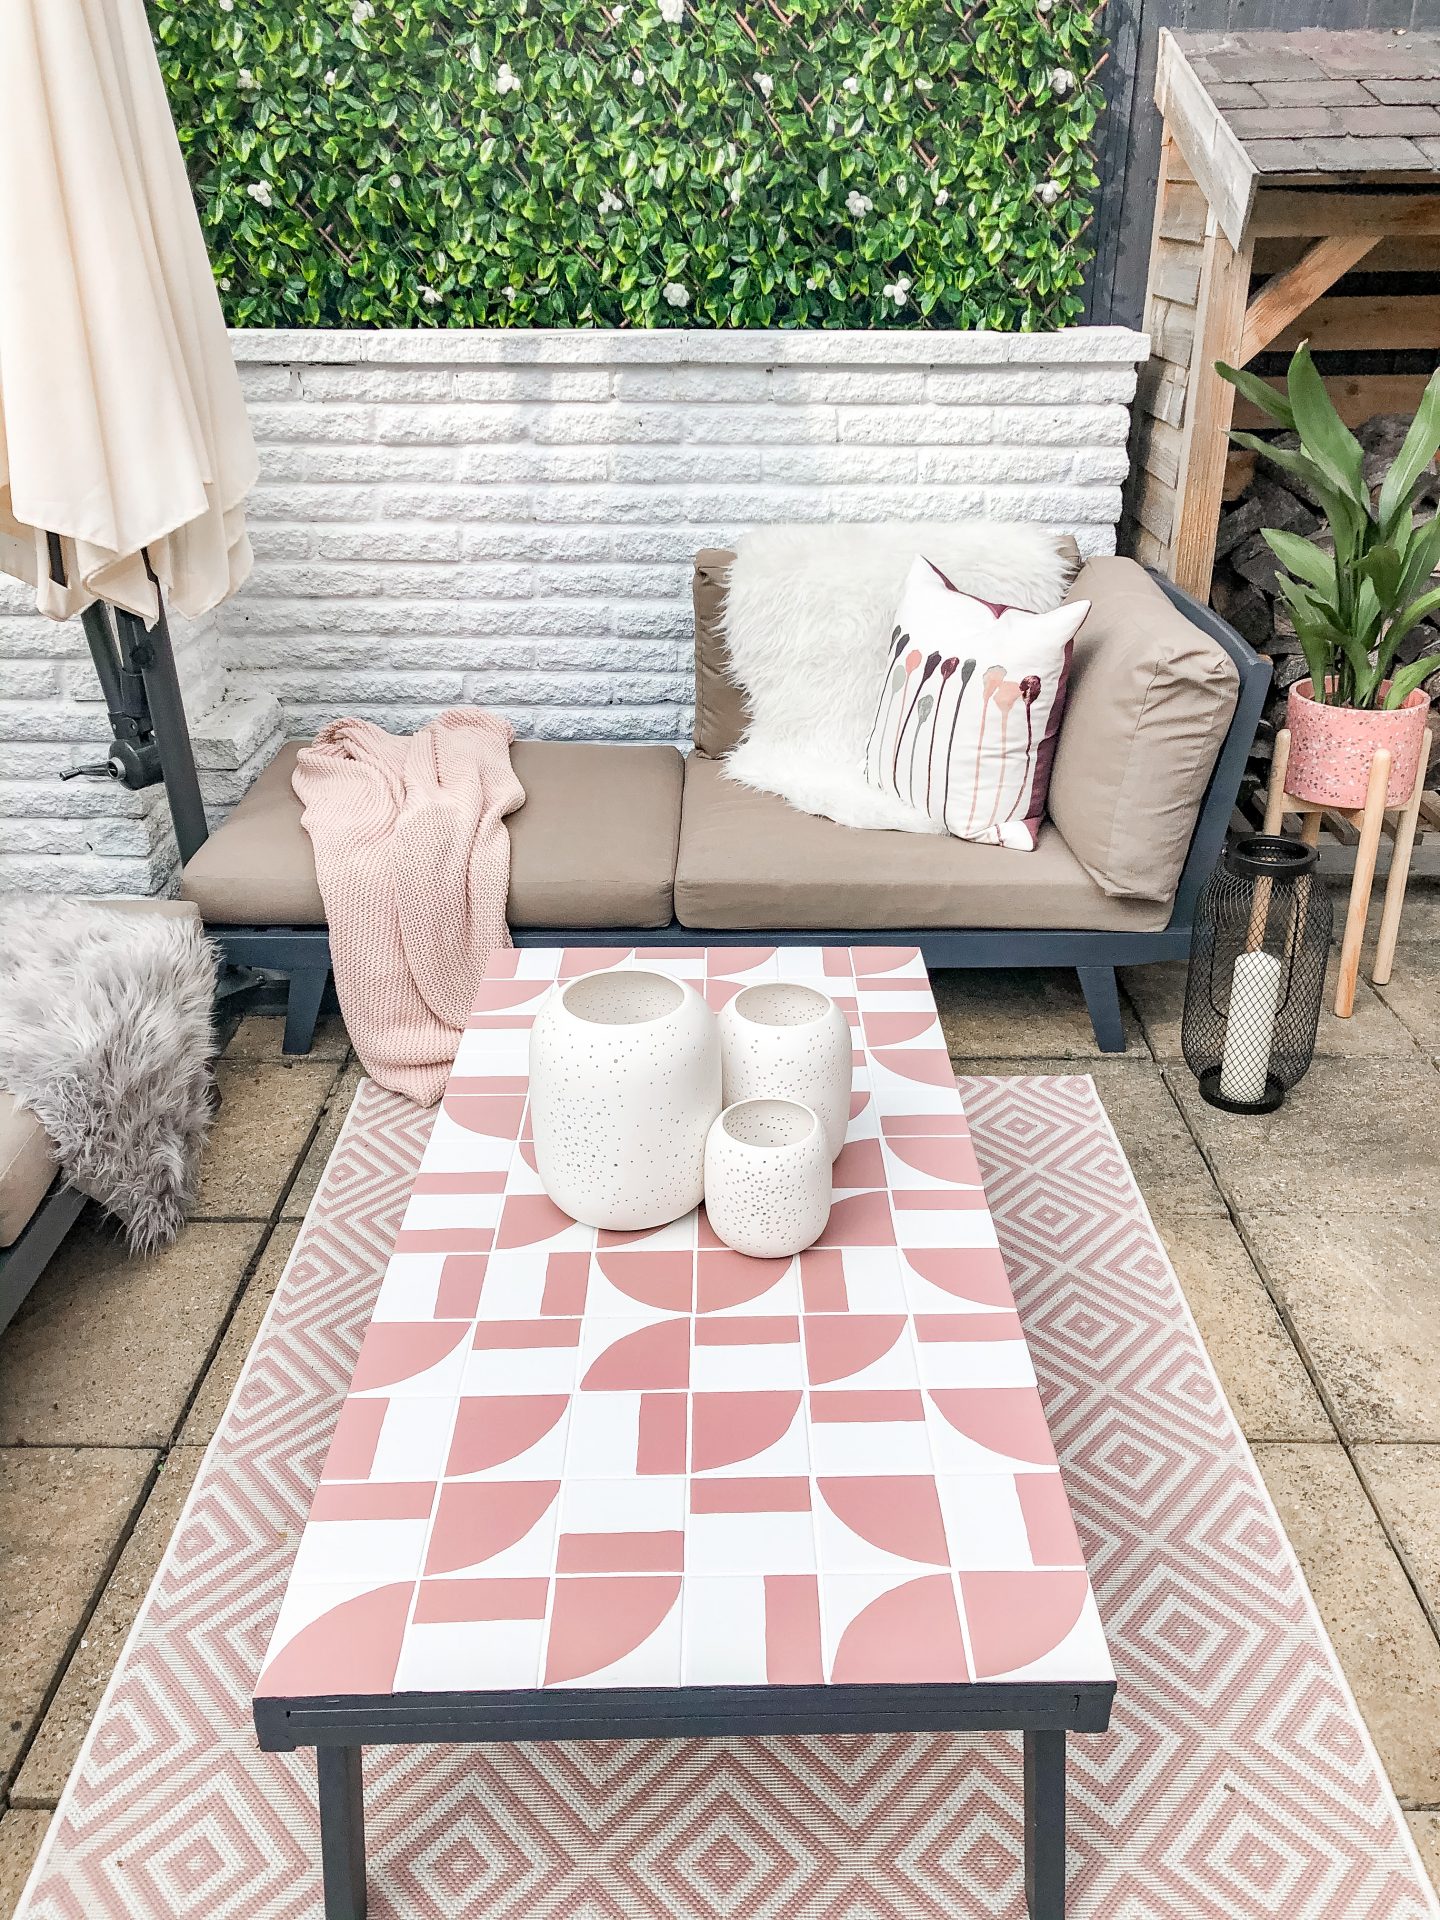
is a versatile and durable material that comes in a variety of colors, patterns, and textures. This makes it perfect for creating a unique and eye-catching table top that can complement any kitchen design. Whether you prefer a classic subway tile or a bold mosaic design, the possibilities are endless with tile.
The kitchen is often considered the heart of the home, where families gather to cook, eat, and spend quality time together. As one of the most used rooms in the house, it's important to not only have a functional kitchen, but also a stylish one that reflects your personal taste and design aesthetic. One way to achieve this is by creating a DIY tile kitchen table top, which not only adds a unique touch to your kitchen, but also serves as a practical and durable surface for all your cooking and dining needs.
DIY
(do-it-yourself) projects have become increasingly popular in recent years, and for good reason. They not only allow you to save money, but also give you the opportunity to personalize and customize your home according to your own preferences. A DIY tile kitchen table top is a perfect project for those looking to revamp their kitchen without breaking the bank.
Tile
is a versatile and durable material that comes in a variety of colors, patterns, and textures. This makes it perfect for creating a unique and eye-catching table top that can complement any kitchen design. Whether you prefer a classic subway tile or a bold mosaic design, the possibilities are endless with tile.
The Benefits of a Tile Table Top
 Apart from its aesthetic appeal, a tile kitchen table top offers many practical benefits. Unlike traditional wooden or marble table tops, tile is resistant to stains, scratches, and heat, making it a perfect surface for meal prep and dining. It's also easy to clean and maintain, making it a practical choice for busy families.
In addition, a tile table top can also help protect your wooden kitchen table from damage, as it acts as a barrier between hot pots and pans and the table's surface. This can help extend the lifespan of your table and save you money in the long run.
Apart from its aesthetic appeal, a tile kitchen table top offers many practical benefits. Unlike traditional wooden or marble table tops, tile is resistant to stains, scratches, and heat, making it a perfect surface for meal prep and dining. It's also easy to clean and maintain, making it a practical choice for busy families.
In addition, a tile table top can also help protect your wooden kitchen table from damage, as it acts as a barrier between hot pots and pans and the table's surface. This can help extend the lifespan of your table and save you money in the long run.
Creating Your Own DIY Tile Table Top
 Creating a DIY tile kitchen table top may seem daunting, but with the right tools and materials, it's a project that can easily be tackled by beginners. You will need to start by measuring your kitchen table and purchasing enough tile to cover the surface, along with the necessary tools such as tile adhesive, grout, and a tile cutter.
Before starting, it's important to
plan
out your design and layout to ensure a seamless and professional-looking finish. You can get creative with your design by incorporating different colors and patterns, or even add a personal touch by using hand-painted tiles or creating a mosaic design.
Creating a DIY tile kitchen table top may seem daunting, but with the right tools and materials, it's a project that can easily be tackled by beginners. You will need to start by measuring your kitchen table and purchasing enough tile to cover the surface, along with the necessary tools such as tile adhesive, grout, and a tile cutter.
Before starting, it's important to
plan
out your design and layout to ensure a seamless and professional-looking finish. You can get creative with your design by incorporating different colors and patterns, or even add a personal touch by using hand-painted tiles or creating a mosaic design.
In Conclusion
 A DIY tile kitchen table top not only adds a touch of personality and style to your kitchen, but also provides a practical and durable surface for your daily needs. With its versatility and affordability, it's a project that can easily be customized to fit any design aesthetic. So why not give it a try and see the transformation it brings to your kitchen?