Are you tired of dealing with a clogged bathroom sink drain? Look no further than the Delta Bathroom Sink Drain 1 1/4 for a reliable and efficient solution. In this guide, we will walk you through the steps of installing a Delta drain for your bathroom sink.Delta Bathroom Sink Drain Installation: A Step-by-Step Guide


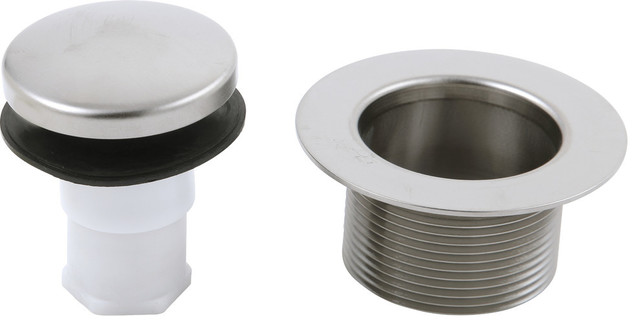
Delta Bathroom Sink Drain Installation


/bathroom-sink-drain-installation-2718843-01-4955fe1f576b447a91abe51c126d220b.jpg)
Before starting the installation process, make sure you have all the necessary tools handy. You will need a basin wrench, adjustable pliers, plumber's putty, and a screwdriver.Step 1: Gather Your Tools


Delta Bathroom Sink Drain 1 1/4


Start by removing the old drain and cleaning the sink surface thoroughly. Make sure there is no debris or residue left behind. This will ensure a smooth and secure fit for the new drain.Step 2: Prepare the Sink

Delta Bathroom Sink Drain Installation Guide

Take a small amount of plumber's putty and roll it into a thin rope. Apply this around the underside of the flange on the new Delta drain. This will create a watertight seal between the drain and the sink.Step 3: Apply Plumber's Putty


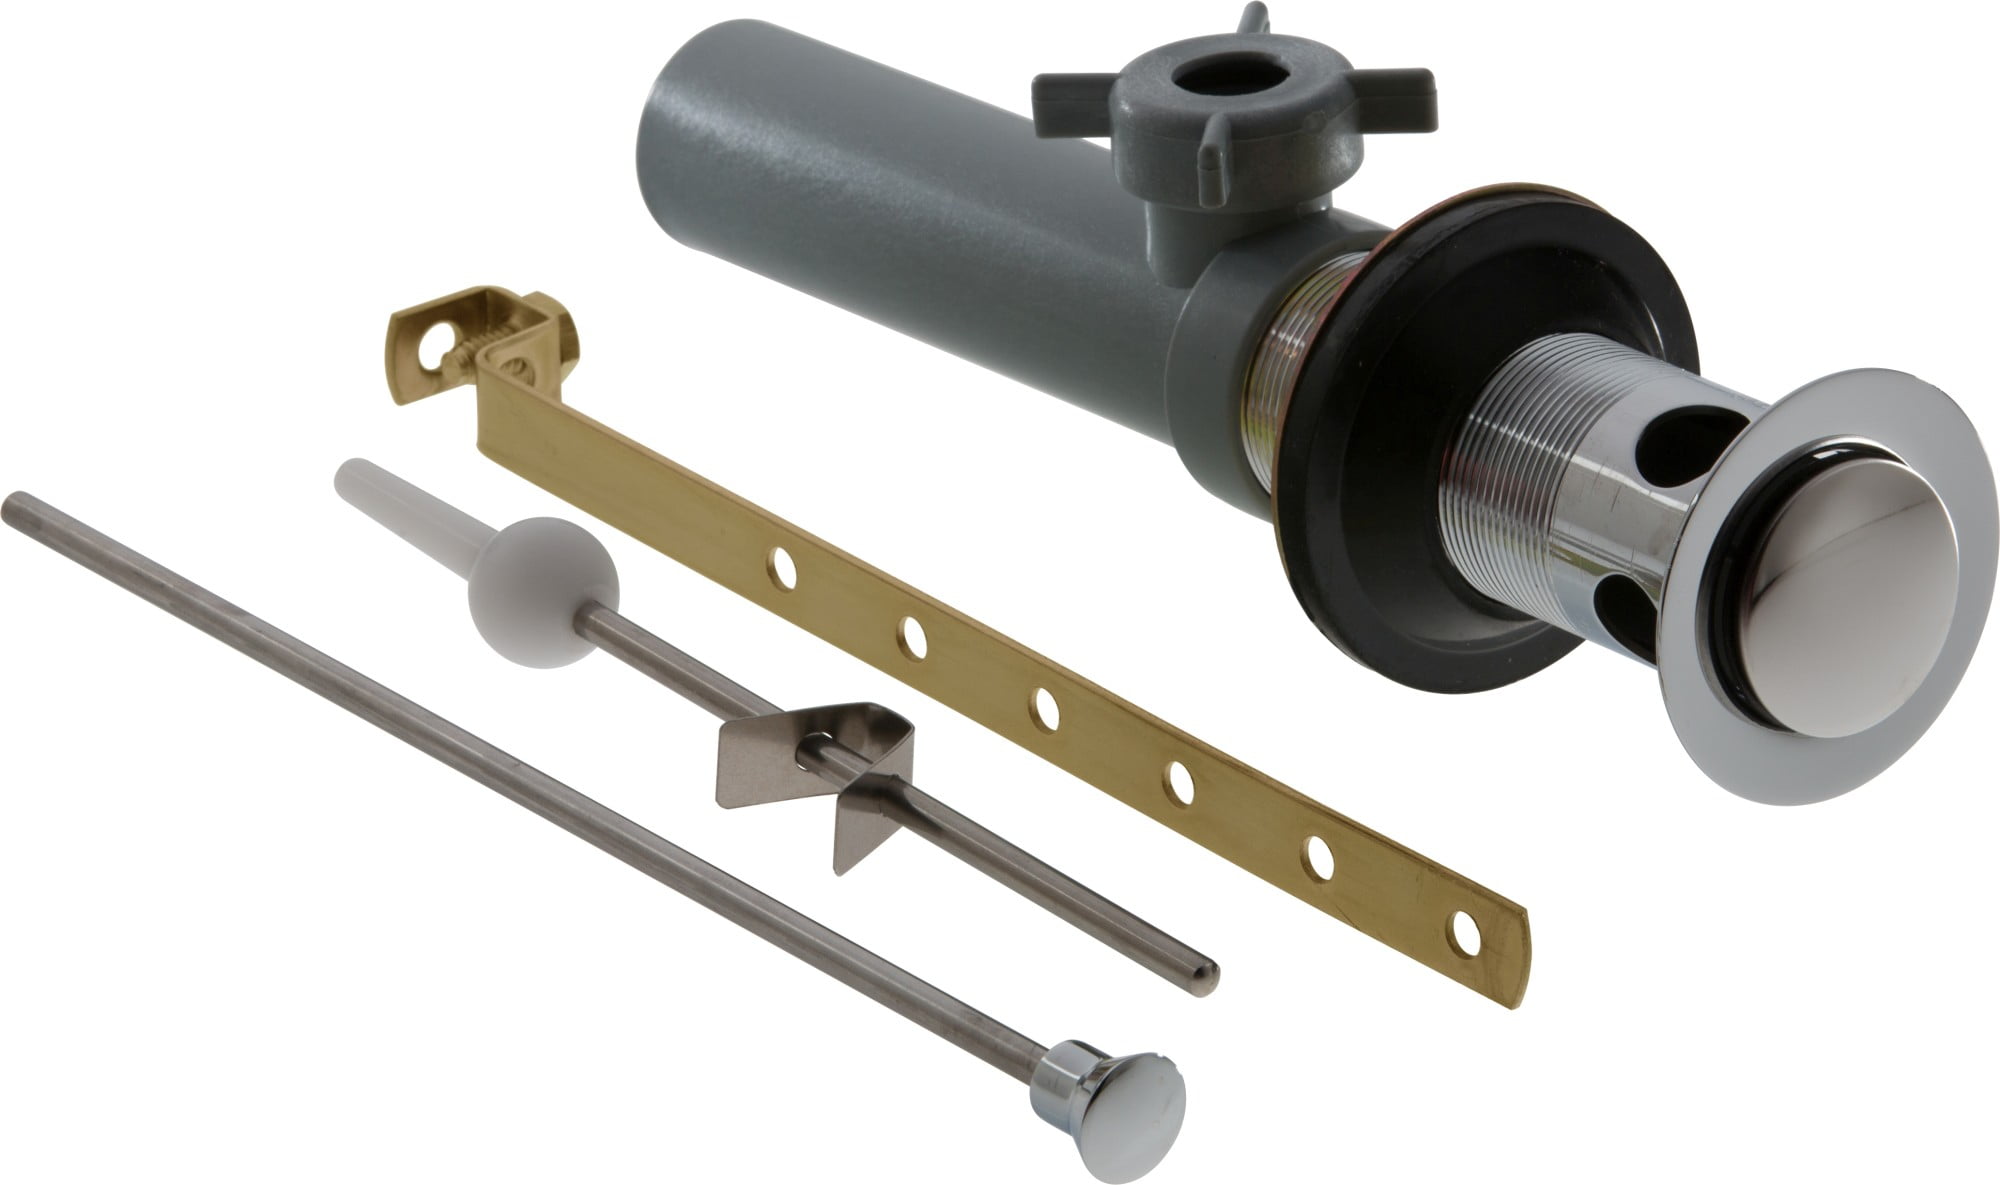
Delta Bathroom Sink Drain Assembly


Place the new drain into the sink's drain opening and press down firmly. Make sure it is properly aligned and centered before moving on to the next step.Step 4: Insert the Drain
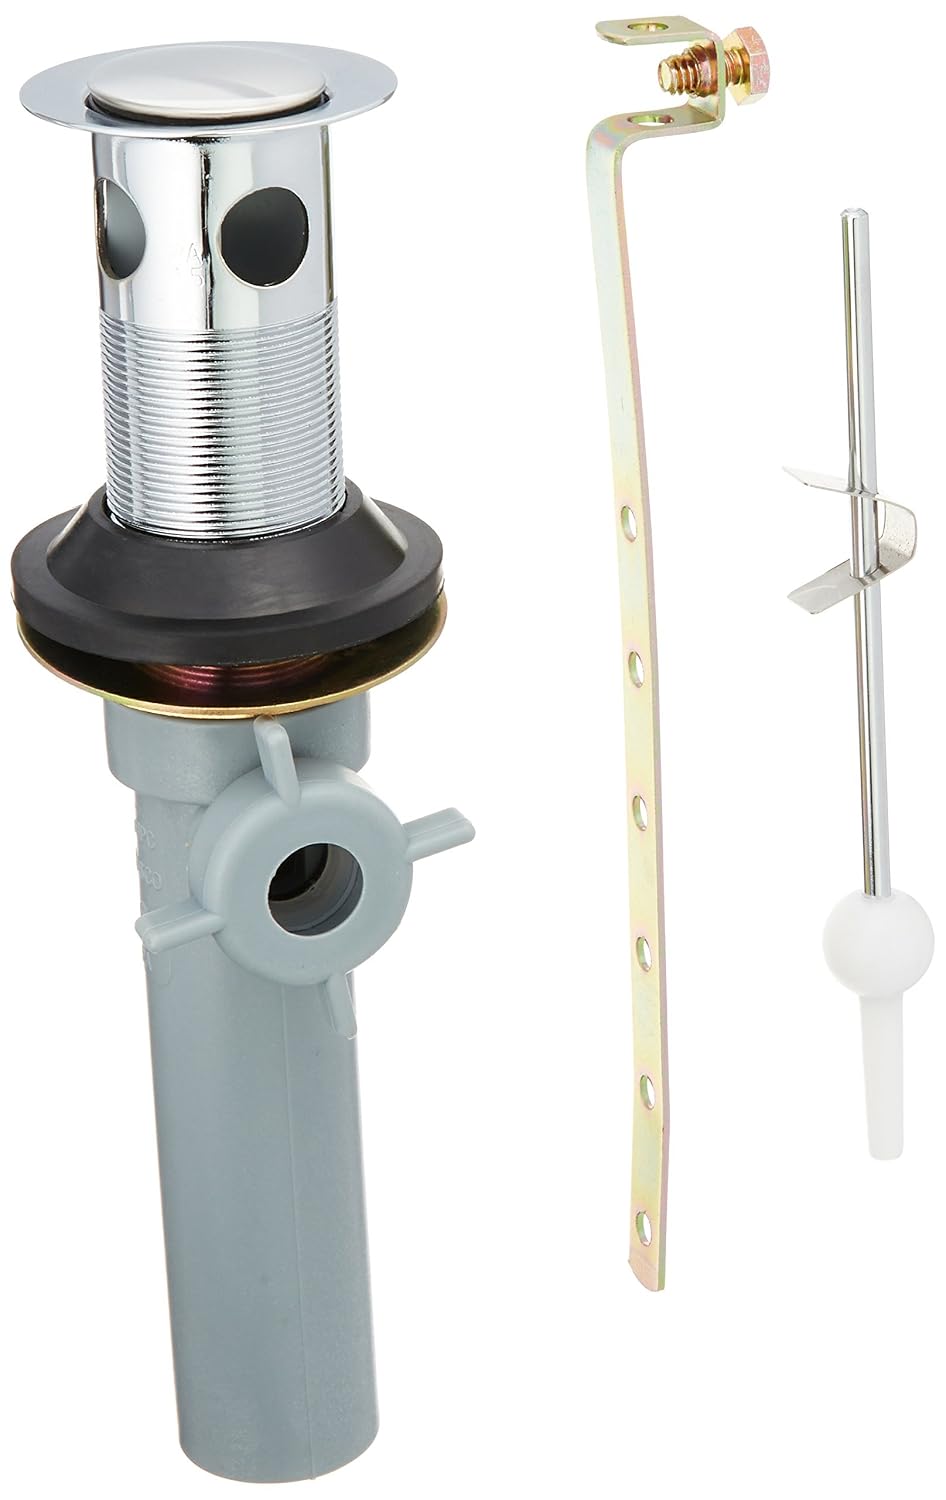


Delta Bathroom Sink Drain Replacement


Using the basin wrench, tighten the nut underneath the sink to secure the drain in place. Use adjustable pliers to hold the body of the drain while tightening the nut. Make sure not to overtighten, as this can cause damage to the sink or drain.Step 5: Secure the Drain


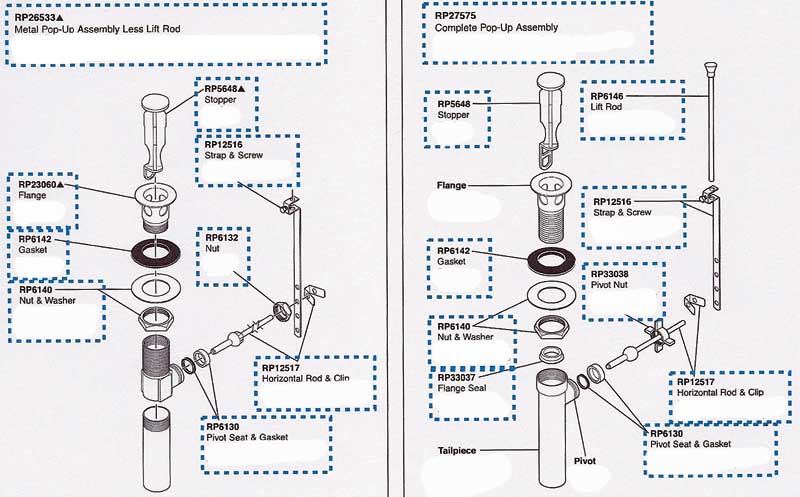
Delta Bathroom Sink Drain Parts


The P-trap is the curved pipe that connects the drain to the plumbing. Use the adjustable pliers to connect this pipe to the drain and the wall plumbing. Make sure all connections are secure and there are no leaks.Step 6: Connect the P-Trap


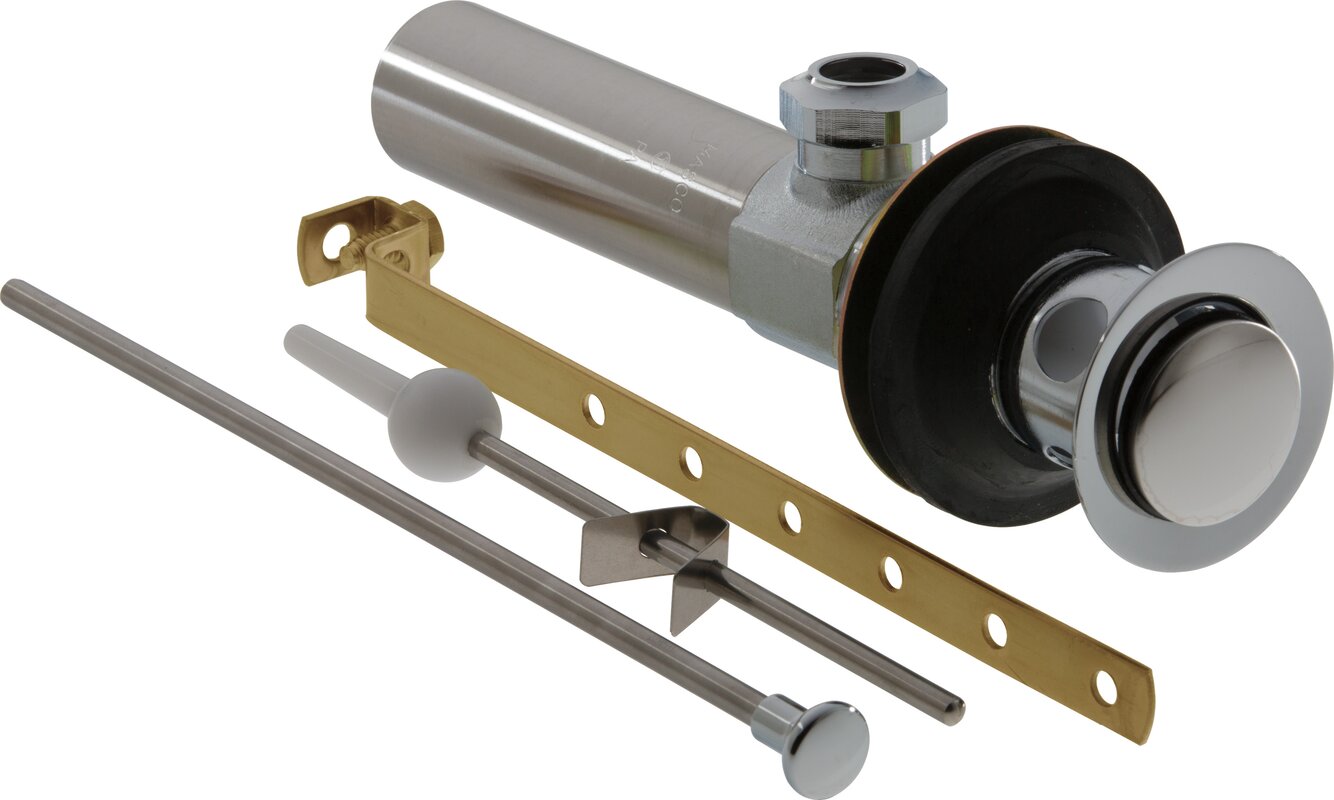
Delta Bathroom Sink Drain Stopper


Most Delta drains come with a pop-up drain stopper that is controlled by a lever on the faucet. Follow the manufacturer's instructions to install the stopper properly. Test it to make sure it opens and closes smoothly.Step 7: Install the Drain Stopper


Delta Bathroom Sink Drain Installation Video

Turn on the water and let it run for a few minutes to check for any leaks. If you notice any, tighten the connections or apply more plumber's putty as needed.Step 8: Test for Leaks


Delta Bathroom Sink Drain Installation Instructions
Congratulations, you have successfully installed your new Delta bathroom sink drain! Enjoy a clog-free and stylish sink with the added convenience of a pop-up drain stopper.Step 9: Enjoy Your New Drain
Delta Bathroom Sink Drain Installation Kit


Installing a Delta Drain Bathroom Sink: A Step-by-Step Guide

Creating a Functional and Stylish Bathroom Design
 When it comes to designing or remodeling a bathroom, the sink is often one of the most important elements to consider. Not only does it serve a functional purpose, but it can also add style and character to the overall design of the space. That's why choosing the right sink and ensuring proper installation is crucial. If you have chosen a
Delta drain bathroom sink
for your project, you're in luck. This popular brand offers a variety of stylish and high-quality sink options, and with this
1 1 4 installation
guide, you'll have your new sink up and running in no time.
When it comes to designing or remodeling a bathroom, the sink is often one of the most important elements to consider. Not only does it serve a functional purpose, but it can also add style and character to the overall design of the space. That's why choosing the right sink and ensuring proper installation is crucial. If you have chosen a
Delta drain bathroom sink
for your project, you're in luck. This popular brand offers a variety of stylish and high-quality sink options, and with this
1 1 4 installation
guide, you'll have your new sink up and running in no time.
Gather Your Tools and Materials
 Before you begin the installation process, it's important to make sure you have all the necessary tools and materials. These may include a
drain wrench
,
plumber's putty
,
plumber's tape
,
adjustable wrench
,
screwdriver
, and
silicone caulking
. It's also a good idea to have a
bucket
and
rags
on hand to catch any water that may spill.
Before you begin the installation process, it's important to make sure you have all the necessary tools and materials. These may include a
drain wrench
,
plumber's putty
,
plumber's tape
,
adjustable wrench
,
screwdriver
, and
silicone caulking
. It's also a good idea to have a
bucket
and
rags
on hand to catch any water that may spill.
Remove Old Sink and Prepare the Area
 If you are replacing an old sink, start by shutting off the water supply and disconnecting the
water lines
and
drain pipe
. Then, remove the old sink and clean the area thoroughly. If you are installing a new sink in a brand new space, make sure all the necessary plumbing lines are in place and the area is clean and level.
If you are replacing an old sink, start by shutting off the water supply and disconnecting the
water lines
and
drain pipe
. Then, remove the old sink and clean the area thoroughly. If you are installing a new sink in a brand new space, make sure all the necessary plumbing lines are in place and the area is clean and level.
Install the Drain Assembly
 Start by attaching the
drain assembly
to the sink using the
rubber gasket
and
locknut
. Apply a thin layer of
plumber's putty
around the drain opening to create a watertight seal. Place the sink onto the countertop and secure it in place with the provided
fastening clips
. Then, connect the
drain pipe
to the assembly and tighten all connections with the
drain wrench
.
Start by attaching the
drain assembly
to the sink using the
rubber gasket
and
locknut
. Apply a thin layer of
plumber's putty
around the drain opening to create a watertight seal. Place the sink onto the countertop and secure it in place with the provided
fastening clips
. Then, connect the
drain pipe
to the assembly and tighten all connections with the
drain wrench
.
Connect the Water Supply
 Next, attach the
water lines
to the
faucet
and tighten with an
adjustable wrench
. Make sure the hot and cold water lines are connected to the correct sides of the faucet. Turn on the water supply and check for any leaks. If there are no leaks, you're ready to move on to the final step.
Next, attach the
water lines
to the
faucet
and tighten with an
adjustable wrench
. Make sure the hot and cold water lines are connected to the correct sides of the faucet. Turn on the water supply and check for any leaks. If there are no leaks, you're ready to move on to the final step.
Apply Caulk and Finishing Touches
 To prevent water from seeping underneath the sink, apply a thin layer of
silicone caulking
around the edges of the sink where it meets the countertop. Smooth out the caulking with your finger or a putty knife. Finally, install the
pop-up drain stopper
and test the sink to make sure it's functioning properly.
Congratulations, you have successfully installed your new
Delta drain bathroom sink
! With proper installation, this sink will not only add functionality to your bathroom, but it will also enhance the overall design. Remember to regularly clean and maintain your sink to keep it looking and functioning its best.
To prevent water from seeping underneath the sink, apply a thin layer of
silicone caulking
around the edges of the sink where it meets the countertop. Smooth out the caulking with your finger or a putty knife. Finally, install the
pop-up drain stopper
and test the sink to make sure it's functioning properly.
Congratulations, you have successfully installed your new
Delta drain bathroom sink
! With proper installation, this sink will not only add functionality to your bathroom, but it will also enhance the overall design. Remember to regularly clean and maintain your sink to keep it looking and functioning its best.