How to Change a Bathroom Sink Washer
Is your bathroom sink constantly dripping? This could be a sign that your washer needs to be replaced. Don't worry, changing a bathroom sink washer is a simple and inexpensive DIY project. With the right tools and a little know-how, you can easily fix that pesky leak and save yourself some money on a plumber. Follow this step-by-step guide for replacing a bathroom sink washer and say goodbye to those annoying drips.
Step-by-Step Guide for Replacing a Bathroom Sink Washer
Changing a bathroom sink washer may seem like a daunting task, but with the right tools and a little patience, you can get the job done in no time. Here's a step-by-step guide to help you through the process.
Step 1: Turn off the water supply. Before you begin, make sure to turn off the water supply to your sink. You can usually find the shut-off valve under the sink or in the main water line.
Step 2: Remove the faucet handle. Use a screwdriver to remove the handle of your faucet. This will give you access to the compression nut and the stem that holds the washer in place.
Step 3: Remove the stem. Once you have removed the faucet handle, use a pair of pliers to loosen and remove the stem. Be sure to keep track of any small parts that may come loose.
Step 4: Remove the old washer. Use a flat-head screwdriver to remove the old washer from the stem. If it's stuck, you may need to use a little force to pry it off.
Step 5: Clean the area. Before installing the new washer, make sure to clean the area thoroughly. Remove any build-up or debris that may be preventing a proper seal.
Step 6: Install the new washer. Place the new washer onto the stem, making sure it is securely in place.
Step 7: Reassemble the faucet. Carefully put the stem and faucet handle back in place, tightening the compression nut with your pliers.
Step 8: Turn the water supply back on. Once everything is reassembled, turn the water supply back on and check for any leaks. If there are still drips, you may need to tighten the compression nut a little more.
Step 9: Test the faucet. Turn on the faucet to make sure it is working properly and that there are no leaks.
Step 10: Clean up. Congratulations, you have successfully changed your bathroom sink washer! Now all that's left to do is clean up any mess and pat yourself on the back for a job well done.
DIY: Replacing a Bathroom Sink Washer
As you can see, changing a bathroom sink washer is a simple DIY project that can save you time and money. With the right tools and a little guidance, you can easily fix a leaky faucet and prevent any further damage. So next time you notice a drip, don't panic – just follow this step-by-step guide and take care of the problem yourself.
Quick and Easy Fix: Changing a Bathroom Sink Washer
No one wants to deal with a leaky faucet, but luckily, changing a bathroom sink washer is a quick and easy fix. With just a few simple steps, you can have your sink back to normal in no time. So instead of putting up with that annoying drip, take a few minutes to replace your old washer and enjoy a leak-free bathroom sink.
Essential Tools for Changing a Bathroom Sink Washer
Before you start changing your bathroom sink washer, make sure you have all the necessary tools. Here's a list of essential tools you'll need for this project:
Troubleshooting Common Issues with Bathroom Sink Washers
While changing a bathroom sink washer is a fairly straightforward process, there are some common issues that may arise. Here are a few troubleshooting tips to help you along the way:
Tips for Choosing the Right Washer for Your Bathroom Sink
When it comes to choosing a washer for your bathroom sink, there are a few things to keep in mind. Here are some tips to help you make the right choice:
Preventing Leaks: Importance of Regularly Changing Bathroom Sink Washers
It may not seem like a big deal, but a leaky faucet can waste a significant amount of water and increase your water bill. That's why it's important to regularly change your bathroom sink washer to prevent leaks. By doing so, you'll not only save money but also conserve water and help the environment.
How Often Should You Change Your Bathroom Sink Washer?
The frequency of changing your bathroom sink washer will depend on several factors, such as the quality of the washer and how often the sink is used. However, it's generally recommended to change your washer every 6-12 months to ensure it is in good condition and prevent any potential leaks.
Professional vs. DIY: Pros and Cons of Changing a Bathroom Sink Washer
When it comes to changing a bathroom sink washer, you may be wondering whether it's better to hire a professional or do it yourself. Here are some pros and cons to consider for each option:
Changing a Bathroom Sink Washer: A Simple Fix for a Common Problem

When it comes to house design, the bathroom is one of the most important spaces that can greatly impact the overall aesthetic and functionality of a home. However, even the most well-designed bathrooms can encounter issues, such as a leaky sink. This may seem like a daunting problem, but in reality, it can be easily fixed by replacing the sink washer . In this article, we will guide you through the simple steps to changing a bathroom sink washer, saving you time and money from calling a plumber.
The Importance of a Well-Functioning Sink

A sink is an essential fixture in any bathroom, used for tasks such as washing your hands, brushing your teeth, and even doing your makeup. A leaky sink not only causes an inconvenience but can also lead to water damage and higher water bills. This is why it is important to address the issue as soon as possible.
Identifying the Problem
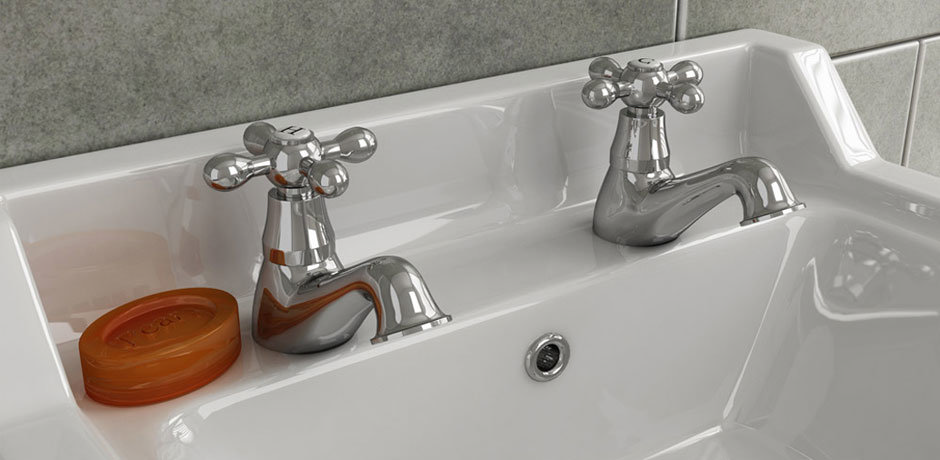
The first step in changing a bathroom sink washer is to identify the problem. If you notice water constantly dripping from the faucet, chances are the sink washer needs to be replaced. This small rubber or plastic ring is located at the bottom of the faucet and is responsible for creating a watertight seal. Over time, it can wear out or become damaged, causing leaks.
Gathering the Necessary Tools

Before starting the replacement process, make sure you have the necessary tools on hand. These include an adjustable wrench, pliers, a screwdriver, and a new sink washer that fits your faucet. It's important to note that different faucets may require different types of washers, so be sure to check the size and type of washer needed for your specific faucet.
Replacing the Sink Washer

Once you have the tools and new sink washer ready, it's time to start the replacement process. First, turn off the water supply to the sink by shutting off the valves located under the sink. Next, use the adjustable wrench to unscrew the nut that holds the handle onto the faucet. Once the handle is removed, use the pliers to remove the retaining clip that holds the sink washer in place. Take out the old washer and replace it with the new one. Finally, reassemble the handle and turn the water supply back on to test for any leaks.
Conclusion

Changing a bathroom sink washer may seem like a daunting task, but with the right tools and a little know-how, it can be easily done. By following the simple steps outlined in this article, you can save yourself time and money from calling a plumber. Keep in mind that regular maintenance and prompt repairs can prevent larger and more costly issues in the future. With a well-functioning sink, your bathroom will not only look great but also be more functional and efficient.











:max_bytes(150000):strip_icc()/what-is-under-the-bathroom-sink-3973574-03-c2c800c743054899aca9bdcc0535db34.jpg)


