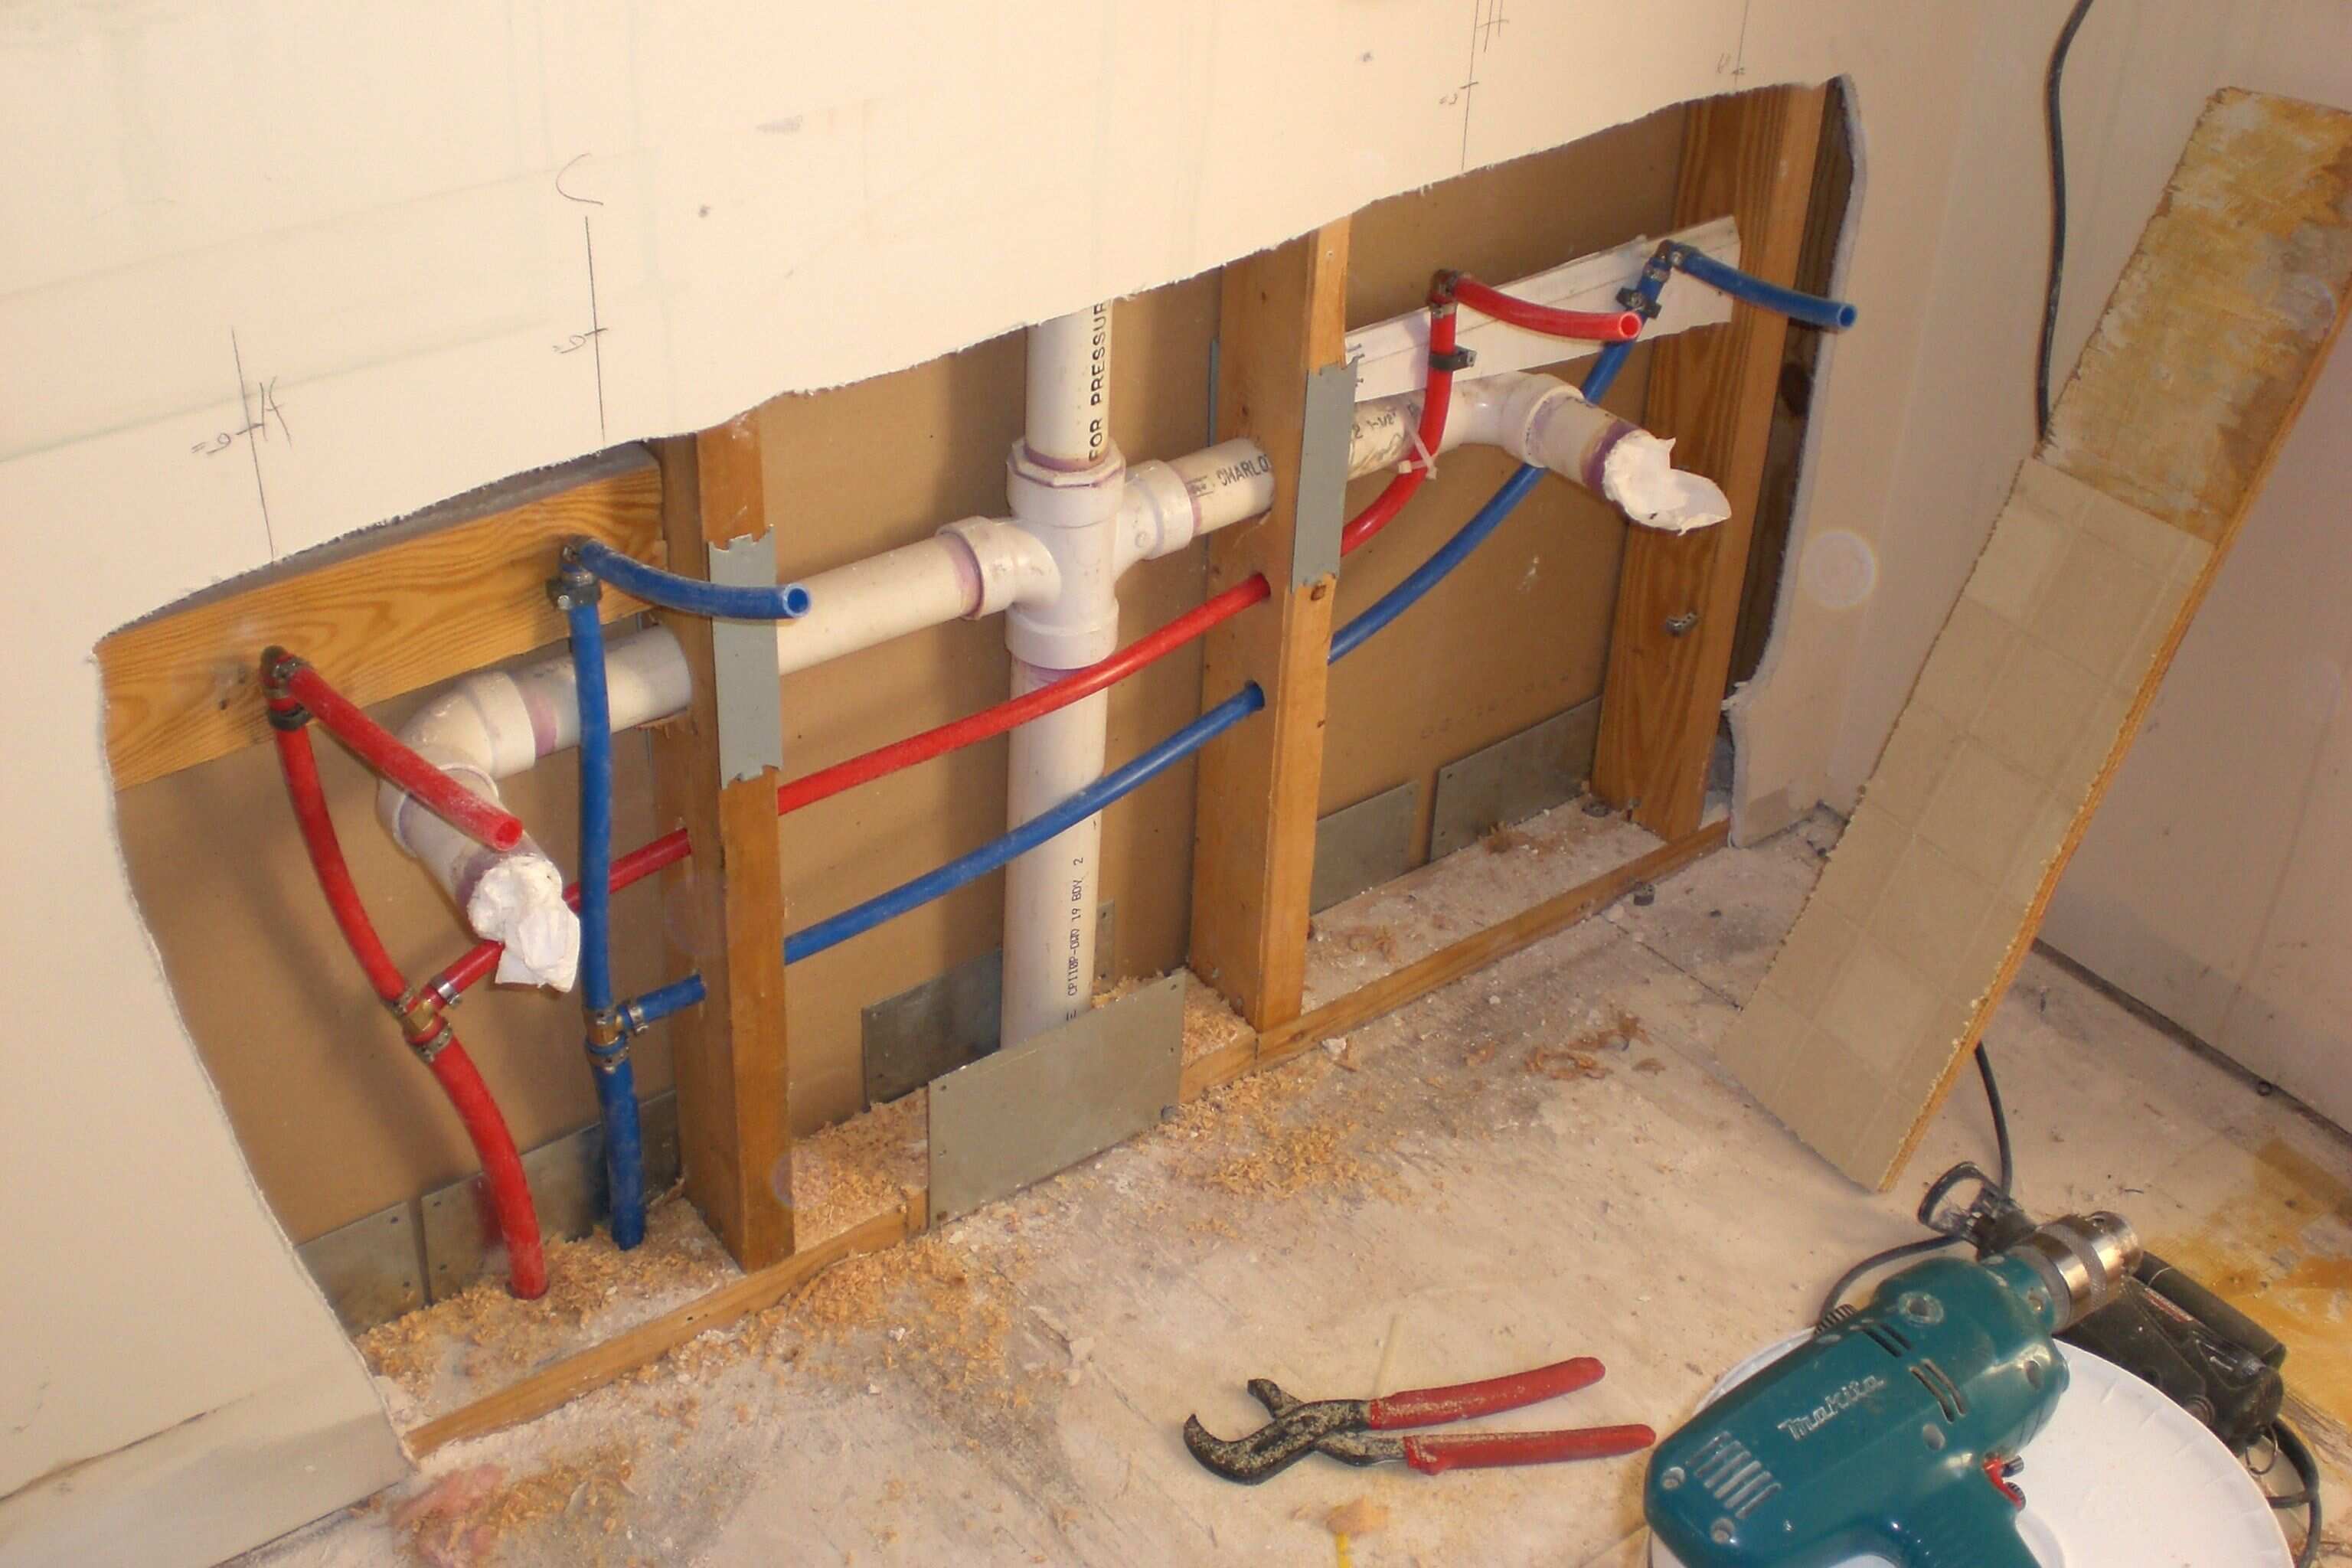
Bathroom Sink Rough In: The First Step in Bathroom Renovation
If you're planning to renovate your bathroom, one of the first things you'll need to consider is the rough in for your bathroom sink. This may not be the most glamorous aspect of your renovation, but it's an essential part of ensuring your sink functions properly and looks great. In this guide, we'll cover everything you need to know about bathroom sink rough in, from installation to plumbing and more.
Bathroom Sink Installation: A Step-by-Step Guide
The first step in the bathroom sink rough in process is installation. Installing a bathroom sink may seem daunting, but with the right tools and a bit of know-how, it can be a relatively simple task. Here's a step-by-step guide to help you with your bathroom sink installation.
Step 1: Gather all the necessary tools and materials, including a sink, faucet, drain assembly, plumber's putty, and a wrench.
Step 2: Measure and mark the sink's location on the wall, making sure it's centered and level.
Step 3: Cut a hole in the vanity or countertop using a jigsaw, following the marked lines.
Step 4: Place the sink into the hole and secure it with clips or brackets, depending on the sink type.
Step 5: Install the faucet according to the manufacturer's instructions.
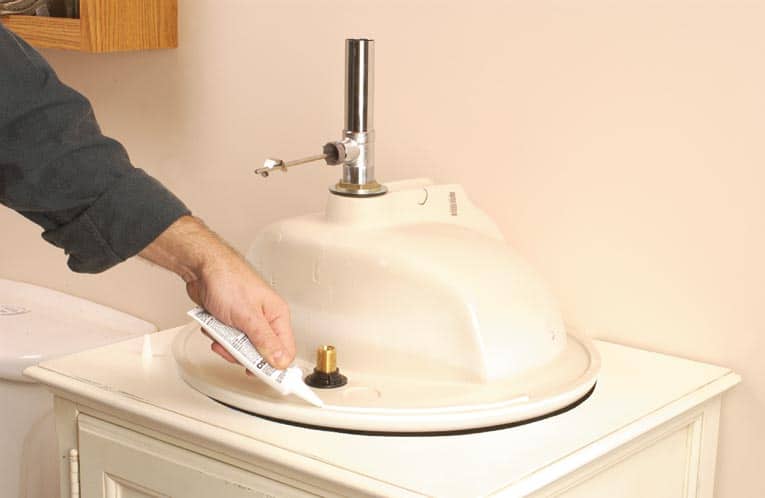
Step 6: Install the drain assembly, using plumber's putty to create a watertight seal.
Step 7: Connect the water supply lines to the faucet and turn on the water to test for any leaks.
With these steps, you can have your new bathroom sink installed in no time.
Bathroom Sink Plumbing: Connecting the Drain
Once the sink is installed, the next step in the bathroom sink rough in process is connecting the drain. This is an important step, as it ensures that your sink properly drains water and prevents any potential plumbing issues. Follow these steps for proper bathroom sink drain installation.
Step 1: Measure and cut the drain pipe to the correct length, leaving enough room for the P-trap to fit in between the sink and the wall.
Step 2: Install the P-trap, connecting it to the sink's drain and the wall's drain pipe.
Step 3: Use plumber's tape to secure all connections and prevent any leaks.
Step 4: Test the sink by running water and checking for any leaks. Make any necessary adjustments to ensure proper drainage.
By following these steps, you can ensure that your bathroom sink's plumbing is properly installed and functioning.
Bathroom Sink Drain Rough In: Important Measurements and Dimensions
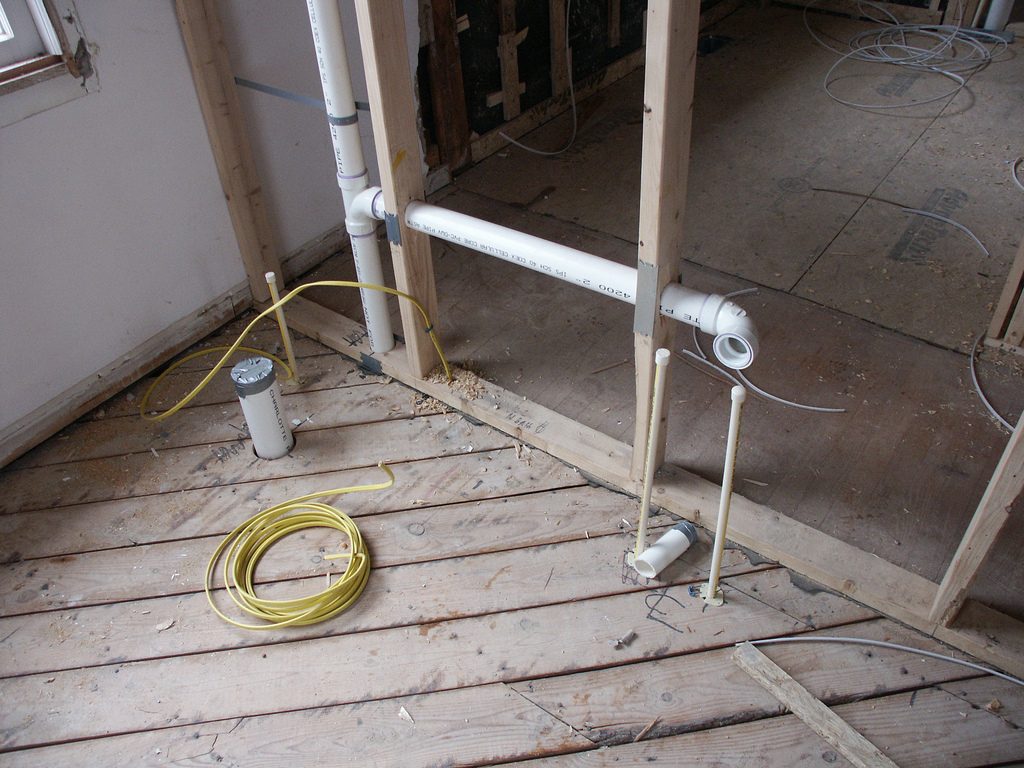
When it comes to bathroom sink rough in, there are a few important measurements and dimensions to keep in mind. These will help you ensure that your sink is properly installed and that all plumbing connections are made correctly.
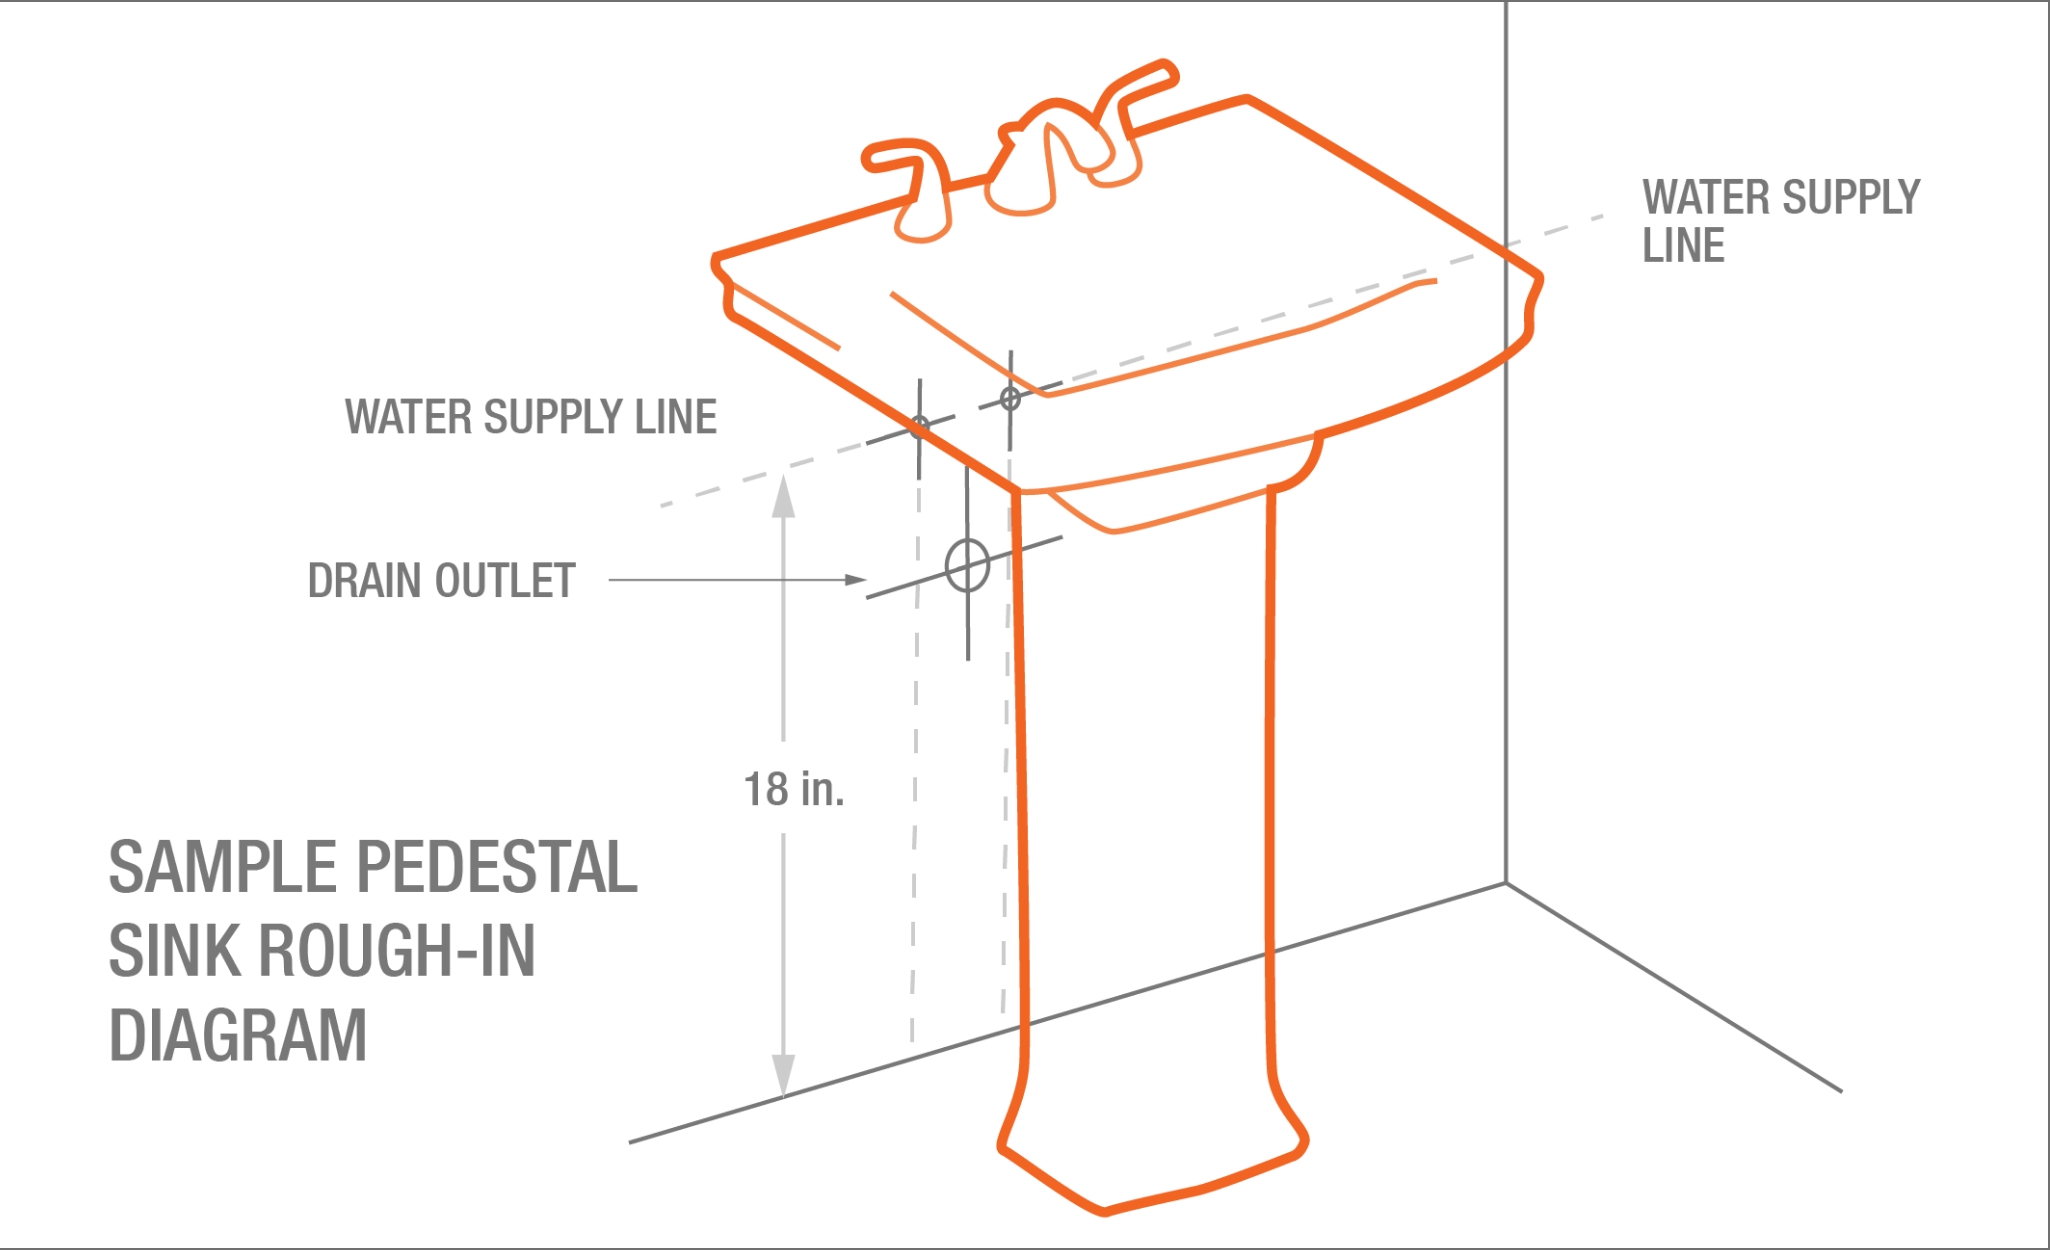
Drain Rough In Height: The standard height for a bathroom sink drain rough in is 24 inches from the floor.
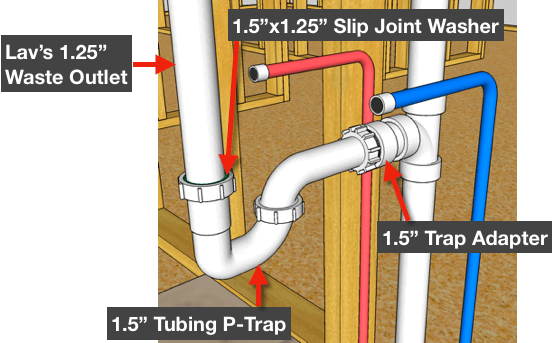
Drain Rough In Dimensions: The standard dimensions for a bathroom sink drain rough in are 1.25 inches for the drain pipe and 1.5 inches for the P-trap.
Drain Rough In Plumbing: The plumbing for a bathroom sink drain rough in should be installed with a slight downward slope to ensure proper drainage.
By keeping these measurements and dimensions in mind, you can ensure that your bathroom sink is installed correctly and that all plumbing connections are made properly.
Bathroom Sink Drain Rough In: A Helpful Diagram and Instructions
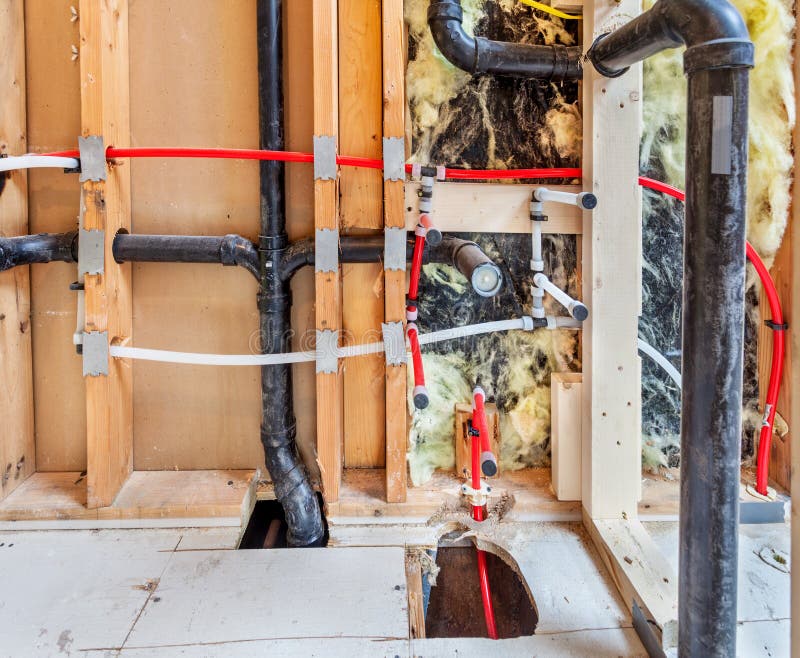
If you're a visual learner, a diagram can be a helpful tool when it comes to bathroom sink drain rough in. Here's a simple diagram to help you visualize the steps outlined above:
Bathroom Sink Drain Rough In: Code Requirements and Regulations
When it comes to bathroom sink rough in, it's important to follow all code requirements and regulations to ensure safety and proper function. Some common codes and regulations to keep in mind include:
Drain Pipe Slope: The drain pipe should slope at a minimum of 1/4 inch per foot to ensure proper drainage.
Drain Pipe Size: The drain pipe should be at least 2 inches in diameter for a bathroom sink.
Trap Arm Length: The trap arm should be at least 2.5 times the pipe's diameter, with a maximum length of 60 inches.
Distance from Vent: The distance between the bathroom sink drain and the vent should be no more than 6 feet.
By following these codes and regulations, you can ensure that your bathroom sink meets all safety and functionality requirements.
Final Thoughts on Bathroom Sink Rough In
Bathroom sink rough in may not be the most exciting part of a bathroom renovation, but it's an essential step to ensure your sink functions properly and looks great. By following the steps outlined in this guide, you can confidently install your bathroom sink and complete your renovation with ease.
Remember to take measurements, follow code regulations, and consult a professional if you're unsure about any aspect of the rough in process. With a little bit of effort and know-how, you can have a beautiful and functional bathroom sink in no time.
The Importance of Having a Bathroom with Two Sinks

Maximizing Space and Efficiency
 When designing a house, one of the most important areas to consider is the bathroom. This is where we start and end our day, and it is essential to have a functional and well-designed space. One of the key features that can greatly enhance a bathroom's functionality is having two sinks. Having two sinks in a bathroom is not just a luxury, but it also has practical benefits that make it a wise investment in your house design. In this article, we will discuss the importance of having a bathroom with two sinks, specifically focusing on the
bathroom 2 sink rough in
concept.
Convenience for Multiple Users
 One of the main reasons why having two sinks in a bathroom is beneficial is convenience. If you live with a partner or have a big family, having two sinks can significantly reduce morning rush hour stress. With two sinks, two people can simultaneously use the bathroom without getting in each other's way. This saves time and eliminates the frustration of waiting for someone to finish using the sink. Additionally, two sinks provide more counter space, allowing each person to have their own designated area for toiletries and personal items.
Increased Property Value
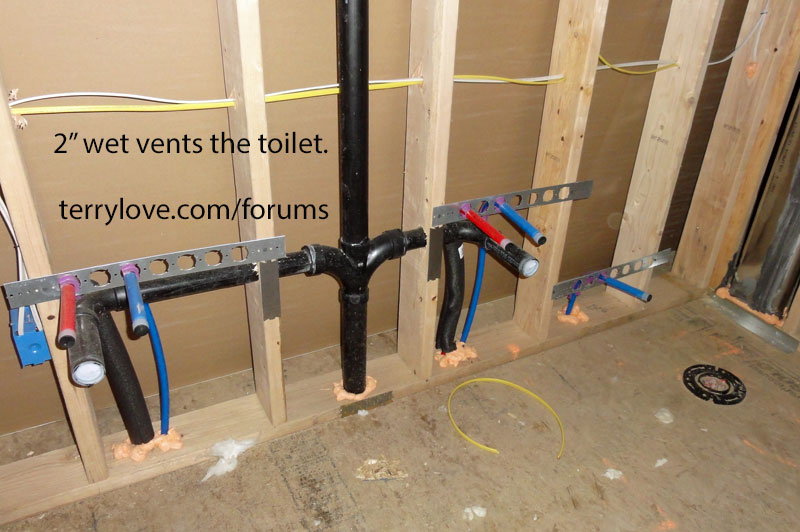 Investing in a bathroom with two sinks is also a smart decision for homeowners looking to increase their property's value. In today's real estate market, having two sinks in a bathroom is considered a desirable feature and can make your house stand out to potential buyers. It is a small but significant detail that can add value to your property and make it more appealing to a wider range of buyers.
Improved Hygiene and Cleanliness
 Having two sinks in a bathroom not only provides convenience for multiple users but also promotes good hygiene and cleanliness. With two sinks, it is easier to separate and organize personal items, reducing the risk of cross-contamination between users. This is especially important for families with young children who may need help with their personal hygiene routines.
Flexibility in Design
 Another advantage of having a bathroom with two sinks is the flexibility it provides in design. With two sinks, you have more options for the layout and design of your bathroom. You can choose to have two separate vanities or a double vanity with two sinks. This allows you to customize your bathroom to your unique style and needs, making it a more functional and aesthetically pleasing space.
In conclusion,
bathroom 2 sink rough in
is an essential element to consider when designing a bathroom. It offers convenience for multiple users, increases property value, promotes good hygiene and cleanliness, and provides flexibility in design. So, if you are in the process of designing or renovating your bathroom, make sure to include two sinks in your plans. It is a small investment that can greatly improve the functionality and value of your home.












/bathroom-sink-drain-installation-2718843-03-6fee5b9d9f7d475abfe06a95ddb1f695.jpg)
/bathroom-sink-drain-installation-2718843-01-4955fe1f576b447a91abe51c126d220b.jpg)
