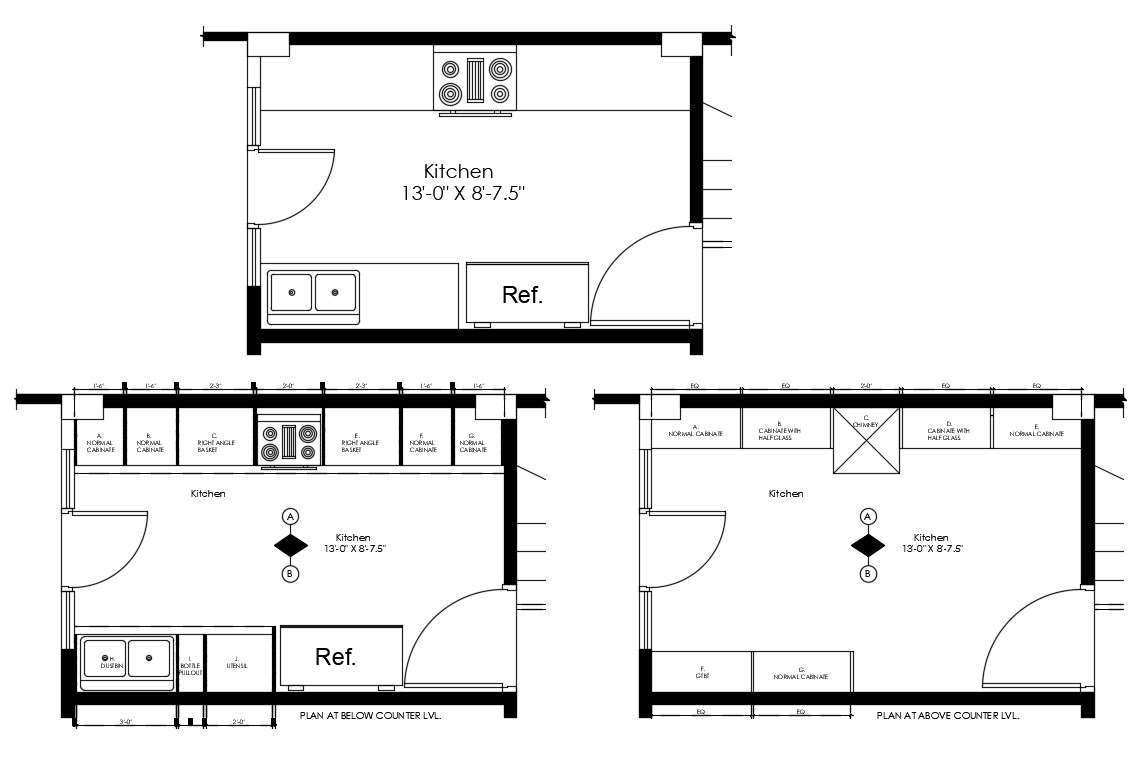
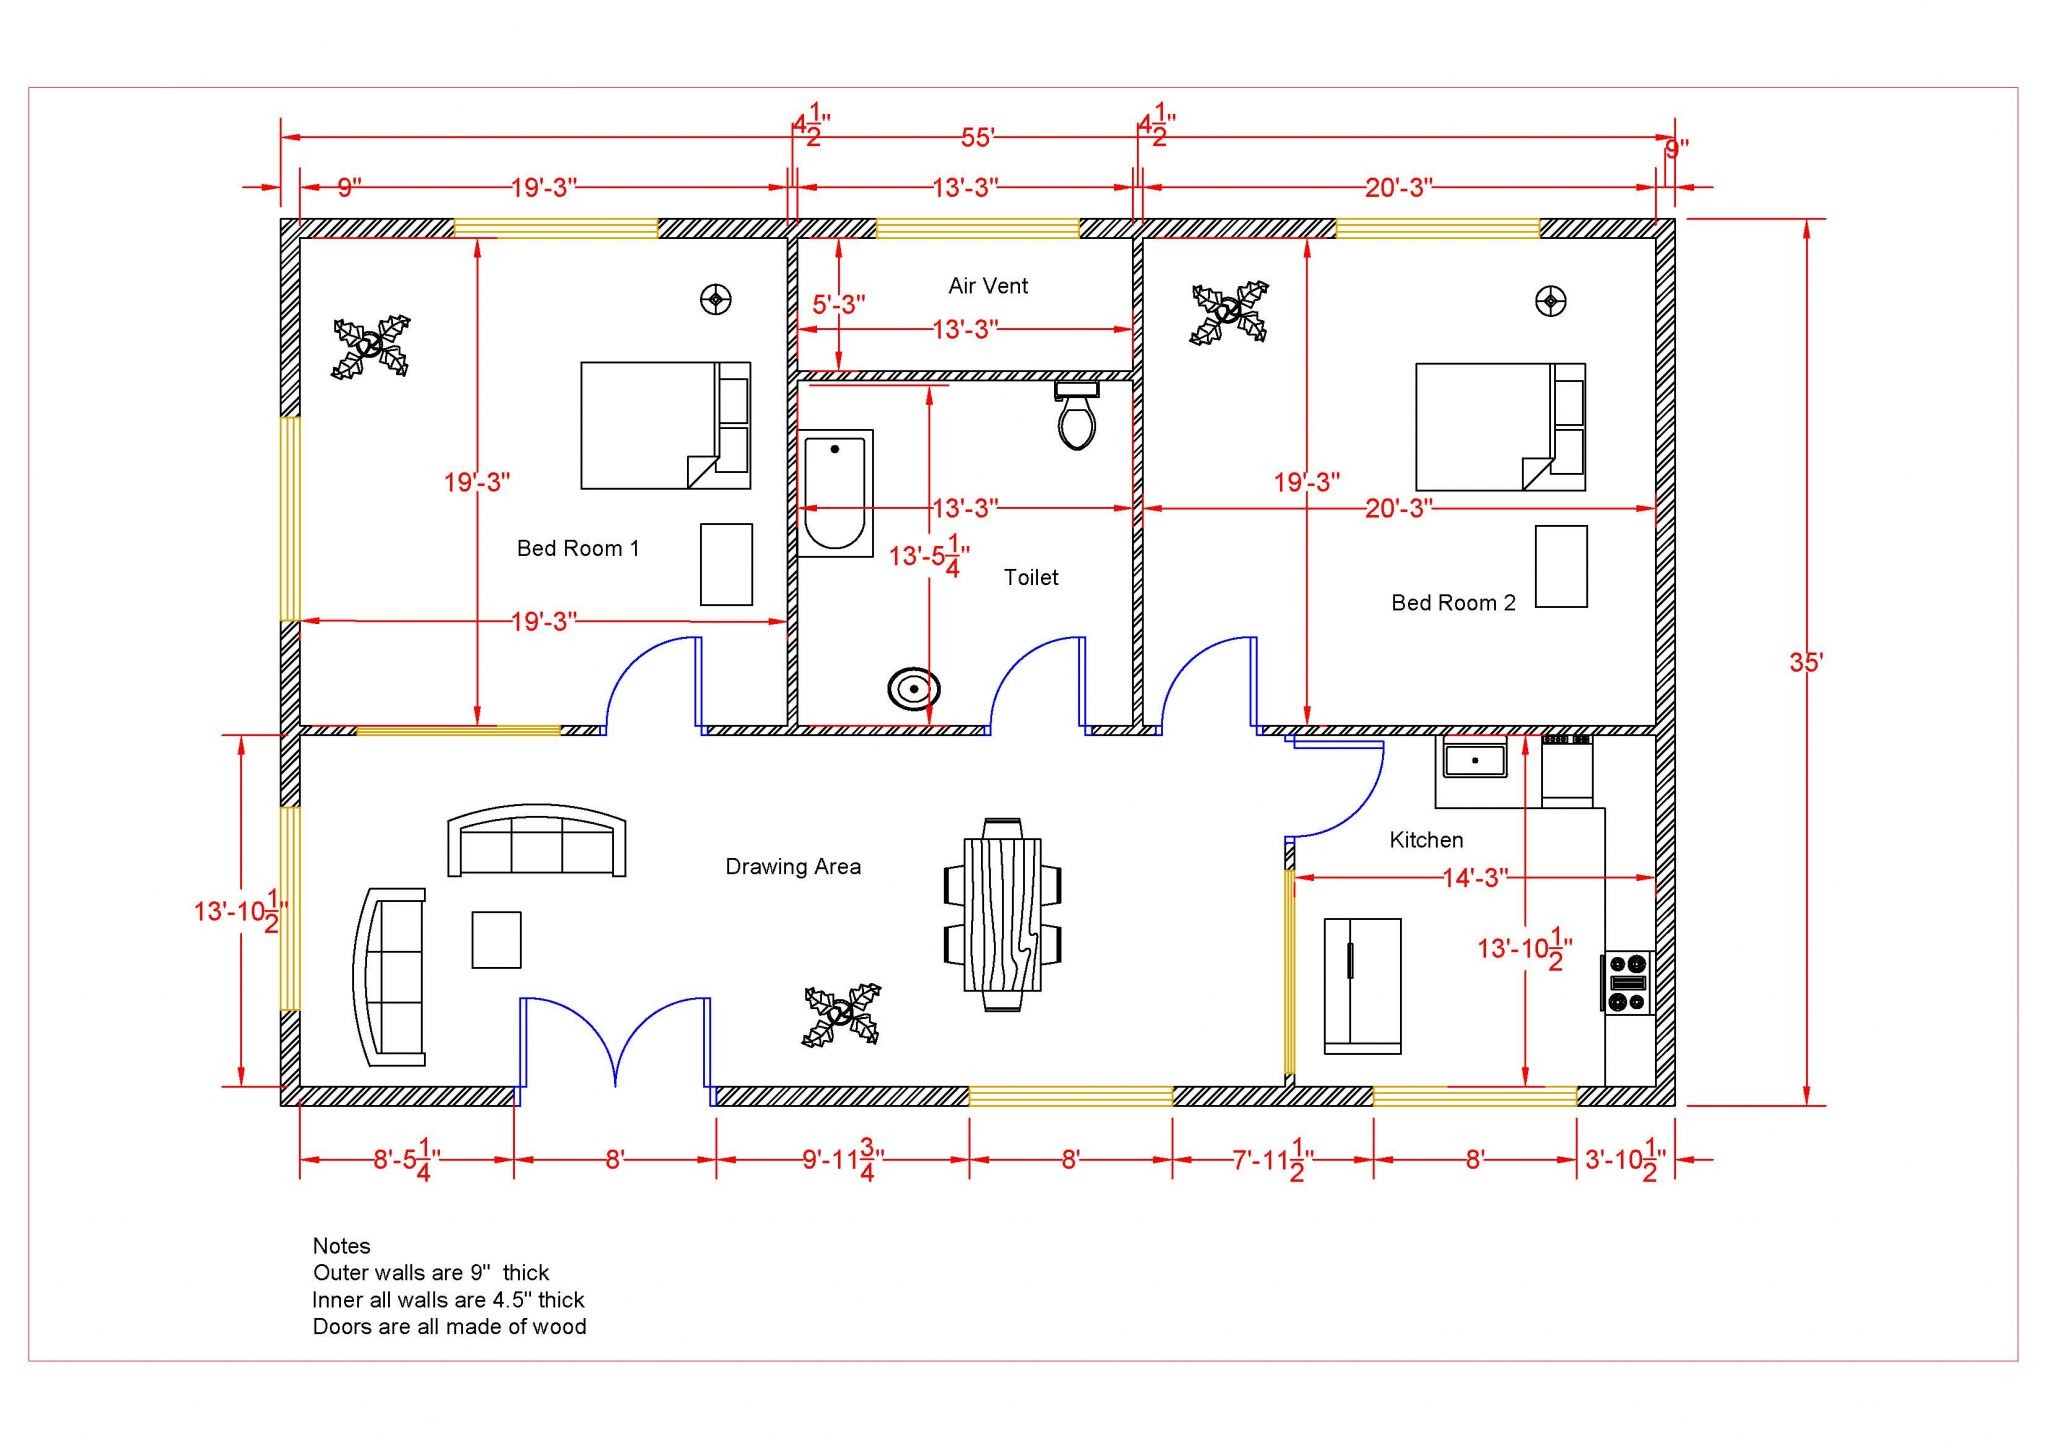
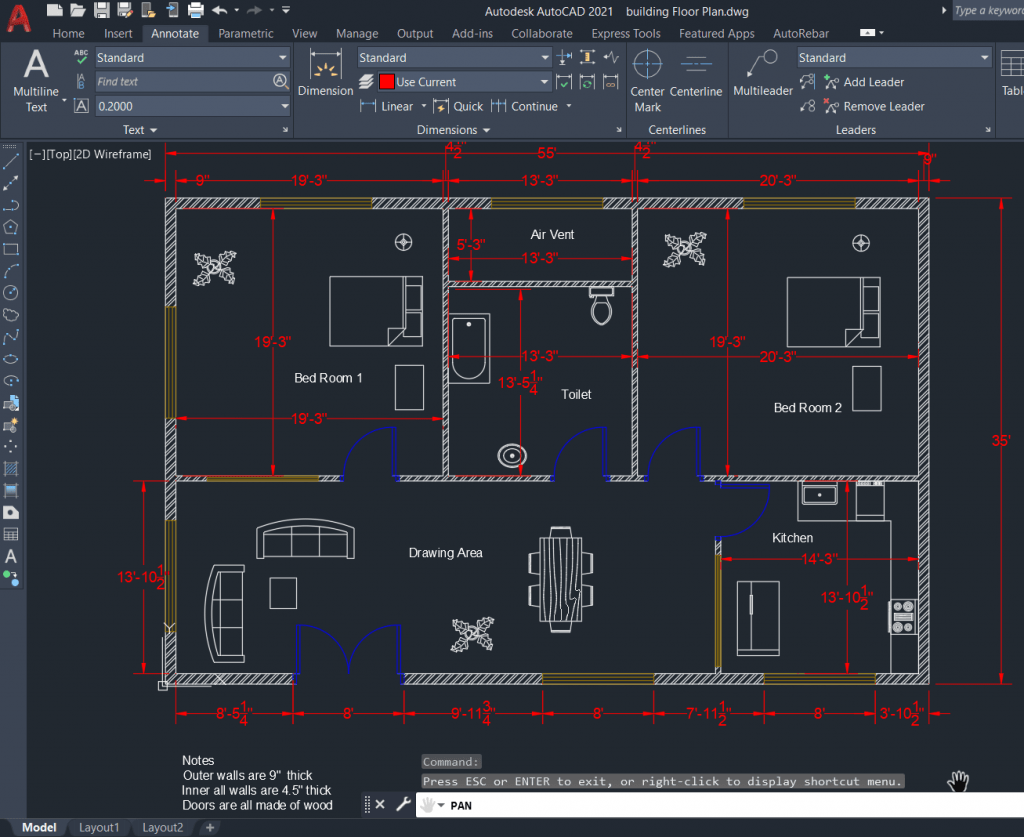
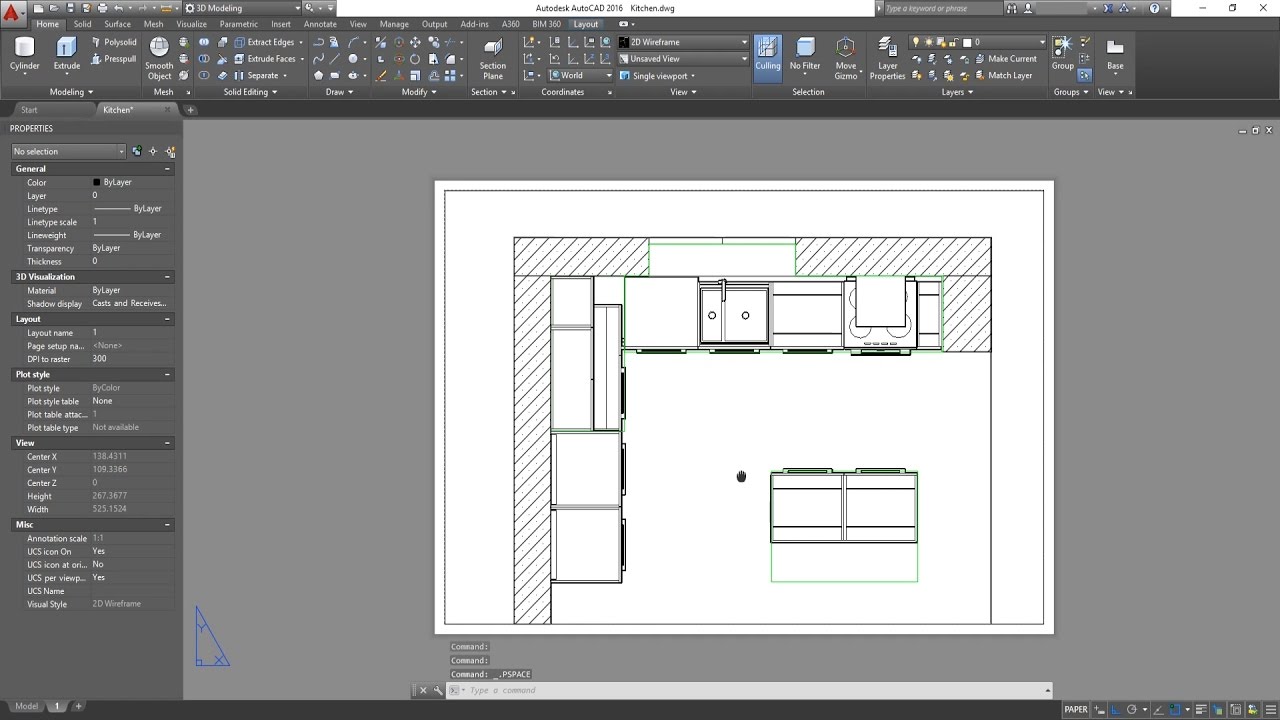
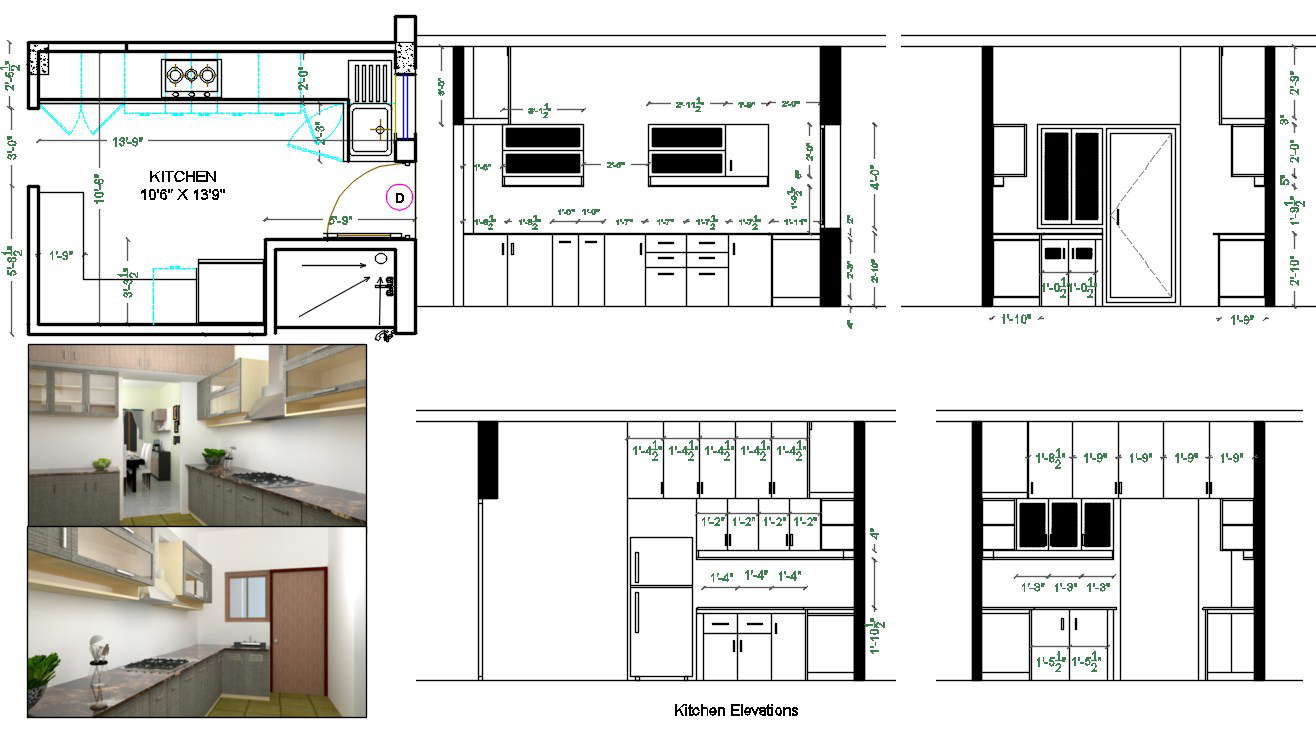
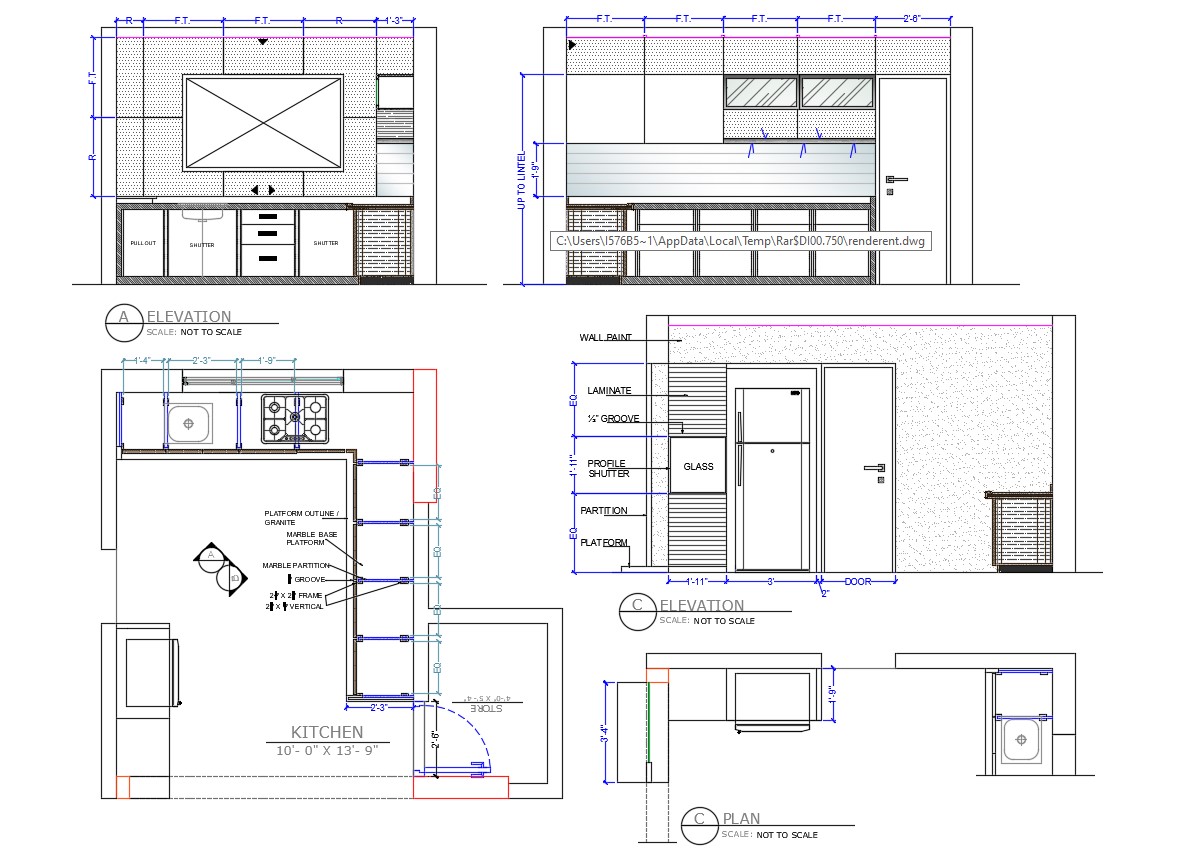
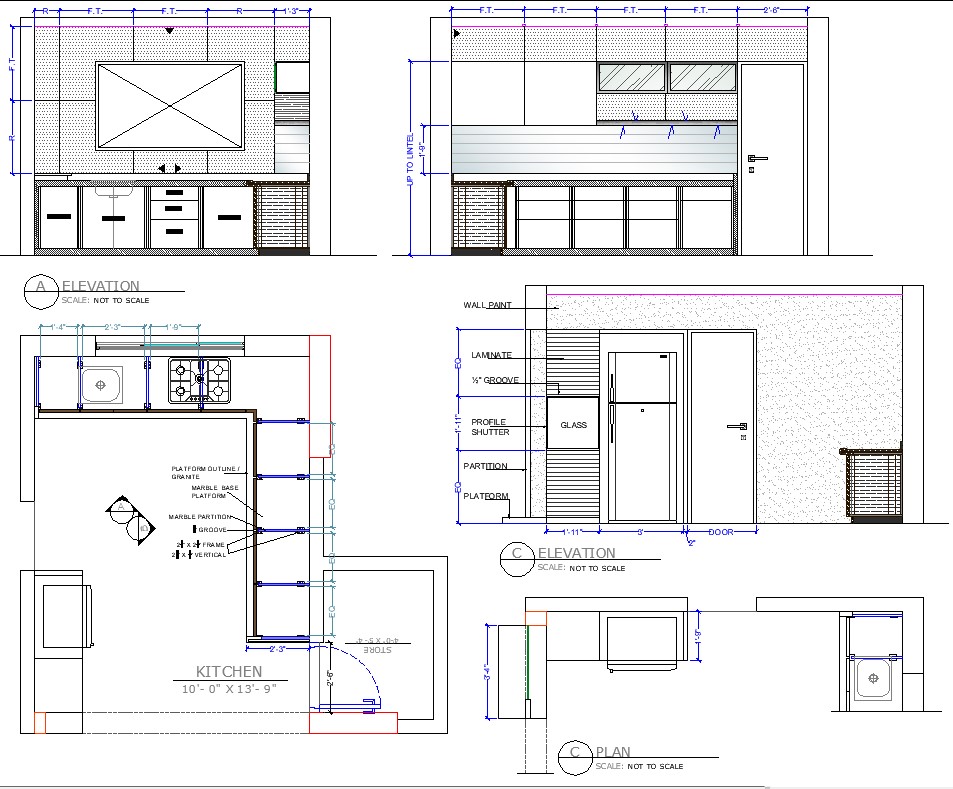
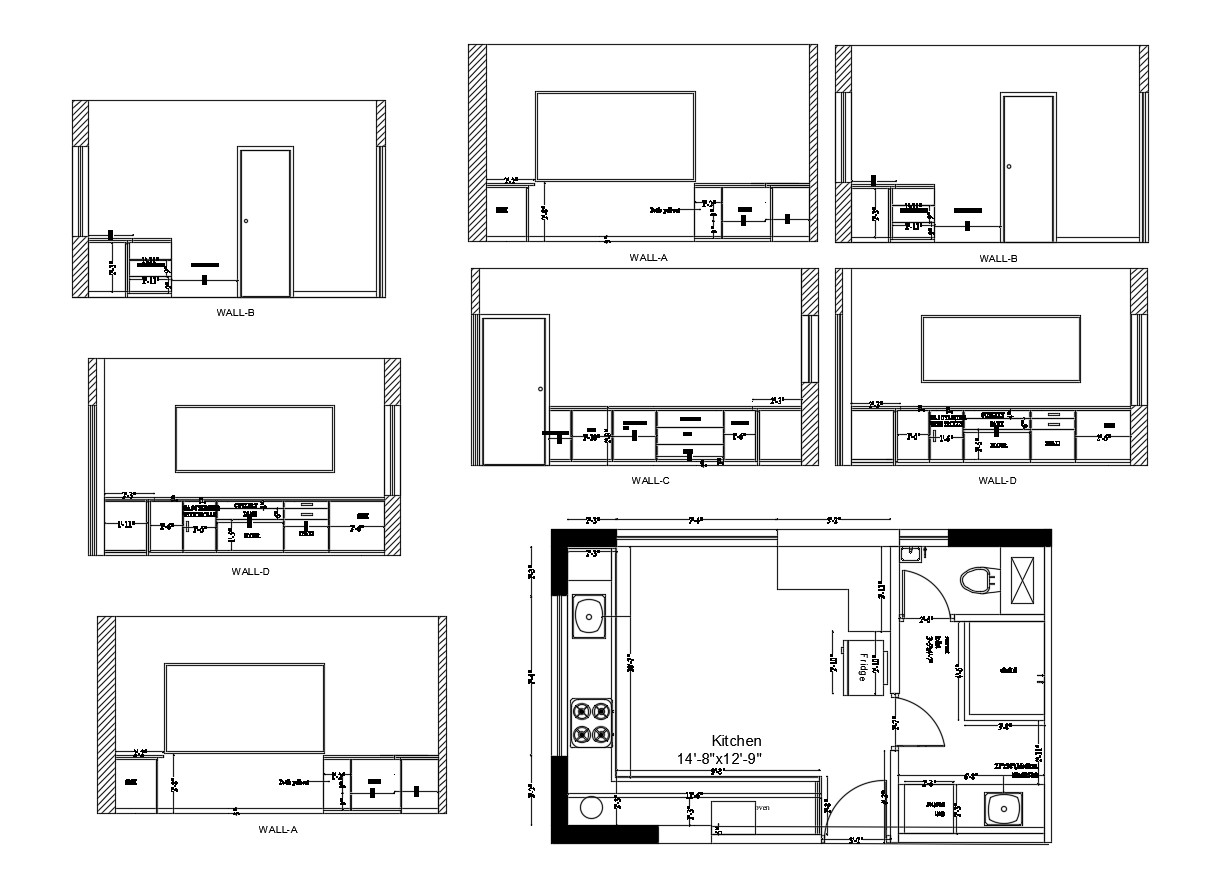
When it comes to designing a kitchen in AutoCAD, creating a basic floor plan is the first step. This will serve as the foundation for your entire design, so it’s important to get it right. To begin, start by setting the scale of your drawing to match the actual measurements of the space. This will ensure accuracy and make it easier to add in the necessary elements later on. Next, use the line tool to draw the walls of your kitchen. Be sure to include any doors, windows, or openings that are present in the space. You can also use the offset tool to create the thickness of the walls. Once you have your walls in place, you can start adding in the different elements of your kitchen, such as cabinets, appliances, and fixtures. Don’t forget to use layers in your drawing to keep things organized. You can create separate layers for walls, cabinets, appliances, and so on, and easily turn them on and off as needed. This will make it easier to make changes or adjustments to your floor plan as you go.1. AutoCAD Kitchen Design Tutorial: Creating Basic Floor Plan


1. AutoCAD Kitchen Design Tutorial: Creating Basic Floor Plan


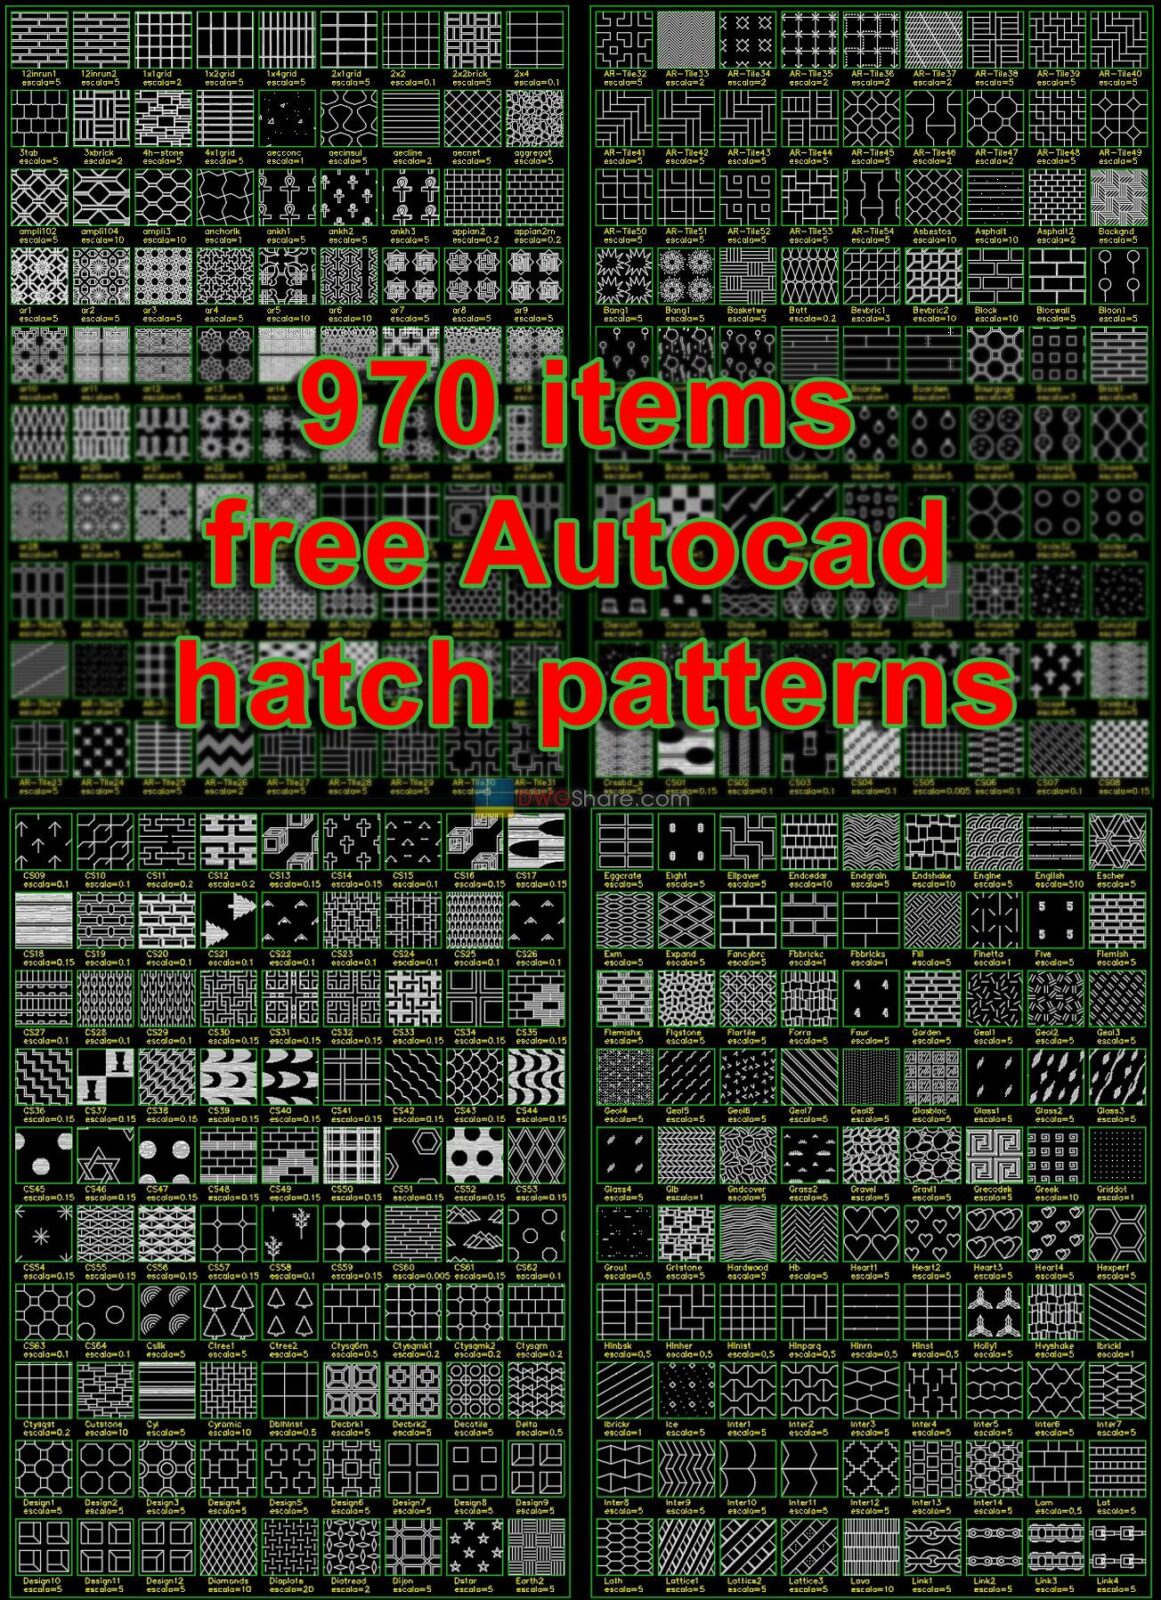
Designing a kitchen in AutoCAD may seem daunting, but with the right tools and techniques, it can be a breeze. One tip is to make use of the grid snap feature, which will help you align objects and elements easily. You can also use the polar tracking feature to ensure that lines are drawn at specific angles, making your design more precise. Another helpful tool is the hatch feature, which allows you to fill in areas with different patterns and textures. This can be useful for things like flooring or backsplashes. Additionally, using blocks for frequently used items, such as cabinets or appliances, can save you time and make your design more consistent. Remember to constantly save your work as you go and don’t be afraid to experiment and try different approaches. With practice, you’ll become more proficient in designing kitchens in AutoCAD.2. How to Design a Kitchen in AutoCAD


2. How to Design a Kitchen in AutoCAD

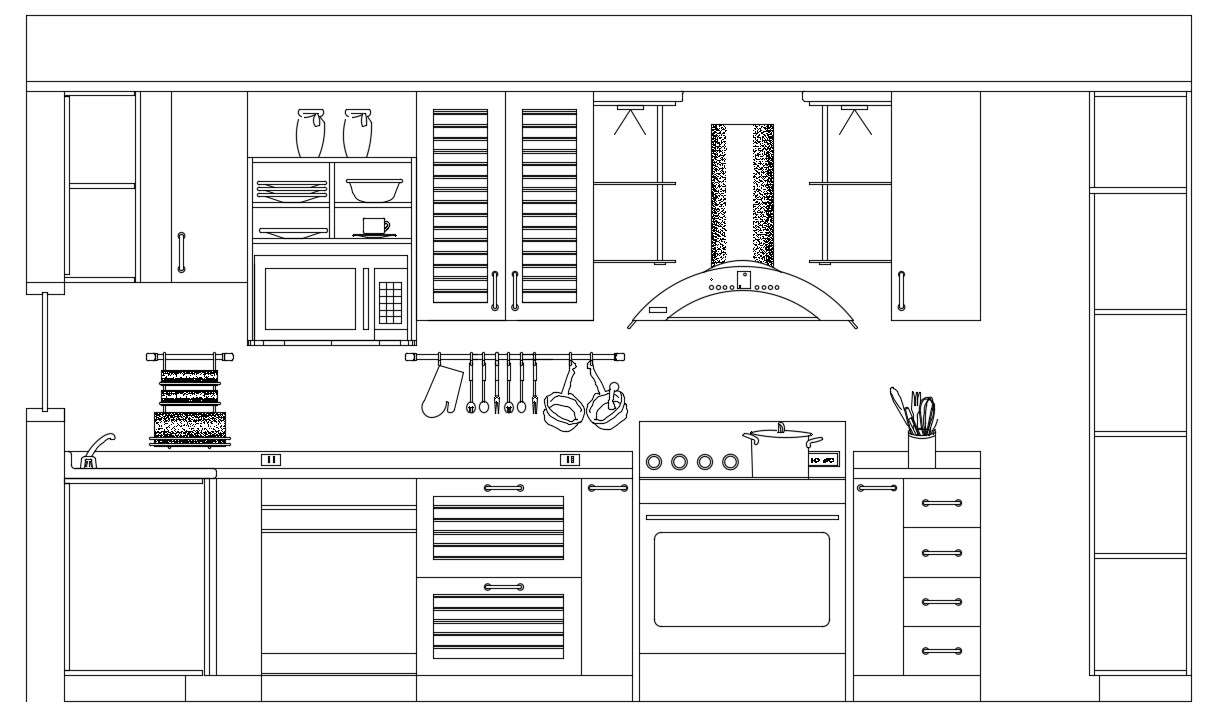


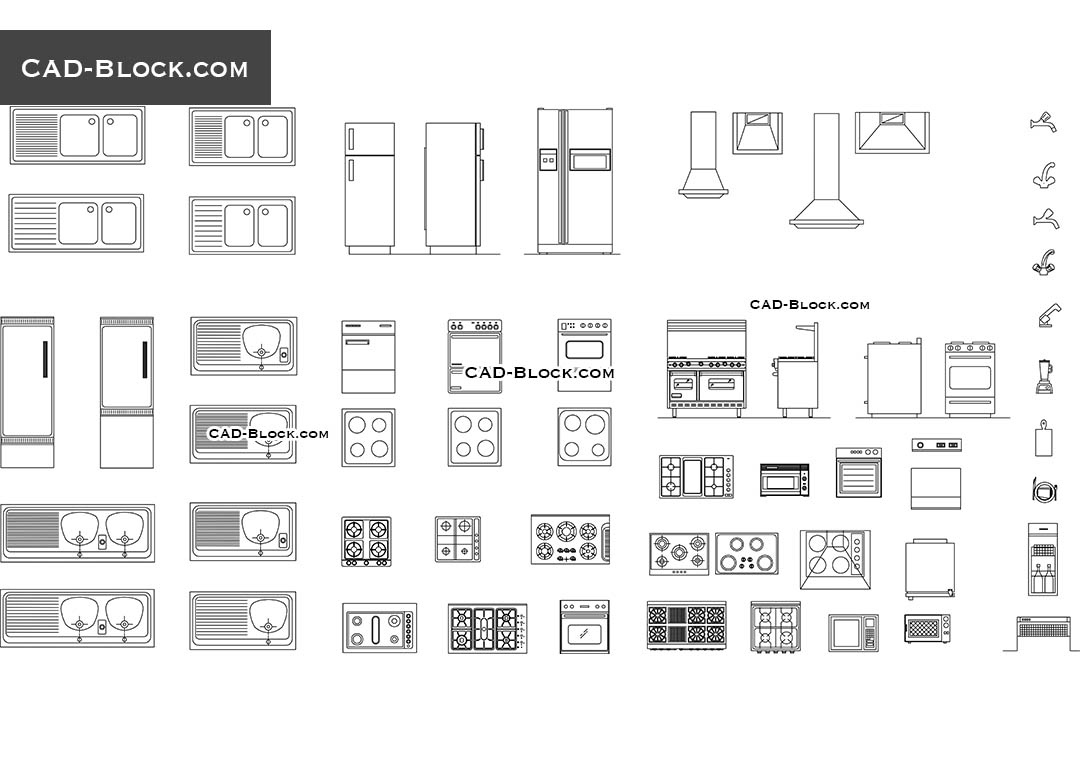
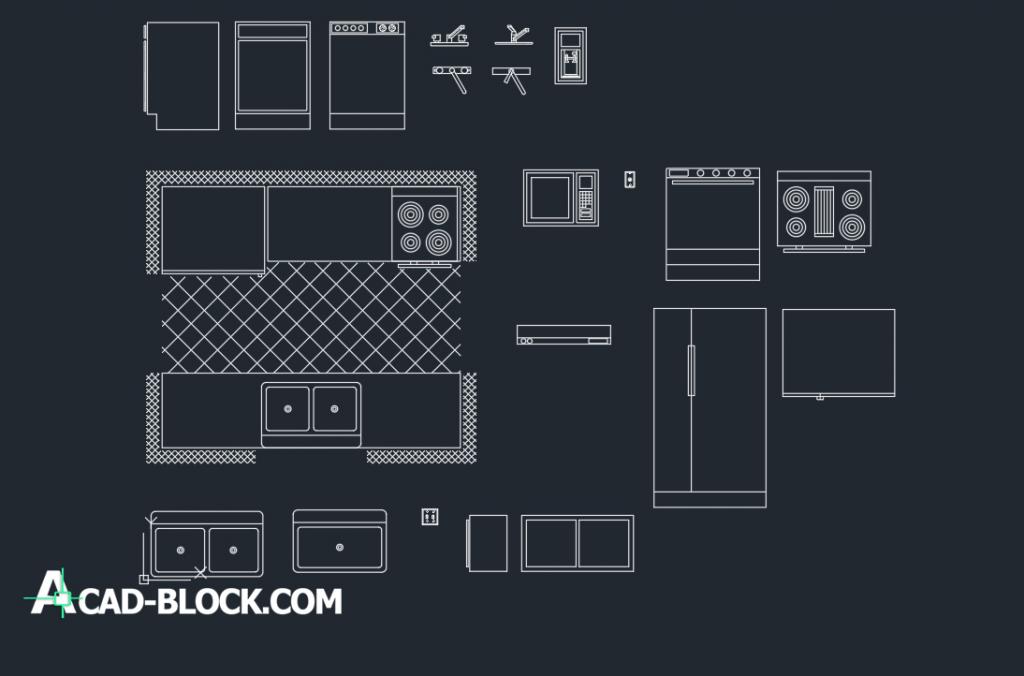
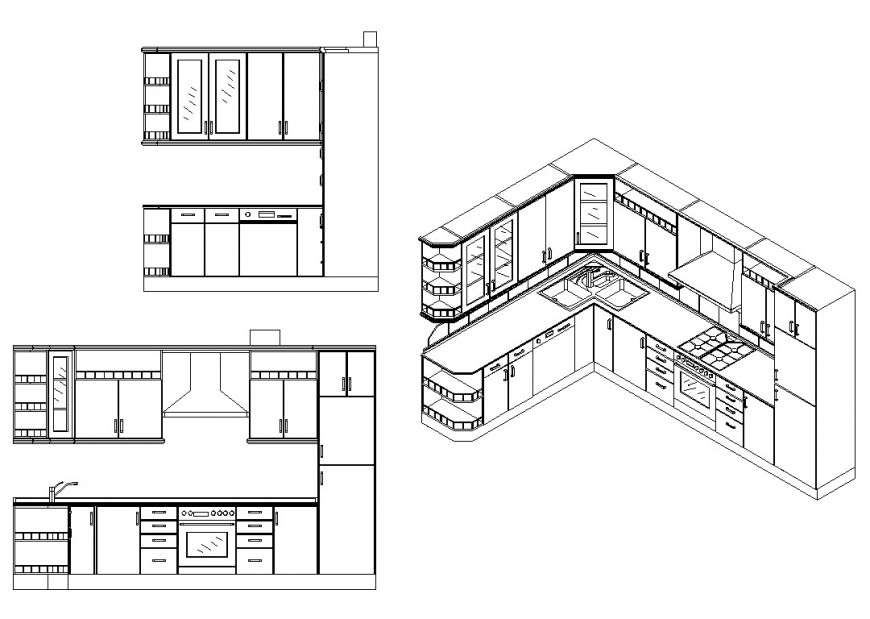
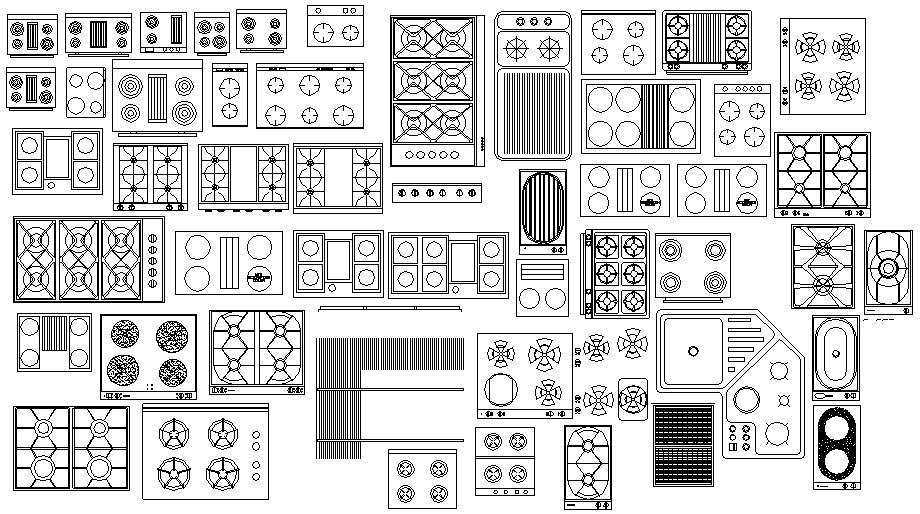
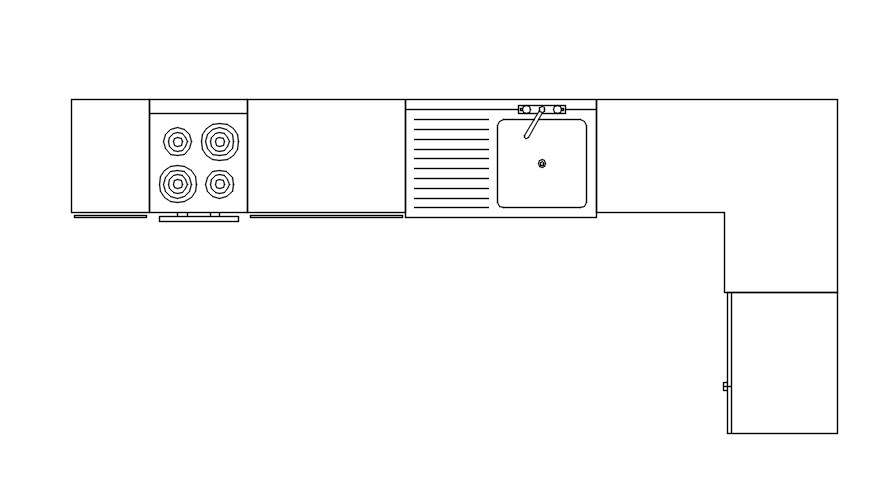
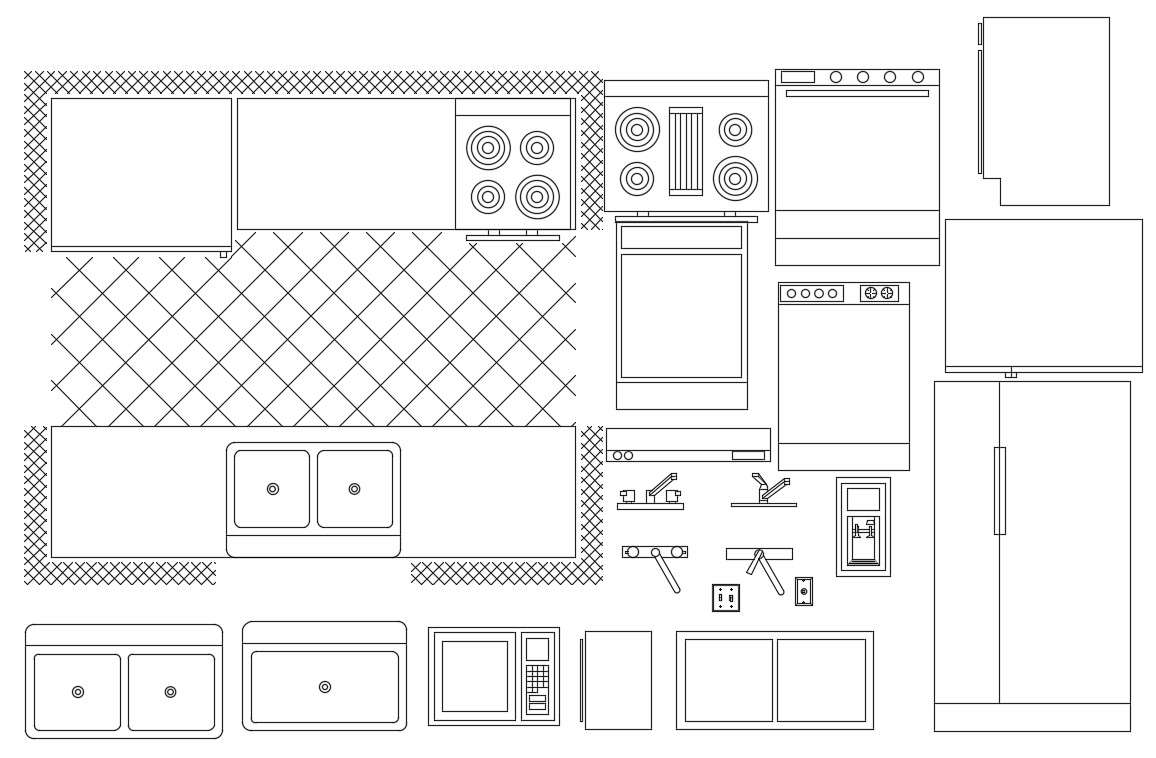
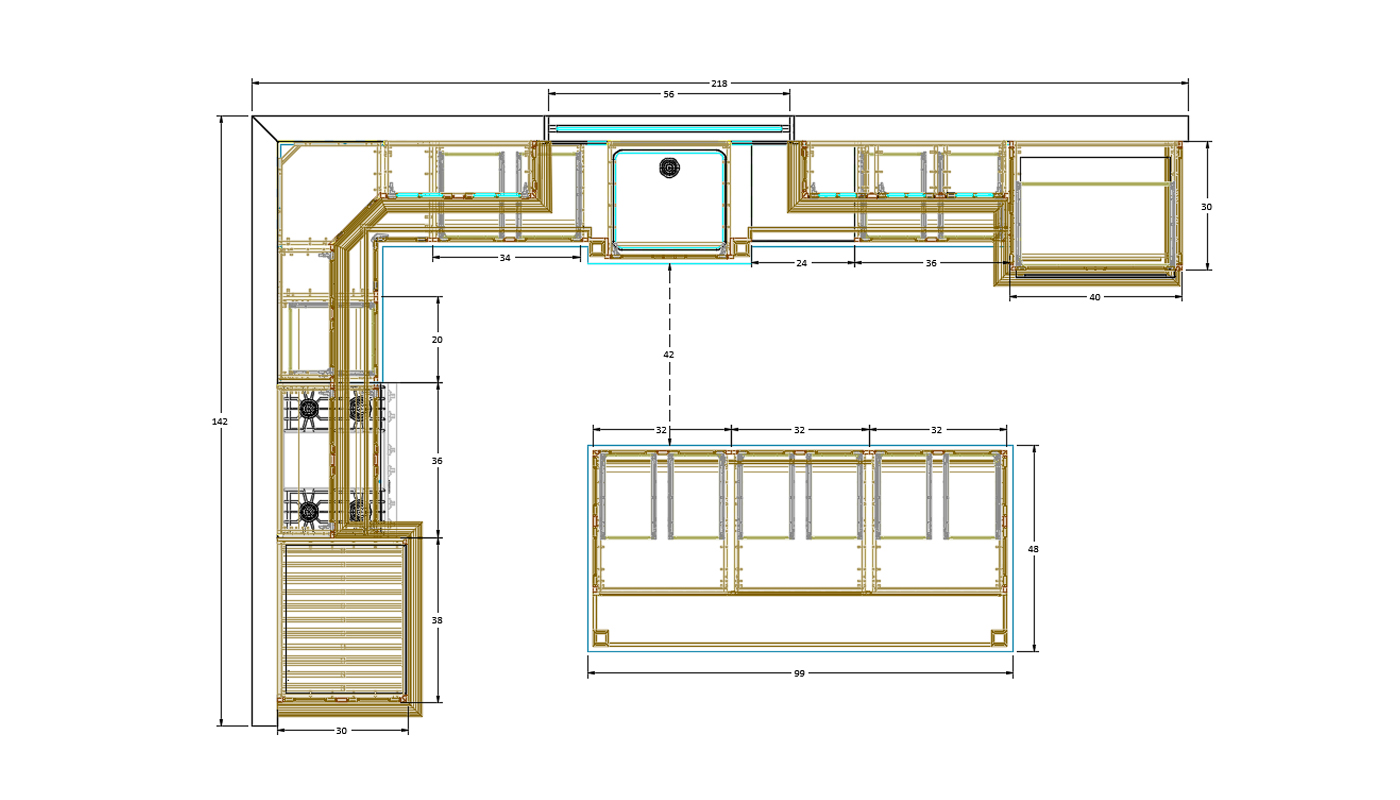
Cabinets and appliances play a crucial role in any kitchen design, and adding them in AutoCAD is a straightforward process. For cabinets, start by drawing the outline of the cabinet using the polyline tool. Then, use the offset tool to create the thickness of the cabinet walls. You can use the hatch tool to fill in the cabinets with color or texture. For appliances, you can either draw them from scratch or use pre-made blocks. If you choose to draw them, make sure to use accurate measurements and pay attention to details such as handles, knobs, and buttons. If you opt for pre-made blocks, make sure to scale them appropriately to fit your design. Adding cabinets and appliances to your kitchen design will give you a better understanding of the layout and help you visualize the final result.3. AutoCAD Kitchen Design Tutorial: Adding Cabinets and Appliances


3. AutoCAD Kitchen Design Tutorial: Adding Cabinets and Appliances
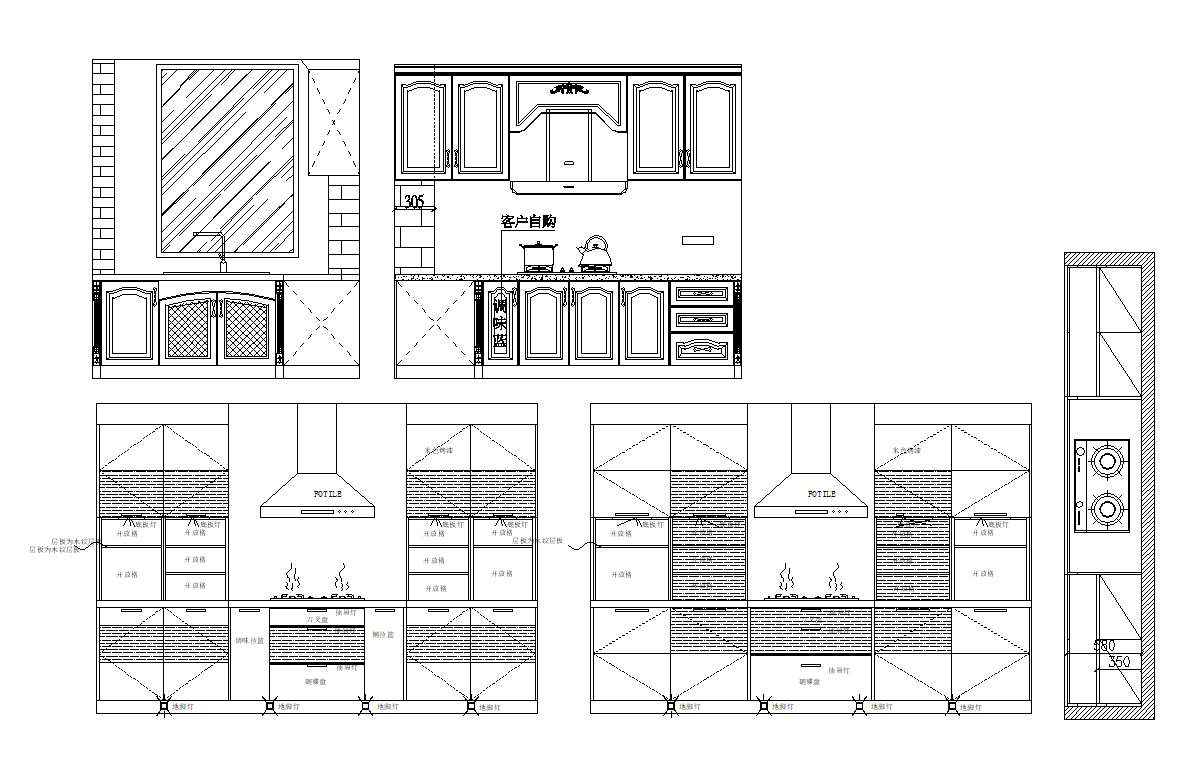

Countertops are another important element in kitchen design, and with AutoCAD, you can create custom countertops to fit your specific needs and style. You can use the polyline tool to draw the outline of your countertop and then use the hatch tool to fill it in with a pattern or texture. To create a more realistic look, you can use the fillet and chamfer tools to add rounded or beveled edges to your countertops. You can also use the extrude tool to give your countertop thickness and make it appear more three-dimensional. Don’t forget to experiment with different patterns and textures to find the perfect countertop for your design.4. AutoCAD Kitchen Design Tutorial: Creating Custom Countertops


4. AutoCAD Kitchen Design Tutorial: Creating Custom Countertops

Lighting and fixtures are essential for creating a functional and visually appealing kitchen. In AutoCAD, you can add these elements by using blocks or by drawing them yourself. When placing lighting fixtures, make sure to consider the placement of your cabinets and appliances to ensure optimal lighting in the space. To add a more realistic touch, you can use the render tool to create a lighting effect on your surfaces. This will give you a better understanding of how the lighting will look in your design and help you make any necessary adjustments. Remember to keep your lighting and fixtures on their own layer for easy editing and organization.5. AutoCAD Kitchen Design Tutorial: Adding Lighting and Fixtures


5. AutoCAD Kitchen Design Tutorial: Adding Lighting and Fixtures
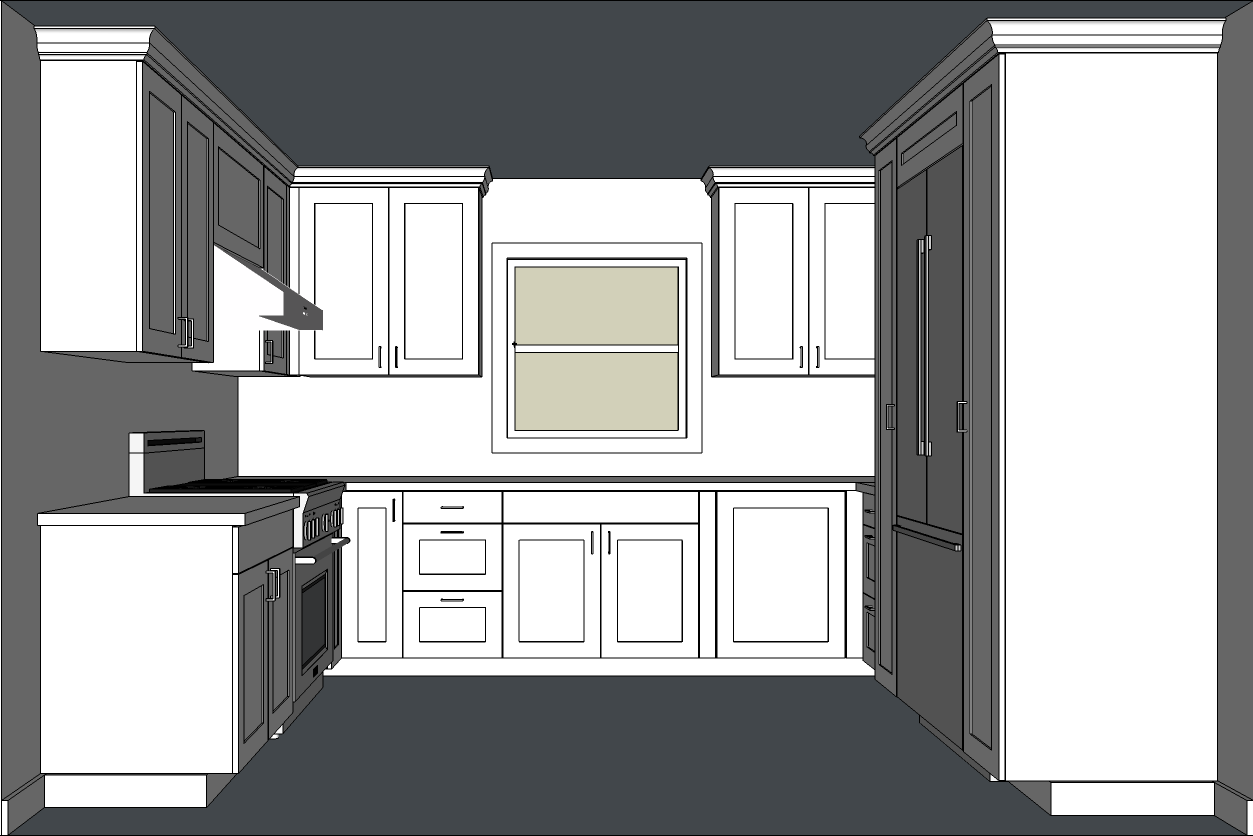
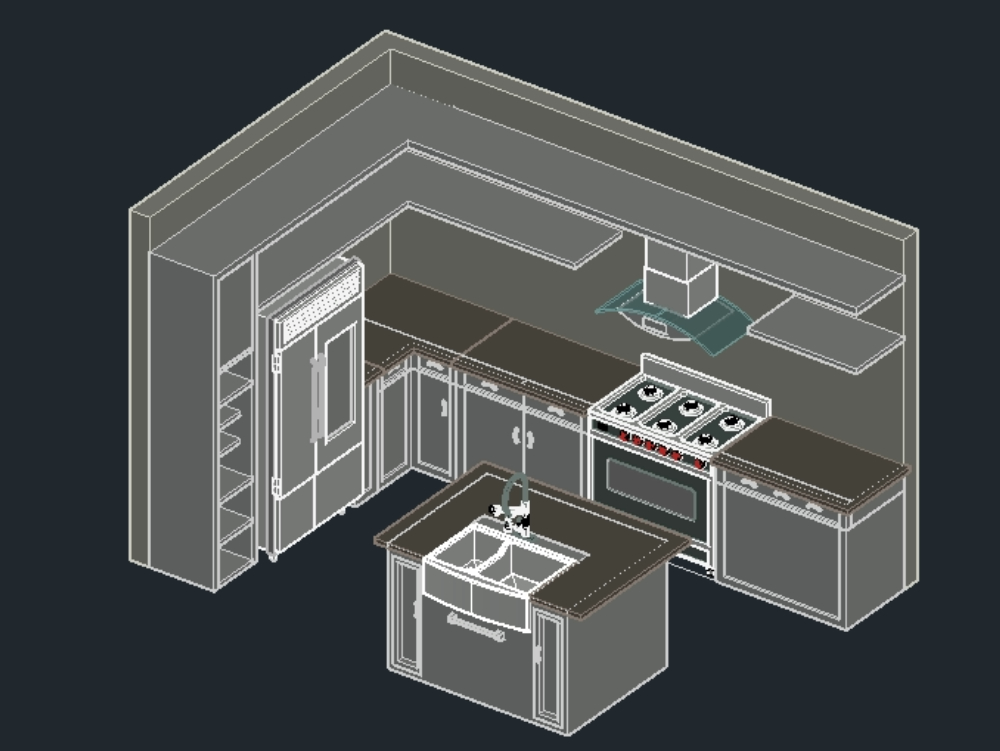
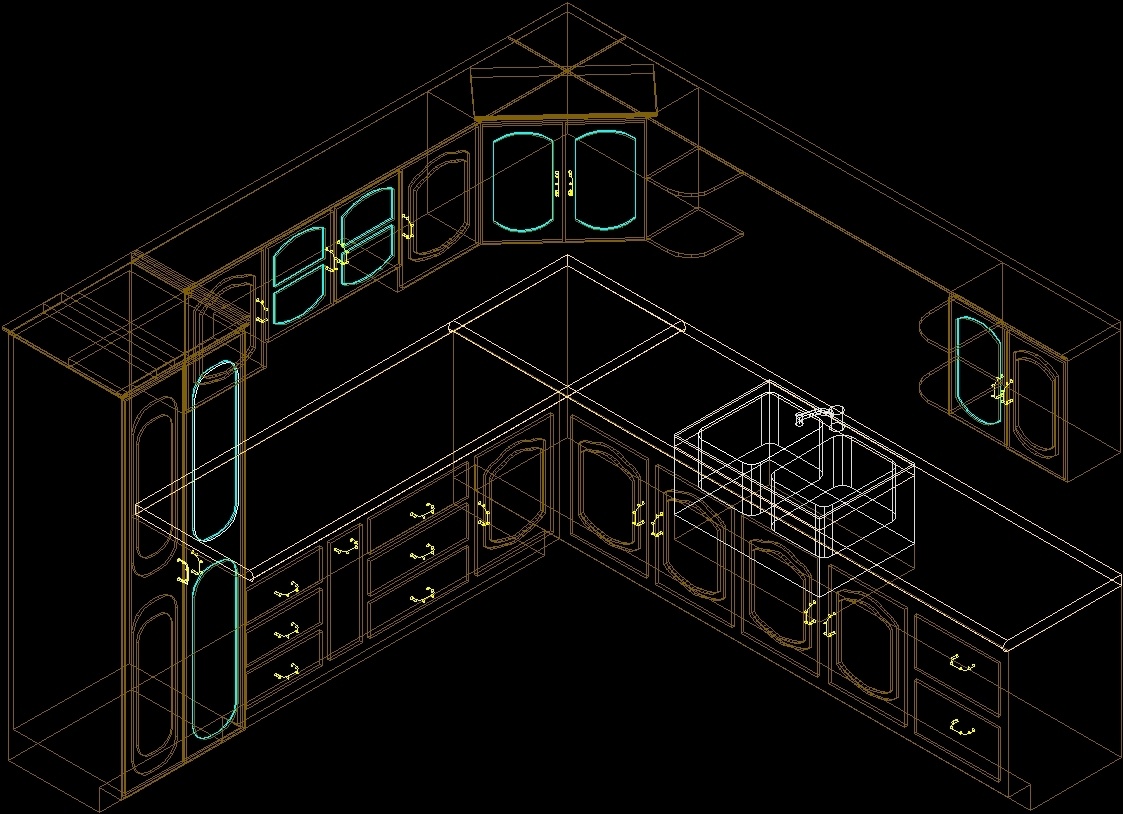
Creating 3D renderings of your kitchen design can give you a better idea of how the final result will look and help you make any necessary changes before starting the construction process. In AutoCAD, you can use the 3D modeling tools to create a realistic 3D rendering of your design. Start by extruding your 2D drawing to give it depth and use the subtract tool to create openings for doors and windows. You can also use the render tool to add materials and textures to your surfaces, making your 3D rendering look more lifelike. Creating 3D renderings can also be useful for presenting your design to clients or stakeholders.6. AutoCAD Kitchen Design Tutorial: Creating 3D Renderings


6. AutoCAD Kitchen Design Tutorial: Creating 3D Renderings

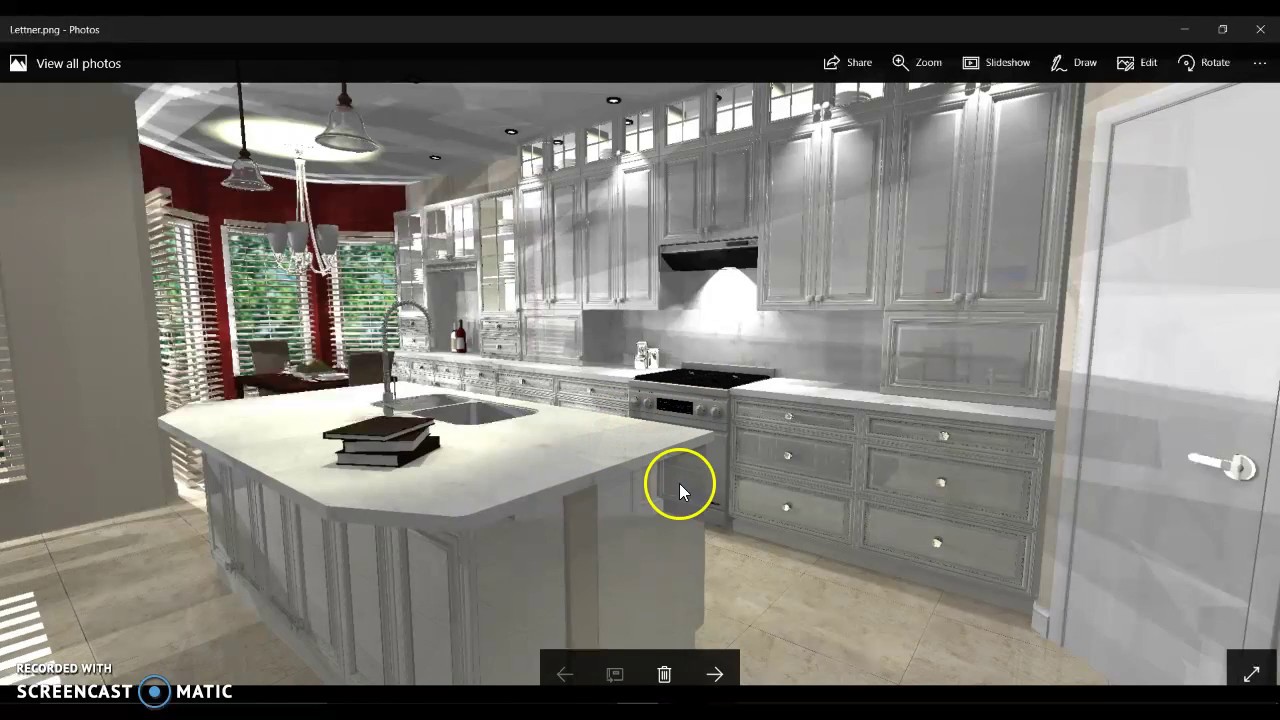
Adding textures and materials to your kitchen design can bring it to life and give it a more realistic look. In AutoCAD, you can use the materials library to add different materials to your surfaces, such as wood, tile, or granite. You can also use the hatch tool to add patterns and textures to your design. This can be particularly useful for things like flooring, backsplashes, and walls. Don’t be afraid to experiment with different materials and textures to find the perfect combination for your design.7. AutoCAD Kitchen Design Tutorial: Adding Textures and Materials


7. AutoCAD Kitchen Design Tutorial: Adding Textures and Materials

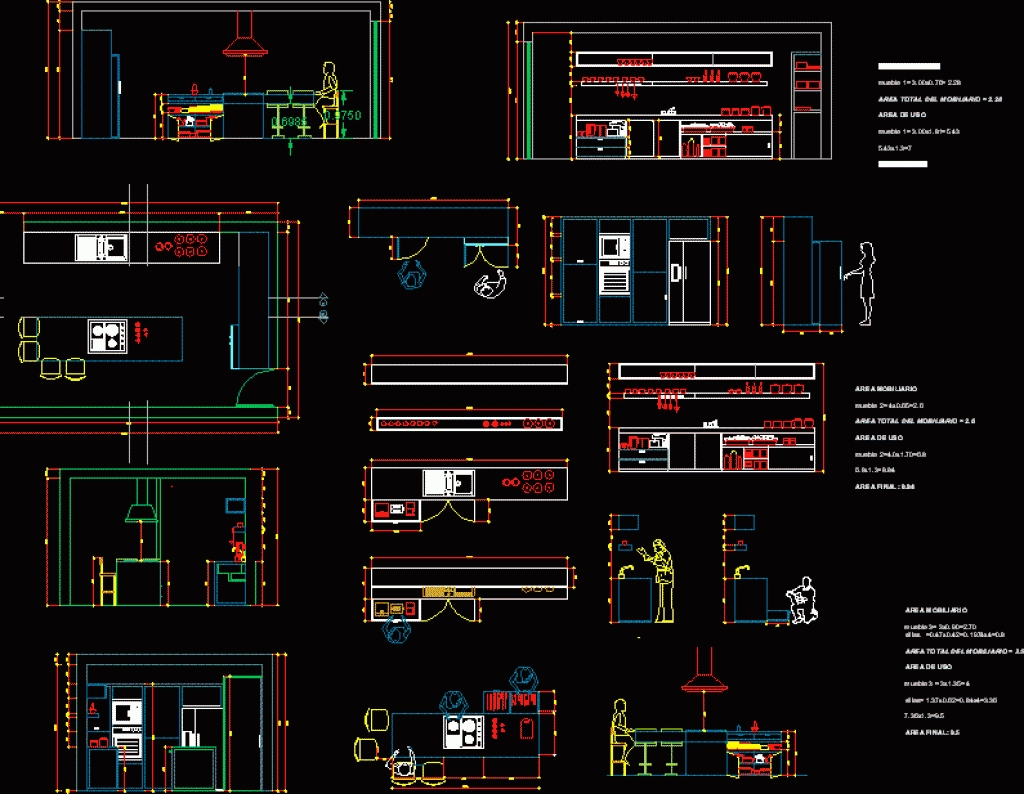


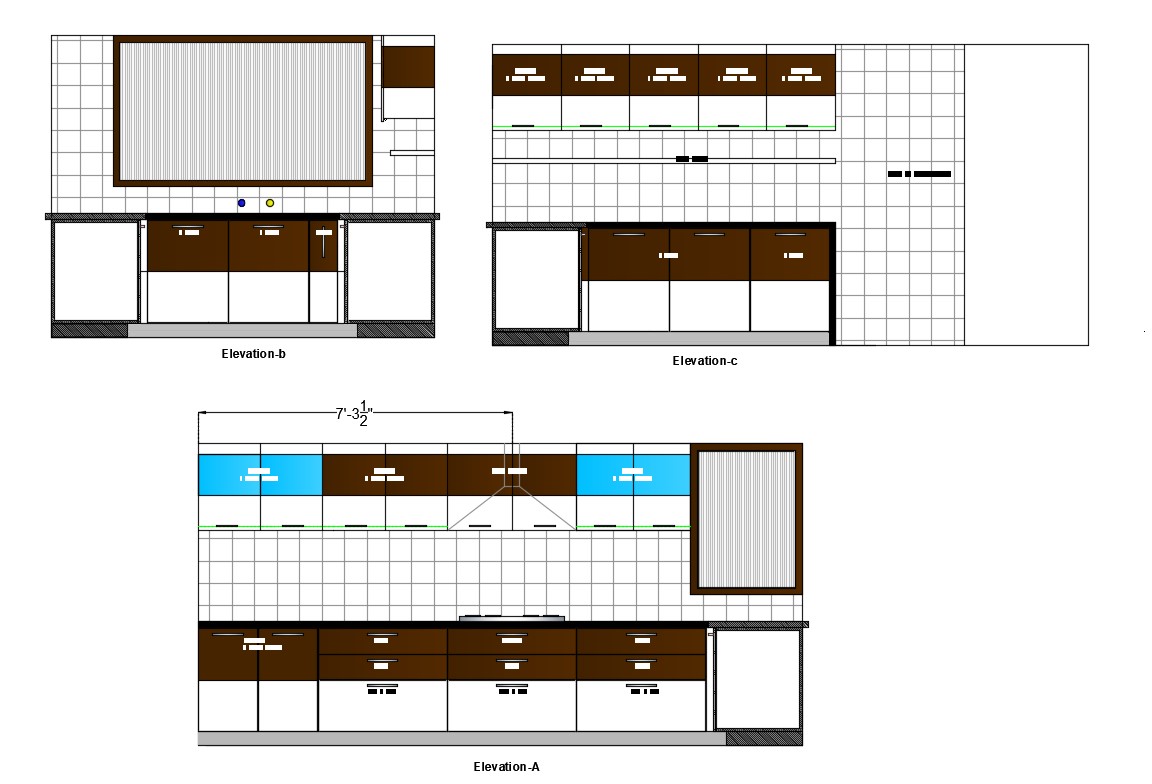
Elevations are drawings that show the different sides of a space, and they are crucial for understanding the overall design of a kitchen. In AutoCAD, you can create detailed elevations by using the 3D modeling tools to create a 3D rendering of your design and then using the flatshot command to convert it into a 2D drawing. Be sure to include all necessary elements in your elevations, such as cabinets, appliances, and fixtures. You can also add dimensions and annotations to provide more information and make it easier to understand.8. AutoCAD Kitchen Design Tutorial: Creating Detailed Elevations


8. AutoCAD Kitchen Design Tutorial: Creating Detailed Elevations


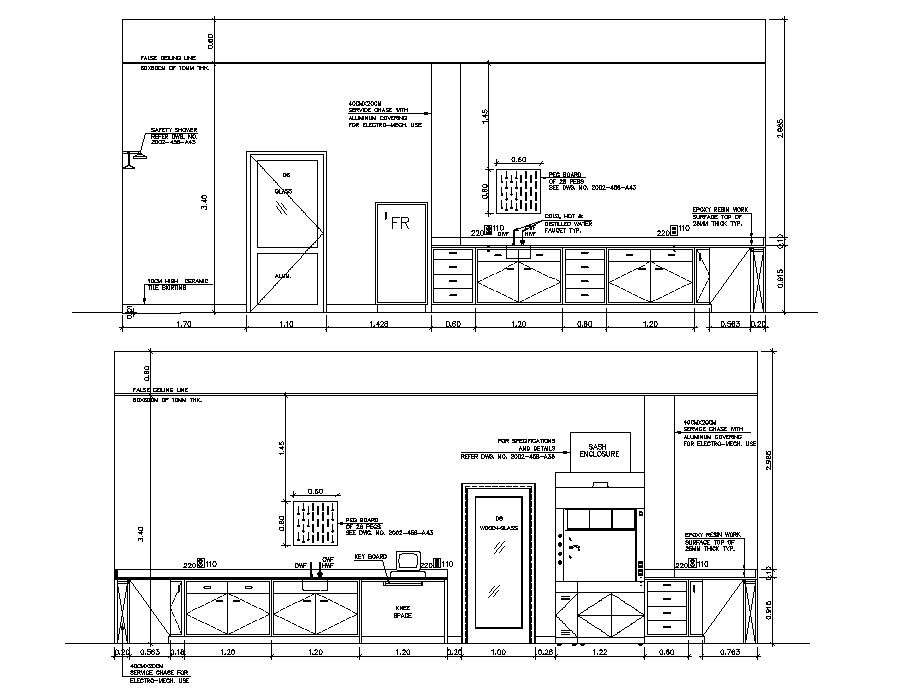

Annotations and dimensions are important for providing additional information and clarifying measurements in your kitchen design. In AutoCAD, you can add annotations by using the text tool and dimensions by using the dimension tool. Be sure to use the correct dimension style to ensure consistency throughout your drawing. You can also use the annotation scale tool to adjust the size of your annotations and dimensions to fit the scale of your drawing.9. AutoCAD Kitchen Design Tutorial: Adding Annotations and Dimensions


9. AutoCAD Kitchen Design Tutorial: Adding Annotations and Dimensions
Once you have completed your kitchen design in AutoCAD, the final step is to export and share it with others. You can save your drawing as a PDF or image file to easily share with clients, stakeholders, or contractors. You can also use the publish tool to create a set of drawings or sheets for printing or sharing. This will allow you to include multiple views or layouts of your design in one file. Sharing your design with others will help you get feedback and make any necessary changes before the final construction process begins.10. AutoCAD Kitchen Design Tutorial: Exporting and Sharing Your Design


10. AutoCAD Kitchen Design Tutorial: Exporting and Sharing Your Design


Creating a Functional and Aesthetic Kitchen Using AutoCAD

Utilize AutoCAD to Design Your Dream Kitchen
 If you're planning on designing or renovating your kitchen, using AutoCAD can make the process much easier and more efficient. This powerful software allows you to create detailed and accurate designs that can be easily modified and shared with others. With its vast array of tools and features, AutoCAD is the perfect tool for creating a functional and aesthetic kitchen that meets your specific needs and preferences.
Start with Proper Measurements and Layout
 The first step in designing a kitchen using AutoCAD is to gather the necessary measurements of your space. This includes the dimensions of the walls, windows, doors, and any other structural elements that will impact your design. Once you have these measurements, you can begin creating a layout using the software's drafting tools. This will give you a better idea of the available space and how you can best utilize it for your kitchen design.
Keywords: kitchen design, AutoCAD, measurements, layout
The first step in designing a kitchen using AutoCAD is to gather the necessary measurements of your space. This includes the dimensions of the walls, windows, doors, and any other structural elements that will impact your design. Once you have these measurements, you can begin creating a layout using the software's drafting tools. This will give you a better idea of the available space and how you can best utilize it for your kitchen design.
Keywords: kitchen design, AutoCAD, measurements, layout
Choose Your Kitchen's Features and Elements
 With AutoCAD, you have the flexibility to customize your kitchen design to your liking. This includes choosing the style and placement of cabinets, countertops, appliances, and other features. You can also experiment with different colors, materials, and finishes to create a truly unique and personalized space. Additionally, AutoCAD's 3D modeling capabilities allow you to see your design in a realistic, three-dimensional view, making it easier to visualize and make any necessary changes.
Keywords: kitchen features, customization, 3D modeling
With AutoCAD, you have the flexibility to customize your kitchen design to your liking. This includes choosing the style and placement of cabinets, countertops, appliances, and other features. You can also experiment with different colors, materials, and finishes to create a truly unique and personalized space. Additionally, AutoCAD's 3D modeling capabilities allow you to see your design in a realistic, three-dimensional view, making it easier to visualize and make any necessary changes.
Keywords: kitchen features, customization, 3D modeling
Create a Functional and Efficient Workflow
 A well-designed kitchen not only looks great, it also functions efficiently. Utilizing AutoCAD's tools, you can create a workflow that makes the most of the available space and enhances your cooking experience. This may include placing the sink, stove, and refrigerator in a triangular formation for easy movement, or incorporating a kitchen island for additional workspace and storage. With AutoCAD, you can easily adjust and fine-tune your design to ensure a functional and efficient workflow in your kitchen.
Keywords: functional kitchen, workflow, kitchen island
A well-designed kitchen not only looks great, it also functions efficiently. Utilizing AutoCAD's tools, you can create a workflow that makes the most of the available space and enhances your cooking experience. This may include placing the sink, stove, and refrigerator in a triangular formation for easy movement, or incorporating a kitchen island for additional workspace and storage. With AutoCAD, you can easily adjust and fine-tune your design to ensure a functional and efficient workflow in your kitchen.
Keywords: functional kitchen, workflow, kitchen island
Collaborate and Review with Others
 AutoCAD also allows for easy collaboration and review with others involved in your kitchen design process. You can share your design with contractors, interior designers, or friends and family to gather feedback and make any necessary changes. Additionally, AutoCAD's extensive library of symbols and objects makes it easy to incorporate specific elements and features that may be recommended by others.
Keywords: collaboration, review, design feedback
AutoCAD also allows for easy collaboration and review with others involved in your kitchen design process. You can share your design with contractors, interior designers, or friends and family to gather feedback and make any necessary changes. Additionally, AutoCAD's extensive library of symbols and objects makes it easy to incorporate specific elements and features that may be recommended by others.
Keywords: collaboration, review, design feedback
Conclusion
 Using AutoCAD for kitchen design allows for precision, efficiency, and creativity in creating your dream kitchen. With its robust features and tools, you can easily bring your vision to life and make any necessary adjustments along the way. So why wait? Start using AutoCAD today and see the endless possibilities for your kitchen design.
Keywords: AutoCAD, precision, creativity, dream kitchen
Using AutoCAD for kitchen design allows for precision, efficiency, and creativity in creating your dream kitchen. With its robust features and tools, you can easily bring your vision to life and make any necessary adjustments along the way. So why wait? Start using AutoCAD today and see the endless possibilities for your kitchen design.
Keywords: AutoCAD, precision, creativity, dream kitchen