Attaching a drain to your kitchen sink may seem like a daunting task, but with the right tools and knowledge, you can easily do it yourself. Not only will this save you money, but it will also give you a sense of accomplishment. In this article, we will provide you with a step-by-step guide on how to attach a drain to your kitchen sink.How to Attach a Drain to a Kitchen Sink


How to Attach a Drain to a Kitchen Sink


:max_bytes(150000):strip_icc()/how-to-install-a-sink-drain-2718789-hero-24e898006ed94c9593a2a268b57989a3.jpg)

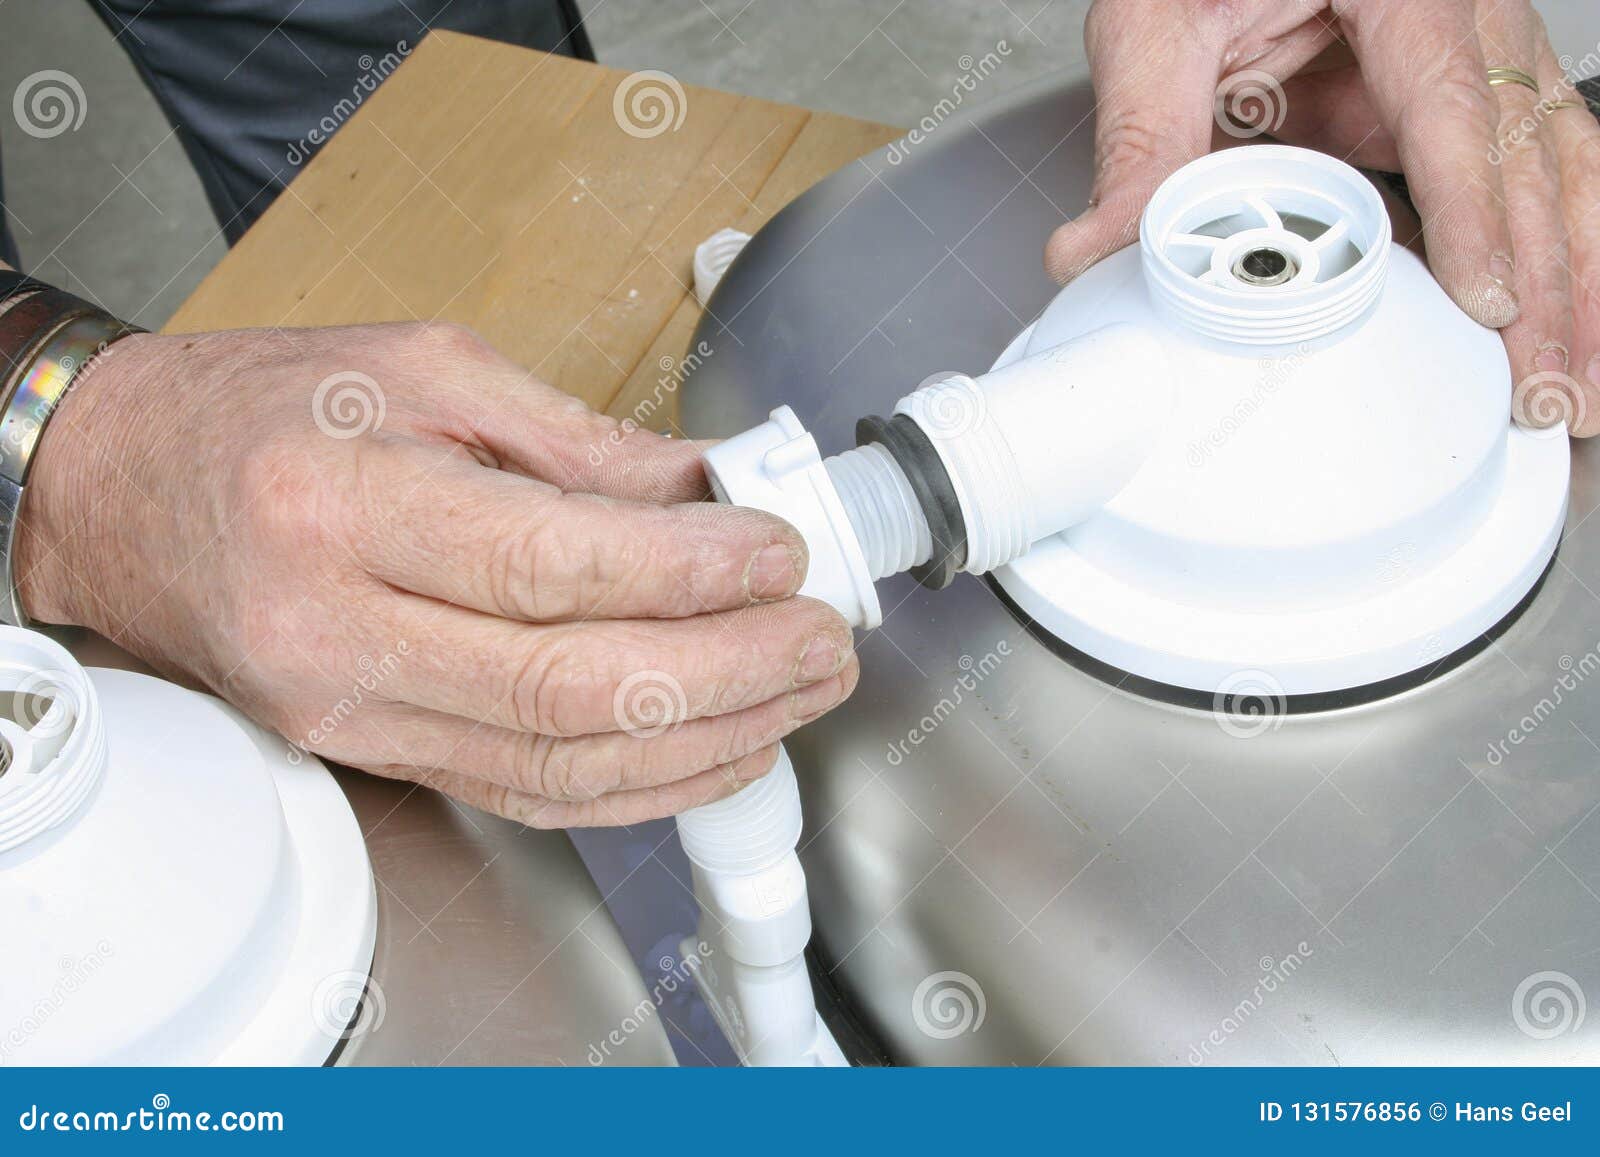
If you're replacing your kitchen sink or installing a new one, attaching the drain is an essential step. It ensures that water and other debris can flow out of your sink efficiently. Before you begin the process, make sure you have all the necessary tools and materials. This includes a P-trap, plumber's putty, adjustable pliers, and a wrench.How to Install a Kitchen Sink Drain


How to Install a Kitchen Sink Drain
/how-to-install-a-sink-drain-2718789-hero-b5b99f72b5a24bb2ae8364e60539cece.jpg)


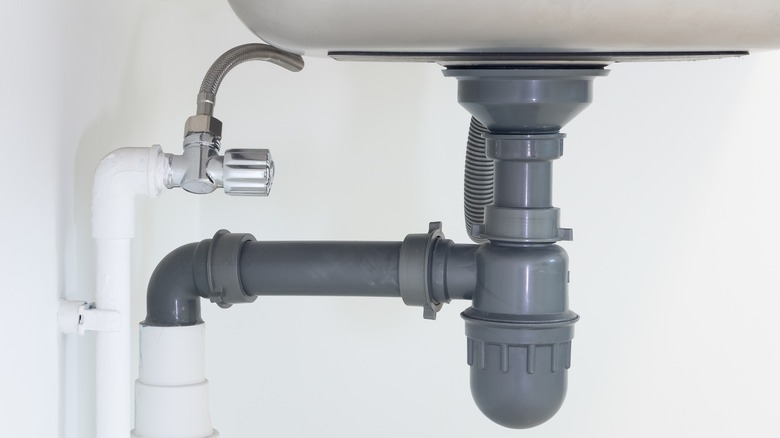
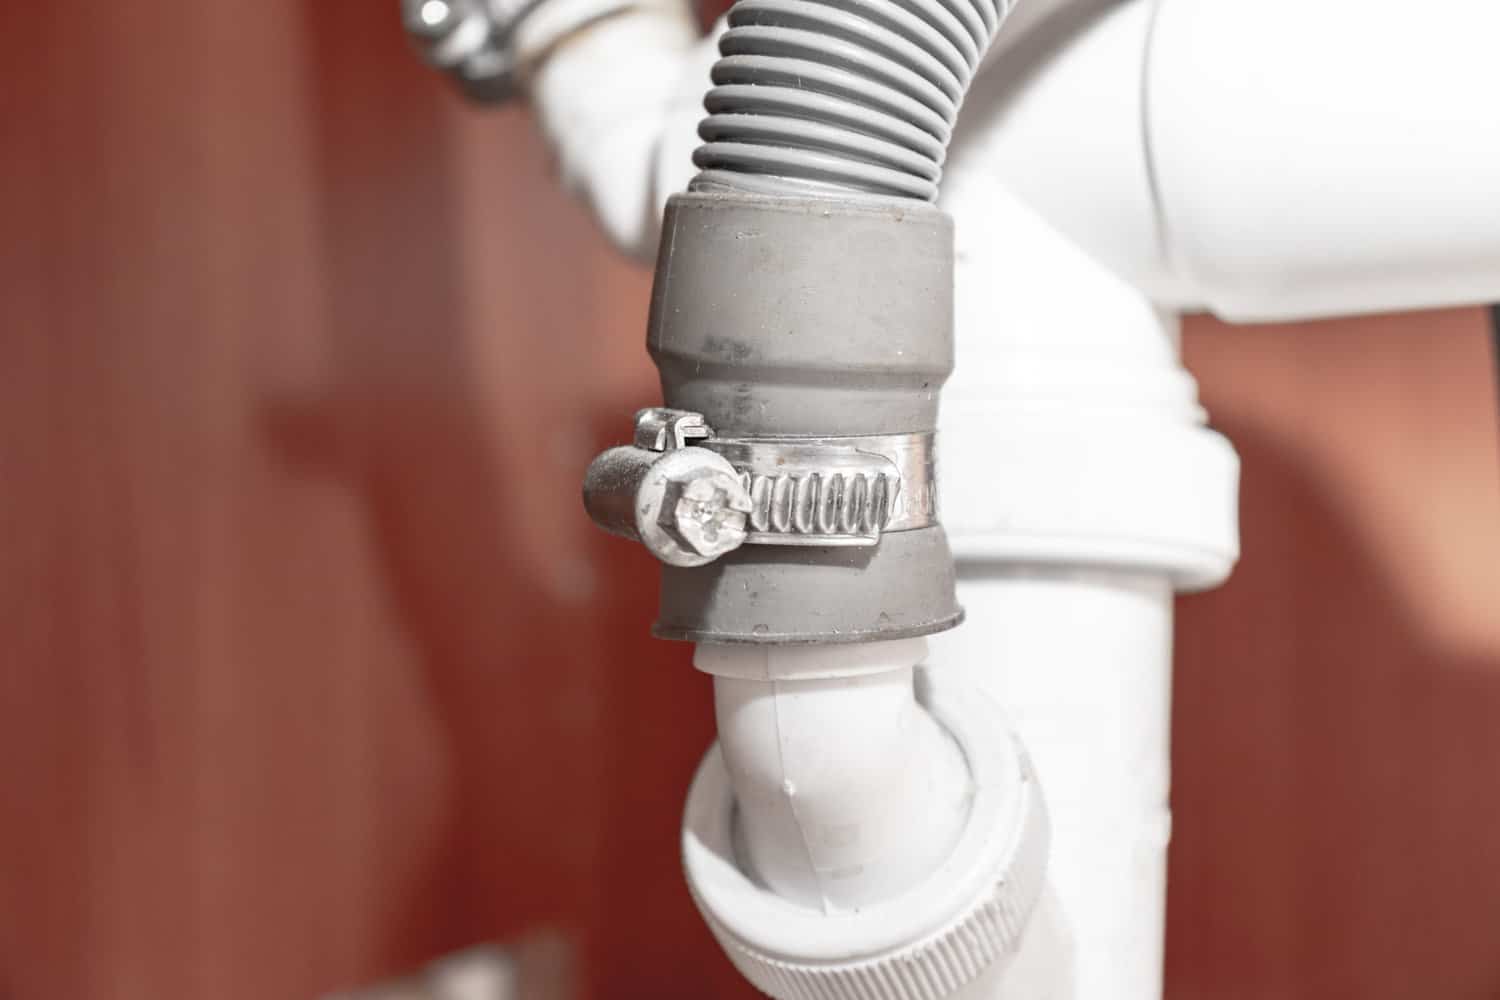
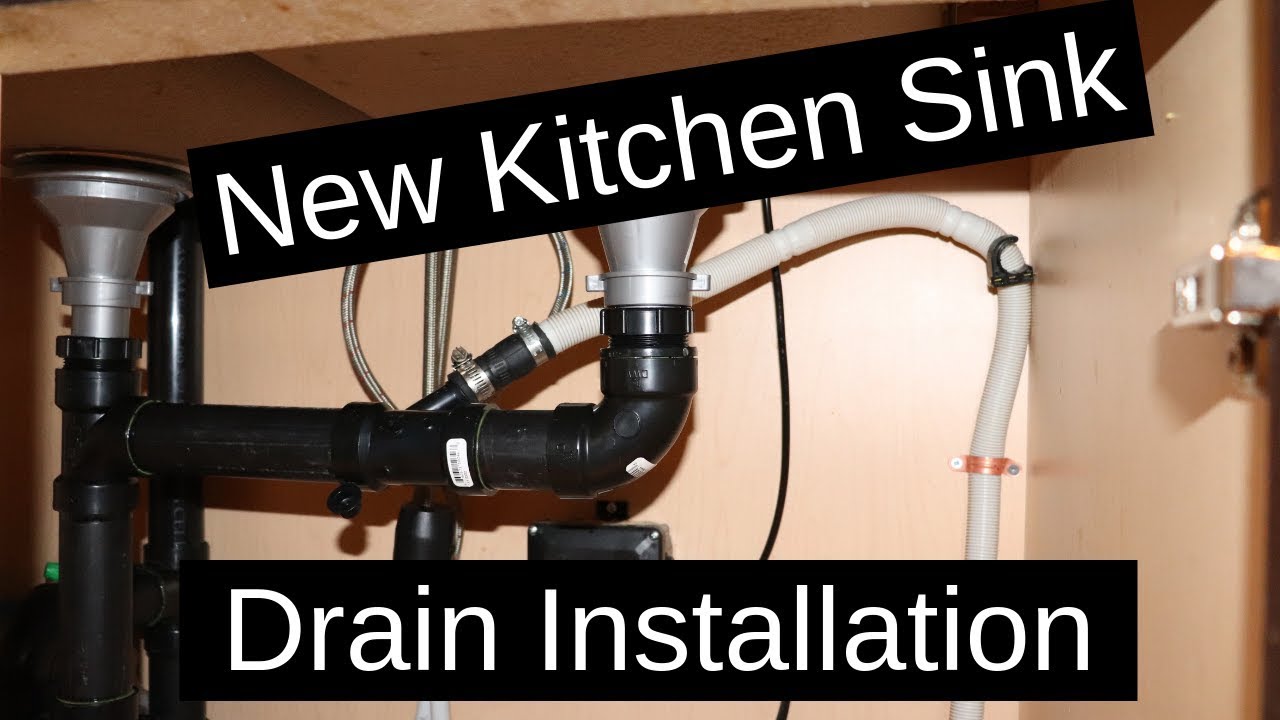
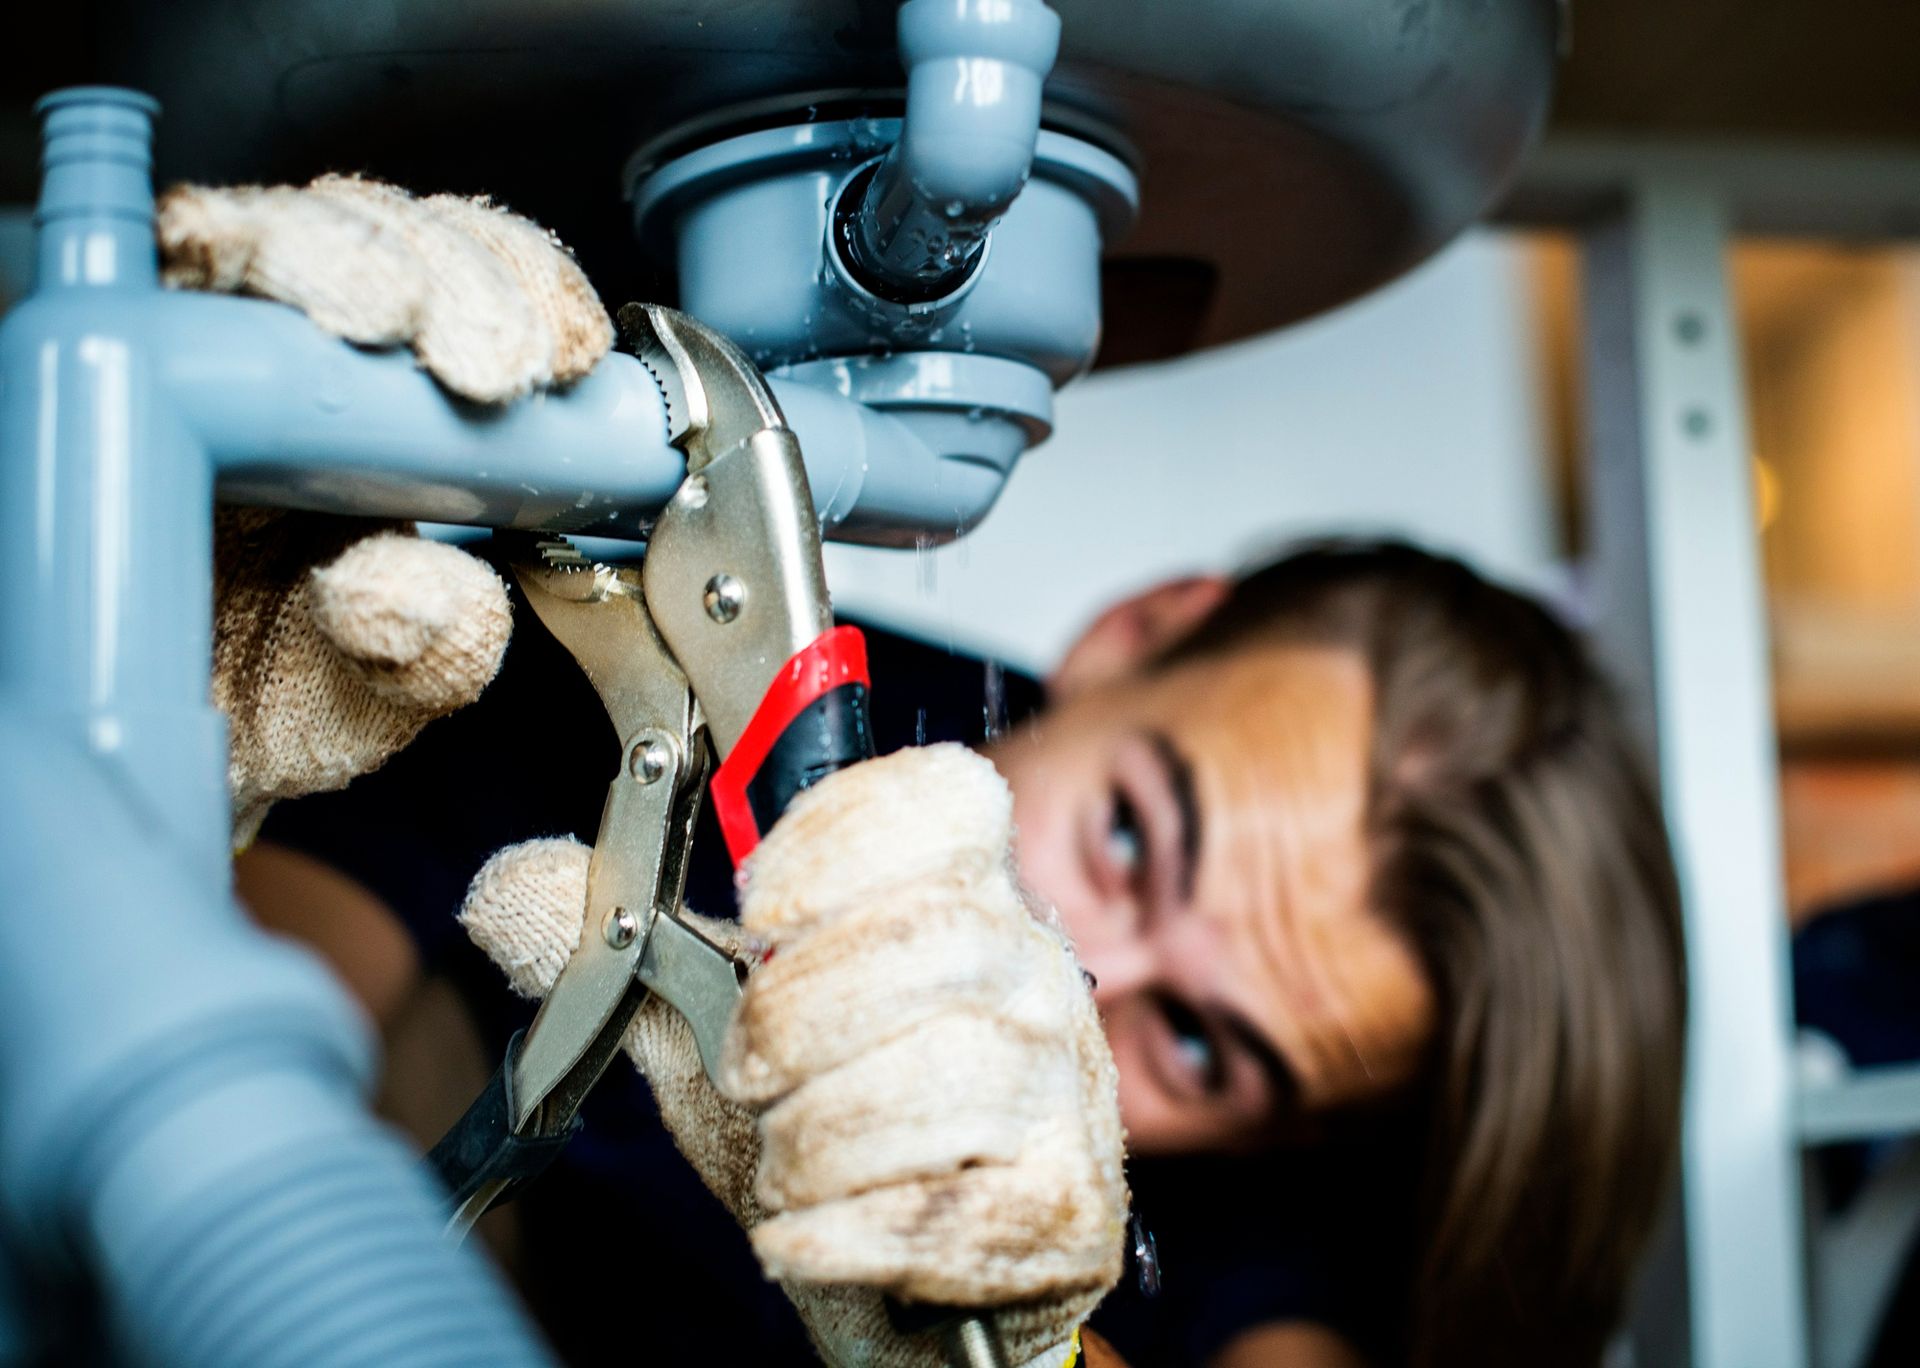
Step 1: Prepare the Sink Clean the area around the sink opening and remove any old putty or debris. If you're installing a new sink, make sure the drain hole is clear of any packaging material. Step 2: Apply Plumber's Putty Take a small amount of plumber's putty and roll it into a thin rope. Place it around the underside of the drain opening on the sink. Step 3: Insert the Drain Insert the drain into the sink opening and press it down firmly. Make sure it is centered and flush with the sink's surface. Step 4: Secure the Drain From under the sink, place the gasket and mounting ring over the drain. Hand tighten the nut to secure the drain in place. Step 5: Connect the P-Trap Using adjustable pliers, connect the P-trap to the drain and the wall pipe. Make sure the connections are tight to prevent any leaks. Step 6: Check for Leaks Turn on the water and check for any leaks. If there are any, use a wrench to tighten the connections further.Step-by-Step Guide for Attaching a Drain to a Kitchen Sink


Step-by-Step Guide for Attaching a Drain to a Kitchen Sink


Attaching a drain to your kitchen sink is a task that you can easily do yourself. By following the steps outlined above, you can save money and feel a sense of accomplishment. It's also a great way to learn more about your plumbing system.DIY: Attaching a Drain to Your Kitchen Sink


DIY: Attaching a Drain to Your Kitchen Sink


To successfully attach a drain to your kitchen sink, you will need the following tools and materials:Tools and Materials Needed for Attaching a Drain to a Kitchen Sink


Tools and Materials Needed for Attaching a Drain to a Kitchen Sink


While attaching a drain to a kitchen sink may seem straightforward, there are some common mistakes that people make. These include not using enough plumber's putty, not tightening connections properly, and not checking for leaks. Avoiding these mistakes can save you time and frustration in the long run.Common Mistakes to Avoid When Attaching a Drain to a Kitchen Sink


Common Mistakes to Avoid When Attaching a Drain to a Kitchen Sink


Here are a few tips and tricks to keep in mind when attaching a drain to your kitchen sink:Tips and Tricks for Successfully Attaching a Drain to a Kitchen Sink


Tips and Tricks for Successfully Attaching a Drain to a Kitchen Sink


If you're a visual learner, watching a video tutorial can be helpful in understanding how to attach a drain to a kitchen sink. There are many tutorials available online that can guide you through the process step by step.Video Tutorial: Attaching a Drain to a Kitchen Sink

Video Tutorial: Attaching a Drain to a Kitchen Sink


If you encounter any issues when attaching a drain to your kitchen sink, here are some common troubleshooting tips:Troubleshooting: Common Issues When Attaching a Drain to a Kitchen Sink


Troubleshooting: Common Issues When Attaching a Drain to a Kitchen Sink


Hiring a professional to install a kitchen sink drain can be costly, but it ensures that the job is done correctly. On the other hand, DIY installation can save you money, but it requires some knowledge and skill. Consider your budget and capabilities before deciding which option is best for you. In conclusion, attaching a drain to a kitchen sink is a task that you can easily do yourself with the right tools and knowledge. By following the steps outlined in this article, you can successfully complete the installation and have a functional kitchen sink in no time.Professional vs. DIY: Pros and Cons of Attaching a Drain to a Kitchen Sink

Professional vs. DIY: Pros and Cons of Attaching a Drain to a Kitchen Sink


Why Properly Attaching the Drain to Your Kitchen Sink is Key for a Functional and Stylish House Design

When it comes to designing a house, the kitchen is often considered the heart of the home. It is where families gather to cook, eat, and spend quality time together. As such, it is important to ensure that every aspect of the kitchen is designed with both functionality and style in mind. This includes properly attaching the drain to your kitchen sink, a crucial element that often goes overlooked but can greatly impact the overall design of your kitchen.
The Importance of a Properly Attached Drain

The drain of a kitchen sink is responsible for carrying away dirty water and preventing clogs. A poorly attached drain can lead to drainage issues, leaks, and even mold growth. Not only can this be a nuisance, but it can also cause expensive and time-consuming repairs down the line.
Additionally, a properly attached drain can enhance the overall aesthetic of your kitchen. The drain and sink are often the most used and visible parts of a kitchen, so it is important to ensure they are both functional and visually appealing. By properly attaching the drain, you can create a seamless and stylish look that elevates the design of your kitchen.
How to Properly Attach the Drain to Your Kitchen Sink

The first step in attaching the drain to your kitchen sink is to choose the right type of drain for your sink. There are two main types of drains – basket strainers and garbage disposals. Basket strainers are typically used for sinks without a garbage disposal, while garbage disposals are used for sinks with one. Make sure to choose the correct type of drain for your specific sink.
Next, carefully read the manufacturer's instructions for attaching the drain. This will vary depending on the type of drain and sink you have. Generally, the process involves placing the drain into the sink's drain hole and securing it with a locknut and gasket. It is important to make sure the drain is tightly secured to prevent leaks.
Finally, double check the drain's functionality by running water through it and checking for any leaks. If there are any leaks, tighten the connections or call a professional for assistance.
Conclusion

In conclusion, attaching the drain to your kitchen sink is a crucial step in designing a functional and stylish kitchen. Properly attaching the drain not only ensures the functionality of your sink but also enhances the overall aesthetic of your kitchen. By following the proper steps and choosing the right type of drain, you can achieve a seamless and visually appealing design for your kitchen.