An overlay grid is an incredibly useful tool when it comes to making floor plans in Microsoft Visio. It is the process of laying out a grid on top of a regular floor plan in Visio, giving the user the ability to see points of reference when it comes to the layout of a room or house. Creating an overlay grid in Visio is a straightforward process and will help greatly in making a room design look more sophisticated in Visio. To begin creating a grid overlay in Visio, select the "Insert" tab and then go to the "Design" area. First, select the "Grid" button. This will bring up a menu that will allow you to specify the number of rows and columns of the grid, as well as the type of grid you'd like to use. You can choose between a rectangular grid and a diamond-shaped grid. A rectangular grid is the traditional grid type. After selecting your grid type, choose the size of the grid. This can be any size you'd like, from small increments to larger sizes, with each grid size representing one square of the smaller grid. As an example, if you chose the height of the grid to be 10, there would be ten rows of the grid. After you have chosen the size of the grid, it's time to add the grid to your diagram. You can do this by dragging and dropping the grid onto the drawing page. Make sure to align it to the edge of the drawing sheet. You can also move the grid around and adjust its size as needed. Next, you'll need to adjust the grid color. Go to the "Design" area again, and select "Grid Colors" to change the colors of the grid. You can choose between eight colors, and you can also adjust the width and opacity of the grid line. Finally, the overlay grid is complete. This tool allows you to easily add reference points to your floor plan, and will make your design look more professional in Visio. When it comes to creating art deco house designs, the overlay grid is a key tool that can help make your designs look unique and sophisticated.How to Make an Overlay Grid For a Room in Visio


How to Make an Overlay Grid For a Room in Visio


When it comes to making art deco house designs in Microsoft Visio, the process can feel overwhelming at first. However, with a few key tips and tricks, you can learn how to make accurate and beautiful floor plans. By following this step-by-step guide on how to draw a house plan in Visio, you'll be able to create the perfect art deco house quickly and easily. The first step in designing a Visio house plan is to select the "Design" tab on the top right of the page. Select the house design template from the menu. This will bring up a new menu that will allow you to choose a house design template or create a custom template. If you create your own custom template, you can add features such as walls, doors, windows, and furniture. Once you've chosen a design template, you'll need to start making changes to the design. To do this, select the "Insert" tab on the top right and select the "Shapes" button. This will bring up a variety of shapes that you can use to customize the design, such as walls, doors, windows, furniture, and more. You can drag and drop these shapes onto the page and begin arranging them into the design you'd like. Once you're finished arranging the shapes in the design, you can adjust the size of the design by dragging and dropping the edges of the shapes. You can also add text to the shapes if necessary. When you're happy with the design, you can go to the "Design" tab once again and select the "Grid" button for your reference points. Using the grid overlay will help give you a more accurate view of the design by displaying the exact measurements of the shapes. You can change the size and color of the grid overlay as needed. Now your design is complete, and you can view it from different angles using the "Zoom" tool. By following this guide on how to draw a house plan in Microsoft Visio, you can easily make beautiful art deco house designs. With a few simple steps, you'll be well on your way to making a stunning design.How to Draw a House Plan in Microsoft Visio


How to Draw a House Plan in Microsoft Visio


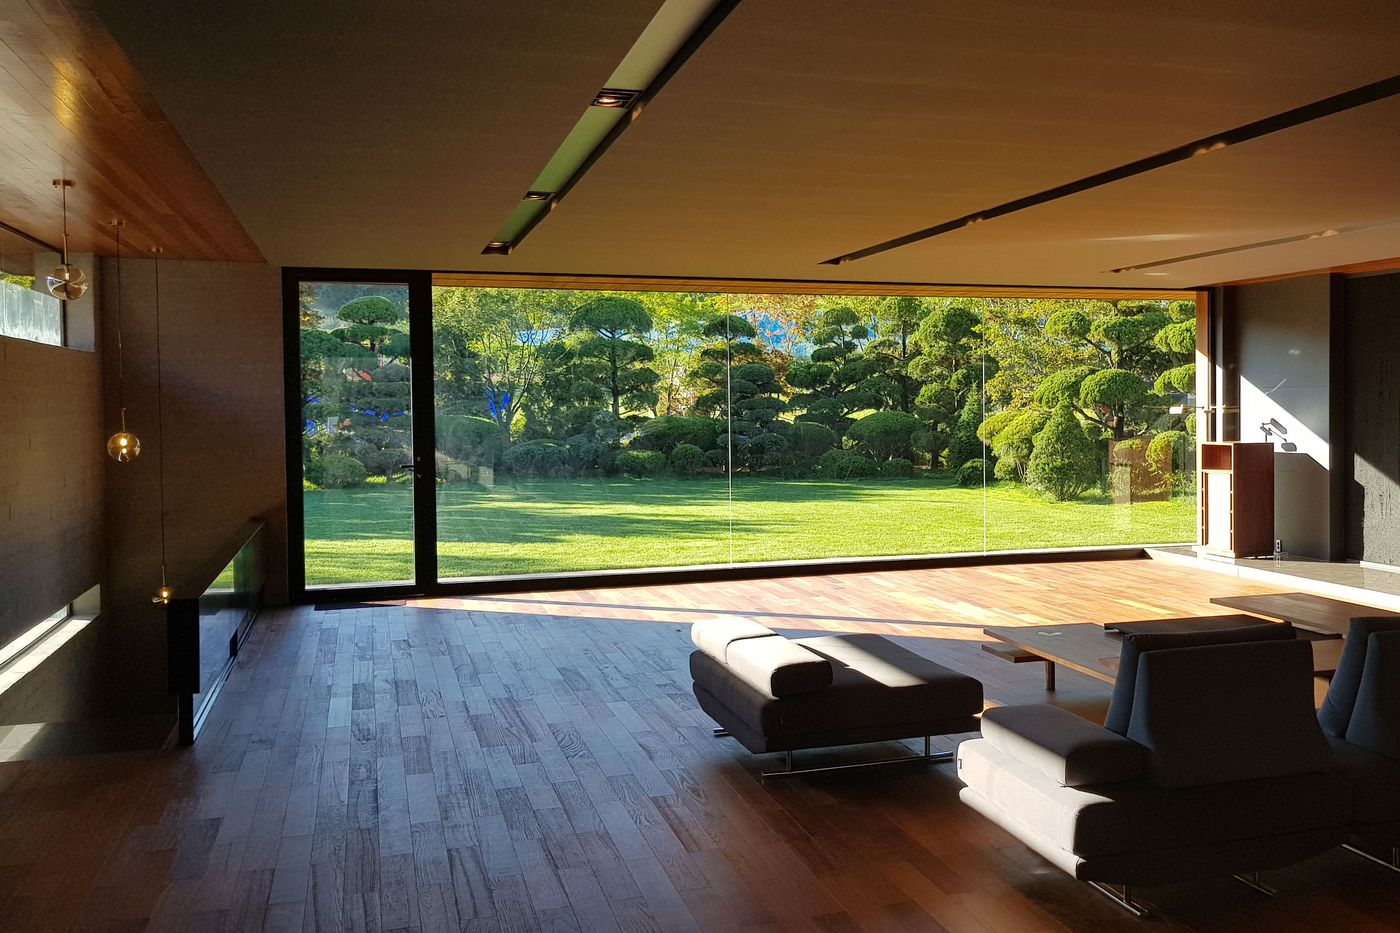
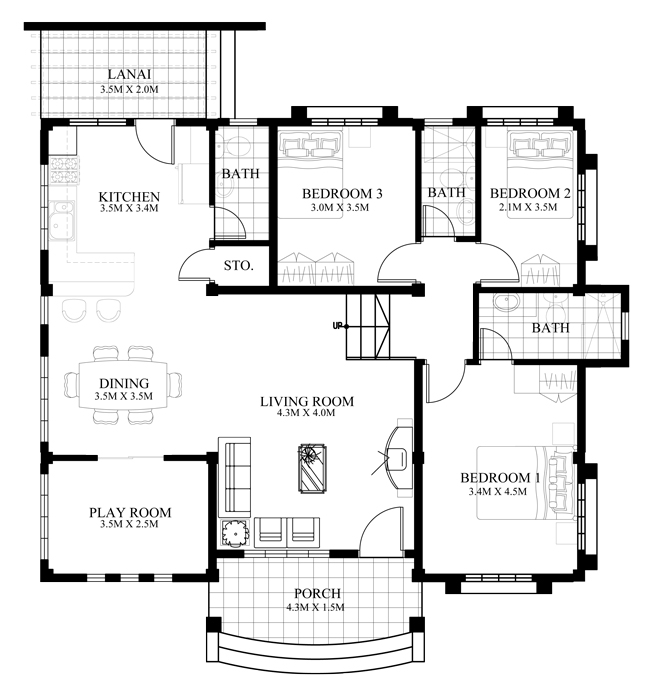
When it comes to designing a home, there are many important factors to consider. One of these factors is the house design and floor plan. It's important to plan out the different aspects of the house before you begin building, such as the number of rooms, the type of furniture, and the placement of doors and windows. In order to make an efficient design, it's important to use a variety of tools, such as architectural software, grid overlays, and templates. When it comes to creating a house design and floor plan, it's important to consider the layout of the rooms and the location of the doors and windows. This will help make sure that the house is well-ventilated, comfortable, and aesthetically pleasing. Additionally, it's important to keep in mind the type of furniture that will be used in the home. For instance, when it comes to an art deco house design, it's important to keep the furniture modern and sleek. In order to create a successful design, it's important to have access to various tools. Architectural software is a great way to design a house plan and visualize the final product. There are many different types of software available, from basic programs that allow you to drag and drop shapes to more advanced programs that allow you to customize the house design in detail. Additionally, grid overlays are extremely useful when it comes to creating floor plans. The grid serves as a template for measurements, allowing you to easily adjust the size and shape of the design. Finally, there are many templates available that can be used for creating house designs. These templates provide a starting point for creating the floor plan, and can be adjusted as needed. By utilizing these various tools, it is possible to create an efficient and aesthetically pleasing house design and floor plan. With a little time and effort, you can create an art deco house design that is both beautiful and practical.House Designs and Floor Plans


House Designs and Floor Plans


Creating a grid floor plan in Visio is an essential skill to have when making floor plans. By creating a grid floor plan, the user can make precise measurements and, as a result, have a more precise and professional looking floor plan. This tutorial will explain how to create a grid floor plan in Visio. The first step is to open a new Visio document. Go to the "Insert" tab and then select the "Shapes" drop-down menu. From here, select the type of grid overlay you'd like to use. You can select from a rectangular grid, a diamond-shaped grid, or a simple line grid. For art deco house designs, the rectangular grid is the most suitable. Next, select the size of the grid. This can be done by adjusting the "Width" and "Height" boxes. Keep in mind that each grid size will represent one square of the smaller-sized grid. For example, if the grid size is set to 5, then there will be five columns and five rows in the grid. Once you have selected the size of the grid, you can add it to the drawing page. To do this, simply select the "Grid" button on the top right and drag and drop it onto the page. Make sure to align it to the edge of the drawing sheet. You can also move the grid around and adjust its size as needed. Finally, you can adjust the color of the grid as desired. To do this, simply select the "Design" tab and select "Grid Colors". You can choose from eight colors, and you can also adjust the width and opacity of the grid line. By following the steps outlined in this tutorial, you can easily create a grid floor plan in Visio. This is an important step for making an art deco house design, as it will ensure that the design is accurate and precise.Visio How to Create Grid Floor Plan


Visio How to Create Grid Floor Plan


When it comes to making an art deco house design in Visio, many people feel overwhelmed. Fortunately, it doesn't have to be a difficult process. By following a few simple steps, you can create a stunning design in Visio. This tutorial will explain how to make a house design in Visio. The first step is to select the "Design" tab and then select the "House Design" template. This will bring up a new menu that will allow you to choose from a variety of predefined house designs. Select the design you'd like to use and then select "Create." This will bring up a new page with the chosen design. Next, you'll need to add the shapes for the house design. To do this, select the "Insert" tab and select the "Shapes" button. This will bring up a variety of shapes that you can use to customize the design, such as walls, doors, windows, furniture, and more. You can drag and drop these shapes onto the page and begin arranging them into the design you'd like. Once you're finished arranging the shapes in the design, you can adjust the size of the design by dragging and dropping the edges of the shapes. You can also add text to the shapes if necessary. When you're happy with the design, you can go to the "Design" tab once again and select the "Grid" button for your reference points. Using the grid overlay will help give you a more accurate view of the design by displaying the exact measurements of the shapes. You can change the size and color of the grid overlay as needed. Now your design is complete, and you can view it from different angles using the "Zoom" tool. By following this tutorial on how to make a house design in Visio, you can easily create a stunning and unique art deco house design. With a few simple steps, you'll be well on your way to making the perfect art deco house.Visio House Design Tutorial


Visio House Design Tutorial


Visio is a powerful program that allows you to create a variety of floor plans, from simple bedrooms to large multi-room houses. However, Visio does not come with all the tools you need to make a house plan. To make a successful design, you will need access to various drawing tools, shapes, and templates. In this tutorial, we'll take a look at the Visio shapes and templates available for house plans. The first tool that you'll need is the "Shapes" tool. This tool allows you to add a variety of shapes, such as walls, doors, windows, and furniture, to your house plan. This is a great way to customize your design and make it unique. You can drag and drop these shapes onto the page and rearrange them as needed. The second tool that you'll need is the "Grid" overlay. The grid overlay is a great tool for making sure that your design is precise and accurate. You can adjust the size and color of the grid, and it will provide a template for making measurements. This is essential for creating an art deco house design. Finally, you'll need access to templates. Many people prefer to start their designs with a predefined template. This saves time, and allows you to create a professional design quickly and easily. There are many Visio templates available for house plans, from basic plans to complex multi-room houses. By utilizing the various Visio shapes, templates, and tools, you can create an effective, aesthetically pleasing house plan. Whether you are creating an art deco house design or a more traditional style, the Visio shapes and templates available will help make your design look beautiful and professional.Visio Shapes and Templates for House Plans


Visio Shapes and Templates for House Plans


The third tool that you'll need when creating a Visio house plan is the overlay grid. The overlay grid is a great tool for ensuring that your design is precise and accurate. It's a simple process of laying out a grid on top of the floor plan in Visio, giving the user the ability to see the exact measurements for the design. This is essential for making art deco house designs. To begin creating an overlay grid in Visio, select the "Insert" tab and then go to the "Design" area. First, select the "Grid" button. This will bring up a menu that will allow you to specify the number of rows and columns of the grid, as well as the type of grid you'd like to use. You can choose between a rectangular grid and a diamond-shaped grid. A rectangular grid is the traditional grid type. After selecting your grid type, choose the size of the grid. This can be any size you'd like, from small increments to larger sizes, with each grid size representing one square of the smaller grid. As an example, if you chose the height of the grid to be 10, there would be ten rows of the grid. After you have chosen the size of the grid, it's time to add the grid to your diagram. You can do this by dragging and dropping the grid onto the drawing page. Make sure to align it to the edge of the drawing sheet. You can also move the grid around and adjust its size as needed. Finally, you can adjust the color of the grid as desired. To do this, simply select the "Design" tab and select "Grid Colors". You can choose from eight colors, and you can also adjust the width and opacity of the grid line. By utilizing Visio floor plan overlay grids, you can create precise and accurate art deco house designs. This is an essential tool for making effective floor plans in Visio.Visio Floor Plan Overlay Grids


Visio Floor Plan Overlay Grids


Create Visio House Plans with the Grid Overlay


Create Visio House Plans with the Grid Overlay


Simplifying Home Design with Visio House Plan Grid Overlays
 Do you often get overwhelmed by the seemingly endless choices for home design? With Visio's house plan grid overlays, you can organize your design layout and simplify the process of designing your home. Visio's
grid overlays
provide an interactive reference grid that will surely be helpful in creating the perfect house layout.
Visio's house plan grid overlays are customizable and easy-to-use tools. With these overlays, you can easily color-code spaces as you create your home's design. You can also label rooms with the customizable text.
Visio house plan grid overlays
give you an interactive reference grid right within your design, so you can easily map out the perfect house plan.
Furthermore, you can precisely adjust the size of the overlays. You can also choose to use the system measurements or inputs of your choice, like meters or feet. This way, you can guarantee that the measurements of your design are precise and accurate.
Another great feature of Visio's house plan grid overlays is that it works across multiple devices. This means that you can design your house plan at your own pace, while still having the latest information backed up across all your devices. You can also add your own details and colors to your design on the go, making the entire process of home design a lot easier.
It's also much easier to create an overall aesthetic for the entire house. With the grid overlays, you can easily match the colors and Themes of other rooms in the house. This way, you can be sure that the design of your house is uniform and coherent, making the entire house look much more elegant and beautiful.
Visio house plan grid overlays provide an organized and simplified approach to your design needs. Whether you need a completely new design for your home or are simply looking to give an existing design a fresh look, these house plan overlays will surely be of great help.
Do you often get overwhelmed by the seemingly endless choices for home design? With Visio's house plan grid overlays, you can organize your design layout and simplify the process of designing your home. Visio's
grid overlays
provide an interactive reference grid that will surely be helpful in creating the perfect house layout.
Visio's house plan grid overlays are customizable and easy-to-use tools. With these overlays, you can easily color-code spaces as you create your home's design. You can also label rooms with the customizable text.
Visio house plan grid overlays
give you an interactive reference grid right within your design, so you can easily map out the perfect house plan.
Furthermore, you can precisely adjust the size of the overlays. You can also choose to use the system measurements or inputs of your choice, like meters or feet. This way, you can guarantee that the measurements of your design are precise and accurate.
Another great feature of Visio's house plan grid overlays is that it works across multiple devices. This means that you can design your house plan at your own pace, while still having the latest information backed up across all your devices. You can also add your own details and colors to your design on the go, making the entire process of home design a lot easier.
It's also much easier to create an overall aesthetic for the entire house. With the grid overlays, you can easily match the colors and Themes of other rooms in the house. This way, you can be sure that the design of your house is uniform and coherent, making the entire house look much more elegant and beautiful.
Visio house plan grid overlays provide an organized and simplified approach to your design needs. Whether you need a completely new design for your home or are simply looking to give an existing design a fresh look, these house plan overlays will surely be of great help.
Benefits of Visio House Plan Grid Overlays
- Customizable and easy-to-use
- Interactive reference grid
- Adjustable size and system measurements
- Multi-device accessibility
- Aesthetic uniformity for an entire house