Setting up a bathroom sink drain may seem like a daunting task, but with the right tools and knowledge, it can be done easily and efficiently. Whether you're installing a new sink or replacing an old drain, this step-by-step guide will help you get the job done right.How to Set Up a Bathroom Sink Drain


How to Set Up a Bathroom Sink Drain


Installing a bathroom sink drain requires a few key steps to ensure proper functioning. Before you begin, gather all necessary tools and materials, including a new drain kit, plumber's putty, and a wrench. Then, follow these simple steps: Step 1: Remove the old drain by unscrewing the nut that connects it to the bottom of the sink. You may need to use a wrench to loosen it. Step 2: Clean the area around the drain hole and remove any old putty or debris. Step 3: Roll a small amount of plumber's putty into a thin rope and place it around the opening of the drain hole. Step 4: Insert the new drain into the hole and press down firmly to ensure a tight seal with the putty. Step 5: Underneath the sink, attach the rubber gasket and nut to the bottom of the drain. Tighten with a wrench. Step 6: Connect the P-trap to the drain pipe and tighten with a wrench. Step 7: Turn on the water to test for any leaks. If everything looks good, you're all set!How to Install a Bathroom Sink Drain


How to Install a Bathroom Sink Drain


:max_bytes(150000):strip_icc()/bathroom-sink-drain-installation-2718843-07-2b728cbd5c994dc39179346f51bb6421.jpg)


/bathroom-sink-drain-installation-2718843-03-6fee5b9d9f7d475abfe06a95ddb1f695.jpg)
If you're new to DIY plumbing, it's important to have a comprehensive guide to follow when installing a bathroom sink drain. Here are some additional tips to ensure a successful installation: Tip 1: Make sure the new drain kit is the correct size for your sink and plumbing. Tip 2: Use a rag or towel to protect the sink's finish when using a wrench. Tip 3: If your sink has an overflow hole, be sure to install the drain accordingly. Tip 4: Use a level to ensure the sink is installed evenly and securely. Tip 5: If you encounter any difficulties, don't hesitate to call a professional plumber for assistance.Bathroom Sink Drain Installation Guide


Bathroom Sink Drain Installation Guide


To summarize, here is a step-by-step guide for setting up a bathroom sink drain: Step 1: Gather all necessary tools and materials. Step 2: Remove the old drain. Step 3: Clean the area and apply plumber's putty. Step 4: Insert the new drain and tighten the nut. Step 5: Connect the P-trap and tighten the nuts. Step 6: Test for leaks. Step 7: Enjoy your newly installed bathroom sink drain!Step-by-Step Guide for Setting Up a Bathroom Sink Drain


Step-by-Step Guide for Setting Up a Bathroom Sink Drain

/bathroom-sink-drain-installation-2718843-01-4955fe1f576b447a91abe51c126d220b.jpg)


Setting up a bathroom sink drain can save you time and money, as long as you have the necessary tools and a little bit of know-how. With the right instructions and some patience, you can successfully complete this DIY project and have a fully functioning sink in no time.DIY Bathroom Sink Drain Setup

DIY Bathroom Sink Drain Setup


Before you begin the installation process, make sure you have the following essential tools on hand: Wrench - This will be used to remove the old drain and tighten the new one. Plumber's Putty - A must-have for creating a watertight seal around the drain. New Drain Kit - Make sure to check the size and compatibility with your sink and plumbing. Screwdriver - May be needed for removing the old drain or tightening screws. Level - This will ensure your sink is installed evenly and securely.Essential Tools for Setting Up a Bathroom Sink Drain


Essential Tools for Setting Up a Bathroom Sink Drain


Proper installation is key to ensuring your bathroom sink drain functions correctly. Here are some additional tips to keep in mind: Tip 1: Read the instructions carefully before beginning the installation process. Tip 2: Use a damp cloth to clean up any excess plumber's putty after installation. Tip 3: If the drain is leaking, try tightening the connections before calling a plumber. Tip 4: Consider using a drain stopper or mesh strainer to prevent clogs in the future. Tip 5: Regularly clean and maintain your sink and drain to prevent any issues.Tips for Properly Setting Up a Bathroom Sink Drain

Tips for Properly Setting Up a Bathroom Sink Drain


While setting up a bathroom sink drain may seem simple, there are some common mistakes to avoid to ensure a successful installation: Mistake 1: Not using enough plumber's putty, resulting in leaks. Mistake 2: Using the wrong size or type of drain kit. Mistake 3: Forgetting to remove the old putty or debris before applying new putty. Mistake 4: Overtightening connections, which can cause damage to the sink or drain. Mistake 5: Not testing for leaks before using the sink.Common Mistakes to Avoid When Setting Up a Bathroom Sink Drain

Common Mistakes to Avoid When Setting Up a Bathroom Sink Drain


If you encounter any problems with your bathroom sink drain setup, here are some troubleshooting steps to follow: Problem: Leak at the drain connection. Solution: Tighten the connection with a wrench and check for cracks or damage in the drain kit. Problem: Water drains slowly or not at all. Solution: Check for clogs in the P-trap or drain pipe and remove any debris. If the issue persists, there may be a blockage further down the plumbing system. Problem: Sink is not level or securely attached. Solution: Use a level to adjust the sink and tighten all connections.How to Troubleshoot Issues with Bathroom Sink Drain Setup


How to Troubleshoot Issues with Bathroom Sink Drain Setup

Deciding between hiring a professional plumber or tackling the installation yourself can be a tough decision. While hiring a professional can ensure a quick and efficient installation, DIY can save you money and give you a sense of accomplishment. Ultimately, it comes down to your comfort level and the complexity of the installation. By following this guide and using the proper tools and techniques, you can successfully set up a bathroom sink drain and have a functional and beautiful sink in your home. Remember to take your time, read instructions carefully, and troubleshoot any issues that may arise. Happy DIY-ing!Professional vs. DIY Bathroom Sink Drain Setup: Which is Better?
Professional vs. DIY Bathroom Sink Drain Setup: Which is Better?
:max_bytes(150000):strip_icc()/bathroom-sink-drain-installation-2718843-02-61e5ecbee1e949be8d8f45ac4f5a6797.jpg)
Introduction
 When it comes to designing a house, every little detail matters. From the color of the walls to the placement of furniture, everything contributes to the overall aesthetic and functionality of a home. One often overlooked aspect of house design is the
bathroom sink drain
. While it may seem like a small and insignificant feature, the
drain
plays a crucial role in keeping your bathroom clean and functional. In this article, we will discuss the importance of a well-installed
drain
and provide a step-by-step guide on how to set up a
bathroom sink drain
in your home.
When it comes to designing a house, every little detail matters. From the color of the walls to the placement of furniture, everything contributes to the overall aesthetic and functionality of a home. One often overlooked aspect of house design is the
bathroom sink drain
. While it may seem like a small and insignificant feature, the
drain
plays a crucial role in keeping your bathroom clean and functional. In this article, we will discuss the importance of a well-installed
drain
and provide a step-by-step guide on how to set up a
bathroom sink drain
in your home.
The Importance of a Properly Installed Bathroom Sink Drain
 A
bathroom sink drain
is an essential component of any bathroom. It is responsible for draining out wastewater and keeping your sink clean and hygienic. A
drain
that is not installed correctly can lead to a host of problems, including clogs, leaks, and foul odors. Not only can this be a nuisance, but it can also lead to costly repairs in the future. Therefore, it is crucial to ensure that your
bathroom sink drain
is installed correctly from the beginning.
A
bathroom sink drain
is an essential component of any bathroom. It is responsible for draining out wastewater and keeping your sink clean and hygienic. A
drain
that is not installed correctly can lead to a host of problems, including clogs, leaks, and foul odors. Not only can this be a nuisance, but it can also lead to costly repairs in the future. Therefore, it is crucial to ensure that your
bathroom sink drain
is installed correctly from the beginning.
Step-by-Step Guide for Setting Up a Bathroom Sink Drain
 Now that we understand the importance of a properly installed
bathroom sink drain
, let's dive into the steps involved in setting one up in your home.
Step 1: Gather Materials
Before you begin, make sure you have all the necessary materials on hand. This includes a new
bathroom sink
, a
drain
assembly, plumber's putty, a wrench, and a screwdriver.
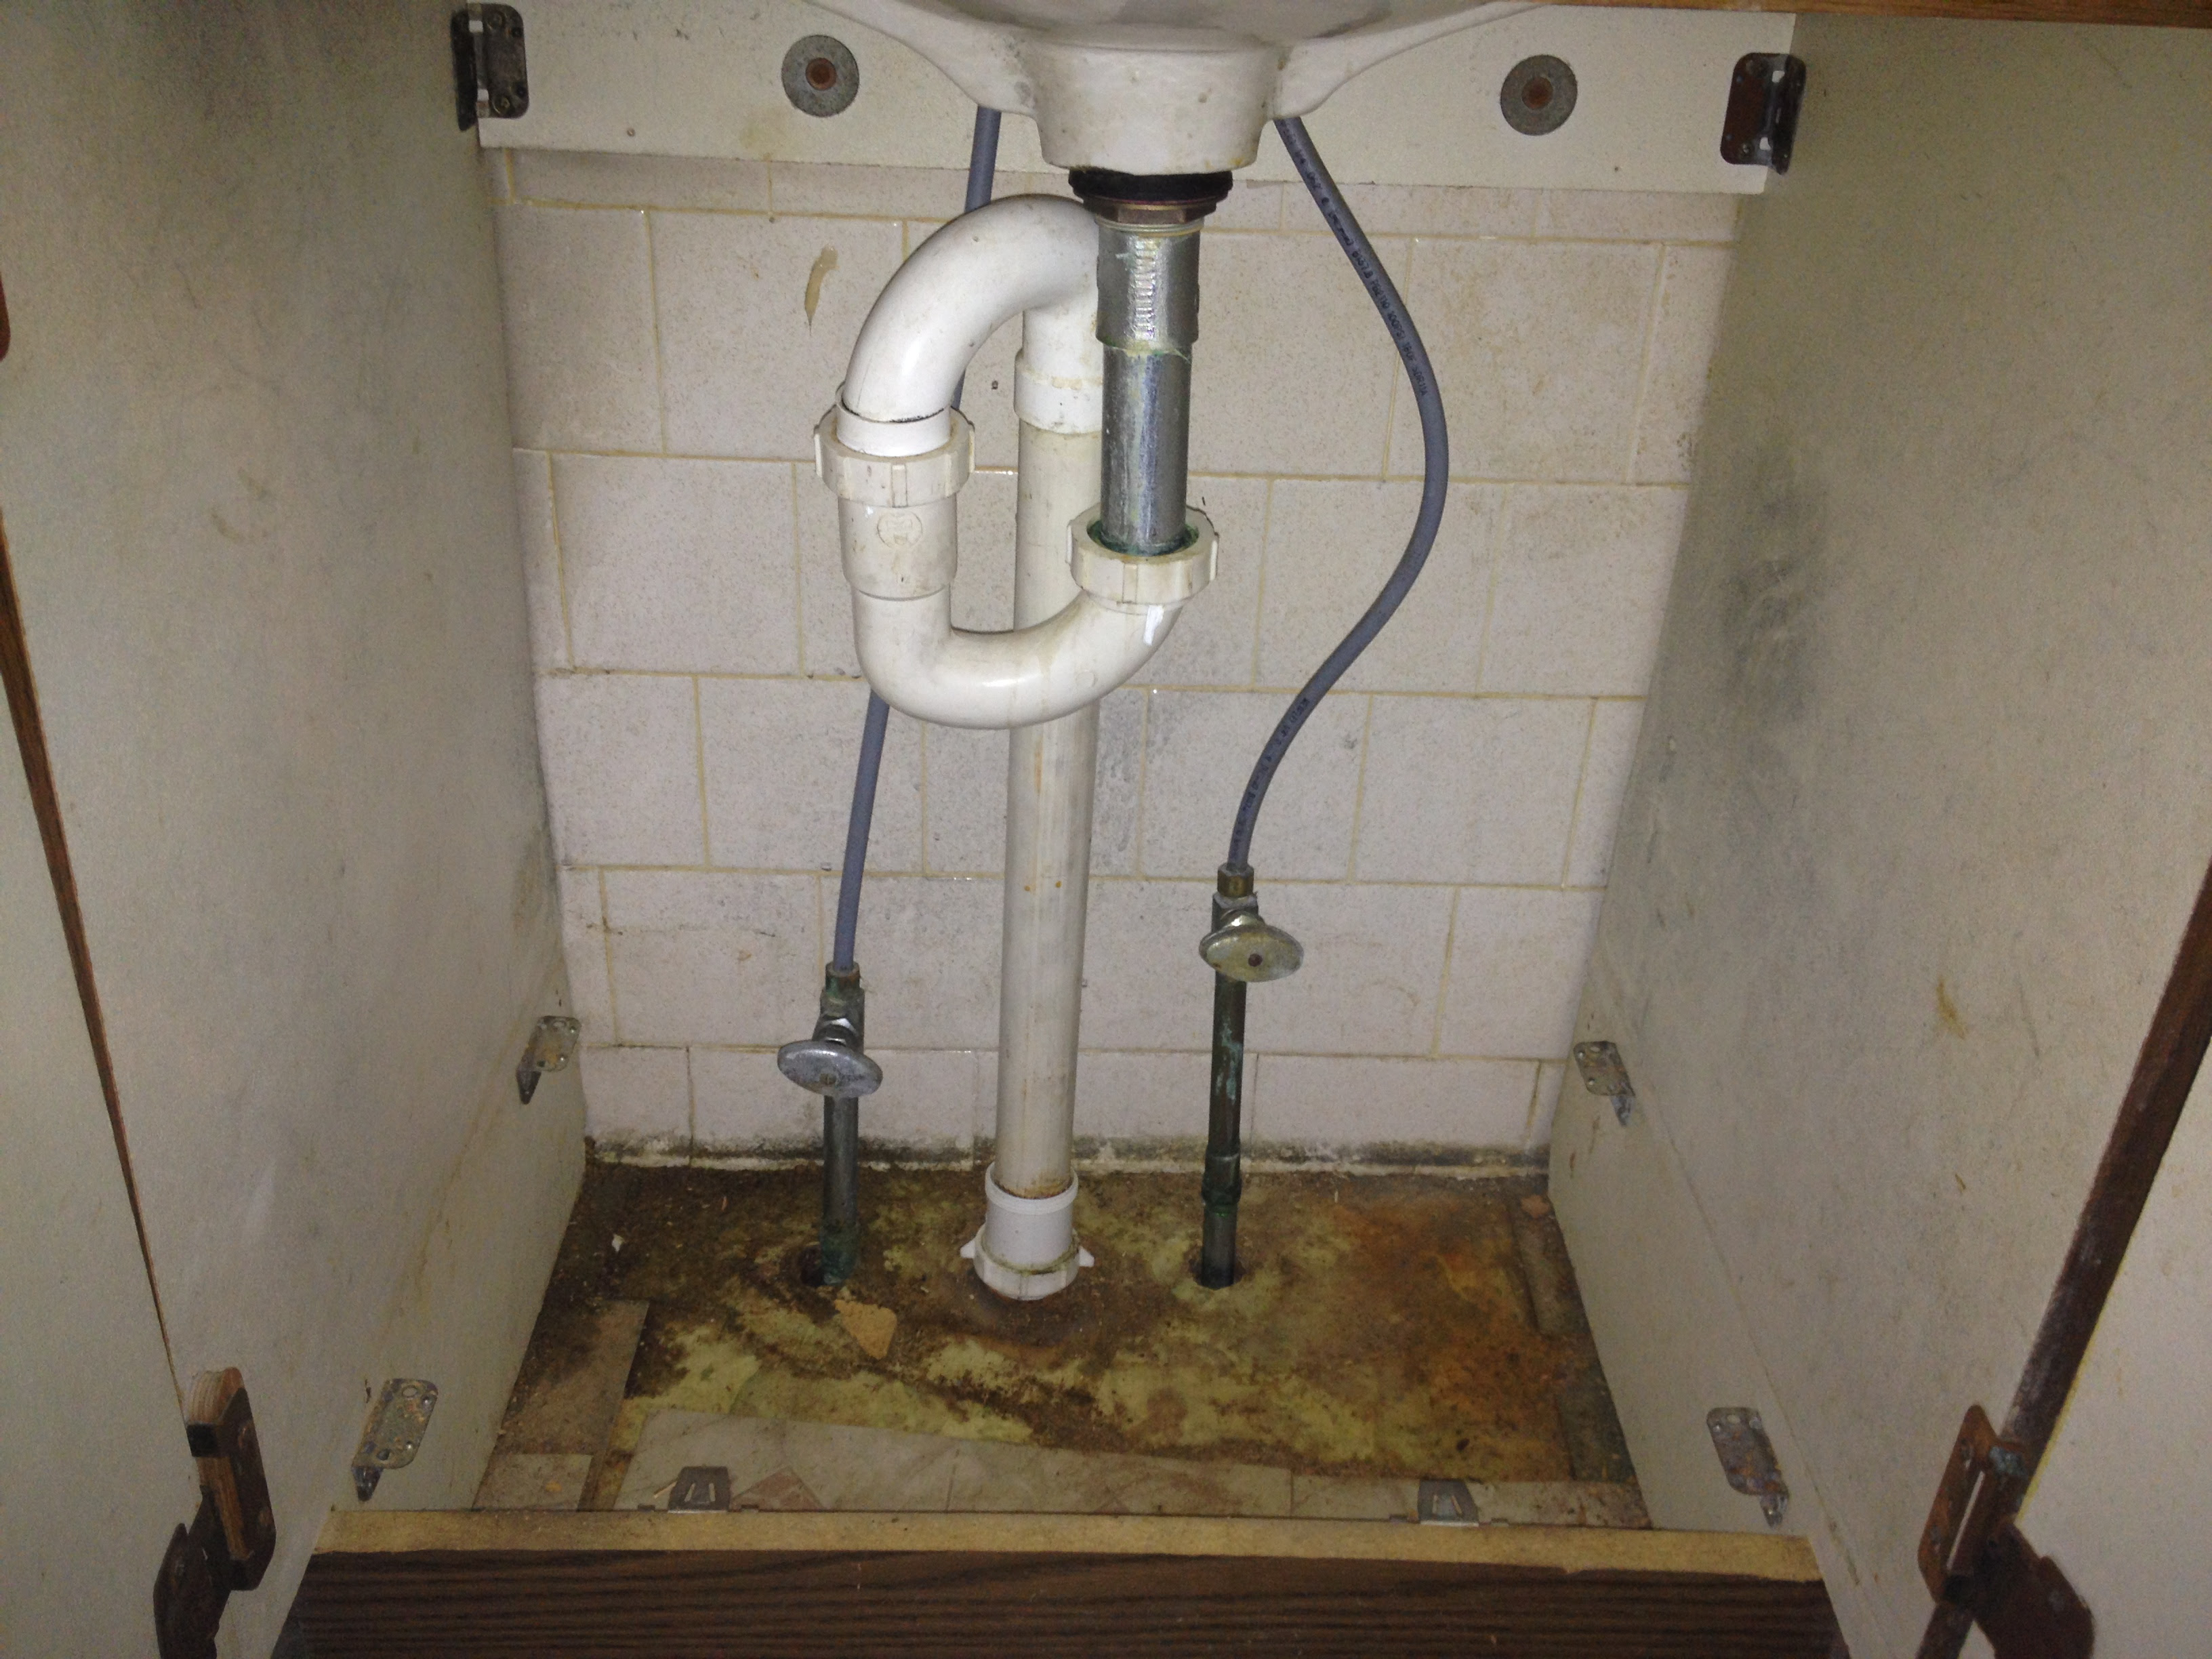
Step 2: Remove the Old Sink
If you are replacing an old
bathroom sink
, start by removing the old one. Turn off the water supply, disconnect the faucet and
drain
pipes, and remove the sink from the countertop.
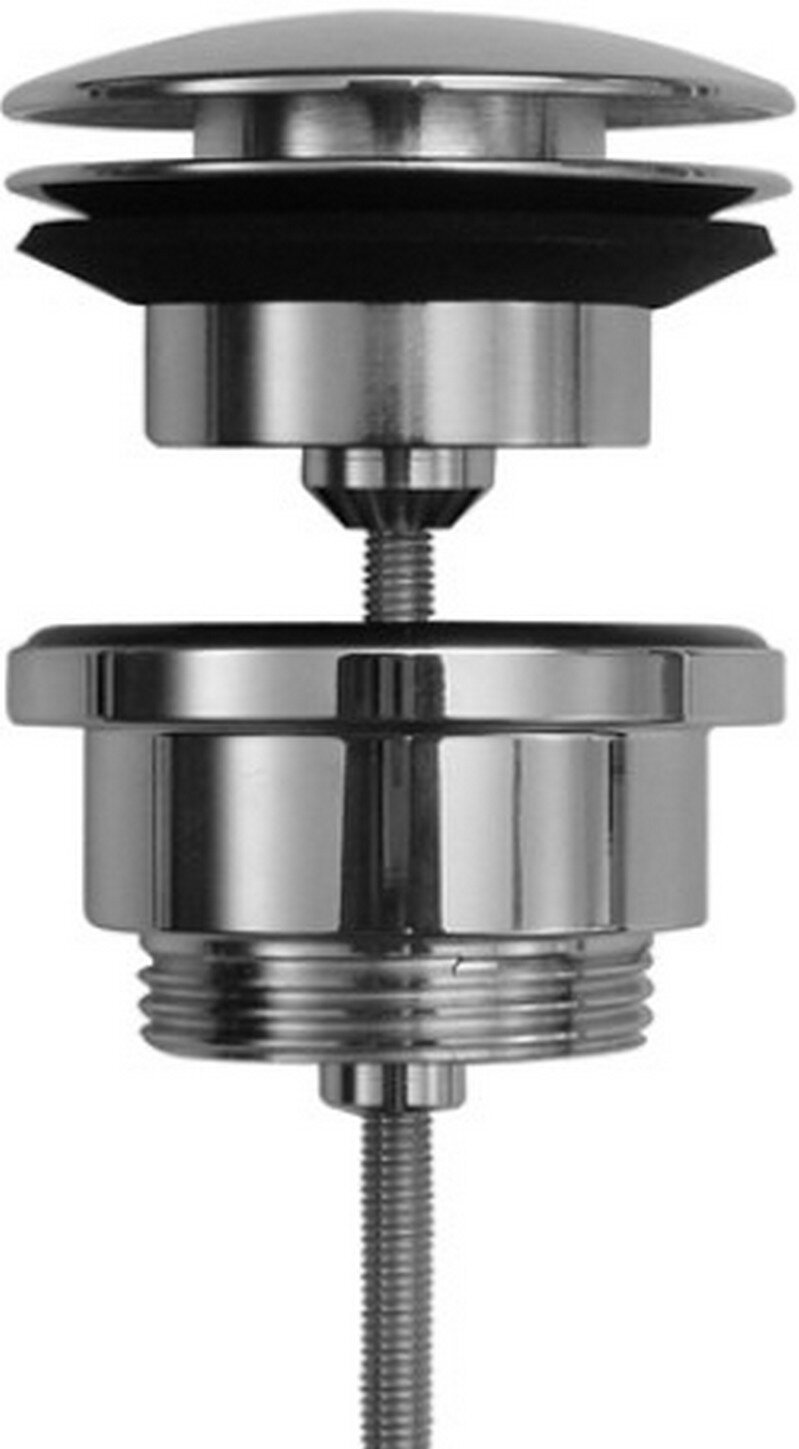
Step 3: Prepare the New Sink
Place the new
bathroom sink
upside down on a flat surface. Apply a thin layer of plumber's putty around the edge of the
drain
hole. This will help create a watertight seal.
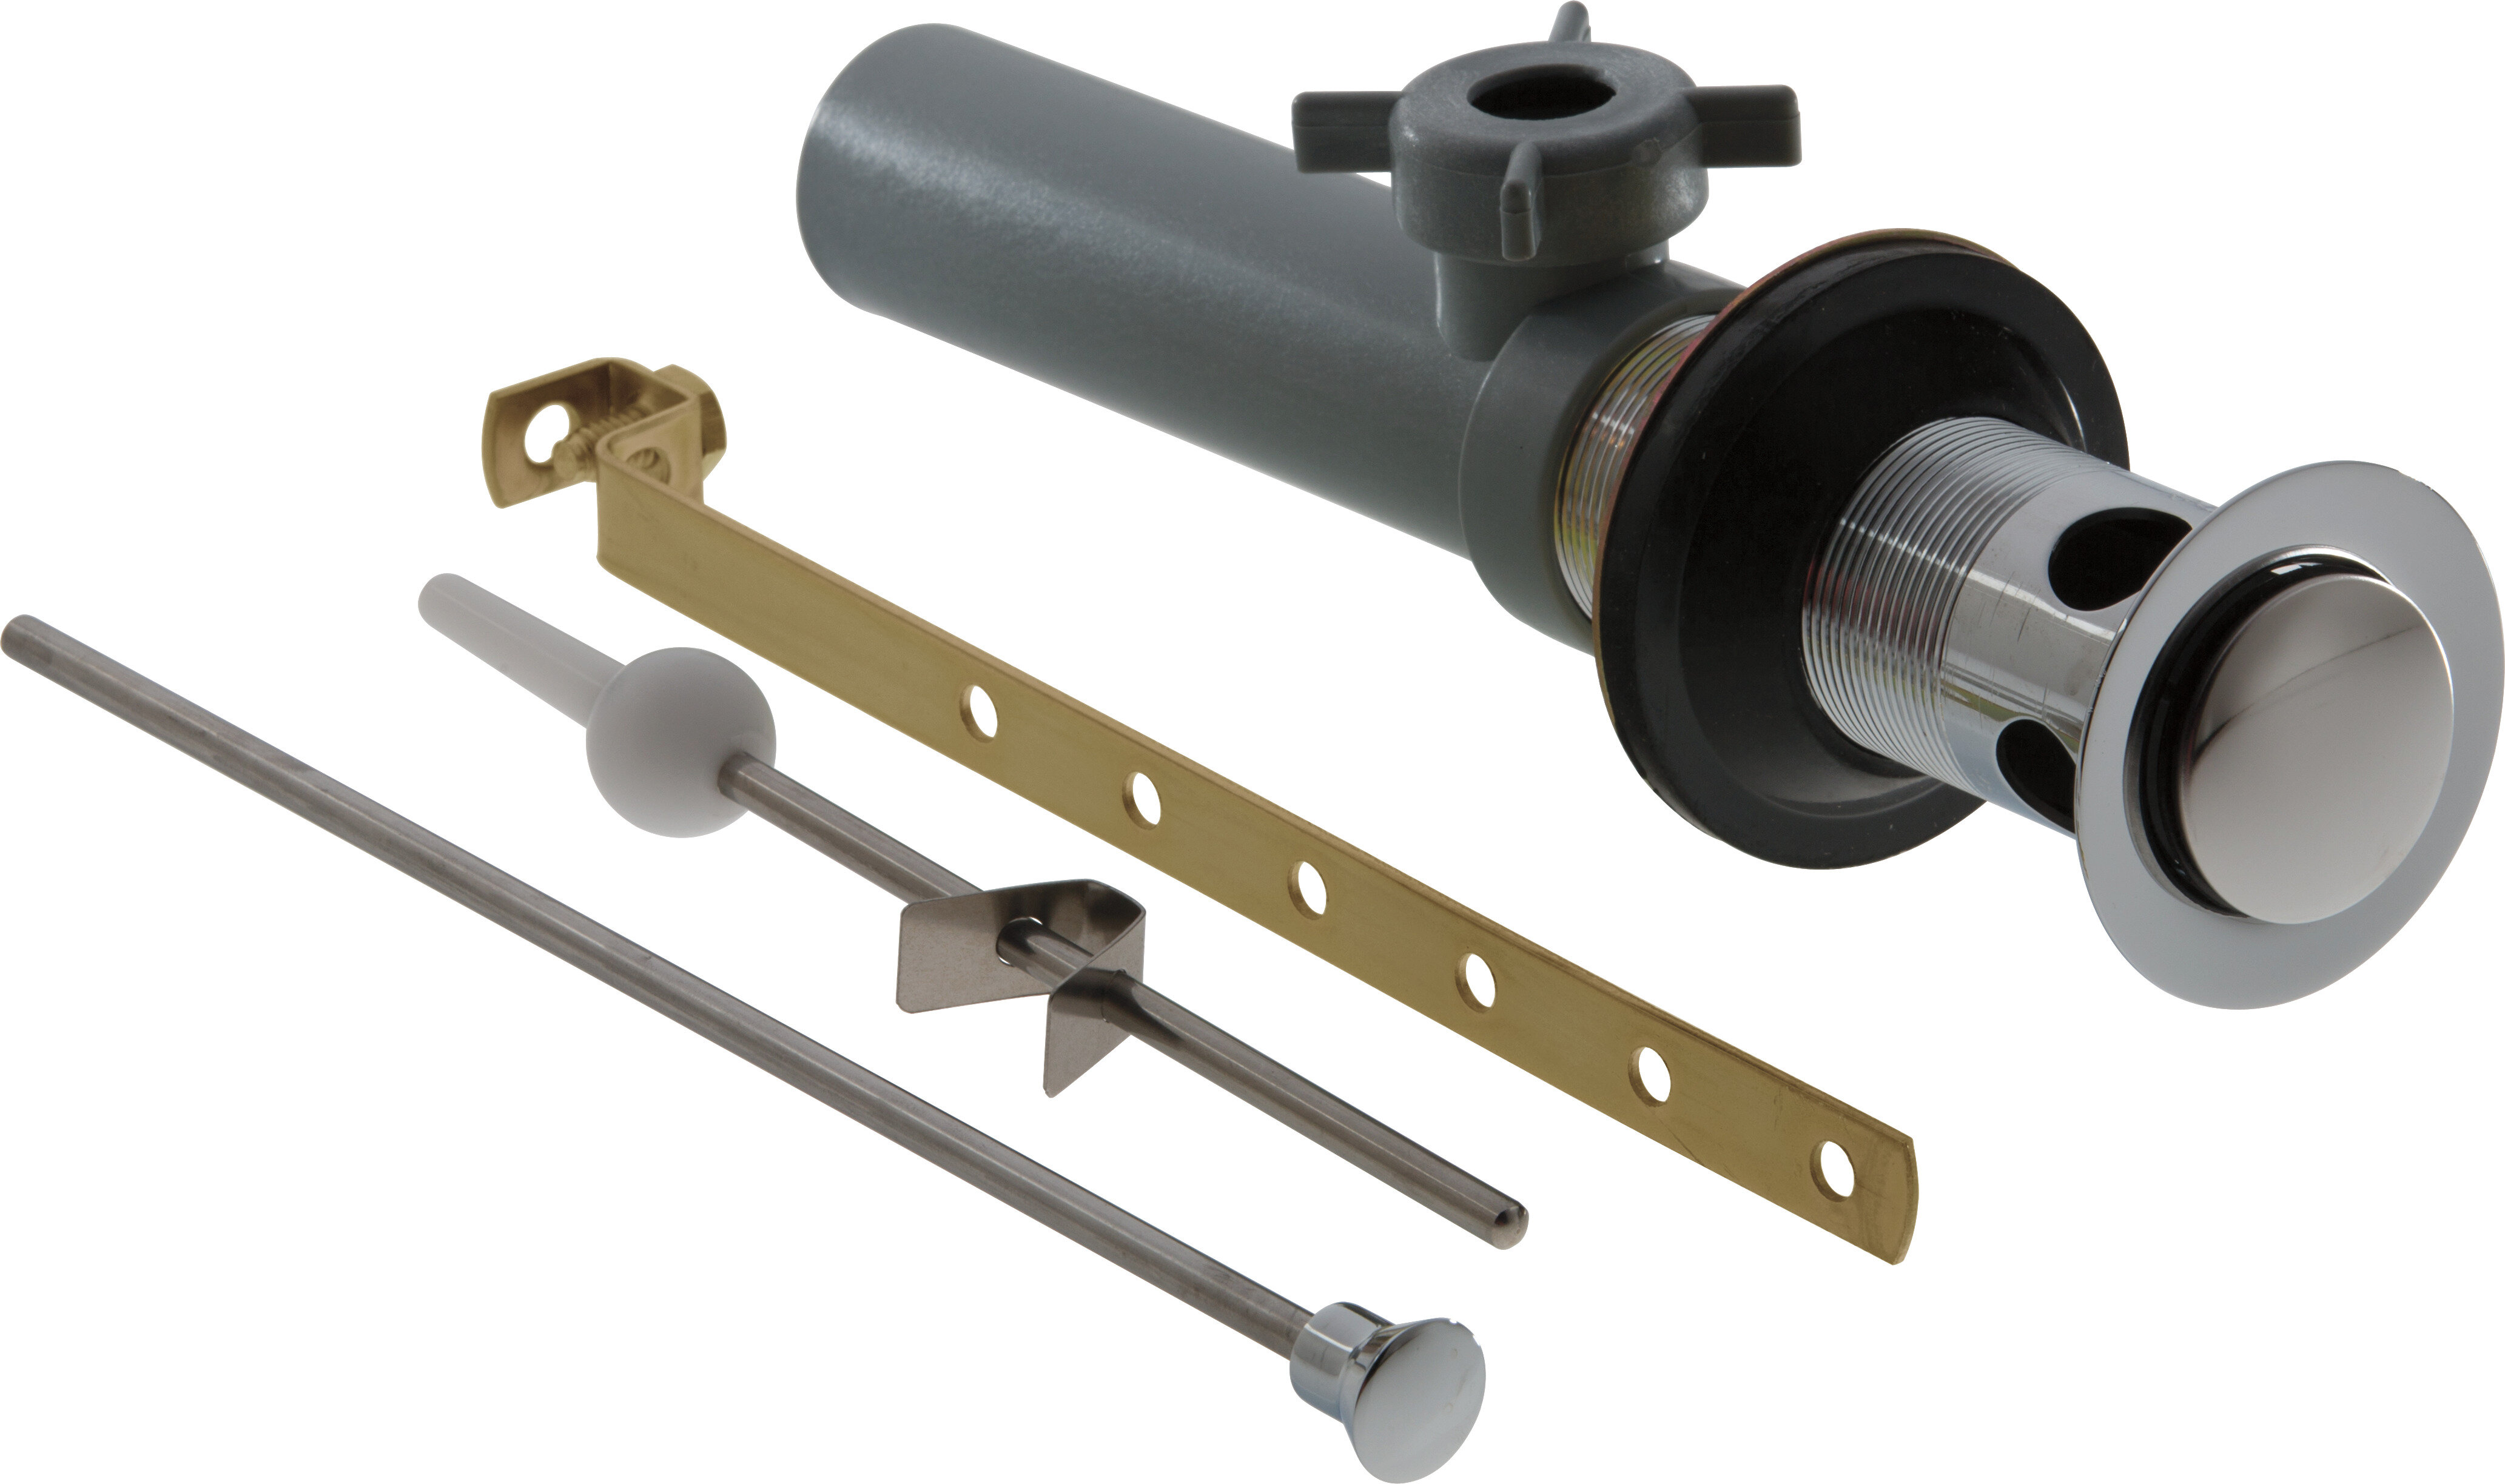
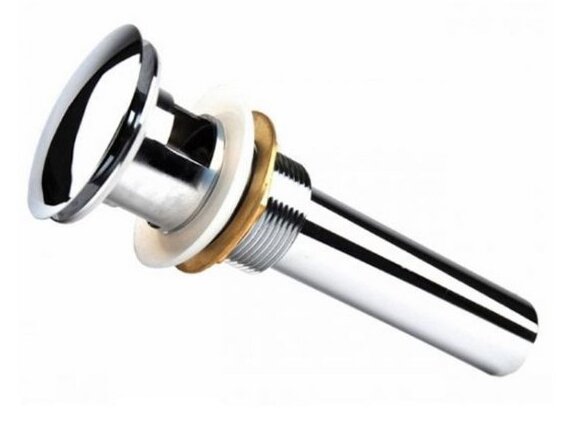
Step 4: Install the Drain Assembly
Insert the
drain
assembly into the
drain
hole on the sink. From under the sink, thread the mounting nut onto the
drain
assembly and tighten it with a wrench.
Step 5: Connect the Pipes
Connect the
drain
pipes to the
drain
assembly. Use a wrench to tighten the connections and ensure there are no leaks.
Step 6: Attach the Sink to the Countertop
Place the sink on top of the countertop and secure it in place with mounting clips. Use a screwdriver to tighten the clips.
Step 7: Connect the Water Supply
Finally, connect the water supply to the faucet and turn on the water. Check for any leaks and make sure the
bathroom sink drain
is functioning properly.
Now that we understand the importance of a properly installed
bathroom sink drain
, let's dive into the steps involved in setting one up in your home.
Step 1: Gather Materials
Before you begin, make sure you have all the necessary materials on hand. This includes a new
bathroom sink
, a
drain
assembly, plumber's putty, a wrench, and a screwdriver.
Step 2: Remove the Old Sink
If you are replacing an old
bathroom sink
, start by removing the old one. Turn off the water supply, disconnect the faucet and
drain
pipes, and remove the sink from the countertop.
Step 3: Prepare the New Sink
Place the new
bathroom sink
upside down on a flat surface. Apply a thin layer of plumber's putty around the edge of the
drain
hole. This will help create a watertight seal.
Step 4: Install the Drain Assembly
Insert the
drain
assembly into the
drain
hole on the sink. From under the sink, thread the mounting nut onto the
drain
assembly and tighten it with a wrench.
Step 5: Connect the Pipes
Connect the
drain
pipes to the
drain
assembly. Use a wrench to tighten the connections and ensure there are no leaks.
Step 6: Attach the Sink to the Countertop
Place the sink on top of the countertop and secure it in place with mounting clips. Use a screwdriver to tighten the clips.
Step 7: Connect the Water Supply
Finally, connect the water supply to the faucet and turn on the water. Check for any leaks and make sure the
bathroom sink drain
is functioning properly.
Conclusion
 A well-installed
bathroom sink drain
is crucial for a clean and functional bathroom. By following the steps outlined in this guide, you can ensure that your
drain
is installed correctly and avoid any future headaches. Remember, attention to detail is key when it comes to house design, and the
bathroom sink drain
is no exception.
A well-installed
bathroom sink drain
is crucial for a clean and functional bathroom. By following the steps outlined in this guide, you can ensure that your
drain
is installed correctly and avoid any future headaches. Remember, attention to detail is key when it comes to house design, and the
bathroom sink drain
is no exception.