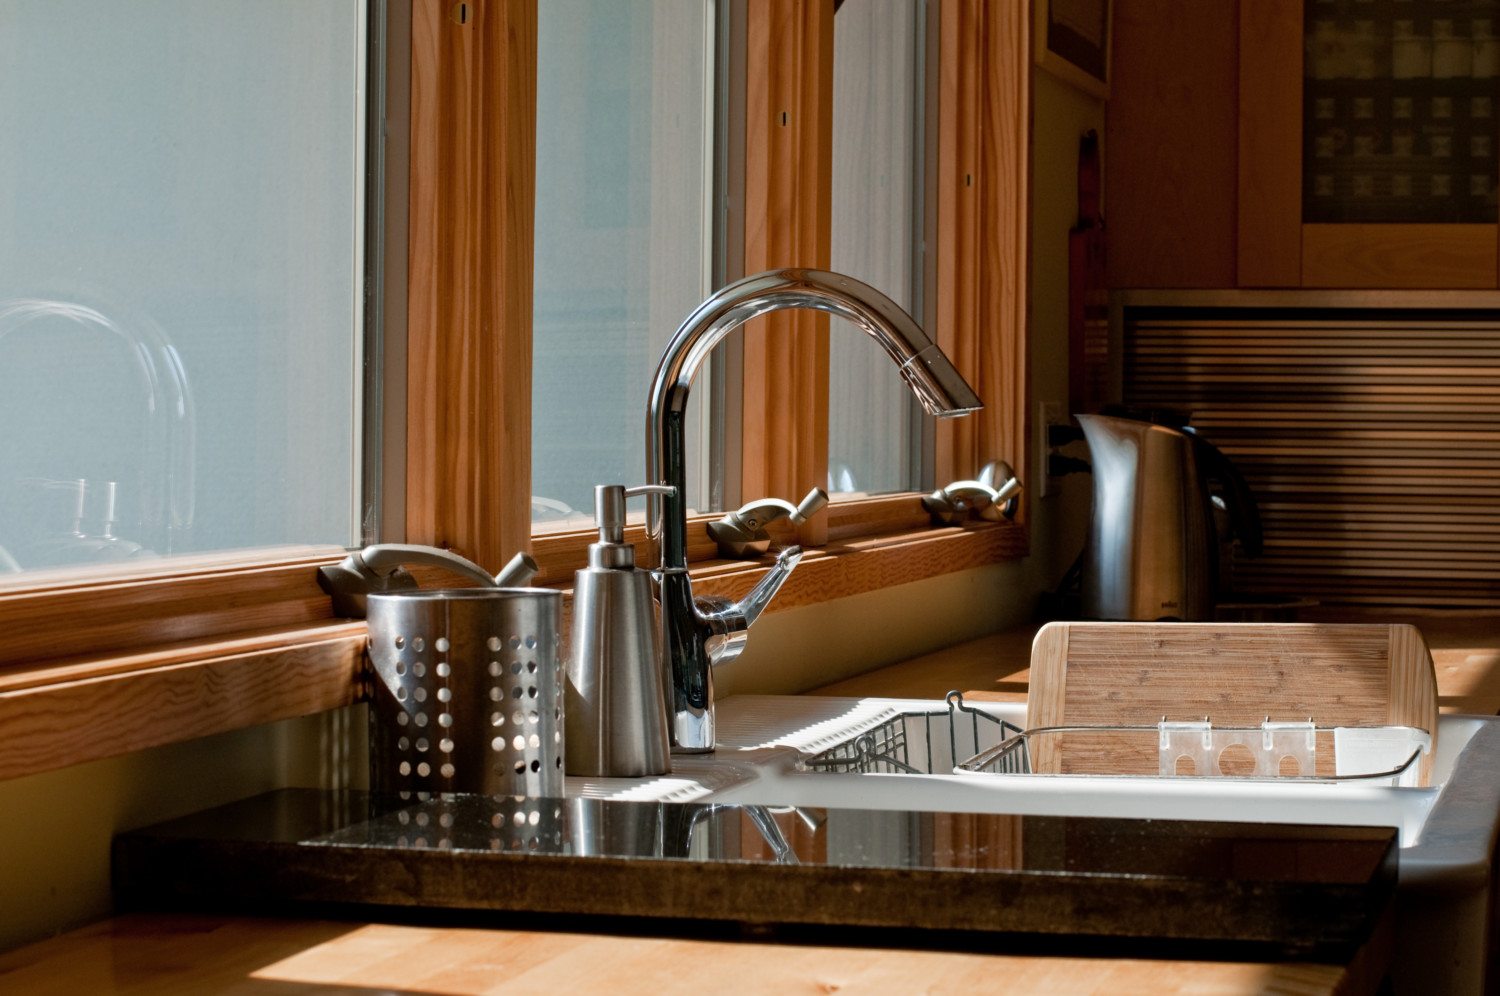
If you're remodeling your kitchen or simply need to replace your old kitchen sink, one of the main components you'll need to install is the kitchen sink drain. This is the part of the sink that connects to the plumbing and allows water to drain out. It may seem like a daunting task, but with the right tools and a little bit of know-how, you can easily install a kitchen sink drain on your own. First, start by removing the old drain if you're replacing an existing sink. Use a pipe wrench to loosen the nuts and remove the old drain and any remaining putty or caulk. Once the old drain is removed, clean the area around the drain hole to ensure a smooth surface for the new drain. Next, apply a thin layer of plumber's putty around the bottom edge of the drain flange. This will create a watertight seal when the drain is installed. Place the drain flange into the drain hole and press down firmly. Then, from underneath the sink, screw on the mounting nuts and washers to secure the drain in place. Finally, connect the P-trap to the drain and the main plumbing line. Make sure all connections are tight and secure. Turn on the water to test for any leaks and make adjustments if necessary. Congratulations, you have successfully installed a kitchen sink drain!1. How to Install a Kitchen Sink Drain


1. How to Install a Kitchen Sink Drain


/how-to-install-a-sink-drain-2718789-hero-b5b99f72b5a24bb2ae8364e60539cece.jpg)


:max_bytes(150000):strip_icc()/how-to-install-a-sink-drain-2718789-07-e20d2b61c2d4497b8738ed41060537ba.jpg)
Replacing a kitchen sink may seem like a daunting task, but with the right tools and some patience, it can be done easily. Whether you're upgrading to a new sink or just need to replace a damaged one, here's a step-by-step guide on how to replace a kitchen sink. First, turn off the water supply and disconnect the old sink from the plumbing. Use a utility knife to cut through any caulk or adhesive holding the sink in place. Once the sink is disconnected, remove it from the counter and clean the area thoroughly. Next, measure the opening for the new sink and make any necessary adjustments to the countertop. Place the new sink upside down on a soft surface and attach the mounting clips or brackets to the sink. Then, apply a bead of silicone caulk around the edge of the sink and carefully place it into the countertop opening. From underneath the sink, tighten the mounting clips or brackets to secure the sink in place. Once the sink is secure, reconnect the plumbing and turn on the water supply. Test for any leaks and make any necessary adjustments. Voila, you have successfully replaced your kitchen sink!2. How to Replace a Kitchen Sink


2. How to Replace a Kitchen Sink


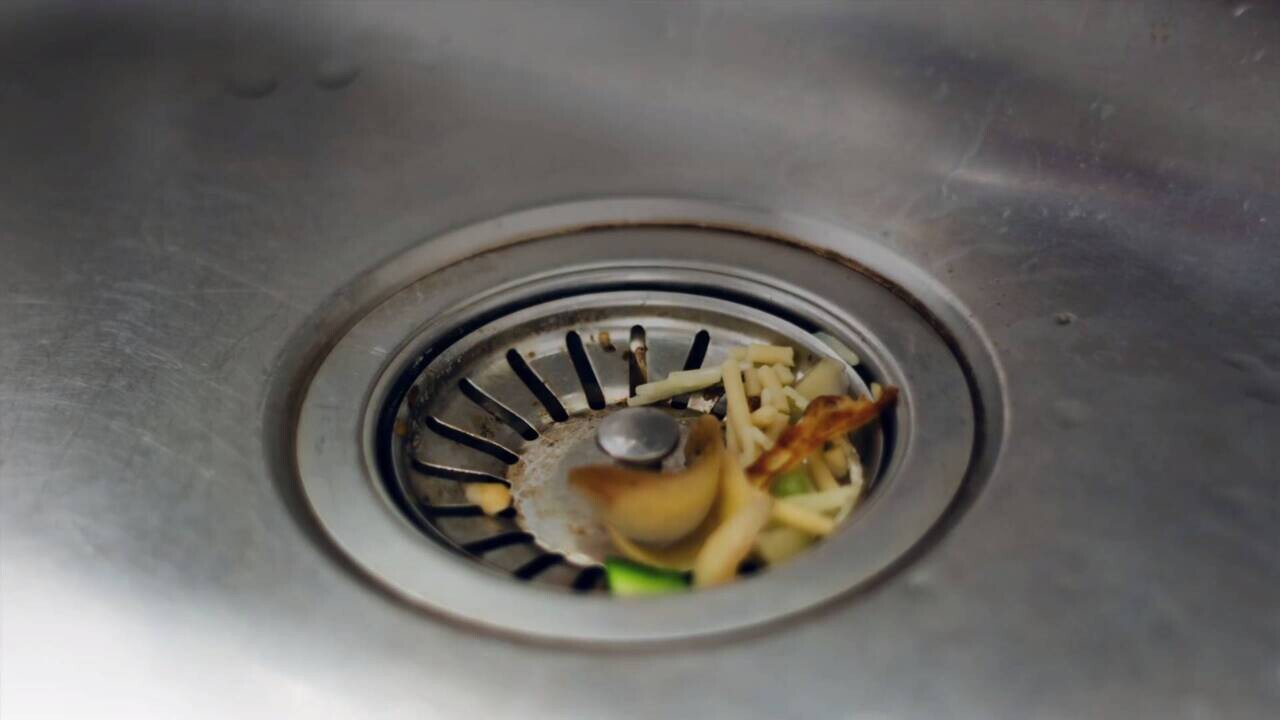
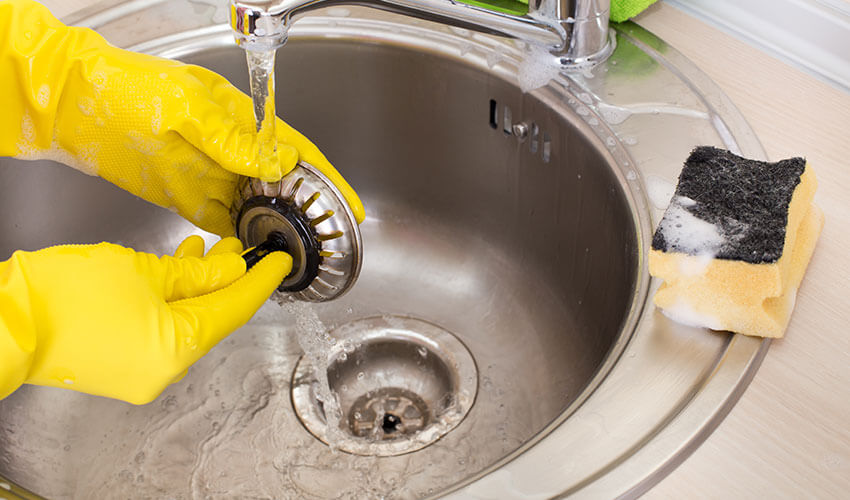
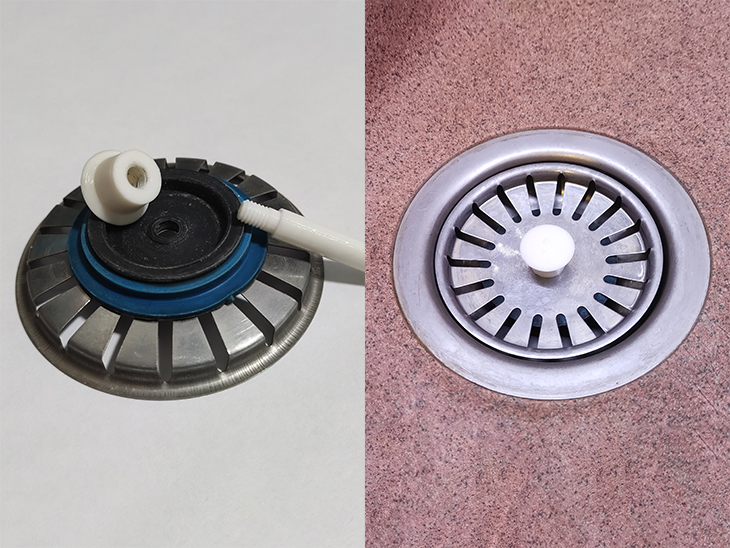
A clogged kitchen sink can be a major inconvenience, but before reaching for harsh chemicals, try these natural methods to unclog your sink. First, try using a plunger to loosen and remove any blockages. If that doesn't work, try pouring boiling water down the drain to break up any grease or debris. If the clog persists, try using a mixture of baking soda and vinegar. Pour ½ cup of baking soda down the drain, followed by 1 cup of vinegar. Let it sit for 15 minutes, then pour boiling water down the drain to flush out the mixture and hopefully clear the clog. If none of these methods work, you may need to use a drain snake or call a professional plumber to help clear the clog. However, with a little bit of patience and some household ingredients, you can unclog your kitchen sink and get back to your daily routine.3. How to Unclog a Kitchen Sink


3. How to Unclog a Kitchen Sink

/Kitchen-sink-791172_1920-589cd9b25f9b58819c51b2e1.jpg)
/how-to-unclog-a-kitchen-sink-2718799_sketch_FINAL-8c5caa805a69493ab22dfb537c72a1b7.png)


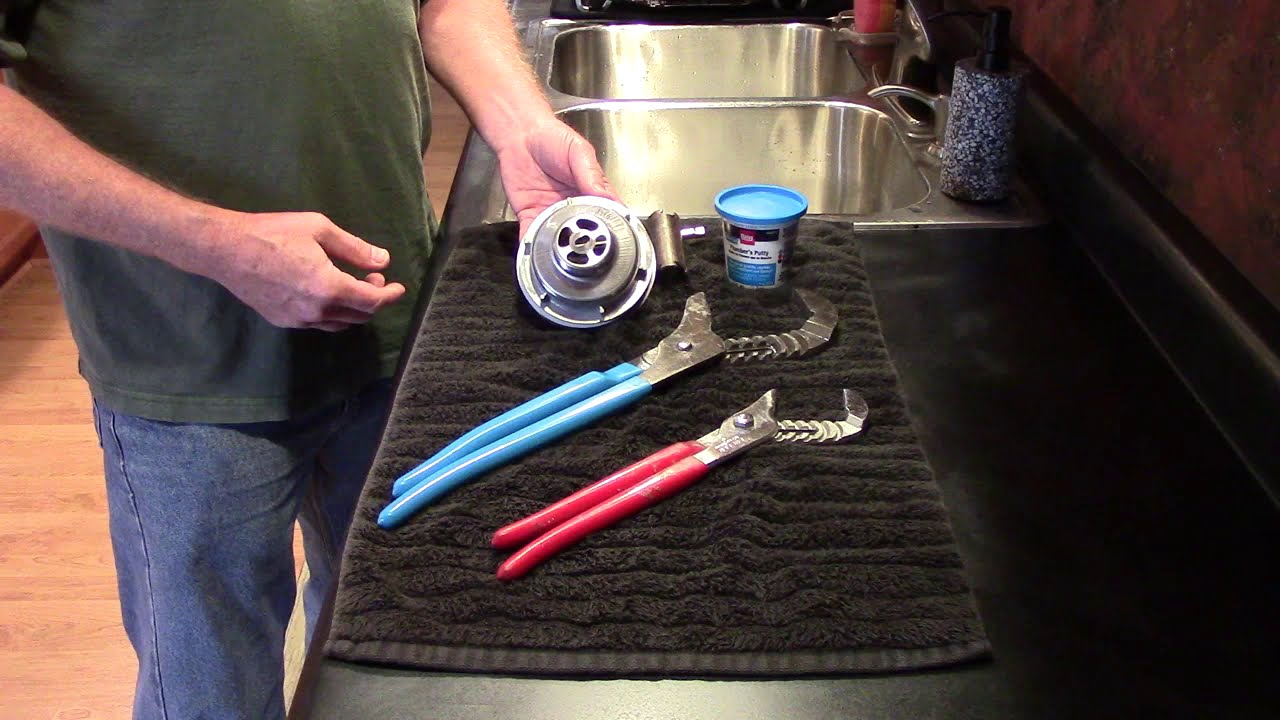
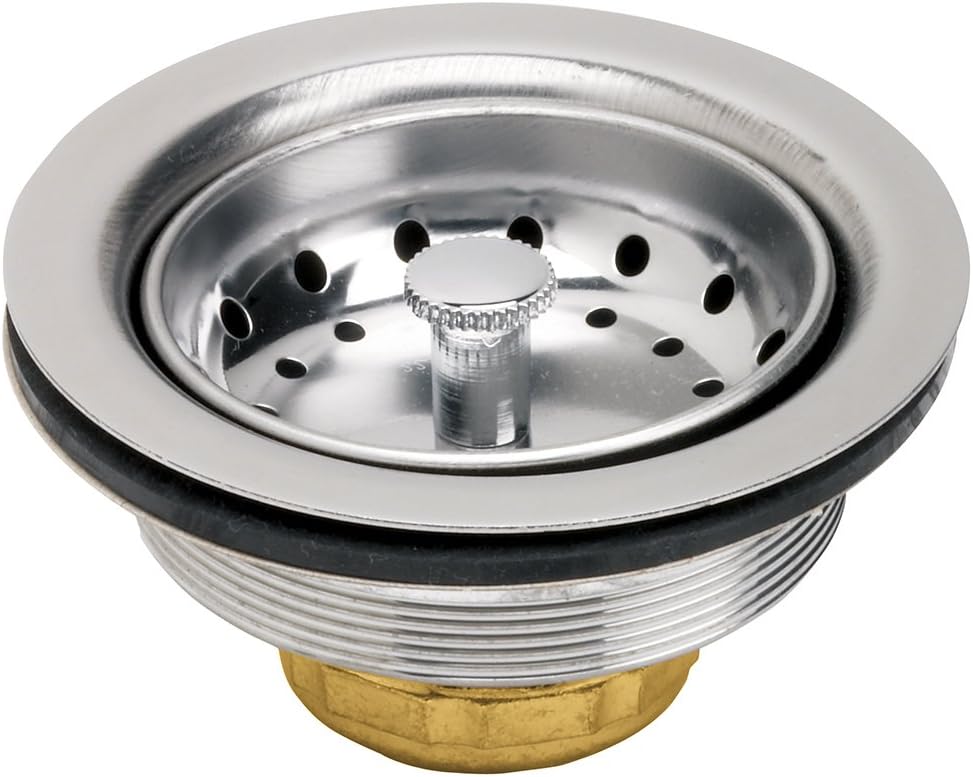
The kitchen sink strainer is an important part of your sink that helps prevent food scraps from clogging your drain. Installing a new kitchen sink strainer is a simple process that can be done in just a few steps. First, remove the old strainer if you're replacing an existing one. Use a pipe wrench to loosen the locknut and remove the old strainer and any remaining putty or caulk. Next, clean the area around the drain hole to ensure a smooth surface for the new strainer. Apply a thin layer of plumber's putty around the bottom edge of the strainer basket. Then, place the strainer basket into the drain hole and press down firmly. From underneath the sink, screw on the locknut to secure the strainer in place. Wipe away any excess putty from around the strainer. Finally, attach the rubber gasket and tailpiece to the strainer and tighten all connections. Turn on the water to test for any leaks and make adjustments if necessary. You have now successfully installed a kitchen sink strainer!4. How to Install a Kitchen Sink Strainer


4. How to Install a Kitchen Sink Strainer


A leaky kitchen sink is not only annoying, but it can also waste water and increase your monthly water bill. Luckily, fixing a leaky kitchen sink is a simple task that can be done in just a few steps. First, determine where the leak is coming from. It could be a loose connection or a damaged part. If it's a loose connection, simply tighten the affected area. If it's a damaged part, such as a worn out washer or O-ring, you will need to replace it. To replace a damaged part, turn off the water supply and disassemble the affected area. Remove the damaged part and replace it with a new one. Reassemble the area and turn on the water supply to test for any leaks. If there are no leaks, you have successfully fixed your leaky kitchen sink.5. How to Fix a Leaky Kitchen Sink


5. How to Fix a Leaky Kitchen Sink


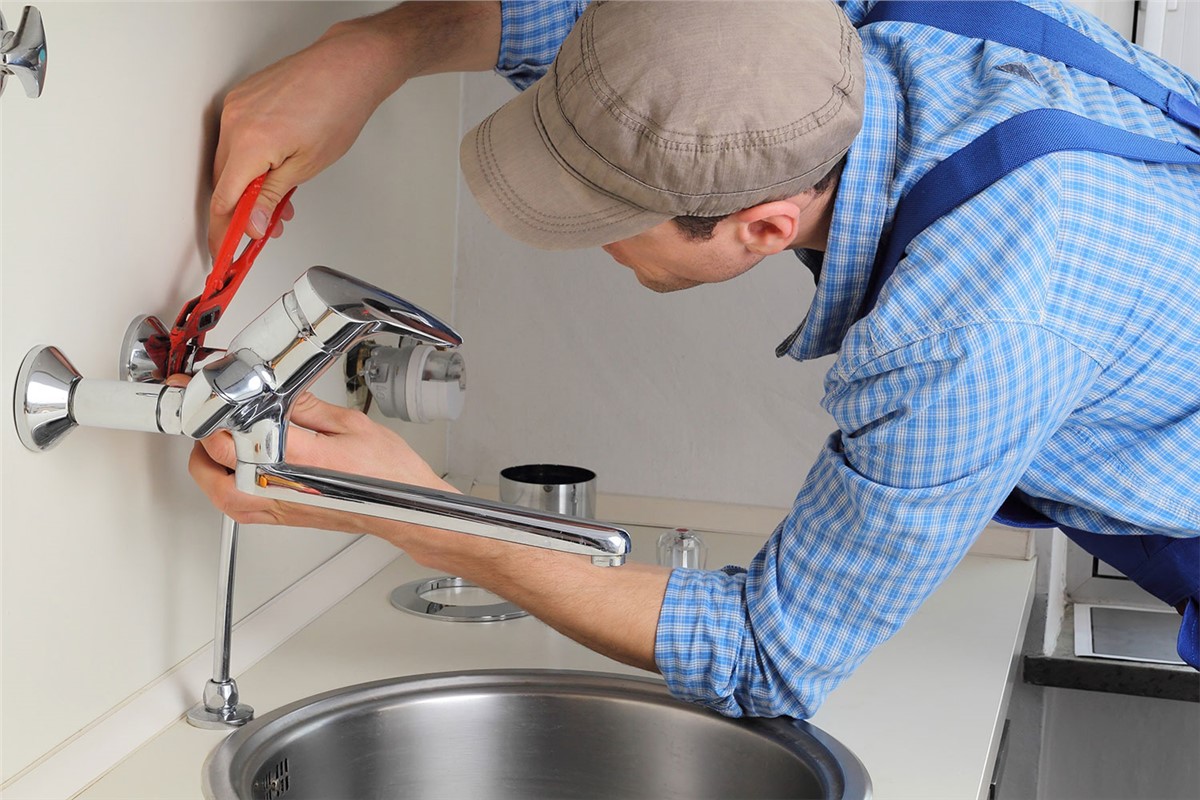
The kitchen sink faucet is not only a functional part of your sink, but it can also add style and personality to your kitchen. Installing a new kitchen sink faucet is a simple process that can be done in just a few steps. First, turn off the water supply and disconnect the old faucet from the plumbing. Then, remove the old faucet from the sink and clean the area thoroughly. Next, follow the manufacturer's instructions to assemble the new faucet. Place the new faucet into the sink and secure it with the mounting hardware provided. Then, attach the water supply lines and turn on the water supply to test for any leaks. Adjust the faucet as needed to ensure proper water flow and you have successfully installed a new kitchen sink faucet.6. How to Install a Kitchen Sink Faucet


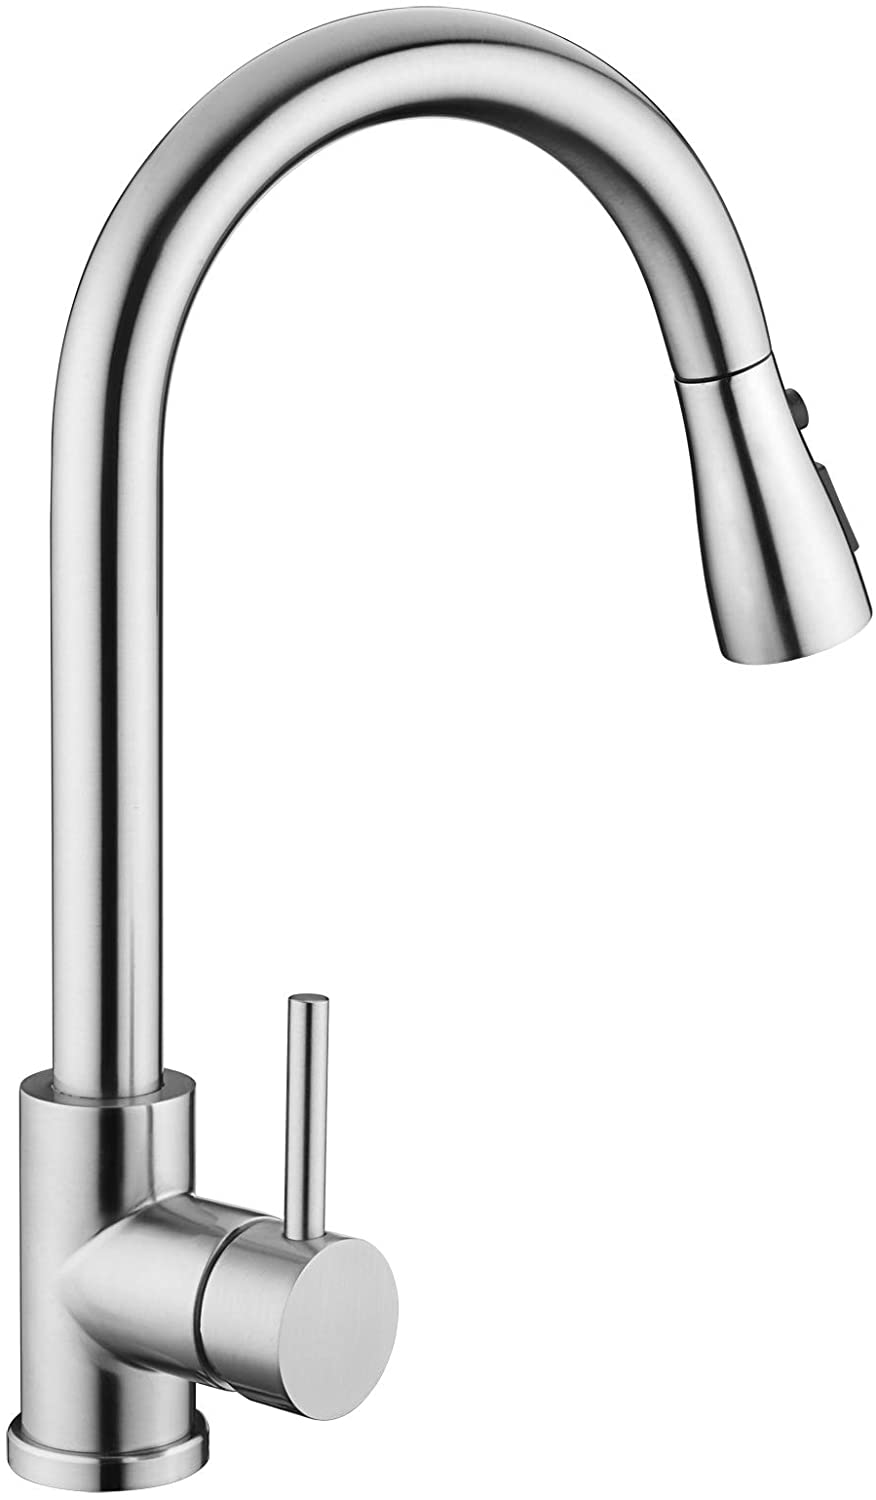
6. How to Install a Kitchen Sink Faucet


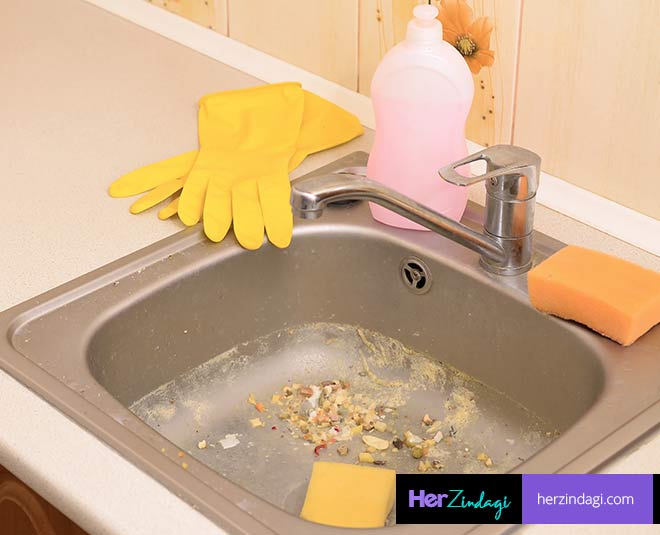
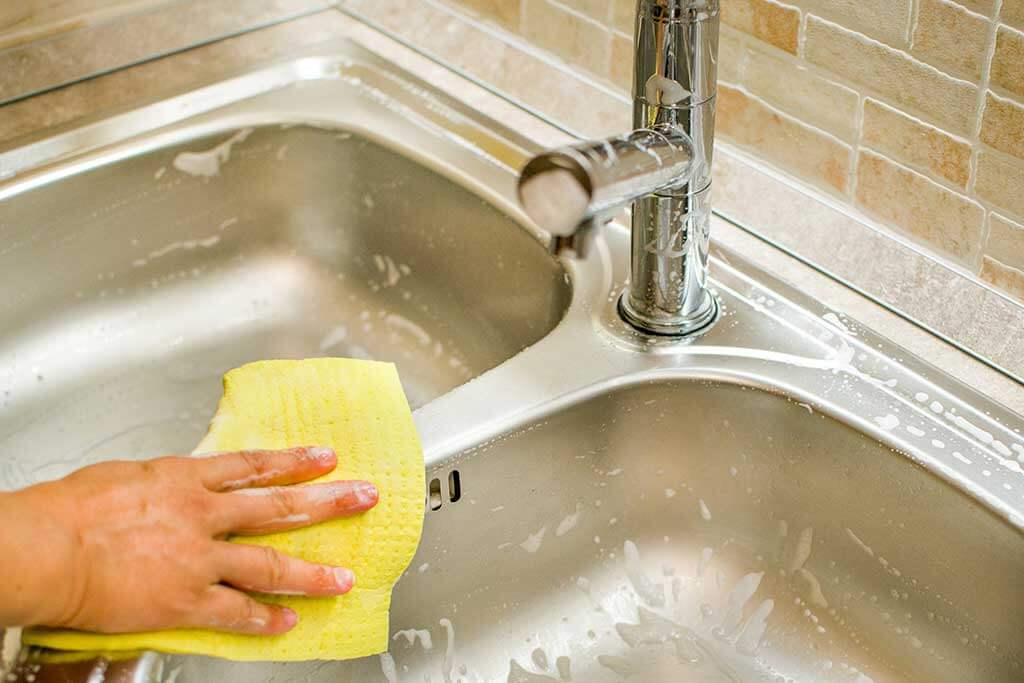
A clean kitchen sink not only looks better, but it also helps prevent bacteria and germs from building up. To keep your kitchen sink clean, start by rinsing it with hot water after each use. This will help prevent any food scraps from sticking to the sink. For tougher stains, mix equal parts of baking soda and water to make a paste. Apply the paste to the stains and let it sit for 15 minutes before scrubbing with a soft brush or sponge. Rinse with hot water and dry with a clean cloth. To disinfect your sink, mix 1 tablespoon of bleach with 1 gallon of water. Wipe down the sink with the solution and let it sit for 5 minutes before rinsing with hot water. This will help kill any bacteria and leave your sink sparkling clean.7. How to Clean a Kitchen Sink


7. How to Clean a Kitchen Sink


If you're remodeling your kitchen or need to replace a damaged sink, you will need to know how to remove a kitchen sink. First, turn off the water supply and disconnect the sink from the plumbing. Then, use a utility knife to cut through any caulk or adhesive holding the sink in place. Next, remove any mounting clips or brackets that are securing the sink to the countertop. Once all the connections are removed, carefully lift the sink out of the countertop and clean the area thoroughly. You can now install your new sink or continue with your kitchen remodeling project.8. How to Remove a Kitchen Sink


8. How to Remove a Kitchen Sink


Sealing your kitchen sink is an important step to prevent water from leaking into your cabinets and causing damage. To seal a kitchen sink, start by applying a bead of silicone caulk around the edge of the sink where it meets the countertop. Use your finger or a caulk smoothing tool to smooth out the caulk and create a watertight seal. Wipe away any excess caulk and let it dry for at least 24 hours before using your sink. This will ensure a strong and durable seal to protect your sink and cabinets.9. How to Seal a Kitchen Sink


9. How to Seal a Kitchen Sink


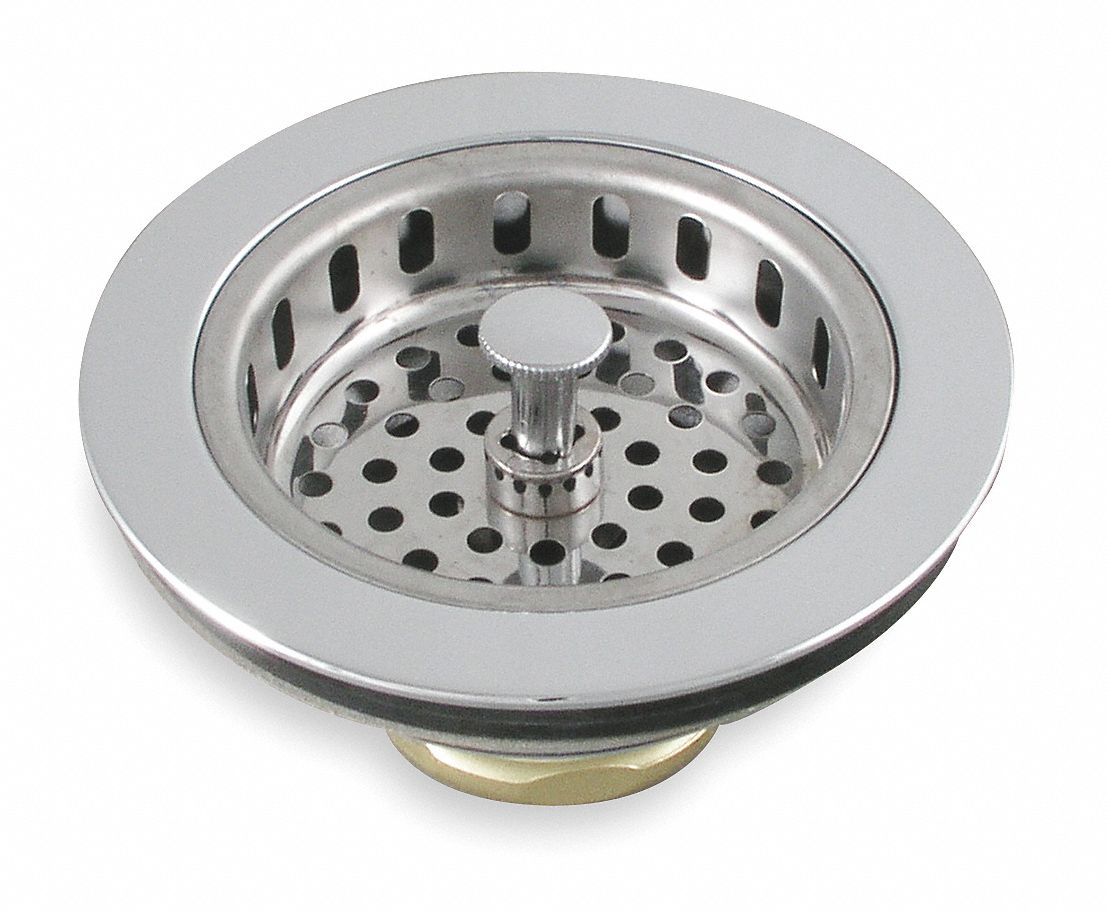
The kitchen sink basket strainer is an essential part of your sink that helps prevent food scraps from clogging your drain. Installing a new kitchen sink basket strainer is a simple process that can be done in just a few steps. First, remove the old strainer if you're replacing an existing one. Use a pipe wrench to loosen the locknut and remove the old strainer and any remaining putty or caulk. Next, clean the area around the drain hole to ensure a smooth surface for the new basket strainer. Apply a thin layer of plumber's putty around the bottom edge of the basket strainer. Then, place the strainer into the drain hole and press down firmly. From underneath the sink, screw on the locknut to secure the strainer in place. Wipe away any excess putty from around the strainer. Finally, attach the rubber gasket and tailpiece to the strainer and tighten all connections. Turn on the water to test for any leaks and make adjustments if necessary. You have now successfully installed a kitchen sink basket strainer.10. How to Install a Kitchen Sink Basket Strainer


10. How to Install a Kitchen Sink Basket Strainer


The Importance of Choosing the Right Kitchen Sink for Your House Design

Functionality and Style
 When designing a kitchen, the sink may seem like a minor detail compared to other features such as cabinets and countertops. However,
choosing the right kitchen sink
is crucial for both
functionality and style
. A kitchen sink is one of the most used areas in a kitchen, and it plays a significant role in food preparation, dishwashing, and overall cleanliness. Therefore, it is essential to consider both practicality and aesthetic appeal when selecting a kitchen sink for your house design.
When designing a kitchen, the sink may seem like a minor detail compared to other features such as cabinets and countertops. However,
choosing the right kitchen sink
is crucial for both
functionality and style
. A kitchen sink is one of the most used areas in a kitchen, and it plays a significant role in food preparation, dishwashing, and overall cleanliness. Therefore, it is essential to consider both practicality and aesthetic appeal when selecting a kitchen sink for your house design.
Size and Placement
 The size and placement
of your kitchen sink should be determined by the size and layout of your kitchen. A larger kitchen may have space for a double or even triple basin sink, while a smaller kitchen may require a single basin sink to maximize counter space. It is also essential to consider the placement of the sink in relation to other kitchen features, such as the stove and refrigerator. This will ensure that the sink is easily accessible and does not disrupt the flow of the kitchen.
The size and placement
of your kitchen sink should be determined by the size and layout of your kitchen. A larger kitchen may have space for a double or even triple basin sink, while a smaller kitchen may require a single basin sink to maximize counter space. It is also essential to consider the placement of the sink in relation to other kitchen features, such as the stove and refrigerator. This will ensure that the sink is easily accessible and does not disrupt the flow of the kitchen.
Material and Durability
 Another crucial factor to consider when choosing a kitchen sink is the
material and durability
. Popular materials for kitchen sinks include stainless steel, porcelain, and granite composite. Each material has its own benefits and drawbacks, so it is essential to research and consider your needs before making a decision. For example,
stainless steel
sinks are durable and easy to clean, while
porcelain
sinks offer a classic and elegant look.
Granite composite
sinks are a popular choice for their durability and resistance to scratches and stains.
Another crucial factor to consider when choosing a kitchen sink is the
material and durability
. Popular materials for kitchen sinks include stainless steel, porcelain, and granite composite. Each material has its own benefits and drawbacks, so it is essential to research and consider your needs before making a decision. For example,
stainless steel
sinks are durable and easy to clean, while
porcelain
sinks offer a classic and elegant look.
Granite composite
sinks are a popular choice for their durability and resistance to scratches and stains.
Design and Finishing Touches
 Lastly, the design and finishing touches of your kitchen sink can add a touch of
personality and style
to your kitchen. From apron-front farmhouse sinks to sleek and modern undermount sinks, there are endless options to choose from. You can also personalize your sink with different
finishes
such as brushed nickel or oil-rubbed bronze. These small details can make a big impact on the overall look and feel of your kitchen.
In conclusion,
choosing the right kitchen sink
is a crucial decision when designing a house. It is essential to consider factors such as functionality, size, material, and design to ensure that your kitchen sink not only serves its purpose but also enhances the overall aesthetic of your kitchen. With the right kitchen sink, your kitchen will not only be functional but also a beautiful and inviting space for you and your family to enjoy.
Lastly, the design and finishing touches of your kitchen sink can add a touch of
personality and style
to your kitchen. From apron-front farmhouse sinks to sleek and modern undermount sinks, there are endless options to choose from. You can also personalize your sink with different
finishes
such as brushed nickel or oil-rubbed bronze. These small details can make a big impact on the overall look and feel of your kitchen.
In conclusion,
choosing the right kitchen sink
is a crucial decision when designing a house. It is essential to consider factors such as functionality, size, material, and design to ensure that your kitchen sink not only serves its purpose but also enhances the overall aesthetic of your kitchen. With the right kitchen sink, your kitchen will not only be functional but also a beautiful and inviting space for you and your family to enjoy.