How to Replace a Sink Drain in Your Bathroom
Replacing a sink drain in your bathroom may seem like a daunting task, but with the right tools and knowledge, it can be a simple DIY project. Whether your current drain is old and worn out, or you're looking to update the style of your sink, knowing how to replace a sink drain can save you time and money.
DIY: Replacing a Bathroom Sink Drain
Replacing a bathroom sink drain is a DIY project that can be easily tackled by anyone with basic plumbing skills. Not only will it save you the cost of hiring a professional, but it can also be a satisfying accomplishment to do it yourself. With the right tools and some patience, you can have a new sink drain installed in no time.
Step-by-Step Guide for Replacing a Bathroom Sink Drain
If you're ready to take on the task of replacing your bathroom sink drain, here is a step-by-step guide to help you along the way:
Step 1: Gather Your Materials
Before you begin, make sure you have all the necessary tools and materials. This includes a new sink drain, pliers, a wrench, plumber's putty, and Teflon tape.
Step 2: Clear Out the Cabinet
Make sure the area under the sink is clear of any objects or items that may get in the way. This will give you more space to work and prevent any damage to your belongings.
Step 3: Remove the Old Drain
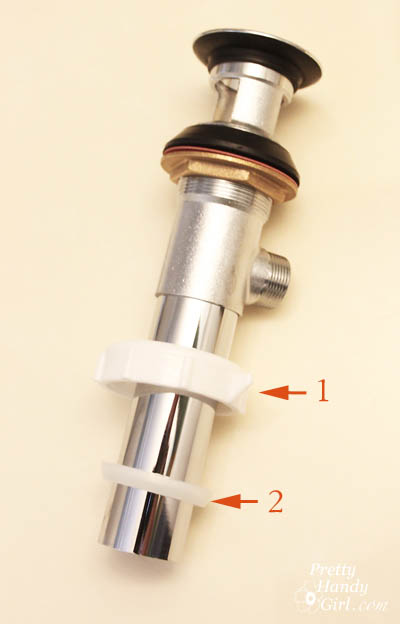
Using your pliers or a wrench, loosen and remove the nuts and washers connecting the drain to the sink and the trap. Once the drain is loose, you can pull it out from the top of the sink.
Step 4: Clean the Area
With the old drain removed, clean the area around the sink hole and the drain pipe. This will ensure a tight seal for the new drain.
Step 5: Apply Plumber's Putty
Take a small amount of plumber's putty and roll it into a thin rope. Place it around the underside of the flange on the new drain. This will create a watertight seal between the sink and the drain.
Step 6: Insert the New Drain
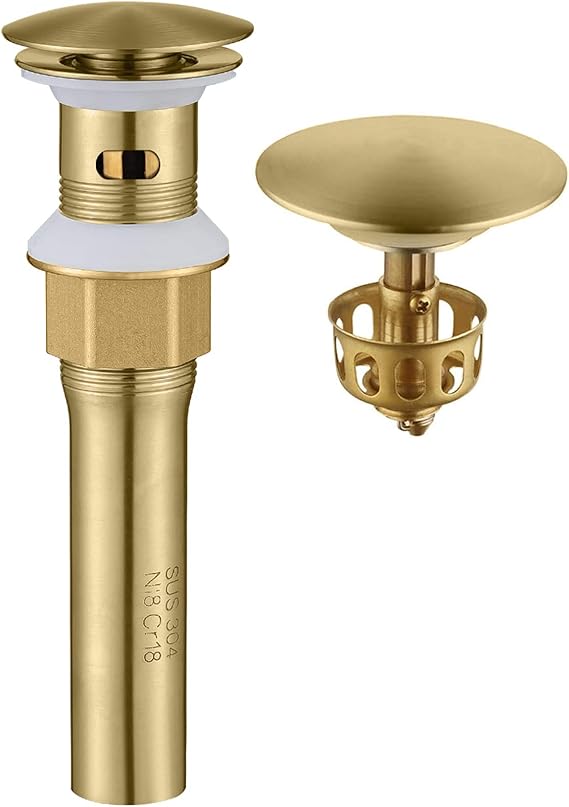
Insert the new drain into the sink hole and push it down firmly. From underneath the sink, add the washers and nuts to secure the drain in place. Use your pliers or wrench to tighten the nuts.
Step 7: Connect the Drain Pipe
Attach the drain pipe to the bottom of the sink drain and the trap. Use Teflon tape on the threads to create a tight seal. Make sure all connections are secure.
Step 8: Test for Leaks
Turn on the water and let it run for a few minutes. Check for any leaks around the connections and tighten as needed.
Step 9: Clean Up
Wipe away any excess putty or debris from the area and clean up your tools.
Step 10: Enjoy Your New Sink Drain
Congratulations, you have successfully replaced your bathroom sink drain! Now you can enjoy a new and improved sink without any leaks or issues.
Replacing a Bathroom Sink Drain: Tips and Tricks
Here are a few tips and tricks to keep in mind when replacing a bathroom sink drain:
• Make sure you have the right tools and materials before beginning the project.
• Take your time and follow the steps carefully to avoid any mistakes or complications.
• Use Teflon tape on all threaded connections to create a tight seal.
• If you encounter any issues, don't hesitate to call a professional for help.
The Ultimate Guide to Replacing a Bathroom Sink Drain
Replacing a bathroom sink drain may seem like a daunting task, but with this guide, you have all the information you need to successfully complete the project. Remember to gather your materials, follow the step-by-step guide, and use these tips and tricks for a smooth and easy process.
Replacing a Bathroom Sink Drain: Common Mistakes to Avoid
While replacing a bathroom sink drain can be a relatively simple task, there are some common mistakes that can lead to issues down the line. Here are a few things to avoid:
• Not using enough plumber's putty, which can result in leaks.
• Not using Teflon tape on threaded connections, which can also lead to leaks.
• Not tightening connections enough, which can cause leaks or a loose drain.
Tools You'll Need for Replacing a Bathroom Sink Drain
To successfully replace a bathroom sink drain, you will need the following tools:
• Pliers
• Wrench
• Plumber's putty
• Teflon tape
• New sink drain
Replacing a Bathroom Sink Drain: What to Know Before You Start
Before you begin replacing a bathroom sink drain, here are a few things to keep in mind:
• Make sure you have the right tools and materials for the job.
• Clear out the area under the sink to give yourself more space to work.
• Take your time and follow the steps carefully to avoid any mistakes.
• If you encounter any issues, don't hesitate to call a professional for assistance.
Expert Tips for Replacing a Bathroom Sink Drain
To ensure a successful and efficient replacement of your bathroom sink drain, here are some expert tips to keep in mind:
• Use a plunger to remove any debris from the drain before beginning the project.
• Apply a small amount of petroleum jelly to the plunger before using it to create a better seal.
• Use a drain snake or wire hanger to clear any clogs in the drain before replacing the drain.
Replacing a Bathroom Sink Drain: Step-by-Step Video Tutorial
For visual learners, there are plenty of step-by-step video tutorials available online that can guide you through the process of replacing a bathroom sink drain. These videos can be a helpful resource to supplement the written instructions and provide a clear demonstration of each step.
Why Replacing Your Sink Drain is an Important Part of Home Bathroom Design

Ensuring Proper Functionality and Aesthetics
 When it comes to designing your home bathroom, it's important to pay attention to even the smallest details, such as your sink drain. While it may seem like a minor component, the sink drain actually plays a crucial role in both the functionality and aesthetics of your bathroom. That's why it's important to regularly check and replace your sink drain when necessary.
Proper Functionality
The main purpose of a sink drain is to allow water to flow out of the sink and into the plumbing system. Over time, debris and grime can build up in the drain, causing it to become clogged and preventing water from draining properly. This can lead to standing water in your sink, which not only creates an unpleasant environment but can also cause damage to your sink and plumbing system.
Replacing your sink drain ensures that water can flow freely and prevents any potential damage to your sink and pipes. It also helps to maintain the overall functionality of your bathroom, as a clogged drain can also lead to issues with your toilet and shower drains.
Enhancing Aesthetics
Aside from functionality, the sink drain also plays a role in the overall aesthetic of your bathroom. An old, rusted, or mismatched drain can be an eyesore and detract from the overall design of your space. By replacing your sink drain, you can choose a new one that complements your bathroom's design and adds a touch of style to your sink area.
Moreover, replacing your sink drain gives you the opportunity to upgrade to a more modern and efficient option. There are various styles and finishes available, such as brushed nickel or oil-rubbed bronze, that can add a sleek and sophisticated touch to your bathroom design.
DIY or Hire a Professional?
While some may choose to replace their sink drain themselves, it's important to note that it can be a complex task for those without plumbing experience. To ensure proper installation and avoid any potential issues, it's best to hire a professional plumber to replace your sink drain. They have the necessary skills and knowledge to get the job done efficiently and effectively.
In conclusion, replacing your sink drain is an important aspect of home bathroom design. It not only ensures proper functionality but also enhances the overall aesthetics of your space. So, don't overlook this seemingly small detail when designing or updating your bathroom. Trust us, your sink (and plumbing system) will thank you.


:max_bytes(150000):strip_icc()/bathroom-sink-drain-installation-2718843-02-61e5ecbee1e949be8d8f45ac4f5a6797.jpg)


