1. How to Repair a Hole in an Air Mattress Seam
Discovering a hole in your air mattress can be a real headache, especially if it's in the seam. But don't worry, with a little bit of know-how and some simple tools, you can easily repair the hole in the seam and get back to enjoying a good night's sleep.
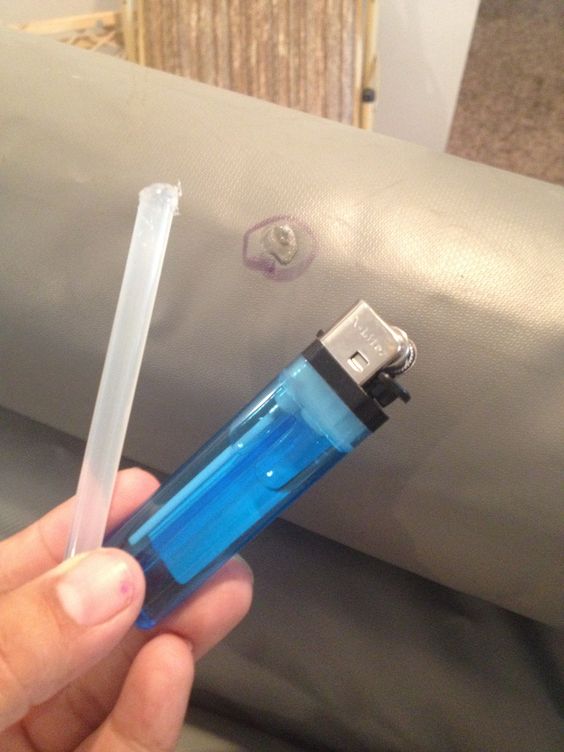
First, locate the hole by inflating the air mattress and listening for a hissing sound or feeling for escaping air. Once you've found the hole, use a piece of chalk or a marker to mark its location.
Next, deflate the air mattress and clean the area around the hole with rubbing alcohol. This will ensure that the patch adheres properly.
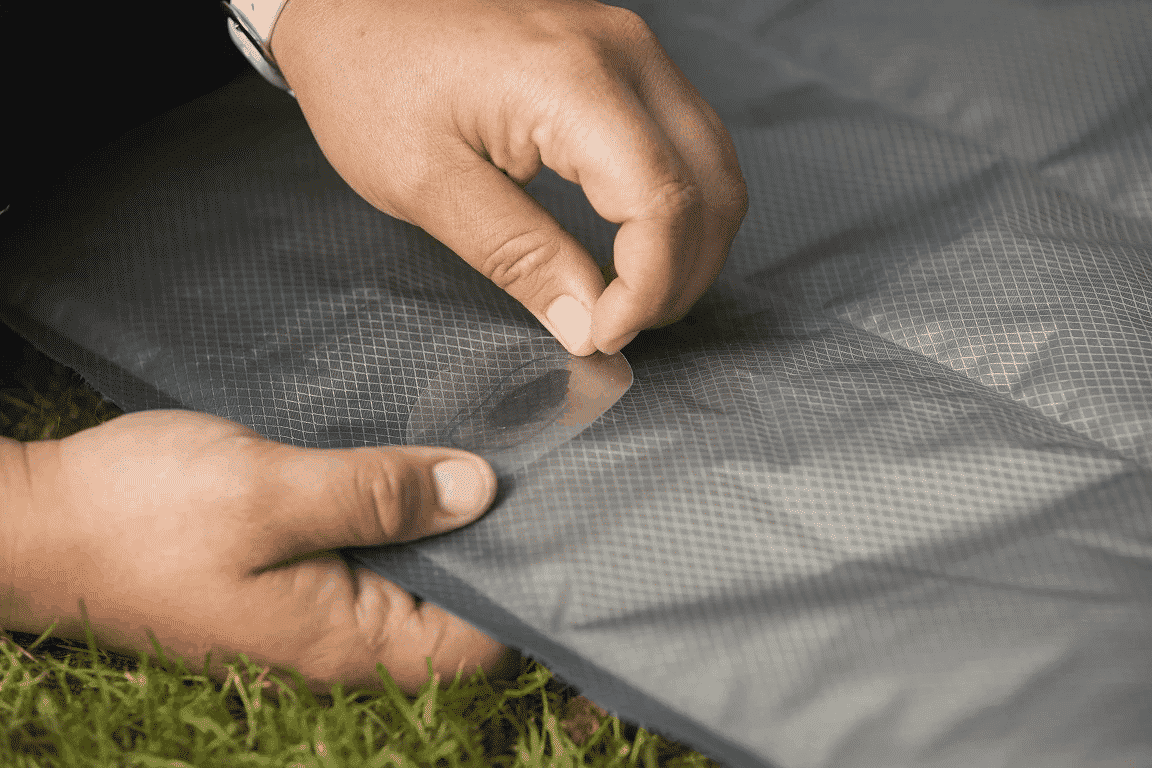
Now, it's time to patch the hole. You can use a patch kit specifically designed for air mattresses, or you can make your own patch using a piece of strong, flexible material such as a shower curtain or a tarp. Cut the material to fit over the hole, leaving a few inches of excess around the edges.
Apply a generous amount of adhesive to the patch and the area around the hole. Then, carefully place the patch over the hole and press down firmly. Smooth out any air bubbles or wrinkles, and hold the patch in place for a few minutes to allow the adhesive to set.
Once the patch is secured, let it dry completely before inflating the air mattress and testing it out. If there are any remaining holes or leaks, repeat the process until the mattress is fully sealed.
With these simple steps, you can easily repair a hole in an air mattress seam and extend the lifespan of your mattress.
2. Quick and Easy Air Mattress Seam Repair
Discovering a hole in your air mattress can be a real headache, especially if it's in the seam. But don't worry, with a little bit of know-how and some quick fixes, you can easily repair the hole in the seam and get back to enjoying a good night's sleep.
If the hole in your air mattress seam is small, you can use a simple and effective method to seal it. First, clean the area around the hole with rubbing alcohol. Then, take a piece of duct tape and cut it into a small square, slightly larger than the hole. Place the duct tape over the hole, pressing down firmly to create a seal.
If the hole is larger or if the duct tape method doesn't work, you can also use a hot glue gun to seal the hole. Simply apply a small amount of hot glue around the hole and smooth it out with a piece of wax paper. Let it dry completely before inflating the mattress and testing it out.
These quick and easy methods can save you time and money, and get your air mattress back in working condition in no time.
3. DIY Air Mattress Seam Repair
If you're a fan of DIY projects, you can easily repair a hole in an air mattress seam using common household items. First, gather the following materials: a piece of fabric (such as an old t-shirt or towel), scissors, a needle and thread, and some strong adhesive (such as super glue or fabric glue).
Cut the fabric into a square or rectangle that is slightly larger than the hole in the seam. Next, thread the needle and sew the fabric patch onto the mattress, covering the hole completely. Make sure to sew tightly and securely to prevent any air from escaping.
Once the patch is sewn on, apply a thin layer of adhesive around the edges of the patch and smooth it out with your finger. This will create a strong seal and prevent the patch from coming loose.
Let the adhesive dry completely before inflating the air mattress and testing it out. Your DIY air mattress seam repair is now complete!
4. Fixing a Seam Leak in an Air Mattress
Seam leaks can be a common issue with air mattresses, and they can be frustrating to deal with. But with the right tools and techniques, you can easily fix a seam leak and get your air mattress back to top condition.
First, locate the leak by inflating the air mattress and listening or feeling for escaping air. Once you've found the leak, deflate the mattress and clean the area around it with rubbing alcohol.
Next, use a seam sealer specifically designed for air mattresses to seal the leak. Simply apply the sealer along the seam, making sure to cover the entire area where the leak is located. Let it dry completely before inflating the mattress and testing it out.
If the seam sealer doesn't work, you can also use a patch kit or DIY patch to cover the leak. Make sure to follow the instructions provided with the patch kit or use the DIY method mentioned in previous sections.
With these techniques, you can easily fix a seam leak in your air mattress and extend its lifespan.
5. Patching a Hole in an Air Mattress Seam
Discovering a hole in your air mattress seam can be frustrating, but with the right tools and methods, you can easily patch it up and get back to enjoying a comfortable night's sleep.
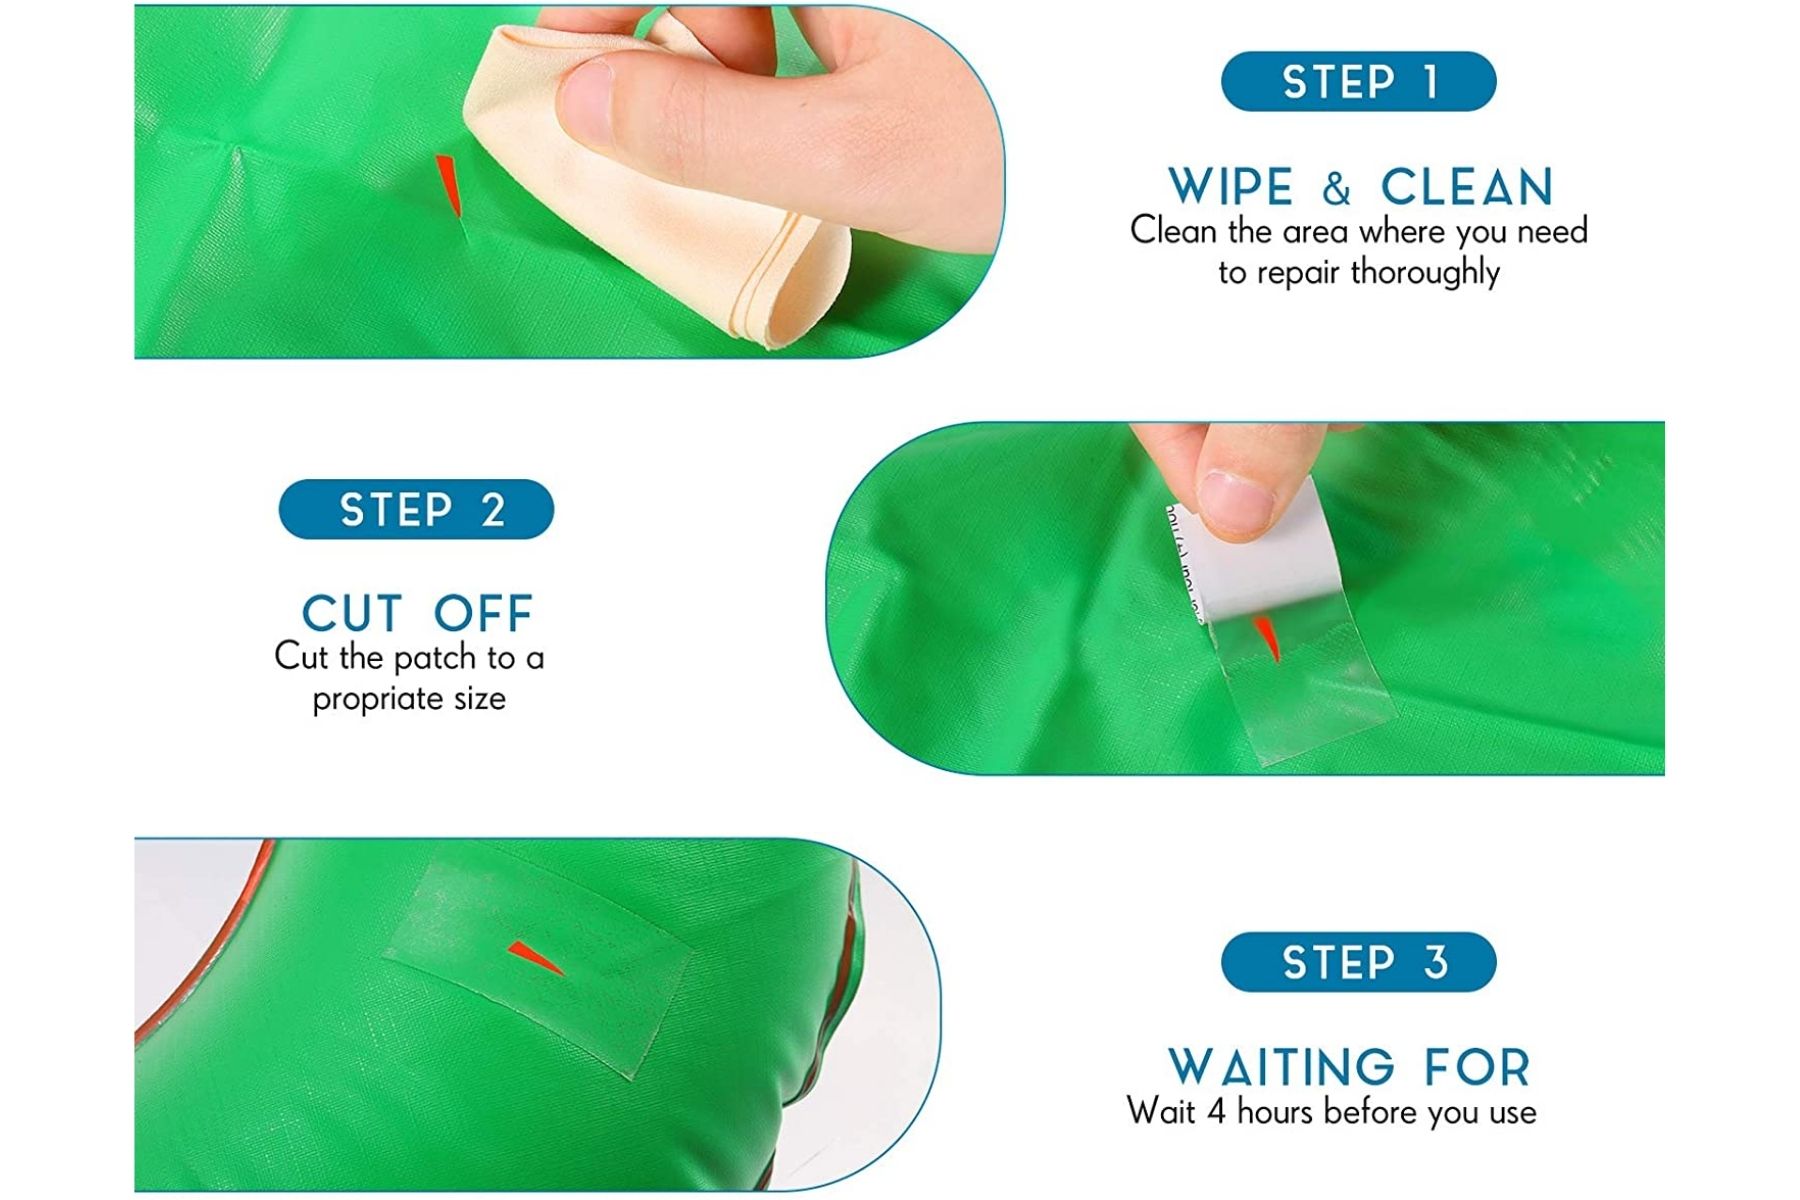
First, clean the area around the hole with rubbing alcohol. Next, use a patch kit specifically designed for air mattresses, or make your own patch using a strong, flexible material such as a shower curtain or tarp. Cut the material to fit over the hole, leaving a few inches of excess around the edges.
Apply a generous amount of adhesive to the patch and the area around the hole. Then, carefully place the patch over the hole and press down firmly. Smooth out any air bubbles or wrinkles, and hold the patch in place for a few minutes to allow the adhesive to set.
Once the patch is secured, let it dry completely before inflating the air mattress and testing it out. If there are any remaining holes or leaks, repeat the process until the mattress is fully sealed.
Patching a hole in an air mattress seam is a simple and effective way to extend the life of your mattress and save you money in the long run.
6. Tips for Repairing a Seam on an Air Mattress
When it comes to repairing a seam on an air mattress, there are a few tips and tricks that can make the process easier and more effective.
First, always clean the area around the hole or seam with rubbing alcohol before applying any patches or adhesive. This will ensure that the patch adheres properly and creates a strong seal.
If you're using a patch kit, make sure to read the instructions carefully and follow them step-by-step. Each kit may have different materials or methods, so it's important to use the one provided with your kit.
When using a DIY patch, make sure to use a strong, flexible material such as a shower curtain or tarp. This will ensure that the patch is durable and can withstand the weight of the mattress and its occupants.
Lastly, always let the adhesive or patch dry completely before inflating the air mattress and testing it out. This will ensure that the patch is fully secured and won't come loose.
7. Step-by-Step Guide to Fixing a Seam on an Air Mattress
Repairing a seam on an air mattress may seem like a daunting task, but with a step-by-step guide, you can easily tackle the job and get your mattress back in working condition.
Step 1: Locate the leak by inflating the air mattress and listening or feeling for escaping air.
Step 2: Deflate the mattress and clean the area around the leak with rubbing alcohol.
Step 3: If using a patch kit, follow the instructions provided and apply the patch over the leak. If using a DIY patch, sew the patch onto the mattress and apply adhesive around the edges.
Step 4: Let the adhesive dry completely before inflating the mattress and testing it out.
Step 5: If there are any remaining leaks, repeat the process until the mattress is fully sealed.
Following these steps can help you easily fix a seam on an air mattress and extend its lifespan.
8. Common Causes of Air Mattress Seam Holes and How to Fix Them
There are a few common causes of air mattress seam holes, and understanding these causes can help prevent future issues and save you time and money on repairs.
Sometimes, a seam hole can occur due to over-inflation of the mattress. To prevent this, make sure to follow the recommended inflation instructions provided by the manufacturer.
Another cause of seam holes is sharp objects such as rocks or sticks poking through the mattress. To avoid this, make sure to place the mattress on a flat, debris-free surface when using it outdoors.
If the hole is located in the seam, it may be due to wear and tear or a manufacturing defect. In these cases, it's important to regularly check the seams and patch any holes as soon as they are discovered.
By understanding the common causes of air mattress seam holes, you can take preventative measures and fix any issues that may arise.
9. Best Products for Repairing a Hole in an Air Mattress Seam
When it comes to repairing a hole in an air mattress seam, there are several products on the market that can make the process easier and more effective.
Some popular options include patch kits specifically designed for air mattresses, which come with all the necessary materials and instructions for patching a hole. These kits are convenient and can provide a strong and durable patch.
DIY patches made from strong, flexible materials such as shower curtains or tarps can also be effective in sealing a hole in an air mattress seam. These materials are easily accessible and can be customized to fit any size hole.
Other products such as seam sealers or hot glue guns can also be useful for repairing seam holes. Make sure to choose a product that is specifically designed for air mattresses and follow the instructions carefully for best results.
10. Preventing and Repairing Seam Holes in Your Air Mattress
To prevent seam holes in your air mattress, it's important to properly maintain and care for your mattress. This includes regularly checking for leaks and patching them as soon as they are discovered.
When using the mattress outdoors, make sure to place it on a flat, debris-free surface to avoid sharp objects that could puncture the mattress. It's also important to follow the recommended inflation instructions provided by the manufacturer to avoid over-inflating the mattress.
If a seam hole does occur, make sure to repair it promptly using one of the methods mentioned in this article. By taking preventative measures and quickly addressing any issues, you can extend the lifespan of your air mattress and ensure a comfortable night's sleep for years to come.
How to Repair a Hole in the Seam of an Air Mattress

The Importance of a Well-Functioning Air Mattress
 Air mattresses are a popular choice for both indoor and outdoor use, providing a comfortable and convenient sleeping option. However, as with any type of furniture, they are susceptible to wear and tear over time. One common issue that can arise with air mattresses is a hole in the seam, which can cause air to leak out and make the mattress unusable. This can be especially frustrating if you have guests staying over or are using the mattress for camping. Fortunately, repairing a hole in the seam of an air mattress is a simple and cost-effective solution that will have your mattress functioning like new again.
Gather Supplies
 Before beginning the repair process, make sure to gather all necessary supplies. You will need
duct tape, patching material, scissors, and rubbing alcohol
. The patching material can be a piece of fabric, a patch kit specifically designed for air mattresses, or even a sturdy garbage bag. It is important to have all the supplies on hand before starting the repair to ensure a smooth process.
Locate the Hole
 The first step in repairing a hole in the seam of an air mattress is to locate the hole. If you are having trouble finding it, try inflating the mattress and listening for any hissing sounds. Once you have located the hole,
use rubbing alcohol to clean the area around it
. This will help the patching material adhere better and create a stronger seal.
Repair the Hole
 Now it's time to repair the hole. If you are using a piece of fabric or a garbage bag,
cut a piece that is slightly larger than the hole
. If you are using a patch kit, follow the instructions provided. Apply a layer of duct tape around the hole, leaving about an inch of tape around the edges of the hole. Then, place the patching material over the hole and press down firmly. Make sure to smooth out any wrinkles or air bubbles to create a tight seal.
Test the Repair
 Once the patching material is in place,
lightly press down on the area to ensure the seal is secure
. If there are any leaks, add more duct tape or patching material until the hole is completely sealed. If the repair is successful,
deflate the mattress and wait for the duct tape and patching material to adhere completely
.
Enjoy Your Restored Air Mattress
 Congratulations, you have successfully repaired your air mattress!
Make sure to check the repair periodically and add more duct tape or patching material if needed
. With proper care and maintenance, your air mattress will provide comfortable sleep for years to come.

