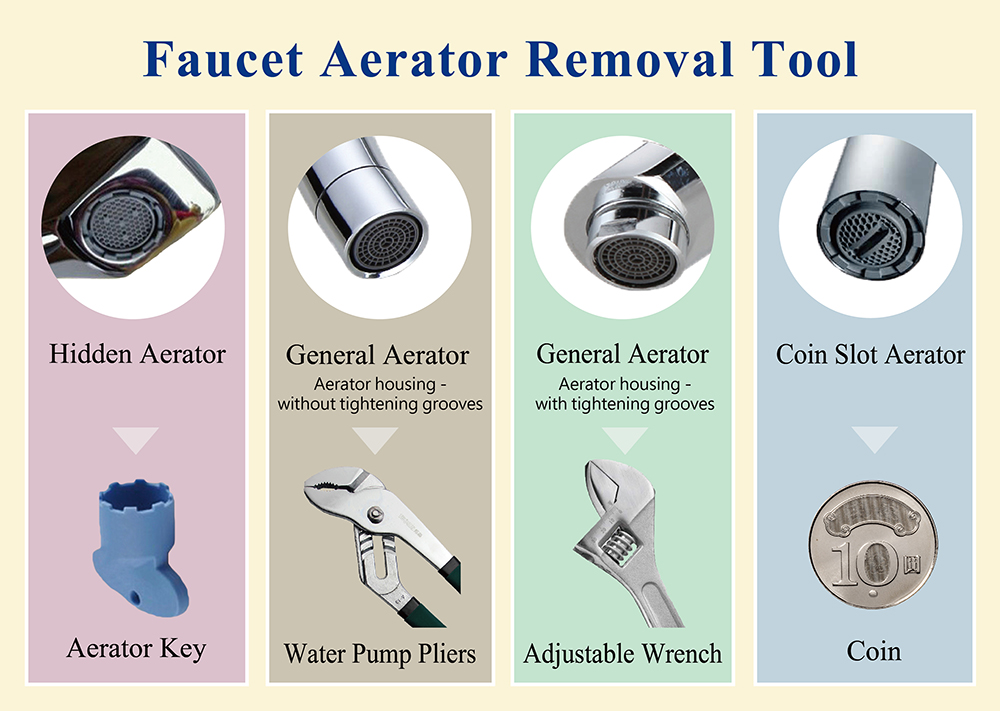
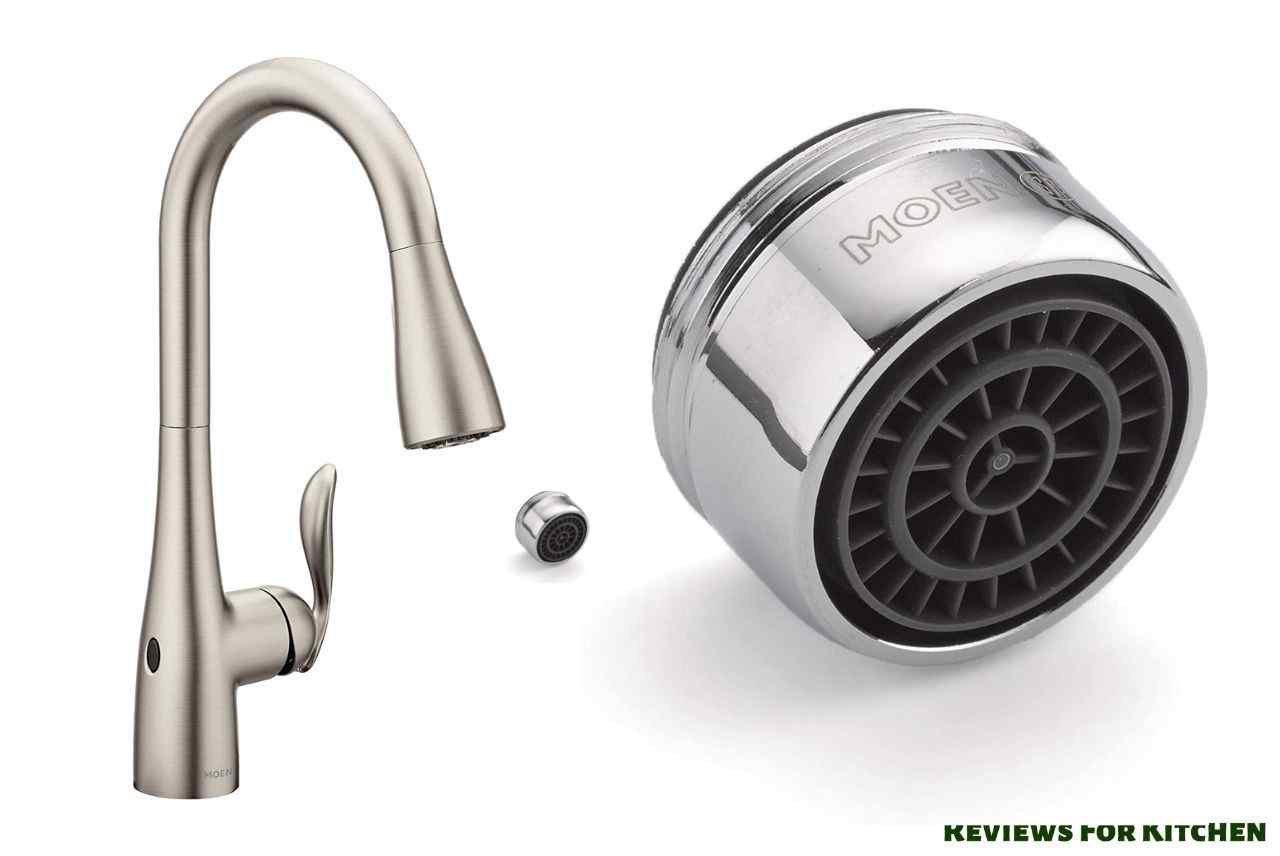
The kitchen sink aerator is a small but essential part of your sink that helps regulate the flow and direction of water. Over time, it can become clogged with mineral deposits or debris, causing reduced water pressure and an uneven flow. If you're experiencing these issues, it may be time to remove and clean your kitchen sink aerator. Here's a step-by-step guide to help you through the process.How to Remove a Kitchen Sink Aerator
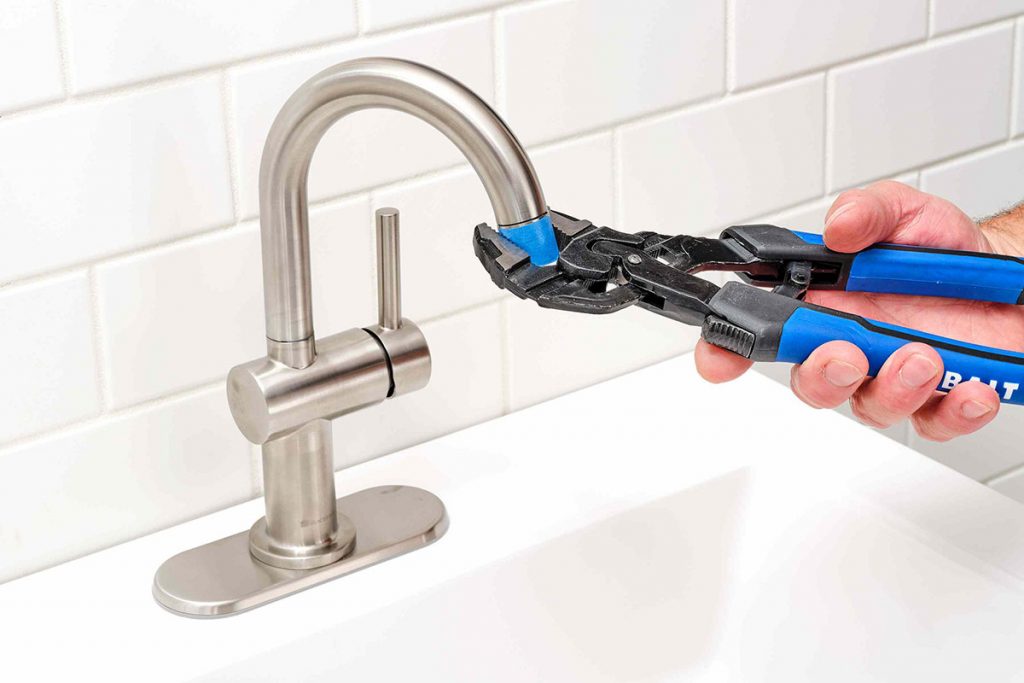
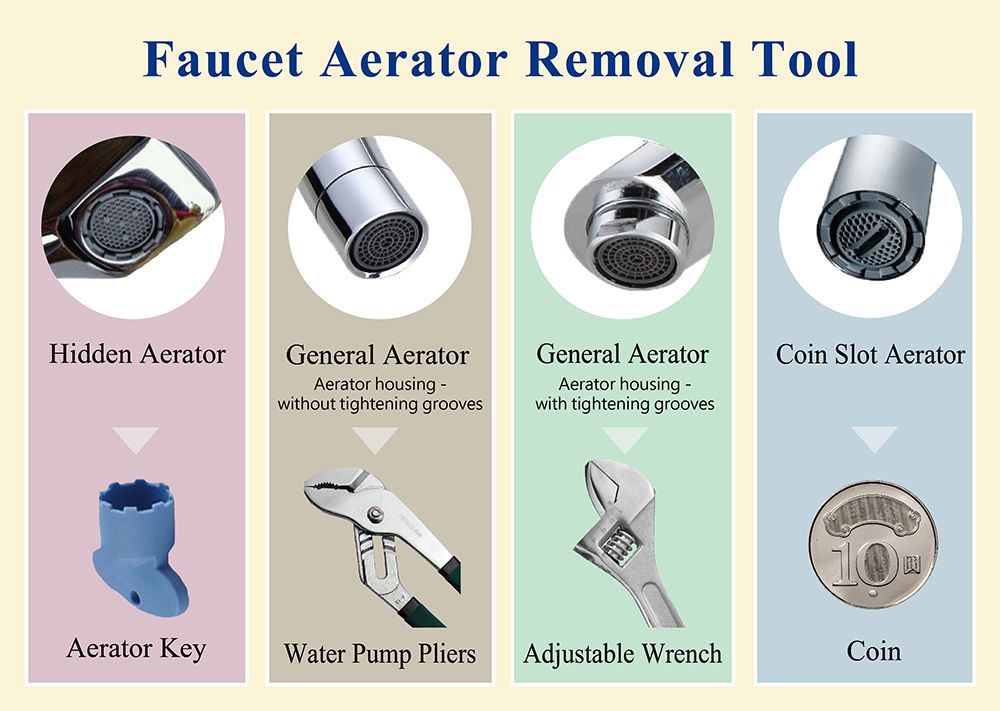
Before you begin, make sure to gather all necessary tools and materials. You will need pliers, a towel or cloth, and a small bowl or container to catch any water that may come out during the removal process. 1. Start by turning off the water supply to your sink. This can usually be done by turning the handles or knobs under the sink in a clockwise direction. 2. Place a towel or cloth over the sink drain to prevent any small parts from falling down and getting lost. 3. Locate the aerator, which is usually located at the end of the faucet spout. It may have a decorative cap or cover over it, which you can remove by hand or with pliers if needed. 4. Firmly grasp the aerator with your pliers and turn it counterclockwise to loosen and remove it from the faucet. 5. If the aerator is stuck, you can try using a wrench or applying a small amount of oil or lubricant to help loosen it. 6. Once the aerator is removed, take a closer look at it to see if there are any visible clogs or buildup that may be causing the issues. 7. If there is buildup, you can use a toothbrush or small brush to gently scrub it away. Soaking the aerator in vinegar can also help dissolve any mineral deposits. 8. Rinse the aerator thoroughly with water and then reattach it to the faucet in the same direction you removed it from. 9. Turn the water supply back on and test the flow and pressure of the water. If it's still not working properly, you may need to replace the aerator altogether. 10. If everything looks good, you can remove the towel or cloth from the sink drain and clean up any water that may have collected in the bowl or container.Removing a Kitchen Sink Aerator: Step-by-Step Guide
Removing a kitchen sink aerator is a simple DIY task that can save you time and money. Instead of calling a plumber, you can easily do it yourself with just a few tools and some basic knowledge. Follow these steps to remove your kitchen sink aerator and get your sink flowing smoothly again.DIY: How to Remove a Kitchen Sink Aerator
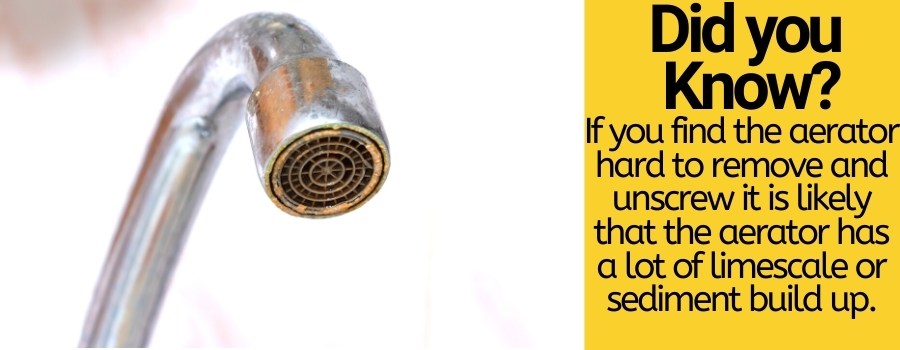
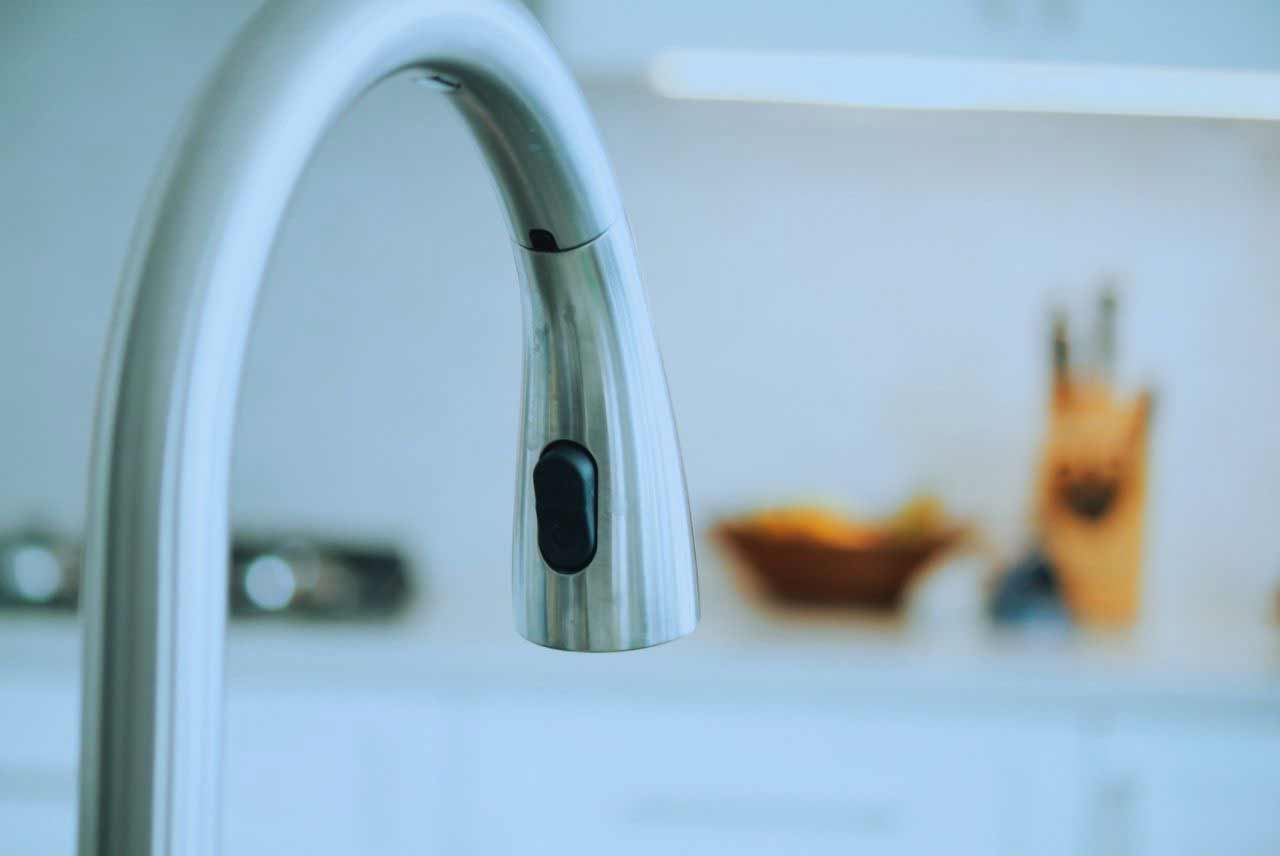
Here are some additional tips and tricks to keep in mind when removing your kitchen sink aerator: - If the aerator is still stuck after using pliers, try using a rubber band or cloth to get a better grip and more leverage. - If you have a pull-out faucet, the aerator may be located in the spray head instead of at the end of the spout. - If you have a water filtration system, make sure to turn it off before removing the aerator to prevent any damage. - Soaking the aerator in vinegar overnight can help remove stubborn buildup.Removing a Kitchen Sink Aerator: Tips and Tricks
For a more detailed and visual guide, here are the steps for removing a kitchen sink aerator: 1. Turn off the water supply. 2. Cover the drain to prevent any parts from falling down. 3. Remove any decorative caps or covers from the aerator. 4. Use pliers to loosen and remove the aerator from the faucet. 5. Clean and rinse the aerator. 6. Reattach the aerator to the faucet. 7. Turn the water supply back on and test the water flow.Step-by-Step Guide for Removing a Kitchen Sink Aerator
While removing a kitchen sink aerator is a simple task, there are some common mistakes that you should avoid to prevent any damage or issues: - Using too much force when trying to remove the aerator can cause it to break or damage the faucet. - Forgetting to turn off the water supply can result in a mess and potential water damage. - Not cleaning the aerator properly can lead to continued issues with water flow.Removing a Kitchen Sink Aerator: Common Mistakes to Avoid
If you're short on time or don't have the necessary tools, here's a quick and easy method for removing a kitchen sink aerator: 1. Turn off the water supply. 2. Place a towel or cloth over the aerator and use pliers to loosen and remove it. 3. Clean and rinse the aerator. 4. Reattach the aerator to the faucet. 5. Turn the water supply back on and test the water flow.Quick and Easy Method for Removing a Kitchen Sink Aerator
To successfully remove a kitchen sink aerator, you will need the following tools: - Pliers - Towel or cloth - Small bowl or container - Toothbrush or small brush (optional) - Vinegar (optional)Removing a Kitchen Sink Aerator: Tools You'll Need
If you want to remove your kitchen sink aerator without causing any damage, follow these steps: 1. Turn off the water supply. 2. Place a towel or cloth over the aerator and use pliers to gently loosen and remove it. 3. Clean and rinse the aerator carefully to avoid damaging any delicate parts. 4. Reattach the aerator to the faucet with the same gentle approach. 5. Turn the water supply back on and test the water flow.Step-by-Step Guide for Removing a Kitchen Sink Aerator Without Damaging It
If you're having trouble with removing your kitchen sink aerator, here are some common issues and their solutions: - The aerator is stuck: Try using a wrench or lubricant to help loosen it. - The aerator won't come off: Make sure the water supply is turned off and try using a rubber band or cloth for a better grip. - The water flow is still uneven: The aerator may need to be replaced if there is severe buildup or damage.Removing a Kitchen Sink Aerator: Troubleshooting Common Issues
Why You Should Consider Removing Your Kitchen Sink Aerator for a Better House Design
:max_bytes(150000):strip_icc()/cleaning-the-aerator-from-deposits--the-girl-hand-washes-a-dirty-limestone-aerator-with-water-1126244919-72868100964f42d5aa564a928371fea5.jpg)
Understanding the Function of a Kitchen Sink Aerator
 When you turn on your kitchen sink, you may have noticed a small device attached to the end of the faucet. This is called the aerator, and its purpose is to regulate the flow of water and prevent splashing. While it may seem like a small and insignificant part of your kitchen, the aerator actually plays a crucial role in water conservation and energy efficiency.
The Benefits of Removing the Kitchen Sink Aerator
 While the aerator may have its benefits, there are also reasons why you may want to consider removing it for a better house design. First and foremost, removing the aerator can improve the water pressure in your sink. This is especially beneficial for those with low water pressure or older plumbing systems. Without the aerator restricting the flow, you can enjoy a stronger and more efficient stream of water.
Additionally, removing the aerator can also make cleaning your sink easier. The small holes in the aerator can easily get clogged with debris and mineral buildup, making it difficult to clean. By removing the aerator, you eliminate this problem and can easily clean your sink without any obstructions.
The Aesthetic Appeal of a Sink Without Aerator
 Another reason to consider removing your kitchen sink aerator is for the aesthetic appeal it can add to your house design. A sink without an aerator can give off a clean and modern look, which can be especially beneficial for those with a minimalist or contemporary style. Without the aerator, your sink will have a sleek and uncluttered appearance, making it a focal point in your kitchen.
Conclusion
 In conclusion, while the kitchen sink aerator may have its benefits, there are also reasons why you may want to remove it for a better house design. Not only can it improve water pressure and make cleaning easier, but it can also add to the overall aesthetic appeal of your kitchen. So next time you're considering a kitchen renovation, don't forget to take a closer look at your kitchen sink aerator and consider removing it for a better and more efficient design.


/cleaning-the-aerator-from-deposits--the-girl-hand-washes-a-dirty-limestone-aerator-with-water-1126244919-72868100964f42d5aa564a928371fea5.jpg)


/RemovingAeratorAssembly-99881d30169b43cebc3fe72f6d4b25b9.jpg)






:max_bytes(150000):strip_icc()/clearing-a-blocked-faucet-aerator-2718807-07-b5a90554991f4bb69efb45a472df7f23.jpg)


:max_bytes(150000):strip_icc()/removing-a-faucet-aerator-2718836-02-9280a2c1a07f448c9d4f1f1511f84446.jpg)


:max_bytes(150000):strip_icc()/removing-a-faucet-aerator-2718836-07-232c6342214a4de2b110311d65bea154.jpg)

:max_bytes(150000):strip_icc()/removing-a-faucet-aerator-2718836-hero-01d87b8d7dd942ce8a8eee99f555781f.jpg)

:max_bytes(150000):strip_icc()/removing-a-faucet-aerator-2718836-06-2d4711dfca0f4e78b03f998f1006113e.jpg)


