If you're dealing with a clogged sink, removing the drain cover is often the first step in solving the problem. But if you've never done it before, the process can seem daunting. Don't worry, we've got you covered. In this guide, we'll walk you through the steps of removing a bathroom sink drain cover, so you can get your sink back to working order in no time.How to Remove a Bathroom Sink Drain Cover


How to Remove a Bathroom Sink Drain Cover


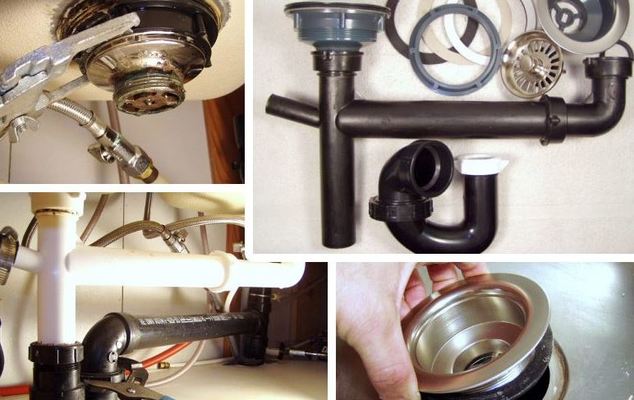
Before we dive into the steps, let's first gather the necessary tools. You'll need a pair of pliers, a flathead screwdriver, and a bucket or container to catch any water that may come out. Once you have these items, you're ready to begin. Step 1: Locate the Drain Cover The drain cover is usually located at the bottom of the sink, in the center. It may be a small, round disk or a larger, square-shaped cover. If you're having trouble finding it, try shining a flashlight into the drain to get a better view. Step 2: Remove the Stopper If your sink has a stopper, you'll need to remove it before you can access the drain cover. To do this, pull up on the stopper to open it, then twist and pull it out of the drain. Step 3: Loosen the Drain Cover Using your pliers, grip the edges of the drain cover and twist counterclockwise. This should loosen it enough for you to be able to pull it out with your hands. If the cover is stuck, you may need to use the screwdriver to gently pry it loose. Step 4: Clean the Drain Cover Once the cover is removed, take a moment to clean it with a mixture of hot water and dish soap. This will help remove any buildup or debris that may have accumulated on the cover. Step 5: Reinstall the Drain Cover After cleaning the drain cover, you can now reinstall it by following the reverse steps. Simply place it back into the drain and twist it clockwise with your pliers until it is snug. Step 6: Test the Drain Now that the drain cover is back in place, turn on the water and let it run for a few seconds. If the water is draining properly, then you have successfully removed and reinstalled the drain cover. If the water is still not draining, you may have a more serious clog that requires further attention.Removing a Bathroom Sink Drain Cover: A Step-by-Step Guide


Removing a Bathroom Sink Drain Cover: A Step-by-Step Guide


Removing a sink drain cover is a simple task that you can easily do yourself. Not only will it save you money, but it will also give you a sense of accomplishment. Plus, you'll be able to fix any future clogs on your own, without having to call a plumber.DIY: Removing a Bathroom Sink Drain Cover


DIY: Removing a Bathroom Sink Drain Cover
Here are a few tips and tricks to keep in mind while removing a bathroom sink drain cover: - If the drain cover is stuck, try using a hairdryer to heat it up. This will help loosen any debris or buildup that may be causing it to stick. - If you don't have pliers, you can use a pair of rubber gloves to grip and twist the drain cover. - Be careful not to damage the drain cover or the sink while removing it. Use gentle force and avoid using excessive pressure.Removing a Bathroom Sink Drain Cover: Tips and Tricks


Removing a Bathroom Sink Drain Cover: Tips and Tricks

If you're short on time or just want a quick and easy method for removing a bathroom sink drain cover, here's a handy trick. Take a rubber band and place it over the drain cover, then twist and pull. The rubber band will give you extra grip and make it easier to twist the cover loose.Quick and Easy Method for Removing a Bathroom Sink Drain Cover

Quick and Easy Method for Removing a Bathroom Sink Drain Cover


When removing a bathroom sink drain cover, there are a few common mistakes that people make. These include using too much force, not using the right tools, and not cleaning the cover before reinstalling it. Avoid these mistakes to make the process smoother and prevent any potential damage to your sink or drain cover.Removing a Bathroom Sink Drain Cover: Common Mistakes to Avoid

Removing a Bathroom Sink Drain Cover: Common Mistakes to Avoid


As mentioned before, you'll need a pair of pliers, a flathead screwdriver, and a bucket or container to catch any water. If you don't have these tools on hand, you can easily find them at your local hardware store. It's always a good idea to have these basic tools in your home for any small DIY projects.Removing a Bathroom Sink Drain Cover: Tools You'll Need


Removing a Bathroom Sink Drain Cover: Tools You'll Need


If you encounter any issues while removing the drain cover, here are a few troubleshooting tips: - If the drain cover won't budge, try using a lubricant like WD-40 to help loosen it. - If the drain cover is damaged or broken, you may need to replace it. You can find replacement covers at most hardware stores.Removing a Bathroom Sink Drain Cover: Troubleshooting Common Issues
Removing a Bathroom Sink Drain Cover: Troubleshooting Common Issues
/bathroom-sink-drain-installation-2718843-01-4955fe1f576b447a91abe51c126d220b.jpg)
When working on any plumbing project, it's important to keep safety in mind. Here are a few precautions to take when removing a bathroom sink drain cover: - Wear gloves to protect your hands from any sharp edges or debris. - Turn off the water supply before beginning any work to avoid any accidental flooding. - If you encounter any electrical components while removing the cover, turn off the power to the sink before proceeding.Removing a Bathroom Sink Drain Cover: Safety Precautions to Keep in Mind


Removing a Bathroom Sink Drain Cover: Safety Precautions to Keep in Mind

If you're still having trouble removing the drain cover, here are a few alternative methods you can try: - Use a plunger to create suction and pull the cover out. - Insert a wire hanger or plumbing snake into the drain to remove any clogs that may be causing the cover to stick. With these tips and tricks, removing a bathroom sink drain cover should be a breeze. Just remember to take your time and use caution to avoid any accidents. And if all else fails, don't hesitate to call a professional plumber for assistance.Removing a Bathroom Sink Drain Cover: Alternative Methods to Try

Removing a Bathroom Sink Drain Cover: Alternative Methods to Try


Why Removing Bathroom Sink Drain Cover is Important for Your House Design

Ensuring Proper Functionality and Aesthetics
 When it comes to house design, every detail matters. From the color of the walls to the layout of the furniture, every element contributes to the overall look and feel of a home. One often overlooked aspect of house design is the bathroom sink drain cover. While it may seem like a small and insignificant part of the bathroom, removing the drain cover can actually make a big difference in both functionality and aesthetics.
Proper Drainage for a Clean and Hygienic Bathroom
The main purpose of a bathroom sink drain cover is to prevent debris and hair from clogging the drain. Over time, these covers can become caked with grime and buildup, inhibiting proper drainage. This can lead to standing water in the sink, which not only looks unsightly but also creates a breeding ground for bacteria and mold. By regularly removing and cleaning the drain cover, you can ensure that your bathroom sink drains properly, promoting a clean and hygienic environment.
Refreshing the Look of Your Bathroom
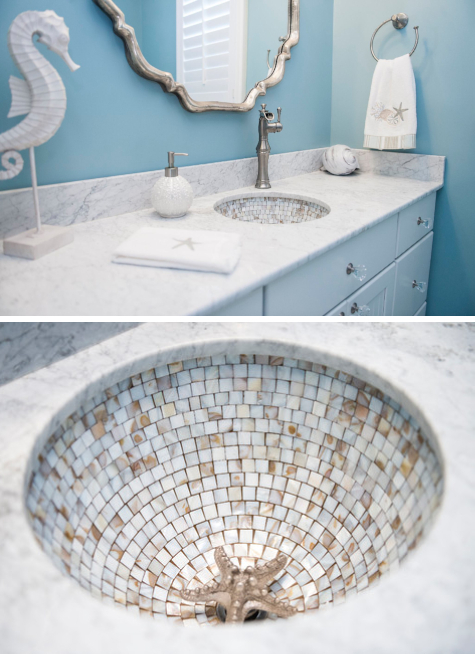
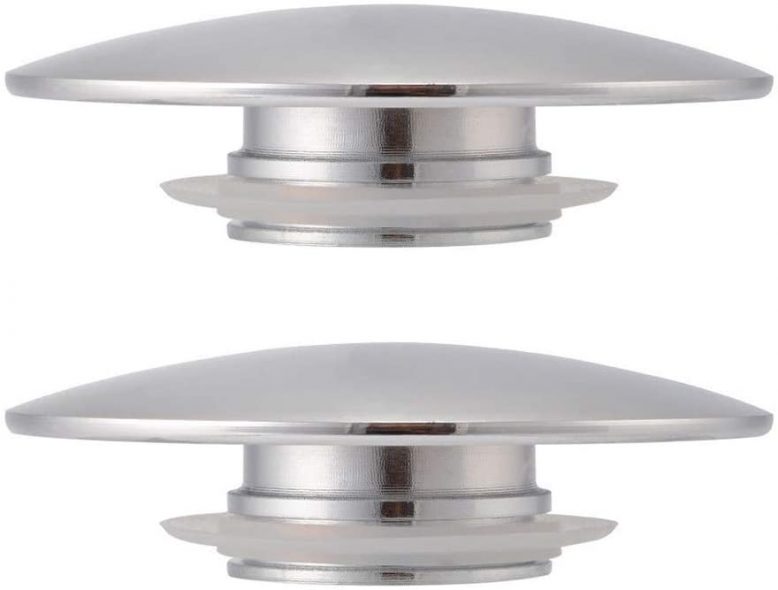
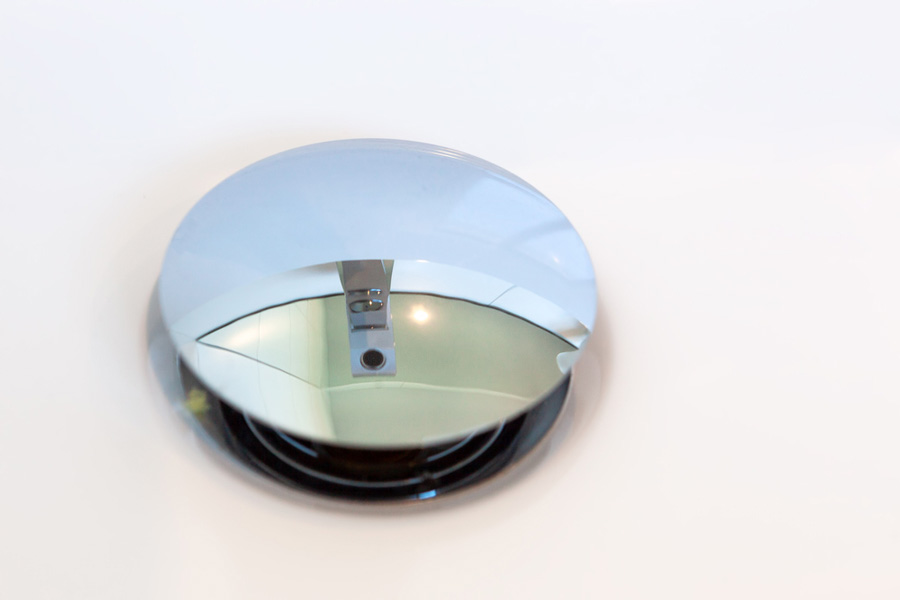
In addition to functionality, removing the drain cover can also make a visual impact on your bathroom design. Over time, drain covers can become discolored, rusted, or cracked, detracting from the overall look of your sink area. By replacing an old or damaged drain cover with a new one, you can instantly refresh the look of your bathroom. You can even choose a different style or finish to match your desired aesthetic.
Easy DIY Project with Big Results
Removing a bathroom sink drain cover is a simple and quick DIY project that can have a big impact on your house design. All you need is a pair of pliers and a few minutes of your time. With the right tools and techniques, you can easily remove the drain cover without damaging the sink or the cover itself. This makes it a cost-effective and efficient way to improve the functionality and appearance of your bathroom.
In conclusion, removing the bathroom sink drain cover is an essential part of maintaining a functional and aesthetically pleasing house design. By ensuring proper drainage, refreshing the look of your bathroom, and easily completing a DIY project, removing the drain cover is a small yet important detail that should not be overlooked. So the next time you are sprucing up your house, don't forget to give your bathroom sink some attention and remove that drain cover for a cleaner and more visually appealing space.
When it comes to house design, every detail matters. From the color of the walls to the layout of the furniture, every element contributes to the overall look and feel of a home. One often overlooked aspect of house design is the bathroom sink drain cover. While it may seem like a small and insignificant part of the bathroom, removing the drain cover can actually make a big difference in both functionality and aesthetics.
Proper Drainage for a Clean and Hygienic Bathroom
The main purpose of a bathroom sink drain cover is to prevent debris and hair from clogging the drain. Over time, these covers can become caked with grime and buildup, inhibiting proper drainage. This can lead to standing water in the sink, which not only looks unsightly but also creates a breeding ground for bacteria and mold. By regularly removing and cleaning the drain cover, you can ensure that your bathroom sink drains properly, promoting a clean and hygienic environment.
Refreshing the Look of Your Bathroom
In addition to functionality, removing the drain cover can also make a visual impact on your bathroom design. Over time, drain covers can become discolored, rusted, or cracked, detracting from the overall look of your sink area. By replacing an old or damaged drain cover with a new one, you can instantly refresh the look of your bathroom. You can even choose a different style or finish to match your desired aesthetic.
Easy DIY Project with Big Results
Removing a bathroom sink drain cover is a simple and quick DIY project that can have a big impact on your house design. All you need is a pair of pliers and a few minutes of your time. With the right tools and techniques, you can easily remove the drain cover without damaging the sink or the cover itself. This makes it a cost-effective and efficient way to improve the functionality and appearance of your bathroom.
In conclusion, removing the bathroom sink drain cover is an essential part of maintaining a functional and aesthetically pleasing house design. By ensuring proper drainage, refreshing the look of your bathroom, and easily completing a DIY project, removing the drain cover is a small yet important detail that should not be overlooked. So the next time you are sprucing up your house, don't forget to give your bathroom sink some attention and remove that drain cover for a cleaner and more visually appealing space.