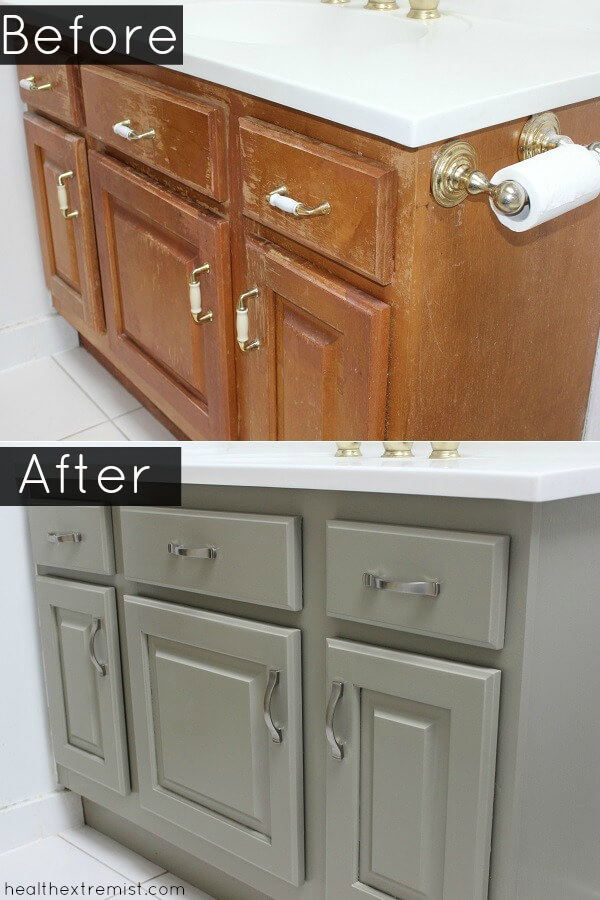
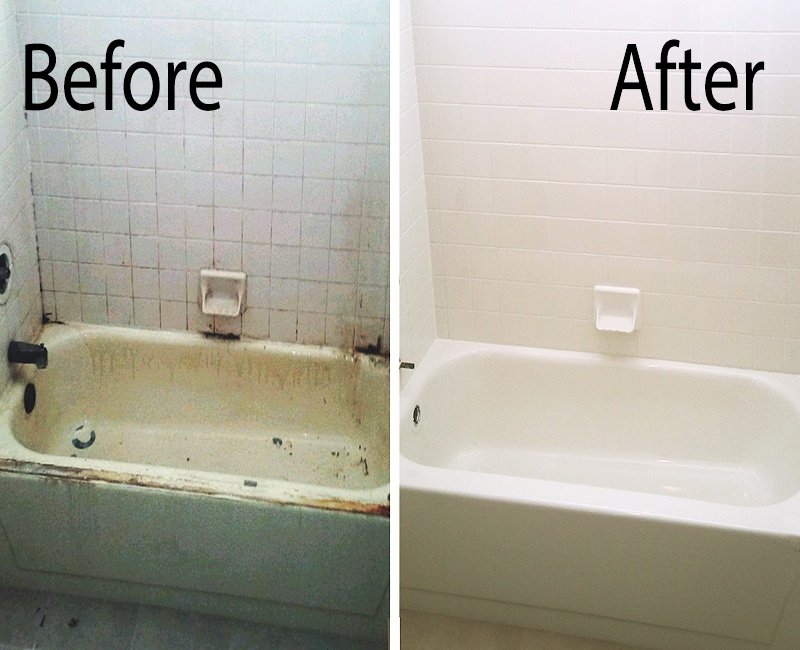
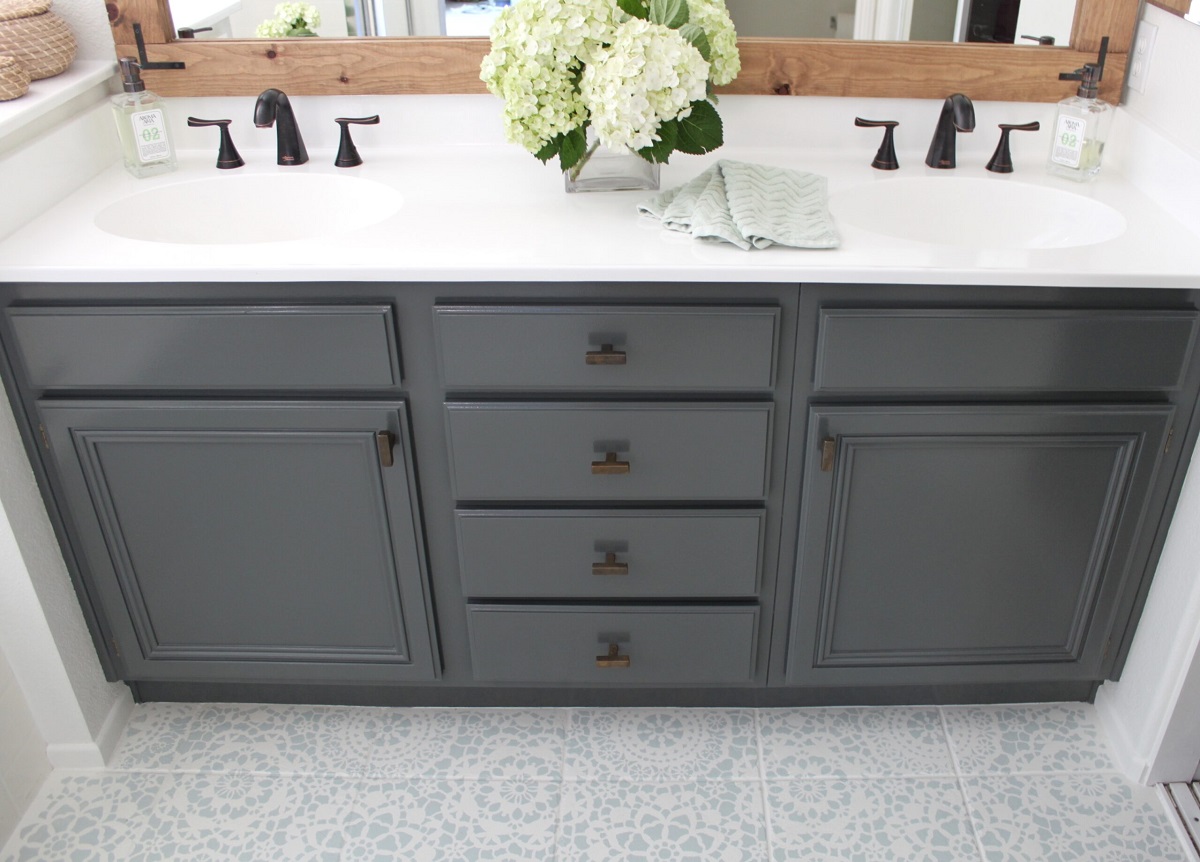
Are you tired of looking at your dull and stained bathroom sink? Refinishing your bathroom sink can give your entire bathroom a fresh and updated look without breaking the bank. Plus, doing it yourself can save you a lot of money compared to hiring a professional. In this article, we will guide you through the process of refinishing your bathroom sink in 10 easy steps. Refinishing a Bathroom Sink: DIY Guide


Refinishing a Bathroom Sink: DIY Guide

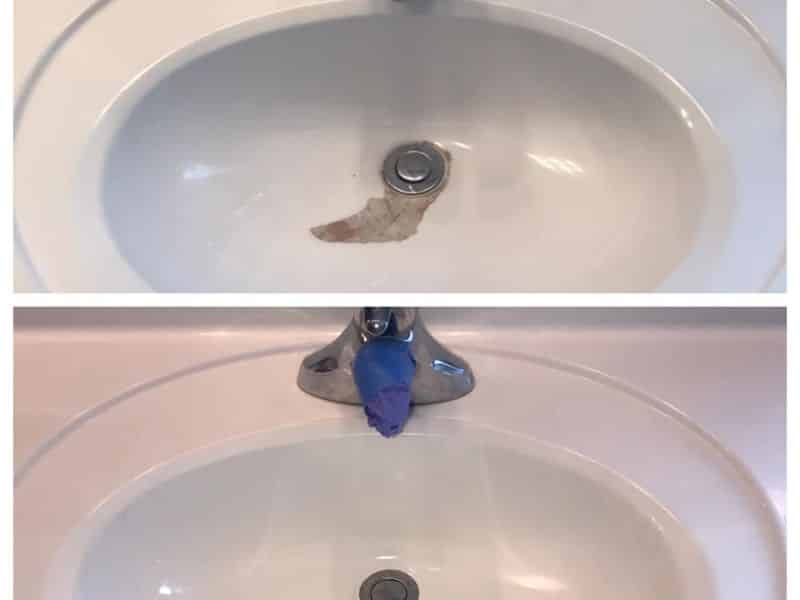


Refinishing a bathroom sink may seem like a daunting task, but with the right tools and techniques, it can be done easily. Follow these steps to refinish your bathroom sink yourself and achieve professional-looking results. How to Refinish a Bathroom Sink Yourself


How to Refinish a Bathroom Sink Yourself


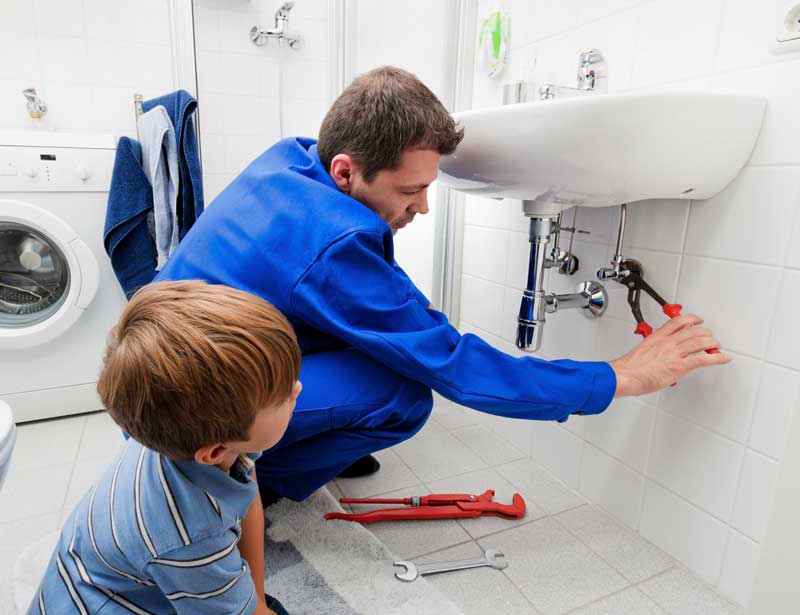
Step 1: Gather your materials and tools. For this project, you will need painter's tape, sandpaper, a sander, a cloth, a drop cloth, a primer, a topcoat, a paintbrush, and a foam roller. Step 2: Clean the sink thoroughly. Use a degreaser to remove any soap scum, dirt, or grime from the sink. Rinse it thoroughly and let it dry completely. Step 3: Sand the sink. Use sandpaper or a sander to roughen the surface of the sink. This will help the primer and paint adhere better. Be sure to wear a mask and safety goggles while sanding. Step 4: Tape off any areas you don't want to be painted. Use painter's tape to cover the edges of the sink, the faucet, and any other fixtures. Step 5: Apply the primer. Use a paintbrush to apply a thin coat of primer to the sink. Be sure to cover all areas evenly. Let it dry completely before moving on to the next step. Step 6: Sand the primer. Once the primer is dry, use fine-grit sandpaper to lightly sand the surface. This will help smooth out any imperfections and create a better surface for the paint to adhere to. Step 7: Apply the topcoat. Using a foam roller, apply a thin coat of topcoat to the sink. Make sure to follow the manufacturer's instructions for drying time between coats. Step 8: Sand between coats. After each coat, lightly sand the surface with fine-grit sandpaper to create a smooth finish. Repeat this step until you are happy with the color and coverage. Step 9: Let it dry completely. Once you have achieved your desired look, let the sink dry completely before using it. Step 10: Remove the tape and admire your newly refinished bathroom sink! DIY Bathroom Sink Refinishing: Step-by-Step Guide


DIY Bathroom Sink Refinishing: Step-by-Step Guide


Refinishing your bathroom sink doesn't have to be a complicated process. Follow these 5 easy steps to transform your bathroom sink in no time. Step 1: Clean the sink thoroughly. Step 2: Tape off any areas you don't want to be painted. Step 3: Apply the primer. Step 4: Apply the topcoat. Step 5: Let it dry completely. Refinish Your Bathroom Sink in 5 Easy Steps

Refinish Your Bathroom Sink in 5 Easy Steps


Refinishing your bathroom sink doesn't have to cost a fortune. Here are some budget-friendly DIY tips to help you achieve a professional look without breaking the bank. Tip 1: Use a high-quality primer and topcoat. Investing in good quality products will ensure a long-lasting finish and save you money in the long run. Tip 2: Look for sales or coupons. Many home improvement stores offer discounts on paint and supplies, so be sure to keep an eye out for deals. Tip 3: Use leftover paint. If you have leftover paint from a previous project, you can use it to refinish your bathroom sink. Just make sure it's suitable for use on your sink. Budget-Friendly DIY Bathroom Sink Refinishing


Budget-Friendly DIY Bathroom Sink Refinishing


Want to take your bathroom sink refinishing to the next level? Here are some tips to help you achieve a professional and unique look. Tip 1: Experiment with different colors. Instead of sticking to the traditional white or off-white, try a bold color to make your sink stand out. Tip 2: Add a pattern. Use painters tape or stencils to create a unique pattern on your sink. Tip 3: Add a metallic finish. Use a metallic topcoat to give your sink a modern and luxurious look. Transform Your Bathroom Sink with These DIY Refinishing Tips


Transform Your Bathroom Sink with These DIY Refinishing Tips

With the right techniques, you can achieve a professional-looking finish on your bathroom sink. Here are some tips to help you achieve a smooth and flawless finish. Tip 1: Use a foam roller for a smooth finish. A foam roller will help you achieve an even and streak-free finish on your sink. Tip 2: Sand between coats. This will help create a smooth surface and remove any imperfections. Tip 3: Use a paintbrush for hard-to-reach areas. Use a small paintbrush to reach corners and edges that the roller can't reach. Refinish Your Bathroom Sink Like a Pro: DIY Techniques
Refinish Your Bathroom Sink Like a Pro: DIY Techniques

Here is a list of materials and tools you will need to refinish your bathroom sink: - Painter's tape - Sandpaper or sander - Cloth - Drop cloth - Primer - Topcoat - Paintbrush - Foam roller DIY Bathroom Sink Refinishing: Materials and Tools You'll Need


DIY Bathroom Sink Refinishing: Materials and Tools You'll Need
If you're on a tight budget, refinishing your bathroom sink is still possible. Here are some tips to help you save money while achieving a beautiful finish. Tip 1: Use a DIY kit. Many home improvement stores offer DIY refinishing kits at a fraction of the cost of hiring a professional. Tip 2: Use a cheaper paint. While it's important to use a high-quality primer and topcoat, you can save money by using a cheaper paint for the base coats. Tip 3: Do it yourself. Hiring a professional to refinish your sink can cost hundreds of dollars. By doing it yourself, you can save a significant amount of money. How to Refinish a Bathroom Sink on a Budget

How to Refinish a Bathroom Sink on a Budget


Want to give your bathroom sink a makeover in just a weekend? Follow these tips to get the job done quickly and efficiently. Tip 1: Work in sections. Instead of trying to finish the entire sink in one go, work on one section at a time. This will prevent you from feeling overwhelmed and allow you to achieve a better finish. Tip 2: Have all your materials and tools ready. This will save you time and prevent you from having to run to the store in the middle of your project. Tip 3: Take breaks. Refinishing a bathroom sink can be a tiring and time-consuming task, so be sure to take breaks to avoid burnout. With these 10 easy steps and tips, you can refinish your bathroom sink like a pro and give your bathroom a fresh and updated look. So, why wait? Start your DIY project today and enjoy your newly refinished bathroom sink in no time! Refinish Your Bathroom Sink in a Weekend with These DIY Tips

Refinish Your Bathroom Sink in a Weekend with These DIY Tips


How to Refinish Your Bathroom Sink in Just a Few Simple Steps

Why Refinish Your Bathroom Sink?
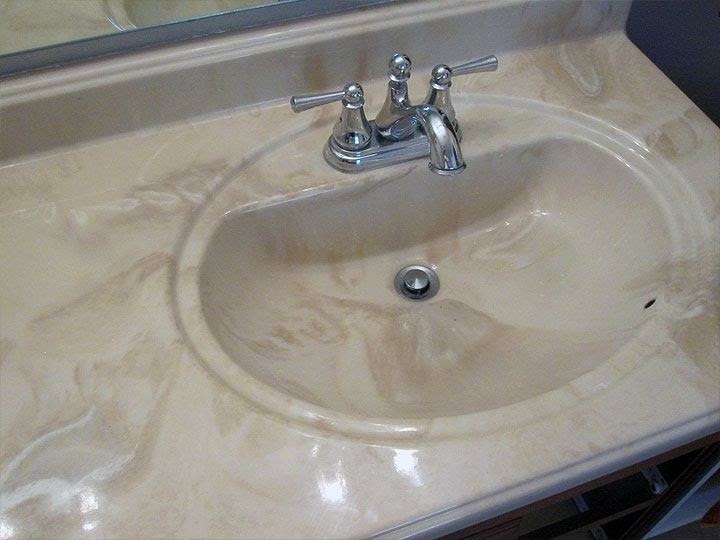
 When it comes to home design, the bathroom is often overlooked. However, it is a space that is used daily and deserves just as much attention as any other room in the house. One of the most important elements in a bathroom is the sink. Over time, sinks can become worn, outdated or even damaged. Instead of replacing your sink, which can be costly and time-consuming,
refinishing
it yourself is a great DIY option that can give your bathroom a fresh and updated look.
When it comes to home design, the bathroom is often overlooked. However, it is a space that is used daily and deserves just as much attention as any other room in the house. One of the most important elements in a bathroom is the sink. Over time, sinks can become worn, outdated or even damaged. Instead of replacing your sink, which can be costly and time-consuming,
refinishing
it yourself is a great DIY option that can give your bathroom a fresh and updated look.
What You Will Need
 Before you begin the refinishing process, it's important to gather all the necessary materials. Here's what you'll need:
- Masking tape - to protect surrounding areas from overspray
- Sandpaper - to remove any existing finish and smooth out imperfections
- Primer - to create a smooth and even surface for the new finish
- Spray paint - choose a paint specifically designed for use on sinks and tubs
- Clear coat - to seal and protect the new finish
- Drop cloth - to protect the floor from any drips or spills
- Protective gear - such as gloves, goggles, and a mask
The Refinishing Process
 Now that you have all your materials ready, it's time to start the refinishing process. Follow these steps for a successful bathroom sink transformation:
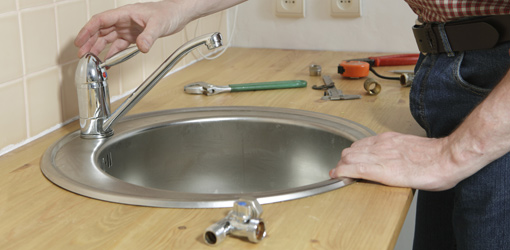
Step 1: Prepare the Sink
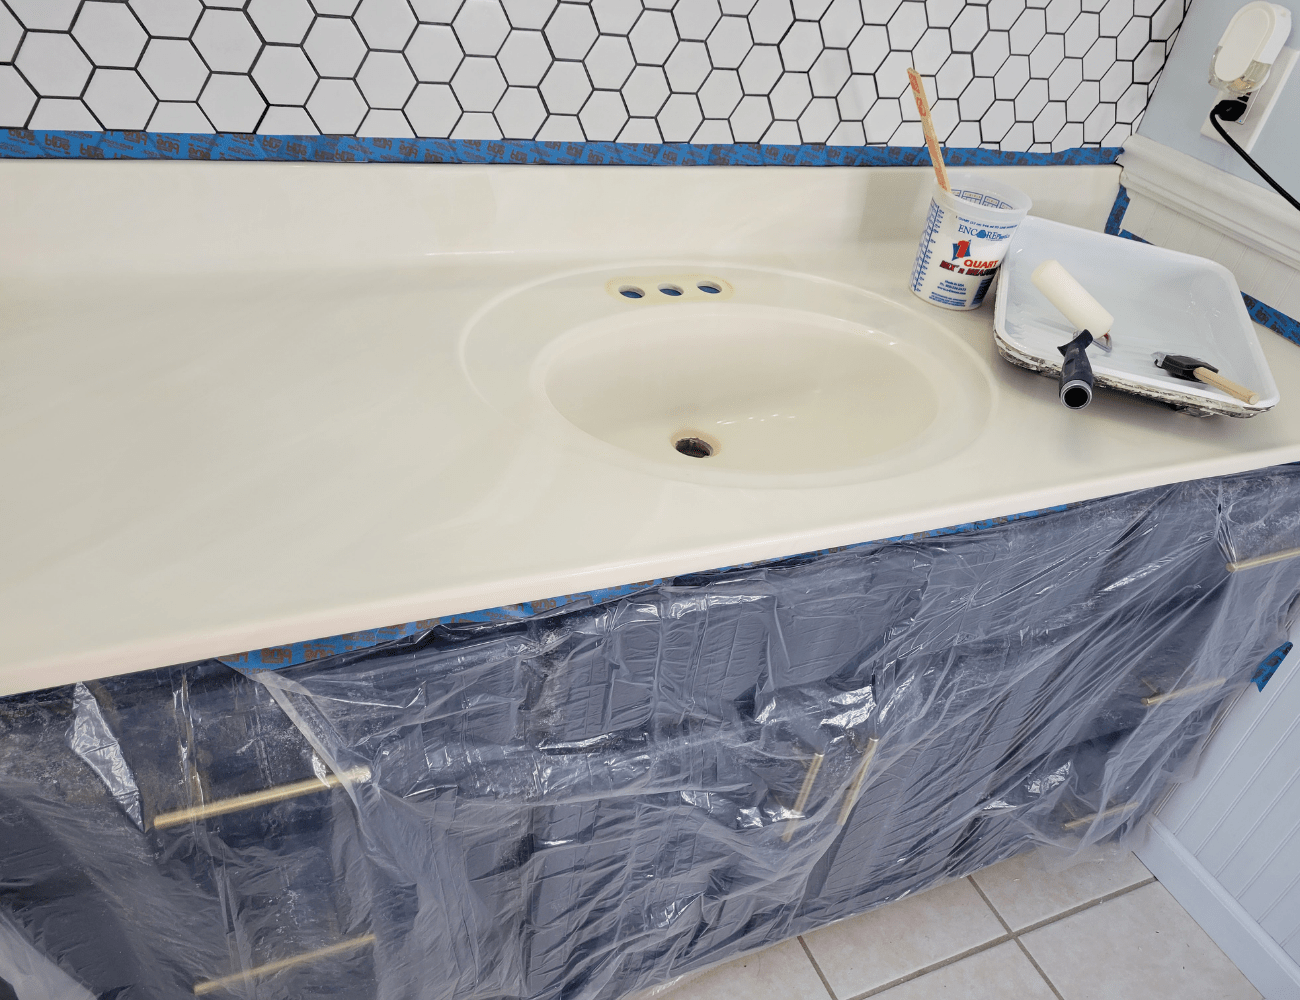
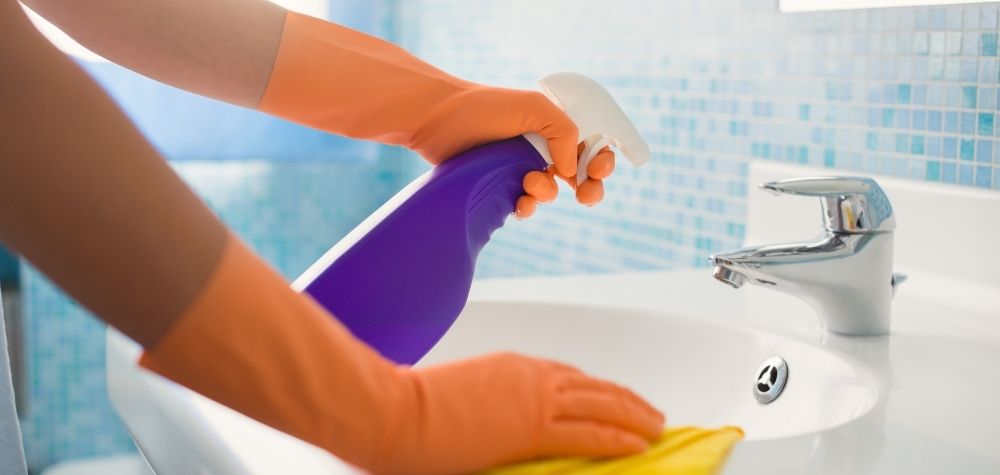
Start by removing any hardware and thoroughly cleaning the sink with a mild cleaner. Once clean, use masking tape to cover the areas you don't want to be painted, such as the faucet and drain.Step 2: Sand the Sink
Using sandpaper, gently sand the entire sink to remove any existing finish and create a smooth surface for the new paint to adhere to. Be sure to sand any imperfections or scratches as well.Step 3: Apply Primer
With a clean and dry sink, apply a coat of primer using a paintbrush or roller. This will help the paint adhere better and create a smooth and even surface.Step 4: Paint the Sink
Once the primer is dry, it's time to apply the spray paint. Be sure to follow the instructions on the can and apply thin, even coats. Don't be afraid to use multiple coats to achieve your desired color and finish.Step 5: Seal the Finish
After the paint is completely dry, apply a clear coat to seal and protect the new finish. This will also give your sink a shiny and polished look.Final Thoughts
 Refinishing your bathroom sink is a simple and cost-effective way to update the look of your bathroom. With the right materials and some patience, you can achieve professional-looking results without breaking the bank. So why wait? Give your bathroom sink a fresh new look today with this easy DIY project.

:max_bytes(150000):strip_icc()/_hero_4109254-feathertop-5c7d415346e0fb0001a5f085.jpg)