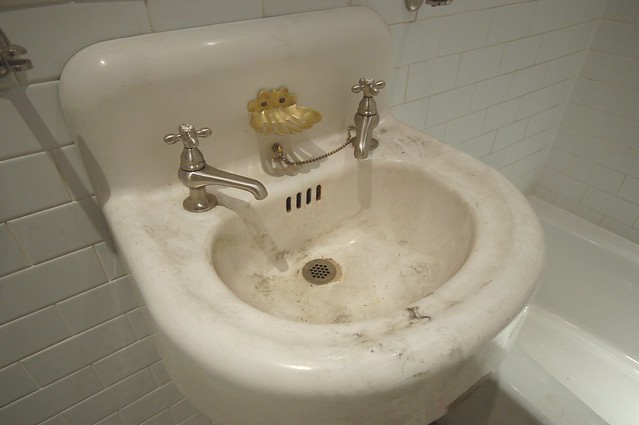
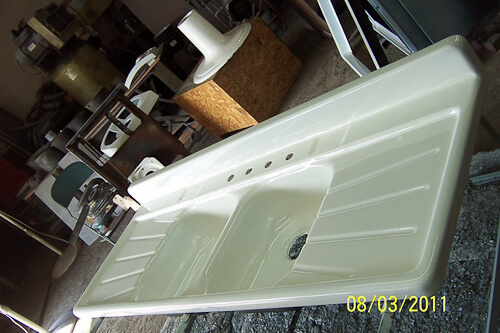
If you're tired of looking at your old, stained, and chipped kitchen sink, it may be time to consider re-enameling it. Re-enameling, also known as reglazing or refinishing, is a cost-effective way to give your sink a brand new look without the hefty price tag of replacing it. In this guide, we'll walk you through the process of re-enameling your kitchen sink and provide you with some helpful tips and tricks along the way.How to Re-Enamel a Kitchen Sink


How to Re-Enamel a Kitchen Sink


The first step to re-enameling your kitchen sink is to thoroughly clean it with a non-abrasive cleaner. This will remove any dirt, grime, or soap scum that may have built up over time. Once the sink is clean and dry, use a sandpaper or a sander to roughen up the surface. This will help the new enamel adhere better to the old surface. Next, use a high-quality primer specifically designed for metal surfaces and apply it to the sink. This will create a smooth and even base for the enamel to stick to. Once the primer is dry, it's time to apply the enamel. Make sure to use a product that is specifically made for sink re-enameling and follow the manufacturer's instructions for best results. After the enamel has dried, you can add a second coat for a more durable finish. Once the second coat is dry, you can buff the sink with a buffing pad to achieve a glossy finish. Finally, let the sink cure for at least 24 hours before using it again.Re-Enameling a Kitchen Sink: A Step-by-Step Guide


Re-Enameling a Kitchen Sink: A Step-by-Step Guide


Re-enameling your kitchen sink can be a DIY project, but it's important to keep a few tips and tricks in mind for a successful outcome. Firstly, make sure to wear protective gear, such as gloves and a mask, when handling the enamel and other chemicals. It's also important to properly ventilate the area while working. Additionally, take your time and follow the instructions carefully. Rushing through the process can result in a sloppy finish and may require you to start over. It's also a good idea to practice on a small area of the sink first to get a feel for the process and to ensure you're happy with the color and finish.DIY Kitchen Sink Re-Enameling: Tips and Tricks


DIY Kitchen Sink Re-Enameling: Tips and Tricks


When it comes to updating your kitchen sink, you may be wondering if it's better to re-enamel or replace it altogether. While replacing the sink may seem like the obvious choice, it's also the more expensive one. Re-enameling your sink can provide a similar outcome at a fraction of the cost. However, if your sink is beyond repair or if you're looking for a completely different style, replacing it may be the better option.Re-Enameling vs. Replacing a Kitchen Sink: Which is Better?


Re-Enameling vs. Replacing a Kitchen Sink: Which is Better?


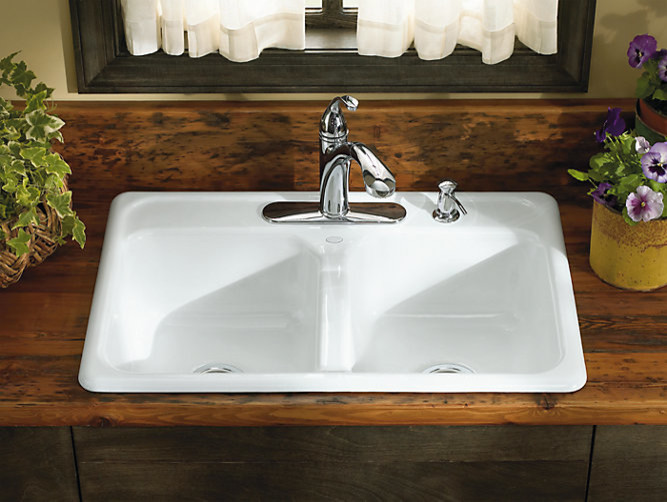
There are many benefits to re-enameling your kitchen sink, the most obvious being the cost savings. Re-enameling is much more affordable than replacing the sink, and it can give your kitchen a fresh new look without the mess and hassle of a full renovation. Additionally, re-enameling can prolong the life of your sink, making it a more sustainable and eco-friendly option. Re-enameling also allows you to choose the color and finish of your sink, giving you the opportunity to customize it to your liking. This can be a great option for those wanting to update their kitchen without a full remodel. Lastly, re-enameling is a quick and easy process, meaning you won't have to deal with a long and disruptive renovation in your kitchen.The Benefits of Re-Enameling Your Kitchen Sink


The Benefits of Re-Enameling Your Kitchen Sink


When it comes to choosing the right products for re-enameling your kitchen sink, there are a few key things to keep in mind. Firstly, make sure to choose a product specifically made for sink re-enameling. These products are formulated to withstand water and heavy use, making them more durable and long-lasting. It's also important to choose a product that is the right color and finish for your desired outcome. Some products may offer a glossy finish, while others may have a matte or textured finish. Make sure to read reviews and choose a high-quality product for the best results.Best Products for Re-Enameling a Kitchen Sink
:max_bytes(150000):strip_icc()/hopes-perfect-sink-c1752544f489427299f9c003aa66cefc.jpg)


Best Products for Re-Enameling a Kitchen Sink


The cost of re-enameling a kitchen sink can vary depending on the size of your sink and the products you choose. On average, it can cost anywhere from $200 to $500, which is significantly less than the cost of replacing the sink. However, if you choose to hire a professional, the cost may increase. It's important to consider your budget and the condition of your sink before deciding whether to re-enamel or replace it.How Much Does it Cost to Re-Enamel a Kitchen Sink?


How Much Does it Cost to Re-Enamel a Kitchen Sink?


While re-enameling a kitchen sink is a relatively simple process, there are a few common mistakes to avoid for a successful outcome. Firstly, make sure to properly prepare the sink by cleaning and sanding it before applying the primer. Skipping this step can result in a poor finish and may cause the enamel to peel over time. It's also important to apply the enamel in thin, even coats and to let it dry completely between coats. Rushing through the process or applying too thick of a coat can result in a lumpy or uneven finish. Lastly, make sure to properly ventilate the area and wear protective gear to avoid inhaling any chemicals or fumes.Common Mistakes to Avoid When Re-Enameling a Kitchen Sink

Common Mistakes to Avoid When Re-Enameling a Kitchen Sink


Deciding between hiring a professional or doing the re-enameling yourself will depend on your budget, time, and skill level. Re-enameling can be a DIY project, but it does require some time and effort. If you're not confident in your ability to achieve a professional finish, or if you're short on time, hiring a professional may be the better option. However, if you have the time and patience, doing it yourself can save you a significant amount of money.Professional vs. DIY Re-Enameling: Which is Right for You?


Professional vs. DIY Re-Enameling: Which is Right for You?


The frequency at which you should re-enamel your kitchen sink will depend on how well you maintain it and the quality of the products used. On average, a re-enameling job can last anywhere from 5-15 years. However, if you regularly clean and take care of your sink, it may last even longer. It's important to keep an eye out for any chips or stains and to address them promptly to prolong the life of your sink.How Often Should You Re-Enamel Your Kitchen Sink?


How Often Should You Re-Enamel Your Kitchen Sink?


Why Re-Enamel Your Kitchen Sink?

Benefits of Re-Enameling
 Re-enameling a kitchen sink is a cost-effective and efficient way to give your kitchen a fresh new look. It involves applying a new layer of enamel over the existing sink, covering up any scratches, stains, or discoloration. This process not only restores the appearance of your sink, but it also provides numerous benefits that make it a worthwhile investment for any homeowner.
Durable and Long-Lasting
Enamel is a durable material that can withstand daily wear and tear in a busy kitchen. By re-enameling your sink, you are essentially adding a protective layer that will prevent further damage and extend the life of your sink. This means you won't have to worry about replacing your sink anytime soon, saving you time and money in the long run.
Affordable Alternative to Replacement
Replacing a kitchen sink can be a costly and time-consuming process. Re-enameling, on the other hand, is a much more affordable option that can easily transform the look of your sink without breaking the bank. Plus, it can be done in a matter of hours, so you won't have to deal with the inconvenience of a lengthy renovation.
Customizable Options
One of the great things about re-enameling is that it allows you to customize the color and finish of your sink. You can choose from a variety of colors to match your kitchen's aesthetic or go for a trendy and modern look. Additionally, you can opt for a glossy or matte finish, depending on your personal preference.
Easy Maintenance
Enamel is a non-porous material, which makes it resistant to stains and easy to clean. Once your sink has been re-enameled, all you need is a mild cleaner and a soft cloth to keep it looking like new. This low maintenance option is perfect for busy households and ensures that your sink will continue to look pristine for years to come.
Re-enameling a kitchen sink is a cost-effective and efficient way to give your kitchen a fresh new look. It involves applying a new layer of enamel over the existing sink, covering up any scratches, stains, or discoloration. This process not only restores the appearance of your sink, but it also provides numerous benefits that make it a worthwhile investment for any homeowner.
Durable and Long-Lasting
Enamel is a durable material that can withstand daily wear and tear in a busy kitchen. By re-enameling your sink, you are essentially adding a protective layer that will prevent further damage and extend the life of your sink. This means you won't have to worry about replacing your sink anytime soon, saving you time and money in the long run.
Affordable Alternative to Replacement
Replacing a kitchen sink can be a costly and time-consuming process. Re-enameling, on the other hand, is a much more affordable option that can easily transform the look of your sink without breaking the bank. Plus, it can be done in a matter of hours, so you won't have to deal with the inconvenience of a lengthy renovation.
Customizable Options
One of the great things about re-enameling is that it allows you to customize the color and finish of your sink. You can choose from a variety of colors to match your kitchen's aesthetic or go for a trendy and modern look. Additionally, you can opt for a glossy or matte finish, depending on your personal preference.
Easy Maintenance
Enamel is a non-porous material, which makes it resistant to stains and easy to clean. Once your sink has been re-enameled, all you need is a mild cleaner and a soft cloth to keep it looking like new. This low maintenance option is perfect for busy households and ensures that your sink will continue to look pristine for years to come.
The Re-Enameling Process
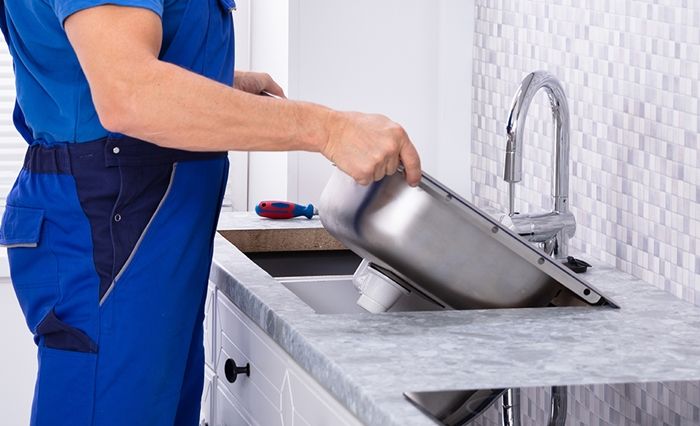
 Re-enameling a kitchen sink is a relatively simple process that can be done by a professional or as a DIY project. First, the sink is cleaned and any old enamel or rust is removed. Then, a new layer of enamel is applied using a specialized spray gun. Once the enamel has dried, a second coat is applied for added durability. The result is a smooth, glossy finish that will make your sink look brand new.
In conclusion, re-enameling your kitchen sink is a smart and cost-effective way to update the look of your kitchen without the hassle and expense of a full renovation. With its numerous benefits and customizable options, it's a great option for any homeowner looking to give their kitchen a fresh new look.
Re-enameling a kitchen sink is a relatively simple process that can be done by a professional or as a DIY project. First, the sink is cleaned and any old enamel or rust is removed. Then, a new layer of enamel is applied using a specialized spray gun. Once the enamel has dried, a second coat is applied for added durability. The result is a smooth, glossy finish that will make your sink look brand new.
In conclusion, re-enameling your kitchen sink is a smart and cost-effective way to update the look of your kitchen without the hassle and expense of a full renovation. With its numerous benefits and customizable options, it's a great option for any homeowner looking to give their kitchen a fresh new look.