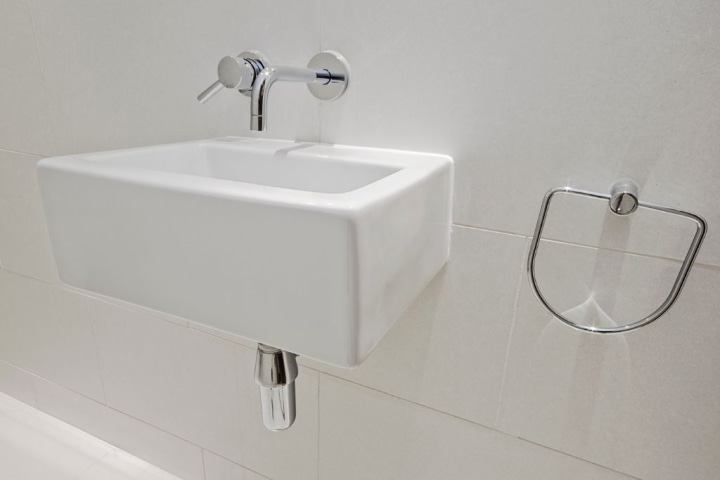
Moving a bathroom sink may seem like a daunting task, but with the right tools and knowledge, it can be a simple and straightforward process. Whether you're renovating your bathroom or just looking to change the layout, moving a bathroom sink can give your space a whole new look. In this article, we will discuss the step-by-step process of moving a bathroom sink and provide tips to help you avoid any potential mistakes. So, let's dive in and learn how to move a bathroom sink like a pro.How to Move a Bathroom Sink
How to Move a Bathroom Sink


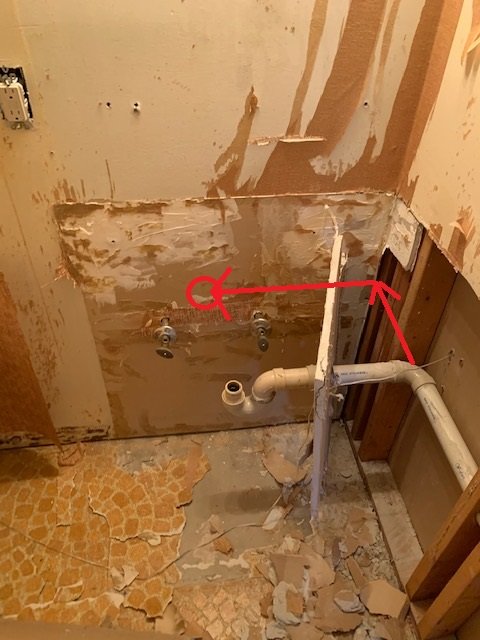
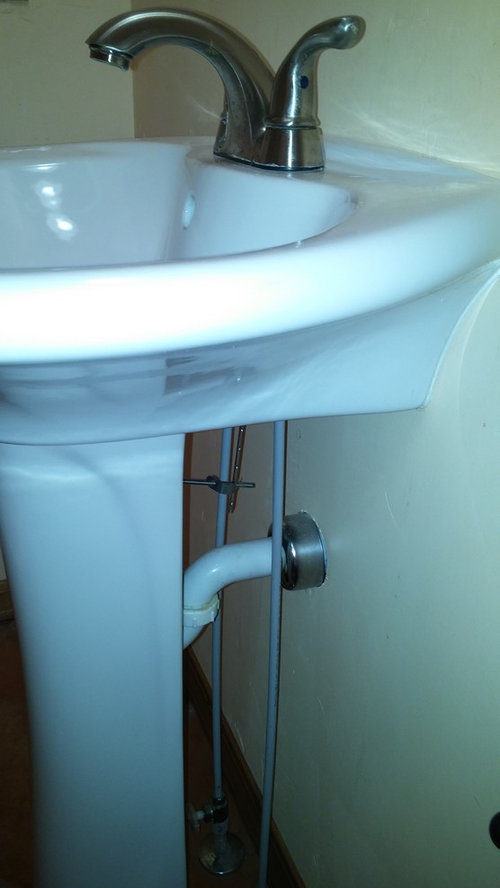
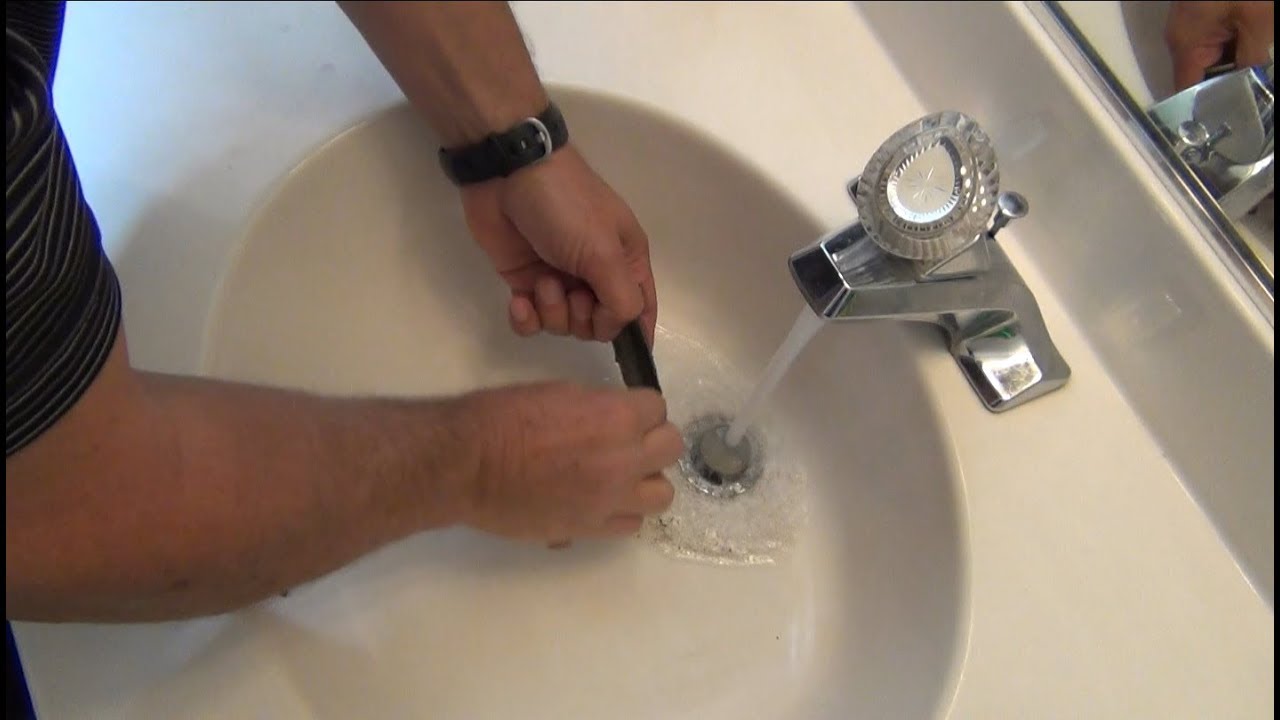
The first step to moving a bathroom sink is to shut off the water supply. Locate the shut-off valve, usually found under the sink or near the toilet, and turn it off. Once the water supply is turned off, turn on the faucet to release any remaining water in the pipes. Next, remove the drain and water supply lines from the sink. Using a wrench, loosen the nuts connecting the lines to the sink and remove them. Make sure to have a bucket or towel handy to catch any excess water. Now it's time to remove the sink from the vanity or wall. If the sink is attached to the vanity, use a screwdriver to remove the screws holding it in place. If it's a wall-mounted sink, carefully lift it off the brackets or supports. With the sink removed, you can now detach it from the countertop or wall. Use a putty knife to break the seal between the sink and the surface. Gently pry the sink away, being careful not to damage the surrounding surface. Once the sink is removed, you can begin to prepare the new location. Make sure the area is clean and free of any debris. Measure and mark the placement for the new sink according to your desired layout. Now it's time to install the new sink. Follow the manufacturer's instructions for attaching the sink to the vanity or wall. Use plumber's putty to create a seal around the edges of the sink before placing it in the designated area. Once the sink is securely in place, reattach the drain and water supply lines. Turn on the water supply and check for any leaks. If everything looks good, you can now enjoy your newly moved bathroom sink.Moving a Bathroom Sink: Step-by-Step Guide


Moving a Bathroom Sink: Step-by-Step Guide


While moving a bathroom sink may seem like a job for a professional, it can be done as a DIY project with the right tools and preparation. However, it's essential to note that if you're not confident in your abilities or if the sink is complex, it's best to hire a professional plumber to avoid any potential damage or mistakes. When attempting to move a bathroom sink on your own, make sure to have all the necessary tools and materials, including a wrench, screwdriver, putty knife, and plumber's putty. It's also crucial to follow the manufacturer's instructions for the specific sink you are installing and to take your time to ensure everything is done correctly.DIY Bathroom Sink Removal and Installation


DIY Bathroom Sink Removal and Installation


Moving a bathroom sink can be a delicate process, and it's essential to take precautions to avoid any damage. Here are a few tips to help you move your bathroom sink without causing any harm. Protect the Sink: Before beginning the moving process, make sure to protect the sink by wrapping it in a towel or using a sink cover. This will prevent any scratches or dings from occurring during the removal and installation process. Use Proper Tools: It's crucial to use the right tools for the job to avoid any damage to the sink or surrounding surfaces. For example, using a putty knife instead of a screwdriver to remove the sink can prevent any scratches or cracks. Be Gentle: When removing the sink, be gentle and take your time. Rushing the process can cause damage to the sink or surrounding surfaces, resulting in additional repair costs. Follow Instructions: Whether you're using a new or existing sink, make sure to follow the manufacturer's instructions for installation. This will ensure that the sink is securely attached and prevent any damage or leaks.Tips for Moving a Bathroom Sink Without Damaging It


Tips for Moving a Bathroom Sink Without Damaging It


Here is a list of tools and materials you'll need to move a bathroom sink: - Wrench - Screwdriver - Putty Knife - Plumber's Putty - Towel or Sink Cover - Bucket or Towel - New Sink (if desired)Moving a Bathroom Sink: Tools and Materials You'll Need


Moving a Bathroom Sink: Tools and Materials You'll Need
/installing-a-new-toilet-in-bathroom-185312649-57f306373df78c690f77d061.jpg)


The cost of moving a bathroom sink can vary depending on the complexity of the job and whether you hire a professional or do it yourself. On average, hiring a plumber to move a bathroom sink can cost anywhere from $200-$500, while doing it yourself can save you money on labor costs. Keep in mind that the cost may also increase if you need to purchase a new sink or if any additional repairs are required.The Cost of Moving a Bathroom Sink


The Cost of Moving a Bathroom Sink


While moving a bathroom sink can be done as a DIY project, it's essential to know when to call in a professional. If the sink is complex or if you are not confident in your abilities, it's best to hire a professional plumber to ensure the job is done correctly. A professional plumber will have the necessary tools and expertise to move your bathroom sink without causing any damage.Hiring a Professional Plumber for Moving a Bathroom Sink


Hiring a Professional Plumber for Moving a Bathroom Sink


When moving a bathroom sink, there are a few common mistakes that you should avoid to prevent any damage or issues. These include: - Using the wrong tools - Using the wrong tools can lead to scratches or cracks on the sink or surrounding surfaces. - Rushing the process - Taking your time and being gentle is crucial when moving a bathroom sink. Rushing the process can result in damage or leaks. - Not following instructions - Whether you're installing a new or existing sink, make sure to follow the manufacturer's instructions to avoid any potential issues.Common Mistakes to Avoid When Moving a Bathroom Sink


Common Mistakes to Avoid When Moving a Bathroom Sink


In some cases, damage may occur during the bathroom sink moving process. If this happens, it's essential to address it immediately to prevent any further damage. Here are a few tips to help you fix any damage that may occur during the bathroom sink moving process. - Scratches or chips: If your sink gets scratched or chipped, you can use a porcelain repair kit to fix the damage. These kits can be found at most hardware stores and are relatively easy to use. - Leaks: If you notice any leaks after moving the sink, it's crucial to address them immediately to avoid any water damage. Check the connections and tighten any loose nuts or fittings. If the leak persists, it's best to call a professional plumber for assistance.How to Fix Any Damage During the Bathroom Sink Moving Process


How to Fix Any Damage During the Bathroom Sink Moving Process


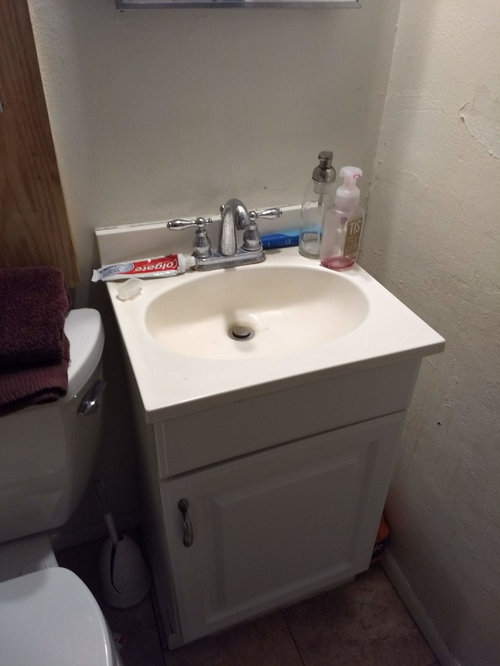
If you're considering moving your bathroom sink to a different location, there are a few things you should consider before starting the process. These include: - Plumbing: Moving a bathroom sink to a new location may require additional plumbing work, which can increase the cost and complexity of the project. - Space: Make sure to consider the available space in the new location and whether it will accommodate your desired sink and vanity size. - Ventilation: Moving the sink may also affect the ventilation in your bathroom, so it's crucial to consult a professional to ensure proper ventilation is maintained. With this step-by-step guide and helpful tips, you can successfully move your bathroom sink without any issues. Just remember to take your time, use the proper tools, and don't hesitate to call a professional if needed. Happy renovating!Moving a Bathroom Sink to a Different Location: Things to Consider

Moving a Bathroom Sink to a Different Location: Things to Consider

Moving a Bathroom Sink: Tips and Considerations
Introduction
 Moving a bathroom sink may seem like a daunting task, but it can be a great way to revamp your bathroom and create a more functional and aesthetically pleasing space. Whether you are looking to relocate your sink to a different spot in the bathroom or to a completely different room, there are a few things you should consider before beginning the process. In this article, we will discuss the steps involved in moving a bathroom sink and provide helpful tips to ensure a smooth and successful project.
Step 1: Plan and Measure
 The first step in moving a bathroom sink is to carefully plan and measure the new location. This includes taking accurate measurements of the new space and determining if any additional plumbing or electrical work will be needed. It is important to
consider the layout and functionality
of the new location to ensure that the sink will fit and function properly.
The first step in moving a bathroom sink is to carefully plan and measure the new location. This includes taking accurate measurements of the new space and determining if any additional plumbing or electrical work will be needed. It is important to
consider the layout and functionality
of the new location to ensure that the sink will fit and function properly.
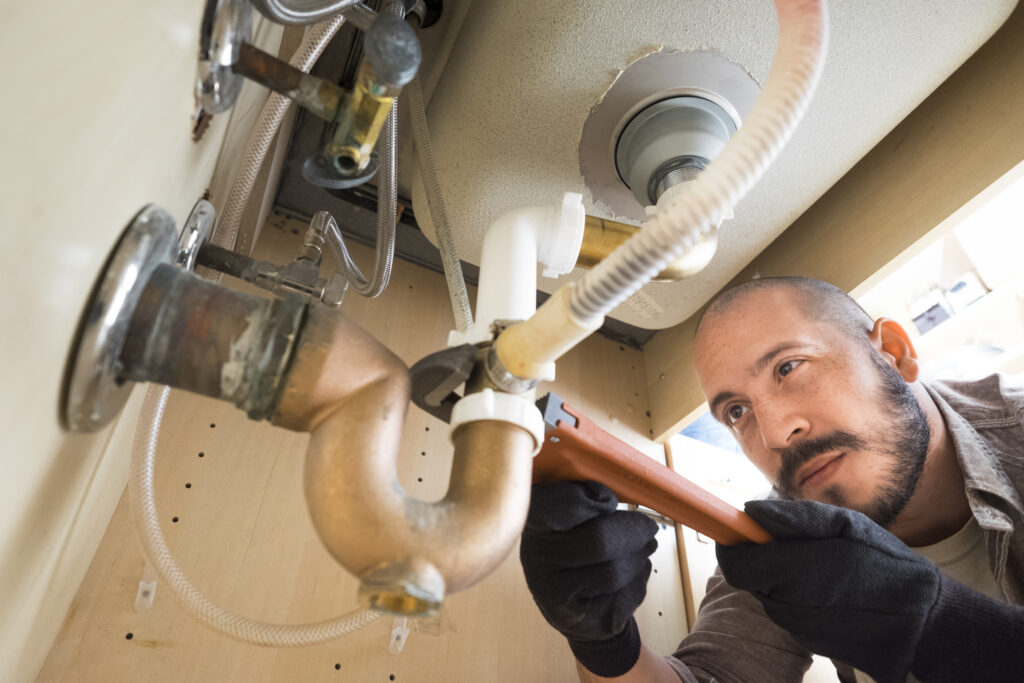
Step 2: Shut off Water and Disconnect
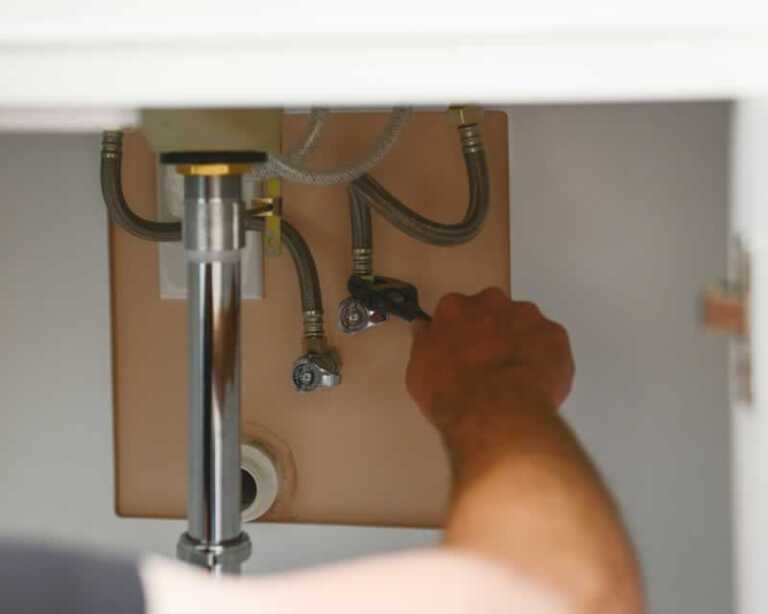 Before beginning any work, be sure to shut off the water supply to the sink. This can usually be done by turning the shut-off valves under the sink clockwise. Once the water is shut off, disconnect the plumbing and remove the sink from its current location. This may require the use of a wrench or pliers to loosen any connections.
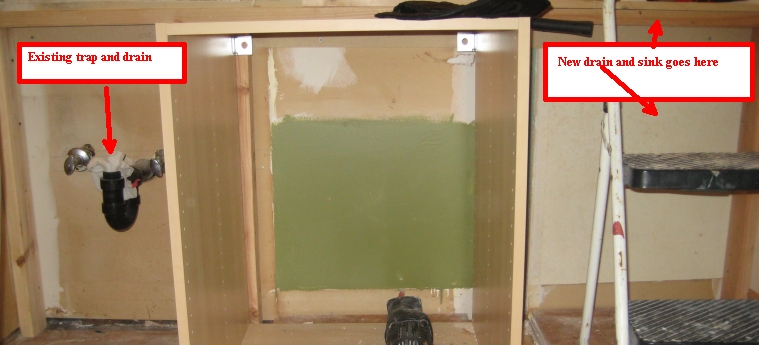
Step 3: Relocate Plumbing and Electrical
 If the new location for the sink requires any additional plumbing or electrical work, it is important to hire a professional to ensure proper installation. This may include moving pipes or installing new electrical outlets. It is
crucial to make sure all work is up to code
to avoid any potential issues in the future.
If the new location for the sink requires any additional plumbing or electrical work, it is important to hire a professional to ensure proper installation. This may include moving pipes or installing new electrical outlets. It is
crucial to make sure all work is up to code
to avoid any potential issues in the future.
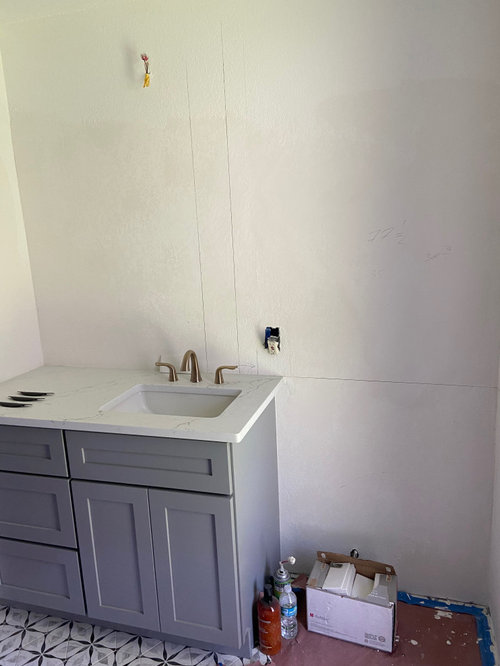
Step 4: Install the Sink
 Once the plumbing and electrical work is complete, it is time to install the sink in its new location. Begin by attaching the sink to the wall or vanity, depending on the type of sink. Use a level to make sure the sink is straight and secure any necessary brackets or supports. Then, reconnect the plumbing and turn the water supply back on.
Test the sink for any leaks
and make adjustments as needed.
Once the plumbing and electrical work is complete, it is time to install the sink in its new location. Begin by attaching the sink to the wall or vanity, depending on the type of sink. Use a level to make sure the sink is straight and secure any necessary brackets or supports. Then, reconnect the plumbing and turn the water supply back on.
Test the sink for any leaks
and make adjustments as needed.
Step 5: Finishing Touches
 With the sink in place, it is time to add the finishing touches. This may include installing a new faucet, adding caulking around the edges of the sink, and attaching any accessories such as towel racks or shelves. Take the time to
make sure everything is properly secured
and functioning correctly.
With the sink in place, it is time to add the finishing touches. This may include installing a new faucet, adding caulking around the edges of the sink, and attaching any accessories such as towel racks or shelves. Take the time to
make sure everything is properly secured
and functioning correctly.
In Conclusion
 Moving a bathroom sink can be a challenging task, but with proper planning and the help of professionals, it can be a rewarding project that adds value to your home. Remember to carefully plan and measure, shut off water and disconnect, relocate plumbing and electrical if needed, install the sink, and add finishing touches. Soon enough, you will have a beautiful and functional bathroom with a relocated sink that meets your design and functionality needs.