If you have a ball faucet in your kitchen sink, you may encounter some issues with it over time. The good news is that ball faucets are relatively easy to repair and can save you from having to replace the entire faucet. In this article, we will guide you through the steps of repairing a ball faucet and provide some tips for maintaining it to prevent future repairs.How to Repair a Ball Faucet

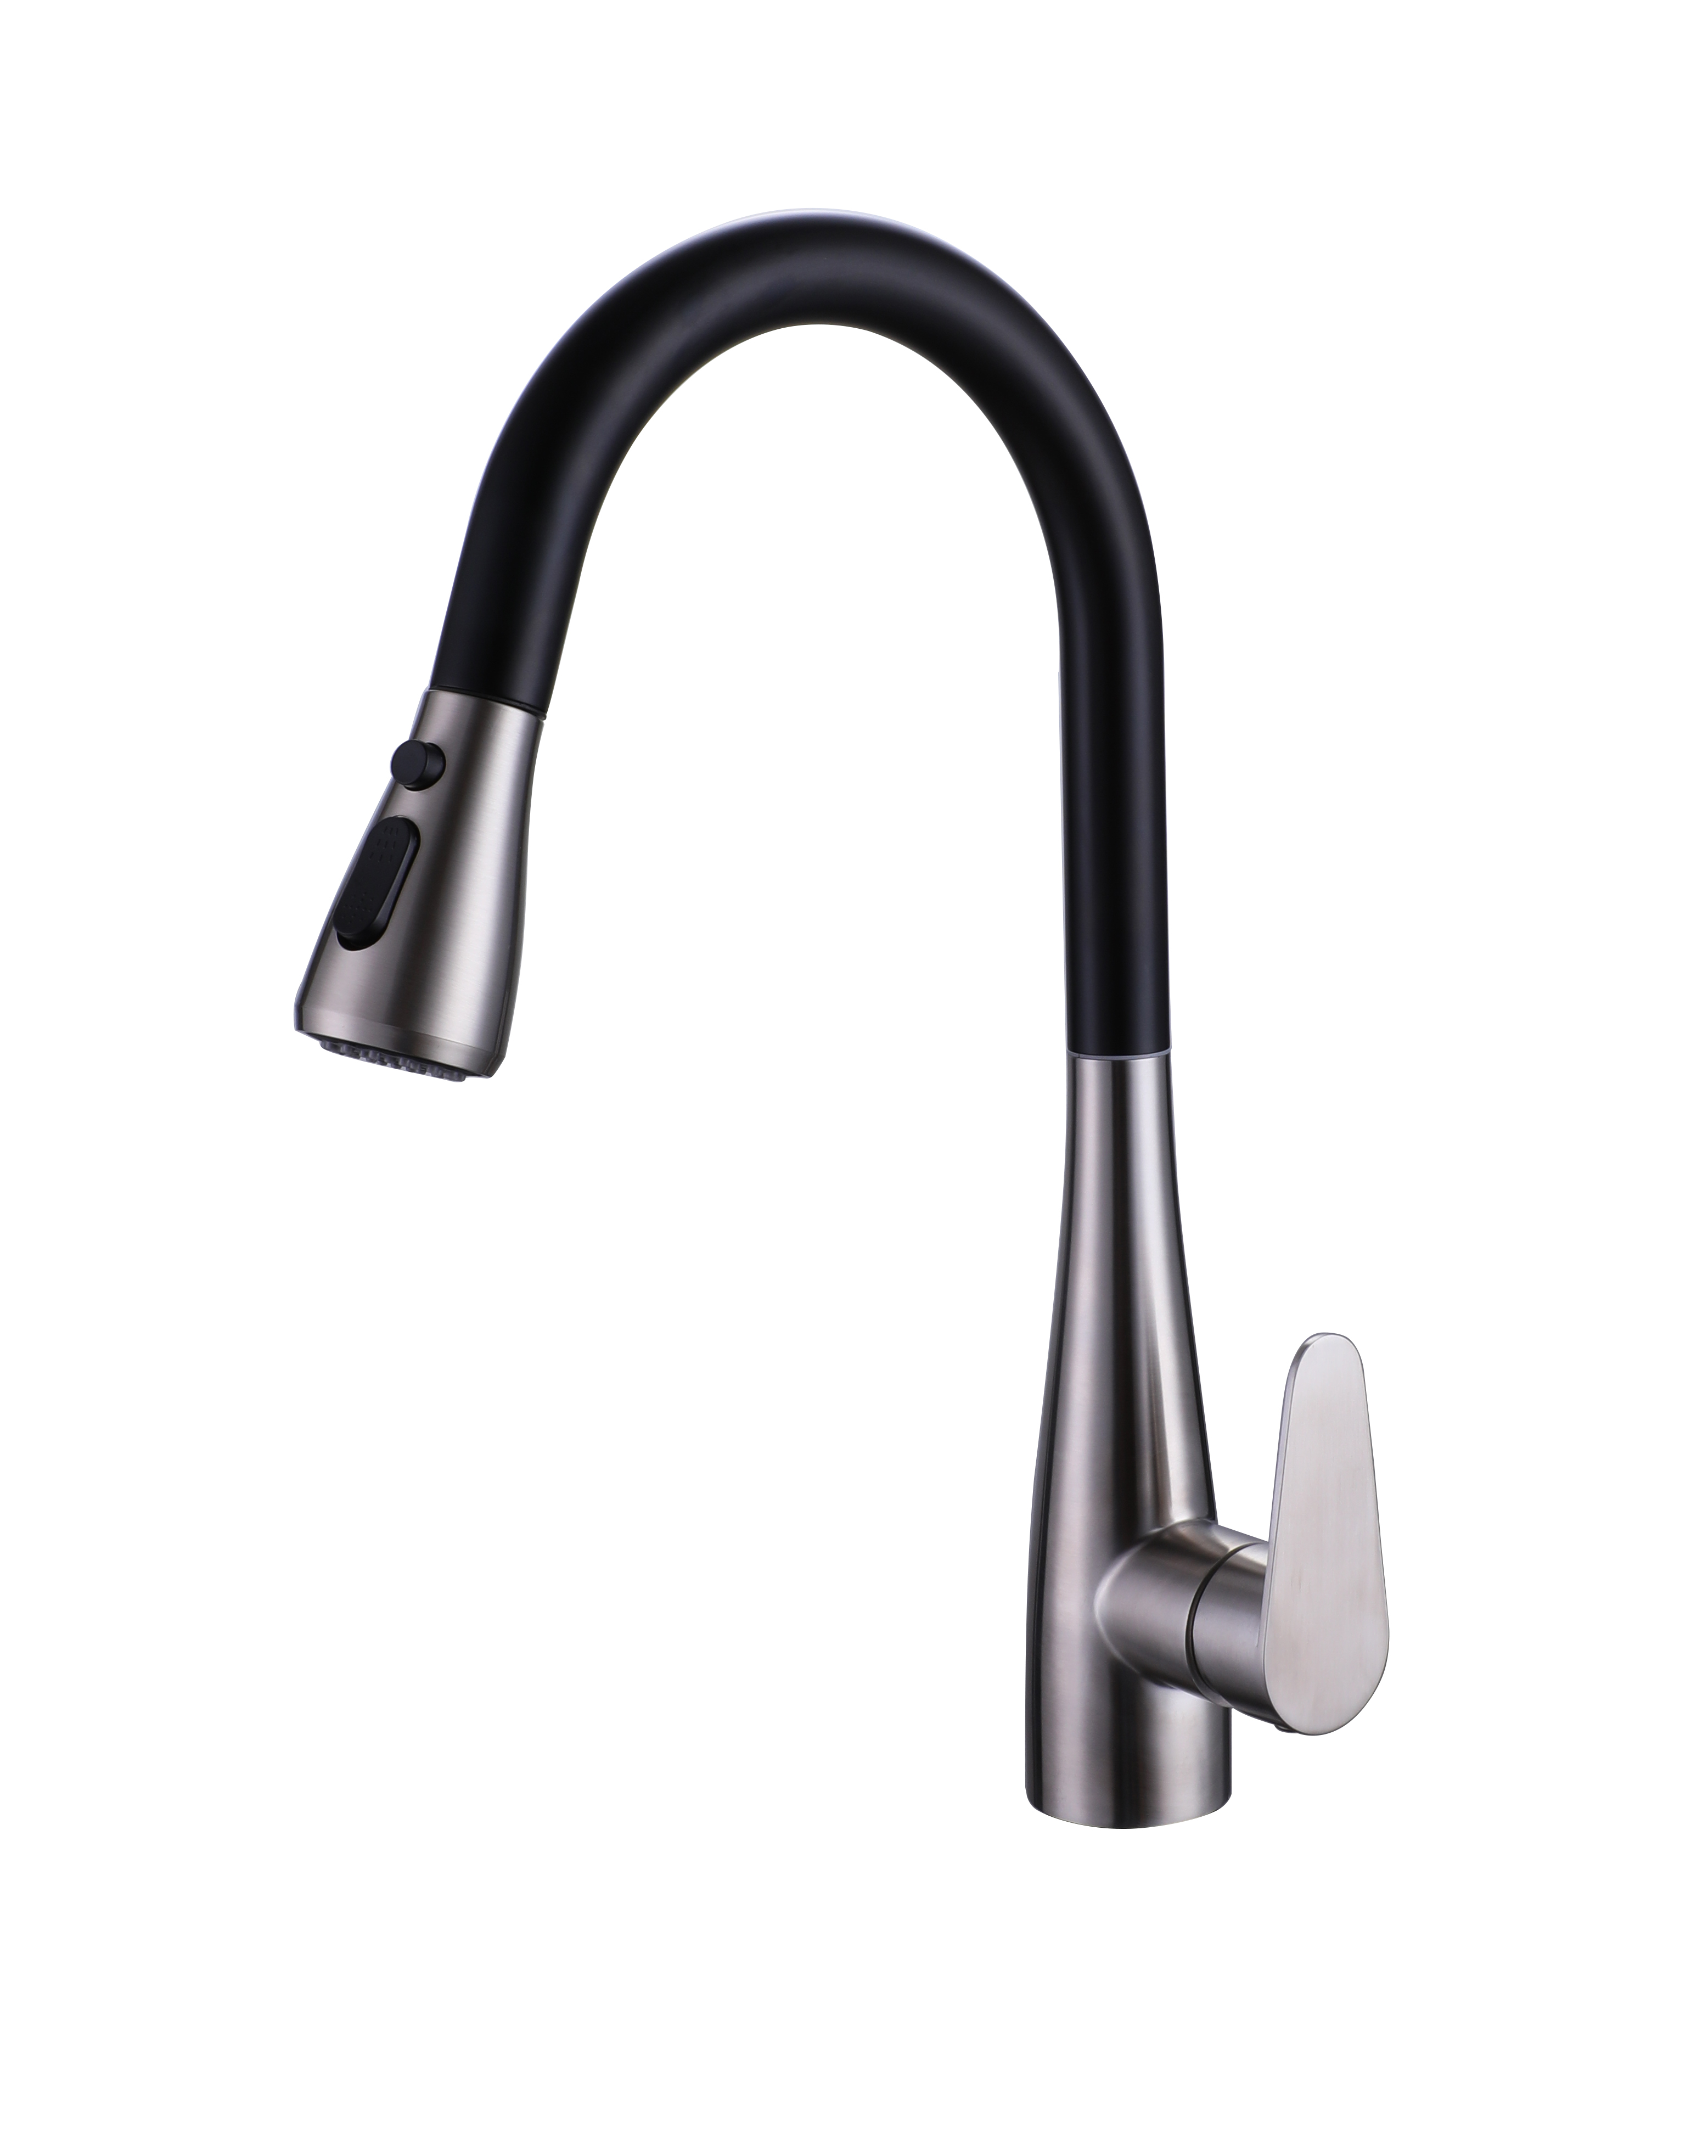
How to Repair a Ball Faucet
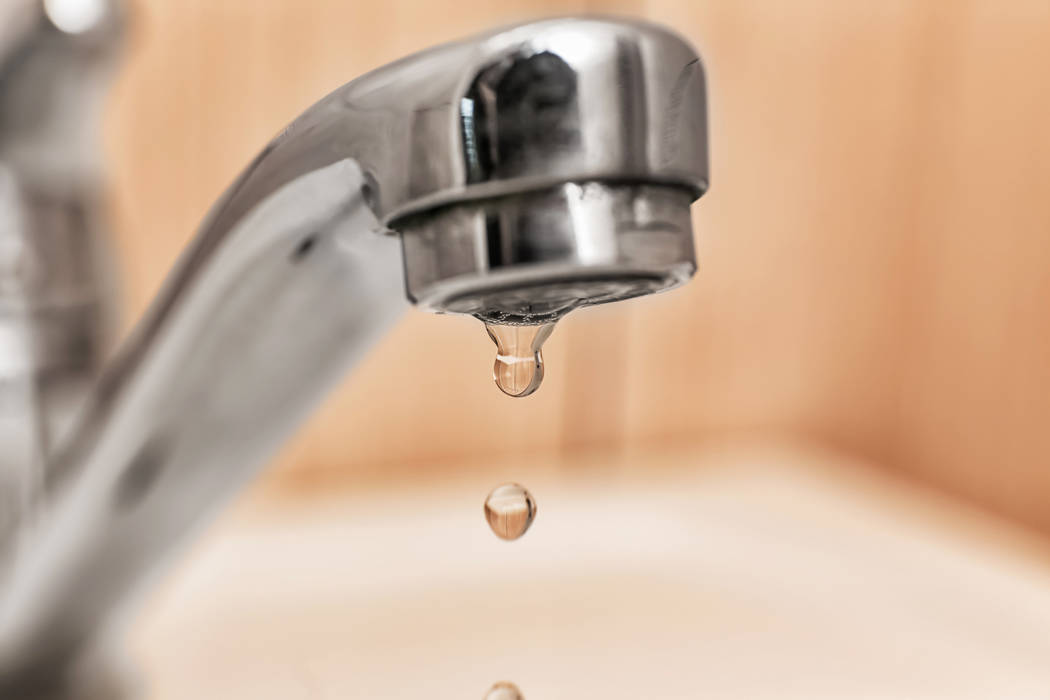
/repair-a-leaking-ball-faucet-1824868-12-f016144064ee4b5188bf6c500aada90f.jpg)


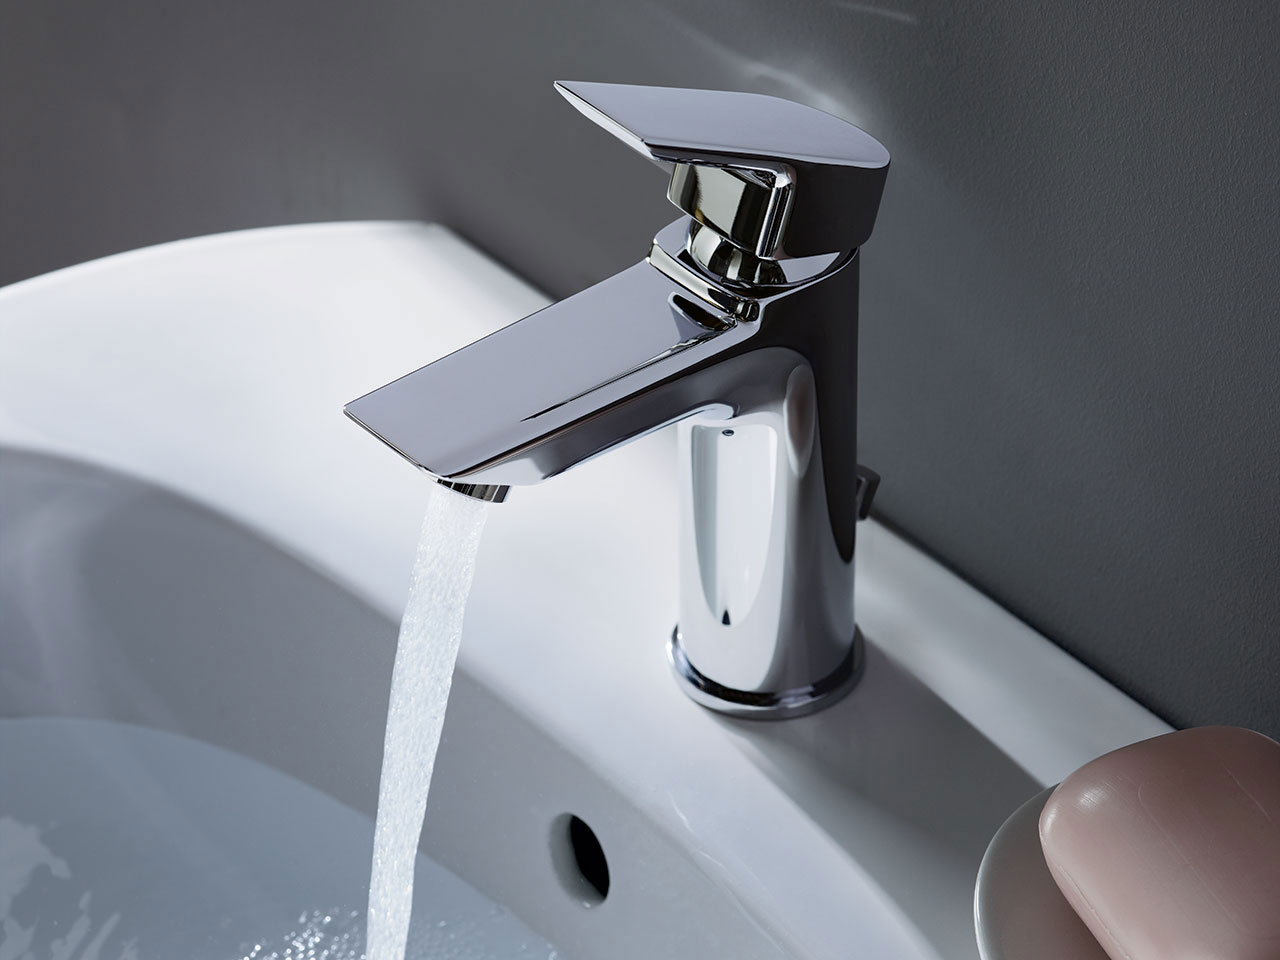
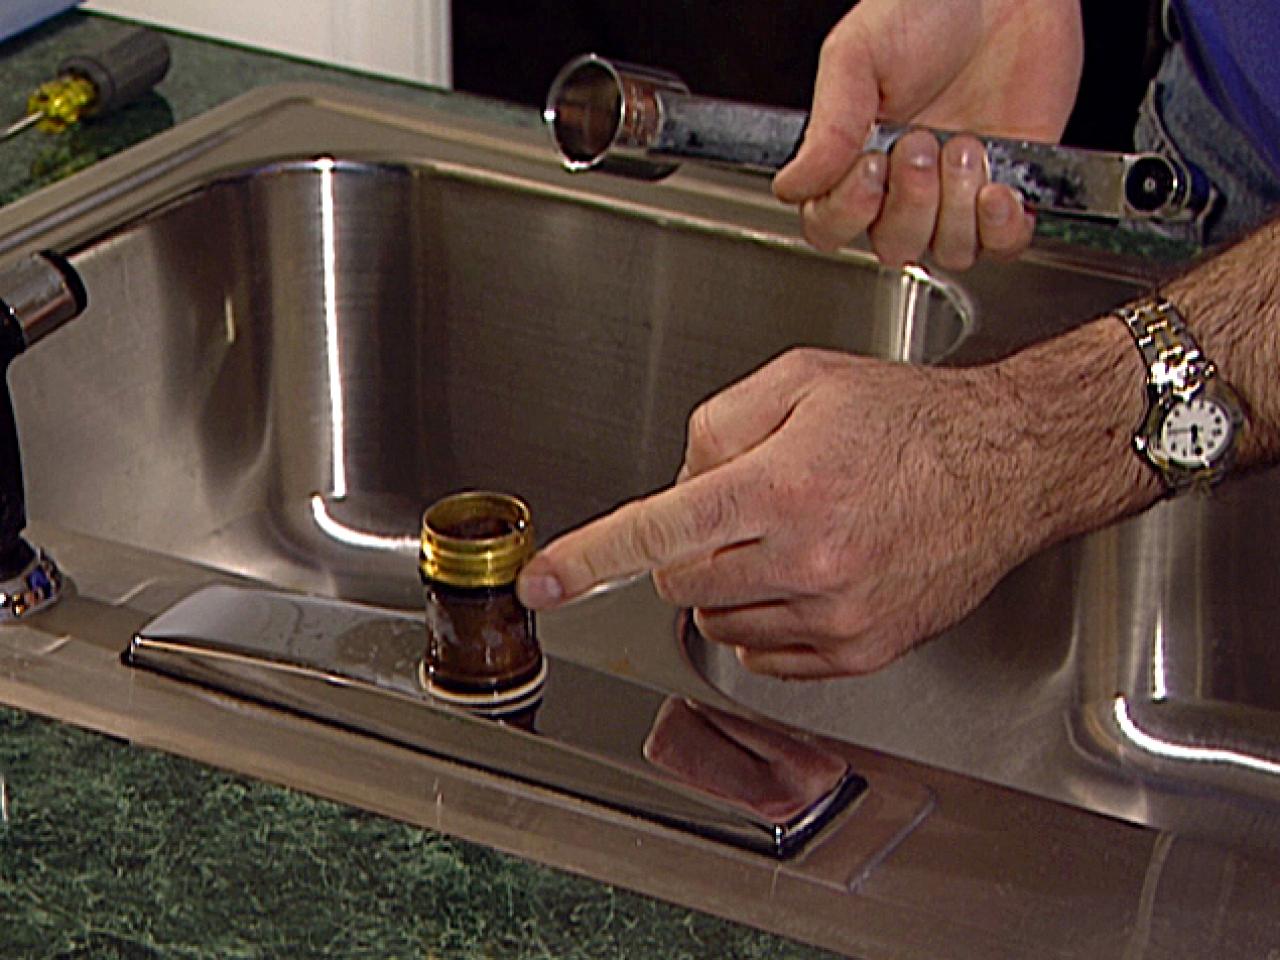
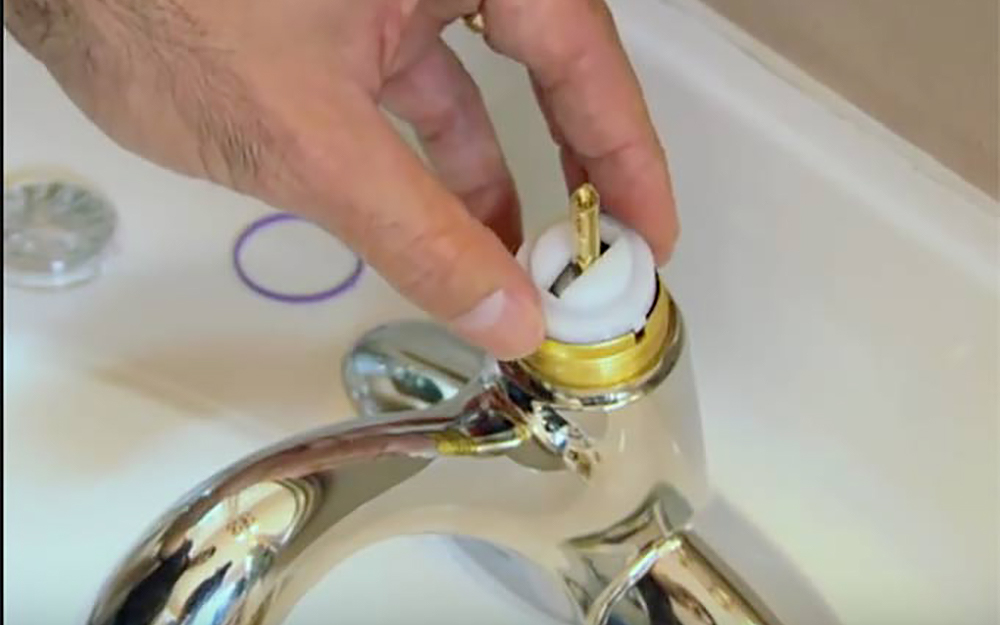
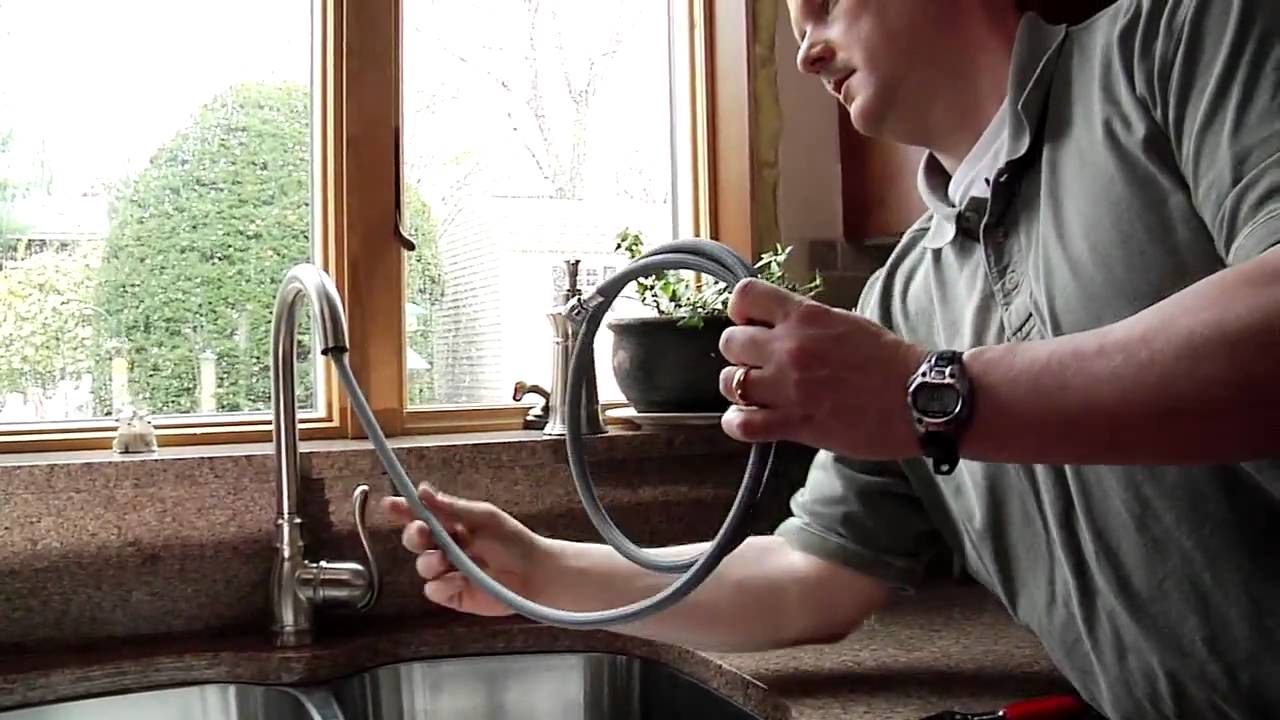
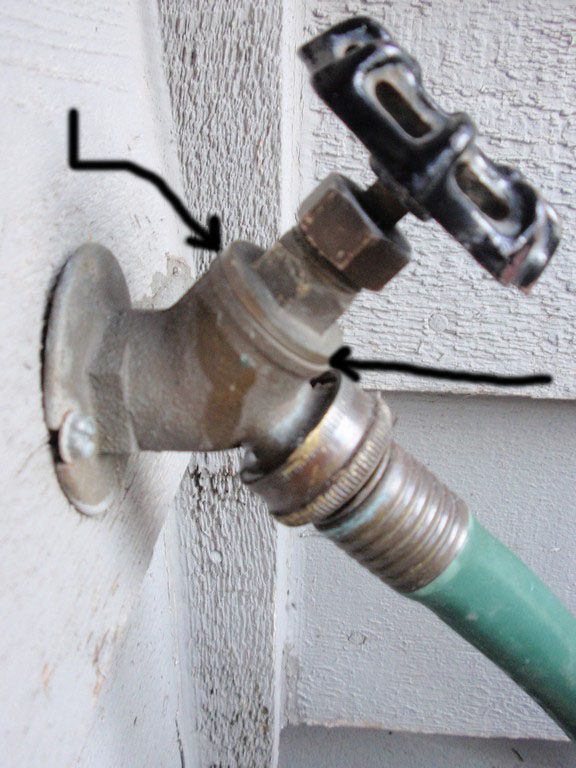
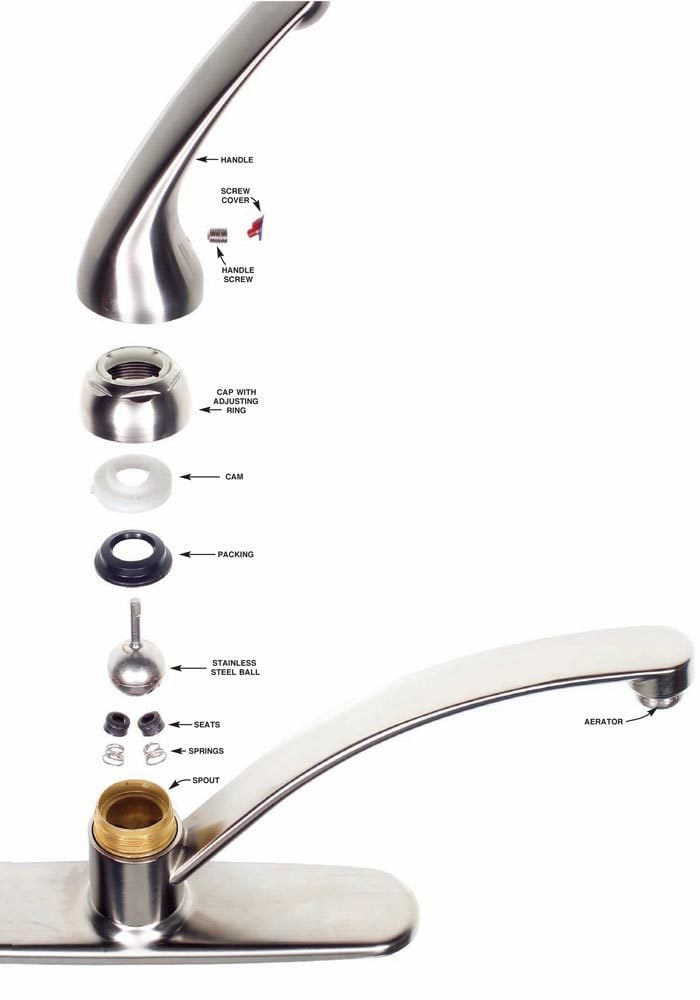
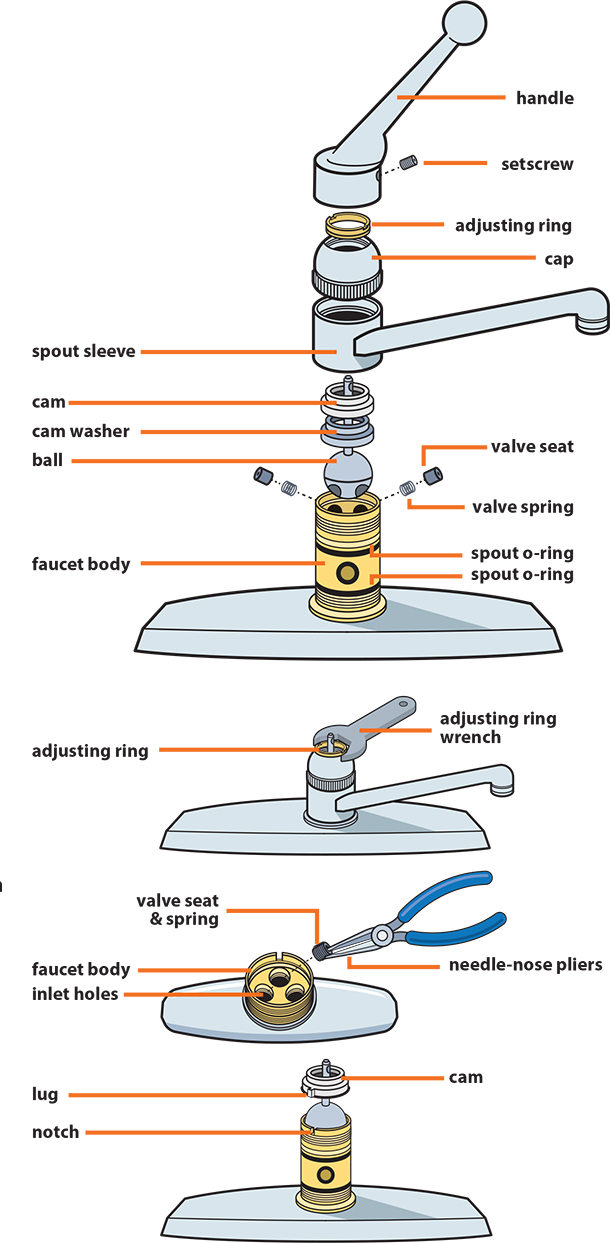
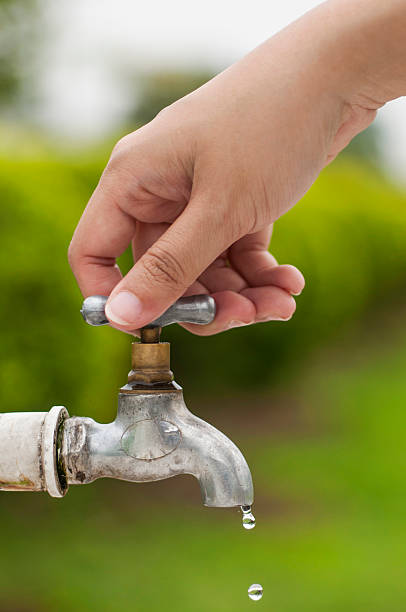
A common problem with ball faucets is a leaky handle. This can be caused by worn out O-rings, which are small rubber rings that create a tight seal to prevent water from leaking out. To fix this issue, start by shutting off the water supply to the faucet. Then, remove the handle by unscrewing the set screw located under the handle. Next, use pliers to remove the cap and collar. You will then see the ball assembly, which is responsible for controlling the flow of water. Check the O-rings and replace them if they are worn out. Reassemble the faucet and turn the water supply back on to test for leaks.How to Fix a Leaky Ball Faucet

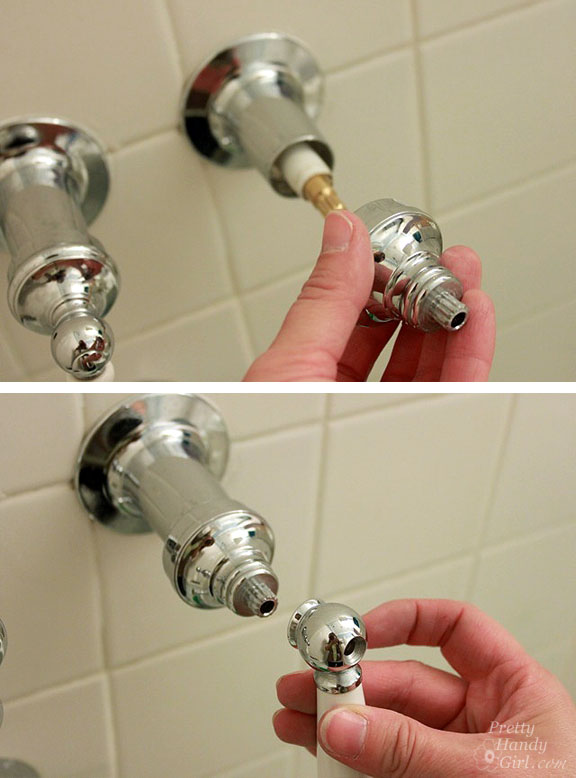

How to Fix a Leaky Ball Faucet


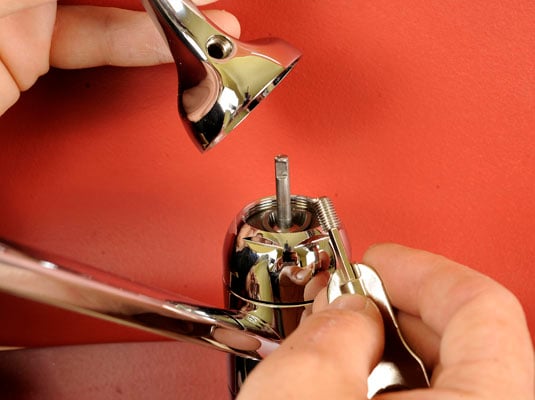


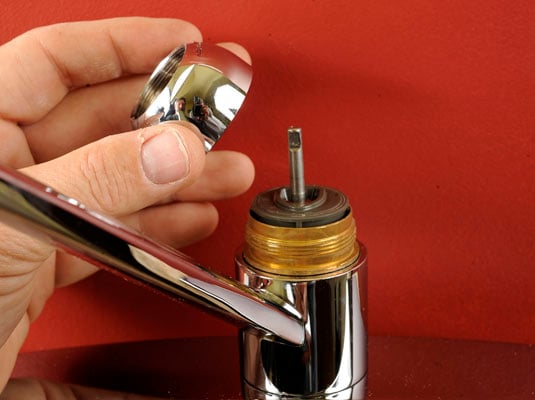
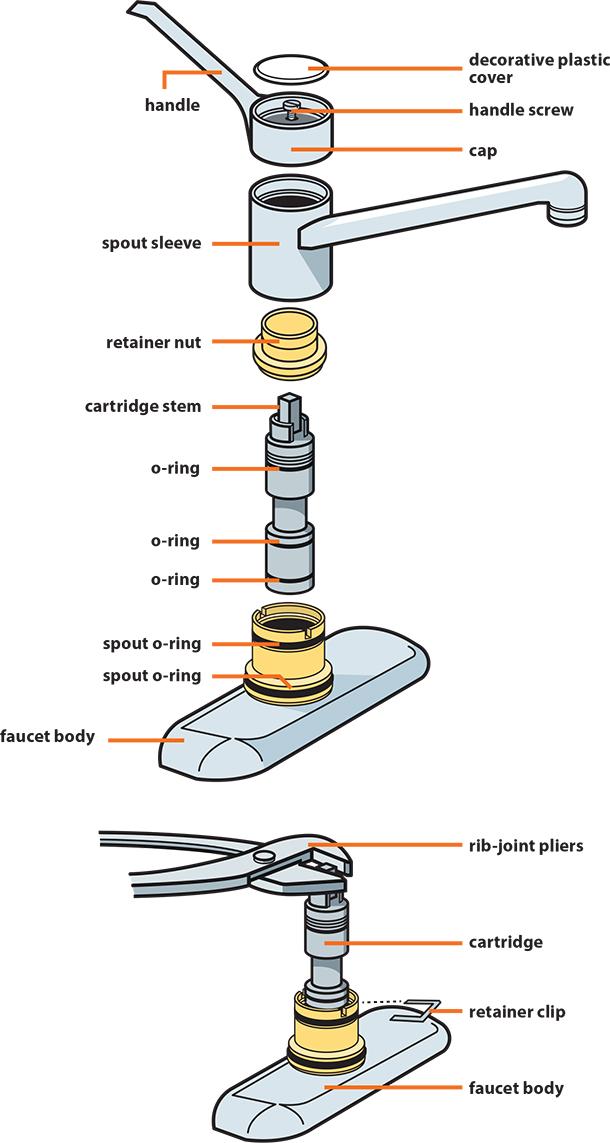
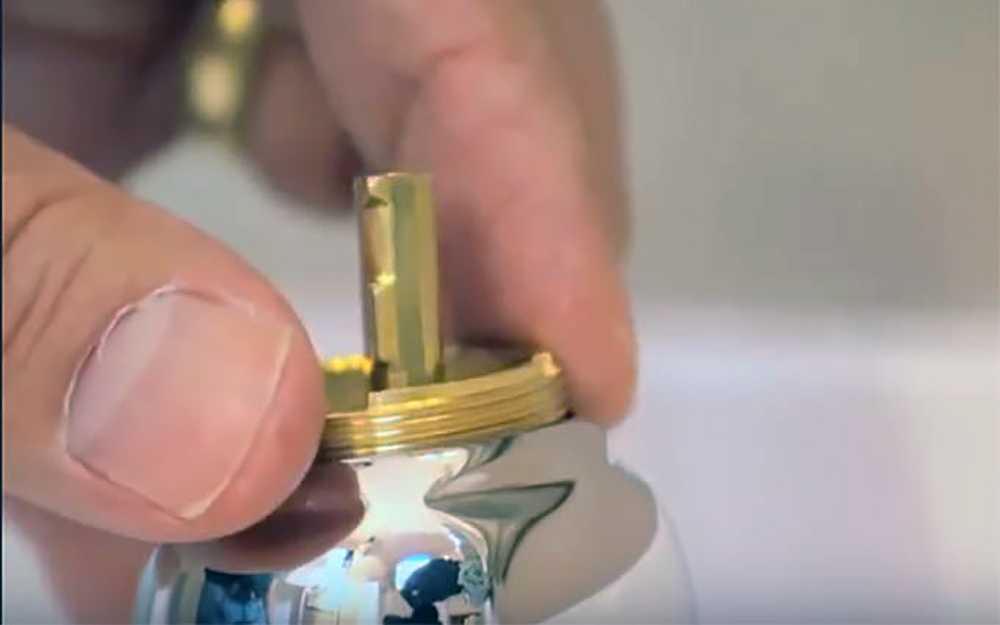
If your ball faucet is not turning on or off properly, the ball assembly may be the culprit. This can happen when the ball or the springs and seals inside the assembly become worn out. To replace the ball assembly, start by shutting off the water supply and removing the handle, cap, and collar as mentioned in the previous step. Then, use pliers to remove the ball assembly. Take note of the orientation of the assembly before removing it to ensure you install the new one correctly. Install the new assembly and reassemble the faucet.Replacing the Ball Assembly in a Kitchen Faucet


Replacing the Ball Assembly in a Kitchen Faucet


:max_bytes(150000):strip_icc()/CompleteAerator-3e947443dd424faeb92a9c9c0a45d8dd.jpg)
To summarize the steps for repairing a ball faucet, follow this guide:Step-by-Step Guide for Repairing a Ball Faucet


Step-by-Step Guide for Repairing a Ball Faucet
Aside from leaky handles and malfunctioning ball assemblies, some other common problems with ball faucets include difficulty turning the faucet on or off, water temperature issues, and low water pressure. To fix these issues, follow the same steps mentioned above and check for any worn out parts that may need to be replaced.Common Problems with Ball Faucets and How to Fix Them


Common Problems with Ball Faucets and How to Fix Them


Repairing a ball faucet is a DIY task that can save you money and hassle. As long as you have the necessary tools and replacement parts, you can easily fix most issues with your ball faucet. However, if you are not comfortable with DIY repairs, it is best to hire a professional plumber.DIY Kitchen Sink Ball Faucet Repair


DIY Kitchen Sink Ball Faucet Repair


If you are experiencing issues with your ball faucet, there are a few things you can do to troubleshoot the problem. First, check the water supply to make sure it is not turned off. Next, check for any mineral buildup or debris that may be clogging the faucet. If necessary, clean the faucet with a mixture of water and vinegar to remove any buildup. If these steps do not solve the issue, it may be time to replace some parts of the faucet.Troubleshooting a Ball Faucet


Troubleshooting a Ball Faucet


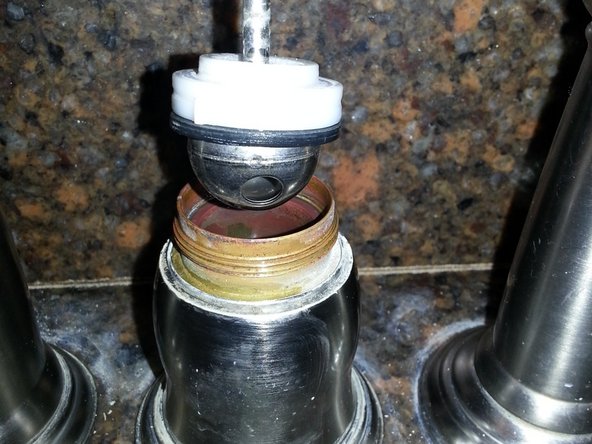
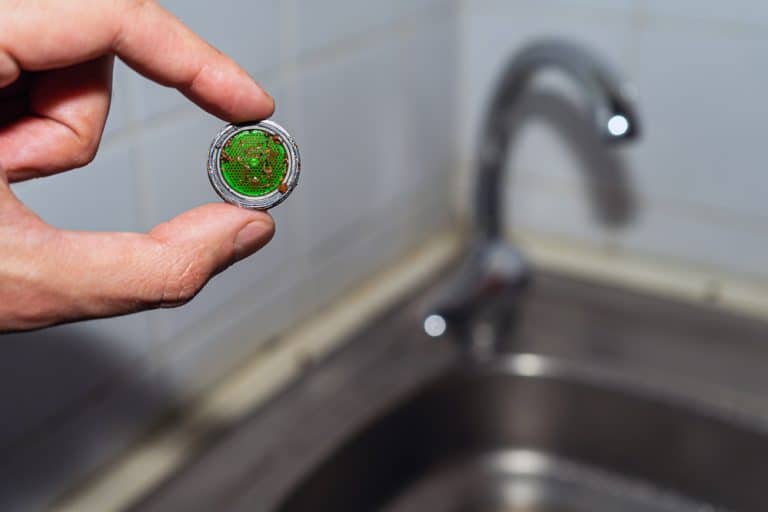
O-rings are essential for creating a tight seal in a ball faucet. Over time, they can become worn out and need to be replaced. To replace the O-rings, follow the steps mentioned earlier to remove the handle, cap, and collar. Then, use pliers to remove the old O-rings and replace them with new ones. Reassemble the faucet and turn the water supply back on to test for leaks.Replacing the O-Rings in a Ball Faucet


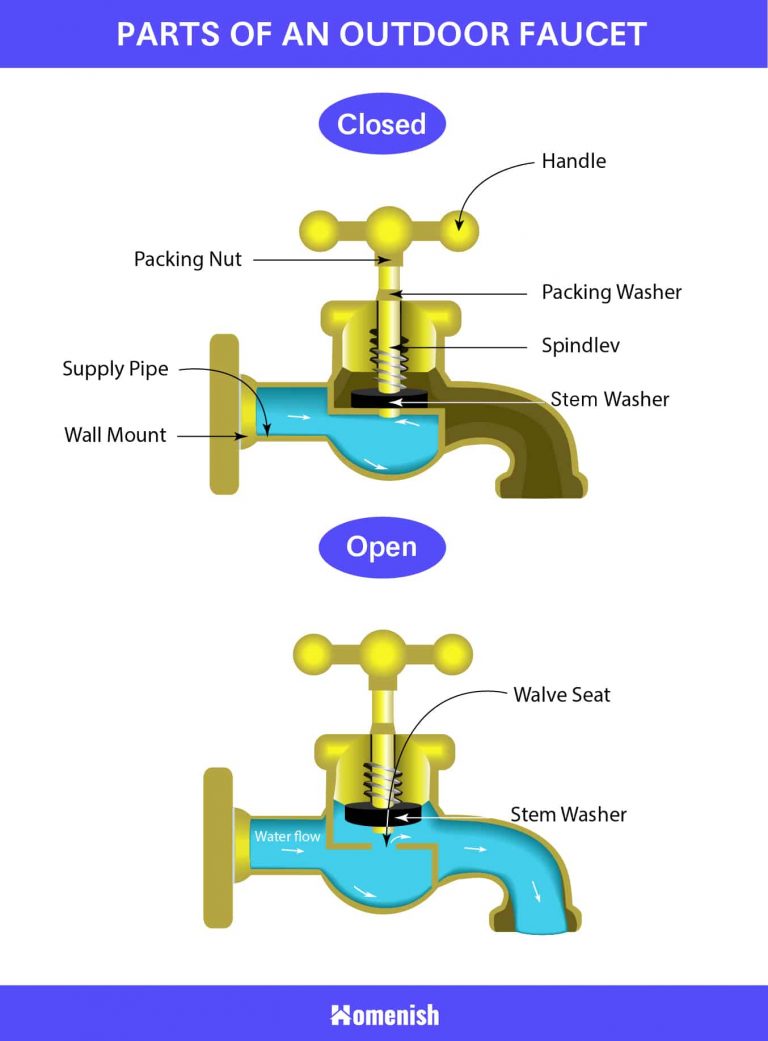
Replacing the O-Rings in a Ball Faucet


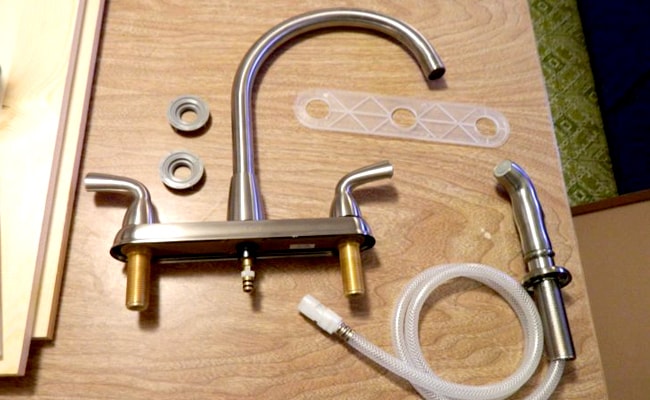
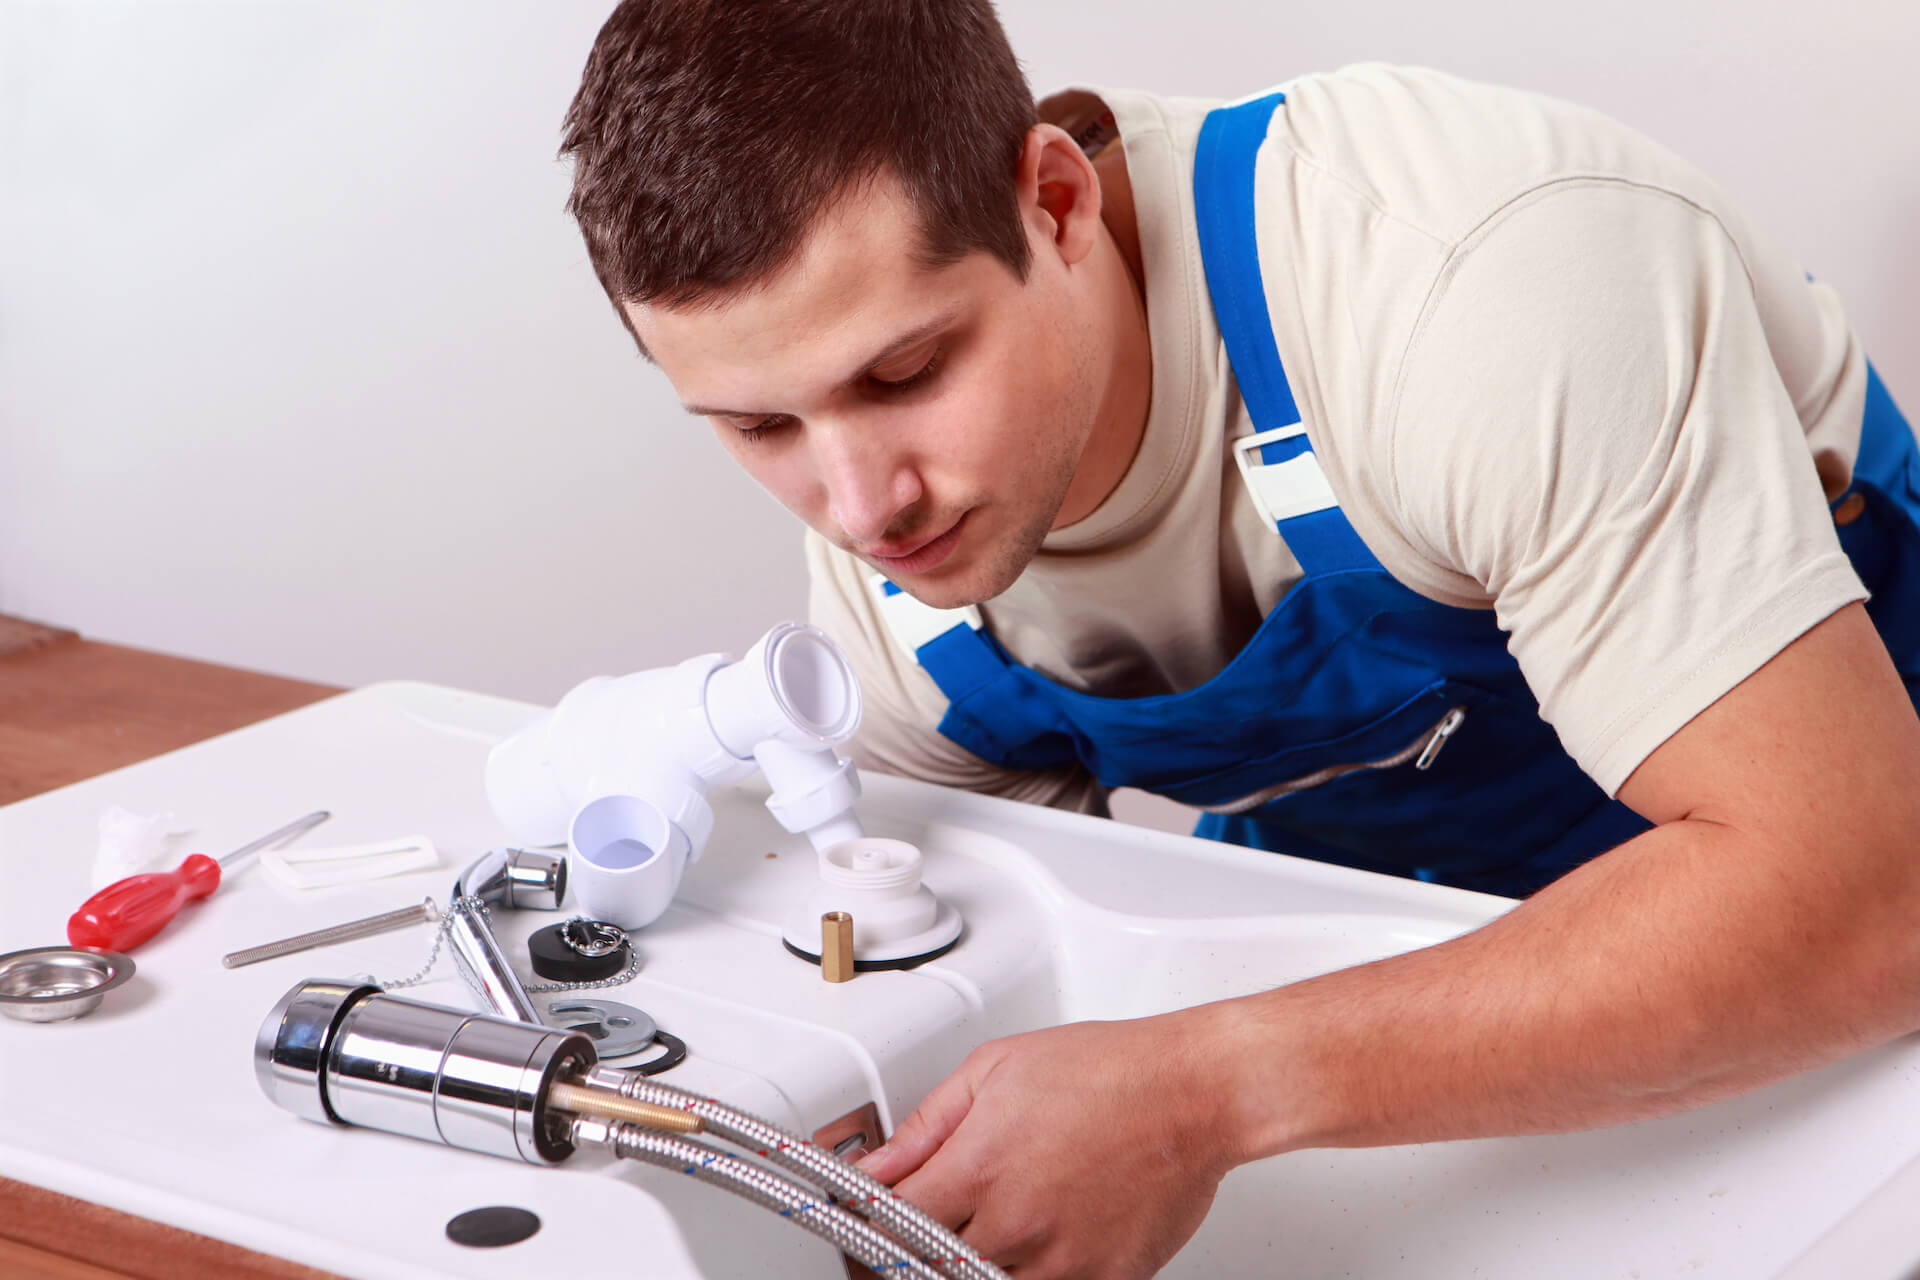
If you are planning to repair a ball faucet, you will need the following tools and materials:Tools and Materials Needed for Repairing a Ball Faucet
.jpg)

Tools and Materials Needed for Repairing a Ball Faucet


To keep your ball faucet in good working condition and prevent future repairs, here are some helpful tips:Tips for Maintaining a Ball Faucet to Prevent Future Repairs

Tips for Maintaining a Ball Faucet to Prevent Future Repairs


Kitchen Sink Ball Faucet Repair: The Simple Solution to Your Leaky Faucet
Introduction to Kitchen Sink Ball Faucet
 If you have a kitchen sink with a ball faucet, you know how convenient and efficient it can be for everyday use. Unlike traditional faucets, ball faucets allow for smooth and easy movement of the handle, making it easy to control the water flow and temperature. However, like any other plumbing fixture, ball faucets are susceptible to wear and tear, which can lead to leaks and other issues. This is where knowing how to repair your kitchen sink ball faucet comes in handy.
Common Issues with Ball Faucets
 There are a few common issues that may arise with your kitchen sink ball faucet, such as leaks, low water pressure, and difficulty in turning the handle. These issues can be caused by various factors, including worn-out parts, mineral build-up, or improper installation. Fortunately, most of these problems can be easily fixed with some basic tools and a little know-how.
Step-by-Step Repair Guide
:max_bytes(150000):strip_icc()/repair-a-leaking-ball-faucet-1824868-05-cbd5bf6248d347b1aeea89f670a7f2d4.jpg) Step 1: Gather Your Tools
Before you start the repair process, make sure you have all the necessary tools at hand, including pliers, screwdrivers, and an adjustable wrench.
Kitchen sink repair kit
may also come in handy, as it usually includes all the necessary replacement parts.
Step 2: Turn Off the Water Supply
Before you start disassembling your faucet, make sure to turn off the water supply to avoid any potential mess. You can usually find the shut-off valve under the sink or in the basement.
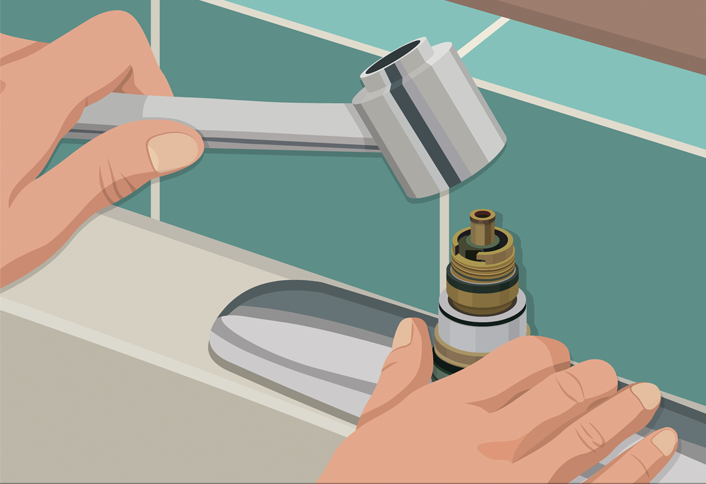
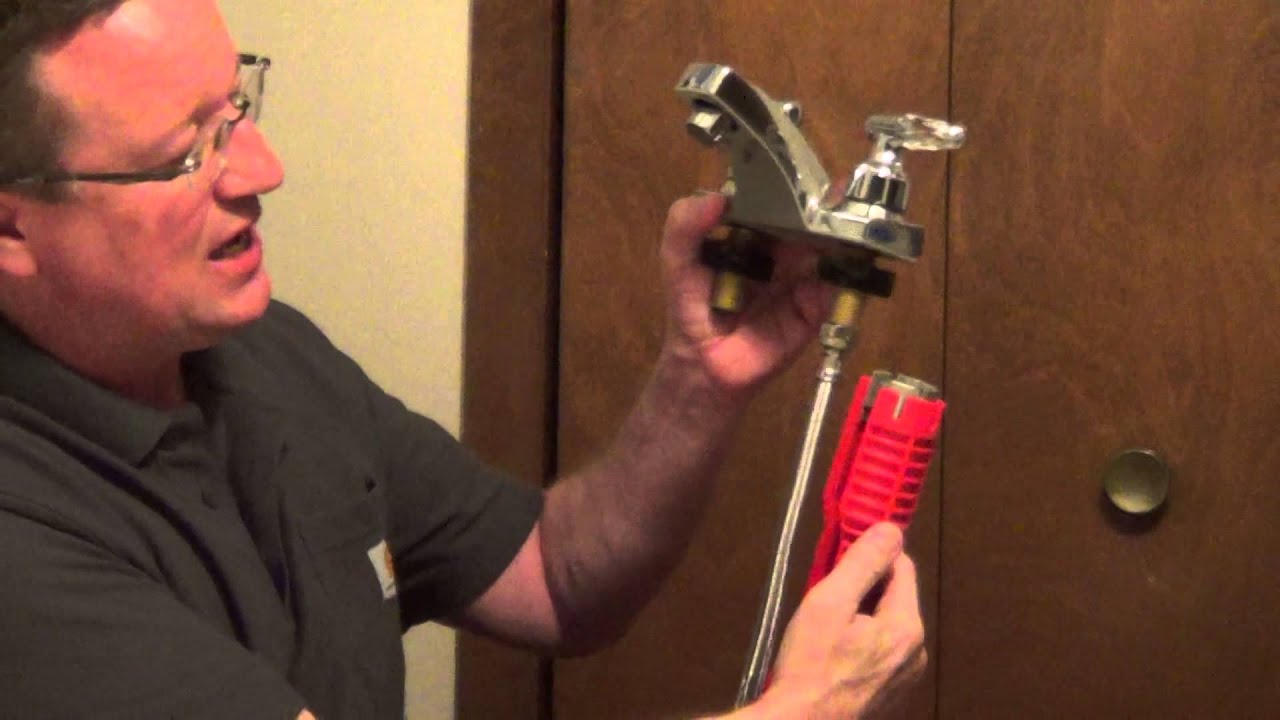
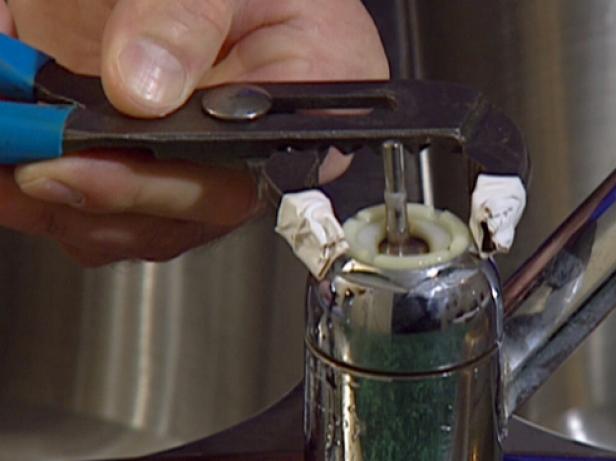
Step 3: Disassemble the Faucet
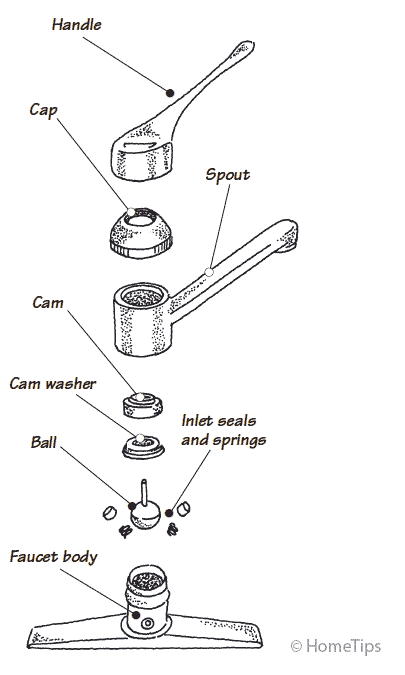
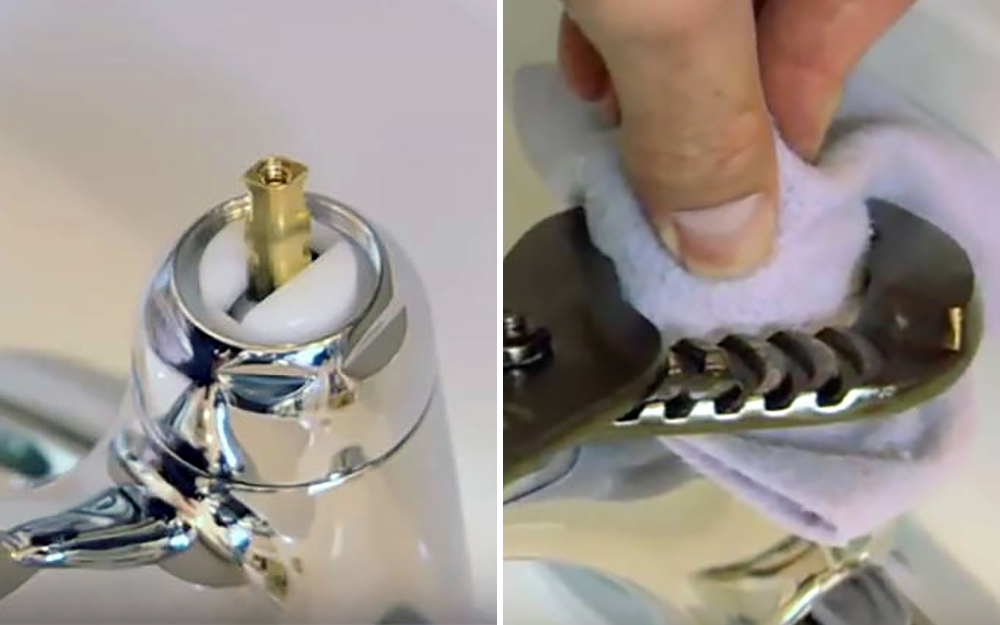
Using your pliers, carefully remove the handle and the cap of the faucet. You should then be able to see the ball and the cam, which are the main components of the ball faucet. Inspect them for any signs of wear and tear, such as cracks or mineral build-up. If necessary,
replace these parts with new ones
from the repair kit.
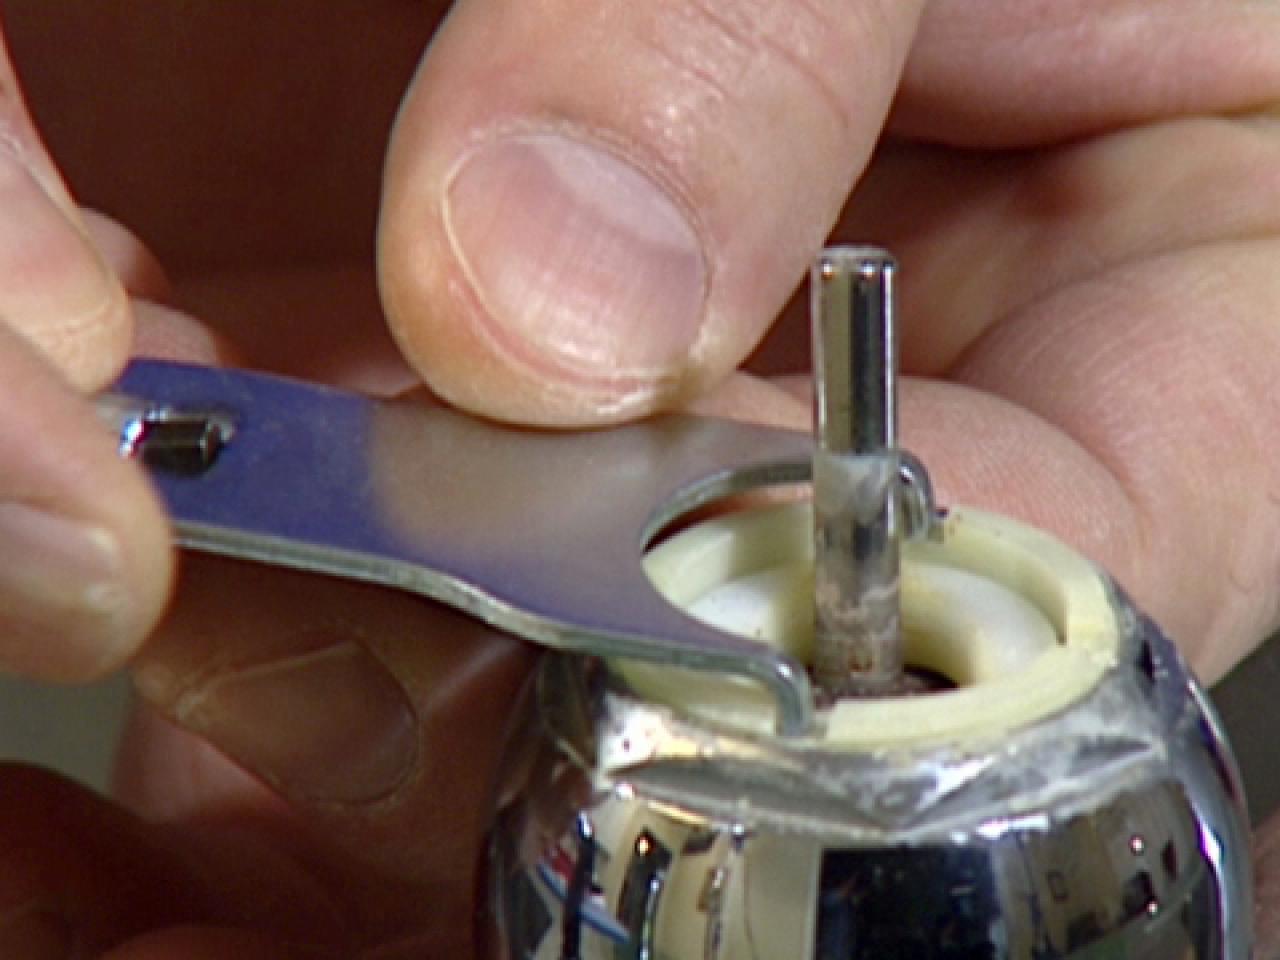
Step 4: Replace the O-Rings
If your faucet is leaking from the spout, it may be caused by worn-out O-rings. These small rubber rings are responsible for creating a watertight seal between the faucet and the spout. Carefully remove the old O-rings and replace them with new ones from the repair kit.
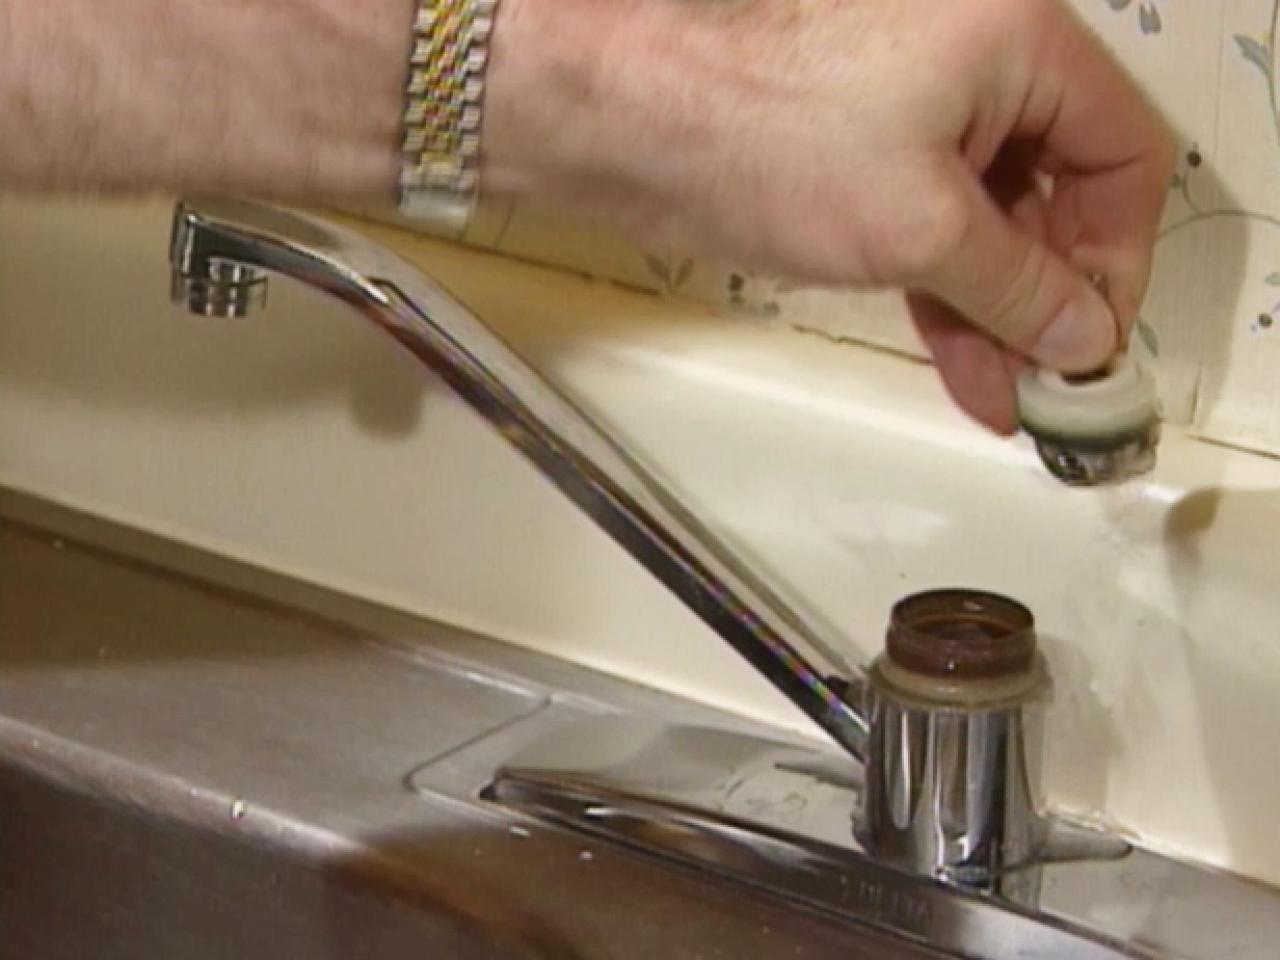
Step 5: Reassemble the Faucet
Once you have replaced any necessary parts, reassemble the faucet in the reverse order of disassembly. Make sure everything is tightly secured and the handle moves smoothly.
Step 6: Test the Faucet
Turn the water supply back on and test your faucet for any leaks or issues. If everything looks good, you have successfully repaired your kitchen sink ball faucet!
Step 1: Gather Your Tools
Before you start the repair process, make sure you have all the necessary tools at hand, including pliers, screwdrivers, and an adjustable wrench.
Kitchen sink repair kit
may also come in handy, as it usually includes all the necessary replacement parts.
Step 2: Turn Off the Water Supply
Before you start disassembling your faucet, make sure to turn off the water supply to avoid any potential mess. You can usually find the shut-off valve under the sink or in the basement.
Step 3: Disassemble the Faucet
Using your pliers, carefully remove the handle and the cap of the faucet. You should then be able to see the ball and the cam, which are the main components of the ball faucet. Inspect them for any signs of wear and tear, such as cracks or mineral build-up. If necessary,
replace these parts with new ones
from the repair kit.
Step 4: Replace the O-Rings
If your faucet is leaking from the spout, it may be caused by worn-out O-rings. These small rubber rings are responsible for creating a watertight seal between the faucet and the spout. Carefully remove the old O-rings and replace them with new ones from the repair kit.
Step 5: Reassemble the Faucet
Once you have replaced any necessary parts, reassemble the faucet in the reverse order of disassembly. Make sure everything is tightly secured and the handle moves smoothly.
Step 6: Test the Faucet
Turn the water supply back on and test your faucet for any leaks or issues. If everything looks good, you have successfully repaired your kitchen sink ball faucet!
Preventative Maintenance Tips
 To avoid future issues with your ball faucet, it is essential to perform regular maintenance. This includes cleaning the faucet regularly to prevent mineral build-up, checking for any leaks, and tightening any loose parts.
In Conclusion
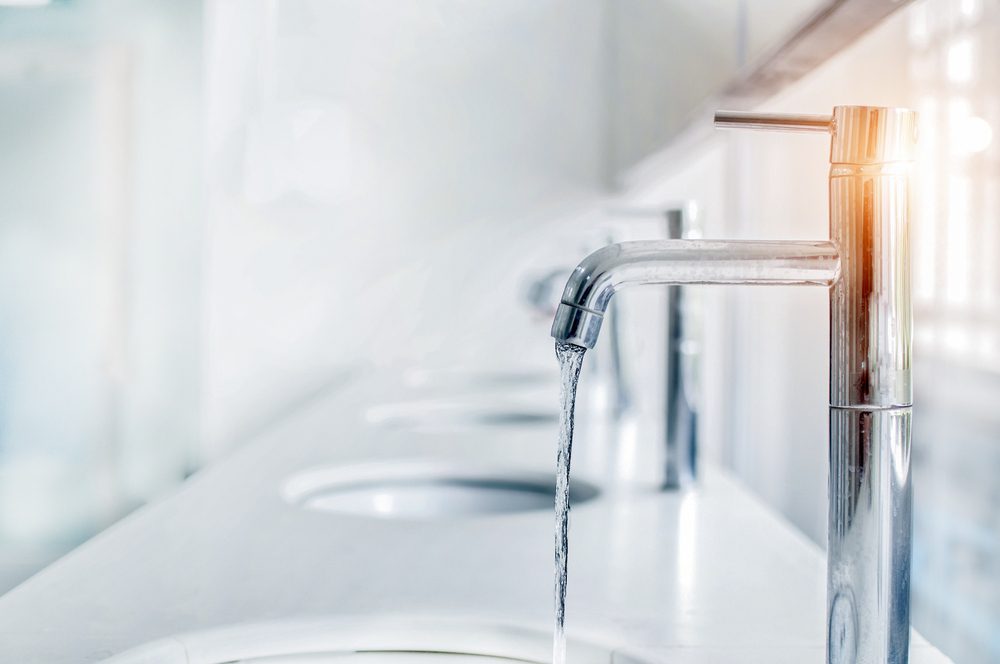
/kitchenfaucetsink-GettyImages-97747586-591726523df78c7a8c258710.jpg) With a little bit of knowledge and some basic tools, repairing a kitchen sink ball faucet can be a simple and cost-effective solution to a leaky faucet. However, if you encounter any difficulties or the issue persists, it is always best to seek professional help. By following the steps outlined in this guide and performing regular maintenance, you can keep your ball faucet in top working condition for years to come.
With a little bit of knowledge and some basic tools, repairing a kitchen sink ball faucet can be a simple and cost-effective solution to a leaky faucet. However, if you encounter any difficulties or the issue persists, it is always best to seek professional help. By following the steps outlined in this guide and performing regular maintenance, you can keep your ball faucet in top working condition for years to come.