If you're looking to give your kitchen a sleek and modern look, installing an undermount sink in your tile countertop is the way to go. This type of sink is installed underneath the countertop, leaving a smooth and seamless surface. However, the installation process may seem daunting, but with the right tools and steps, you can easily do it yourself. In this guide, we'll walk you through the process of installing a kitchen sink undermount tile.How to Install a Kitchen Sink Undermount Tile


How to Install a Kitchen Sink Undermount Tile


Before you begin the installation, make sure to gather all the necessary tools and materials. This includes a measuring tape, pencil, drill, silicone adhesive, and mounting brackets. Once you have everything ready, follow these steps:How to Install an Undermount Kitchen Sink in a Tile Countertop


How to Install an Undermount Kitchen Sink in a Tile Countertop


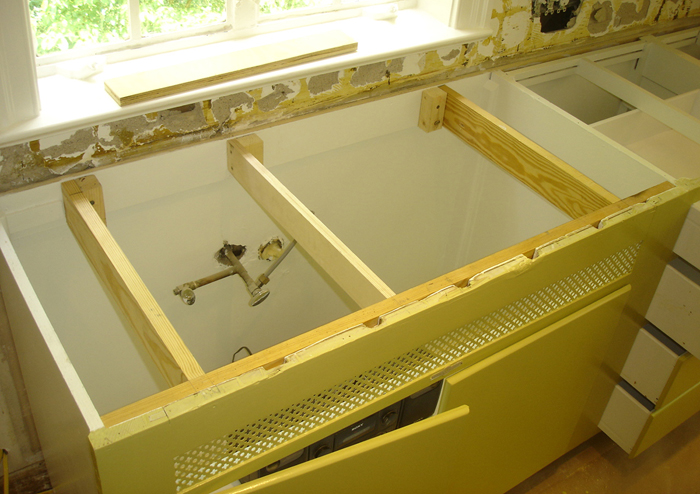
Step 1: Measure and mark the location of your sink on the bottom side of the countertop. It's important to make precise measurements to ensure a perfect fit. Step 2: Using a drill, create a pilot hole on the marked lines. This will make it easier to cut through the tile. Step 3: Using a jigsaw or a hole saw, carefully cut out the sink hole. Make sure to follow the marked lines and take your time to avoid cracking the tile. Step 4: Once the hole is cut, place the sink upside down on the countertop and trace its outline onto the tile. This will serve as a guide for applying the silicone adhesive.Step-by-Step Guide to Installing an Undermount Kitchen Sink in Tile


Step-by-Step Guide to Installing an Undermount Kitchen Sink in Tile


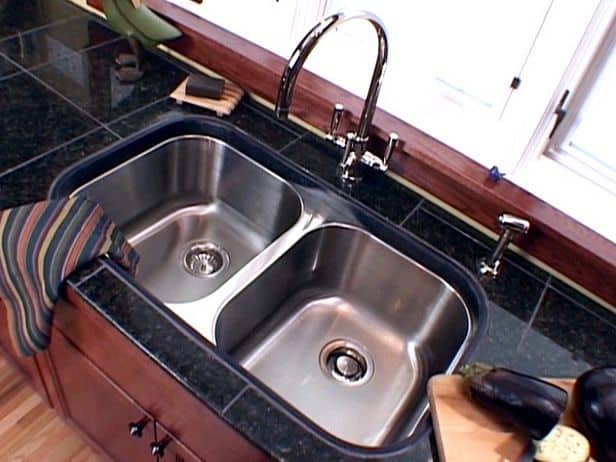
:no_upscale()/cdn.vox-cdn.com/uploads/chorus_asset/file/19495086/drain_0.jpg)

Step 5: Apply a generous amount of silicone adhesive on the edge of the sink and around the traced outline on the tile. Make sure to use a waterproof and heat-resistant adhesive for best results. Step 6: Carefully place the sink into the cutout, making sure it's centered and flush with the countertop. Use mounting brackets to secure the sink in place, following the manufacturer's instructions. Step 7: Clean up any excess adhesive and let it dry for at least 24 hours before using the sink.DIY: Installing an Undermount Kitchen Sink in Tile


DIY: Installing an Undermount Kitchen Sink in Tile


While the installation process may seem straightforward, there are a few tips and tricks that can help you achieve a professional-looking finish: * Use a diamond-tipped hole saw or jigsaw blade to cut through the tile. This will prevent it from cracking or chipping. * Make sure to use a level to ensure the sink is installed evenly and avoid any pooling of water. * Apply a thin layer of silicone adhesive on the sink's edge to prevent any water leakage. * Once the sink is installed, run a bead of caulk around the edges to seal any gaps and give a finished look.Installing an Undermount Kitchen Sink in Tile: A Comprehensive Guide


Installing an Undermount Kitchen Sink in Tile: A Comprehensive Guide


Now that you know the steps and tricks for installing an undermount sink in tile, here are a few additional tips to keep in mind: * Before cutting the hole in your countertop, make sure to double-check the measurements to avoid any mistakes. * If your sink comes with a mounting clip, use it to secure the sink to the countertop for added stability. * If you're unsure about the process, it's always best to consult a professional to avoid any costly mistakes.Undermount Kitchen Sink Installation in Tile: Tips and Tricks


Undermount Kitchen Sink Installation in Tile: Tips and Tricks


Installing an undermount sink in tile can give your kitchen a modern and elegant look. Follow these steps and tips, and you'll have a beautifully installed sink in no time. With a little patience and attention to detail, you can achieve professional-looking results and save money by doing it yourself.The Best Way to Install an Undermount Kitchen Sink in Tile

The Best Way to Install an Undermount Kitchen Sink in Tile


To ensure your undermount sink is properly installed and will last for years to come, here are a few things to keep in mind: * Regularly check for any signs of water damage or leaks. If you notice any, make sure to address them immediately to prevent further damage. * Avoid using harsh chemicals or abrasive cleaners on your sink, as they can damage the sealant and cause the sink to detach from the countertop. * Keep the area around the sink dry to prevent mold and mildew growth.How to Properly Install a Kitchen Sink Undermount Tile


How to Properly Install a Kitchen Sink Undermount Tile


While installing an undermount sink in a tile countertop may seem like a simple task, there are a few common mistakes that can lead to a less-than-perfect outcome: * Not using a waterproof and heat-resistant adhesive can cause the sink to detach from the countertop over time. * Rushing the installation process can lead to inaccurate measurements and a poorly installed sink. * Not properly securing the sink with mounting brackets can result in an unstable and potentially dangerous sink.Undermount Kitchen Sink Installation in Tile: Common Mistakes to Avoid


Undermount Kitchen Sink Installation in Tile: Common Mistakes to Avoid
Now that you have a comprehensive understanding of how to install an undermount sink in a tile countertop, here's a quick recap of the steps: 1. Measure and mark the location of the sink on the countertop. 2. Cut out the sink hole using a jigsaw or hole saw. 3. Apply silicone adhesive on the sink's edge and around the cutout. 4. Secure the sink in place with mounting brackets. 5. Let the adhesive dry for 24 hours. 6. Run a bead of caulk around the sink's edges to seal any gaps. 7. Enjoy your newly installed undermount sink in tile! With this step-by-step guide and helpful tips, you can easily install an undermount kitchen sink in your tile countertop and give your kitchen a stylish upgrade. Just remember to take your time and follow the instructions carefully for the best results. Happy installing!Step-by-Step Tutorial for Installing a Kitchen Sink Undermount Tile


Step-by-Step Tutorial for Installing a Kitchen Sink Undermount Tile


Why Choose an Undermount Tile Kitchen Sink?
Enhance Your Kitchen's Aesthetics and Functionality
 Kitchen sink undermount tile
is becoming a popular choice among homeowners and for good reason. Not only does it add a touch of elegance to your kitchen, but it also offers practical benefits that can make your everyday tasks easier. The seamless design of an undermount sink creates a clean and sleek look that can instantly elevate the overall design of your kitchen. With its
tile
material, it adds a unique texture and visual interest to the space.
Kitchen sink undermount tile
is becoming a popular choice among homeowners and for good reason. Not only does it add a touch of elegance to your kitchen, but it also offers practical benefits that can make your everyday tasks easier. The seamless design of an undermount sink creates a clean and sleek look that can instantly elevate the overall design of your kitchen. With its
tile
material, it adds a unique texture and visual interest to the space.
Increase Counter Space and Create a Spacious Feel
 One of the main advantages of an undermount sink is its installation method. Unlike a traditional drop-in sink, it is mounted underneath the countertop, allowing for more counter space and a clutter-free look. This can be especially beneficial for smaller kitchens where every inch of space counts. The lack of edges or rims also creates a more spacious and open feel, making your kitchen appear larger and more inviting.
Durable and Easy to Clean
 Tile
is a durable material that can withstand the daily wear and tear of a busy kitchen. It is resistant to scratches, stains, and heat, making it the perfect choice for a high-traffic area. With an undermount sink, there are no crevices or edges for food particles and debris to get trapped in, making it easier to clean and maintain. Simply wipe away any spills or debris directly into the sink without worrying about any grime building up around the edges.
Tile
is a durable material that can withstand the daily wear and tear of a busy kitchen. It is resistant to scratches, stains, and heat, making it the perfect choice for a high-traffic area. With an undermount sink, there are no crevices or edges for food particles and debris to get trapped in, making it easier to clean and maintain. Simply wipe away any spills or debris directly into the sink without worrying about any grime building up around the edges.
Seamless Integration with Your Countertop
 Since an undermount sink is installed underneath the countertop, it seamlessly integrates with the rest of your kitchen design. This allows for a cohesive and streamlined look, without any interruption in the flow of your countertop. You can also choose from a variety of
tile
materials and colors to match your countertop, creating a cohesive and visually appealing design.
Since an undermount sink is installed underneath the countertop, it seamlessly integrates with the rest of your kitchen design. This allows for a cohesive and streamlined look, without any interruption in the flow of your countertop. You can also choose from a variety of
tile
materials and colors to match your countertop, creating a cohesive and visually appealing design.
Professional Installation is Key
 While installing an undermount sink may seem like a simple task, it is important to hire a professional to ensure it is done correctly. Improper installation can lead to leaks and damage to your countertop and cabinets. A professional will also be able to provide advice on the best type of
kitchen sink undermount tile
for your specific needs and ensure that it is installed securely and efficiently.
In conclusion, an undermount tile kitchen sink is a great addition to any kitchen. It not only enhances the aesthetics of your space but also offers practical benefits such as increased counter space, durability, and easy maintenance. Just be sure to hire a professional for installation to ensure a seamless and functional sink that will last for years to come.
While installing an undermount sink may seem like a simple task, it is important to hire a professional to ensure it is done correctly. Improper installation can lead to leaks and damage to your countertop and cabinets. A professional will also be able to provide advice on the best type of
kitchen sink undermount tile
for your specific needs and ensure that it is installed securely and efficiently.
In conclusion, an undermount tile kitchen sink is a great addition to any kitchen. It not only enhances the aesthetics of your space but also offers practical benefits such as increased counter space, durability, and easy maintenance. Just be sure to hire a professional for installation to ensure a seamless and functional sink that will last for years to come.