Are you tired of your old, worn out bathroom sink faucet and drain? Do you want to upgrade to a newer, more modern style? Installing a new bathroom sink faucet and drain can give your bathroom a fresh new look and improve its functionality. It may seem like a daunting task, but with the right tools and knowledge, you can easily install a bathroom sink faucet and drain yourself. In this article, we will guide you through the steps of installing a bathroom sink faucet and drain, from start to finish.Install a Bathroom Sink Faucet and Drain
Before you begin the installation process, make sure you have all the necessary tools and materials. You will need a basin wrench, adjustable wrench, plumber’s putty, Teflon tape, silicone caulk, and a new bathroom sink faucet and drain. Once you have everything ready, follow these steps for a successful installation:How to Install a Bathroom Sink Faucet and Drain
Step 1: Shut off the water supply The first step in any plumbing project is to turn off the water supply. Locate the shut-off valves under the sink and turn them clockwise to shut off the water flow. If you cannot find the shut-off valves, you can turn off the main water supply to your house. Step 2: Remove the old faucet and drain Using a basin wrench, loosen and remove the nuts that hold the old faucet and drain in place. Once they are removed, you can easily take out the old faucet and drain from the sink. Step 3: Clean the sink and install the new drain Remove any old putty or caulk from the sink and clean it thoroughly. Apply a thin layer of plumber’s putty around the bottom of the new drain and insert it into the sink’s drain hole. Secure it in place with the provided nuts and washers. Step 4: Install the new faucet Place the new faucet on top of the sink and secure it in place with the provided nuts and washers, using an adjustable wrench. Make sure the faucet is straight and centered before tightening the nuts. Step 5: Connect the water supply lines Using Teflon tape, wrap the threads of the water supply lines to prevent any leaks. Connect the hot and cold water supply lines to the corresponding valves on the faucet and tighten them with an adjustable wrench. Step 6: Check for leaks Before using your new faucet and drain, turn the water supply back on and check for any leaks. If you notice any leaks, tighten the connections or add more Teflon tape if needed.Bathroom Sink Faucet and Drain Installation Guide
Installing a bathroom sink faucet and drain may seem intimidating, but by following these simple steps, you can easily complete the installation process: Step 1: Gather all the necessary tools and materials. Step 2: Shut off the water supply. Step 3: Remove the old faucet and drain. Step 4: Clean the sink and install the new drain. Step 5: Install the new faucet. Step 6: Connect the water supply lines. Step 7: Check for leaks.Step-by-Step Bathroom Sink Faucet and Drain Installation
Installing a bathroom sink faucet and drain yourself can save you time and money. With the right tools and instructions, you can easily complete the installation process without the help of a professional. Just make sure to follow the steps carefully and take your time to ensure a successful installation.DIY Bathroom Sink Faucet and Drain Installation
Here are some extra tips to keep in mind during your bathroom sink faucet and drain installation: Tip 1: Use Teflon tape to prevent leaks. Tip 2: Make sure the faucet is straight and centered before tightening the nuts. Tip 3: Use silicone caulk to seal any gaps between the sink and faucet. Tip 4: Let the caulk dry completely before using the sink.Bathroom Sink Faucet and Drain Installation Tips
Installing a new bathroom sink faucet and drain is a quick and easy project that can instantly upgrade the look of your bathroom. With the right tools and instructions, you can easily complete the installation process in just a few hours.Quick and Easy Bathroom Sink Faucet and Drain Installation
If you are not comfortable with DIY projects or do not have the necessary tools, you can always hire a professional to install your bathroom sink faucet and drain. They have the expertise and experience to ensure a flawless installation and can save you time and hassle.Professional Bathroom Sink Faucet and Drain Installation Services
When choosing a bathroom sink faucet and drain, make sure to consider the style and design of your bathroom. You want to make sure the new faucet and drain complement the overall aesthetic of your bathroom. Also, consider the functionality and features of the faucet and drain, such as water flow and durability.Choosing the Right Bathroom Sink Faucet and Drain for Installation
Here are some common mistakes to avoid during your bathroom sink faucet and drain installation: Mistake 1: Not turning off the water supply before starting the installation process. Mistake 2: Not using Teflon tape to prevent leaks. Mistake 3: Not checking for leaks before using the sink. Mistake 4: Using too much plumber’s putty, which can cause a messy installation. By avoiding these mistakes and following the installation steps carefully, you can successfully install a new bathroom sink faucet and drain and enjoy a fresh, updated bathroom. Common Mistakes to Avoid When Installing a Bathroom Sink Faucet and Drain
How to Install a Bathroom Sink Faucet and Drain: A Complete Guide

The Importance of a Functional Bathroom Sink
 The bathroom sink is one of the most used fixtures in any household. It is where we brush our teeth, wash our hands, and get ready for the day. A functional and well-designed bathroom sink can not only enhance the overall aesthetics of your bathroom but also make your daily routine more efficient. Installing a new bathroom sink faucet and drain can be a simple and cost-effective way to update your bathroom and improve its functionality. In this article, we will guide you through the steps of installing a bathroom sink faucet and drain, so you can have a beautiful and fully functional sink in no time.
Gather the Necessary Tools and Materials
 Before starting the installation process, it is important to make sure you have all the tools and materials you need. This will ensure a smooth and hassle-free installation. You will need:
- A new
bathroom sink faucet
- A new
bathroom sink drain
- Plumber's putty
- Adjustable wrench
- Screwdriver
- Pipe wrench
- Pliers
- Bucket
- Cloth or towel
- Plumbers tape
Step-by-Step Guide to Install a Bathroom Sink Faucet and Drain
 Step 1: Turn off the Water Supply
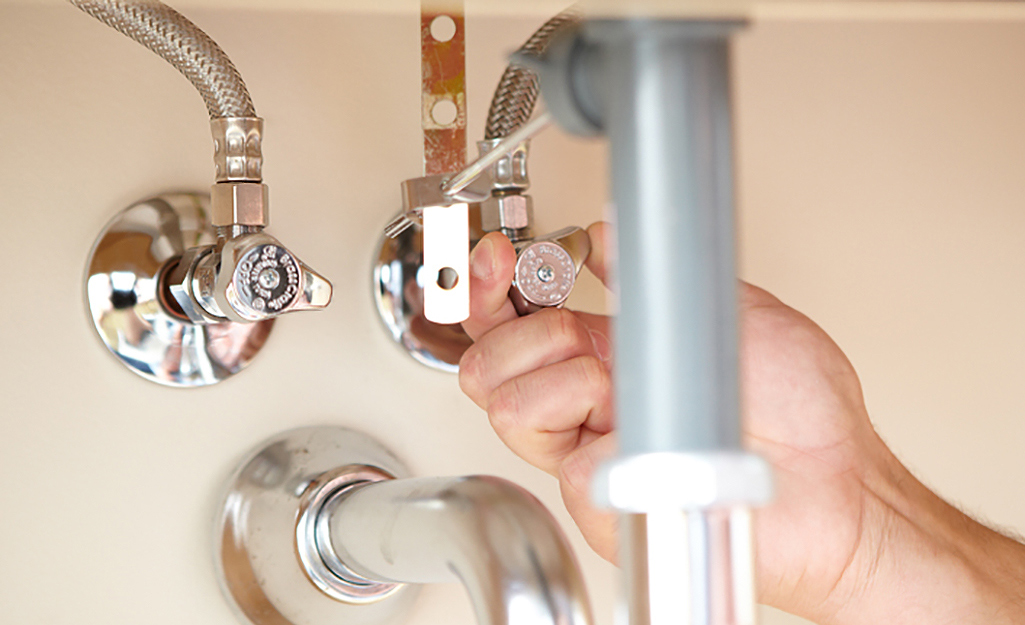
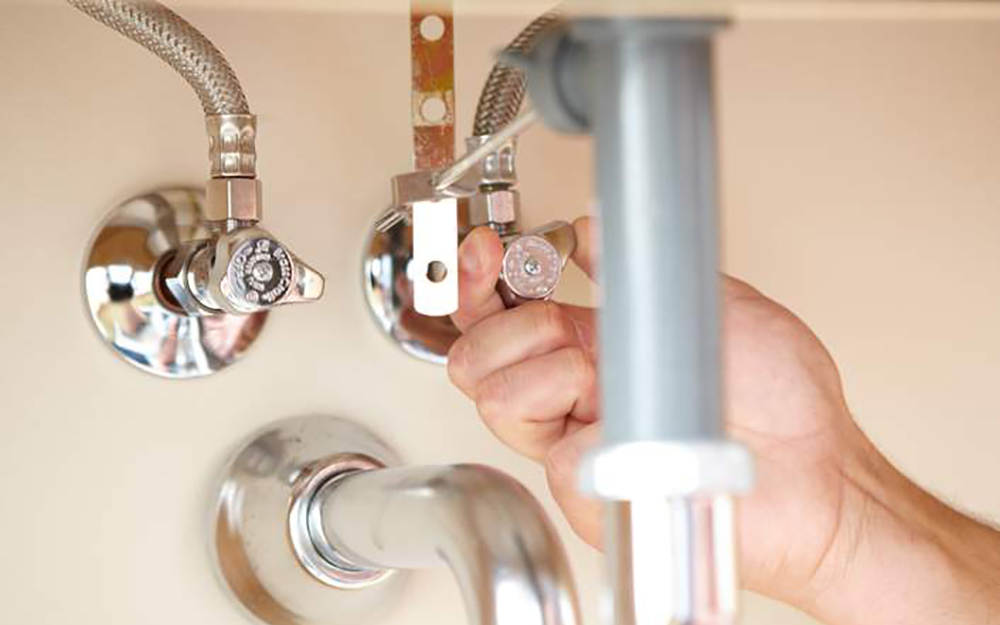
Before starting any plumbing work, it is important to turn off the water supply to avoid any accidents or water damage. Locate the shut-off valves under the sink and turn them off. If your sink does not have shut-off valves, you will need to turn off the main water supply to your house.
Step 2: Remove the Old Faucet
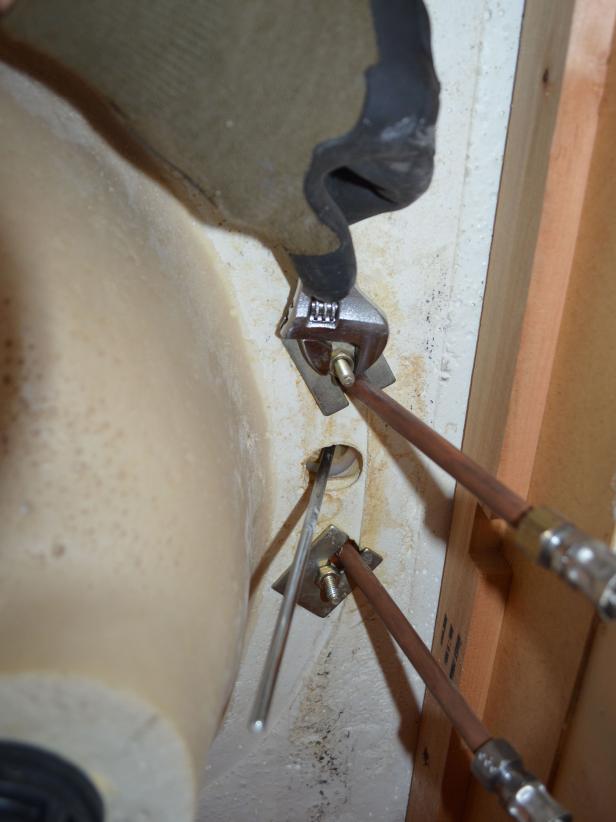
Use an adjustable wrench or pliers to remove the nuts and bolts that hold the old faucet in place. Once you have removed all the hardware, gently pull the faucet out of the sink.
Step 3: Install the New Faucet
Apply a thin layer of plumber's putty around the base of the new faucet. Place the faucet into the holes on the sink and secure it with nuts and bolts. Make sure the faucet is level and tight.
Step 4: Install the New Drain
Apply plumber's putty around the drain flange and insert it into the sink's drain hole. From underneath the sink, secure the drain by tightening the nut with a pipe wrench. Wipe away any excess putty.
Step 5: Connect the Water Supply
Using plumbers tape, wrap the threads of the water supply lines to ensure a tight seal. Connect the water supply lines to the hot and cold water valves under the sink. Use an adjustable wrench to tighten the connections.
Step 6: Test for Leaks
Turn the water supply back on and test the faucet and drain for any leaks. If you notice any leaks, tighten the connections or use plumbers tape to seal them.
In Conclusion
 Installing a new bathroom sink faucet and drain may seem like a daunting task, but with the right tools and our step-by-step guide, you can easily do it yourself. A functional and aesthetically pleasing bathroom sink can greatly enhance the overall design of your bathroom. So, follow these steps and give your bathroom a much-needed upgrade.















/close-up-of-overflowing-bathroom-sink-90201417-579787783df78ceb865822d8.jpg)
