Disassembling a bathroom sink drain may seem like a daunting task, but with the right tools and knowledge, it can be a simple DIY project. Whether you need to replace a leaky drain or just want to give your sink a deep clean, taking apart the drain is the first step. In this article, we will guide you through the process of disassembling a bathroom sink drain in 10 easy steps.How to Disassemble a Bathroom Sink Drain


How to Disassemble a Bathroom Sink Drain


:max_bytes(150000):strip_icc()/bathroom-sink-drain-installation-2718843-02-61e5ecbee1e949be8d8f45ac4f5a6797.jpg)
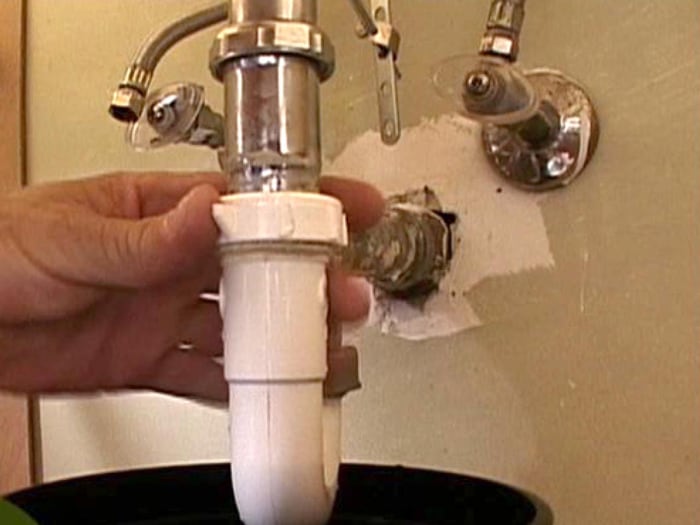
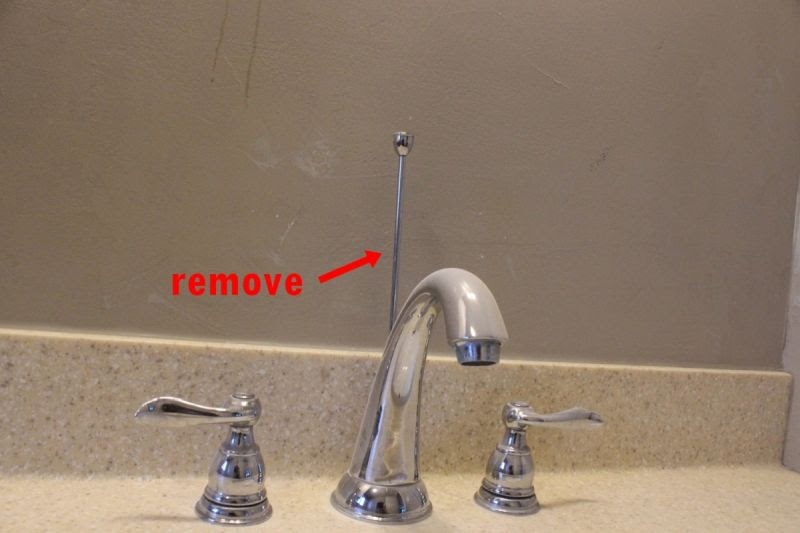
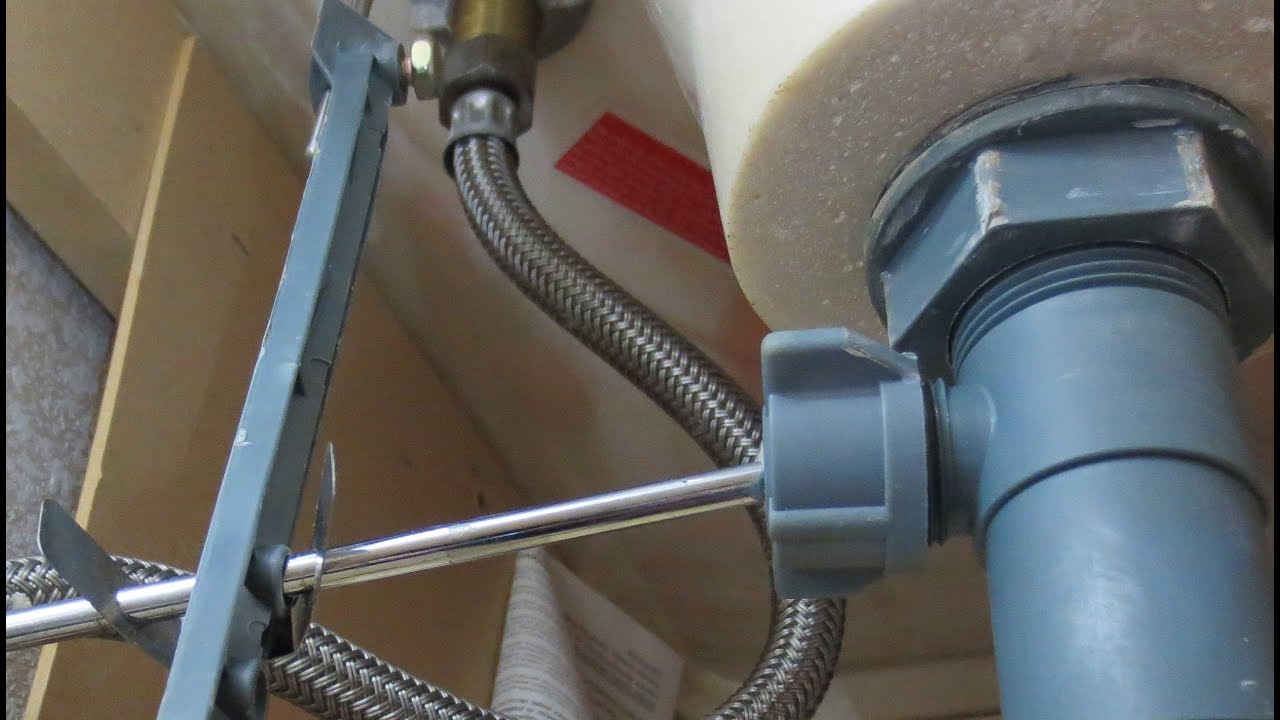
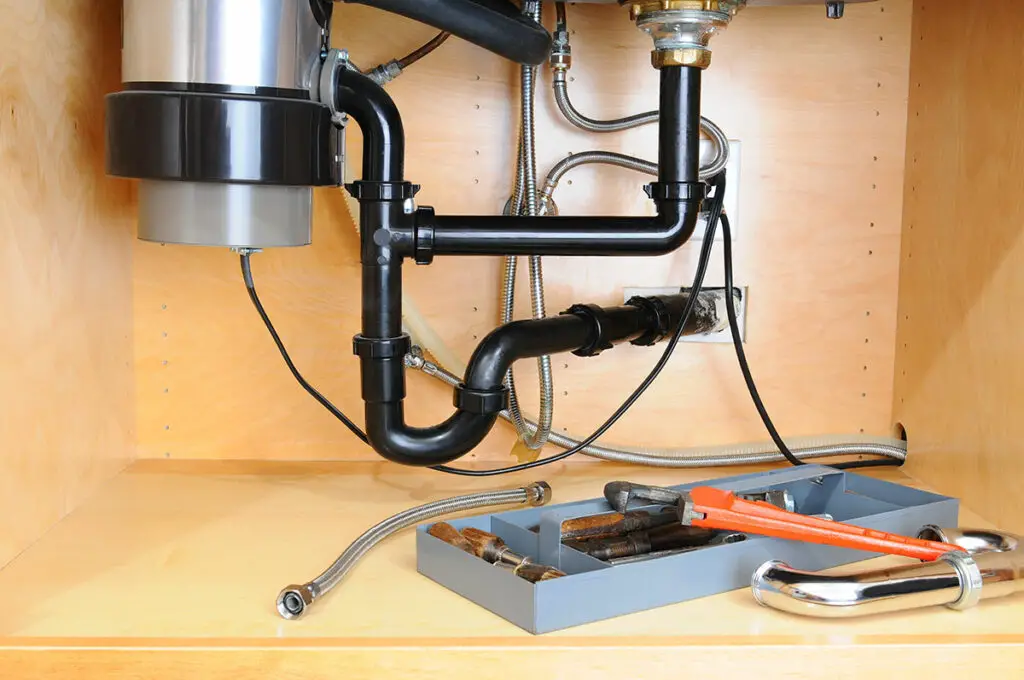
Before you begin, make sure you have all the necessary tools and materials. This includes a pair of pliers, a screwdriver, and a drain wrench. It's also a good idea to have a bucket or towel on hand to catch any water that may spill out during the disassembly process. Step 1: Start by removing the sink stopper. This can usually be done by twisting and lifting the stopper out of the drain. If your sink has a pop-up stopper, you may need to unscrew the nut on the back of the drain before removing it. Step 2: Next, use your pliers to unscrew the nut at the top of the drain pipe, just above the sink. This is called the pivot rod nut and it holds the pivot rod in place. Once the nut is removed, you can pull out the pivot rod. Step 3: Now it's time to remove the retaining nut that holds the drain in place. This nut is located underneath the sink and can be unscrewed with a pair of pliers or a drain wrench. Step 4: With the retaining nut removed, you should be able to lift the drain out of the sink. If the drain feels stuck, you can use WD-40 or a similar lubricant to loosen it. Step 5: Once the drain is out, you will see the rubber gasket and cardboard washer that sits between the drain and the sink. These may need to be replaced if they are worn or damaged. Step 6: Next, remove the drain flange by unscrewing the two screws that hold it in place. These screws are usually located on the sides of the drain. Make sure to keep these screws in a safe place as you will need them to reassemble the drain later. Step 7: With the drain flange removed, you can now access the drain tailpiece. This is the long, curved pipe that connects the drain to the P-trap. Use your pliers to unscrew the nut at the top of the tailpiece and remove it from the drain. Step 8: If you are planning to replace the entire drain assembly, you can skip this step. However, if you just want to clean the drain, you can use a toothbrush or small brush to scrub away any debris or buildup inside the drain pipes. Step 9: Now it's time to reassemble the drain. Start by inserting the drain tailpiece back into the drain hole in the sink. Make sure it is pushed all the way in and then tighten the nut at the top to secure it in place. Step 10: Finally, reattach the drain flange by screwing it back onto the drain. Make sure to line up the holes in the flange with the holes in the drain and use the screws you saved earlier to secure it in place. Once the flange is back on, you can reattach the pivot rod and sink stopper.Step-by-Step Guide for Removing a Bathroom Sink Drain


Step-by-Step Guide for Removing a Bathroom Sink Drain


Disassembling a bathroom sink drain can be a simple DIY project that can save you time and money. By following the step-by-step guide outlined above, you can easily take apart your bathroom sink drain and clean or replace any necessary parts. Remember to always have the right tools on hand and take your time to avoid any mistakes.DIY: Disassembling a Bathroom Sink Drain


DIY: Disassembling a Bathroom Sink Drain


Removing a bathroom sink drain may seem like a complicated task, but with the right knowledge and tools, it can be a quick and easy process. By following our comprehensive guide, you can confidently take apart your drain and complete any necessary repairs or cleaning.Removing a Bathroom Sink Drain: A Comprehensive Guide


Removing a Bathroom Sink Drain: A Comprehensive Guide


If you're new to DIY projects or have never disassembled a bathroom sink drain before, here are a few tips and tricks to keep in mind:Disassembling a Bathroom Sink Drain: Tips and Tricks


Disassembling a Bathroom Sink Drain: Tips and Tricks


With our step-by-step instructions and helpful tips, you now have the ultimate guide to taking apart a bathroom sink drain. Whether you're a seasoned DIYer or a newbie, you can confidently tackle this project and keep your bathroom sink functioning properly.The Ultimate Guide to Taking Apart a Bathroom Sink Drain


The Ultimate Guide to Taking Apart a Bathroom Sink Drain

If you prefer a more visual approach, here are the step-by-step instructions for disassembling a bathroom sink drain:Step-by-Step Instructions for Disassembling a Bathroom Sink Drain


Step-by-Step Instructions for Disassembling a Bathroom Sink Drain

Before you start disassembling your bathroom sink drain, there are a few important things to keep in mind:Disassembling a Bathroom Sink Drain: What You Need to Know


Disassembling a Bathroom Sink Drain: What You Need to Know


By following our step-by-step guide, you can easily take apart a bathroom sink drain in just 10 easy steps. Remember to gather all the necessary tools and take your time to avoid any mistakes or accidents.How to Take Apart a Bathroom Sink Drain in 10 Easy Steps


How to Take Apart a Bathroom Sink Drain in 10 Easy Steps
When it comes to disassembling a bathroom sink drain, there are a few common mistakes that you should avoid:Disassembling a Bathroom Sink Drain: Common Mistakes to Avoid

Disassembling a Bathroom Sink Drain: Common Mistakes to Avoid


Why Disassembling Your Bathroom Sink Drain Is Important for House Design

Maintaining a Functional and Aesthetically Pleasing Bathroom
 When it comes to house design, the bathroom is often an overlooked area. However, it is one of the most used and essential rooms in a house. A properly functioning bathroom not only adds convenience but also contributes to the overall aesthetics of a home. One crucial aspect of a functional bathroom is the sink drain. Over time, bathroom sink drains can become clogged with hair, soap scum, and other debris, leading to slow drainage or even complete blockage. This not only causes inconvenience but also affects the overall appearance of the bathroom. Therefore, it is essential to regularly disassemble and clean the bathroom sink drain to maintain a functional and aesthetically pleasing bathroom.
Preventing Clogs and Avoiding Costly Repairs
One of the main reasons for disassembling a bathroom sink drain is to prevent clogs. As mentioned before, clogs can occur due to the accumulation of hair, soap scum, and other debris in the drain. If left unattended, these clogs can lead to slow drainage or even complete blockage, making it difficult to use the sink. Furthermore, clogged drains can also cause water to back up and overflow, resulting in a messy and unpleasant experience. In some cases, clogs can also cause damage to the pipes and require costly repairs. By regularly disassembling and cleaning the sink drain, you can prevent clogs and avoid the hassle and expense of repairs.
Improving Drainage and Reducing Health Risks
Another important reason for disassembling a bathroom sink drain is to improve drainage. When debris accumulates in the drain, it can restrict the flow of water, resulting in slow drainage. This can be frustrating and time-consuming, especially when you are in a hurry. Moreover, stagnant water in the sink can also create a breeding ground for bacteria and mold, which can pose health risks to you and your family. By disassembling and thoroughly cleaning the sink drain, you can improve drainage and reduce the risk of health hazards.
Enhancing the Appearance of Your Bathroom
Last but not least, disassembling and cleaning the bathroom sink drain can contribute to the overall aesthetics of your bathroom. Over time, debris and grime can build up in the drain, making it look dirty and unappealing. This can be particularly bothersome if you have a modern and stylish bathroom design that you want to maintain. By regularly disassembling and cleaning the sink drain, you can keep it looking clean and shiny, enhancing the appearance of your bathroom.
In conclusion, disassembling your bathroom sink drain is an essential aspect of house design. It not only helps maintain a functional and aesthetically pleasing bathroom but also prevents clogs, reduces health risks, and enhances the overall appearance of your home. Therefore, make sure to include this task in your regular house cleaning routine to keep your bathroom in top-notch condition.
When it comes to house design, the bathroom is often an overlooked area. However, it is one of the most used and essential rooms in a house. A properly functioning bathroom not only adds convenience but also contributes to the overall aesthetics of a home. One crucial aspect of a functional bathroom is the sink drain. Over time, bathroom sink drains can become clogged with hair, soap scum, and other debris, leading to slow drainage or even complete blockage. This not only causes inconvenience but also affects the overall appearance of the bathroom. Therefore, it is essential to regularly disassemble and clean the bathroom sink drain to maintain a functional and aesthetically pleasing bathroom.
Preventing Clogs and Avoiding Costly Repairs
One of the main reasons for disassembling a bathroom sink drain is to prevent clogs. As mentioned before, clogs can occur due to the accumulation of hair, soap scum, and other debris in the drain. If left unattended, these clogs can lead to slow drainage or even complete blockage, making it difficult to use the sink. Furthermore, clogged drains can also cause water to back up and overflow, resulting in a messy and unpleasant experience. In some cases, clogs can also cause damage to the pipes and require costly repairs. By regularly disassembling and cleaning the sink drain, you can prevent clogs and avoid the hassle and expense of repairs.
Improving Drainage and Reducing Health Risks
Another important reason for disassembling a bathroom sink drain is to improve drainage. When debris accumulates in the drain, it can restrict the flow of water, resulting in slow drainage. This can be frustrating and time-consuming, especially when you are in a hurry. Moreover, stagnant water in the sink can also create a breeding ground for bacteria and mold, which can pose health risks to you and your family. By disassembling and thoroughly cleaning the sink drain, you can improve drainage and reduce the risk of health hazards.
Enhancing the Appearance of Your Bathroom
Last but not least, disassembling and cleaning the bathroom sink drain can contribute to the overall aesthetics of your bathroom. Over time, debris and grime can build up in the drain, making it look dirty and unappealing. This can be particularly bothersome if you have a modern and stylish bathroom design that you want to maintain. By regularly disassembling and cleaning the sink drain, you can keep it looking clean and shiny, enhancing the appearance of your bathroom.
In conclusion, disassembling your bathroom sink drain is an essential aspect of house design. It not only helps maintain a functional and aesthetically pleasing bathroom but also prevents clogs, reduces health risks, and enhances the overall appearance of your home. Therefore, make sure to include this task in your regular house cleaning routine to keep your bathroom in top-notch condition.