Adding a kitchen sink sprayer diverter valve is a great way to improve the functionality of your sink. It allows you to easily switch between using the regular faucet and the sprayer, making tasks like washing dishes and cleaning the sink much easier. If you're considering this upgrade, here's a step-by-step guide on how to add plumbing for a kitchen sink sprayer diverter valve.Install a Kitchen Sink Sprayer Diverter Valve


Install a Kitchen Sink Sprayer Diverter Valve


The first step in adding plumbing for a kitchen sink sprayer diverter valve is to gather all the necessary tools and materials. You will need a set of wrenches, Teflon tape, plumber's putty, and a diverter valve kit. Make sure to also have a bucket or towel handy to catch any water that may spill during the installation process.How to Add Plumbing for a Kitchen Sink Sprayer Diverter Valve


How to Add Plumbing for a Kitchen Sink Sprayer Diverter Valve
/how-to-install-a-sink-drain-2718789-hero-24e898006ed94c9593a2a268b57989a3.jpg)
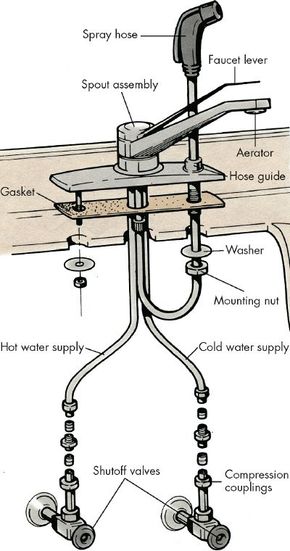
Before starting the installation, shut off the water supply to your sink. Then, disconnect the water supply lines from the faucet using your wrenches. This will allow you to easily access the area where the diverter valve will be installed.Plumbing for Kitchen Sink Sprayer Diverter Valve Installation


Plumbing for Kitchen Sink Sprayer Diverter Valve Installation


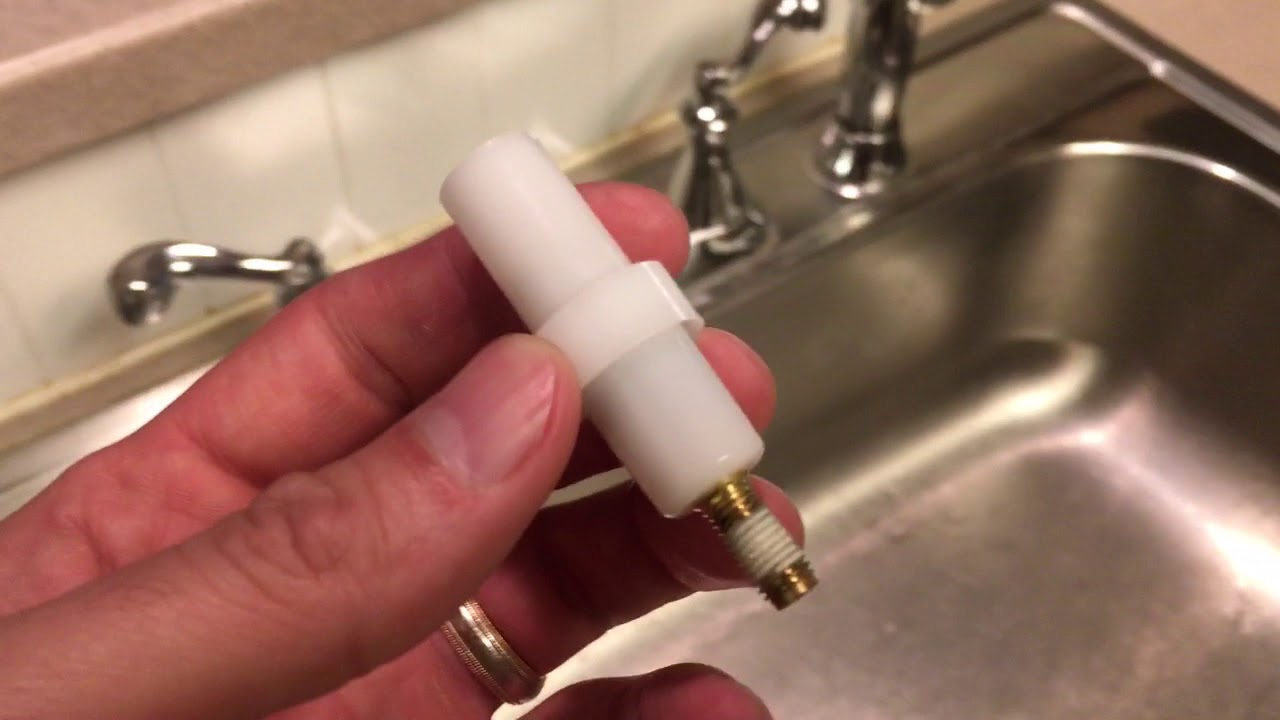
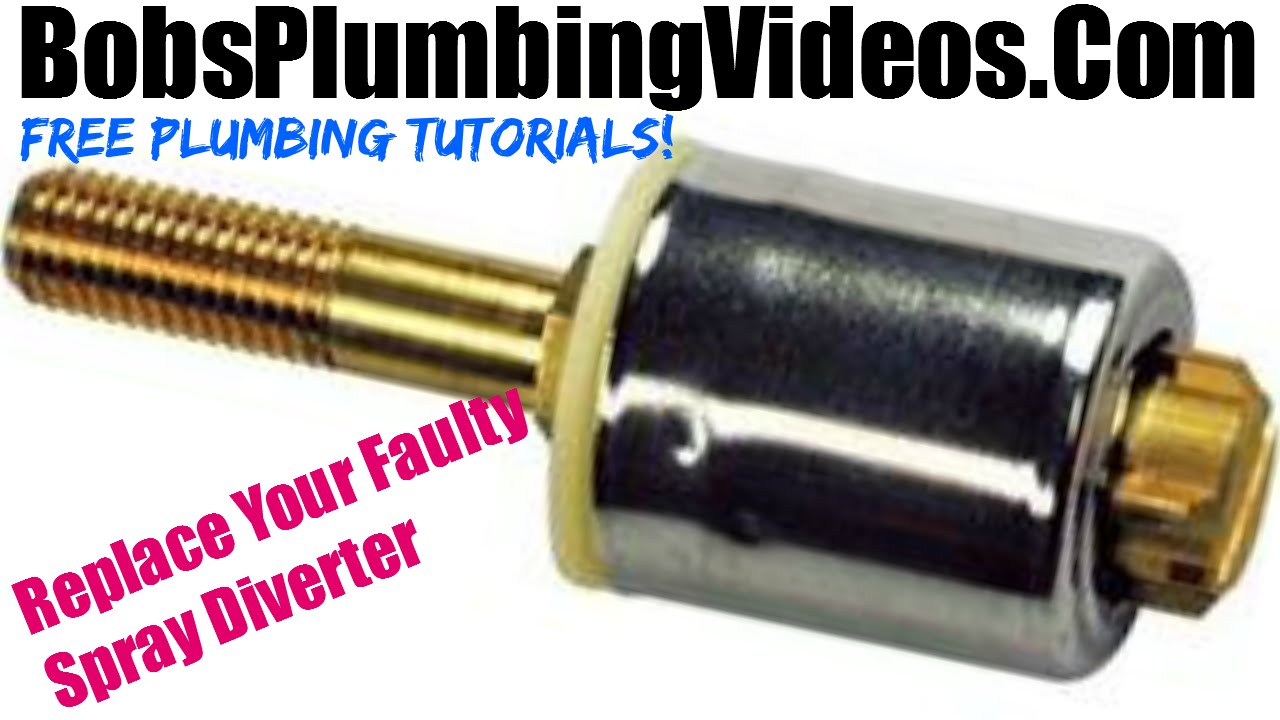
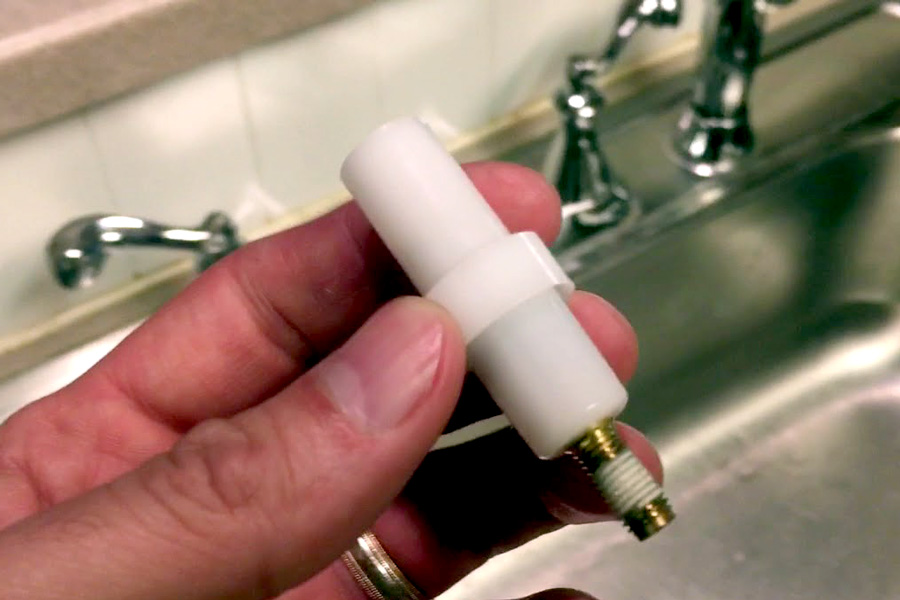
Next, you will need to remove the old faucet aerator and replace it with the new diverter valve. Apply plumber's putty to the threads of the new valve and carefully screw it into place. Make sure it is tight and secure.DIY Kitchen Sink Sprayer Diverter Valve Plumbing


DIY Kitchen Sink Sprayer Diverter Valve Plumbing
Once the valve is in place, it's time to connect the sprayer hose. Apply Teflon tape to the threads of the sprayer hose and attach it to the valve. Use your wrenches to tighten the connection and ensure there are no leaks. Next, reconnect the water supply lines to the faucet and turn the water back on. Test the sprayer to make sure it is working properly. If you notice any leaks, tighten the connections with your wrenches.Step-by-Step Guide for Adding Plumbing to a Kitchen Sink Sprayer Diverter Valve

Step-by-Step Guide for Adding Plumbing to a Kitchen Sink Sprayer Diverter Valve


As mentioned earlier, you will need a set of wrenches, Teflon tape, plumber's putty, and a diverter valve kit. You may also need a bucket or towel to catch any spills, as well as a screwdriver if you need to remove any parts of the faucet before installing the diverter valve.Tools and Materials Needed for Installing a Kitchen Sink Sprayer Diverter Valve


Tools and Materials Needed for Installing a Kitchen Sink Sprayer Diverter Valve


When installing the diverter valve, make sure to follow the manufacturer's instructions carefully. Apply enough plumber's putty to create a tight seal, but not too much that it will ooze out and create a mess. And when connecting the sprayer hose, make sure to use Teflon tape to prevent any leaks.Tips for Properly Adding Plumbing to a Kitchen Sink Sprayer Diverter Valve

Tips for Properly Adding Plumbing to a Kitchen Sink Sprayer Diverter Valve

One common mistake when installing a kitchen sink sprayer diverter valve is not properly tightening the connections. This can lead to leaks and cause damage to your sink and cabinets. It's also important to make sure the diverter valve is securely in place and not loose.Common Mistakes to Avoid When Installing a Kitchen Sink Sprayer Diverter Valve


Common Mistakes to Avoid When Installing a Kitchen Sink Sprayer Diverter Valve


If you're not confident in your DIY skills or simply don't have the time to install a kitchen sink sprayer diverter valve, it's best to hire a professional plumber. They have the expertise and tools needed to get the job done quickly and correctly, ensuring your new valve is installed properly and without any issues.Professional Plumbing Services for Adding a Kitchen Sink Sprayer Diverter Valve
Professional Plumbing Services for Adding a Kitchen Sink Sprayer Diverter Valve
The cost of adding plumbing for a kitchen sink sprayer diverter valve will vary depending on the type of valve and any additional parts or tools needed. On average, it can range from $50 to $150. The installation process can take anywhere from 30 minutes to an hour, depending on your level of experience.Costs and Time Estimates for Adding Plumbing to a Kitchen Sink Sprayer Diverter Valve


Costs and Time Estimates for Adding Plumbing to a Kitchen Sink Sprayer Diverter Valve


Adding a Diverter Valve for Your Kitchen Sink Sprayer

Why You Need a Diverter Valve
 If you have a kitchen sink sprayer, you may have noticed that when you use it, the water stops coming out of the faucet. This can be a bit inconvenient, especially when you need to fill a pot with water or rinse dishes. The solution to this problem is to add a diverter valve to your plumbing system. This valve will allow you to switch between using the sprayer and the faucet without interrupting the water flow. It's a simple and cost-effective solution that can greatly improve the functionality of your kitchen sink.
Preparing for Installation
 Before you can add a diverter valve, you need to make sure your plumbing system is ready for it. This means turning off the water supply and draining any remaining water from the pipes. You will also need to gather the necessary tools and materials, including a wrench, Teflon tape, and the diverter valve itself.
Installing the Diverter Valve
 The diverter valve is typically installed in the sprayer hose under the sink. Start by unscrewing the sprayer hose from the faucet. Then, using your wrench, unscrew the sprayer head from the hose. Next, wrap the threads on the hose with Teflon tape to create a tight seal. Then, attach the diverter valve to the hose and screw the sprayer head back on. Finally, reattach the hose to the faucet.
Testing and Troubleshooting
 Once the diverter valve is installed, turn the water supply back on and test it out. You should now be able to switch between using the sprayer and the faucet without any interruption in water flow. However, if you encounter any issues, such as leaks or reduced water pressure, you may need to troubleshoot the installation. Make sure all connections are tight and check for any obstructions in the hose or valve.
Final Thoughts
 Adding a diverter valve for your kitchen sink sprayer is a relatively simple and quick plumbing project that can greatly improve the functionality of your sink. With the right tools and materials, you can easily install it yourself and enjoy the convenience of being able to switch between the sprayer and faucet without any interruptions. So why not give it a try and make your kitchen sink even more efficient?