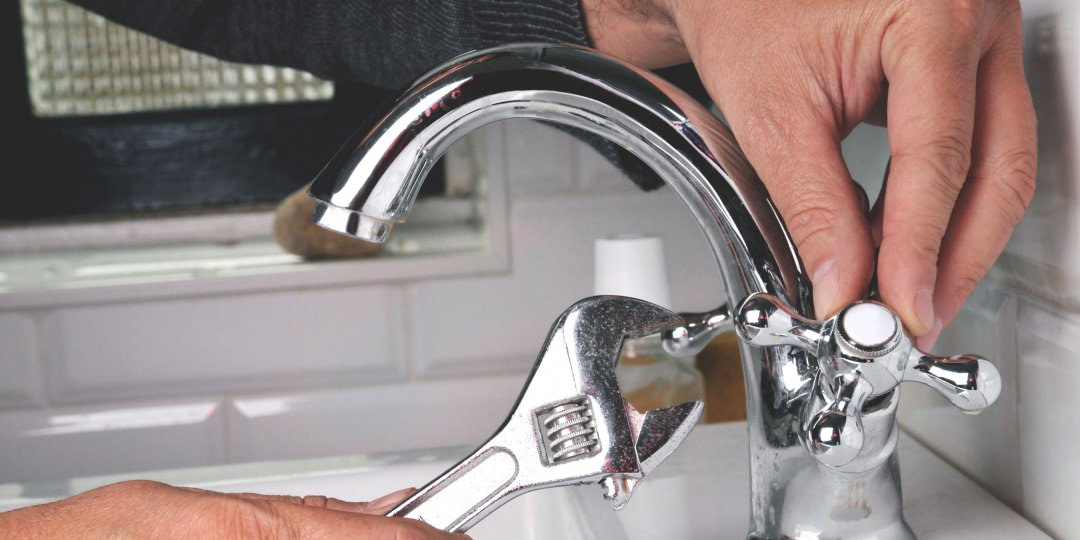
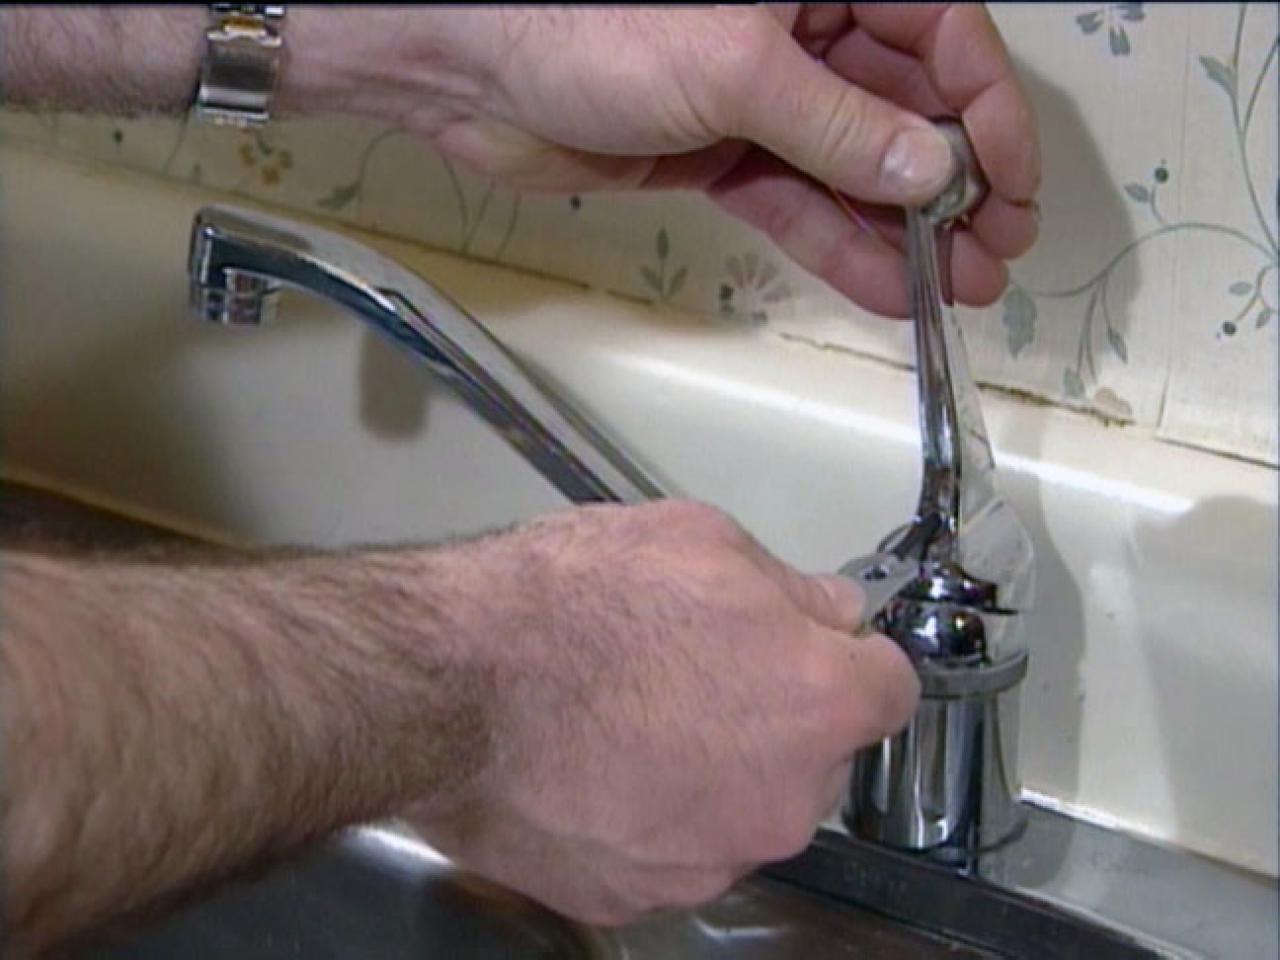
How to Fix a Leaky Kitchen Sink Faucet Double Handle
A leaky kitchen sink faucet can be a constant source of frustration. Not only does it waste water, but it also creates a mess and can even lead to water damage if left untreated. If you have a double handle kitchen sink faucet, here's how you can fix it and stop the leak once and for all.
Step 1: Turn off the water supply
The first step in fixing a leaky kitchen sink faucet is to turn off the water supply. Look for the shut-off valves under your sink and turn them off by twisting them clockwise. If you can't find the valves, you may need to shut off the main water supply to your house.
Step 2: Identify the source of the leak
Before you start taking apart your faucet, you need to determine where the leak is coming from. Is it from the handles, the spout, or the base of the faucet? This will help you determine the cause of the leak and the necessary steps to fix it.
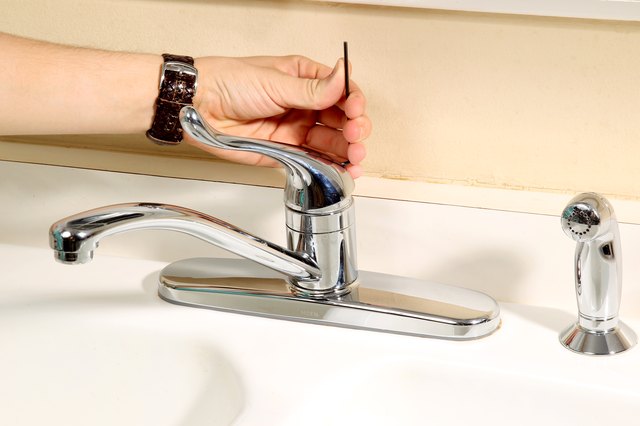
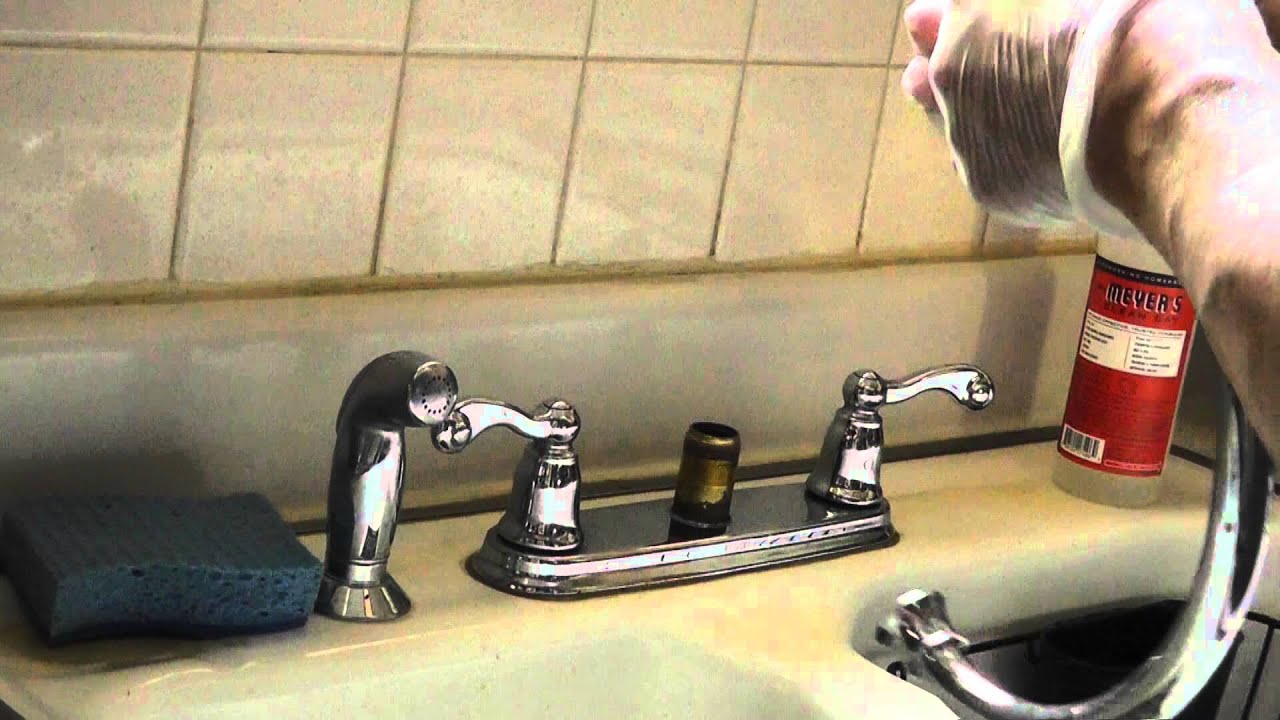
Step 3: Disassemble the faucet
Using a screwdriver, remove the handles from the faucet. Then, remove the nut that holds the cartridge in place. Carefully remove the cartridge and inspect it for any signs of damage or wear and tear.
Step 4: Replace the cartridge
If the cartridge is damaged or worn, you will need to replace it. Take the old cartridge to your local hardware store and purchase an exact replacement. Install the new cartridge by following the instructions provided with it.
Step 5: Reassemble the faucet
Once the new cartridge is installed, reassemble the faucet in the reverse order. Make sure to tighten all nuts and screws securely. Turn the water supply back on and test the faucet for any leaks. If there are no leaks, you have successfully fixed your leaky kitchen sink faucet!


How to Fix a Leaky Kitchen Sink Faucet Double Handle


:max_bytes(150000):strip_icc()/repair-a-two-handle-cartridge-faucet-1824887-04-9236640018c941eb970815539aa094e2.jpg)


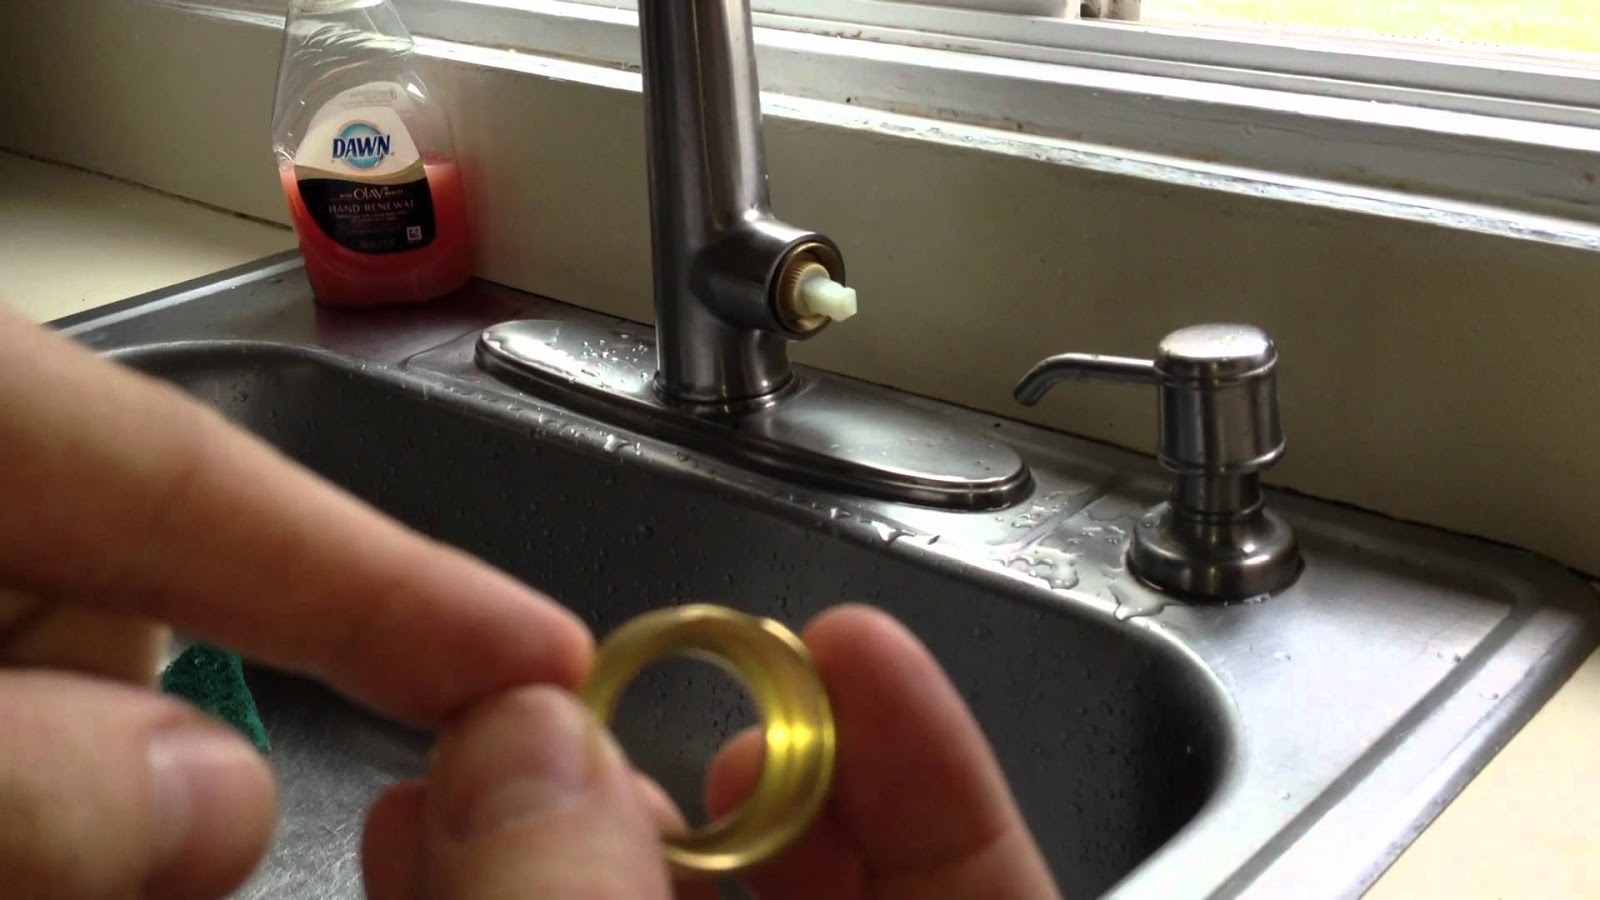
How to Fix a Leaky Kitchen Sink Faucet Single Handle
Single handle kitchen sink faucets are becoming increasingly popular due to their sleek design and ease of use. However, they can also be a source of frustration when they start to leak. Here's how to fix a leaky kitchen sink faucet with a single handle.
Step 1: Turn off the water supply
Just like with a double handle faucet, the first step is to turn off the water supply. Look for the shut-off valves under your sink and turn them off. If you can't find the valves, turn off the main water supply to your house.
Step 2: Remove the handle
Using a screwdriver, remove the handle from the faucet. This will expose the cartridge and the O-ring that may be causing the leak.
Step 3: Replace the O-ring
If the O-ring is damaged or worn, it can cause the faucet to leak. Remove the old O-ring and replace it with a new one. Make sure to use the same size and type of O-ring for the best results.
Step 4: Reassemble the faucet
Once the O-ring is replaced, reassemble the faucet in the reverse order. Make sure to tighten all screws and nuts securely. Turn the water supply back on and test the faucet for any leaks. If there are no leaks, you have successfully fixed your leaky single handle kitchen sink faucet!


How to Fix a Leaky Kitchen Sink Faucet Single Handle


How to Fix a Leaky Kitchen Sink Sprayer
A leaky kitchen sink sprayer can be a nuisance and can also waste water. Here's how you can fix it and stop the leak in no time.
Step 1: Turn off the water supply
As always, the first step is to turn off the water supply. Look for the shut-off valves under your sink and turn them off. If you can't find the valves, turn off the main water supply to your house.
Step 2: Inspect the sprayer head
If the sprayer head is the source of the leak, it may just need to be cleaned. Unscrew the head from the hose and soak it in a mixture of white vinegar and water for a few hours. This will help remove any mineral deposits that may be causing the leak.
Step 3: Check the hose and connections
If the sprayer head is not the source of the leak, check the hose and connections for any signs of damage or wear. Replace any damaged parts and make sure all connections are tight.
Step 4: Reattach the sprayer head
Once all parts are checked and replaced if necessary, reattach the sprayer head to the hose. Turn the water supply back on and test the sprayer for any leaks. If there are no leaks, you have successfully fixed your leaky kitchen sink sprayer!


How to Fix a Leaky Kitchen Sink Sprayer


How to Fix a Leaky Kitchen Sink Drain
A leaky kitchen sink drain can be a messy and frustrating problem. Here's how you can fix it and prevent any further damage.
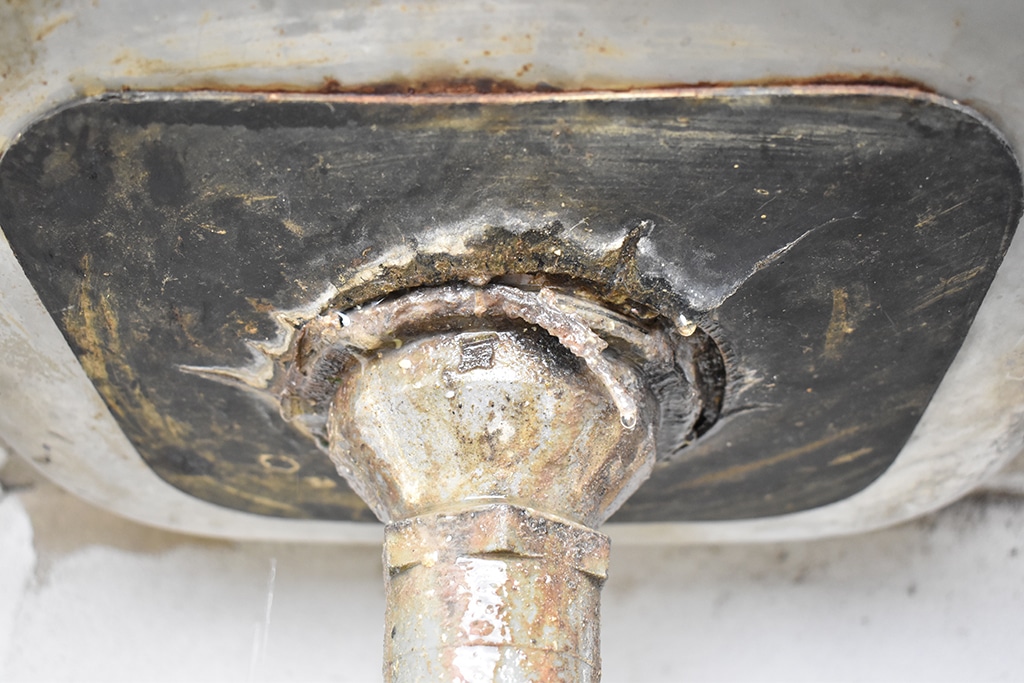
Step 1: Identify the source of the leak
The first step in fixing a leaky kitchen sink drain is to determine where the leak is coming from. Is it from the drain itself, the connections, or the pipes underneath the sink?
Step 2: Tighten the connections
If the leak is coming from the connections, simply tighten them with a wrench. This should stop the leak. If the connections are damaged, you may need to replace them.
Step 3: Replace the drain basket
If the drain basket is the source of the leak, you will need to replace it. Remove the old drain basket and replace it with a new one. Make sure to use plumber's putty to seal the connections.
Step 4: Check the pipes
If the leak is coming from the pipes under the sink, check them for any signs of damage or wear. Replace any damaged pipes to prevent future leaks.
Step 5: Test for leaks
Once all parts are checked and replaced if necessary, turn the water supply back on and test for any leaks. If there are no leaks, you have successfully fixed your leaky kitchen sink drain!


How to Fix a Leaky Kitchen Sink Drain


How to Fix a Leaky Kitchen Sink Pipe
If you have a leaky kitchen sink pipe, it's important to fix it as soon as possible to prevent any further damage. Here's how you can do it yourself.
Step 1: Turn off the water supply
The first step is to turn off the water supply. Look for the shut-off valves under your sink and turn them off. If you can't find the valves, turn off the main water supply to your house.
Step 2: Identify the source of the leak
Determine where the leak is coming from. Is it from the pipe itself, a connection, or a joint? This will help you determine the necessary steps to fix the leak.
Step 3: Replace the damaged section of pipe
If the pipe is damaged, you will need to replace the section that is leaking. Cut out the damaged section using a hacksaw and replace it with a new piece of pipe. Make sure to use the correct type and size of pipe for the best results.
Step 4: Use plumber's tape or putty
If the leak is coming from a connection or joint, you can use plumber's tape or putty to seal it. Apply the tape or putty and tighten the connection securely.
Step 5: Turn the water supply back on
Once all repairs are made, turn the water supply back on and check for any leaks. If there are no leaks, you have successfully fixed your leaky kitchen sink pipe!

How to Fix a Leaky Kitchen Sink Pipe


How to Fix a Leaky Kitchen Sink Shut Off Valve
If your kitchen sink shut off valve is leaking, it's important to fix it before it causes any damage. Here's how you can do it yourself.
Step 1: Turn off the water supply
As always, the first step is to turn off the water supply. Look for the shut-off valves under your sink and turn them off. If you can't find the valves, turn off the main water supply to your house.
Step 2: Tighten the packing nut
If the shut off valve is leaking from the handle, you may be able to fix it by simply tightening the packing nut. Use a wrench to tighten the nut and check for any leaks.
Step 3: Replace the valve
If the packing nut is not the source of the leak, you may need to replace the entire valve. This is a more involved process and may require the help of a professional plumber.
Step 4: Test for leaks
Once the valve is replaced, turn the water supply back on and check for any leaks. If there are no leaks, you have successfully fixed your leaky kitchen sink shut off valve!
How to Fix a Leaky Kitchen Sink Shut Off Valve


How to Fix a Leaky Kitchen Sink Basket Strainer
A leaky kitchen sink basket strainer can be a frustrating problem, but it's also easy to fix. Here's how you can do it yourself.
Step 1: Turn off the water supply
As always, the first step is to turn off the water supply. Look for the shut-off valves under your sink and turn them off. If you can't find the valves, turn off the main water supply to your house.
Step 2: Remove the old strainer
Using a screwdriver, remove the old basket strainer from the sink. Make sure to clean any old putty or debris from the sink and the strainer area.
Step 3: Apply plumber's putty
Roll plumber's putty into a thin rope and apply it around the edge of the strainer. This will create a watertight seal when the strainer is installed.
Step 4: Install the new strainer
Place the new basket strainer in the hole and tighten the locking ring underneath. Make sure the strainer is centered and level.
Step 5: Test for leaks
Once the strainer is installed, turn the water supply back on and check for any leaks. If there are no leaks, you have successfully fixed your leaky kitchen sink basket strainer!


How to Fix a Leaky Kitchen Sink Basket Strainer


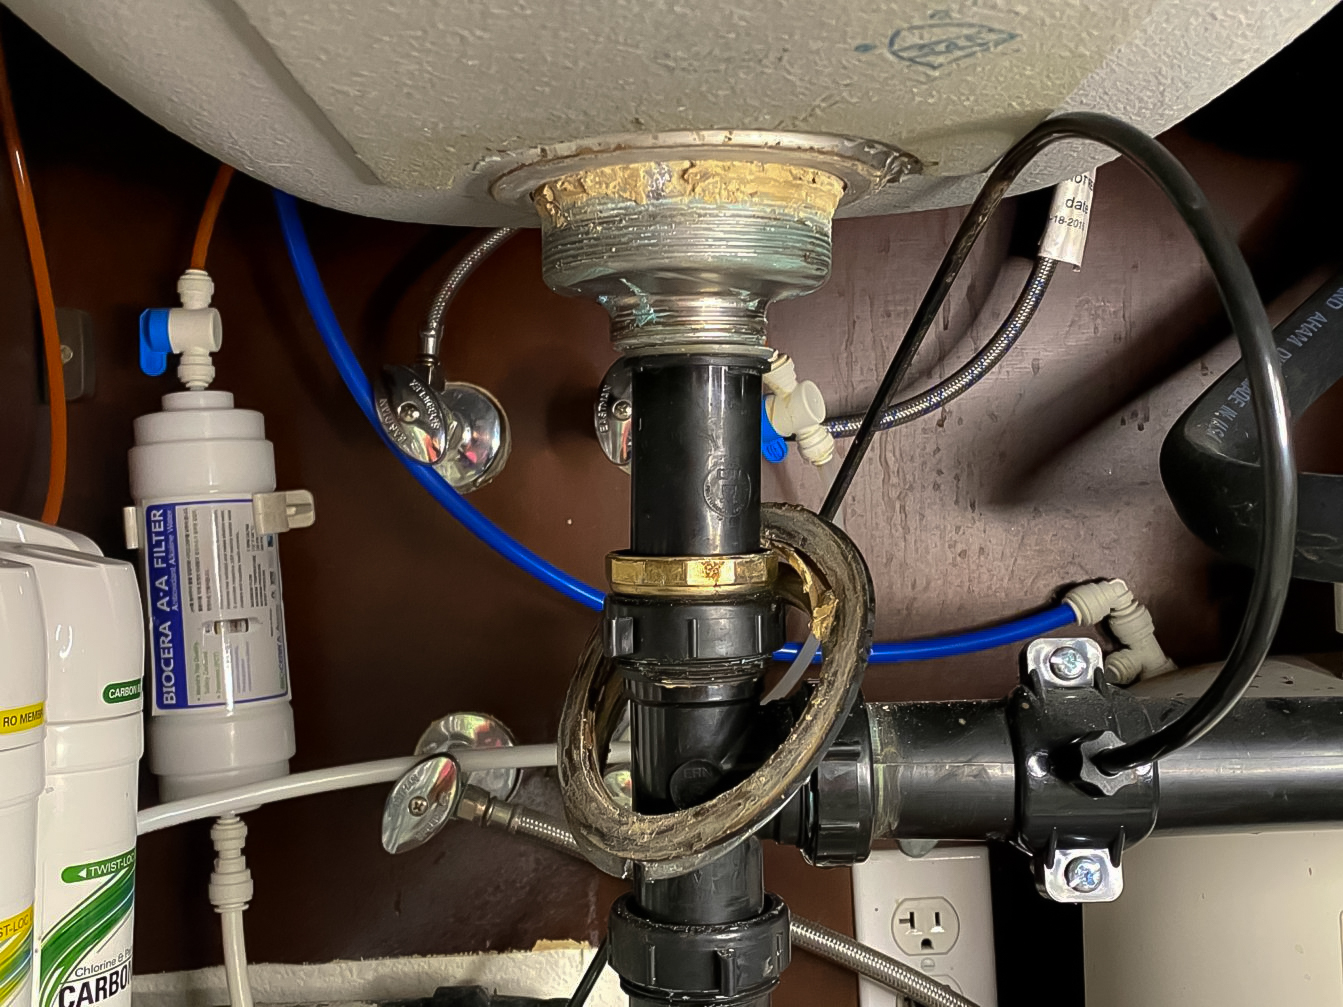
How to Fix a Leaky Kitchen Sink P Trap
A leaky kitchen sink P trap can be a messy and frustrating problem. Here's how you can fix it yourself.
Step 1: Turn off the water supply
As always, the first step is to turn off the water supply. Look for the shut-off valves under your sink and turn them off. If you can't find the valves, turn off the main water supply to your house.
Step 2: Identify the source of the leak
The first step in fixing a leaky kitchen sink P trap is to determine where the leak is coming from. Is it from the connections, the trap itself, or a joint?
Step 3: Tighten the connections
If the leak is coming from the connections, simply tighten them with a wrench. This should stop the leak. If the connections are damaged, you may need to replace them.
Step 4: Replace the trap
If the trap is the source of the leak, you will need to replace it. Remove the old trap and replace it with a new one. Make sure to use the correct type and size of trap for the best results.
Step 5: Test for leaks
Once all repairs are made, turn the water supply back on and check for any leaks. If there are no leaks, you have successfully fixed your leaky kitchen sink P trap!


How to Fix a Leaky Kitchen Sink P Trap


How to Fix a Leaky Kitchen Sink Supply Line
A leaky kitchen sink supply line can cause a lot of damage if left untreated. Here's how you can fix it and prevent any further damage.
Step 1: Turn off the water supply
The first step is to turn off the water supply. Look for the shut-off valves under your sink and turn them off. If you can't find the valves, turn off the main water supply to your house.
Step 2: Identify the source of the leak
Determine where the leak is coming from. Is it from the connection, the line itself, or a joint?
Step 3: Tighten the connections
If the leak is coming from the connections, simply tighten them with a wrench. This should stop the leak. If the connections are damaged, you may need to replace them.
Step 4: Replace the supply line
If the supply line is the source of the leak, you will need to replace it. Remove the old supply line and replace it with a new one. Make sure to use the correct type and size of supply line for the best results.
Step 5: Test for leaks
Once all repairs are made, turn the water supply back on and check for any leaks. If there are no leaks, you have successfully fixed your leaky kitchen sink supply line!

How to Fix a Leaky Kitchen Sink Supply Line


How to Fix a Leaky Kitchen Sink Faucet Base

How to Fix a Leaky Kitchen Sink Faucet Base


How to Fix a Leaking Under Kitchen Sink Knob

Understanding the Issue
 Leaking under kitchen sink knobs
can be a common problem in many households. This issue not only causes inconvenience, but it can also lead to further damage to your kitchen cabinets and flooring if left untreated. The constant drip of water can also cause mold and mildew growth, creating an unhealthy environment in your kitchen. Therefore, it is important to address this problem as soon as possible to prevent any further damage.
Leaking under kitchen sink knobs
can be a common problem in many households. This issue not only causes inconvenience, but it can also lead to further damage to your kitchen cabinets and flooring if left untreated. The constant drip of water can also cause mold and mildew growth, creating an unhealthy environment in your kitchen. Therefore, it is important to address this problem as soon as possible to prevent any further damage.
Identifying the Cause
 The first step to fixing a leaking under kitchen sink knob is to determine the cause of the leak. It could be due to a loose or damaged
knob
, a worn out
O-ring
, or a faulty
valve
. Inspect the knob and the surrounding area to identify any visible signs of damage or wear and tear.
The first step to fixing a leaking under kitchen sink knob is to determine the cause of the leak. It could be due to a loose or damaged
knob
, a worn out
O-ring
, or a faulty
valve
. Inspect the knob and the surrounding area to identify any visible signs of damage or wear and tear.
Gathering Tools and Materials
Fixing the Leak
 To fix a leaking under kitchen sink knob, first shut off the water supply to the sink. This can usually be done by turning off the
water valves
located under the sink. Next, use a wrench to remove the knob and inspect it for any damage. If the knob is damaged, replace it with a new one. If the knob is in good condition, check the
O-ring
and replace it if necessary.
To fix a leaking under kitchen sink knob, first shut off the water supply to the sink. This can usually be done by turning off the
water valves
located under the sink. Next, use a wrench to remove the knob and inspect it for any damage. If the knob is damaged, replace it with a new one. If the knob is in good condition, check the
O-ring
and replace it if necessary.
Preventing Future Leaks
 To prevent future leaks, make sure to properly tighten the knob when using the sink and periodically check for any signs of wear and tear. It is also recommended to replace the O-ring every few years as part of regular maintenance.
Conclusion
 Fixing a leaking under kitchen sink knob may seem like a daunting task, but with the right tools and knowledge, it can be a simple and easy fix. By following these steps and regularly maintaining your sink, you can prevent any future leaks and ensure a healthy and functional kitchen. Remember to always shut off the water supply before attempting any repairs and if the issue persists, it is best to seek professional help.