Staining a kitchen table black is a great way to give your dining space a sleek and modern look. It can also help to hide scratches and imperfections on an old table, making it look like new again. However, the process of staining a kitchen table can seem daunting, especially if you've never done it before. But fear not, with the right tools and techniques, you can achieve a beautiful black stained kitchen table that you'll be proud to show off to your guests. Here's a step-by-step guide on how to stain a kitchen table black.How to Stain a Kitchen Table Black
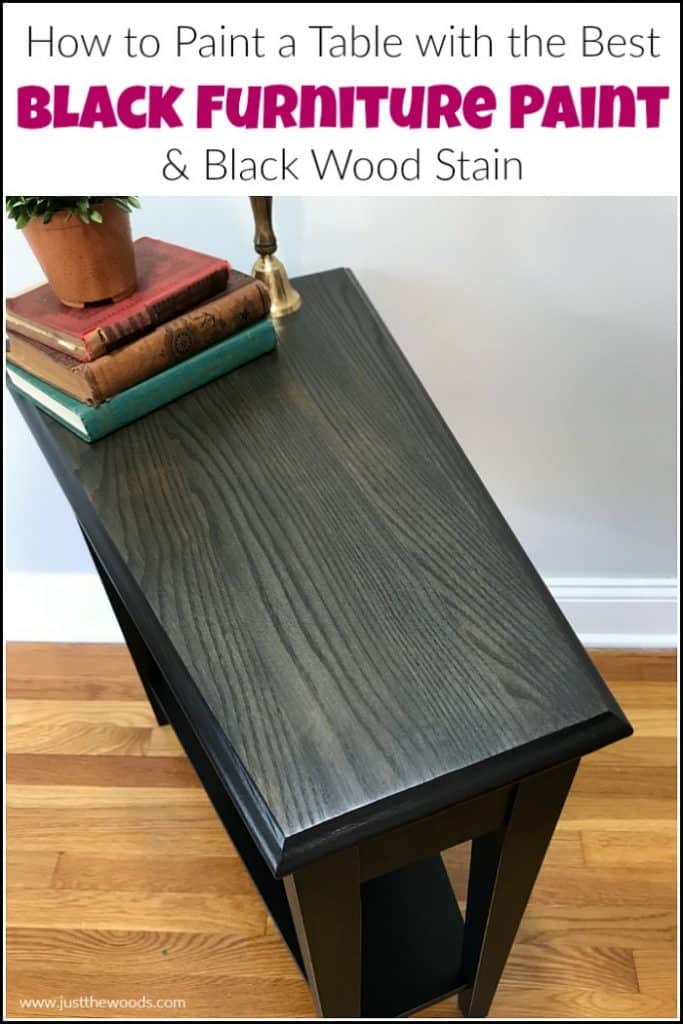

How to Stain a Kitchen Table Black


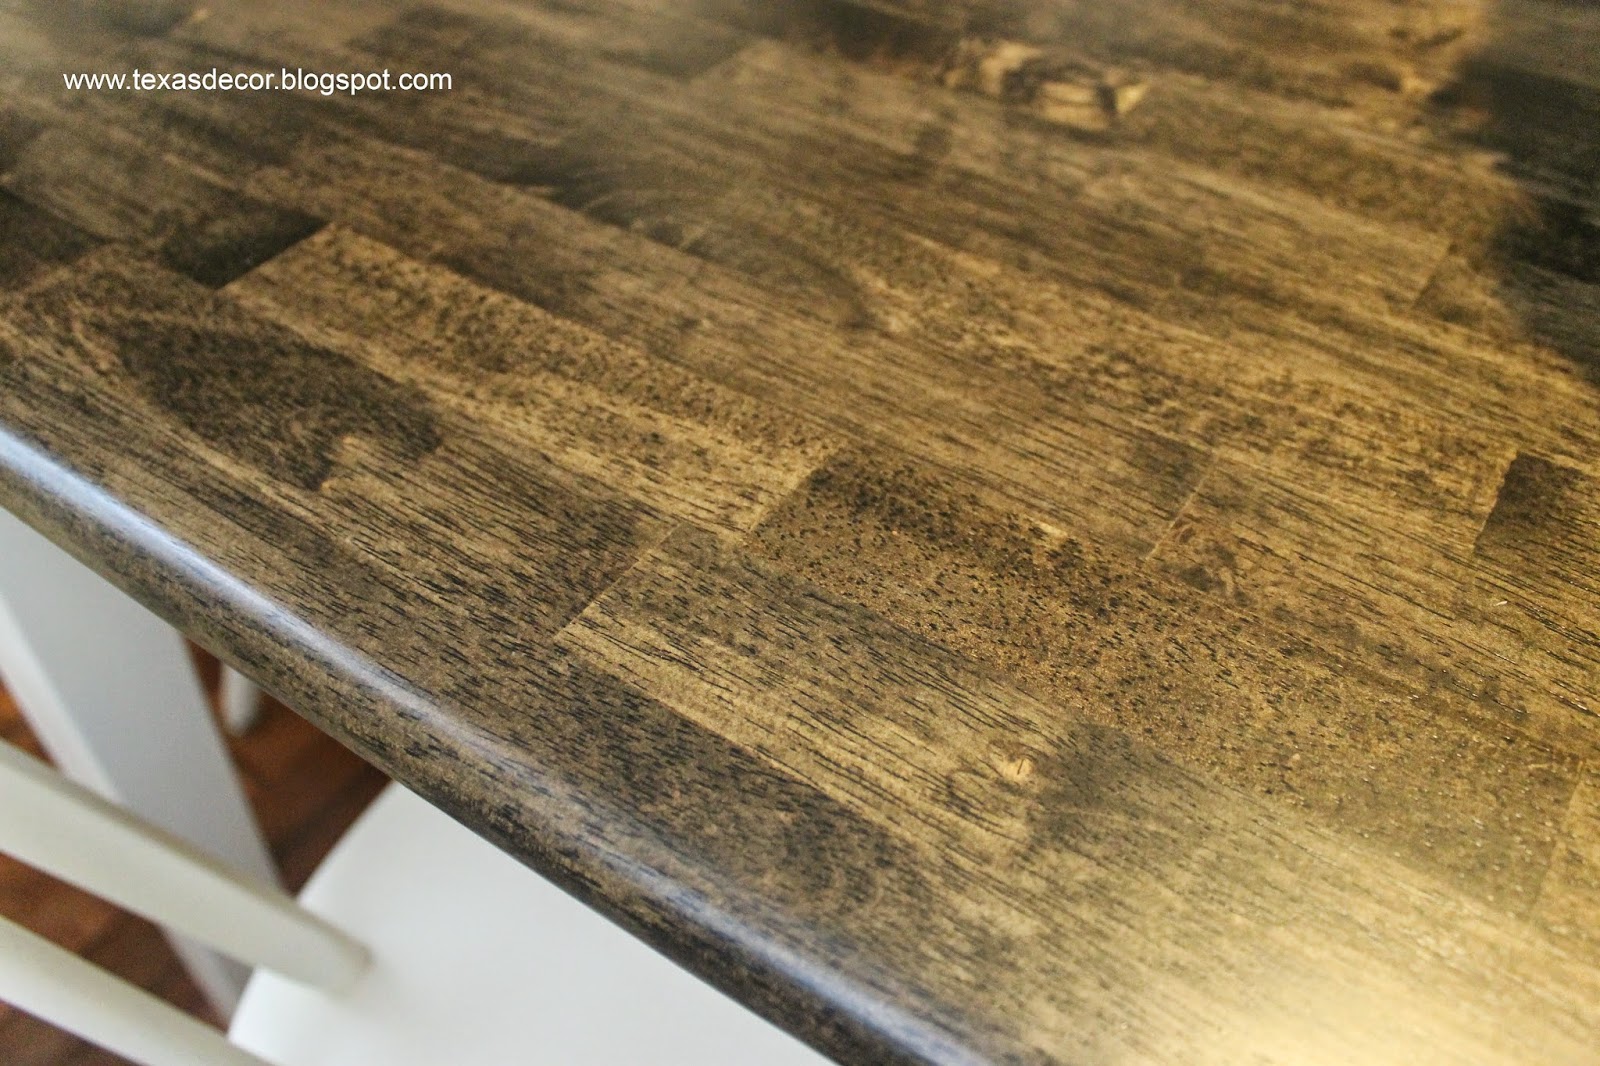
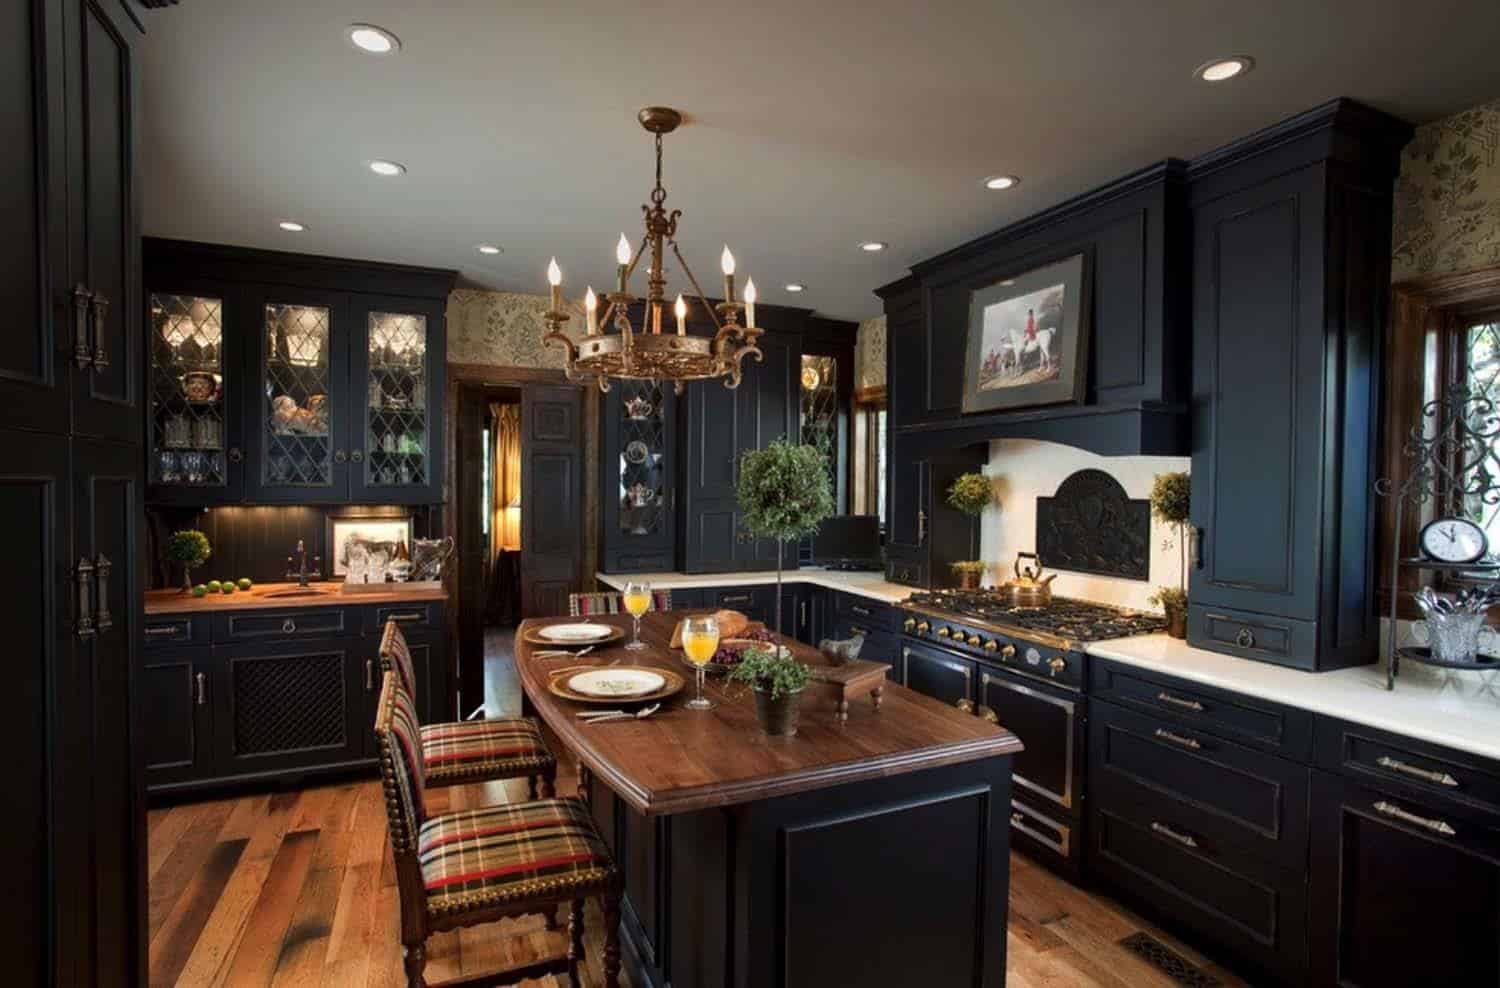
If you're on a budget or just enjoy DIY projects, staining a kitchen table black is a great option. Not only will it save you money, but it also allows you to customize the color and look of your table. You can choose from a variety of black stain shades, from a deep ebony to a more subtle charcoal. Plus, you'll have the satisfaction of knowing you did it yourself.DIY Black Stained Kitchen Table

DIY Black Stained Kitchen Table


Step 1: Prepare the table - Before you start staining, it's important to properly prepare your table. Remove any existing finish or paint by sanding it down. Make sure to use a fine grit sandpaper to avoid any damage to the wood. Step 2: Clean the table - After sanding, thoroughly clean the table with a damp cloth to remove any dust or dirt. Let it dry completely before moving on to the next step. Step 3: Apply the stain - Using a clean cloth or brush, apply the black stain to the table in the direction of the grain. Make sure to work in small sections and wipe off any excess stain with a clean cloth. Repeat this process until you've covered the entire table. Step 4: Let it dry - Allow the stain to dry for at least 24 hours before applying a second coat. This will ensure a deeper and more even color. Step 5: Apply a second coat - Once the first coat is completely dry, lightly sand the table with a fine grit sandpaper and apply a second coat of stain. This will help to achieve a more saturated color. Step 6: Seal the table - After the second coat has dried, apply a clear sealant to protect the stain and give your table a glossy finish. You can choose from a variety of sealants, such as polyurethane, lacquer, or wax.Step-by-Step Guide for Staining a Kitchen Table Black
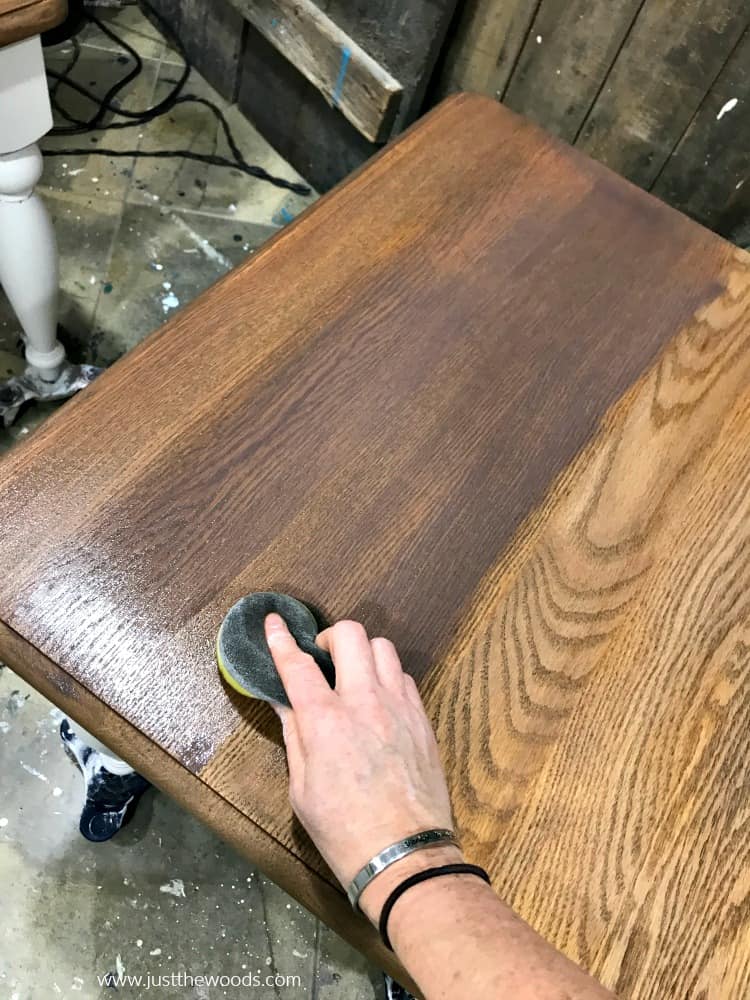


Step-by-Step Guide for Staining a Kitchen Table Black


Choosing the right stain is crucial when it comes to achieving a beautiful black stained kitchen table. Some popular stain brands that offer a range of black shades include Minwax, Varathane, and General Finishes. It's important to read reviews and test the stain on a small area of your table before committing to it. Remember, each type of wood may react differently to the stain, so it's best to do your research beforehand.Best Stain for a Black Kitchen Table


Best Stain for a Black Kitchen Table


1. Choose the right wood - Some woods, such as oak and pine, absorb stain more evenly than others. It's best to choose a hardwood like maple, cherry, or mahogany for a more consistent and rich color. 2. Use a pre-stain wood conditioner - This will help to ensure an even and smooth application of the stain. It also prevents the wood from absorbing too much stain, resulting in a blotchy finish. 3. Work in a well-ventilated area - Staining can produce strong fumes, so it's important to work in a well-ventilated space. If possible, do it outdoors or in a garage with the doors open. 4. Protect your work area - Lay down a drop cloth or old newspapers to protect your floor or work surface from any spills or drips. 5. Wear protective gear - Stain can be messy and hard to remove, so it's important to wear gloves, a mask, and eye protection to avoid any contact with your skin or eyes.Tips for Achieving a Beautiful Black Stained Kitchen Table

Tips for Achieving a Beautiful Black Stained Kitchen Table


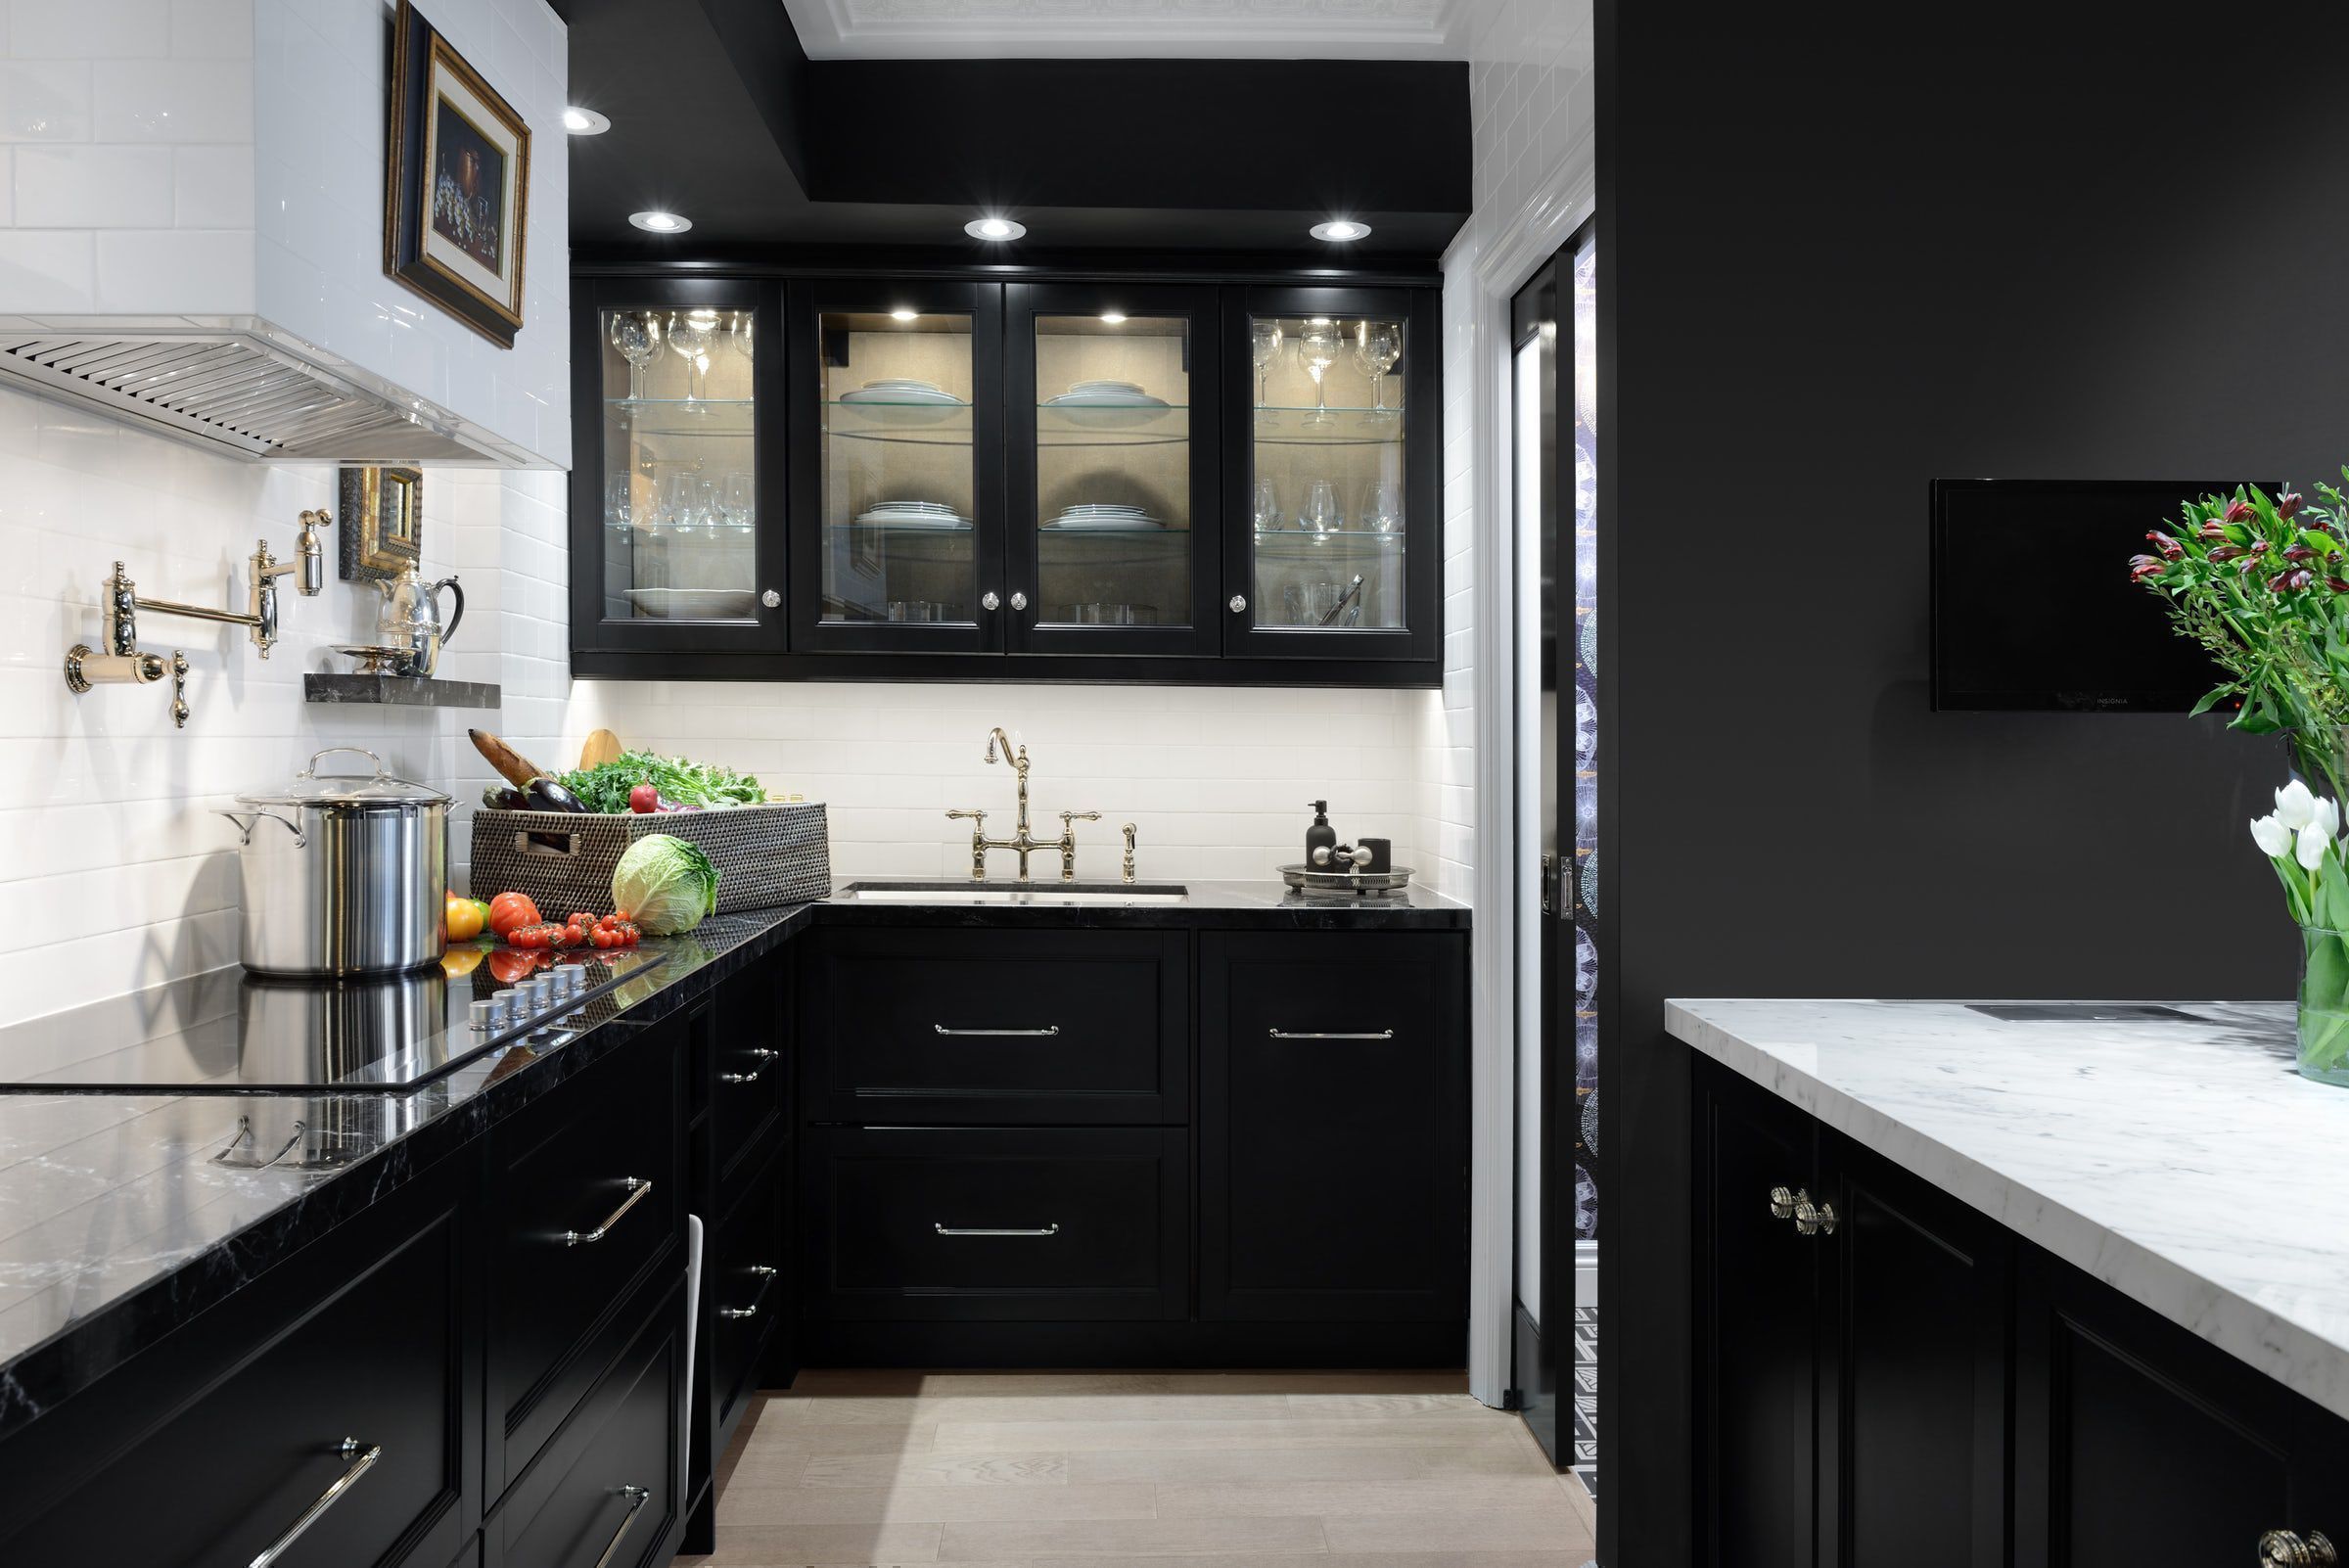


When it comes to transforming your kitchen table, you may be wondering whether to use black stain or paint. While both options can achieve a similar look, there are some differences to consider. Stain allows the natural wood grain to show through, giving your table a more organic and textured look. On the other hand, paint provides a more opaque and solid finish. It's also easier to apply and touch up than stain. Ultimately, it comes down to personal preference and the look you're trying to achieve.Black Stain vs. Paint for Kitchen Tables

Black Stain vs. Paint for Kitchen Tables


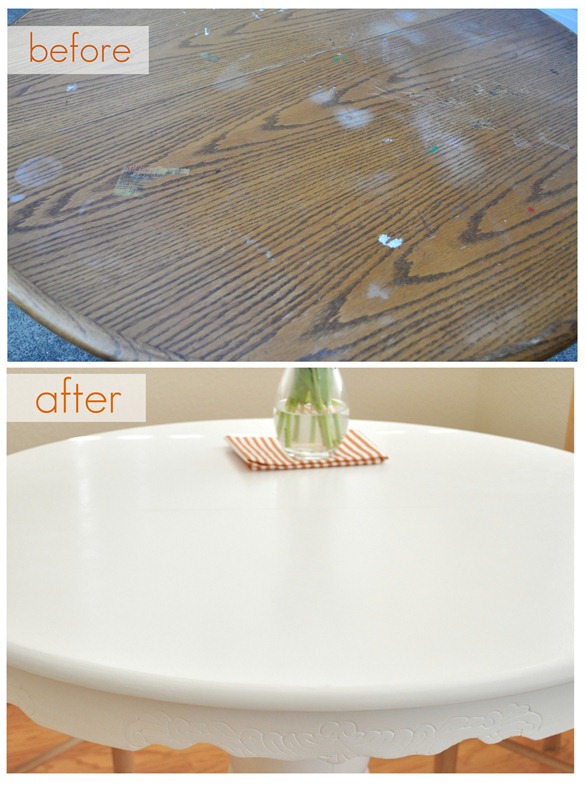
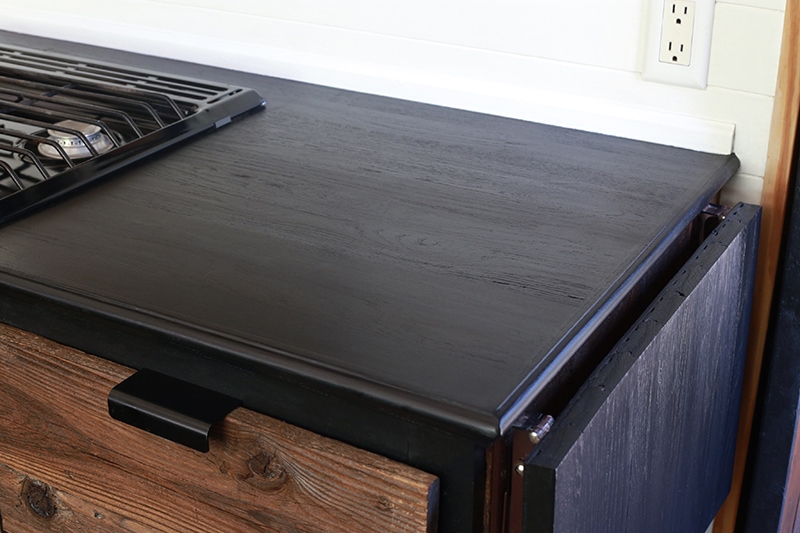
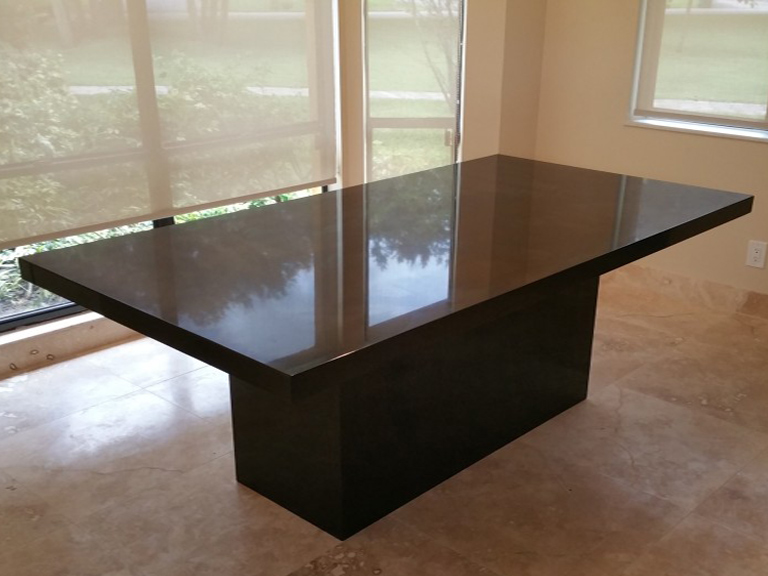
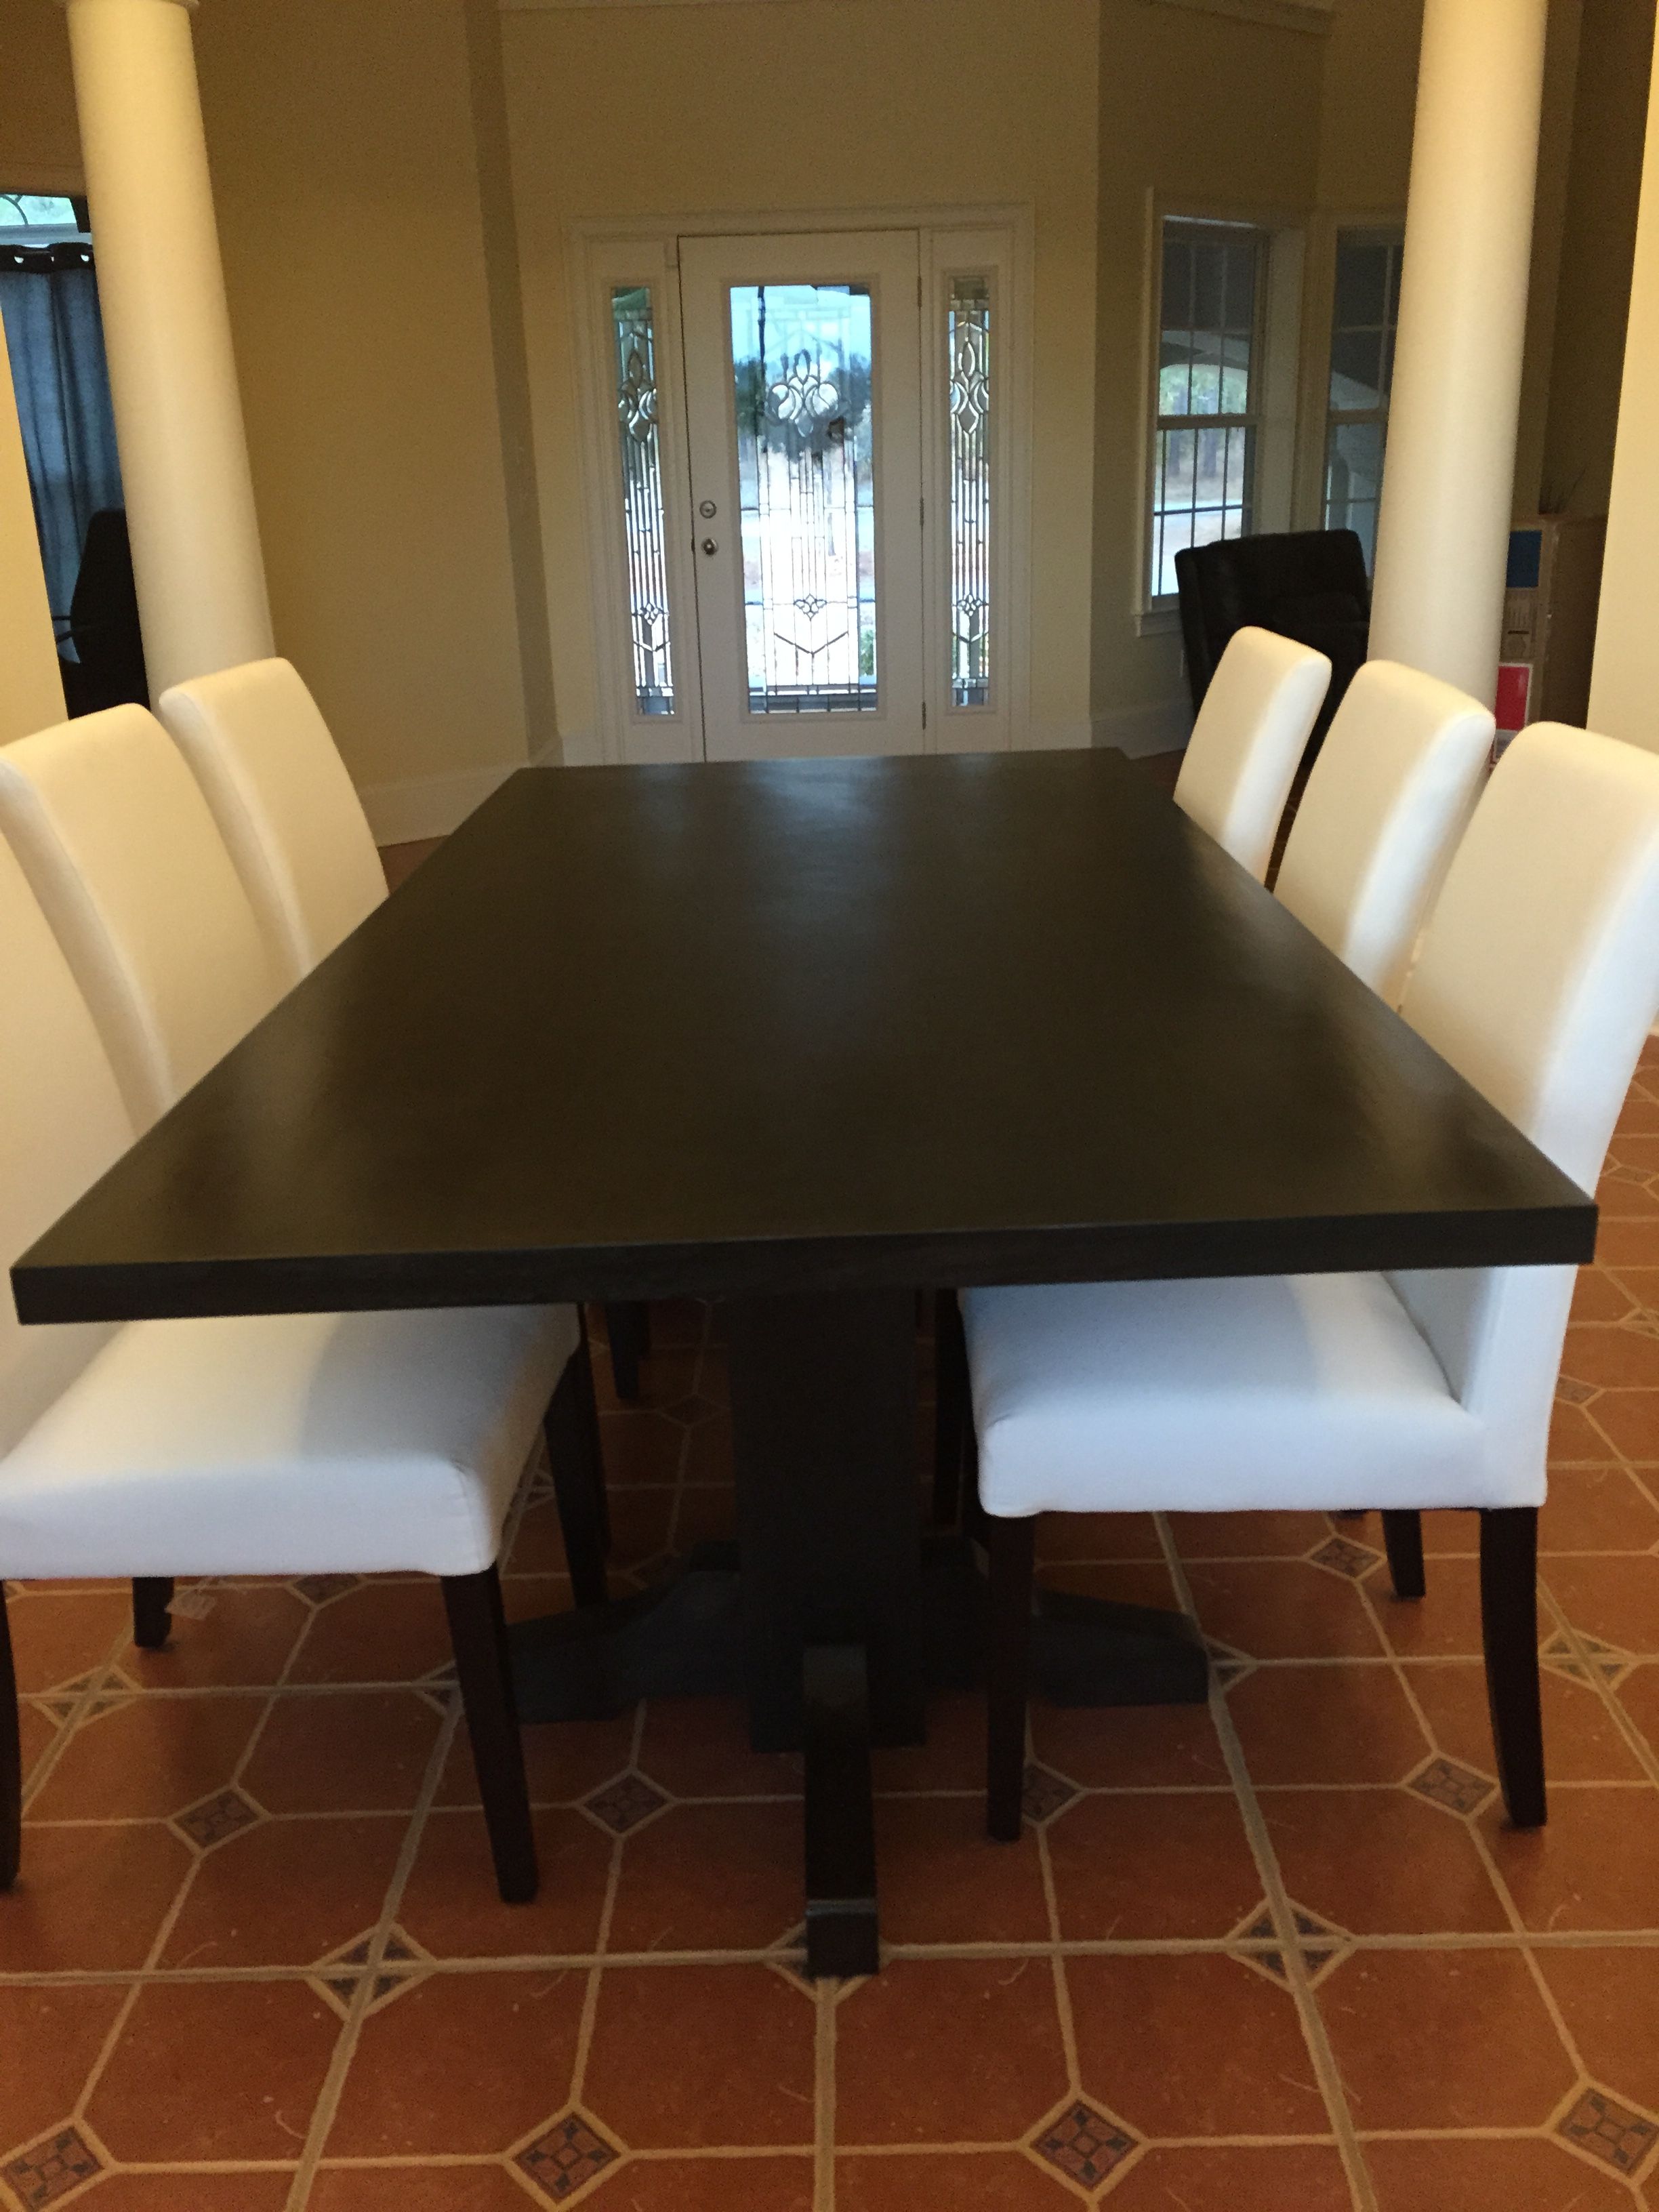
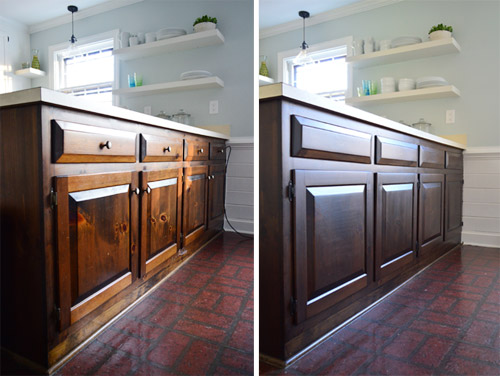
Seeing the transformation of a kitchen table from start to finish can be inspiring. Before you begin your own project, take a look at before and after photos of black stained kitchen tables for some motivation and ideas. You can find these on home decor websites, social media platforms, or even by asking friends or family who have completed similar projects.Before and After: Staining a Kitchen Table Black


Before and After: Staining a Kitchen Table Black


1. Sand it down - As mentioned earlier, sanding your table is crucial to ensure a smooth and even application of the stain. 2. Clean the table thoroughly - Use a mixture of warm water and mild soap to remove any dirt, grime, or grease from the table. 3. Fill in any cracks or imperfections - If your table has any cracks, holes, or scratches, use wood filler to fill them in and sand it down until it's smooth. 4. Remove any hardware - If your table has any hardware, such as knobs or handles, remove them before staining to avoid any damage or staining.How to Prep Your Kitchen Table for Black Stain


How to Prep Your Kitchen Table for Black Stain


1. Not sanding properly - Skipping the sanding step or using the wrong grit sandpaper can result in a less than desirable finish. 2. Not wiping off excess stain - If you leave excess stain on the table without wiping it off, it can result in a sticky and uneven finish. 3. Not using a pre-stain wood conditioner - As mentioned earlier, using a pre-stain wood conditioner can help to achieve a more even and smooth application of the stain. 4. Rushing the process - Staining takes time and patience. Rushing through the process can result in a sloppy and uneven finish. 5. Not using protective gear - Not wearing gloves, a mask, or eye protection can lead to skin and eye irritation from the stain fumes.Common Mistakes to Avoid When Staining a Kitchen Table Black


Common Mistakes to Avoid When Staining a Kitchen Table Black


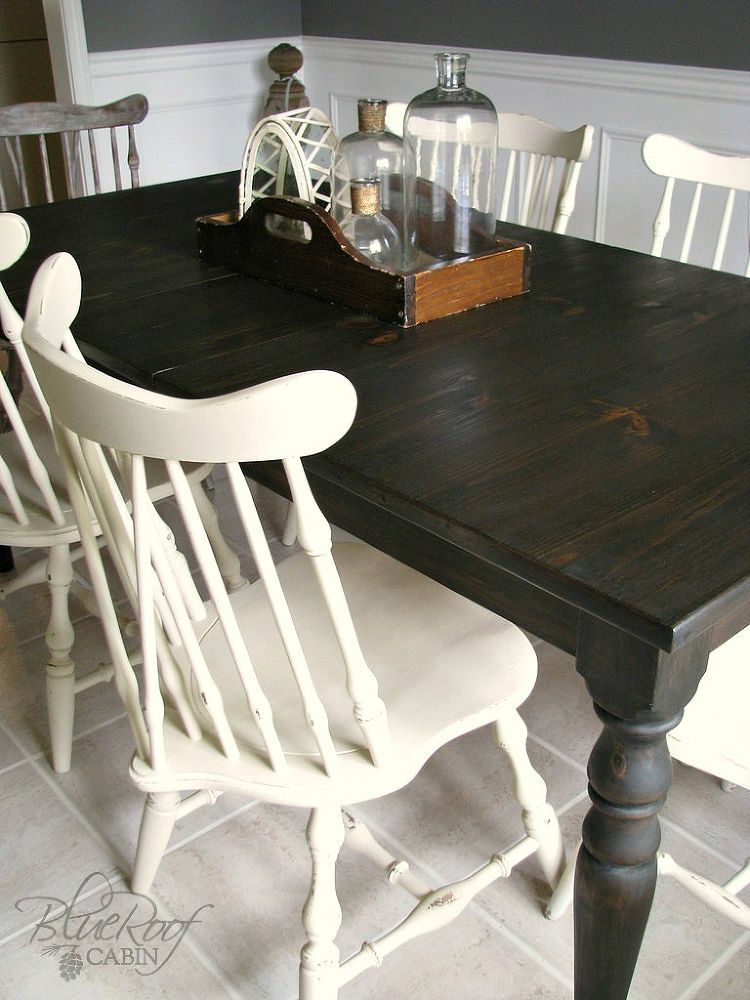
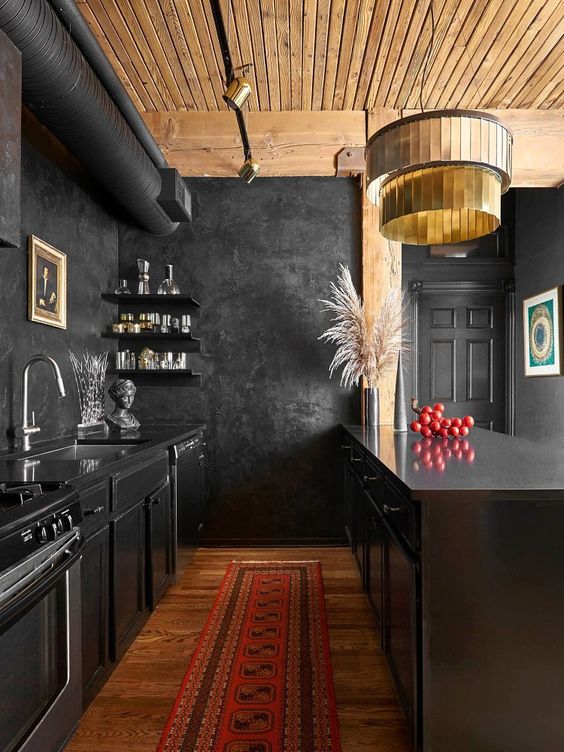
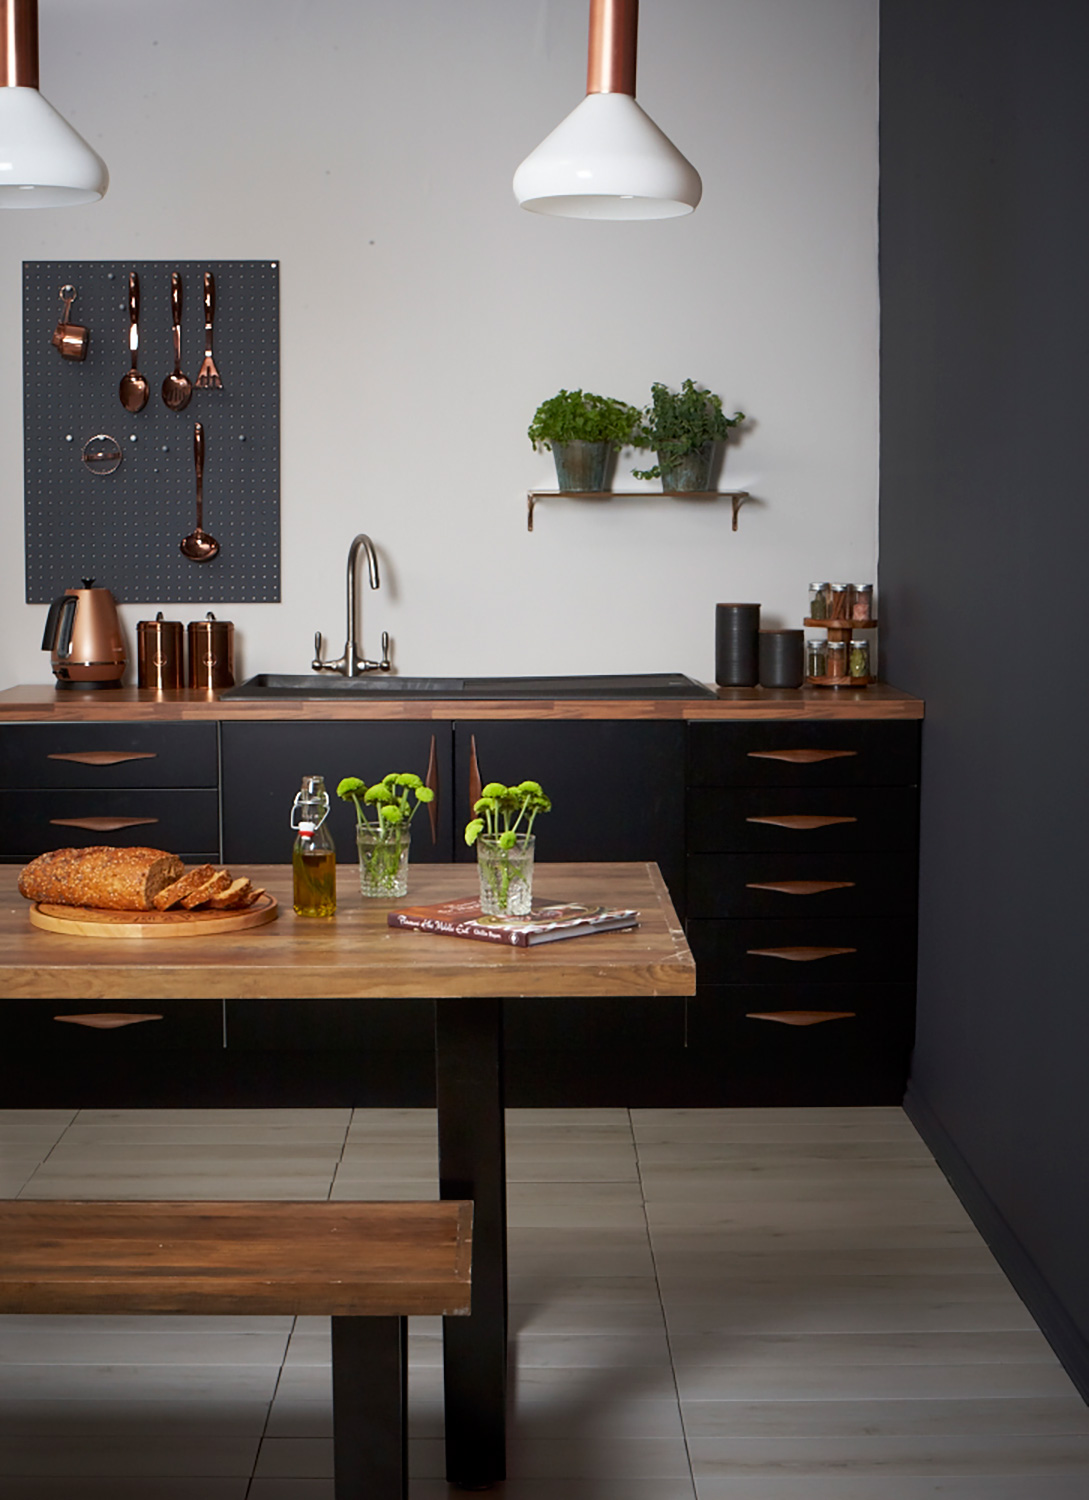
If you're still unsure about staining your kitchen table black, take a look at some inspiration and ideas to help you make a decision. You can find inspiration in home decor magazines, online home decor websites, or by browsing social media platforms like Pinterest and Instagram. You can also get creative and add a unique touch to your table by stenciling a design or using different shades of black stain for a more textured look.Black Stained Kitchen Table Inspiration and Ideas


Black Stained Kitchen Table Inspiration and Ideas


How to Stain a Kitchen Table Black: A Complete Guide

Why Choose Black Stain?
 When it comes to kitchen design, the possibilities are endless. From traditional to modern, there are countless ways to make your kitchen space reflect your personal style. One trend that has become increasingly popular in recent years is staining kitchen tables black. This bold and sophisticated look adds a touch of elegance and drama to any kitchen. So if you're looking to revamp your kitchen and give it a stylish makeover, staining your kitchen table black might just be the perfect solution.
The Benefits of Staining a Kitchen Table Black
 While the traditional choice for kitchen tables may be a light or natural wood color, black staining offers a unique and striking alternative. Here are some of the benefits of choosing black stain for your kitchen table:
1. Adds Depth and Contrast:
Black stain can add depth and contrast to your kitchen design, especially if you have light-colored cabinets and walls. It can create a focal point in the room and make your kitchen table stand out.
2. Hides Imperfections:
As with any piece of furniture, kitchen tables are prone to scratches and dings over time. Staining your table black can help to hide these imperfections and give your table a fresh, new look.
3. Easy to Clean:
Black stain is great for high-traffic areas like the kitchen because it is easy to clean and maintain. Any spills or stains can easily be wiped away without leaving a mark.
4. Versatile:
Black stain can work well with a variety of kitchen styles, from modern to farmhouse. It can also be paired with different materials such as metal, wood, or glass, making it a versatile choice for any kitchen design.
While the traditional choice for kitchen tables may be a light or natural wood color, black staining offers a unique and striking alternative. Here are some of the benefits of choosing black stain for your kitchen table:
1. Adds Depth and Contrast:
Black stain can add depth and contrast to your kitchen design, especially if you have light-colored cabinets and walls. It can create a focal point in the room and make your kitchen table stand out.
2. Hides Imperfections:
As with any piece of furniture, kitchen tables are prone to scratches and dings over time. Staining your table black can help to hide these imperfections and give your table a fresh, new look.
3. Easy to Clean:
Black stain is great for high-traffic areas like the kitchen because it is easy to clean and maintain. Any spills or stains can easily be wiped away without leaving a mark.
4. Versatile:
Black stain can work well with a variety of kitchen styles, from modern to farmhouse. It can also be paired with different materials such as metal, wood, or glass, making it a versatile choice for any kitchen design.
Steps to Staining a Kitchen Table Black
 Now that you know the benefits of staining your kitchen table black, let's dive into the steps to achieve this look:
1. Prepare the Table:
Start by preparing the table for staining. Remove any existing finish or paint using sandpaper or a chemical stripper. Clean the table thoroughly and let it dry completely.
2. Apply the Stain:
Using a brush or cloth, apply a generous coat of black stain to the table. Make sure to follow the wood grain and cover the entire surface evenly. Let it sit for a few minutes, then wipe off any excess stain with a clean cloth.
3. Repeat if Necessary:
Depending on the type and darkness of the stain, you may need to apply multiple coats to achieve the desired color. Follow the instructions on the stain can for the recommended drying time between coats.
4. Seal the Table:
Once the desired color is achieved, seal the table with a clear polyurethane finish for added durability and protection. Apply a few coats, allowing each coat to dry completely before applying the next.
5. Let it Cure:
Finally, let the table cure for at least 24 hours before using it. This will ensure that the stain and finish have properly set.
Now that you know the benefits of staining your kitchen table black, let's dive into the steps to achieve this look:
1. Prepare the Table:
Start by preparing the table for staining. Remove any existing finish or paint using sandpaper or a chemical stripper. Clean the table thoroughly and let it dry completely.
2. Apply the Stain:
Using a brush or cloth, apply a generous coat of black stain to the table. Make sure to follow the wood grain and cover the entire surface evenly. Let it sit for a few minutes, then wipe off any excess stain with a clean cloth.
3. Repeat if Necessary:
Depending on the type and darkness of the stain, you may need to apply multiple coats to achieve the desired color. Follow the instructions on the stain can for the recommended drying time between coats.
4. Seal the Table:
Once the desired color is achieved, seal the table with a clear polyurethane finish for added durability and protection. Apply a few coats, allowing each coat to dry completely before applying the next.
5. Let it Cure:
Finally, let the table cure for at least 24 hours before using it. This will ensure that the stain and finish have properly set.
Final Thoughts
 Staining a kitchen table black may seem like a daunting task, but with the right materials and techniques, it can be a simple and rewarding project. Not only does it add a touch of elegance and style to your kitchen, but it also offers practical benefits such as easy maintenance and hiding imperfections. So why not give your kitchen a bold and sophisticated makeover by staining your kitchen table black?