Replacing a Bathroom Sink Drain
Replacing a bathroom sink drain may seem like a daunting task, but with the right tools and knowledge, it can be a simple DIY project. Whether your drain is clogged or simply old and worn out, replacing it can improve the functionality and aesthetic of your bathroom sink. Here's a step-by-step guide on how to replace a bathroom sink drain.


Replacing a Bathroom Sink Drain


How to Replace a Bathroom Sink Drain
The first step in replacing a bathroom sink drain is to gather all the necessary tools. You will need a pair of pliers, a pipe wrench, a basin wrench, a screwdriver, and a new drain assembly. Make sure to turn off the water supply to your sink before starting the replacement process.


How to Replace a Bathroom Sink Drain


DIY Bathroom Sink Drain Replacement
If you're a DIY enthusiast, replacing a bathroom sink drain can be a satisfying project to tackle on your own. Start by removing the old drain assembly. Use the pliers to loosen and remove the locking nut on the bottom of the sink. Then use the pipe wrench to loosen and remove the drain tailpiece from the drainpipe.
Next, use the basin wrench to remove the mounting nut that holds the drain assembly in place. Once the old assembly is removed, clean the area around the drain hole thoroughly. This will ensure a proper seal for the new drain assembly.


DIY Bathroom Sink Drain Replacement


Step-by-Step Guide for Replacing a Bathroom Sink Drain
After cleaning the area, insert the new drain assembly into the drain hole. Use the basin wrench to tighten the mounting nut and secure the assembly in place. Then, attach the drain tailpiece to the drainpipe using the pipe wrench. Make sure to tighten the connections properly to prevent any leaks.
Next, attach the pop-up assembly to the drain with the included screws. This will allow you to open and close the drain stopper as needed. Finally, turn the water supply back on and test the new drain assembly for any leaks. If everything looks good, your bathroom sink should now have a new and functional drain.


Step-by-Step Guide for Replacing a Bathroom Sink Drain


:max_bytes(150000):strip_icc()/bathroom-sink-drain-installation-2718843-02-61e5ecbee1e949be8d8f45ac4f5a6797.jpg)
Tools Needed for Replacing a Bathroom Sink Drain
As mentioned earlier, you will need a few tools to replace a bathroom sink drain. These include pliers, a pipe wrench, a basin wrench, and a screwdriver. It's important to have these tools readily available before starting the replacement process to avoid any delays or interruptions.


Tools Needed for Replacing a Bathroom Sink Drain


Common Problems When Replacing a Bathroom Sink Drain
Replacing a bathroom sink drain can come with a few common problems. One of the most common issues is improper installation, which can lead to leaks and water damage. It's important to follow the step-by-step guide mentioned earlier to ensure a proper installation.
Another problem that may arise is difficulty removing the old drain assembly. If the connections are rusted or stuck, it may require more force or the use of a lubricant to loosen them. If you encounter any major issues, it's best to seek professional help to avoid causing further damage.


Common Problems When Replacing a Bathroom Sink Drain


Tips for a Successful Bathroom Sink Drain Replacement
Here are a few tips to keep in mind for a successful bathroom sink drain replacement. First, make sure to turn off the water supply before starting the replacement process. This will prevent any potential flooding or accidents.
It's also important to clean the area around the drain hole thoroughly before installing the new assembly. This will ensure a proper seal and prevent any leaks. Lastly, make sure to tighten all connections properly to avoid future issues.


Tips for a Successful Bathroom Sink Drain Replacement


Cost of Replacing a Bathroom Sink Drain
The cost of replacing a bathroom sink drain can vary depending on the type of drain assembly and any potential repairs that may be needed. On average, the cost can range from $50 to $200. If you decide to hire a professional, the cost may be higher.
Cost of Replacing a Bathroom Sink Drain

Professional vs. DIY Bathroom Sink Drain Replacement
Deciding whether to hire a professional or do the replacement yourself ultimately depends on your skill level and comfort with DIY projects. While hiring a professional may cost more, it can save you time and ensure a proper installation. However, if you're confident in your DIY skills, replacing the drain on your own can be a rewarding experience.

Professional vs. DIY Bathroom Sink Drain Replacement


Preventing Future Issues with Your Bathroom Sink Drain
To prevent any future issues with your bathroom sink drain, make sure to clean it regularly and avoid pouring any harsh chemicals down the drain. Regularly checking for any leaks or clogs can also help catch any potential problems before they become major issues.
By following these tips and guidelines, you can successfully replace your bathroom sink drain and improve the functionality and appearance of your sink. Remember to have all the necessary tools, follow the step-by-step guide, and consider hiring a professional if needed. With a new drain assembly, your bathroom sink will be as good as new.

Preventing Future Issues with Your Bathroom Sink Drain


Replacing a Drain in Your Bathroom Sink: A Quick and Easy Guide

Why Replace Your Drain?
 Your bathroom sink's drain is an essential part of your plumbing system, responsible for removing used water and preventing clogs. Over time, buildup from hair, soap, and other debris can cause your drain to become slow or completely clogged. Not only is this frustrating, but it can also lead to foul odors and potential water damage. Replacing your drain is a simple and cost-effective solution to improve the functionality and appearance of your bathroom sink.
What You'll Need
 Featured keywords:
replacing drain, bathroom sink, plumbing system, clogs, debris, cost-effective, functionality, appearance.
Before you begin, gather the necessary tools and materials for the job. This may include a new drain, pliers, a wrench, plumber's putty, and a bucket to catch any excess water. It's also a good idea to have a towel or rag nearby to clean up any spills.
Featured keywords:
replacing drain, bathroom sink, plumbing system, clogs, debris, cost-effective, functionality, appearance.
Before you begin, gather the necessary tools and materials for the job. This may include a new drain, pliers, a wrench, plumber's putty, and a bucket to catch any excess water. It's also a good idea to have a towel or rag nearby to clean up any spills.
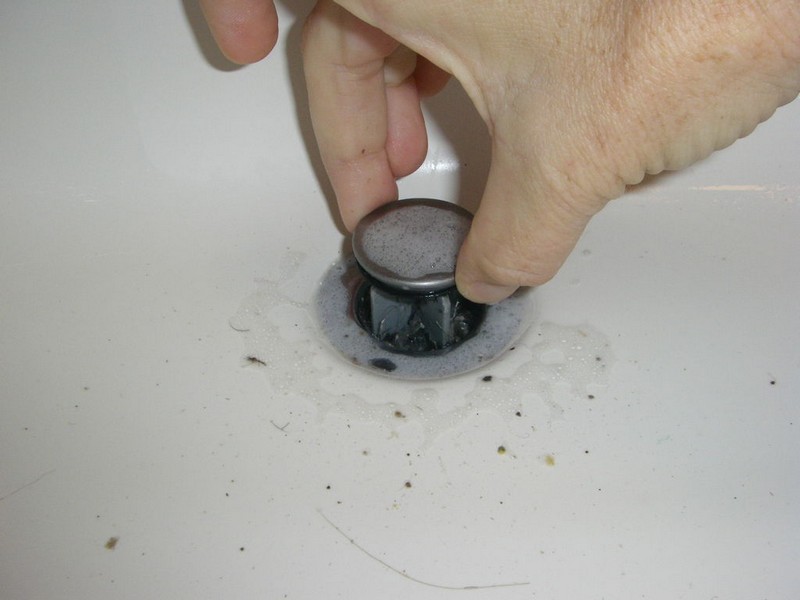
Step 1: Remove the Old Drain
 Start by removing the old drain from your bathroom sink. This can usually be done by unscrewing the drain's top portion with pliers or a wrench. Once removed, you may need to use a drain removal tool or pliers to loosen and remove the bottom portion of the drain.
Step 2: Clean the Area
 Related main keywords:
clean, area.
With the old drain removed, take the opportunity to clean the area around the drain thoroughly. Use a rag or brush to remove any leftover debris or buildup.
Related main keywords:
clean, area.
With the old drain removed, take the opportunity to clean the area around the drain thoroughly. Use a rag or brush to remove any leftover debris or buildup.
Step 3: Prepare the New Drain
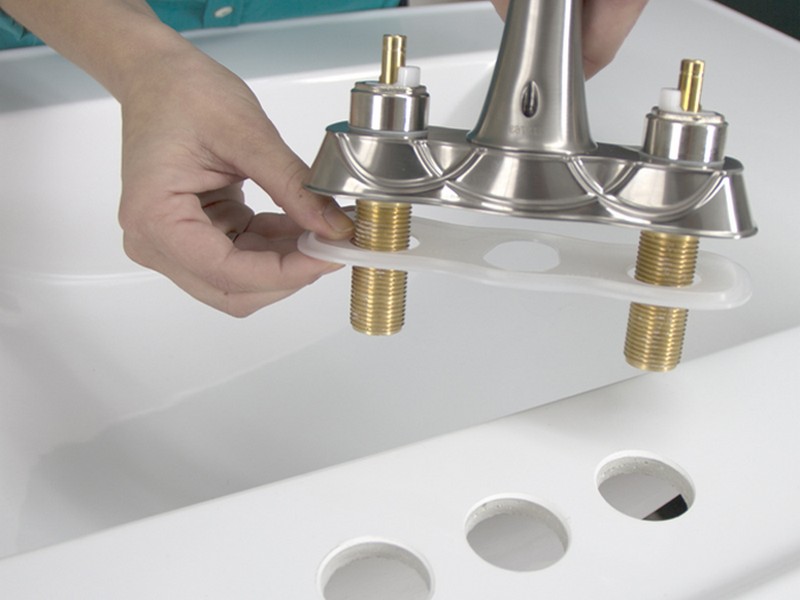
 Now it's time to prepare the new drain for installation. Apply plumber's putty around the bottom edge of the drain's flange. This will create a watertight seal between the drain and sink.
Step 4: Install the New Drain
 Place the new drain into the sink's drain opening, making sure it fits securely. Use pliers or a wrench to tighten the drain's top portion, creating a snug fit. Wipe away any excess putty that may have squeezed out.
Step 5: Test and Adjust
 Related main keywords:
test, adjust.
Before declaring the job complete, run some water through the newly installed drain to test its functionality. If you notice any leaks, use pliers or a wrench to adjust the drain's top portion until the leak stops.
Related main keywords:
test, adjust.
Before declaring the job complete, run some water through the newly installed drain to test its functionality. If you notice any leaks, use pliers or a wrench to adjust the drain's top portion until the leak stops.
In Conclusion
 Replacing a drain in your bathroom sink is a simple and budget-friendly way to improve the functionality and appearance of your bathroom. With the right tools and materials, this task can easily be completed in just a few steps. But if you are not confident in your DIY abilities, don't hesitate to call a professional plumber. They have the expertise and experience to get the job done quickly and efficiently. So, don't let a clogged or slow drain ruin your day – replace it and enjoy a fully functioning bathroom sink!