Are you tired of dealing with a malfunctioning or outdated kitchen sink sprayer head? Don't worry, replacing it is easier than you might think. With just a few simple steps, you can have a brand new sprayer head that works like a charm. In this article, we'll guide you through the process of replacing your kitchen sink sprayer head so you can have a more functional and efficient kitchen.How to Replace a Kitchen Sink Sprayer Head


How to Replace a Kitchen Sink Sprayer Head


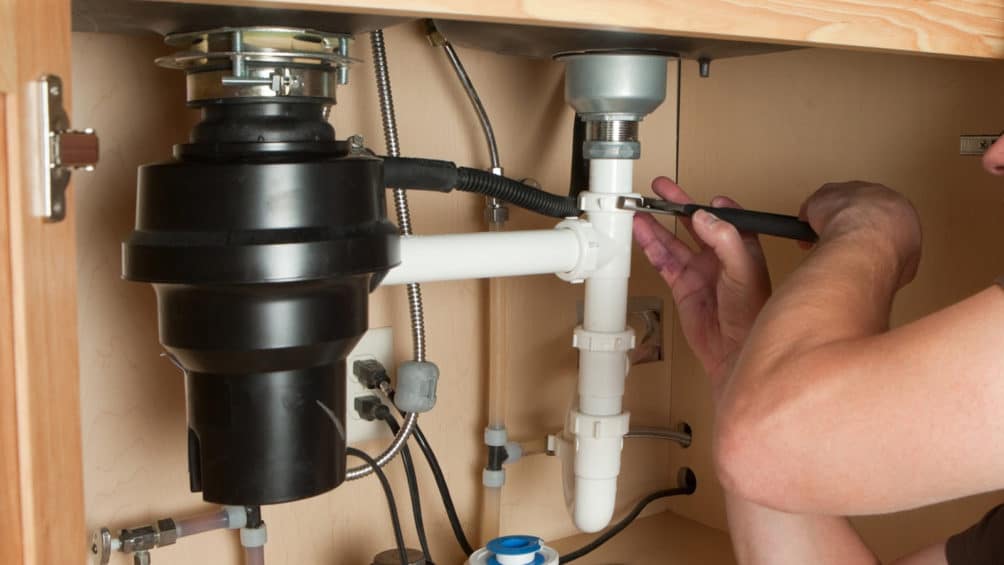
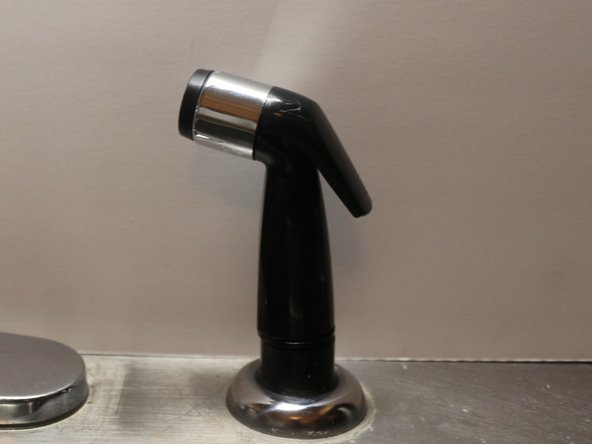
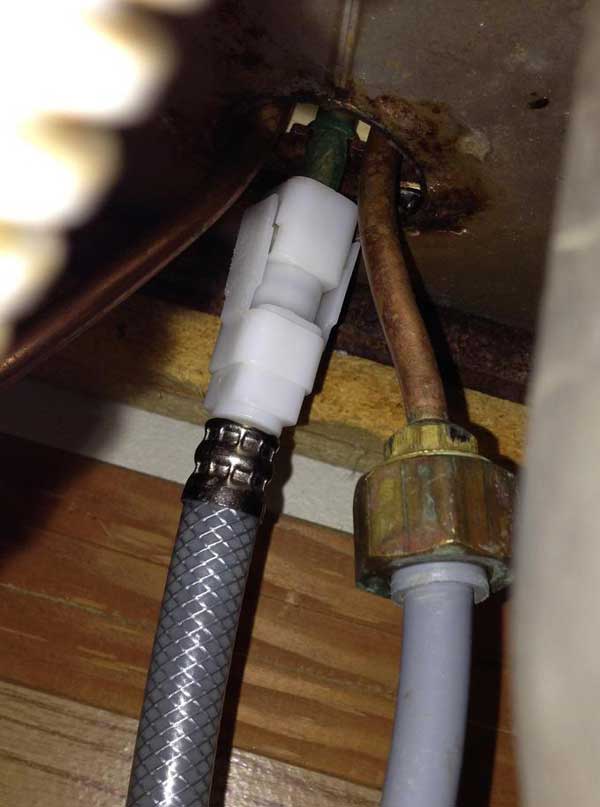
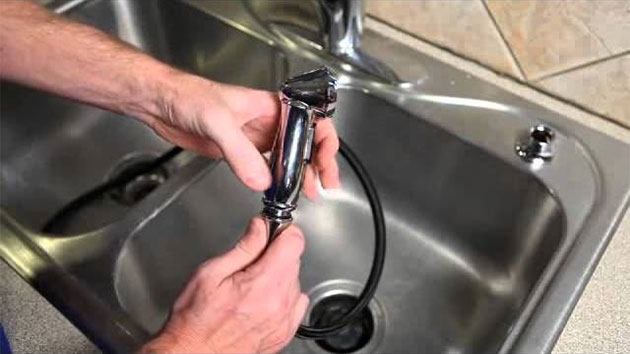
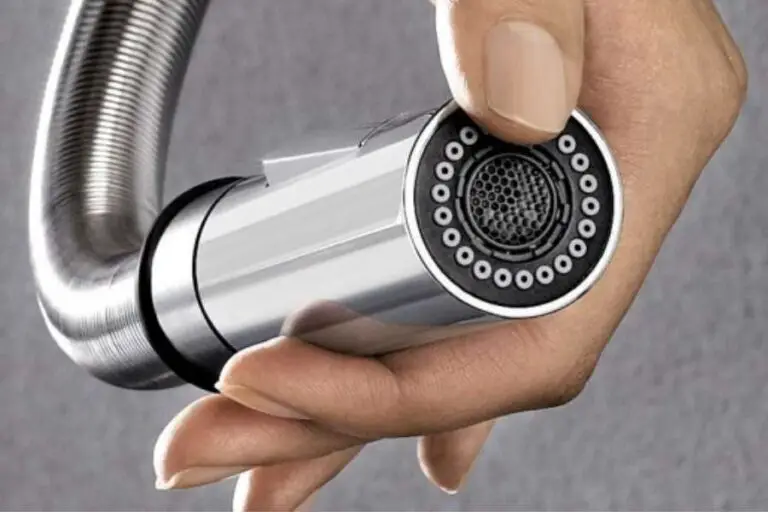
If you're ready to upgrade your kitchen sink sprayer head, follow these simple steps for a hassle-free replacement process: Step 1: Gather Your Materials Before you start the replacement process, make sure you have all the necessary tools and materials. You'll need a new sprayer head, pliers, a wrench, and some plumber's tape. It's also a good idea to have a bucket or towel nearby to catch any water that may leak out during the process. Step 2: Turn Off the Water Supply Before you start working on your sink, make sure to turn off the water supply. Look for the shut-off valves under your sink and turn them clockwise to shut off the water flow. Once the water is off, turn on the faucet to release any remaining water in the pipes. Step 3: Remove the Old Sprayer Head Using pliers, loosen the nuts that hold the old sprayer head in place. Once they're loose, you should be able to easily remove the old sprayer head from the hose. If the sprayer is stuck, you can use a wrench to loosen it. Be careful not to damage the hose or any other parts of your sink. Step 4: Prepare the New Sprayer Head Take your new sprayer head and wrap plumber's tape around the threads. This will help create a tight seal and prevent any leaks. Make sure to wrap the tape in a clockwise direction to prevent it from unraveling when you screw on the new sprayer head. Step 5: Install the New Sprayer Head Screw on the new sprayer head onto the hose and tighten it with pliers. Make sure it is securely in place and facing the correct direction. Then, tighten the nuts to hold the sprayer head in place. Be careful not to overtighten the nuts, as this can damage the hose or the sprayer head.Replacing a Kitchen Sink Sprayer Head: A Step-by-Step Guide


Replacing a Kitchen Sink Sprayer Head: A Step-by-Step Guide


If you're feeling confident, you can replace your kitchen sink sprayer head on your own without calling a professional plumber. Just follow these simple DIY steps: Step 1: Follow the Same Steps as Above Follow the same steps as outlined above to remove the old sprayer head and install the new one. Step 2: Clean and Check for Leaks Once your new sprayer head is installed, turn on the water supply to check for leaks. If you notice any leaks, tighten the nuts or wrap more plumber's tape around the threads. Also, make sure to clean the sprayer head to remove any debris or residue that may have accumulated during the installation process. Step 3: Test the New Sprayer Head Test out your new sprayer head by turning on the water and using the sprayer. Make sure it is functioning properly and that the water pressure is to your liking. If you notice any issues, you may need to adjust the water flow or tighten the connections.DIY: How to Replace a Kitchen Sink Sprayer Head


DIY: How to Replace a Kitchen Sink Sprayer Head


If you're short on time or just looking for a quick and easy guide, follow these simple steps to replace your kitchen sink sprayer head in no time: Step 1: Turn Off the Water Supply As mentioned before, make sure to turn off the water supply before starting the replacement process. Step 2: Remove the Old Sprayer Head Using pliers, loosen the nuts and remove the old sprayer head from the hose. Step 3: Install the New Sprayer Head Wrap plumber's tape around the threads and screw on the new sprayer head. Then, tighten the nuts to secure it in place. Step 4: Test and Adjust as Needed Turn on the water supply and test out your new sprayer head. Make any necessary adjustments to the water flow or connections.Quick and Easy Guide to Replacing a Kitchen Sink Sprayer Head


Quick and Easy Guide to Replacing a Kitchen Sink Sprayer Head

Here are a few tips and tricks to keep in mind when replacing your kitchen sink sprayer head: Tip 1: Use High-Quality Materials Invest in a high-quality sprayer head to ensure it lasts longer and functions better. Tip 2: Replace the Entire Sprayer Head Instead of just replacing the head, consider replacing the entire sprayer if it's outdated or malfunctioning. Tip 3: Follow the Manufacturer's Instructions Make sure to follow the manufacturer's instructions to ensure proper installation and function of your new sprayer head.Replacing a Kitchen Sink Sprayer Head: Tips and Tricks


Replacing a Kitchen Sink Sprayer Head: Tips and Tricks


If you prefer a detailed and comprehensive guide, follow these step-by-step instructions for replacing your kitchen sink sprayer head: Step 1: Gather Your Materials As mentioned before, make sure to have all the necessary tools and materials before starting the replacement process. Step 2: Turn Off the Water Supply Always remember to turn off the water supply before working on your sink. Step 3: Remove the Old Sprayer Head Loosen the nuts and remove the old sprayer head from the hose. Step 4: Clean and Prep the New Sprayer Head Make sure to clean the new sprayer head and wrap plumber's tape around the threads. Step 5: Install the New Sprayer Head Screw on the new sprayer head and tighten the nuts to secure it in place. Step 6: Turn On the Water Supply and Test Turn on the water supply and test out your new sprayer head. Make any necessary adjustments.Step-by-Step Instructions for Replacing a Kitchen Sink Sprayer Head

Step-by-Step Instructions for Replacing a Kitchen Sink Sprayer Head


Here are a few things you should know before replacing your kitchen sink sprayer head: Know 1: Different Types of Sprayer Heads Make sure to choose a sprayer head that is compatible with your sink and faucet. Know 2: Check for Leaks Always check for leaks after installing a new sprayer head and make any necessary adjustments. Know 3: Call a Professional if Needed If you're unsure or uncomfortable with replacing the sprayer head yourself, don't hesitate to call a professional plumber for assistance.Replacing a Kitchen Sink Sprayer Head: What You Need to Know


Replacing a Kitchen Sink Sprayer Head: What You Need to Know
/installing-a-kitchen-sink-sprayer-2718817-hero-2b7047468d594da6be2494ba0eebb480.jpg)
/25089301983_c5145fe85d_o-58418ef15f9b5851e5f392b5.jpg)

:max_bytes(150000):strip_icc()/installing-a-kitchen-sink-sprayer-2718817-05-36c4e6f6c5f34c7abed7277ee47c70c2.jpg)

:max_bytes(150000):strip_icc()/installing-a-kitchen-sink-sprayer-2718817-09-eb32dfd25037467c99fc73cadde60281.jpg)
If you're looking for a quick and easy replacement process, follow these five simple steps: Step 1: Turn Off the Water Supply As always, turn off the water supply before starting any work on your sink. Step 2: Remove the Old Sprayer Head Loosen the nuts and remove the old sprayer head from the hose. Step 3: Prep and Install the New Sprayer Head Wrap plumber's tape around the threads and screw on the new sprayer head. Then, tighten the nuts to secure it in place. Step 4: Check for Leaks and Clean Turn on the water supply and check for leaks. Also, make sure to clean the new sprayer head. Step 5: Test and Adjust as Needed Test out the new sprayer head and make any necessary adjustments to the water flow or connections.How to Replace a Kitchen Sink Sprayer Head in 5 Simple Steps

How to Replace a Kitchen Sink Sprayer Head in 5 Simple Steps

Here are a few common mistakes to avoid when replacing your kitchen sink sprayer head: Mistake 1: Forgetting to Turn Off the Water Supply Always remember to turn off the water supply before working on your sink to avoid any accidents or water damage. Mistake 2: Overtightening Connections Be careful not to overtighten the nuts or connections, as this can damage the hose or sprayer head. Mistake 3: Not Using Plumber's Tape Make sure to wrap plumber's tape around the threads to prevent leaks and ensure a tight seal.Replacing a Kitchen Sink Sprayer Head: Common Mistakes to Avoid

Replacing a Kitchen Sink Sprayer Head: Common Mistakes to Avoid


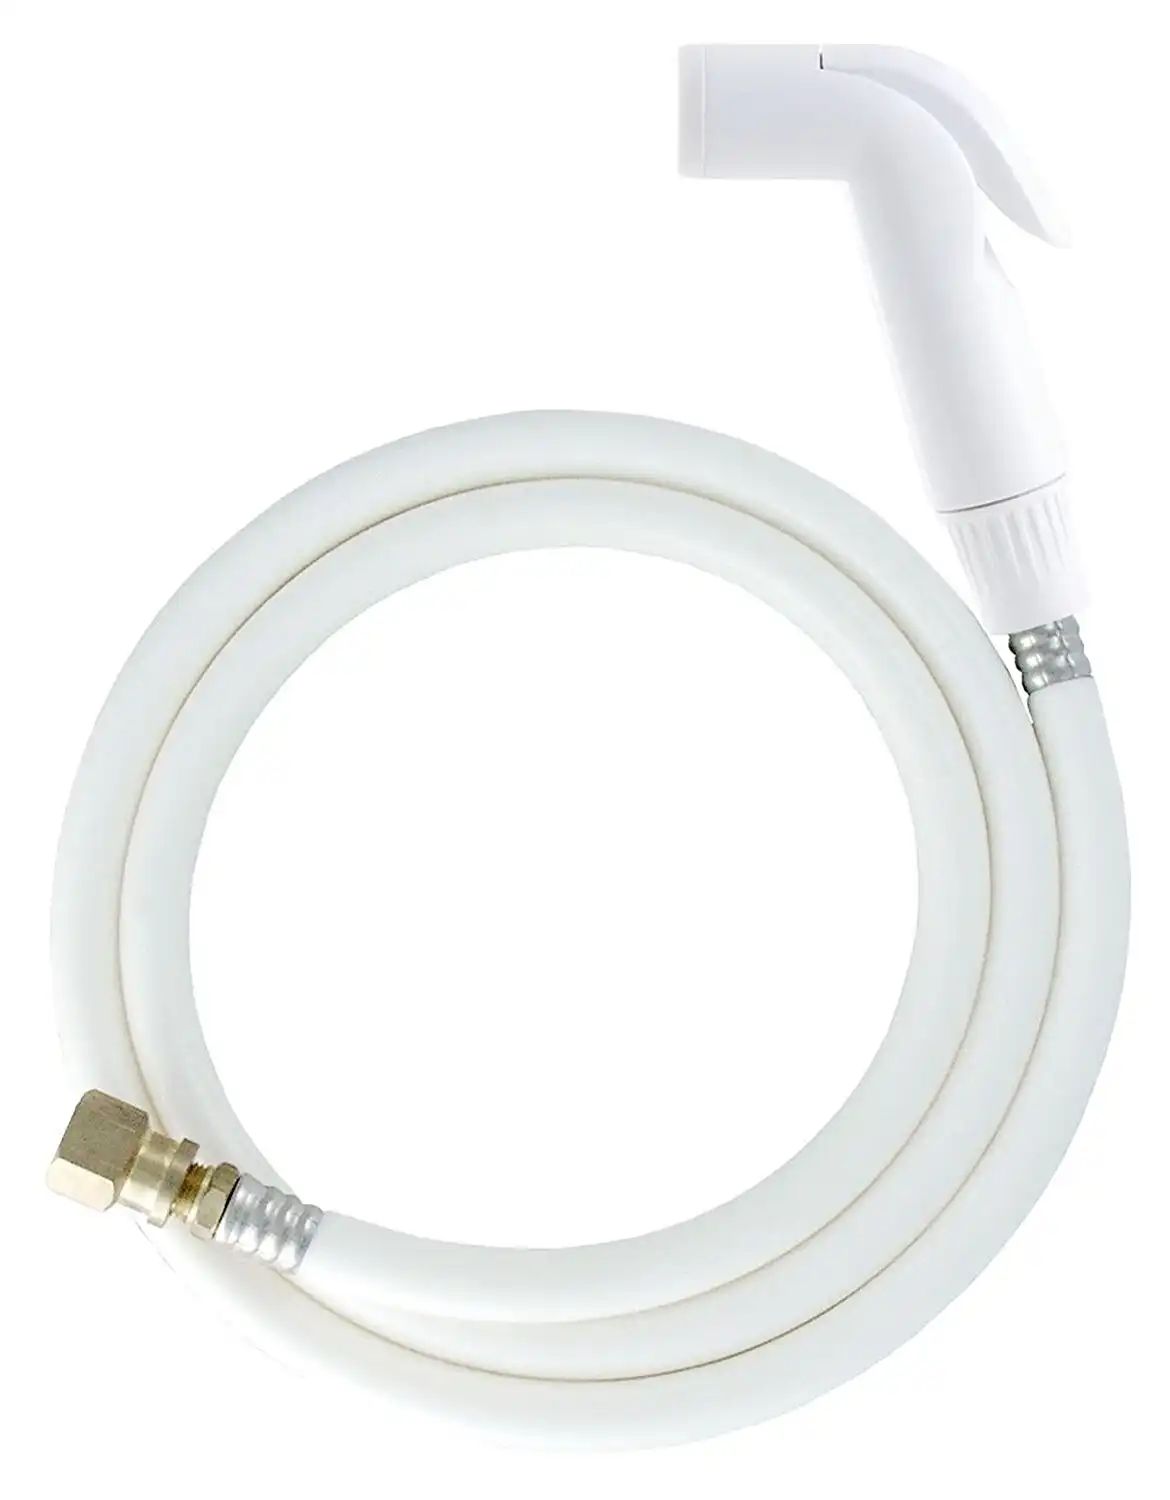
Here are some expert tips to keep in mind when replacing your kitchen sink sprayer head: Tip 1: Use Vinegar to Clean the Sprayer Head If your old sprayer head is clogged with mineral deposits, soak it in vinegar to clean it before installing the new one. Tip 2: Replace the Hose if Needed If your hose is old or damaged, it may be a good idea to replace it along with the sprayer head for better functionality. Tip 3: Consider Upgrading to a High-Pressure Sprayer Head If you're constantly struggling with low water pressure, consider upgrading to a high-pressure sprayer head for a more powerful and efficient spray.Expert Tips for Replacing a Kitchen Sink Sprayer Head

Expert Tips for Replacing a Kitchen Sink Sprayer Head
Why You Should Consider Replacing the Sprayer Head on Your Kitchen Sink

The Importance of a Functional Sprayer Head in Your Kitchen
 When it comes to kitchen design, functionality is just as important as aesthetics. While we often focus on the appearance of our kitchen, it's essential to also consider the efficiency and convenience of our appliances and fixtures. One crucial element that often gets overlooked is the sprayer head on our kitchen sink. This small component plays a vital role in our daily cooking and cleaning tasks, and if it's not functioning properly, it can cause frustration and inconvenience. That's why it's crucial to regularly check and replace the sprayer head when necessary.
Signs That Your Sprayer Head Needs to Be Replaced
 Just like any other appliance or fixture, the sprayer head on your kitchen sink can wear out over time. However, many homeowners tend to ignore the signs and continue using a faulty sprayer head. Some common signs that indicate it's time to replace your sprayer head include reduced water pressure, leaks, and difficulty switching between spray and stream functions. These issues not only hinder your daily tasks but can also lead to larger problems if left unaddressed.
The Benefits of Replacing Your Sprayer Head
 Replacing your sprayer head with a new, functional one can bring a host of benefits to your kitchen. Firstly, it will improve the overall functionality of your sink, making tasks such as washing dishes, rinsing fruits and vegetables, and filling pots and pans much more manageable. A new sprayer head can also save you time and effort, as it will provide stronger water pressure and better coverage. Additionally, a new sprayer head can enhance the appearance of your kitchen, especially if you choose a modern and sleek design.
HTML Code:
Replacing your sprayer head with a new, functional one can bring a host of benefits to your kitchen. Firstly, it will improve the overall functionality of your sink, making tasks such as washing dishes, rinsing fruits and vegetables, and filling pots and pans much more manageable. A new sprayer head can also save you time and effort, as it will provide stronger water pressure and better coverage. Additionally, a new sprayer head can enhance the appearance of your kitchen, especially if you choose a modern and sleek design.
HTML Code:
<h2>
Why You Should Consider Replacing the Sprayer Head on Your Kitchen Sink
</h2>

<h3>
The Importance of a Functional Sprayer Head in Your Kitchen
</h3>

When it comes to kitchen design, functionality is just as important as aesthetics. While we often focus on the appearance of our kitchen, it's essential to also consider the efficiency and convenience of our appliances and fixtures. One crucial element that often gets overlooked is the sprayer head on our kitchen sink. This small component plays a vital role in our daily cooking and cleaning tasks, and if it's not functioning properly, it can cause frustration and inconvenience. That's why it's crucial to regularly check and replace the sprayer head when necessary.
<h3>
Signs That Your Sprayer Head Needs to Be Replaced
</h3>

Just like any other appliance or fixture, the sprayer head on your kitchen sink can wear out over time. However, many homeowners tend to ignore the signs and continue using a faulty sprayer head. Some common signs that indicate it's time to replace your sprayer head include reduced water pressure, leaks, and difficulty switching between spray and stream functions. These issues not only hinder your daily tasks but can also lead to larger problems if left unaddressed.
<h3>
The Benefits of Replacing Your Sprayer Head
</h3>

Replacing your sprayer head with a new, functional one can bring a host of benefits to your kitchen. Firstly, it will improve the overall functionality of your sink, making tasks such as washing dishes, rinsing fruits and vegetables, and filling pots and pans much more manageable. A new sprayer head can also save you time and effort, as it will provide stronger water pressure and better coverage. Additionally, a new sprayer head can enhance the appearance of your kitchen, especially if you choose a modern and sleek design.