Removing a Kitchen Sink Drain Assembly
Removing a kitchen sink drain assembly may seem like a daunting task, but with the right tools and knowledge, it can be a simple DIY project. Whether you're replacing an old, rusty drain or simply want to clean out any buildup, the following guide will provide you with step-by-step instructions on how to remove a kitchen sink drain assembly.


Removing a Kitchen Sink Drain Assembly
:max_bytes(150000):strip_icc()/how-to-install-a-sink-drain-2718789-hero-24e898006ed94c9593a2a268b57989a3.jpg)


How to Remove a Kitchen Sink Drain Assembly
The first step in removing a kitchen sink drain assembly is to gather all the necessary tools. You will need a pair of pliers, a screwdriver, and a drain removal tool. It's also helpful to have a bucket or towel nearby to catch any water that may spill out during the process.


How to Remove a Kitchen Sink Drain Assembly


Step-by-Step Guide for Removing a Kitchen Sink Drain Assembly
1. Begin by turning off the water supply to your sink. This can usually be done by turning the shut-off valves located under the sink clockwise.
2. Next, remove any items from the sink and place a bucket or towel underneath the drain to catch any excess water.
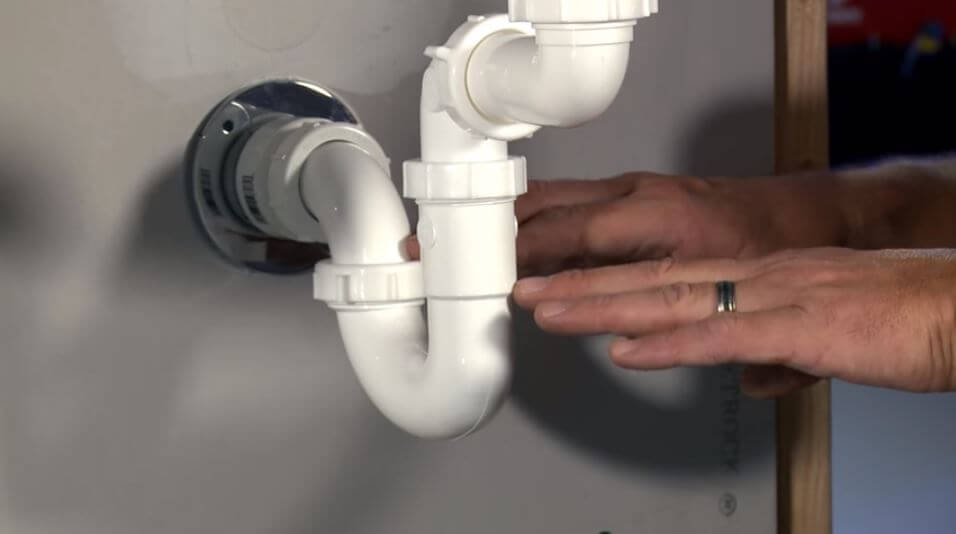
3. Using pliers, loosen the slip nuts that connect the P-trap to the sink drain and remove the P-trap.
4. Locate the locknut that secures the drain assembly to the sink and loosen it with pliers or a drain removal tool.
5. Once the locknut is removed, the drain assembly should be able to be pulled out of the sink.
6. If the drain is difficult to remove, you may need to use a drain removal tool to loosen and remove it.
7. Once the drain assembly is removed, clean any buildup or debris from the sink opening.


Step-by-Step Guide for Removing a Kitchen Sink Drain Assembly


DIY: Removing a Kitchen Sink Drain Assembly
Removing a kitchen sink drain assembly is a task that can easily be done by yourself without the need for a professional plumber. By following the steps outlined above, you can save money and have the satisfaction of completing the project on your own.

DIY: Removing a Kitchen Sink Drain Assembly


Tools Needed for Removing a Kitchen Sink Drain Assembly
To remove a kitchen sink drain assembly, you will need a pair of pliers, a screwdriver, and a drain removal tool. These tools can easily be found at your local hardware store and are essential for a successful removal process.


Tools Needed for Removing a Kitchen Sink Drain Assembly
/how-to-install-a-sink-drain-2718789-hero-24e898006ed94c9593a2a268b57989a3.jpg)

Tips for Removing a Kitchen Sink Drain Assembly
1. When removing a drain assembly, it's important to be gentle and not force anything. If the drain is difficult to remove, try using a drain removal tool instead of excessive force.
2. It's important to have a bucket or towel ready to catch any water that may spill out during the removal process.
3. Before installing a new drain assembly, make sure to thoroughly clean the sink opening to ensure a proper fit.


Tips for Removing a Kitchen Sink Drain Assembly
/how-to-install-a-sink-drain-2718789-hero-b5b99f72b5a24bb2ae8364e60539cece.jpg)
Common Mistakes When Removing a Kitchen Sink Drain Assembly
One common mistake when removing a kitchen sink drain assembly is using excessive force. This can damage the pipes and make the removal process more difficult. It's important to be patient and use the right tools for the job.
Common Mistakes When Removing a Kitchen Sink Drain Assembly


Video Tutorial: Removing a Kitchen Sink Drain Assembly
If you prefer visual instructions, there are many helpful video tutorials available online that can guide you through the process of removing a kitchen sink drain assembly. These videos can provide additional tips and tricks for a successful removal.


Video Tutorial: Removing a Kitchen Sink Drain Assembly


Removing a Rusty Kitchen Sink Drain Assembly
If your kitchen sink drain assembly is rusty, it may be more difficult to remove. In this case, using a rust penetrant spray can help loosen the assembly and make it easier to remove. It's important to thoroughly clean the sink opening after removing the assembly to prevent any rust from spreading.

Removing a Rusty Kitchen Sink Drain Assembly

Alternative Methods for Removing a Kitchen Sink Drain Assembly
If the methods outlined above are not successful in removing the drain assembly, there are alternative methods that can be used. These include using a hammer and chisel to break the assembly apart, or using a reciprocating saw to cut through the assembly. However, these methods should only be used as a last resort and may cause damage to the sink or surrounding pipes.
Removing a kitchen sink drain assembly may seem like a daunting task, but with the right tools and knowledge, it can be a simple DIY project. By following the steps outlined in this guide, you can successfully remove a drain assembly and have a clean, functional sink. Remember to take your time and be gentle to avoid any potential mistakes or damage.
Alternative Methods for Removing a Kitchen Sink Drain Assembly


Tools for Removing Kitchen Sink Drain Assembly

Essential Tools for the Job
 When it comes to removing a kitchen sink drain assembly, having the right tools is crucial. Without them, the process can be time-consuming and frustrating. Here are the essential tools you will need to successfully remove your kitchen sink drain assembly:
1. Plunger:
A plunger is a basic tool that can be used to unclog drains. It works by creating suction to remove any blockages in the drain. Make sure you have a plunger on hand in case you encounter any clogs while removing the drain assembly.
2. Wrenches:
Wrenches are necessary for loosening and tightening the nuts and bolts that hold the drain assembly in place. A
pipe wrench
will be needed to grip and turn the larger nuts, while a
basin wrench
will be necessary for hard-to-reach areas.
3. Screwdriver:
A screwdriver will be needed to remove any screws that may be holding the drain assembly in place. A
Phillips head screwdriver
is typically used for this task.
4. Bucket:
It's always a good idea to have a bucket on hand when working on any plumbing project. This will come in handy for catching any water or debris that may come out of the drain assembly.
5. Putty Knife:
A putty knife is useful for scraping off any old plumber's putty that may be stuck to the sink or drain assembly. This will make it easier to remove the assembly without causing any damage.
When it comes to removing a kitchen sink drain assembly, having the right tools is crucial. Without them, the process can be time-consuming and frustrating. Here are the essential tools you will need to successfully remove your kitchen sink drain assembly:
1. Plunger:
A plunger is a basic tool that can be used to unclog drains. It works by creating suction to remove any blockages in the drain. Make sure you have a plunger on hand in case you encounter any clogs while removing the drain assembly.
2. Wrenches:
Wrenches are necessary for loosening and tightening the nuts and bolts that hold the drain assembly in place. A
pipe wrench
will be needed to grip and turn the larger nuts, while a
basin wrench
will be necessary for hard-to-reach areas.
3. Screwdriver:
A screwdriver will be needed to remove any screws that may be holding the drain assembly in place. A
Phillips head screwdriver
is typically used for this task.
4. Bucket:
It's always a good idea to have a bucket on hand when working on any plumbing project. This will come in handy for catching any water or debris that may come out of the drain assembly.
5. Putty Knife:
A putty knife is useful for scraping off any old plumber's putty that may be stuck to the sink or drain assembly. This will make it easier to remove the assembly without causing any damage.
Optional Tools for Easier Removal
 While the above tools are necessary for removing a kitchen sink drain assembly, there are a few optional tools that can make the process even easier:
1. Drain Key:
A drain key is a specialized tool used for removing stubborn drain assemblies. It works by gripping onto the drain flange and allowing you to unscrew it from the bottom of the sink.
2. Drain Auger:
If you encounter a stubborn clog while removing the drain assembly, a drain auger can come to the rescue. This tool has a long, flexible cable that can reach deep into the drain to clear out any blockages.
3. Hacksaw:
In some cases, the drain assembly may be rusted or corroded, making it difficult to remove. In these situations, a hacksaw can be used to cut through the assembly and make it easier to remove.
While the above tools are necessary for removing a kitchen sink drain assembly, there are a few optional tools that can make the process even easier:
1. Drain Key:
A drain key is a specialized tool used for removing stubborn drain assemblies. It works by gripping onto the drain flange and allowing you to unscrew it from the bottom of the sink.
2. Drain Auger:
If you encounter a stubborn clog while removing the drain assembly, a drain auger can come to the rescue. This tool has a long, flexible cable that can reach deep into the drain to clear out any blockages.
3. Hacksaw:
In some cases, the drain assembly may be rusted or corroded, making it difficult to remove. In these situations, a hacksaw can be used to cut through the assembly and make it easier to remove.
Conclusion
 Having the right tools for the job is essential when it comes to removing a kitchen sink drain assembly. With a plunger, wrenches, screwdriver, bucket, and putty knife, you will be well-equipped to tackle this project. Optional tools such as a drain key, drain auger, and hacksaw can also be helpful in certain situations. Remember to always take your time and be careful when working on any plumbing project to avoid causing any damage.