Removing a bathroom sink coupling may seem like a daunting task, but with the right tools and knowledge, it can be done easily and efficiently. Whether you are replacing your old sink or just need to remove it for cleaning purposes, this step-by-step guide will walk you through the process and provide you with helpful tips and tricks along the way.Removing Bathroom Sink Coupling


Removing Bathroom Sink Coupling


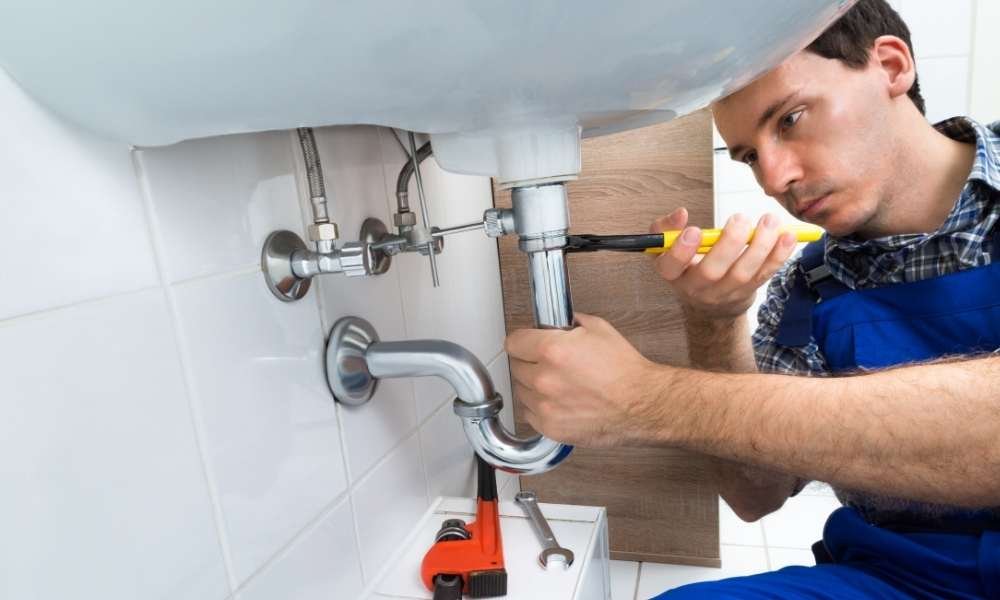
The first step to removing a bathroom sink coupling is to gather all the necessary tools. You will need an adjustable wrench, a bucket, and a cloth or towel to protect the sink and catch any water that may spill out during the process. It is also a good idea to wear gloves to protect your hands. Next, locate the water shut-off valves under the sink and turn them off. This will prevent any water from flowing out when you disconnect the coupling. Using the adjustable wrench, loosen the nuts connecting the water supply lines to the coupling. Once they are loose, use your hands to unscrew them completely and set them aside. Now, use the adjustable wrench to loosen the coupling nut that connects the sink drain to the coupling. Once it is loose, use your hands to unscrew it completely and set it aside. With all the nuts and connections loosened, you should be able to lift the sink slightly and disconnect it from the coupling. Place the sink on a stable surface and remove any remaining water from the sink and the drain. Finally, use a wrench to loosen the coupling nut holding the sink in place. Once it is loose, you should be able to lift the sink out and set it aside.How to Remove a Bathroom Sink Coupling


How to Remove a Bathroom Sink Coupling


To summarize, here is a step-by-step guide for removing a bathroom sink coupling: Step 1: Gather all necessary tools and turn off the water supply. Step 2: Loosen and remove the nuts connecting the water supply lines to the coupling. Step 3: Loosen and remove the nut connecting the sink drain to the coupling. Step 4: Lift the sink slightly and disconnect it from the coupling. Step 5: Remove any remaining water from the sink and drain. Step 6: Loosen and remove the coupling nut holding the sink in place. Step 7: Lift the sink out and set it aside.Step-by-Step Guide for Removing Bathroom Sink Coupling


Step-by-Step Guide for Removing Bathroom Sink Coupling


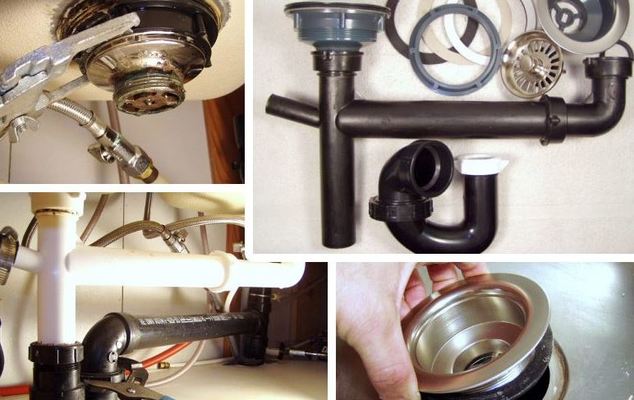
/bathroom-sink-drain-installation-2718843-01-4955fe1f576b447a91abe51c126d220b.jpg)
Here are some helpful tips and tricks to keep in mind when removing a bathroom sink coupling: Tip 1: Before starting the process, it is always a good idea to read the manufacturer's instructions for your specific sink and coupling. Tip 2: If the coupling nut is stuck, try using some lubricant to loosen it. Tip 3: If you are having trouble disconnecting the sink from the coupling, try using a putty knife to gently pry it apart. Tip 4: Always turn off the water supply before disconnecting any plumbing connections. Tip 5: Have a bucket and cloth or towel ready to catch any water that may spill out during the process.Removing Bathroom Sink Coupling: Tips and Tricks

Removing Bathroom Sink Coupling: Tips and Tricks


Removing a bathroom sink coupling can easily be done as a DIY project. However, if you are not comfortable doing it yourself, it is always best to hire a professional plumber to ensure it is done correctly. If you do decide to take on this project yourself, make sure to follow the steps outlined in this guide and use the tips and tricks provided to make the process smoother and more efficient.DIY: Removing Bathroom Sink Coupling


DIY: Removing Bathroom Sink Coupling


While removing a bathroom sink coupling may seem like a simple task, there are some common mistakes that can be easily avoided: Mistake 1: Not turning off the water supply before disconnecting the coupling, causing a potential flood. Mistake 2: Using too much force to loosen the coupling nut, which can lead to damaging the nut or the sink. Mistake 3: Not protecting the sink and surrounding area, resulting in scratches or damage. Mistake 4: Forgetting to remove any remaining water from the sink and drain, causing a mess when moving the sink.Removing Bathroom Sink Coupling: Common Mistakes to Avoid


Removing Bathroom Sink Coupling: Common Mistakes to Avoid


Here is a list of the tools you will need to successfully remove a bathroom sink coupling: Adjustable wrench - for loosening and removing nuts Bucket - for catching any water that may spill out Cloth or towel - for protecting the sink and catching any water Gloves - for protecting your hands Putty knife - for gently prying apart the sink and couplingTools You'll Need for Removing Bathroom Sink Coupling


Tools You'll Need for Removing Bathroom Sink Coupling


If you encounter any issues while removing a bathroom sink coupling, here are some troubleshooting tips: Issue 1: The coupling nut is stuck and will not loosen. Solution: Try using a lubricant on the nut and letting it sit for a few minutes before attempting to loosen it again. Issue 2: The sink will not disconnect from the coupling. Solution: Use a putty knife to gently pry the sink and coupling apart. Issue 3: There is still water in the sink and drain after disconnecting the coupling. Solution: Use a cloth or sponge to remove any remaining water before moving the sink.Removing Bathroom Sink Coupling: Troubleshooting Guide
Removing Bathroom Sink Coupling: Troubleshooting Guide

When removing a bathroom sink coupling, it is important to take safety precautions to prevent any accidents or injuries: Precaution 1: Always turn off the water supply before disconnecting any plumbing connections. Precaution 2: Wear gloves to protect your hands from any sharp edges or potential leaks. Precaution 3: Use caution when using tools to avoid damaging the sink or plumbing connections.Removing Bathroom Sink Coupling: Safety Precautions

Removing Bathroom Sink Coupling: Safety Precautions


While removing a bathroom sink coupling can be done as a DIY project, it is always best to weigh the pros and cons before deciding whether to tackle it yourself or hire a professional: Professional: Hiring a professional plumber ensures that the job will be done correctly and efficiently. They have the knowledge and experience to handle any potential issues that may arise. DIY: Doing it yourself can save you money and give you a sense of accomplishment. However, if you are not comfortable or experienced in plumbing, it is best to hire a professional. In conclusion, removing a bathroom sink coupling may seem like a daunting task, but with the right tools and knowledge, it can be done easily and safely. By following this step-by-step guide and using the tips and tricks provided, you can successfully remove your bathroom sink coupling and complete your project with confidence.Removing Bathroom Sink Coupling: Professional vs. DIY

Removing Bathroom Sink Coupling: Professional vs. DIY
Why Removing Bathroom Sink Coupling is Important for Your House Design

The Function of Bathroom Sink Coupling
 Bathroom sink coupling is an essential component in any bathroom sink installation. It is the mechanism that connects the sink drain to the plumbing system, allowing water to flow in and out of the sink. The coupling also helps to keep the sink in place and prevents leaks from occurring. However, over time and with regular use, the coupling can become worn out or damaged, making it necessary to remove and replace it.
The Importance of Regular Maintenance
 Regular maintenance is crucial for any house design to ensure that all components are functioning properly and to avoid any potential problems. Bathroom sink coupling is no exception. As it is constantly exposed to water and other materials, it is prone to wear and tear, which can lead to leaks, blockages, and even mold growth. By regularly inspecting and replacing old and damaged couplings, you can prevent these issues from occurring and maintain the overall functionality and aesthetics of your bathroom.
Benefits of Removing Bathroom Sink Coupling
 Removing bathroom sink coupling is not only necessary for maintenance purposes, but it also offers several benefits for your house design. First and foremost, it allows you to replace old or damaged couplings with new and improved ones, ensuring better functionality and preventing any potential plumbing issues. Moreover, removing the coupling also provides an opportunity to clean the sink and the surrounding area, which can accumulate grime and bacteria over time. This will not only improve the overall cleanliness of your bathroom but also enhance its visual appeal.
Professional Help vs. DIY
 When it comes to removing bathroom sink coupling, you can either hire a professional plumber or do it yourself. While hiring a professional can save you time and effort, it can also be costly. On the other hand, removing the coupling yourself can be a relatively simple task, especially with the help of online tutorials and guides. However, it is crucial to have basic plumbing knowledge and the right tools to avoid causing any damage or complications.
In conclusion,
regular maintenance and timely removal of bathroom sink coupling are crucial for the proper functioning and aesthetic appeal of your house design. Whether you choose to do it yourself or hire a professional, make sure to prioritize this task to avoid any potential plumbing issues and maintain the overall cleanliness and functionality of your bathroom.
When it comes to removing bathroom sink coupling, you can either hire a professional plumber or do it yourself. While hiring a professional can save you time and effort, it can also be costly. On the other hand, removing the coupling yourself can be a relatively simple task, especially with the help of online tutorials and guides. However, it is crucial to have basic plumbing knowledge and the right tools to avoid causing any damage or complications.
In conclusion,
regular maintenance and timely removal of bathroom sink coupling are crucial for the proper functioning and aesthetic appeal of your house design. Whether you choose to do it yourself or hire a professional, make sure to prioritize this task to avoid any potential plumbing issues and maintain the overall cleanliness and functionality of your bathroom.