Removing a kitchen sink drain may seem like a daunting task, but with the right tools and knowledge, it can be done easily and quickly. Whether you're renovating your kitchen or simply need to replace a faulty drain, we've got you covered with this step-by-step guide on how to remove a kitchen sink drain.How to Remove a Kitchen Sink Drain


How to Remove a Kitchen Sink Drain


The first step to removing a kitchen sink drain is to gather all the necessary tools. You will need a pair of pliers, a screwdriver, a bucket, and a putty knife. Make sure to have these tools handy before you start the process.Step 1: Gather Your Tools


Removing a Kitchen Sink Drain: 5 Easy Steps


Before you start working on the sink drain, it's important to turn off the water supply. Locate the shut-off valves under the sink and turn them clockwise to shut off the water flow. This step is crucial to prevent any water damage or accidents.Step 2: Turn Off the Water Supply


DIY: How to Remove a Kitchen Sink Drain


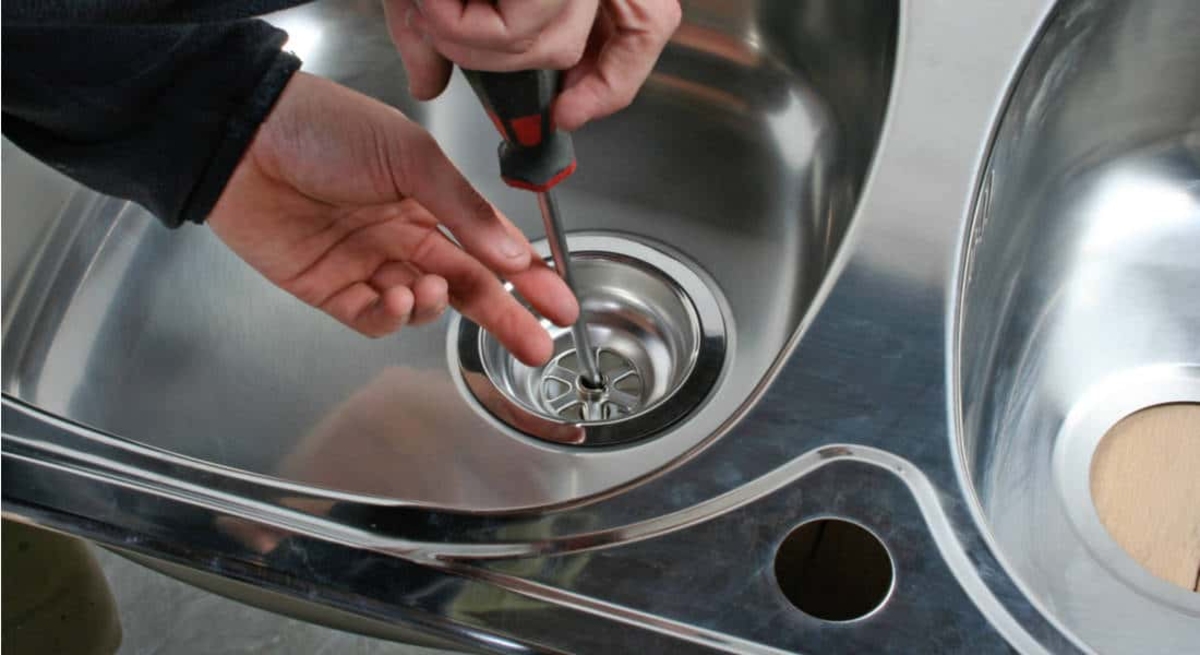
Using a screwdriver, remove the screws that hold the drain cover in place. Once the screws are removed, gently pull out the drain cover and set it aside. Make sure to keep the screws in a safe place so you don't lose them.Step 3: Remove the Drain Cover


Step-by-Step Guide to Removing a Kitchen Sink Drain


With the drain cover removed, you can now access the drain nut. Using pliers, grip the drain nut and turn it counterclockwise to loosen it. You may need to use some force as the drain nut can be tight. Once the nut is loose, remove it and set it aside.Step 4: Loosen the Drain Nut


Removing a Kitchen Sink Drain: Tips and Tricks


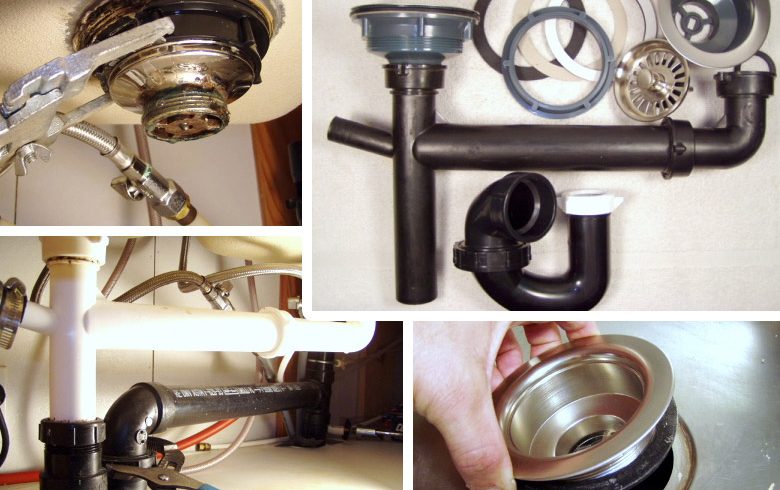
With the nut removed, you can now detach the drain pipe. Place a bucket underneath the pipe to catch any water that may still be in the sink. Using pliers, loosen the slip nuts that connect the drain pipe to the sink and the trap. Once the nuts are loose, you can easily remove the drain pipe.Step 5: Detach the Drain Pipe


The Best Way to Remove a Kitchen Sink Drain


Now that the drain pipe is detached, you can remove the drain flange. Using a putty knife, gently scrape off any remaining putty on the flange. Then, use pliers to grip the flange and turn it counterclockwise to remove it from the sink.Step 6: Remove the Drain Flange


Removing a Kitchen Sink Drain: Common Mistakes to Avoid


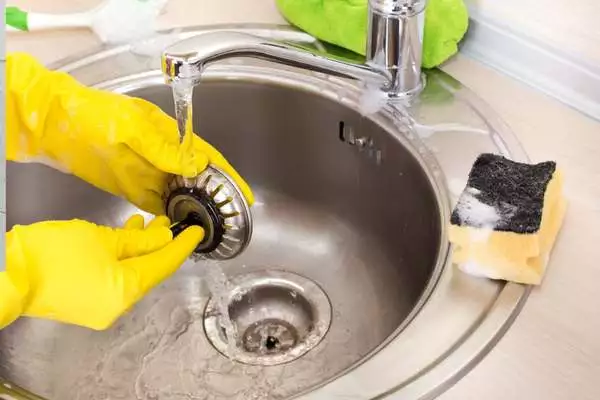
With the drain flange removed, you can now clean the sink and drain thoroughly. Use a mild detergent and warm water to clean any debris or build-up around the sink and drain. Make sure to rinse the area well and dry it with a clean cloth.Step 7: Clean the Sink and Drain


Quick and Easy Method for Removing a Kitchen Sink Drain


If you're replacing the drain, now is the time to prepare the new one. Apply a layer of plumber's putty around the drain flange and insert it into the sink drain. Make sure it is properly aligned and then secure it by tightening the drain nut from underneath the sink.Step 8: Prepare the New Drain


Removing a Kitchen Sink Drain: Tools You'll Need


With the new drain in place, you can now reattach the drain pipe. Apply some plumber's tape to the threads of the drain pipe and then connect it to the sink and trap. Use pliers to tighten the slip nuts and make sure there are no leaks.Step 9: Reattach the Drain Pipe

Step-by-Step Tutorial for Removing a Kitchen Sink Drain
:max_bytes(150000):strip_icc()/how-to-install-a-sink-drain-2718789-hero-24e898006ed94c9593a2a268b57989a3.jpg)

The Importance of Removing a Drain from Your Kitchen Sink

Why Removing a Drain is Necessary
 When it comes to kitchen design and functionality, the sink plays a crucial role. It is where we wash our hands, do dishes, and even prepare food. However, over time, the drain in our kitchen sink can become clogged and cause a range of problems, from slow draining to foul odors. This not only affects the efficiency of our daily tasks but also poses potential health hazards. That is why it is essential to regularly remove the drain from your kitchen sink to maintain a clean and hygienic space.
The Benefits of Removing a Drain
 One of the main benefits of removing a drain from your kitchen sink is to prevent clogs. As we use our sinks daily, it is inevitable for food particles, grease, and other debris to accumulate in our drains, causing blockages. By removing the drain, you can easily clean and remove any buildup, ensuring a smooth and efficient flow of water. This not only saves you from the hassle of dealing with a clogged sink but also helps to maintain the overall health and hygiene of your kitchen.
How to Remove a Drain from Your Kitchen Sink
 Removing a drain from your kitchen sink may seem like a daunting task, but it is a relatively simple process. First, you will need to gather the necessary tools, such as a wrench, pliers, and a drain key. Next, you will need to locate the drain pipe, which is usually found underneath the sink. Using the wrench, loosen the nuts and bolts that are holding the drain in place. Once the drain is loose, you can then use the pliers or drain key to remove it completely. Make sure to clean the drain thoroughly before reattaching it to the sink.
Related Keywords: kitchen design, sink functionality, clogged drain, clean and hygienic, prevent clogs, food particles, grease, debris, blockages, efficient flow of water, health and hygiene, daunting task, necessary tools, drain pipe, nuts and bolts, loosen, pliers, drain key, clean thoroughly, reattach.
Removing a drain from your kitchen sink may seem like a daunting task, but it is a relatively simple process. First, you will need to gather the necessary tools, such as a wrench, pliers, and a drain key. Next, you will need to locate the drain pipe, which is usually found underneath the sink. Using the wrench, loosen the nuts and bolts that are holding the drain in place. Once the drain is loose, you can then use the pliers or drain key to remove it completely. Make sure to clean the drain thoroughly before reattaching it to the sink.
Related Keywords: kitchen design, sink functionality, clogged drain, clean and hygienic, prevent clogs, food particles, grease, debris, blockages, efficient flow of water, health and hygiene, daunting task, necessary tools, drain pipe, nuts and bolts, loosen, pliers, drain key, clean thoroughly, reattach.