Moving a kitchen sink to an exterior wall can be a daunting task, but it can also be a game changer when it comes to the layout and functionality of your kitchen. Not only does it open up more counter space, but it also allows for better natural lighting and ventilation. Whether you're doing a DIY kitchen renovation or hiring a professional, here's a step-by-step guide on how to successfully move your kitchen sink to an exterior wall.How to Move a Kitchen Sink to an Exterior Wall


How to Move a Kitchen Sink to an Exterior Wall


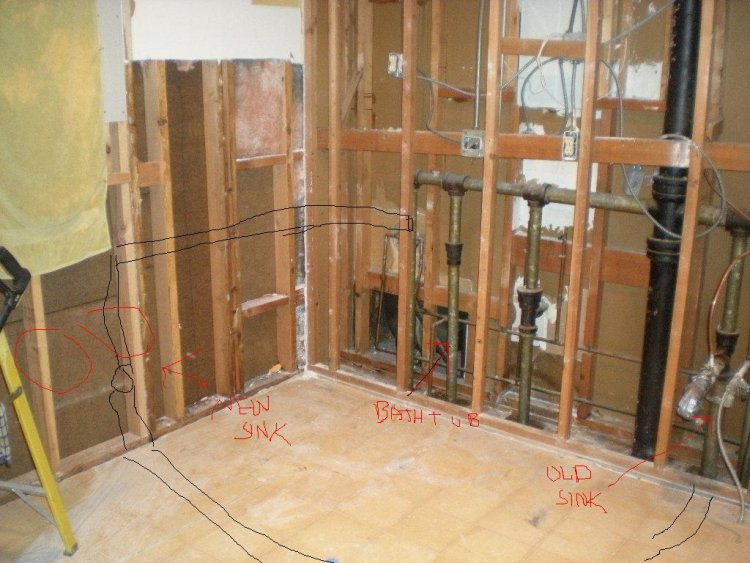
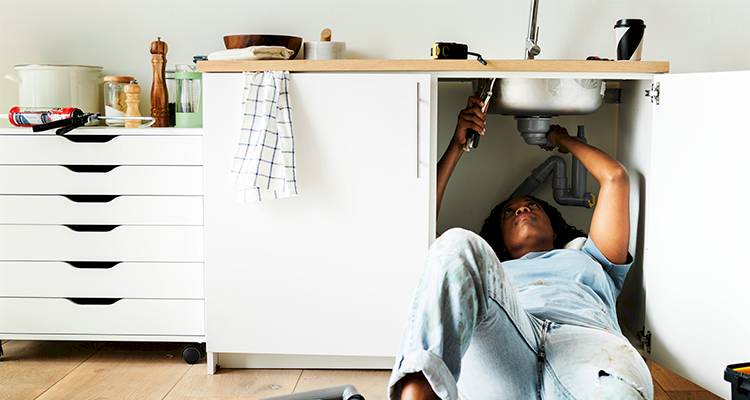
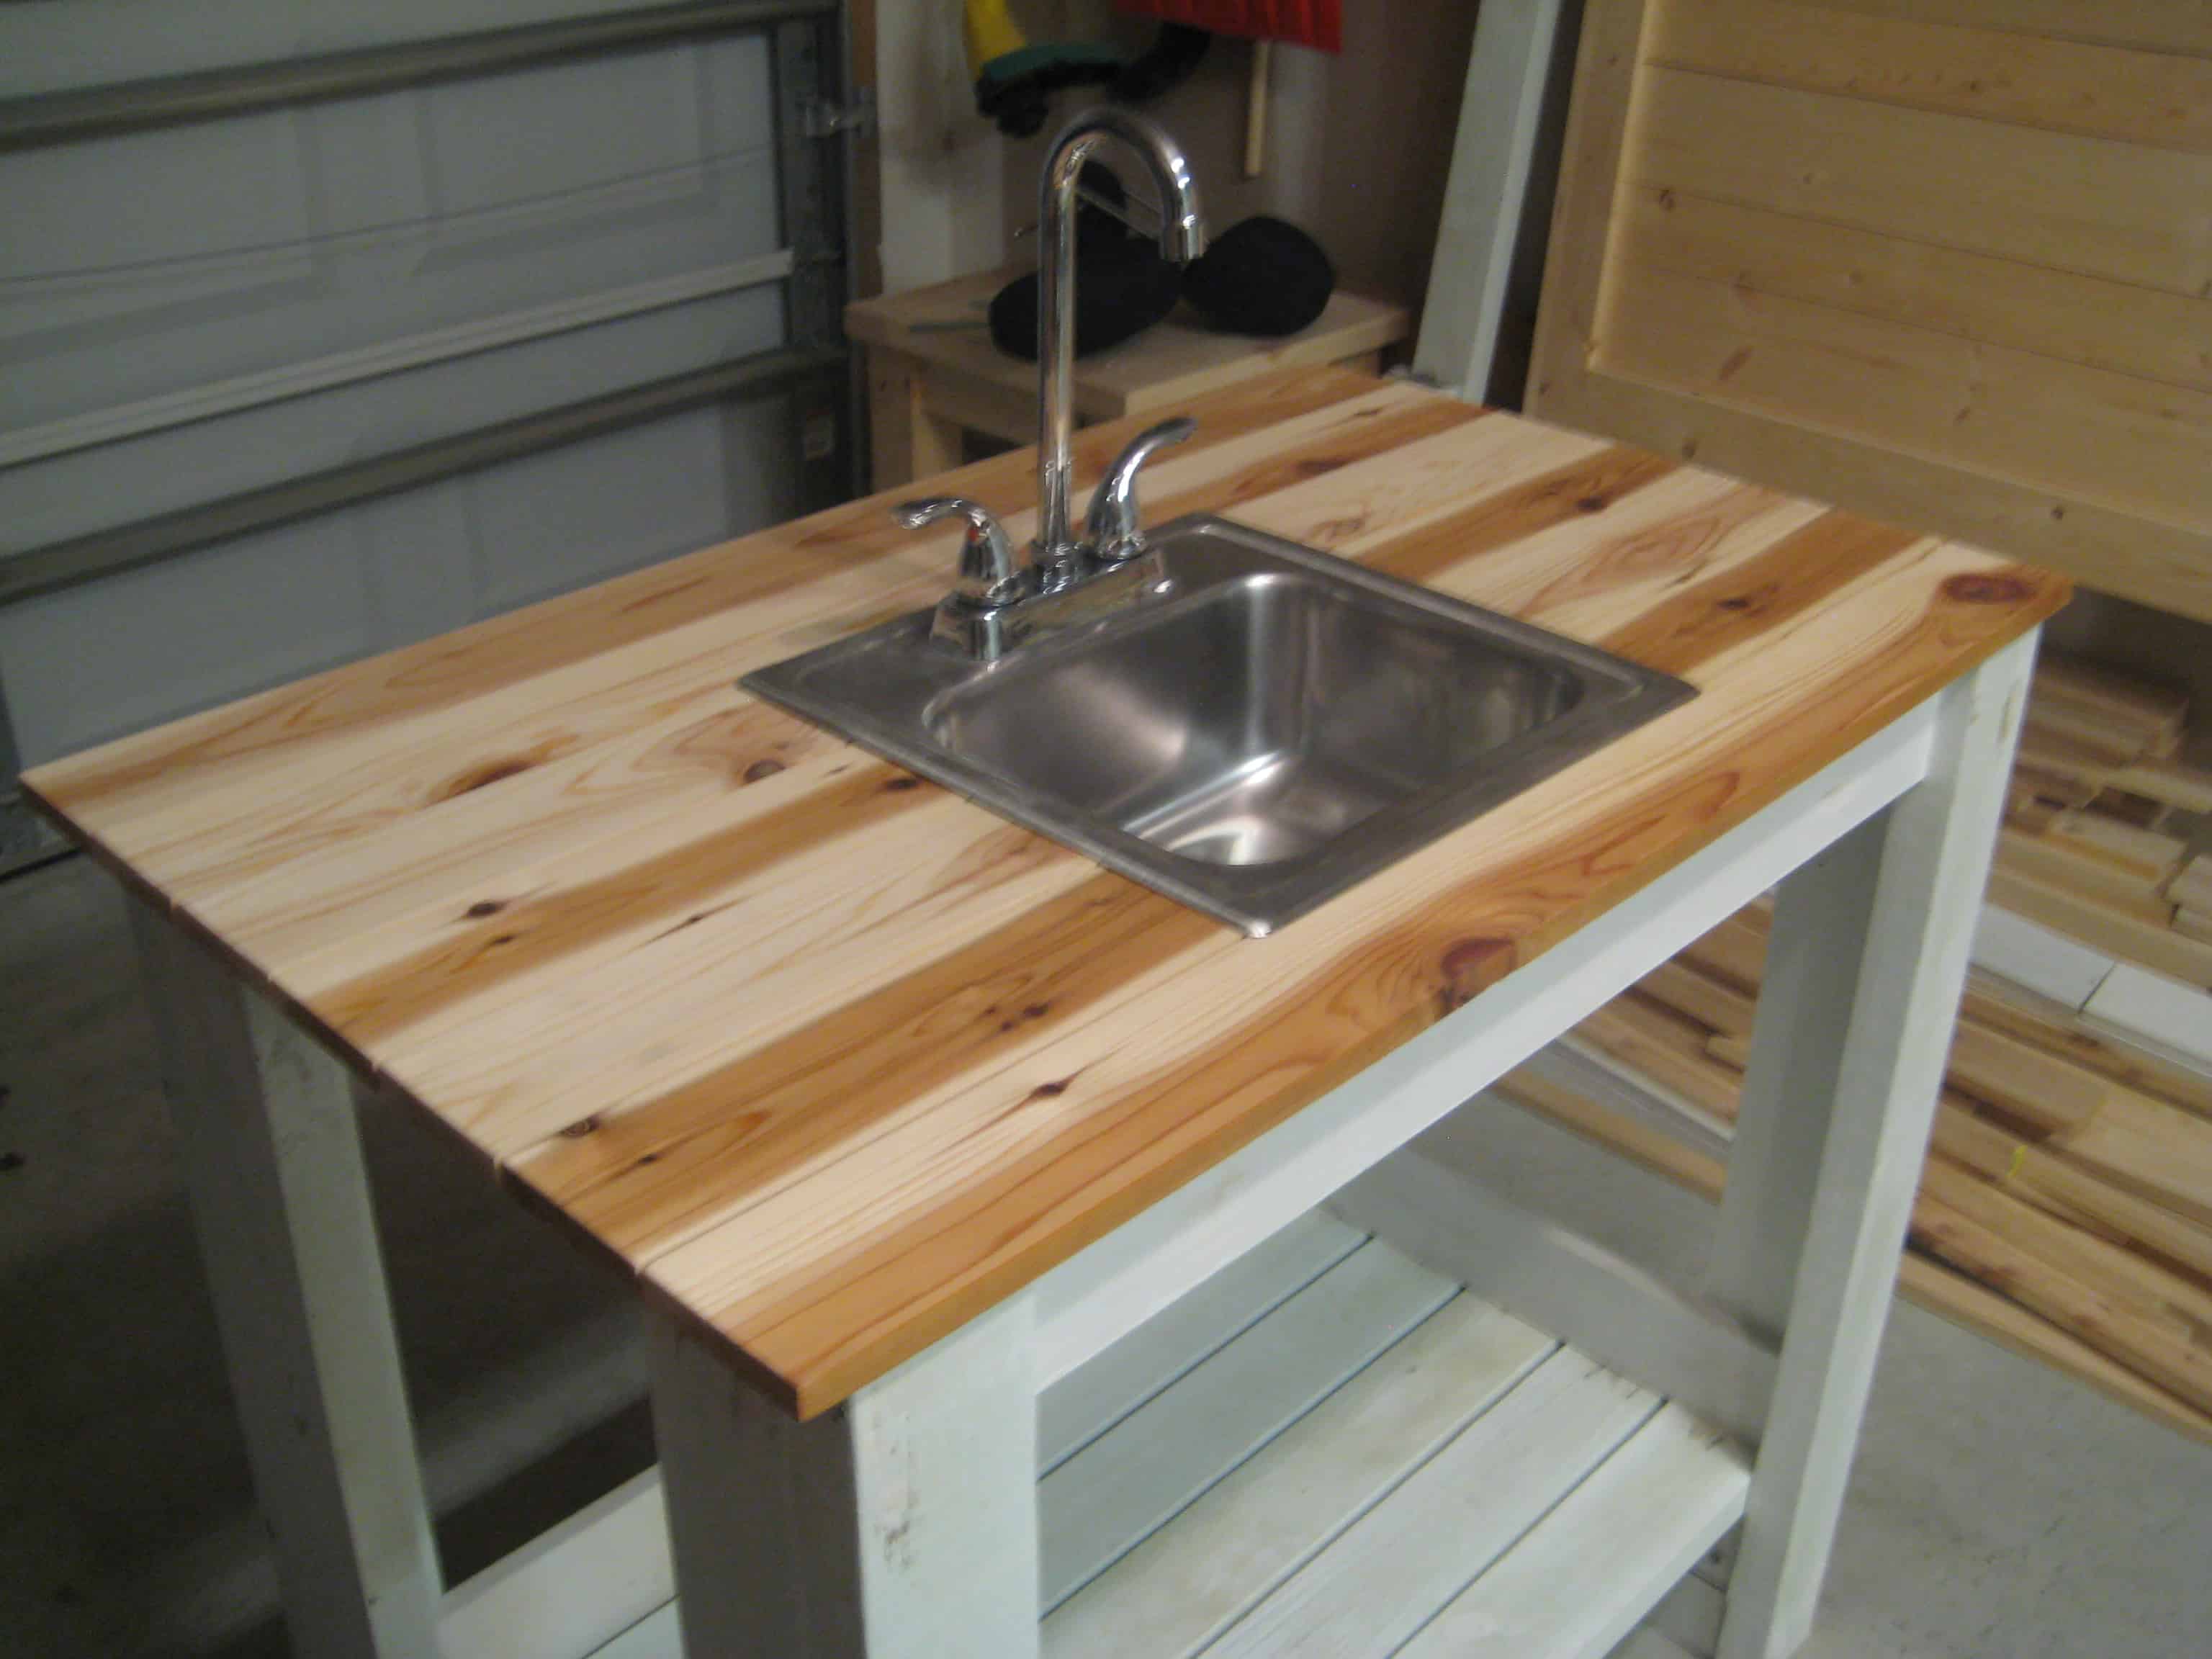
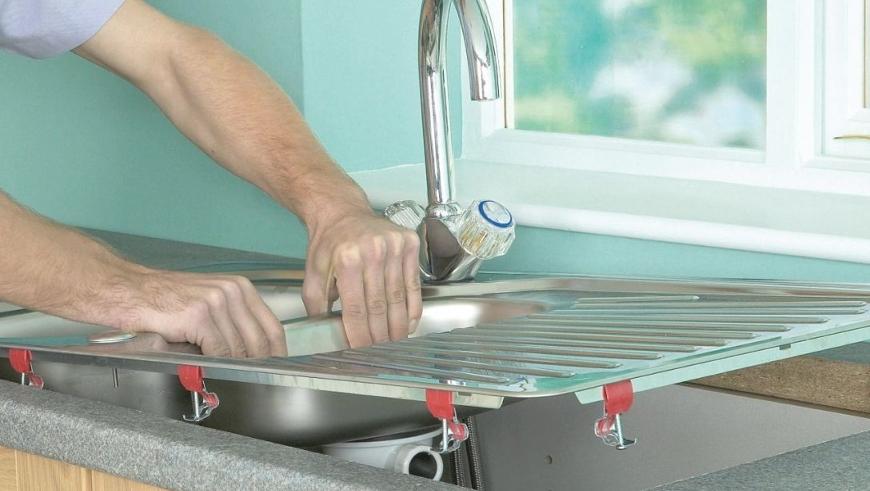
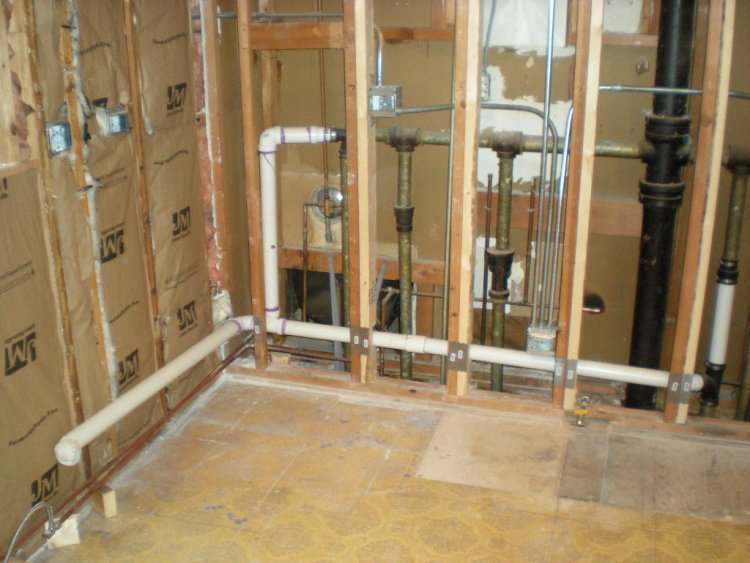
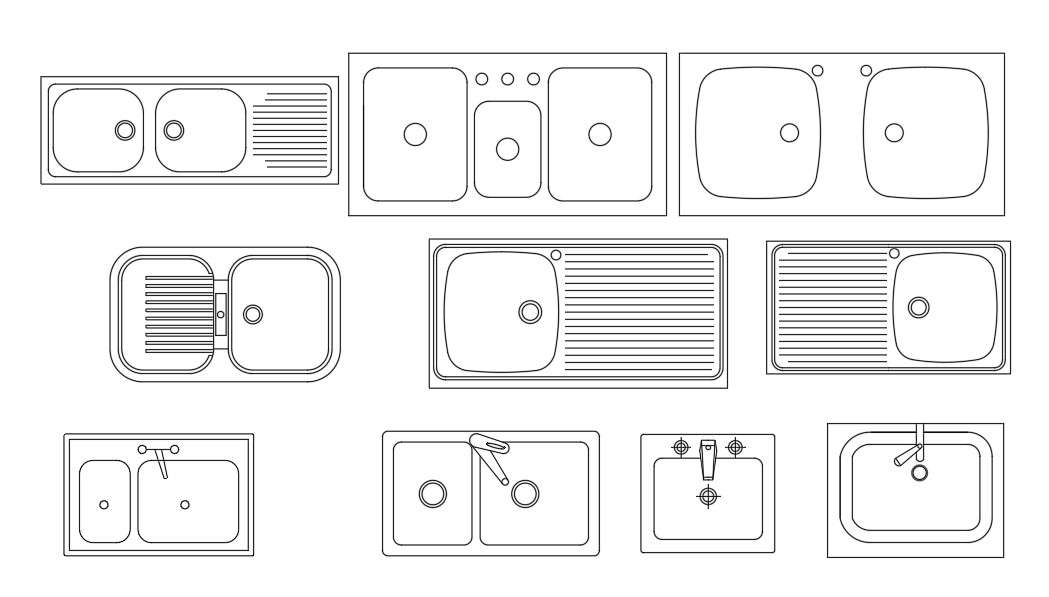
Before you start the process of moving your kitchen sink to an exterior wall, it's important to have a clear plan in place. This includes measuring the space, selecting the right materials, and figuring out the plumbing and electrical requirements. Here are the steps to follow: Step 1: Measure the Space The first step is to carefully measure the space where you want to move your kitchen sink. This will help you determine the size of the sink and the necessary plumbing and electrical work. Step 2: Select the Right Materials Choose a sink that fits your needs and the style of your kitchen. A farmhouse or apron sink is a popular choice for an exterior wall as it adds a rustic and charming touch to the space. Make sure to also select high-quality plumbing fixtures and materials that can withstand the elements. Step 3: Figure Out Plumbing and Electrical Requirements Moving a kitchen sink to an exterior wall means you'll have to reroute the plumbing and electrical lines. This is where it's important to consult with a professional to ensure that everything is up to code and properly installed. Step 4: Cut the Hole Once you have all the necessary materials and plans in place, it's time to cut a hole in the exterior wall. This can be a tricky process, so it's best to hire a professional if you're not comfortable with power tools. Make sure to properly measure and mark the location of the hole before cutting. Step 5: Install the Sink Now that you have a hole in the wall, it's time to install the sink. This involves attaching the sink to the countertop or cabinets and connecting the plumbing and electrical lines. Again, it's best to have a professional take care of this step to ensure it's done correctly. Step 6: Seal and Finish Once the sink is in place, it's important to properly seal and finish the area around it. This will help prevent any water damage and give your kitchen a polished look.Moving a Kitchen Sink to an Exterior Wall: A Step-by-Step Guide


Moving a Kitchen Sink to an Exterior Wall: A Step-by-Step Guide


Moving a kitchen sink to an exterior wall may seem like a daunting task, but it's definitely doable as a DIY project. However, it's important to keep in mind that this is a complex and time-consuming process that requires proper planning and expertise. Tip #1: Plan Ahead Before you start the renovation, make sure to have a clear plan in place. This includes measuring the space, selecting the right materials, and familiarizing yourself with the necessary plumbing and electrical work. Tip #2: Get the Right Tools You'll need a variety of tools for this project, including a saw, drill, wrench, and plumbing and electrical equipment. Make sure to have all the necessary tools on hand before starting the renovation. Tip #3: Take Your Time Moving a kitchen sink to an exterior wall is not a quick project. It requires precision and attention to detail, so don't rush through it. Take your time and make sure each step is done correctly.DIY Kitchen Renovation: Moving the Sink to an Exterior Wall


DIY Kitchen Renovation: Moving the Sink to an Exterior Wall

/light-blue-modern-kitchen-CWYoBOsD4ZBBskUnZQSE-l-97a7f42f4c16473a83cd8bc8a78b673a.jpg)


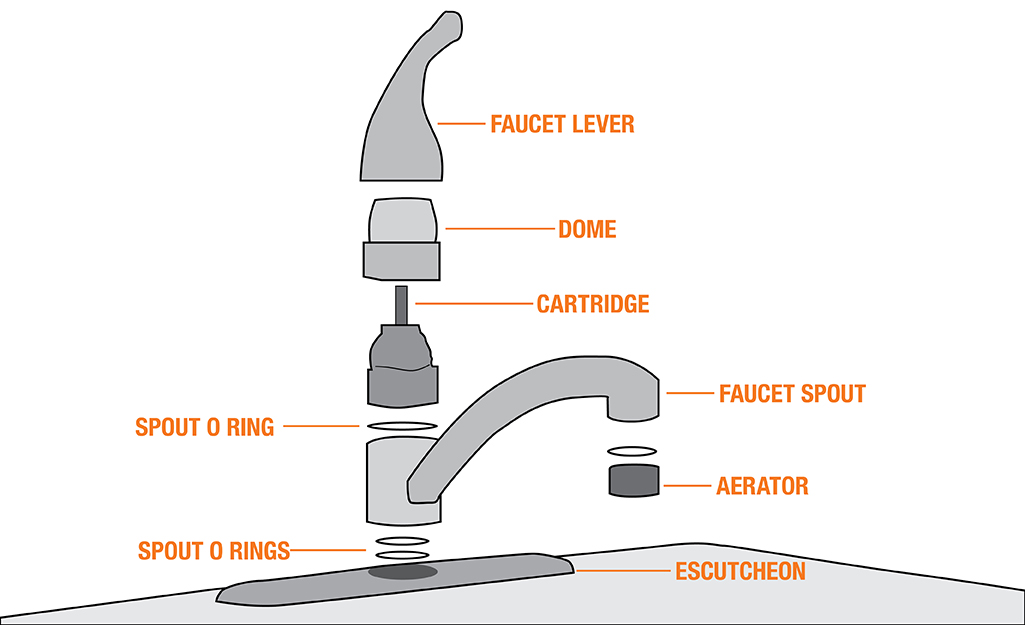
Tip #1: Consider the Plumbing and Electrical Work Relocating a kitchen sink to an exterior wall means you'll have to reroute the plumbing and electrical lines. Make sure to plan ahead and consult with a professional to ensure everything is up to code. Tip #2: Use High-Quality Materials Since your sink will be exposed to the elements, it's important to use high-quality materials that can withstand moisture and temperature changes. This will ensure your sink lasts for years to come. Tip #3: Properly Seal the Area To prevent water damage and maintain the integrity of your kitchen, make sure to properly seal the area around your sink. This includes the exterior wall and any joints or connections.Tips for Relocating a Kitchen Sink to an Exterior Wall


Tips for Relocating a Kitchen Sink to an Exterior Wall

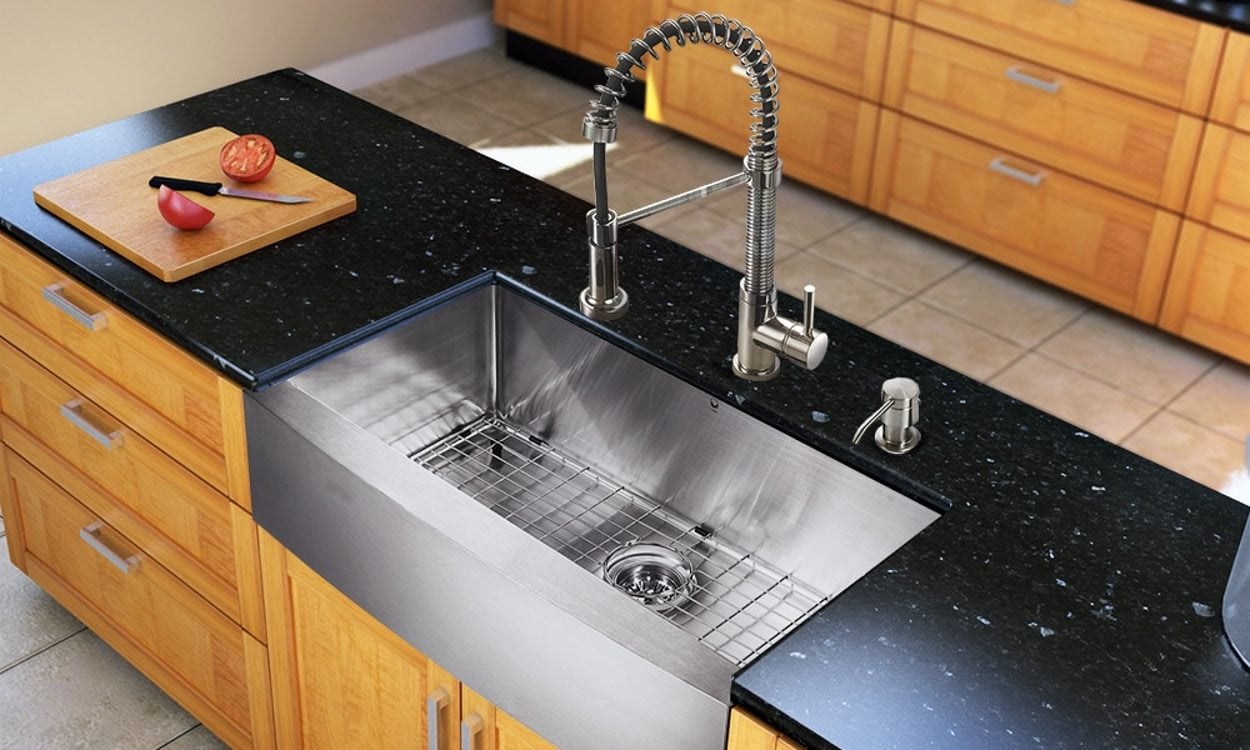


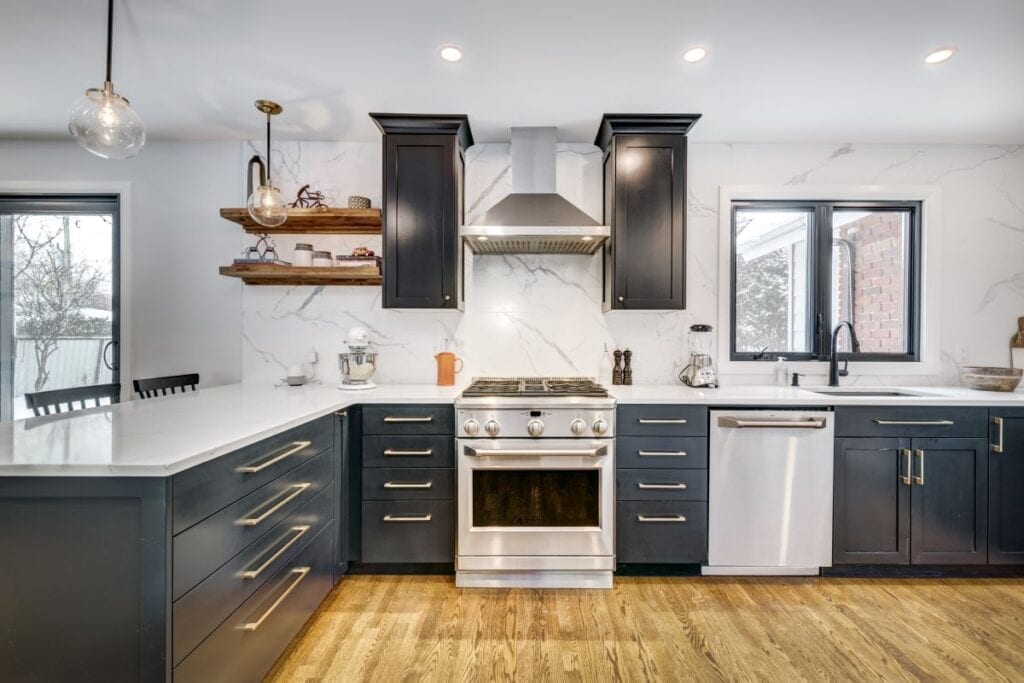
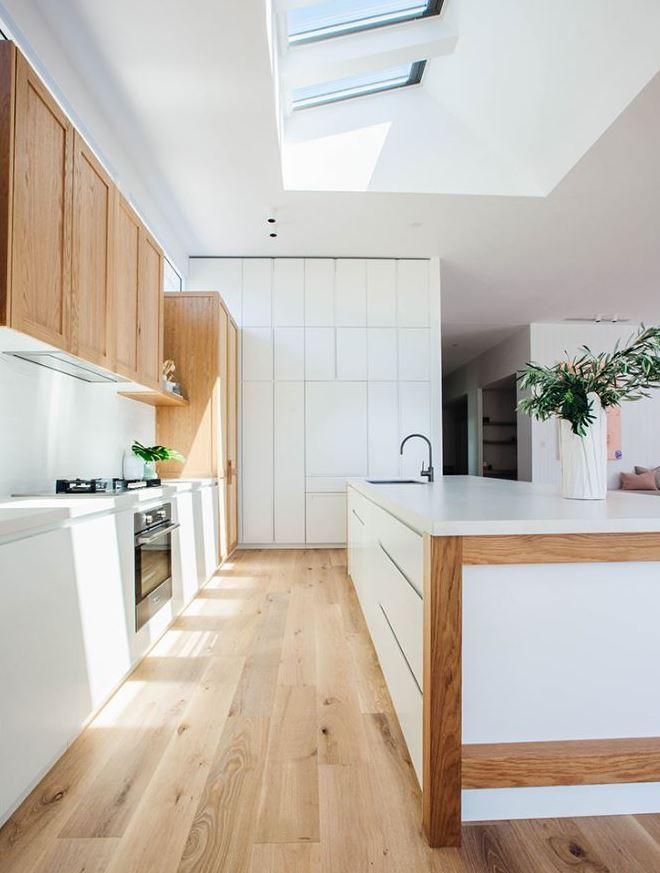
Moving your kitchen sink to an exterior wall offers a variety of benefits, including: More Counter Space: By moving your sink to an exterior wall, you'll have more counter space to work with. This is especially beneficial for smaller kitchens. Natural Light and Ventilation: An exterior wall often has windows, which means more natural light and fresh air in your kitchen. This can make the space feel brighter and more inviting. Improved Functionality: Having your sink on an exterior wall can make kitchen tasks, like washing dishes, more convenient and efficient.The Benefits of Moving Your Kitchen Sink to an Exterior Wall


The Benefits of Moving Your Kitchen Sink to an Exterior Wall


Before making the decision to move your kitchen sink to an exterior wall, here are a few things to keep in mind: Cost: This is a major renovation that involves plumbing and electrical work, so it can be quite costly. Make sure to budget accordingly and consider if the benefits outweigh the cost. Structural Considerations: Moving a sink to an exterior wall may require structural changes, such as reinforcing the wall. Make sure to consult with a professional to ensure your home can support this renovation. Permits: Depending on where you live, you may need to obtain permits before moving your kitchen sink to an exterior wall. Check with your local building department to see what is required.Things to Consider Before Moving Your Kitchen Sink to an Exterior Wall


Things to Consider Before Moving Your Kitchen Sink to an Exterior Wall

If you're not comfortable with DIY projects or don't have the necessary skills and tools, it's best to hire a professional to move your kitchen sink to an exterior wall. They will have the expertise and experience to ensure the project is done correctly and up to code. Tip #1: Get Multiple Quotes Before hiring a professional, get quotes from at least three different contractors. This will give you an idea of the cost and allow you to compare their services and experience. Tip #2: Check References Make sure to check references and read reviews from previous clients. This will give you an idea of the quality of their work and their professionalism. Tip #3: Communicate Effectively Communication is key when working with a professional. Make sure to clearly communicate your expectations and ask any questions or concerns you may have.Hiring a Professional: Moving a Kitchen Sink to an Exterior Wall


Hiring a Professional: Moving a Kitchen Sink to an Exterior Wall


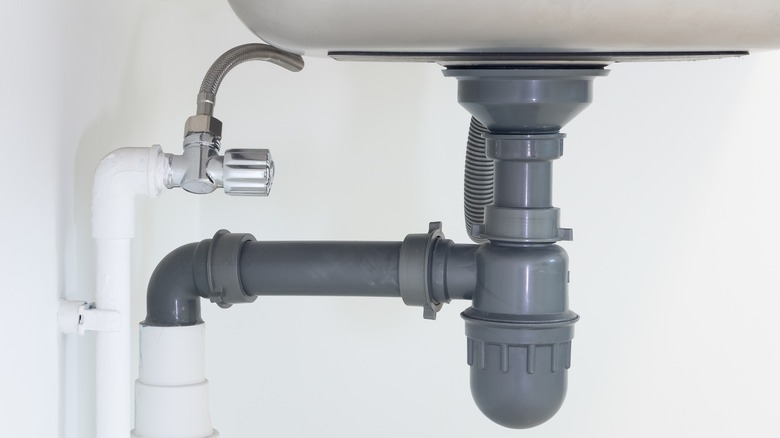
If you're moving your kitchen sink to an exterior wall, proper ventilation is essential. Here's how to ensure your sink is properly vented: Step 1: Determine the Vent Location The vent should be located as close to the sink as possible, typically within 5 feet. This allows for proper air flow and prevents any odors or gases from building up in the pipes. Step 2: Install a Vent Pipe A vent pipe is a vertical pipe that connects to the sink's drain line. It allows air to enter the drain system and helps regulate pressure. Make sure to properly secure the vent pipe in place. Step 3: Connect to an Existing Vent Stack If your kitchen already has a vent stack, you can connect the vent pipe to it. This will save you time and effort, but make sure the vent is not shared with any other fixtures to prevent clogging. Step 4: Use a Mechanical Vent If connecting to an existing vent stack is not an option, you can use a mechanical vent. This is a small valve that sits on top of the sink's drain line and allows air to enter the pipe while preventing any odors or gases from escaping.How to Properly Vent a Kitchen Sink on an Exterior Wall


How to Properly Vent a Kitchen Sink on an Exterior Wall


Moving your kitchen sink to an exterior wall is a great way to maximize space and improve the functionality of your kitchen. Here are a few tips to make the most out of this renovation: Tip #1: Use the Space Under the Sink The space under the sink is often overlooked, but it can be a great spot for storage. Install shelves or drawers to make the most out of this space. Tip #2: Add a Window If possible, add a window above your sink to bring in more natural light and make the space feel brighter and more open. Tip #3: Incorporate a Dishwasher Moving your sink to an exterior wall also allows for the addition of a dishwasher. This can save you time and effort when it comes to washing dishes and adds to the overall functionality of your kitchen.Maximizing Space: Moving Your Kitchen Sink to an Exterior Wall


Maximizing Space: Moving Your Kitchen Sink to an Exterior Wall


Moving a kitchen sink to an exterior wall is a complex project, and there are a few common mistakes to avoid: Not Properly Planning: Rushing into the renovation without a clear plan can lead to mistakes and costly repairs down the line. Using Poor-Quality Materials: Since the sink will be exposed to the elements, it's important to use high-quality materials that can withstand moisture and temperature changes. Skipping Permits: Make sure to obtain any necessary permits before starting the renovation. This will ensure your home is up to code and prevent any issues when it's time to sell. Moving your kitchen sink to an exterior wall is a major renovation that can greatly improve the functionality and aesthetics of your kitchen. Whether you're doing a DIY project or hiring a professional, make sure to properly plan and consider all the factors before taking on this task. With the right preparation and execution, you can successfully move your kitchen sink to an exterior wall and enjoy all the benefits it has to offer.Common Mistakes to Avoid When Moving a Kitchen Sink to an Exterior Wall


Common Mistakes to Avoid When Moving a Kitchen Sink to an Exterior Wall


Why Moving Your Kitchen Sink to the Exterior Wall Can Transform Your House Design

Maximizing Space and Functionality
 When it comes to designing your dream home, every inch of space matters. One often overlooked but crucial aspect of house design is the placement of the kitchen sink. Many homeowners default to placing their sink under a window or on an interior wall, but have you considered moving it to the exterior wall?
Not only can this transform the look and feel of your kitchen, but it can also have a significant impact on the overall functionality of your home.
When it comes to designing your dream home, every inch of space matters. One often overlooked but crucial aspect of house design is the placement of the kitchen sink. Many homeowners default to placing their sink under a window or on an interior wall, but have you considered moving it to the exterior wall?
Not only can this transform the look and feel of your kitchen, but it can also have a significant impact on the overall functionality of your home.
Bringing in Natural Light
 One of the main reasons why homeowners opt to move their kitchen sink to the exterior wall is to bring in more natural light.
Placing your sink next to a window allows for ample natural light to flood into your kitchen, making it feel brighter and more open.
This is especially beneficial for smaller kitchens that may lack windows or natural light sources. By moving your sink to the exterior wall, you can create a more inviting and spacious atmosphere in your kitchen.
One of the main reasons why homeowners opt to move their kitchen sink to the exterior wall is to bring in more natural light.
Placing your sink next to a window allows for ample natural light to flood into your kitchen, making it feel brighter and more open.
This is especially beneficial for smaller kitchens that may lack windows or natural light sources. By moving your sink to the exterior wall, you can create a more inviting and spacious atmosphere in your kitchen.
Creating a Focal Point
 The kitchen sink is often the most used and functional area in a kitchen, so why not make it a focal point?
By moving your sink to the exterior wall, you can create a visually appealing and functional centerpiece for your kitchen.
This can be especially effective if you have a beautiful view outside that you want to showcase. You can also add a statement faucet or backsplash to make your sink area truly stand out.
The kitchen sink is often the most used and functional area in a kitchen, so why not make it a focal point?
By moving your sink to the exterior wall, you can create a visually appealing and functional centerpiece for your kitchen.
This can be especially effective if you have a beautiful view outside that you want to showcase. You can also add a statement faucet or backsplash to make your sink area truly stand out.
Improved Layout and Flow
 Another benefit of moving your kitchen sink to the exterior wall is the improved layout and flow of your kitchen. Placing the sink on an interior wall can disrupt the flow of your kitchen and make it feel cramped.
However, by moving it to the exterior wall, you can free up valuable counter space and create a more efficient and functional layout.
This can also make it easier to clean and maintain your sink area, as water and spills can be directed towards the window instead of onto your countertops.
Another benefit of moving your kitchen sink to the exterior wall is the improved layout and flow of your kitchen. Placing the sink on an interior wall can disrupt the flow of your kitchen and make it feel cramped.
However, by moving it to the exterior wall, you can free up valuable counter space and create a more efficient and functional layout.
This can also make it easier to clean and maintain your sink area, as water and spills can be directed towards the window instead of onto your countertops.
Considerations and Costs
 Before making the decision to move your kitchen sink to the exterior wall, there are a few things to consider.
Depending on the layout and structure of your home, this project may require significant plumbing and electrical work, which can add to the overall cost.
It's important to consult with a professional contractor to ensure that the move is feasible and within your budget.
In conclusion,
moving your kitchen sink to the exterior wall can have a significant impact on the design and functionality of your home.
Not only does it allow for more natural light and create a focal point, but it can also improve the layout and flow of your kitchen. Consider consulting with a professional to see if this is the right choice for your home, and get ready to transform your house design with this simple but effective change.
Before making the decision to move your kitchen sink to the exterior wall, there are a few things to consider.
Depending on the layout and structure of your home, this project may require significant plumbing and electrical work, which can add to the overall cost.
It's important to consult with a professional contractor to ensure that the move is feasible and within your budget.
In conclusion,
moving your kitchen sink to the exterior wall can have a significant impact on the design and functionality of your home.
Not only does it allow for more natural light and create a focal point, but it can also improve the layout and flow of your kitchen. Consider consulting with a professional to see if this is the right choice for your home, and get ready to transform your house design with this simple but effective change.