If you're tired of dealing with a faulty or broken sink stopper in your bathroom, it's time to invest in a Moen Bathroom Sink Stopper Repair Kit. This all-in-one kit includes everything you need to fix or replace your sink stopper, making it a convenient and cost-effective solution. The Moen Bathroom Sink Stopper Repair Kit comes with a high-quality stopper assembly, as well as a lift rod, pivot rod, and ball rod nut for easy installation. The kit also includes a drain flange and gasket, ensuring a tight and secure fit for your sink drain. Whether your sink stopper is stuck, leaking, or simply doesn't fit properly, this repair kit has you covered. With its durable construction and easy-to-follow instructions, you'll have your sink stopper working like new again in no time.Moen Bathroom Sink Stopper Repair Kit


Moen Bathroom Sink Stopper Repair Kit


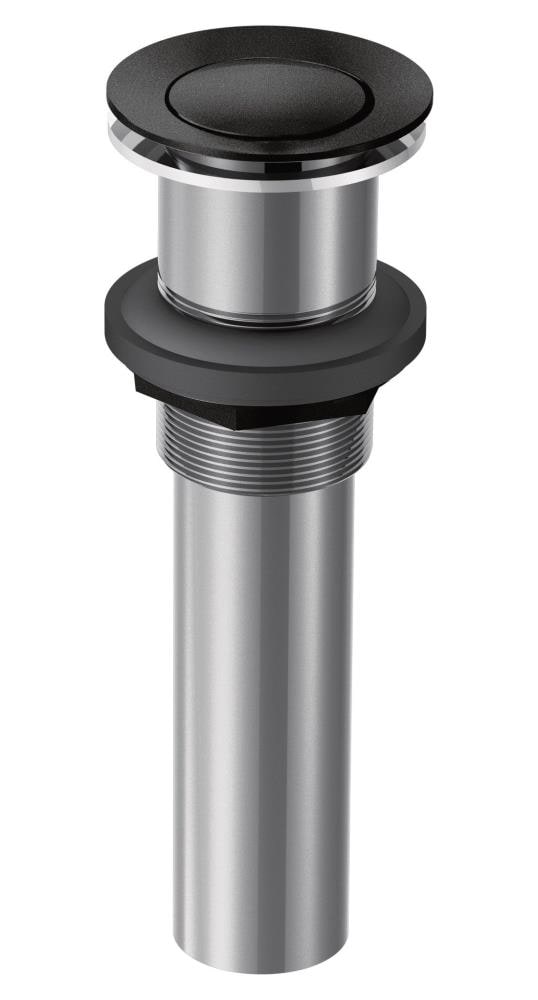
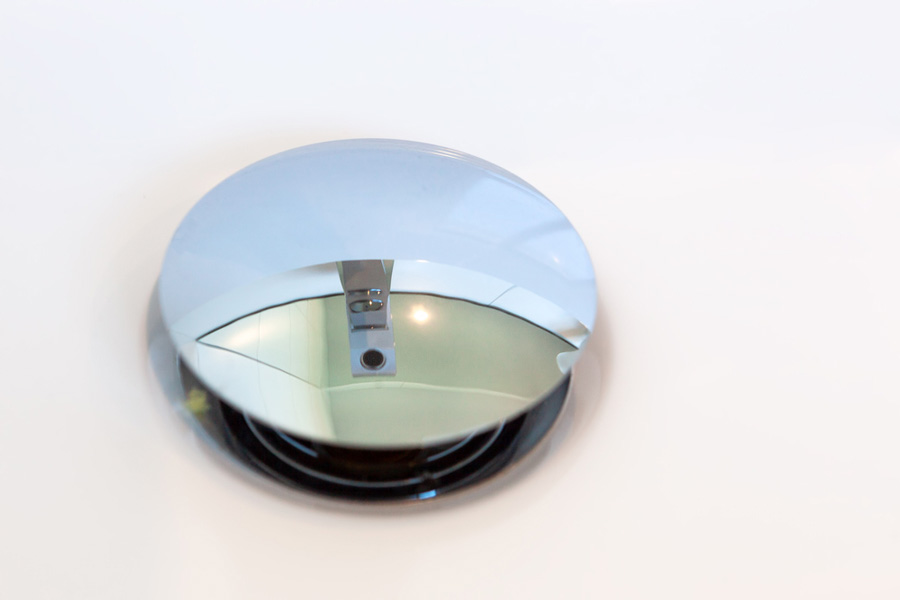
Replacing a sink stopper can seem like a daunting task, but with the right tools and instructions, it's a DIY project that anyone can tackle. If you're in need of a new sink stopper, the Moen Bathroom Sink Stopper Replacement is a top choice for its quality and affordability. This replacement stopper is designed to fit most standard bathroom sinks, making it a versatile option for any home. It features a sleek and modern design, adding a touch of style to your sink while also functioning smoothly. With its durable construction and easy installation process, the Moen Bathroom Sink Stopper Replacement is a practical and reliable solution for your sink stopper needs.Moen Bathroom Sink Stopper Replacement


Moen Bathroom Sink Stopper Replacement


The sink stopper assembly is the heart of your bathroom sink's drainage system, so it's important to choose one that is well-made and easy to use. The Moen Bathroom Sink Stopper Assembly is a top choice for its quality and functionality. This assembly includes all the necessary components for a smooth and efficient sink stopper, including a lift rod, pivot rod, and ball rod nut. It also features a durable stopper and drain flange with a gasket for a secure fit. With its sleek and modern design, the Moen Bathroom Sink Stopper Assembly not only works well but also adds a touch of style to your bathroom sink.Moen Bathroom Sink Stopper Assembly

Moen Bathroom Sink Stopper Assembly


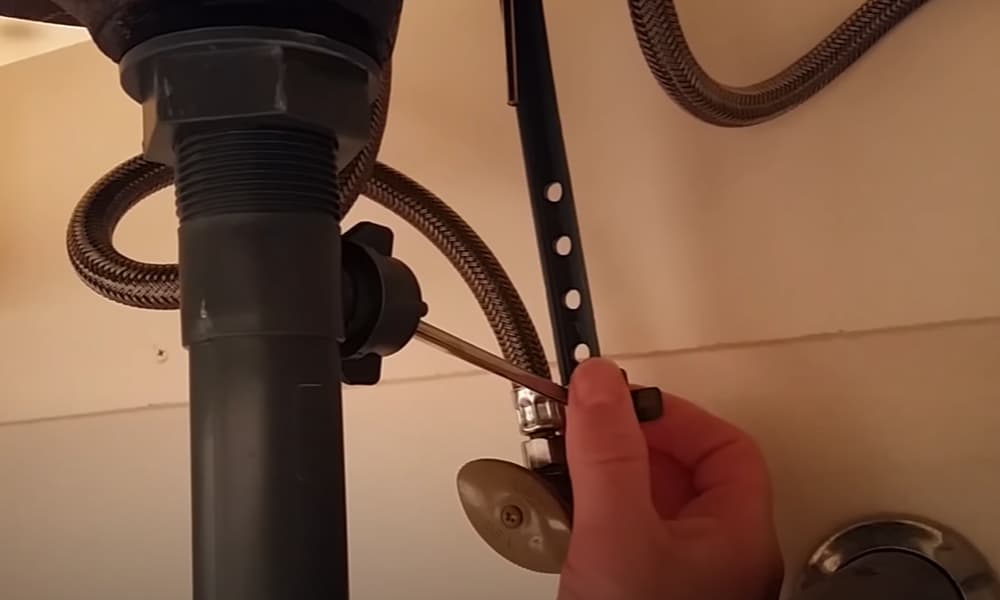
Over time, sink stoppers can become stuck or difficult to remove, causing frustration and inconvenience. If you're struggling to remove your Moen bathroom sink stopper, don't worry – there are simple steps you can take to easily remove it. The first step is to locate the pivot rod under your sink, which connects to the stopper assembly. Loosen the nut on the pivot rod and pull the rod out to release the stopper. You can then remove the stopper from the drain flange and clean any buildup or debris that may be causing it to stick. With the Moen Bathroom Sink Stopper Removal process, you'll have your stopper removed and cleaned in no time, allowing for proper functioning of your sink drain.Moen Bathroom Sink Stopper Removal
Moen Bathroom Sink Stopper Removal


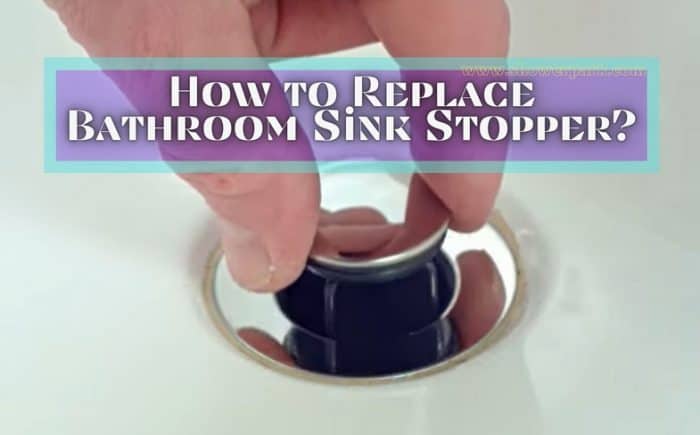
Installing a new sink stopper may seem like a daunting task, but with the right tools and instructions, it's a simple and straightforward process. The Moen Bathroom Sink Stopper Installation is a comprehensive kit that includes everything you need for a successful installation. Start by removing your old stopper, then follow the instructions provided with the kit to install the new stopper assembly. Make sure to tighten all the necessary nuts and bolts for a secure fit. You can then attach the lift rod to the stopper and test it to ensure it is functioning properly. With the Moen Bathroom Sink Stopper Installation, you'll have your new stopper installed and working in no time, saving you time and money on a professional installation.Moen Bathroom Sink Stopper Installation


Moen Bathroom Sink Stopper Installation


:max_bytes(150000):strip_icc()/bathroom-sink-drain-installation-2718843-07-2b728cbd5c994dc39179346f51bb6421.jpg)
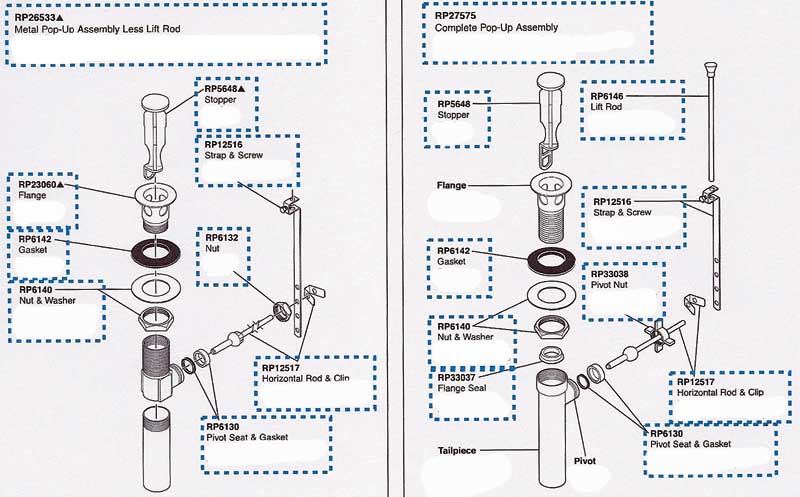
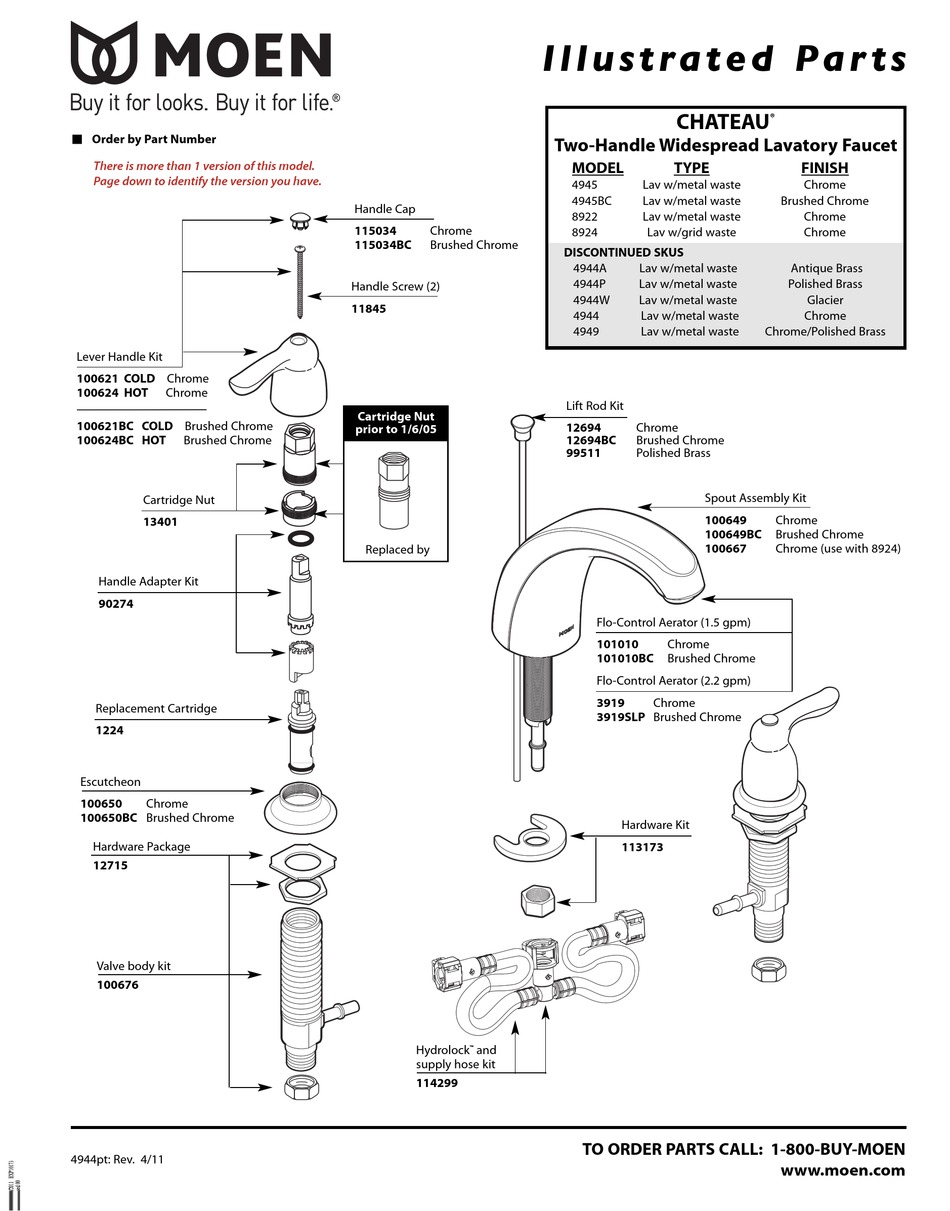
When it comes to repairing or replacing your sink stopper, having the right parts is crucial. The Moen Bathroom Sink Stopper Parts are specifically designed to fit Moen sink stoppers and are made with quality materials for long-lasting use. These parts include a lift rod, pivot rod, and ball rod nut, as well as a stopper and drain flange with a gasket. These components work together to ensure a smooth and efficient stopper for your bathroom sink. With the Moen Bathroom Sink Stopper Parts, you can easily repair or replace any damaged or faulty parts of your sink stopper, saving you the hassle and expense of replacing the entire assembly.Moen Bathroom Sink Stopper Parts

Moen Bathroom Sink Stopper Parts


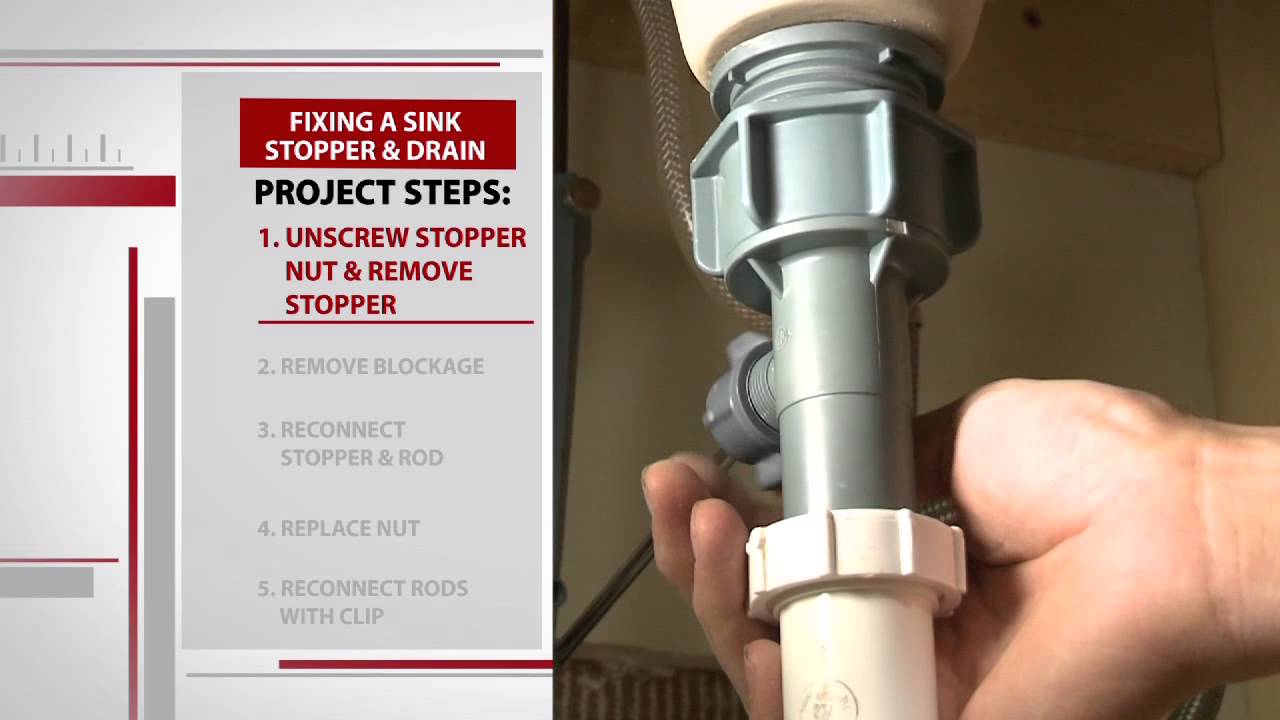
If you're a visual learner, watching a repair video can be an extremely helpful tool for fixing your sink stopper. The Moen Bathroom Sink Stopper Repair Video provides step-by-step instructions on how to repair or replace your Moen sink stopper. The video covers all the necessary tools and parts needed, as well as a demonstration of the repair process. This can be a useful resource for those who are new to DIY projects or want a visual guide to follow along with. With the Moen Bathroom Sink Stopper Repair Video, you can easily and confidently fix your sink stopper, saving you time and money on a professional repair.Moen Bathroom Sink Stopper Repair Video


Moen Bathroom Sink Stopper Repair Video

For those who prefer written instructions, the Moen Bathroom Sink Stopper Repair Instructions provide a detailed guide on how to repair or replace your Moen sink stopper. These instructions are easy to follow and include helpful tips and illustrations for a smooth and successful repair. The instructions cover all the necessary steps, from removing the old stopper to installing the new one. They also include a list of tools and parts needed, allowing you to gather everything beforehand for a seamless repair process. With the Moen Bathroom Sink Stopper Repair Instructions, you can confidently repair your sink stopper without the need for professional help.Moen Bathroom Sink Stopper Repair Instructions

Moen Bathroom Sink Stopper Repair Instructions
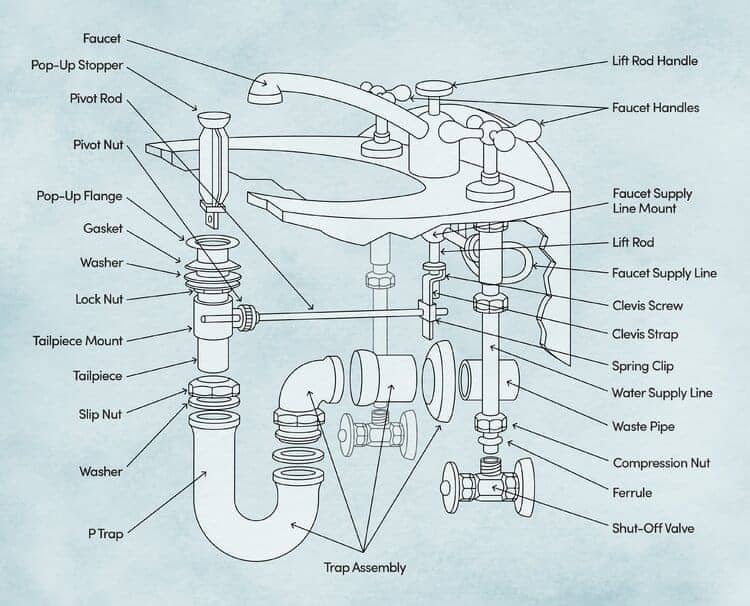
Visual aids can be extremely helpful when it comes to understanding how to repair or replace your sink stopper. The Moen Bathroom Sink Stopper Repair Diagram provides a clear and detailed illustration of the stopper assembly, making it easy to follow along and identify each part. The diagram also includes labels and descriptions of each component, as well as arrows indicating the direction of movement for proper installation. This can be a useful resource for those who are new to DIY repairs or need a visual reference to guide them. With the Moen Bathroom Sink Stopper Repair Diagram, you'll have a better understanding of how your sink stopper works and how to repair or replace it.Moen Bathroom Sink Stopper Repair Diagram
Moen Bathroom Sink Stopper Repair Diagram

When it comes to repairing your sink stopper, having a comprehensive guide can be extremely helpful. The Moen Bathroom Sink Stopper Repair Guide combines all the necessary information, instructions, and visuals into one convenient resource. This guide covers everything from the tools and parts needed to the step-by-step repair process, as well as helpful tips and tricks for a successful fix. It also includes a troubleshooting section for any issues that may arise during the repair process. With the Moen Bathroom Sink Stopper Repair Guide, you'll have all the information you need to confidently repair or replace your sink stopper, saving you time and money on a professional repair.Moen Bathroom Sink Stopper Repair Guide

Moen Bathroom Sink Stopper Repair Guide
How to Repair a Moen Bathroom Sink Stopper

Step 1: Gather Necessary Tools and Materials
 Before beginning any repair, it's important to make sure you have all the necessary tools and materials. For repairing a
moen bathroom sink stopper
, you will need a pair of pliers, a screwdriver, and a replacement stopper. You can find a replacement stopper at your local hardware store or online. Make sure to check the packaging to ensure that it is compatible with your Moen sink.
Before beginning any repair, it's important to make sure you have all the necessary tools and materials. For repairing a
moen bathroom sink stopper
, you will need a pair of pliers, a screwdriver, and a replacement stopper. You can find a replacement stopper at your local hardware store or online. Make sure to check the packaging to ensure that it is compatible with your Moen sink.
Step 2: Remove the Old Stopper
 To begin the repair, first, locate the pivot rod under your sink. This is the metal rod that controls the stopper's movement. Using your pliers, unscrew the pivot rod nut and remove the rod. Next, unscrew the nut that holds the stopper in place and remove the stopper from the drain.
Step 3: Install the New Stopper
 Take your new stopper and insert it into the drain, making sure it is securely in place. Then, screw the nut back on to hold the stopper in place. Next, reattach the pivot rod by screwing the nut back on and inserting the rod into the designated hole. Make sure the stopper moves up and down smoothly before moving on to the next step.
Step 4: Adjust the Stopper Height
 If the stopper is not sitting at the desired height, you can adjust it by tightening or loosening the nut on the pivot rod. This will change the length of the rod and, in turn, the height of the stopper. Test the stopper's height by pulling up on the rod and making sure the stopper stays in place when the water is running.
Step 5: Test the Stopper
 Once the stopper is at the desired height, turn on the water and test it to make sure it is functioning properly. If the water is not draining properly, adjust the stopper's height by tightening or loosening the nut on the pivot rod until it works correctly.
Step 6: Clean Up and Maintenance
 After completing the repair, clean up any excess water and make sure all the connections are tight. It is also a good idea to periodically clean and maintain your bathroom sink stopper to prevent any future issues. This includes regularly removing and cleaning the stopper to prevent any buildup or clogs.
With these easy steps, you can quickly and easily repair a
moen bathroom sink stopper
without the need for a professional plumber. Remember to always read and follow any instructions that come with your replacement stopper and regularly maintain your sink to prevent any future issues.
After completing the repair, clean up any excess water and make sure all the connections are tight. It is also a good idea to periodically clean and maintain your bathroom sink stopper to prevent any future issues. This includes regularly removing and cleaning the stopper to prevent any buildup or clogs.
With these easy steps, you can quickly and easily repair a
moen bathroom sink stopper
without the need for a professional plumber. Remember to always read and follow any instructions that come with your replacement stopper and regularly maintain your sink to prevent any future issues.