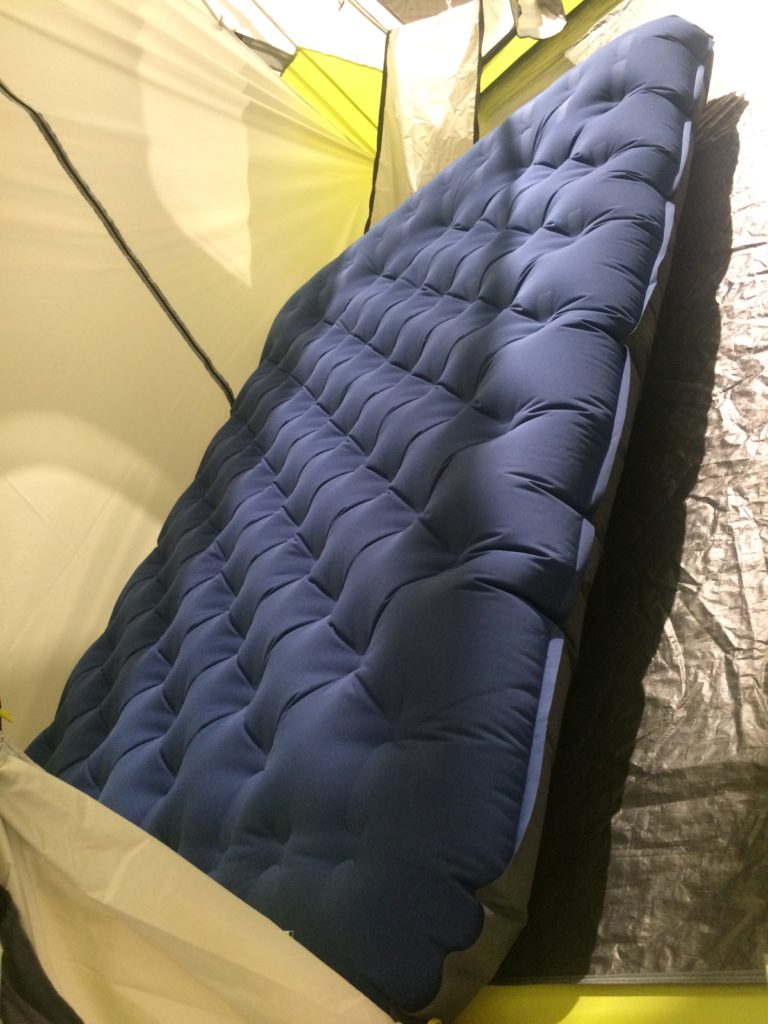
How to Patch a Hole in a Lightspeed Air Mattress
If you're an avid camper or just love a good night's sleep, you probably own a Lightspeed air mattress. These inflatable mattresses are known for their comfort and durability, but even the best products can sometimes develop holes or leaks. Don't worry, though – with the right tools and techniques, you can easily patch a hole in your Lightspeed air mattress and get back to enjoying a restful night's sleep.


How to Patch a Hole in a Lightspeed Air Mattress


How to Repair a Leak in a Lightspeed Air Mattress
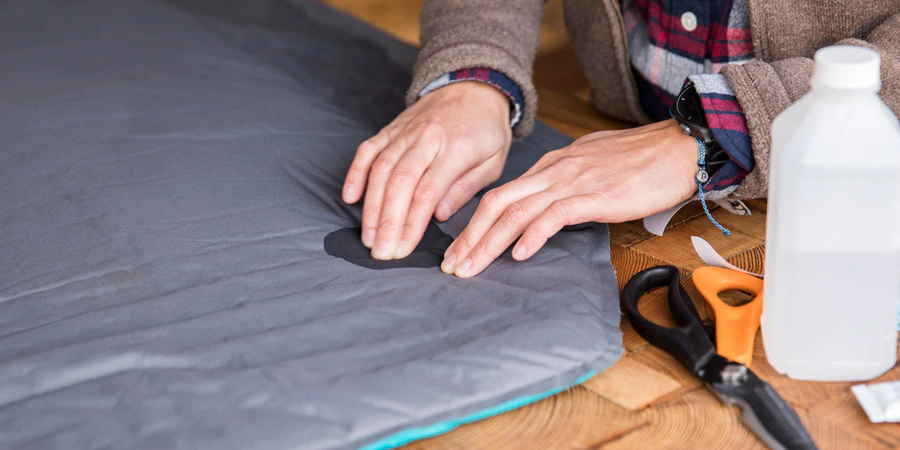
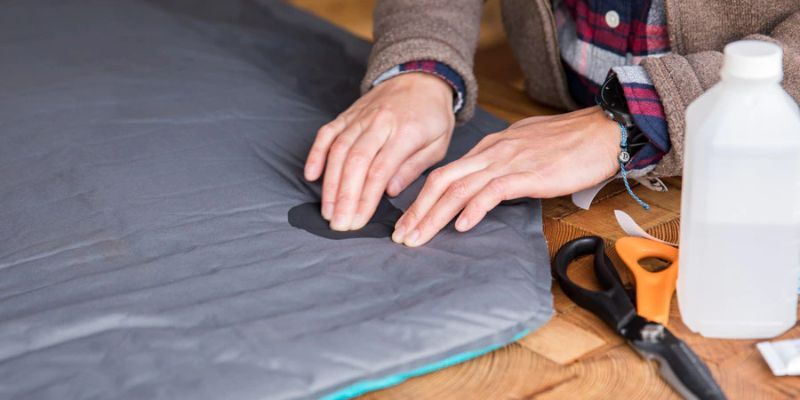
Before you can patch a hole in your air mattress, you need to locate the leak. This may seem like a daunting task, but it's actually quite simple. First, inflate your mattress and listen for any hissing sounds. If you don't hear anything, run your hand over the surface of the mattress and feel for any escaping air. Once you've located the leak, mark it with a piece of tape or a permanent marker so you can easily find it again.


How to Repair a Leak in a Lightspeed Air Mattress


DIY Lightspeed Air Mattress Patching
Now that you've found the leak, it's time to patch it up. While you can purchase pre-made patch kits for air mattresses, you can also create your own DIY patch kit using materials you likely already have at home. Cut a piece of durable fabric, such as denim or canvas, into a small square or rectangle that is larger than the hole in your mattress. Then, spread a layer of waterproof adhesive over the hole and press the fabric onto it. Let it dry completely before inflating the mattress again.


DIY Lightspeed Air Mattress Patching


Best Patch Kit for Lightspeed Air Mattresses
If you prefer to use a pre-made patch kit, there are many options available specifically for repairing air mattresses. Look for a kit that includes adhesive and a small piece of fabric, as well as any necessary tools, such as a patch roller or sandpaper. Make sure to follow the instructions carefully and allow the patch to dry completely before using the mattress again.


Best Patch Kit for Lightspeed Air Mattresses


Step-by-Step Guide for Patching a Lightspeed Air Mattress
If you're unsure of how to patch your air mattress, here is a simple step-by-step guide to help you through the process:


Step-by-Step Guide for Patching a Lightspeed Air Mattress


Tips for Successfully Patching a Lightspeed Air Mattress
While patching a hole in your air mattress may seem straightforward, there are a few tips that can help ensure a successful repair:


Tips for Successfully Patching a Lightspeed Air Mattress
:max_bytes(150000):strip_icc()/81QHm8NXr2L._AC_SL1500_1-17bafdc326cf4922b0d8acca4d9b5639.jpg)


Common Problems with Lightspeed Air Mattresses and How to Fix Them
Aside from leaks and holes, there are a few other common issues that can arise with air mattresses. Here are some solutions for these problems:


Common Problems with Lightspeed Air Mattresses and How to Fix Them


Using a Patch Kit to Fix a Tear in a Lightspeed Air Mattress
If your air mattress has a tear rather than a hole, you may need to use a patch kit specifically designed for tears. These kits often include a patch that is larger and more durable to cover the tear and prevent it from expanding. Make sure to follow the instructions carefully and allow the patch to dry completely before using the mattress again.

Using a Patch Kit to Fix a Tear in a Lightspeed Air Mattress


How to Find and Repair a Leak in a Lightspeed Air Mattress
Leaks in air mattresses can be frustrating, but with the right techniques, they can be easily located and repaired. Make sure to thoroughly clean and dry the area before applying the patch to ensure a secure seal. With a little patience and attention to detail, you can successfully fix a leak in your Lightspeed air mattress and extend its lifespan.

How to Find and Repair a Leak in a Lightspeed Air Mattress


Preventing Future Leaks in Your Lightspeed Air Mattress
To prevent future leaks in your air mattress, it's important to properly care for and store it. Avoid placing the mattress on rough or sharp surfaces and be careful when inflating and deflating it. When not in use, store the mattress in a clean and dry area to prevent mold and mildew growth. Taking these extra precautions can help extend the life of your Lightspeed air mattress and save you from having to patch any more holes in the future.


Preventing Future Leaks in Your Lightspeed Air Mattress


The Importance of Properly Patching Your Lightspeed Air Mattress
Why Patching is Necessary
 When it comes to camping or having guests over, an air mattress is a convenient and comfortable solution. However, even the most durable air mattresses are not immune to punctures and leaks. That's where proper patching techniques come in.
Lightspeed air mattress patching
is essential to ensure your mattress stays in good condition and provides a comfortable sleeping experience.
When it comes to camping or having guests over, an air mattress is a convenient and comfortable solution. However, even the most durable air mattresses are not immune to punctures and leaks. That's where proper patching techniques come in.
Lightspeed air mattress patching
is essential to ensure your mattress stays in good condition and provides a comfortable sleeping experience.
Steps for Lightspeed Air Mattress Patching
 First
and foremost
, it's important to locate the source of the leak. This can be done by inflating the mattress and listening for any hissing sounds or feeling for any air escaping. Once the leak is identified, it's time to gather your materials. You will need a patch kit specifically designed for air mattresses, which typically includes patches and adhesive.
Next, clean the area around the leak with rubbing alcohol and allow it to dry completely. This will ensure proper adhesion of the patch. Then, apply the adhesive to both the patch and the area around the leak, following the instructions on the patch kit.
It's important to let the adhesive dry for the recommended amount of time before moving onto the next step.
Once the adhesive is dry, carefully apply the patch over the leak and press down firmly.
Be sure to smooth out any air bubbles to ensure a tight seal.
Let the patch dry completely before inflating the mattress and testing for any further leaks.
First
and foremost
, it's important to locate the source of the leak. This can be done by inflating the mattress and listening for any hissing sounds or feeling for any air escaping. Once the leak is identified, it's time to gather your materials. You will need a patch kit specifically designed for air mattresses, which typically includes patches and adhesive.
Next, clean the area around the leak with rubbing alcohol and allow it to dry completely. This will ensure proper adhesion of the patch. Then, apply the adhesive to both the patch and the area around the leak, following the instructions on the patch kit.
It's important to let the adhesive dry for the recommended amount of time before moving onto the next step.
Once the adhesive is dry, carefully apply the patch over the leak and press down firmly.
Be sure to smooth out any air bubbles to ensure a tight seal.
Let the patch dry completely before inflating the mattress and testing for any further leaks.
Benefits of Proper Patching
 Properly patching your lightspeed air mattress not only extends its lifespan, but it also ensures a comfortable and safe sleeping experience. Leaks can cause the mattress to deflate and become uneven, leading to discomfort and potential injuries. Additionally, patching your air mattress prevents the need for frequent replacements, saving you time and money in the long run.
In conclusion,
lightspeed air mattress patching
is a crucial step in maintaining the quality and longevity of your air mattress. By following the proper steps and using the right materials, you can easily fix any leaks and enjoy a comfortable night's sleep. Don't let a small puncture ruin your camping trip or guests' visit, make sure to properly patch your air mattress.
Properly patching your lightspeed air mattress not only extends its lifespan, but it also ensures a comfortable and safe sleeping experience. Leaks can cause the mattress to deflate and become uneven, leading to discomfort and potential injuries. Additionally, patching your air mattress prevents the need for frequent replacements, saving you time and money in the long run.
In conclusion,
lightspeed air mattress patching
is a crucial step in maintaining the quality and longevity of your air mattress. By following the proper steps and using the right materials, you can easily fix any leaks and enjoy a comfortable night's sleep. Don't let a small puncture ruin your camping trip or guests' visit, make sure to properly patch your air mattress.