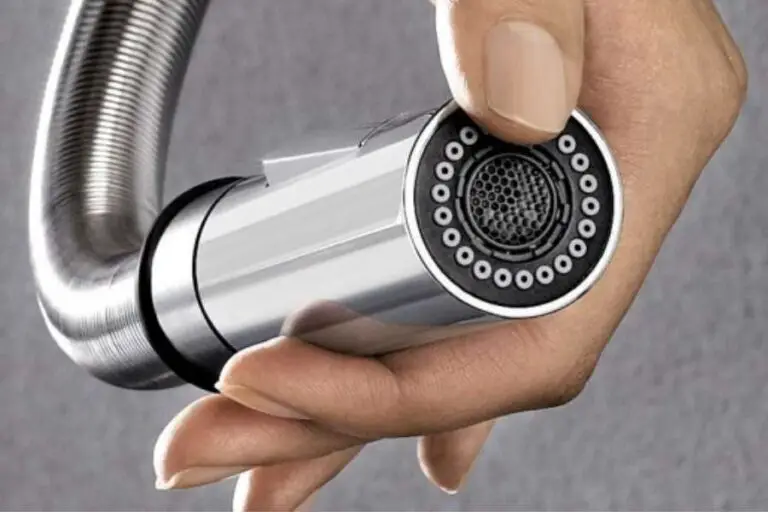
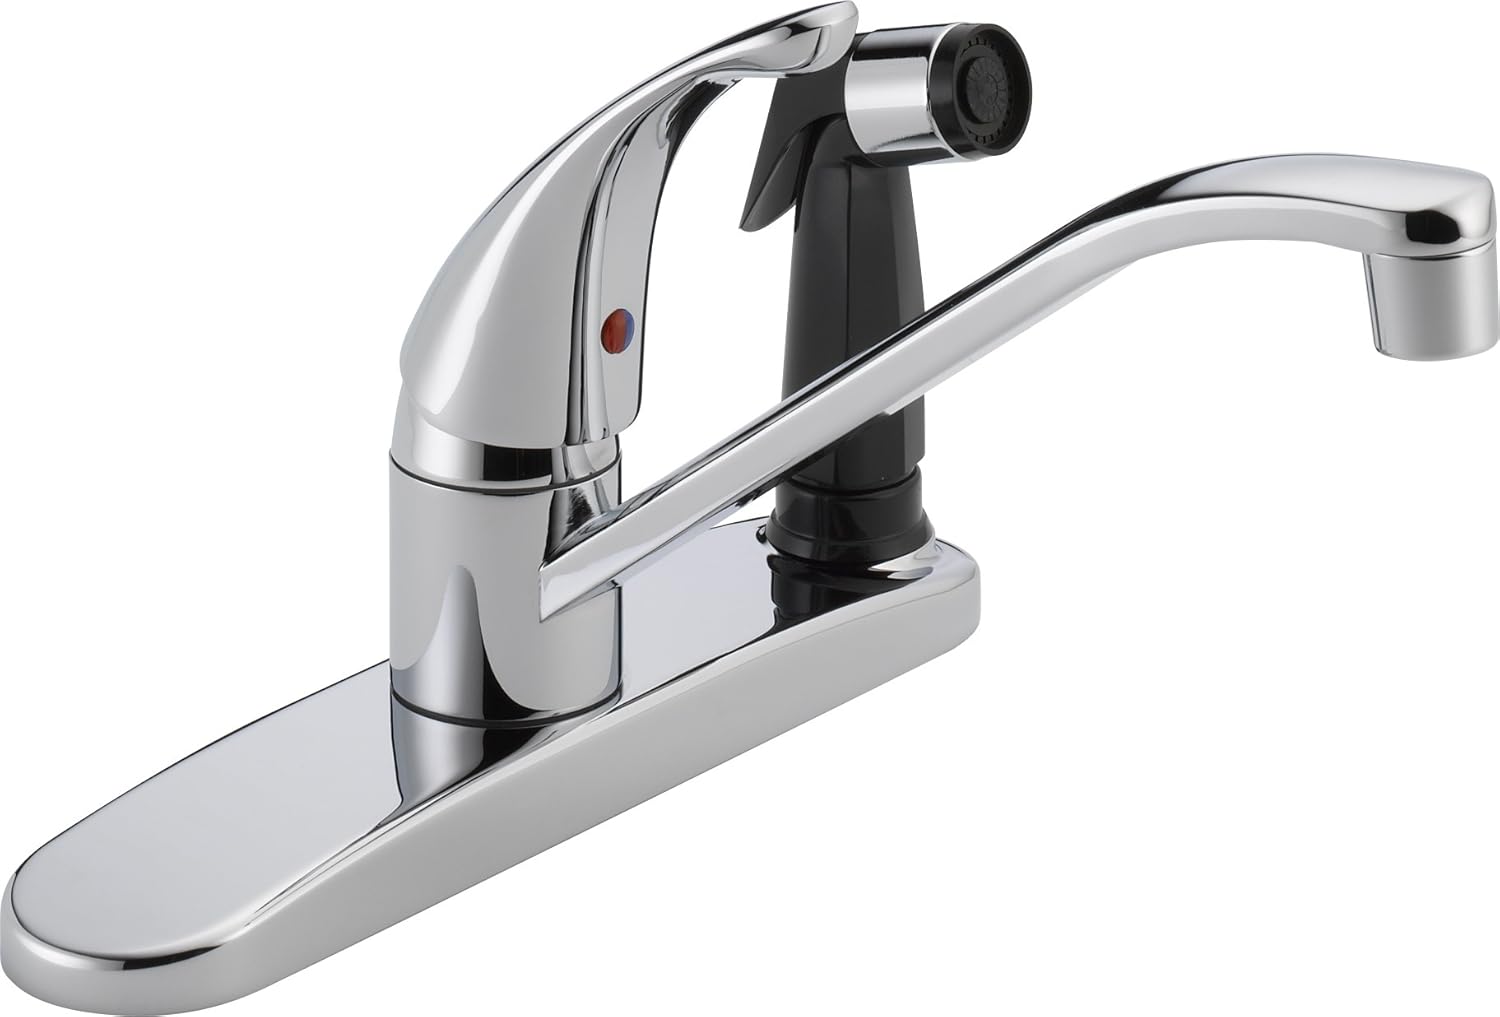
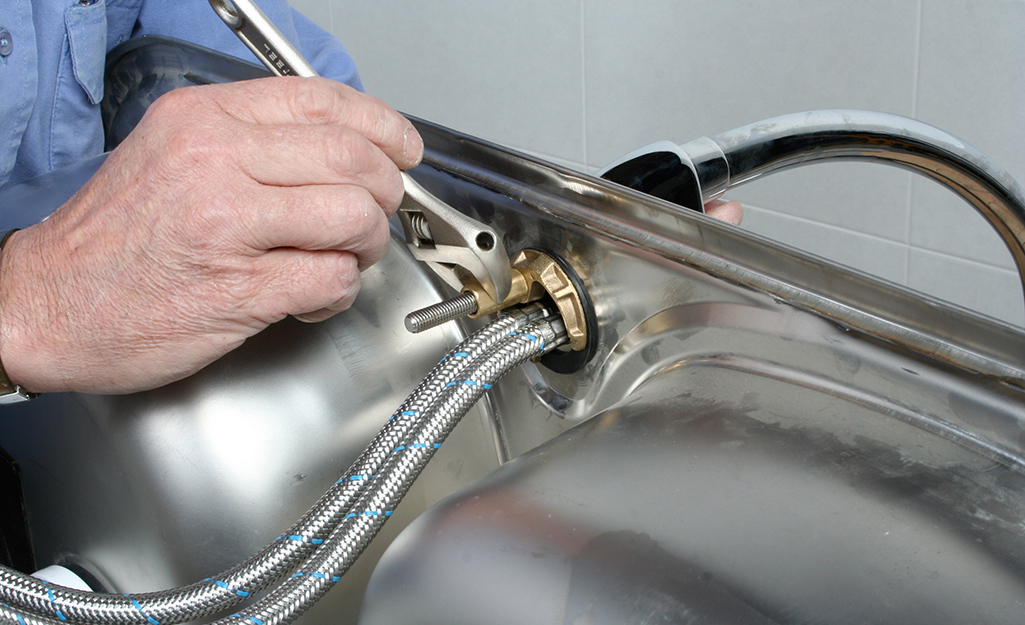
Installing a kitchen sink sprayer is a simple and cost-effective way to add convenience to your kitchen. With a sprayer, you can easily rinse off dishes, fill pots with water, and clean your sink with ease. Here's a step-by-step guide on how to install a kitchen sink sprayer in your home. Step 1: Gather your materials. You will need a kitchen sink sprayer kit, a wrench, and plumber's tape. Step 2: Turn off the water supply to your sink. This can usually be done by turning off the shut-off valves under the sink. Step 3: Remove the old sprayer, if there is one, by unscrewing the mounting nut on the underside of the sink. Then, pull the sprayer out from the top. Step 4: Assemble the new sprayer according to the instructions provided with the kit. Step 5: Apply plumber's tape to the threads of the sprayer hose and the connection on the bottom of the sink. Step 6: Insert the sprayer hose into the hole on the bottom of the sink and secure it with the mounting nut. Step 7: Connect the other end of the hose to the sprayer head and tighten with a wrench. Step 8: Turn the water supply back on and test the sprayer to make sure it is working properly. With these easy steps, you can have a new kitchen sink sprayer installed in no time!How to Install a Kitchen Sink Sprayer


How to Install a Kitchen Sink Sprayer


/25089301983_c5145fe85d_o-58418ef15f9b5851e5f392b5.jpg)


If your kitchen sink sprayer is no longer functioning as it should, it may be time to replace it. Here's a guide on how to replace your kitchen sink sprayer. Step 1: Turn off the water supply to your sink. Step 2: Disconnect the sprayer hose from the bottom of the sink by unscrewing the mounting nut. Step 3: Remove the sprayer head from the hose by unscrewing it with a wrench. Step 4: Install the new sprayer head onto the hose and secure it with a wrench. Step 5: Apply plumber's tape to the threads of the sprayer hose and the connection on the bottom of the sink. Step 6: Insert the sprayer hose into the hole on the bottom of the sink and secure it with the mounting nut. Step 7: Turn the water supply back on and test the sprayer to make sure it is working properly. Replacing a kitchen sink sprayer is a simple task that can greatly improve the functionality of your sink.How to Replace a Kitchen Sink Sprayer


How to Replace a Kitchen Sink Sprayer


/25089301983_c5145fe85d_o-58418ef15f9b5851e5f392b5.jpg)


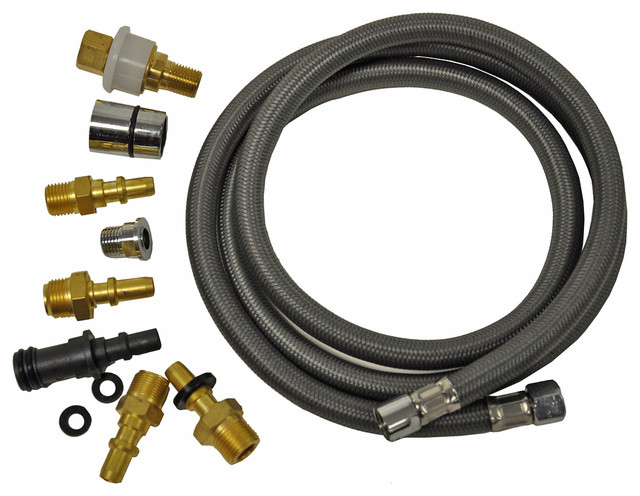
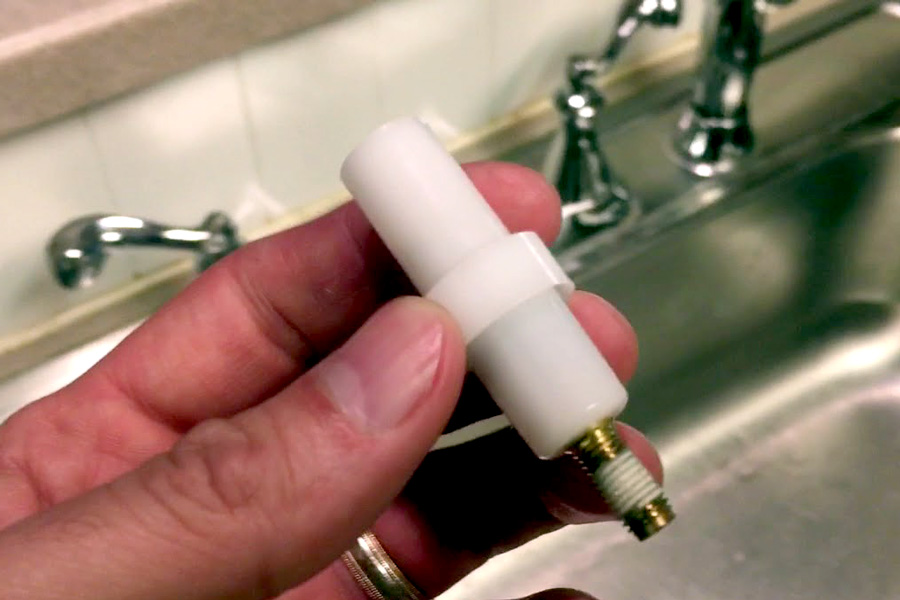
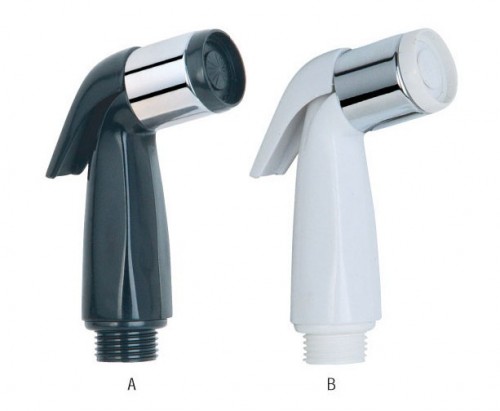
Understanding the different parts of a kitchen sink sprayer can be helpful when it comes to installation, replacement, or repair. Here are the main parts you will need to know about. Sprayer head: This is the part that you hold in your hand and use to spray water. Handle: The handle controls the flow of water and can be used to turn the sprayer on and off. Sprayer hose: This is the flexible hose that connects the sprayer head to the water supply under the sink. Mounting nut: This is the nut that secures the sprayer hose to the bottom of the sink. Divertor valve: This valve is responsible for diverting water from the main faucet to the sprayer. Knowing the different parts of a kitchen sink sprayer can make it easier to troubleshoot any issues that may arise.Kitchen Sink Sprayer Parts
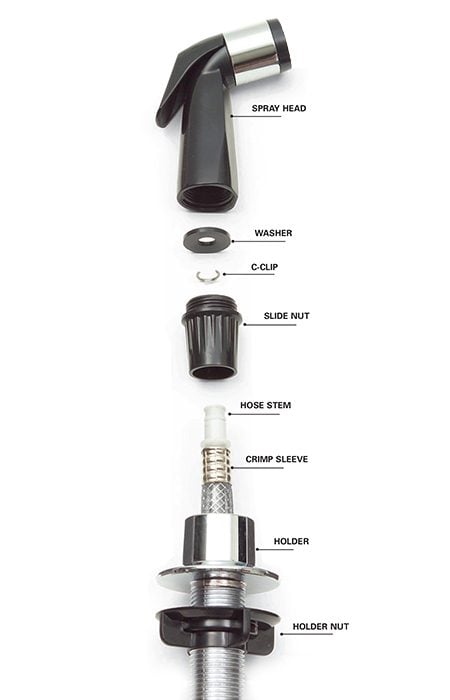

Kitchen Sink Sprayer Parts
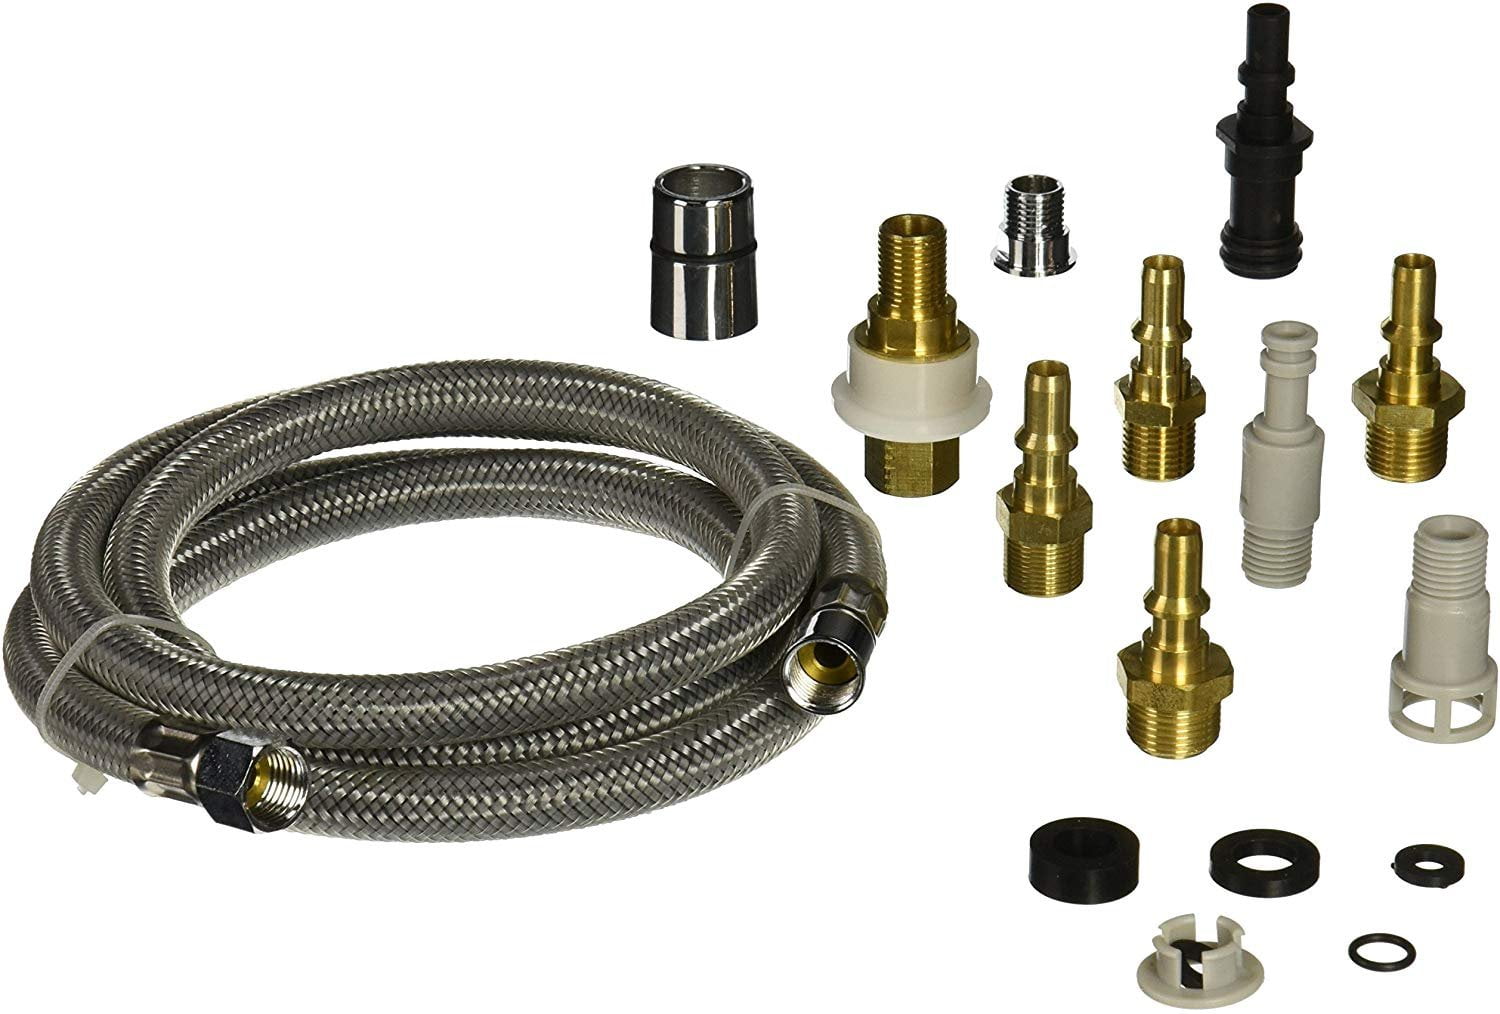

If you notice that your kitchen sink sprayer hose is leaking or damaged, it may be time for a replacement. Here's how to replace your kitchen sink sprayer hose. Step 1: Turn off the water supply to your sink. Step 2: Disconnect the sprayer hose from the bottom of the sink by unscrewing the mounting nut. Step 3: Purchase a new sprayer hose that is the same length and diameter as the old one. Step 4: Apply plumber's tape to the threads of the sprayer hose and the connection on the bottom of the sink. Step 5: Insert the new sprayer hose into the hole on the bottom of the sink and secure it with the mounting nut. Step 6: Turn the water supply back on and test the sprayer to make sure it is working properly. Replacing a kitchen sink sprayer hose is a simple and affordable solution to any leaks or damage.Kitchen Sink Sprayer Hose Replacement

Kitchen Sink Sprayer Hose Replacement


Over time, your kitchen sink sprayer may start to have issues such as low water pressure, leaks, or a malfunctioning sprayer head. Here are a few common problems and how to repair them. Low water pressure: This could be caused by a clogged sprayer head. Remove the sprayer head and soak it in a solution of equal parts water and vinegar for 30 minutes. Rinse and reattach. Leaky hose: If your sprayer hose is leaking, it may need to be replaced. Follow the instructions in the "Kitchen Sink Sprayer Hose Replacement" section above. Malfunctioning sprayer head: If your sprayer head is not working properly, it may need to be replaced. Follow the instructions in the "How to Replace a Kitchen Sink Sprayer" section above. With a few simple repairs, you can get your kitchen sink sprayer working like new again.Kitchen Sink Sprayer Repair

Kitchen Sink Sprayer Repair


If your kitchen sink sprayer is not working at all, there may be a few different causes. No water flow: This could be due to a closed shut-off valve, a clogged sprayer head, or a malfunctioning diverter valve. Check these components and make necessary repairs or replacements. Weak water flow: This could be caused by a clogged sprayer head or low water pressure. Clean or replace the sprayer head, and if the problem persists, check for any issues with your water supply. No spray function: If your sprayer is not spraying, it could be due to a clogged sprayer head or a malfunctioning diverter valve. Clean or replace the sprayer head, and if the problem persists, the diverter valve may need to be replaced. By troubleshooting and addressing the specific issue, you can get your kitchen sink sprayer working again.Kitchen Sink Sprayer Not Working


Kitchen Sink Sprayer Not Working


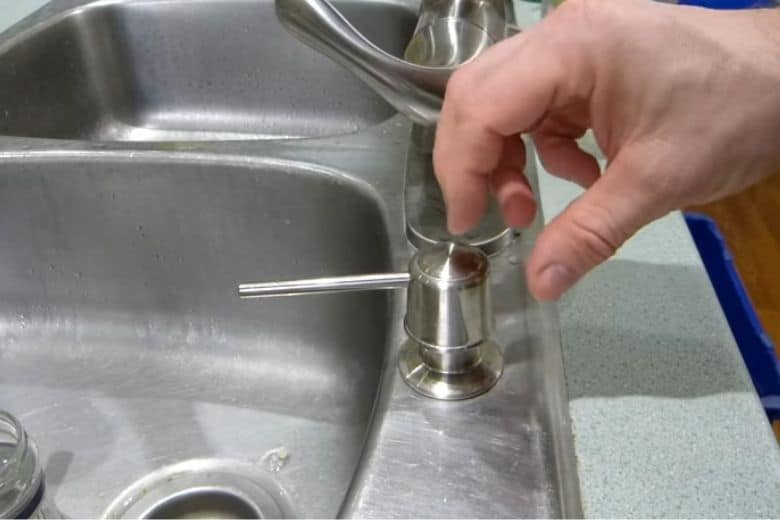
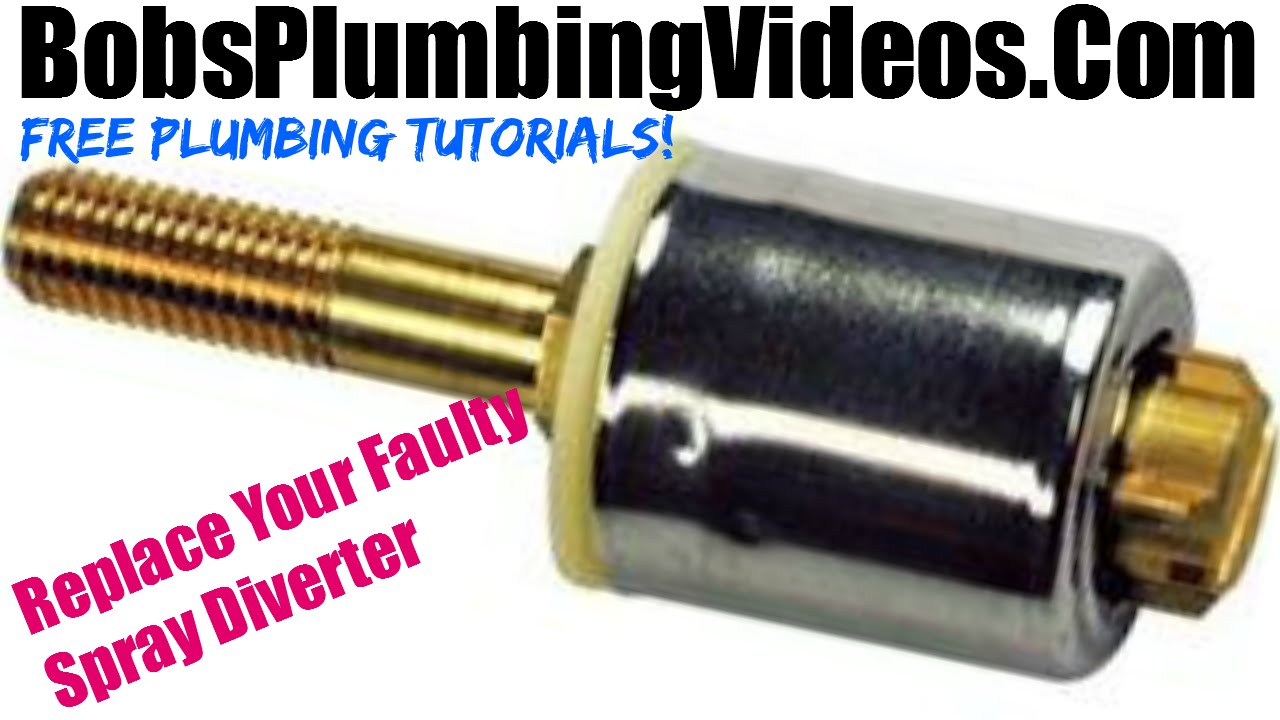
The diverter valve is an important component of a kitchen sink sprayer, as it is responsible for directing water to the sprayer when the handle is turned on. If you are experiencing issues with your sprayer not working, the diverter valve may be the culprit. To replace the diverter valve, follow these steps: Step 1: Turn off the water supply to your sink. Step 2: Remove the sprayer hose from the bottom of the sink by unscrewing the mounting nut. Step 3: Locate the diverter valve, which is usually found on the side of the main faucet. Step 4: Use pliers to unscrew the diverter valve and remove it. Step 5: Install the new diverter valve and reattach the sprayer hose. Step 6: Turn the water supply back on and test the sprayer to make sure it is working properly. If the problem persists, you may need to call a professional plumber for further assistance.Kitchen Sink Sprayer Diverter Valve


Kitchen Sink Sprayer Diverter Valve


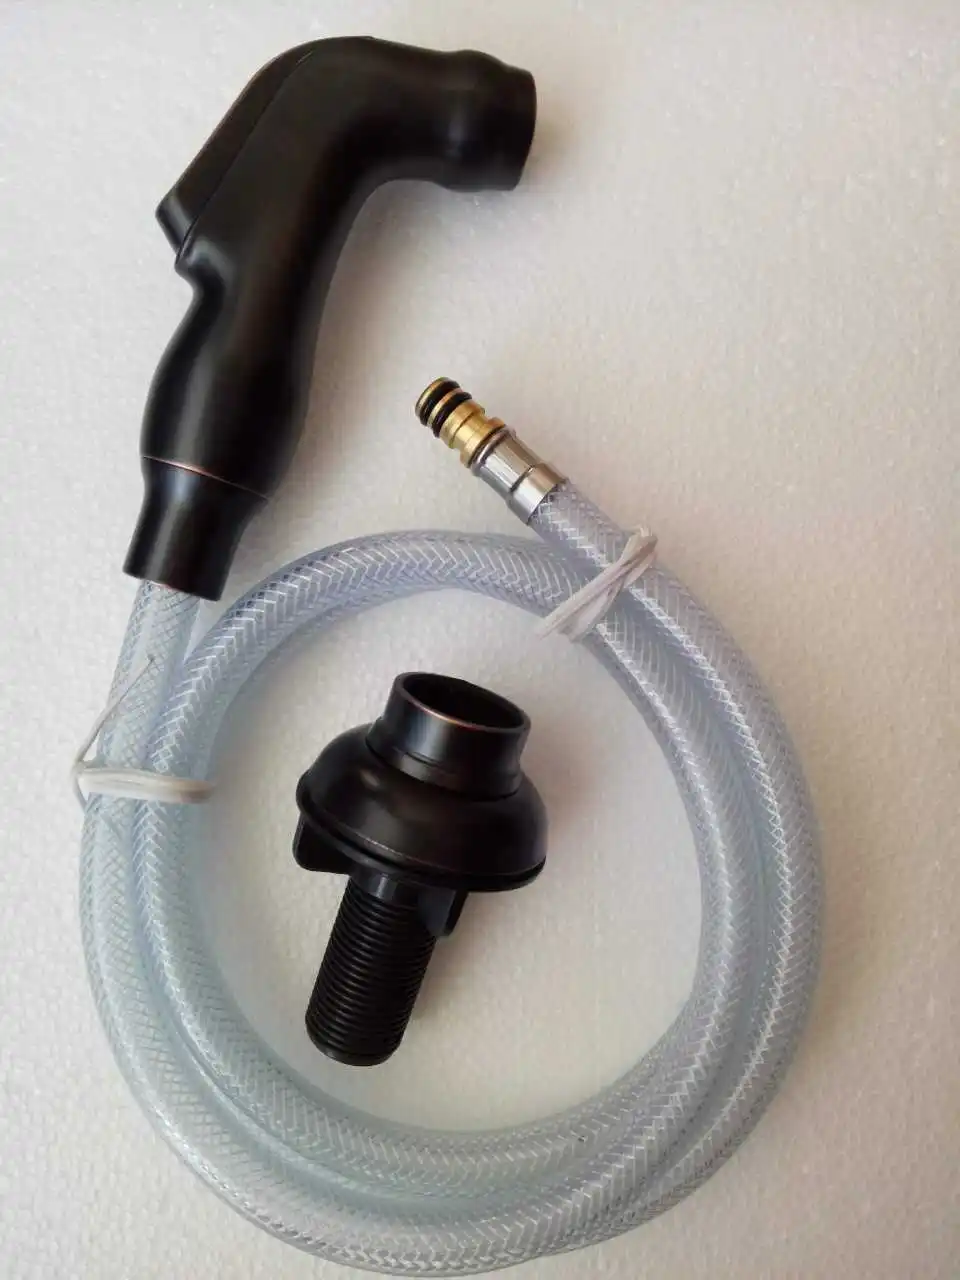
If your sprayer head is damaged or not working properly, it may need to be replaced. Here's how to replace your kitchen sink sprayer head. Step 1: Turn off the water supply to your sink. Step 2: Remove the sprayer head from the hose by unscrewing it with a wrench. Step 3: Purchase a replacement sprayer head that is the same size and style as the old one. Step 4: Install the new sprayer head onto the hose and secure it with a wrench. Step 5: Turn the water supply back on and test the sprayer to make sure it is working properly. Replacing a kitchen sink sprayer head is a simple and affordable way to improve the functionality of your sink.Kitchen Sink Sprayer Head Replacement


Kitchen Sink Sprayer Head Replacement


A leaking kitchen sink sprayer can be a frustrating problem, but it is usually an easy fix. Here's how to fix a leaking kitchen sink sprayer. Step 1: Turn off the water supply to your sink. Step 2: Use a wrench to tighten any loose connections on the sprayer hose and the sprayer head. Step 3: If the leak persists, the sprayer hose may need to be replaced. Follow the instructions in the "Kitchen Sink Sprayer Hose Replacement" section above. Step 4: If the leak is coming from the sprayer head, the head may need to be replaced. Follow the instructions in the "How to Replace a Kitchen Sink Sprayer" section above. By addressing the cause of the leak, you can stop it from causing any further damage and get your kitchen sink sprayer working properly again.Kitchen Sink Sprayer Leaking


Kitchen Sink Sprayer Leaking


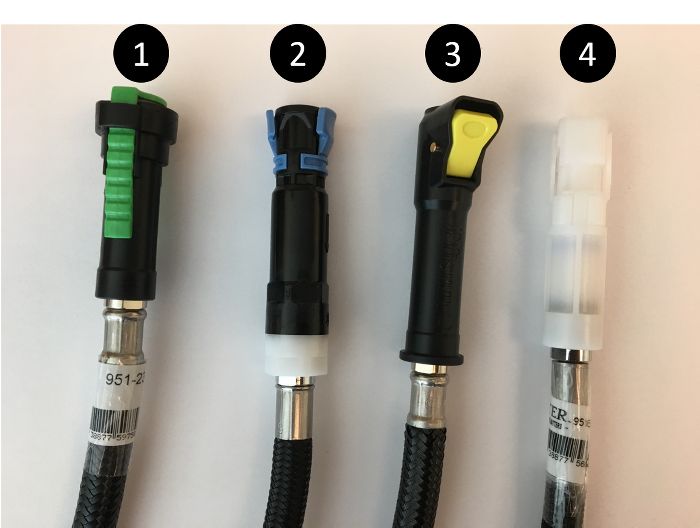
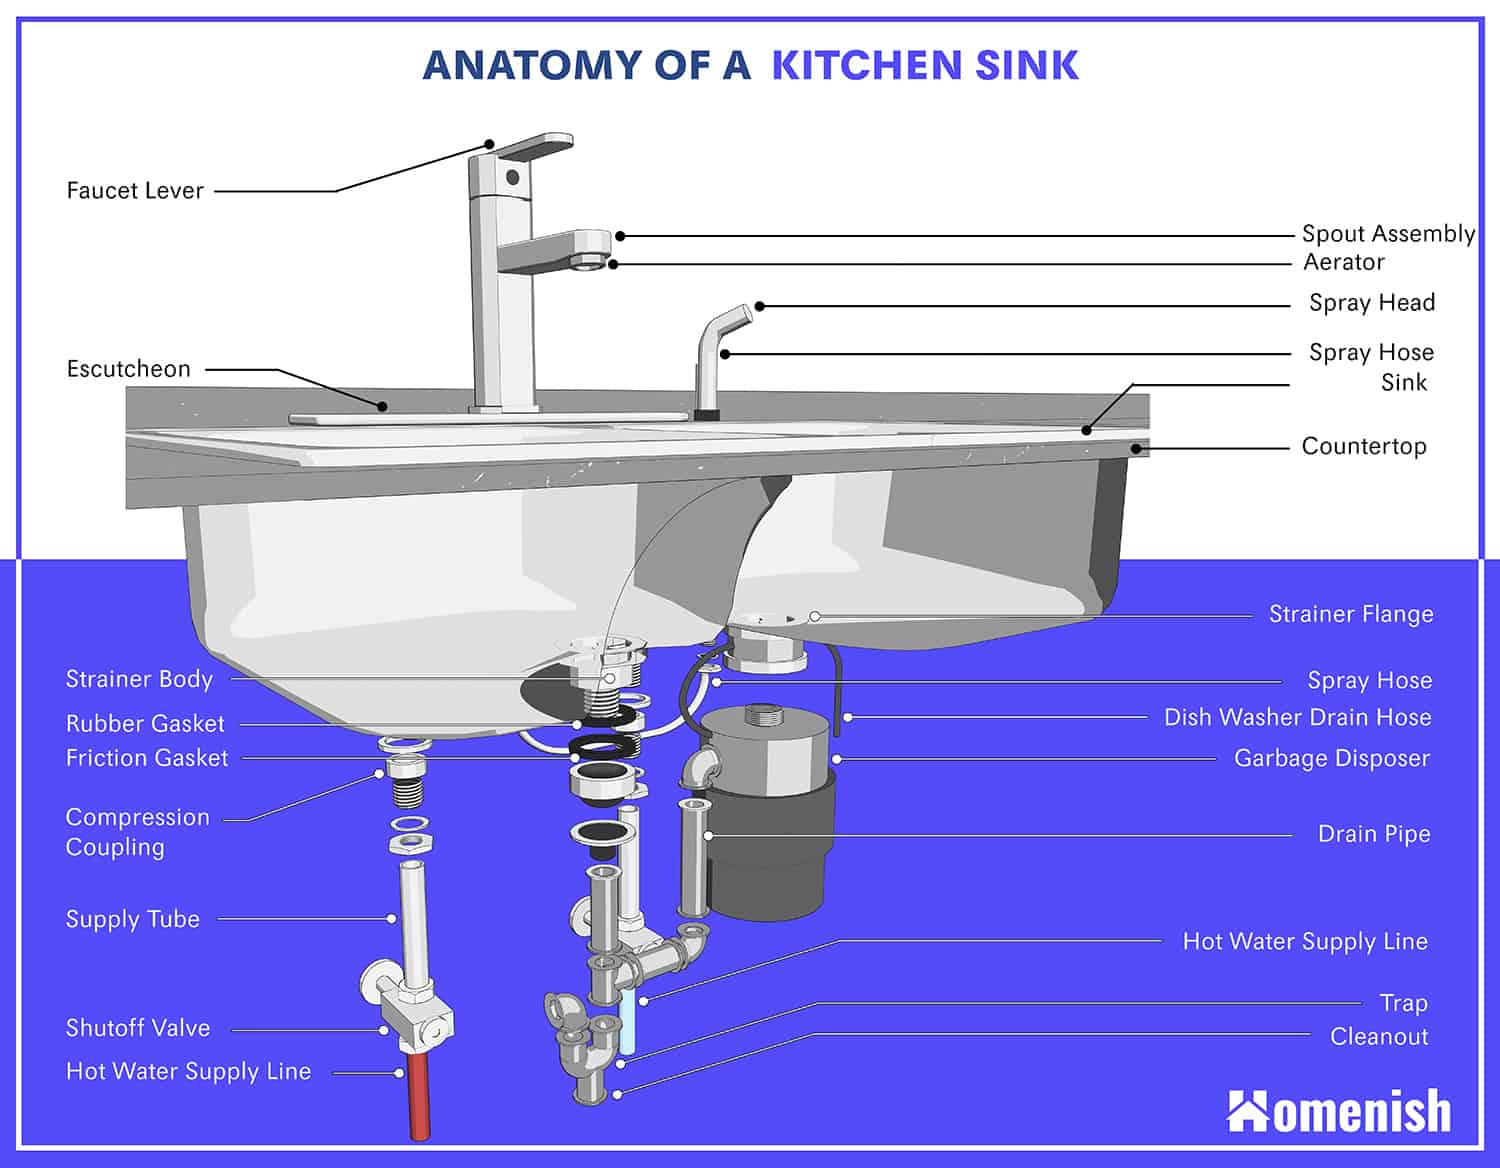
Here is a diagram to help you better understand the different parts of a kitchen sink sprayer and how they are assembled.Kitchen Sink Sprayer Assembly Diagram


Kitchen Sink Sprayer Assembly Diagram


The Benefits of Having a Kitchen Sink Sprayer in Your Home

Efficient and Versatile
 Kitchen sink sprayers
are becoming an increasingly popular feature in modern homes. These convenient and versatile faucets are installed alongside traditional kitchen faucets and offer numerous benefits. One of the main advantages of having a
kitchen sink sprayer
is its efficiency. By allowing you to control the flow of water and target specific areas,
kitchen sink sprayers
make cleaning tasks much quicker and easier. Whether you need to rinse off fruits and vegetables or scrub off stubborn food residue, a
kitchen sink sprayer
can save you time and effort.
Kitchen sink sprayers
are becoming an increasingly popular feature in modern homes. These convenient and versatile faucets are installed alongside traditional kitchen faucets and offer numerous benefits. One of the main advantages of having a
kitchen sink sprayer
is its efficiency. By allowing you to control the flow of water and target specific areas,
kitchen sink sprayers
make cleaning tasks much quicker and easier. Whether you need to rinse off fruits and vegetables or scrub off stubborn food residue, a
kitchen sink sprayer
can save you time and effort.
Water Conservation
 Another major benefit of
kitchen sink sprayers
is their ability to conserve water. Unlike traditional faucets,
kitchen sink sprayers
use less water by allowing you to control the flow and only use as much as you need. This not only saves on your water bill, but also helps to reduce your environmental impact. With concerns about water scarcity and conservation on the rise, installing a
kitchen sink sprayer
can be a small but impactful step towards a more sustainable home.
Another major benefit of
kitchen sink sprayers
is their ability to conserve water. Unlike traditional faucets,
kitchen sink sprayers
use less water by allowing you to control the flow and only use as much as you need. This not only saves on your water bill, but also helps to reduce your environmental impact. With concerns about water scarcity and conservation on the rise, installing a
kitchen sink sprayer
can be a small but impactful step towards a more sustainable home.
Enhanced Kitchen Design
 Aside from their practicality,
kitchen sink sprayers
also add a touch of style and sophistication to any kitchen. With a variety of designs and finishes to choose from, you can easily find a
kitchen sink sprayer
that complements your kitchen's overall aesthetic. Plus, the added functionality of a
kitchen sink sprayer
can make your kitchen more efficient and enjoyable to use, making it a valuable addition to your home's overall design.
Aside from their practicality,
kitchen sink sprayers
also add a touch of style and sophistication to any kitchen. With a variety of designs and finishes to choose from, you can easily find a
kitchen sink sprayer
that complements your kitchen's overall aesthetic. Plus, the added functionality of a
kitchen sink sprayer
can make your kitchen more efficient and enjoyable to use, making it a valuable addition to your home's overall design.
Easy Installation and Maintenance
 Installing a
kitchen sink sprayer
is a relatively simple process that can be done by yourself or with the help of a professional. Most
kitchen sink sprayers
come with easy-to-follow instructions and can be installed in just a few simple steps. Additionally,
kitchen sink sprayers
are low maintenance and can easily be cleaned and maintained with regular use. This makes them a hassle-free addition to your kitchen.
In conclusion, a
kitchen sink sprayer
is a practical, efficient, and stylish addition to any modern kitchen. With its versatility, water conservation, and easy installation and maintenance, it's no wonder why more and more homeowners are opting for this convenient faucet. Consider adding a
kitchen sink sprayer
to your home and see the difference it can make in your daily kitchen routine.
Installing a
kitchen sink sprayer
is a relatively simple process that can be done by yourself or with the help of a professional. Most
kitchen sink sprayers
come with easy-to-follow instructions and can be installed in just a few simple steps. Additionally,
kitchen sink sprayers
are low maintenance and can easily be cleaned and maintained with regular use. This makes them a hassle-free addition to your kitchen.
In conclusion, a
kitchen sink sprayer
is a practical, efficient, and stylish addition to any modern kitchen. With its versatility, water conservation, and easy installation and maintenance, it's no wonder why more and more homeowners are opting for this convenient faucet. Consider adding a
kitchen sink sprayer
to your home and see the difference it can make in your daily kitchen routine.