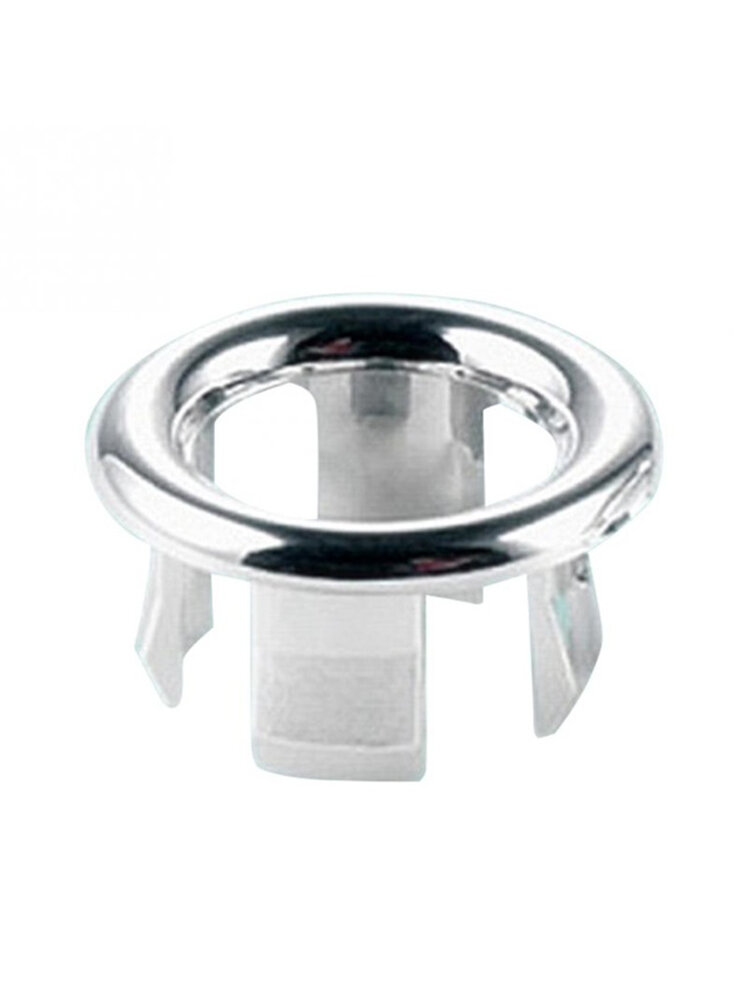
If you've noticed a leak or damage in your kitchen sink, it may be time for a replacement ring. This small but essential piece of hardware helps seal your sink to the countertop, preventing water from leaking into your cabinets and causing damage. In this guide, we'll walk you through the top 10 things you need to know about kitchen sink ring replacement.Kitchen Sink Ring Replacement: A Guide to Fixing Your Sink
When it comes to your kitchen sink, a proper ring is crucial for keeping your sink in good working condition. Without a secure seal, water can seep into the crevices between your sink and countertop, leading to mold growth and damage to your cabinets. A quality replacement ring will ensure that your sink stays in place and prevents any potential leaks.The Importance of a Proper Kitchen Sink Ring
If you're unsure whether you need to replace your kitchen sink ring, there are a few signs to look out for. The most obvious is a visible gap between your sink and countertop, which indicates that the seal has been compromised. You may also notice water leaking into your cabinets or a musty odor coming from under your sink. These are all signs that it's time to replace your ring.Signs You Need a Kitchen Sink Ring Replacement
When it comes to selecting a replacement ring for your kitchen sink, there are a few things to consider. First, you'll want to make sure that the ring is the correct size for your sink and countertop. You'll also want to choose a ring made of high-quality materials, such as stainless steel or rubber, for durability and long-term use.Choosing the Right Kitchen Sink Ring
Replacing your kitchen sink ring is a relatively simple process, but you will need a few tools to get the job done. These may include a screwdriver, pliers, and a putty knife. It's always a good idea to have a cloth or towel on hand as well, in case of any spills or messes.Tools You'll Need for the Replacement
Now that you have all your tools ready, it's time to replace your kitchen sink ring. Here's a step-by-step guide to help you through the process: Step 1: Turn off the water supply to your sink and disconnect the plumbing underneath. Step 2: Use a screwdriver to loosen the screws holding your sink in place. Step 3: Gently lift the sink from the countertop and set it aside. Step 4: Use a putty knife to remove any old sealant or adhesive from the sink and countertop. Step 5: Place the new ring on the sink and carefully lower it back onto the countertop. Step 6: Secure the sink in place by tightening the screws. Step 7: Reconnect the plumbing and turn the water supply back on.Step-by-Step Replacement Process
In order to avoid needing another replacement in the future, there are a few preventative measures you can take for your kitchen sink ring. Regularly check for any signs of damage or wear and tear and replace the ring as needed. You can also use a sealant or adhesive to provide an extra layer of protection for your sink and countertop.Preventative Maintenance for Your Kitchen Sink Ring
If you're not confident in your DIY skills, it may be best to hire a professional to replace your kitchen sink ring. However, with the right tools and instructions, this is a relatively simple task that can save you money in the long run. Just be sure to follow safety precautions and take your time to ensure a proper replacement.Professional Help vs. DIY Replacement
The cost of a kitchen sink ring replacement can vary depending on the materials and labor involved. On average, this can range from $50 to $150. However, if you choose to DIY, you can save on labor costs and potentially find a more budget-friendly replacement ring.Cost of Kitchen Sink Ring Replacement
A kitchen sink ring replacement may seem like a minor task, but it can have a significant impact on the functionality and longevity of your sink. By following these tips and steps, you can ensure a proper replacement that will keep your sink in good working condition for years to come.Final Thoughts
Why You Should Consider Replacing Your Kitchen Sink Ring

Increased Functionality and Efficiency
 One of the main reasons to consider replacing your kitchen sink ring is to improve the functionality and efficiency of your kitchen. Over time, the ring can become worn out or damaged, resulting in leaks and clogs. This can make it difficult to use your sink properly and can even lead to more serious plumbing issues. By replacing the ring, you can ensure that your sink is working at its best and avoid any potential problems.
Enhanced Aesthetics
 In addition to improved functionality, replacing your kitchen sink ring can also enhance the overall aesthetics of your kitchen. The sink is often a focal point in the kitchen, and a worn-out ring can detract from the overall appearance. By choosing a new ring that complements your kitchen design, you can elevate the look and feel of the space. Plus, a new ring can give your sink a fresh and updated look, without the cost of a full sink replacement.
Preventing Water Damage
 A damaged or worn-out kitchen sink ring can also lead to water damage in your kitchen. Leaks can cause water to seep into the cabinets and countertops, leading to mold, mildew, and other issues. By replacing the ring, you can prevent these potential water damage problems and save yourself from costly repairs in the future. This is especially important for homeowners who have wooden cabinets or other materials that can be easily damaged by water.
Cost-Effective Solution
 Replacing your kitchen sink ring is a cost-effective solution compared to replacing the entire sink. A new ring is relatively inexpensive and can be easily installed by a professional plumber. This means you can update the look and functionality of your kitchen without breaking the bank. Plus, by preventing potential water damage and other issues, you can save money in the long run.
Conclusion
 In conclusion, replacing your kitchen sink ring is a simple yet effective way to improve the functionality, aesthetics, and overall value of your kitchen. It is a cost-effective solution that can prevent potential problems and save you money in the long run. Be sure to hire a professional plumber for the installation to ensure a proper fit and to avoid any further issues. Don't wait until your ring is completely worn out, consider replacing it today for a better kitchen tomorrow.
















/interiors-of-the-kitchen-126173645-5835288f5f9b58d5b1b96af2.jpg)
