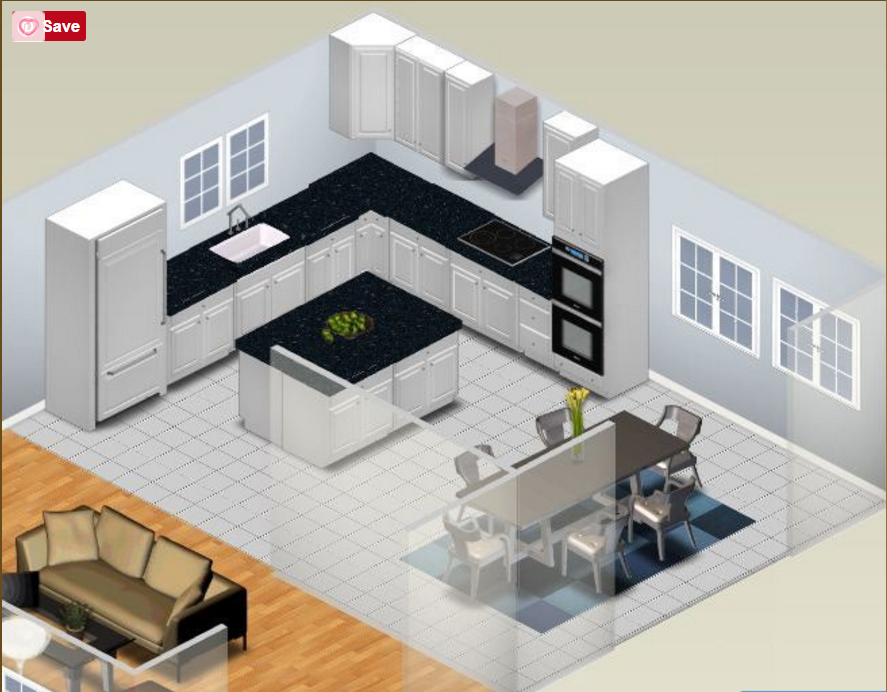
The IKEA Kitchen Planner is a great tool for designing your dream kitchen, but it can be a bit daunting if you're not familiar with the features. One key element that often confuses users is how to add a wall to their kitchen design. Luckily, it's a simple process once you know the steps. To add a wall in the IKEA Kitchen Planner, start by selecting the "Walls" tab on the left-hand side of the screen. Then, click on the "Add Wall" button and drag the wall to the desired location in your kitchen design. You can adjust the length and height of the wall using the green dots, and you can also add doors or windows by selecting the appropriate option from the menu. It's important to note that the wall will automatically snap to existing walls, so you don't have to worry about aligning it perfectly. Once you're happy with the placement and size of the wall, you can move on to customizing it to fit your design vision.1. How to Add a Wall in the IKEA Kitchen Planner


1. How to Add a Wall in the IKEA Kitchen Planner


If you're new to using the IKEA Kitchen Planner, it can be helpful to have a step-by-step guide for adding a wall. Here's a breakdown of the process: Step 1: Open the IKEA Kitchen Planner and select the "Walls" tab on the left-hand side of the screen. Step 2: Click on the "Add Wall" button, located at the bottom of the screen. Step 3: Use your cursor to drag the wall to the desired location in your kitchen design. The wall will automatically snap to existing walls, so you don't have to worry about aligning it perfectly. Step 4: Adjust the length and height of the wall using the green dots. You can also add doors or windows by selecting the appropriate option from the menu. Step 5: Once you're happy with the placement and size of the wall, you can move on to customizing it to fit your design vision.2. Step-by-Step Guide for Adding a Wall in the IKEA Kitchen Planner


2. Step-by-Step Guide for Adding a Wall in the IKEA Kitchen Planner


Adding a wall in the IKEA Kitchen Planner can be a bit tricky, especially if you're new to using the tool. Here are some tips to make the process smoother: Tip 1: Take advantage of the snap feature by placing your wall near existing walls. This will ensure that your wall is properly aligned and will save you time trying to adjust it manually. Tip 2: Use the green dots to adjust the length and height of your wall. This will help you achieve the perfect measurements for your design. Tip 3: Don't be afraid to experiment with different wall placements and sizes. The IKEA Kitchen Planner allows you to easily make changes, so you can see what works best for your design.3. Tips for Using the IKEA Kitchen Planner to Add a Wall


3. Tips for Using the IKEA Kitchen Planner to Add a Wall

While adding a wall in the IKEA Kitchen Planner is a relatively simple process, there are some common mistakes that users make. Here are a few to avoid: Mistake #1: Not using the snap feature. This can result in walls that are not properly aligned and can throw off the entire design. Mistake #2: Forgetting to adjust the length and height of the wall using the green dots. This can result in walls that are too long or too short for your design. Mistake #3: Not experimenting with different wall placements and sizes. This is your chance to create your dream kitchen, so don't be afraid to try different options.4. Common Mistakes to Avoid When Adding a Wall in the IKEA Kitchen Planner


4. Common Mistakes to Avoid When Adding a Wall in the IKEA Kitchen Planner


If you're experiencing issues when trying to add a wall in the IKEA Kitchen Planner, here are some troubleshooting tips: Issue: The wall is not snapping to existing walls. Solution: Make sure you are using the snap feature by placing your wall near existing walls. If the issue persists, try refreshing the page and then trying again. Issue: The wall is not the desired length or height. Solution: Use the green dots to adjust the length and height of the wall. If the issue persists, try refreshing the page and then trying again.5. Troubleshooting: Issues with Adding a Wall in the IKEA Kitchen Planner


5. Troubleshooting: Issues with Adding a Wall in the IKEA Kitchen Planner


Now that you've successfully added a wall to your kitchen design, it's time to customize it to fit your vision. Here are some ways you can do that: Customization 1: Change the color of the wall by selecting it and then choosing a new color from the menu on the right-hand side of the screen. Customization 2: Add textures or patterns to the wall by selecting it and then choosing a new texture or pattern from the menu on the right-hand side of the screen. Customization 3: Add molding or trim to the wall by selecting it and then choosing a style from the menu on the right-hand side of the screen.6. How to Customize a Wall in the IKEA Kitchen Planner


6. How to Customize a Wall in the IKEA Kitchen Planner


In addition to full walls, you can also add half walls in the IKEA Kitchen Planner. Here's how: Step 1: Follow the same steps for adding a full wall, but instead of dragging the wall to the desired length, stop at the halfway point. Step 2: Use the green dots to adjust the height of the wall to your desired half wall height. Step 3: Customize the half wall using the same methods as a full wall, such as changing the color or adding molding.7. Adding a Half Wall in the IKEA Kitchen Planner: Step-by-Step Guide


7. Adding a Half Wall in the IKEA Kitchen Planner: Step-by-Step Guide
Adding a door or window to your wall can add functionality and aesthetic appeal to your kitchen design. Here's how to do it in the IKEA Kitchen Planner: Step 1: Select the wall you want to add a door or window to. Step 2: Click on the "Add Door" or "Add Window" option from the menu on the right-hand side of the screen. Step 3: Drag and position the door or window on the wall. Step 4: Use the green dots to adjust the size and placement of the door or window. You can also customize the style and color from the menu on the right-hand side of the screen.8. Using the IKEA Kitchen Planner to Add a Wall with a Door or Window


8. Using the IKEA Kitchen Planner to Add a Wall with a Door or Window
Adding a wall in the IKEA Kitchen Planner opens up endless design possibilities. Here are some creative ideas to inspire you: Idea 1: Create a half wall as a divider between your kitchen and dining area. Idea 2: Add a full wall with a large window to bring in natural light. Idea 3: Use a half wall with a built-in bookshelf for extra storage and a unique design element.9. Creative Ideas for Adding a Wall in the IKEA Kitchen Planner

9. Creative Ideas for Adding a Wall in the IKEA Kitchen Planner

Once you've added walls to your kitchen design, it's important to save and share your progress. Here's how: Step 1: Click on the "Save" button at the top of the screen. Step 2: Create a login if you don't already have one. Step 3: Once you've saved your design, you can share it with others by clicking on the "Share" button and choosing the desired sharing option. Congratulations, you now know how to add walls in the IKEA Kitchen Planner and can create the kitchen of your dreams. Happy designing!10. How to Save and Share Your Design with Added Walls in the IKEA Kitchen Planner


10. How to Save and Share Your Design with Added Walls in the IKEA Kitchen Planner


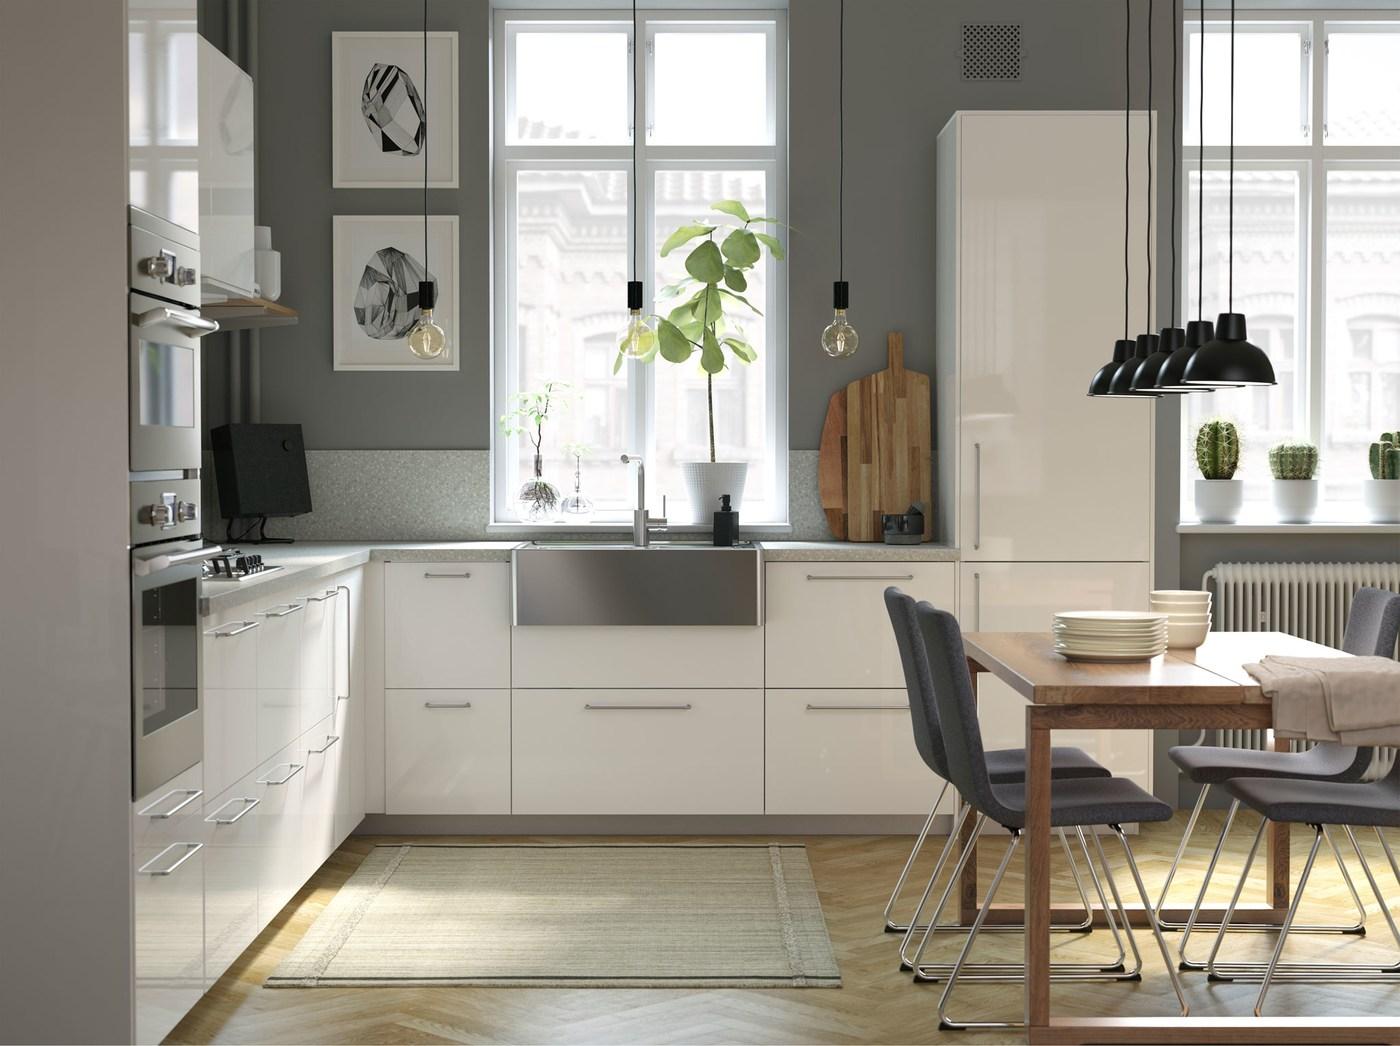
Maximize Your Kitchen Space with IKEA's Innovative Kitchen Planner
Efficient and Functional Design
 When it comes to creating the perfect kitchen, every inch of space counts. That's why IKEA offers a revolutionary kitchen planner tool that allows you to
add walls
and customize your kitchen layout to fit your specific needs. With this tool, you can maximize your kitchen space by adding additional walls to create separate work zones, such as a cooking area, a prep area, and a dining area.
When it comes to creating the perfect kitchen, every inch of space counts. That's why IKEA offers a revolutionary kitchen planner tool that allows you to
add walls
and customize your kitchen layout to fit your specific needs. With this tool, you can maximize your kitchen space by adding additional walls to create separate work zones, such as a cooking area, a prep area, and a dining area.
Customizable Options
 The IKEA kitchen planner also offers a variety of customizable options to help you create a functional and efficient kitchen design. You can choose from a wide range of cabinet styles, colors, and finishes to match your personal taste and overall house design. With the
add walls
feature, you can create a seamless flow in your kitchen, while also adding storage space for all your cooking essentials.
The IKEA kitchen planner also offers a variety of customizable options to help you create a functional and efficient kitchen design. You can choose from a wide range of cabinet styles, colors, and finishes to match your personal taste and overall house design. With the
add walls
feature, you can create a seamless flow in your kitchen, while also adding storage space for all your cooking essentials.
Easy to Use
 Not everyone has the luxury of hiring a professional interior designer to create their dream kitchen. That's where IKEA's kitchen planner comes in handy. The user-friendly interface allows you to easily
add walls
and experiment with different kitchen layouts until you find the perfect one for your space. You can also save and revisit your design to make any necessary changes before making a final decision.
Not everyone has the luxury of hiring a professional interior designer to create their dream kitchen. That's where IKEA's kitchen planner comes in handy. The user-friendly interface allows you to easily
add walls
and experiment with different kitchen layouts until you find the perfect one for your space. You can also save and revisit your design to make any necessary changes before making a final decision.
Cost-Effective Solution
 Renovating or designing a new kitchen can be a costly investment. However, with IKEA's kitchen planner, you can create a functional and stylish kitchen without breaking the bank. The tool is completely free to use and allows you to visualize your design before making any purchases. This way, you can make informed decisions and stick to your budget without sacrificing your dream kitchen.
Get Started Today
 With IKEA's kitchen planner, you have the power to transform your kitchen into a functional and efficient space. So why wait?
Add walls
and customize your kitchen design to fit your needs and style. With just a few clicks, you can create your dream kitchen and bring your house design to the next level. Visit IKEA's website and start planning your dream kitchen today!
With IKEA's kitchen planner, you have the power to transform your kitchen into a functional and efficient space. So why wait?
Add walls
and customize your kitchen design to fit your needs and style. With just a few clicks, you can create your dream kitchen and bring your house design to the next level. Visit IKEA's website and start planning your dream kitchen today!

/cdn.vox-cdn.com/uploads/chorus_image/image/51885049/dining_day_one.0.jpeg)


