Are you looking to add some charm and character to your home's exterior? Consider building your own shutters and window boxes! Not only is it a budget-friendly option, but it also allows for a personalized touch to your home's curb appeal. In this guide, we'll walk you through the steps of building and installing your own DIY exterior shutters and window boxes.DIY Exterior Shutters: How to Build Shutters and Window Boxes


DIY Exterior Shutters: How to Build Shutters and Window Boxes

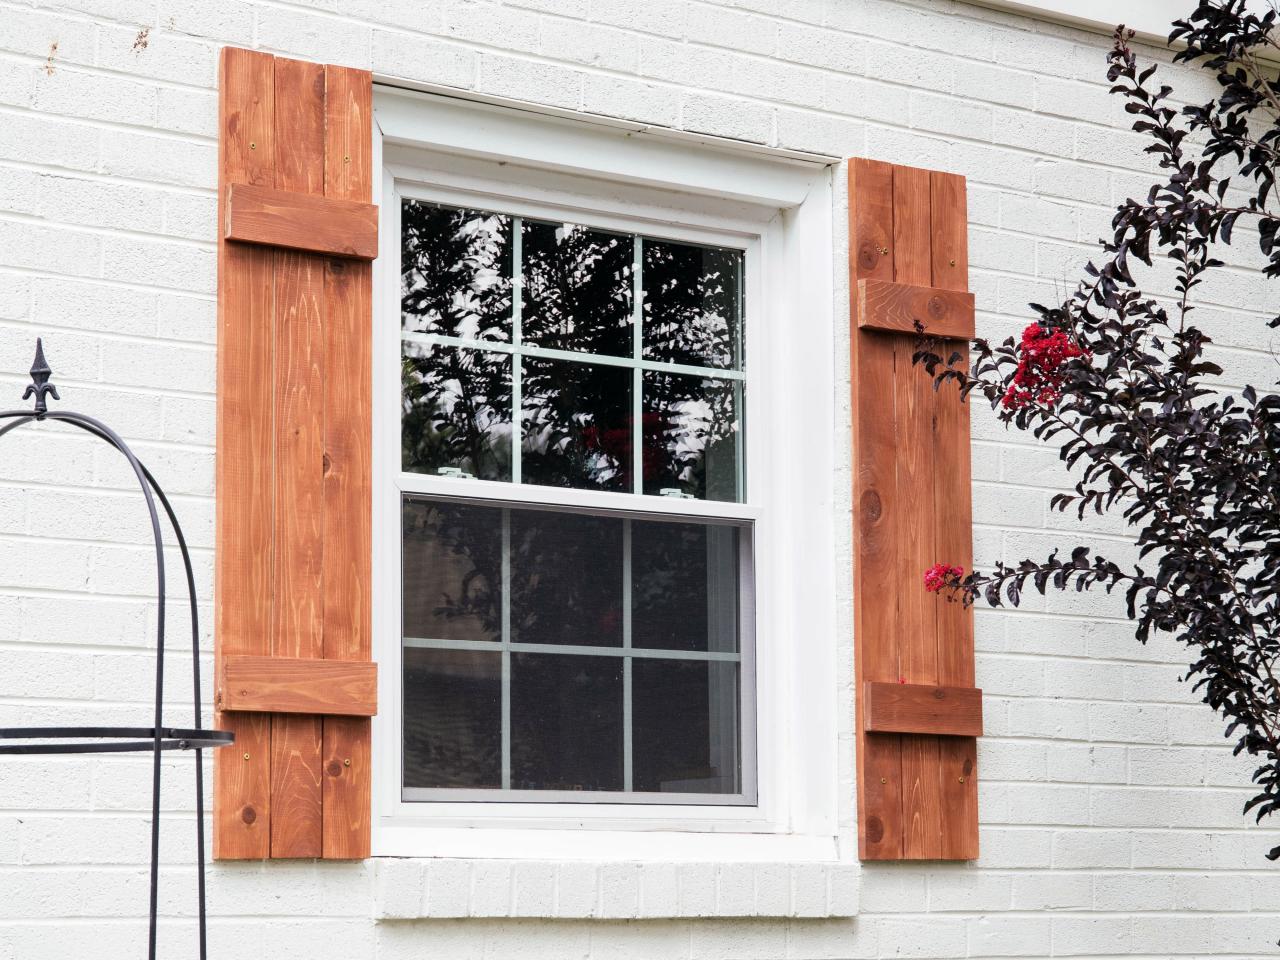


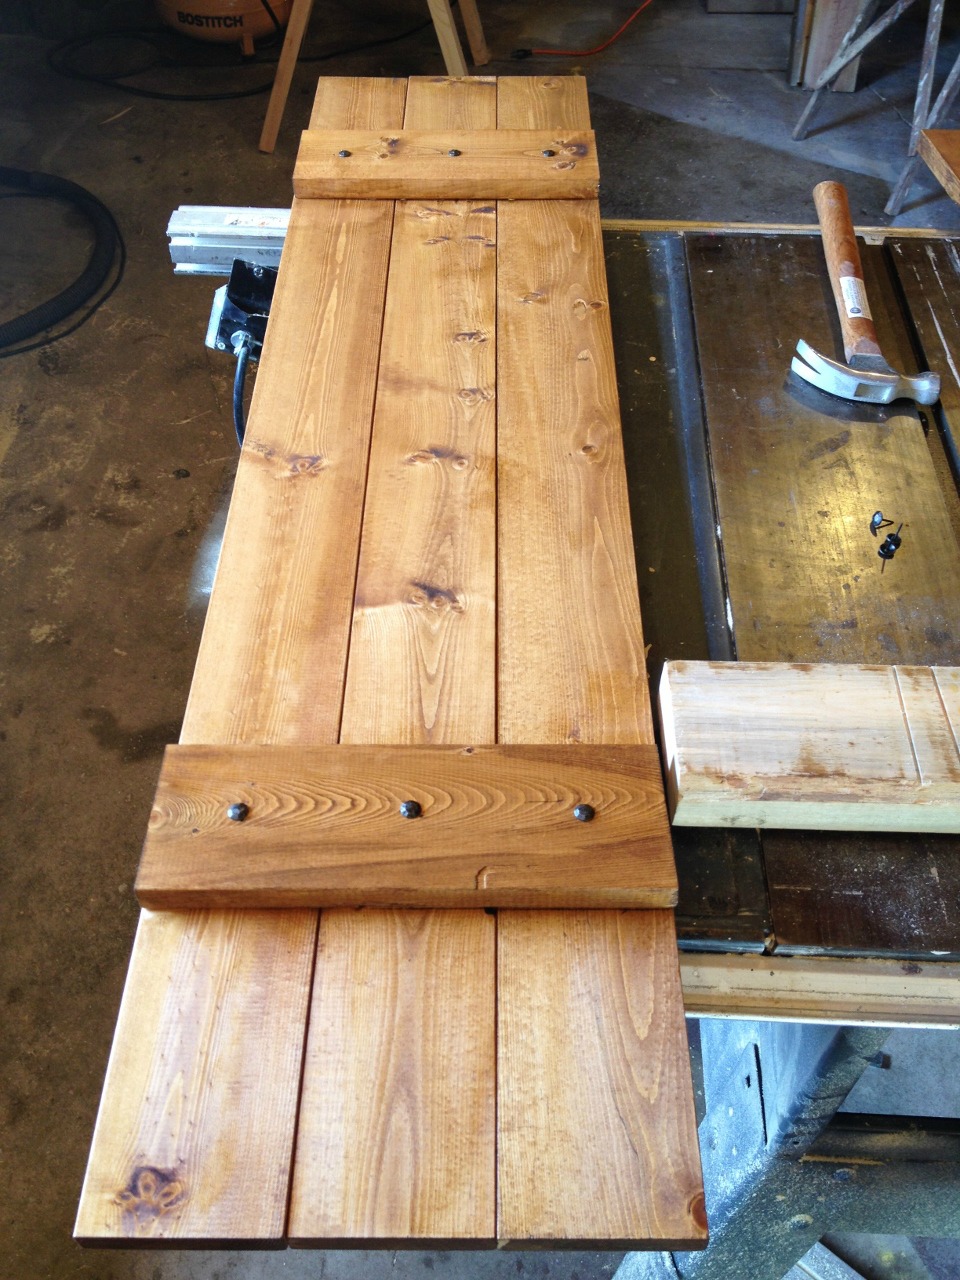
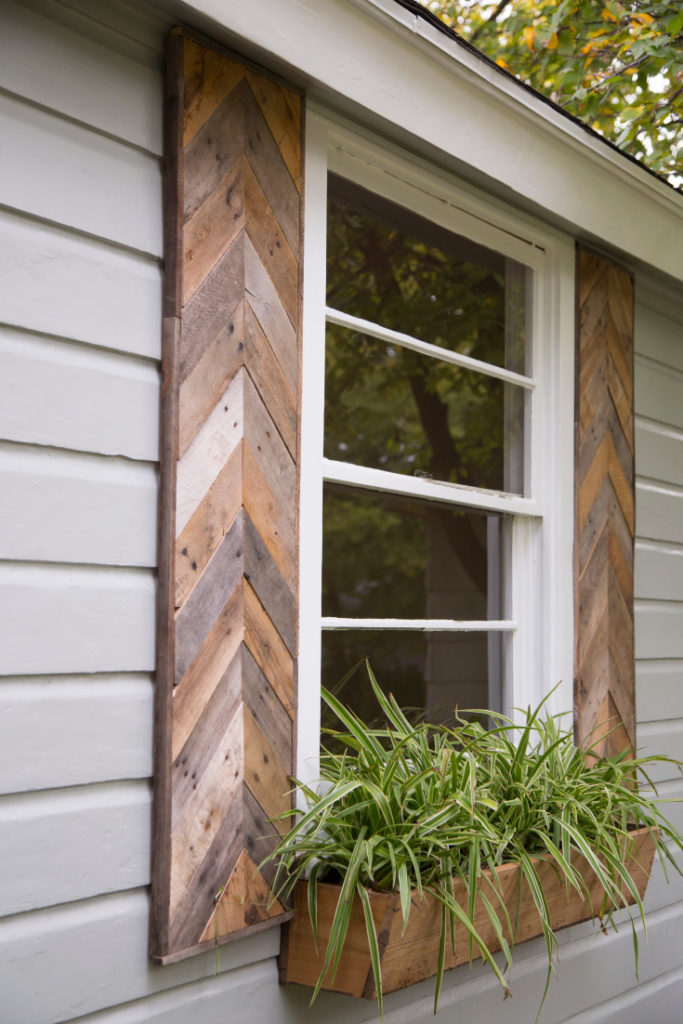
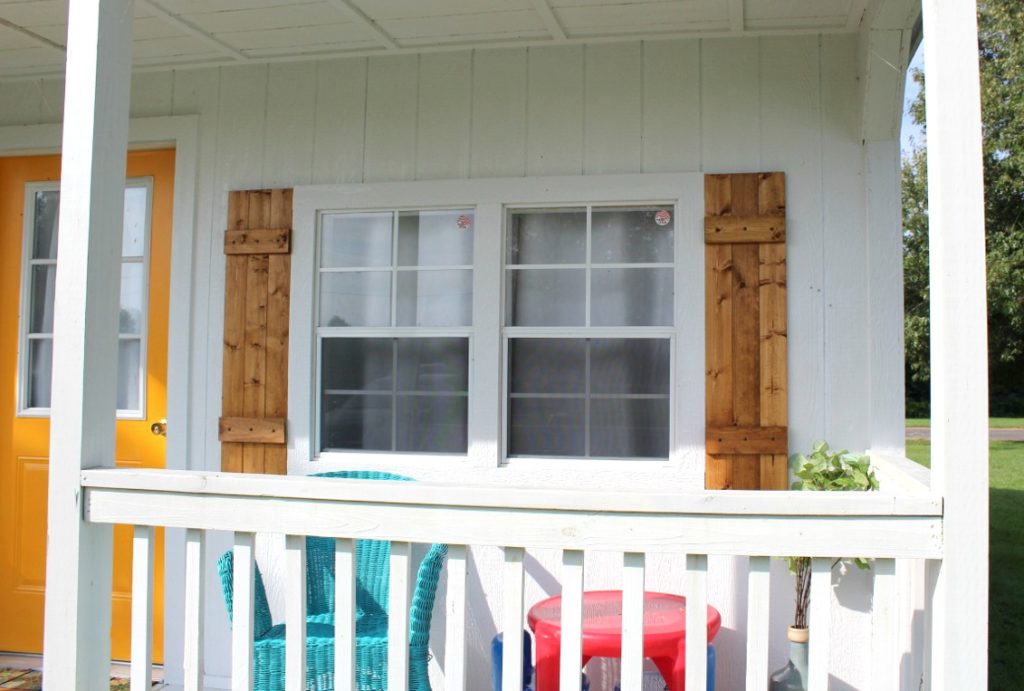
Before you begin building your shutters, you'll need to gather your materials. You can use wood, vinyl, or composite materials for your shutters. Measure the height and width of your windows to determine the size of your shutters. Remember to add a few inches to the measurements to ensure proper coverage and a better aesthetic. Next, cut your chosen material into the desired size and shape for your shutters. You can go for a classic rectangular shape or get creative with different designs. Sand any rough edges and paint or stain the shutters to your liking. Pro tip: Use rustic or distressed paint techniques for a farmhouse or coastal look.DIY Shutters for Windows: How to Build Shutters


DIY Shutters for Windows: How to Build Shutters


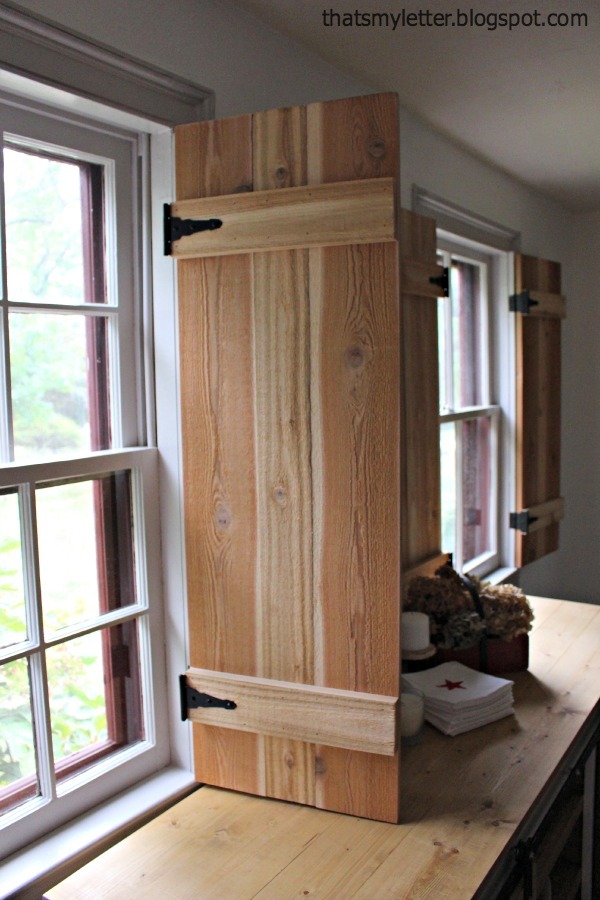
Once your shutters are built, it's time to install them on your windows. First, measure and mark the placement of the hinges on the shutters and the window frame. Pre-drill holes for the screws and attach the hinges to the shutters and frame. Pro tip: Use decorative hinges for an added touch of style. Next, attach a latch or shutter fastener to keep the shutters closed when not in use. You can also add decorative handles or knobs for a more personalized look.DIY Exterior Shutters: How to Make Shutters


DIY Exterior Shutters: How to Make Shutters

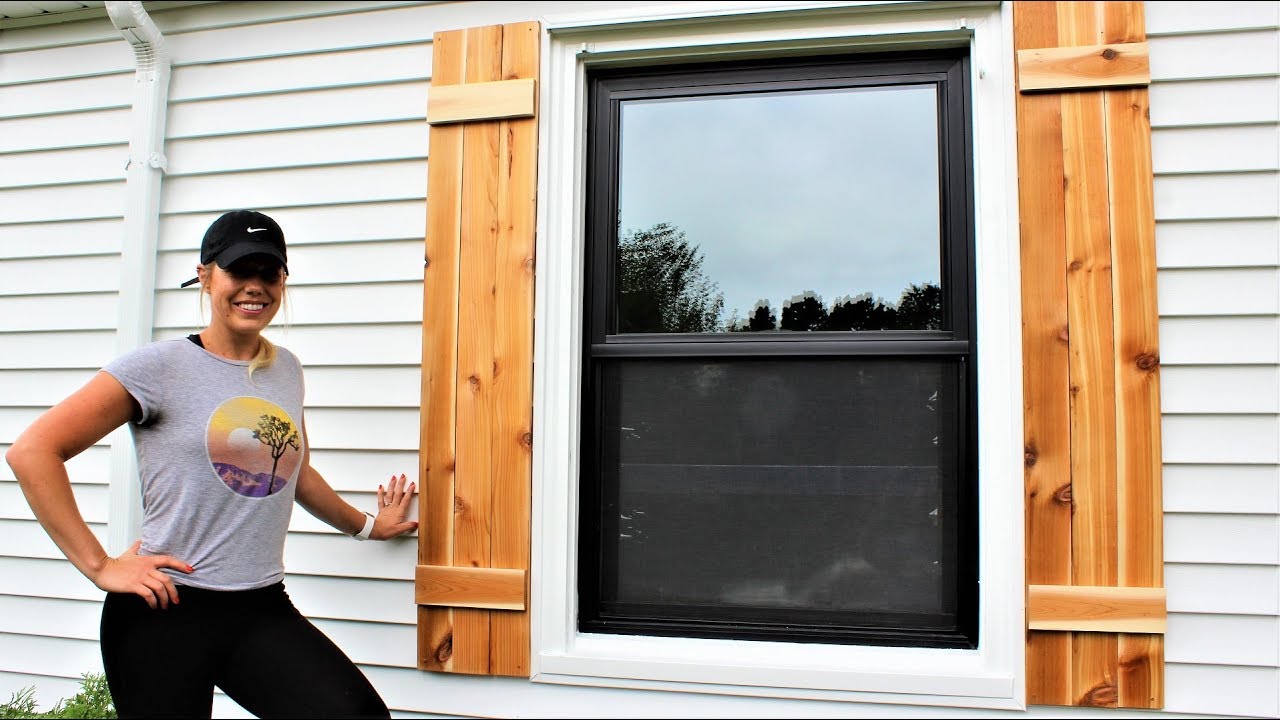
Installing shutters on your windows is a relatively easy process. Once your shutters are built and assembled, hold them up to the window to ensure they fit properly. If needed, make any adjustments to the placement of the hinges before attaching them to the window frame. Once everything is in place, use screws to secure the shutters to the window frame. Repeat the process for all of your windows and step back to admire your handiwork. Your home's exterior will instantly have a new and improved look.DIY Exterior Shutters: How to Install Shutters

DIY Exterior Shutters: How to Install Shutters


If you've chosen to use wood for your shutters, you'll need to paint or stain them. Before doing so, make sure to sand and prime the shutters to create a smooth surface for the paint to adhere to. Pro tip: Use a high-quality exterior paint or stain for long-lasting results. When it comes to choosing a color, consider the overall style and color scheme of your home's exterior. You can opt for a bold color to make a statement or a more neutral color for a classic look. Pro tip: Use the same color as your front door for a cohesive look.DIY Exterior Shutters: How to Paint Shutters


DIY Exterior Shutters: How to Paint Shutters


If you prefer the natural look of wood, you can also choose to stain your shutters. Before staining, make sure to sand and seal the wood to protect it from the elements. When choosing a stain, consider the type of wood you're working with and the desired shade. Pro tip: Use a waterproof stain for added durability. Apply the stain using a brush or cloth, following the wood's natural grain. You may need to apply multiple coats for a more even and saturated color. Allow the stain to dry completely before installing the shutters on your windows.DIY Exterior Shutters: How to Stain Shutters

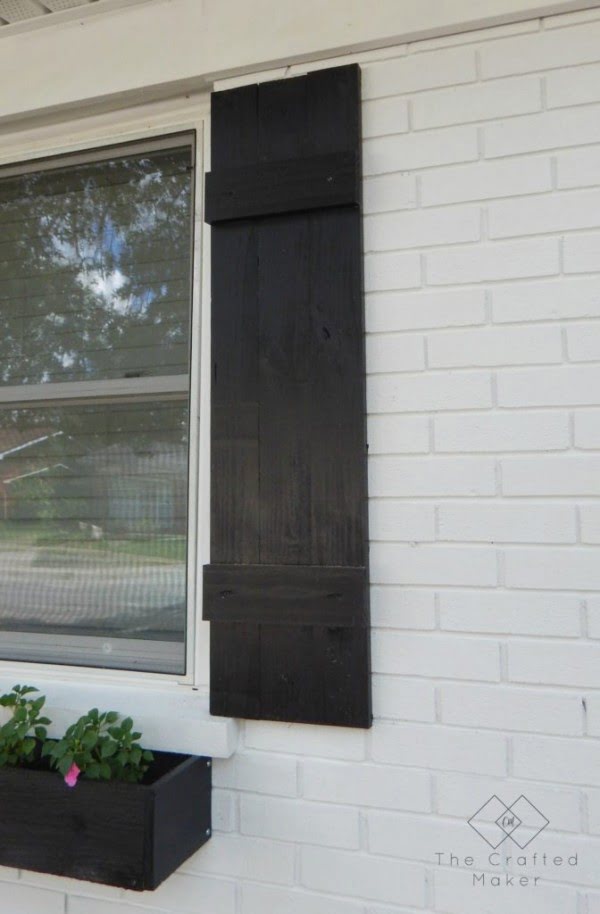
DIY Exterior Shutters: How to Stain Shutters

Before hanging your shutters, make sure to clean and prep the surface of your windows. You may need to scrape off any old paint or caulk and fill in any holes or gaps. Once the surface is clean and dry, you can attach the shutters using the hinges and screws. It's important to make sure the shutters are level and evenly spaced for a polished look. You may need to use shims or spacers to adjust the placement of the shutters. Once everything is in place, secure the shutters to the window frame using screws.DIY Exterior Shutters: How to Hang Shutters
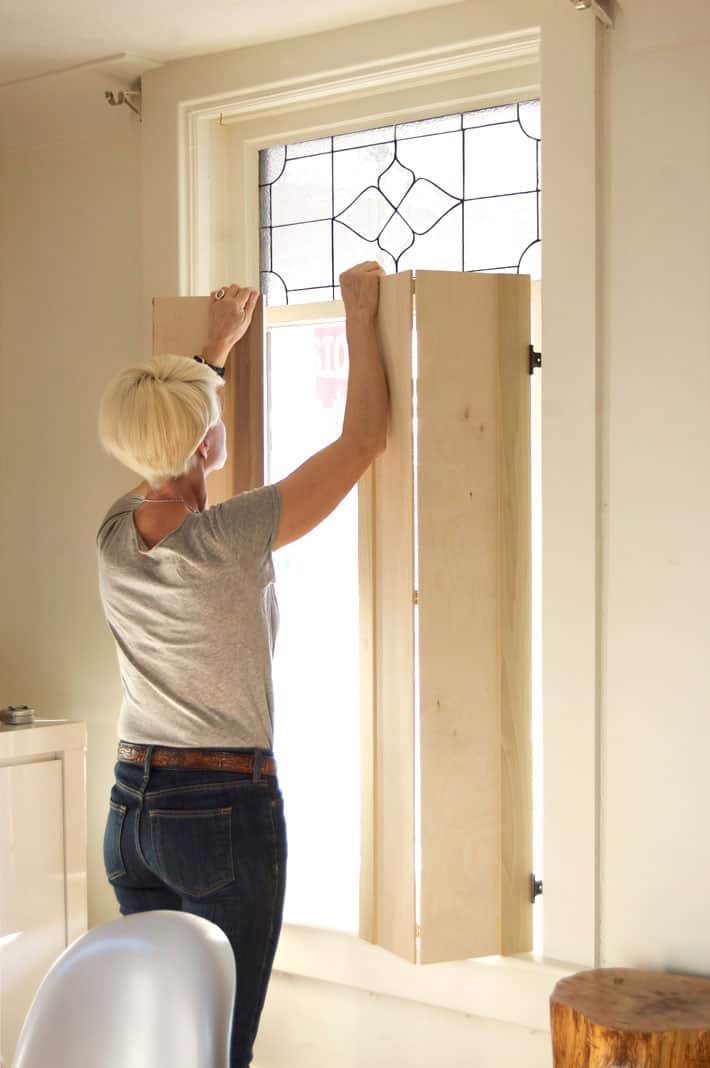


DIY Exterior Shutters: How to Hang Shutters


Accurate measurements are crucial when building or installing shutters. Before starting your project, make sure to measure the height and width of your windows as well as the space between them. This will help determine the appropriate size and placement of your shutters. When measuring for shutters, remember to account for any trim or other obstacles around the window. It's also a good idea to leave a few inches of space between the shutters and windows for proper ventilation.DIY Exterior Shutters: How to Measure for Shutters


DIY Exterior Shutters: How to Measure for Shutters
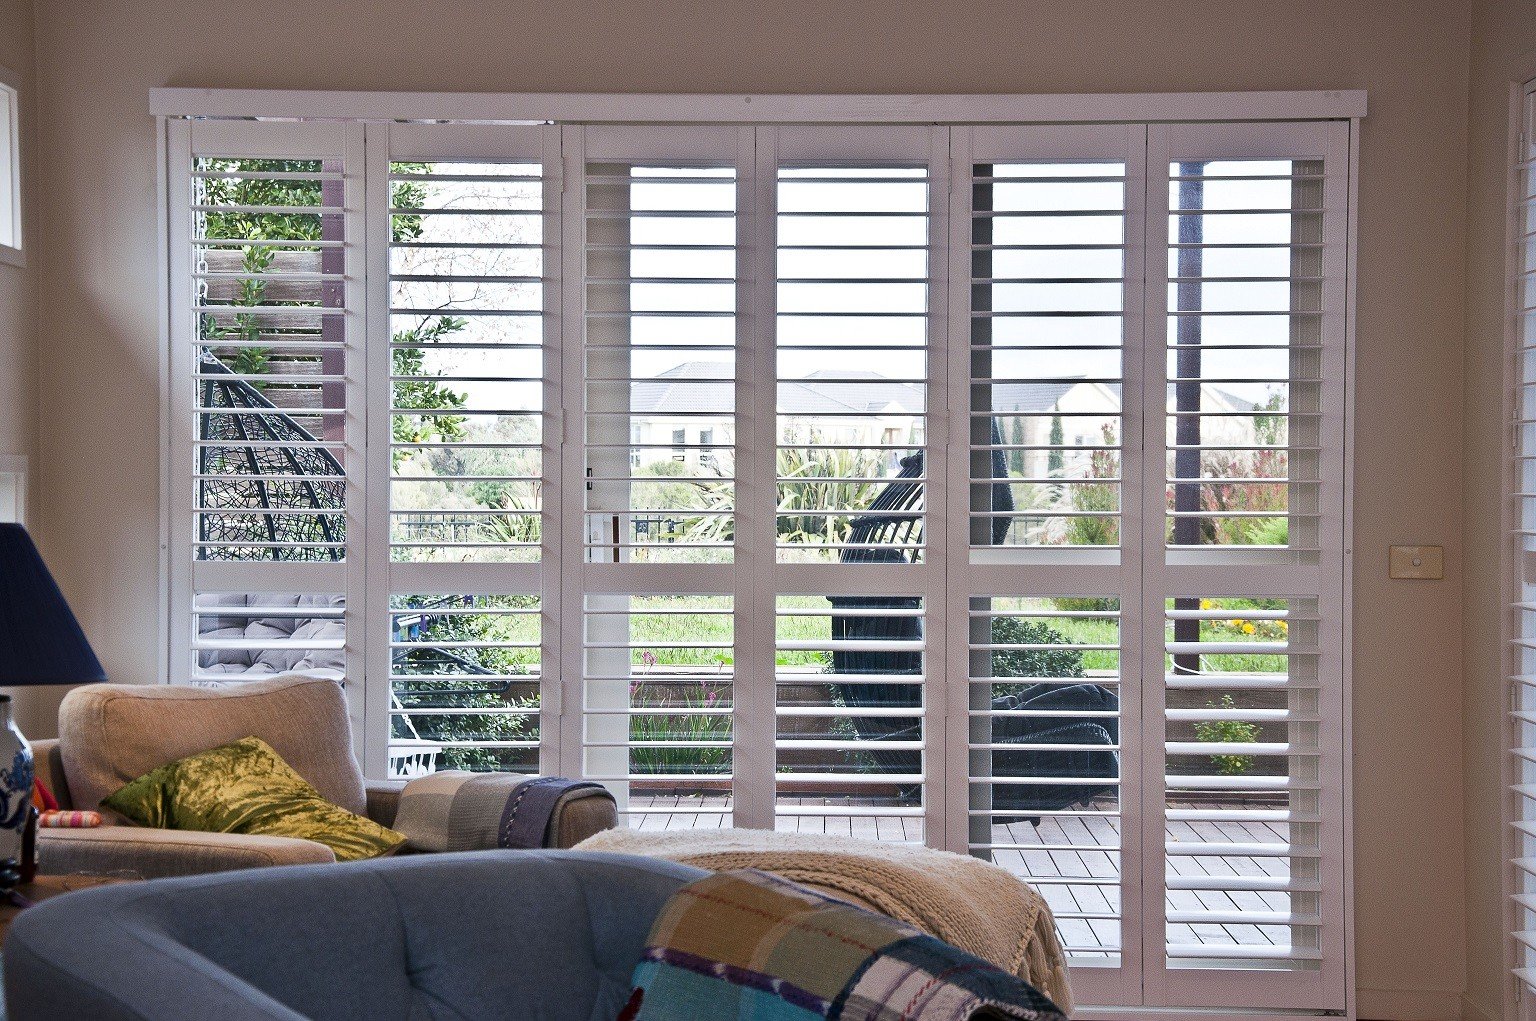
There are many options available when it comes to choosing shutters for your home's exterior. When deciding on the material, consider durability, maintenance, and cost. Wood shutters offer a classic look but may require more upkeep, while vinyl and composite shutters are more low-maintenance. You should also consider the style of your home and choose shutters that complement it. For example, louvered or board and batten shutters are popular options for traditional homes, while raised panel or shaker shutters are better suited for modern homes.DIY Exterior Shutters: How to Choose the Right Shutters

DIY Exterior Shutters: How to Choose the Right Shutters

To keep your shutters looking their best, regular maintenance is key. If you've painted or stained your shutters, you may need to touch them up every few years. Make sure to also check for any signs of damage, such as rot or warping, and address them promptly. For vinyl or composite shutters, simply clean them with soap and water as needed. You may also want to periodically check the hinges and screws to ensure they are secure. Now that you know the ins and outs of DIY exterior shutters, you can confidently tackle this project and enhance the look of your home's exterior. Remember to take your time, use high-quality materials, and have fun adding your personal touch to your shutters and window boxes.DIY Exterior Shutters: How to Maintain Shutters

DIY Exterior Shutters: How to Maintain Shutters
Why DIY Shutters are the Perfect Addition to Your Home's Exterior

Enhance your Home's Curb Appeal
 If you're looking to give your home a quick and easy facelift,
DIY shutters
are the perfect solution. These exterior window treatments not only add a touch of charm and character, but they also
increase curb appeal
and make your home stand out in the neighborhood. With a variety of styles, colors, and materials to choose from, you can customize your shutters to complement your home's unique design and enhance its overall aesthetic.
If you're looking to give your home a quick and easy facelift,
DIY shutters
are the perfect solution. These exterior window treatments not only add a touch of charm and character, but they also
increase curb appeal
and make your home stand out in the neighborhood. With a variety of styles, colors, and materials to choose from, you can customize your shutters to complement your home's unique design and enhance its overall aesthetic.
Protect Your Home from the Elements
 Aside from their decorative purposes,
exterior shutters
also serve a practical function. They provide an extra layer of protection for your windows against harsh elements such as wind, rain, and debris. This can help prevent damage to your windows and potentially save you money on repairs in the long run. Additionally, shutters can also help regulate the temperature inside your home by providing insulation and reducing the amount of heat and sunlight that enters through your windows.
Aside from their decorative purposes,
exterior shutters
also serve a practical function. They provide an extra layer of protection for your windows against harsh elements such as wind, rain, and debris. This can help prevent damage to your windows and potentially save you money on repairs in the long run. Additionally, shutters can also help regulate the temperature inside your home by providing insulation and reducing the amount of heat and sunlight that enters through your windows.
Cost-Effective and Easy to Install
 One of the biggest advantages of
DIY shutters
is that they are cost-effective and easy to install. By opting for a do-it-yourself approach, you can save money on both the shutters themselves and the installation process. With the right tools and materials, you can have your shutters up in no time and achieve a professional-looking result at a fraction of the cost. Not to mention, taking on this project yourself can also be a fun and rewarding experience.
One of the biggest advantages of
DIY shutters
is that they are cost-effective and easy to install. By opting for a do-it-yourself approach, you can save money on both the shutters themselves and the installation process. With the right tools and materials, you can have your shutters up in no time and achieve a professional-looking result at a fraction of the cost. Not to mention, taking on this project yourself can also be a fun and rewarding experience.
Customize to Your Taste
 When it comes to
house design
, the devil is in the details. And adding shutters to your home's exterior is a great way to add a personal touch and make it truly stand out. With a variety of materials such as wood, vinyl, and composite, you can choose the one that best fits your budget and desired aesthetic. You can also customize the color, size, and style of your shutters to perfectly complement your home's unique design.
When it comes to
house design
, the devil is in the details. And adding shutters to your home's exterior is a great way to add a personal touch and make it truly stand out. With a variety of materials such as wood, vinyl, and composite, you can choose the one that best fits your budget and desired aesthetic. You can also customize the color, size, and style of your shutters to perfectly complement your home's unique design.
The Bottom Line
 In conclusion,
DIY shutters
are a great addition to any home's exterior. They not only enhance the overall look and feel of your home, but they also provide practical benefits such as protection and insulation. With their cost-effectiveness and easy installation, you can easily transform the look of your home and make it stand out in the neighborhood. So why wait? Start your DIY shutter project today and reap the many benefits they have to offer.
In conclusion,
DIY shutters
are a great addition to any home's exterior. They not only enhance the overall look and feel of your home, but they also provide practical benefits such as protection and insulation. With their cost-effectiveness and easy installation, you can easily transform the look of your home and make it stand out in the neighborhood. So why wait? Start your DIY shutter project today and reap the many benefits they have to offer.