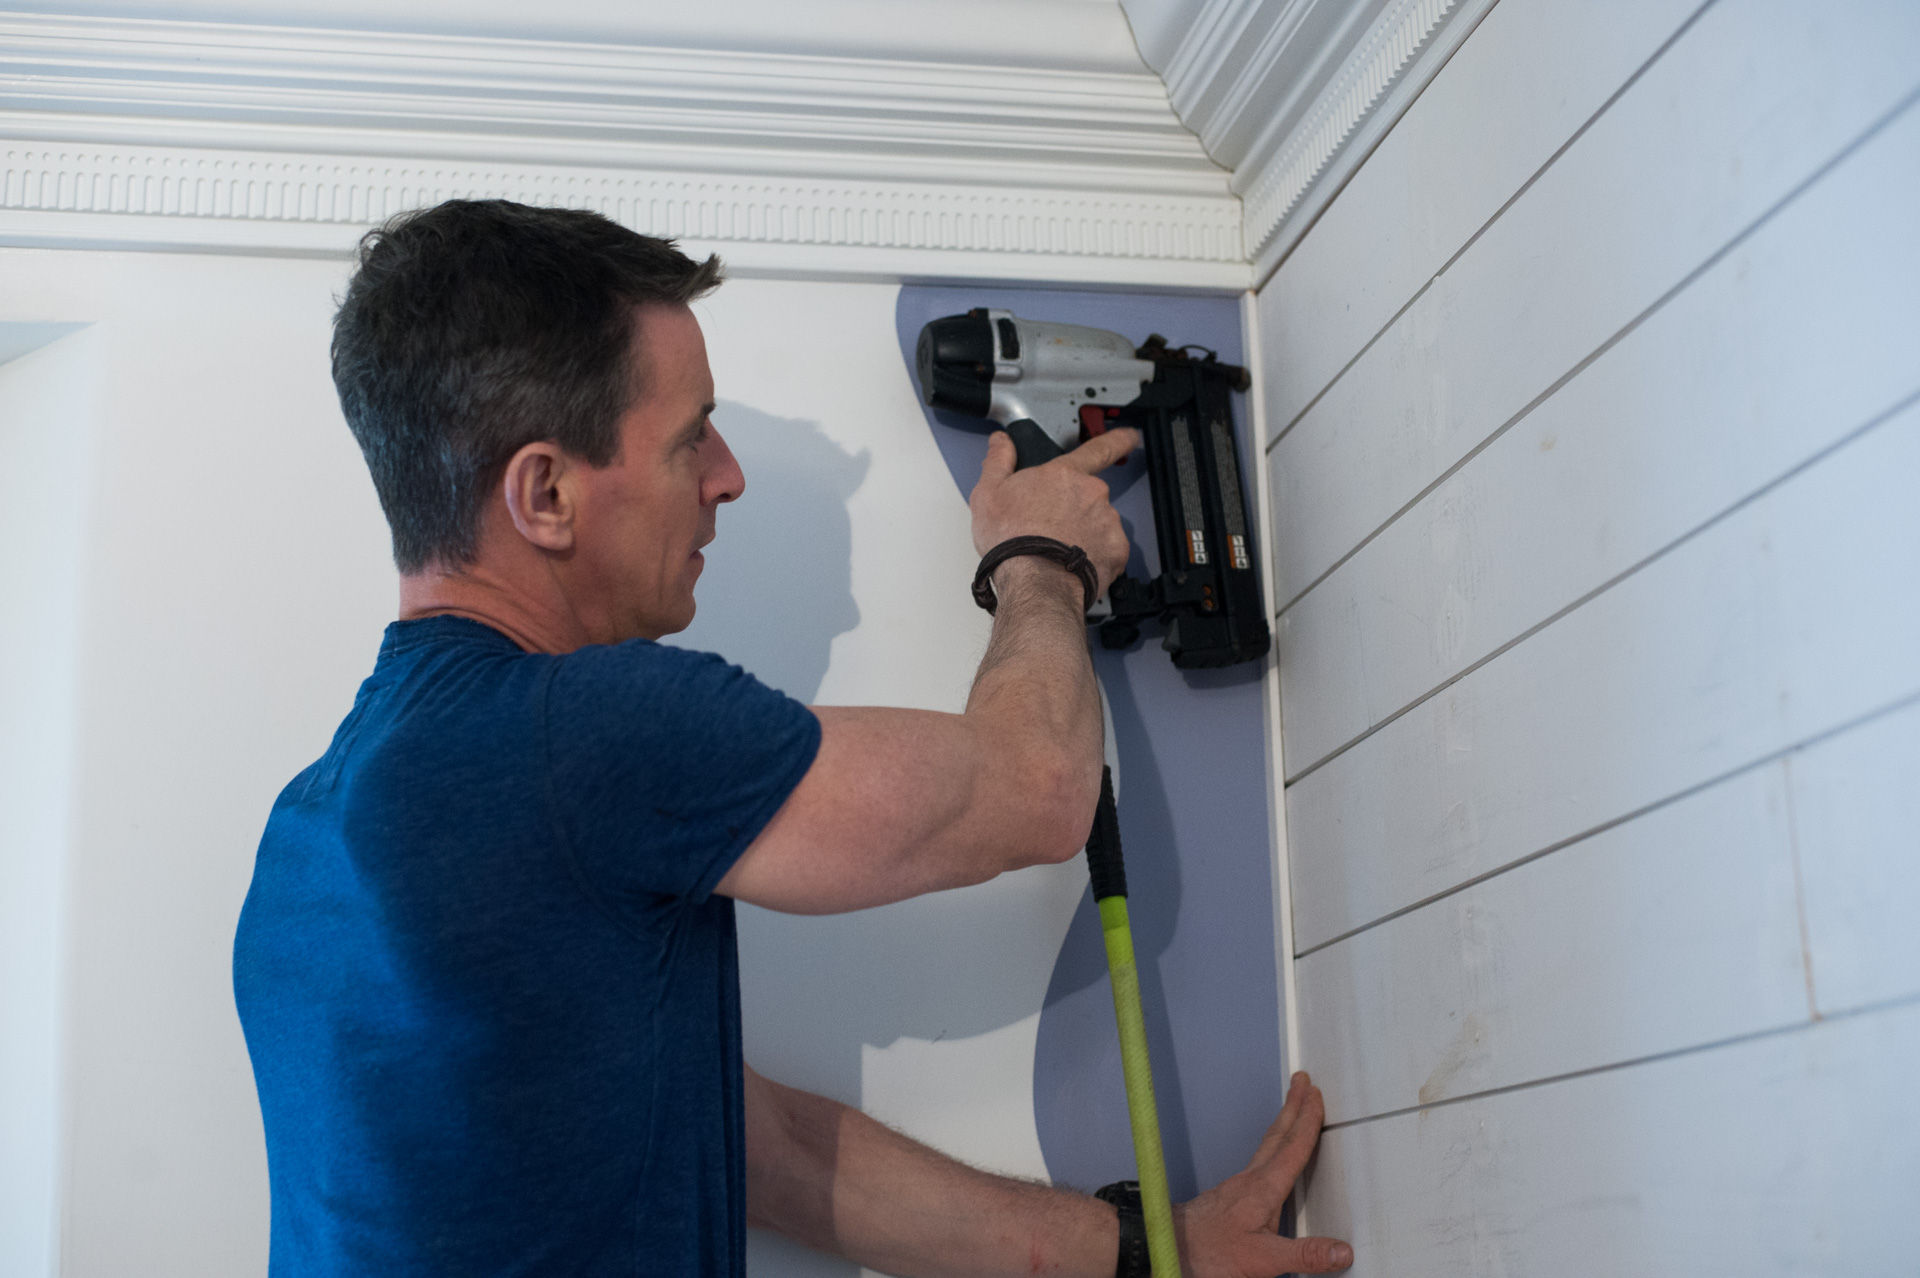
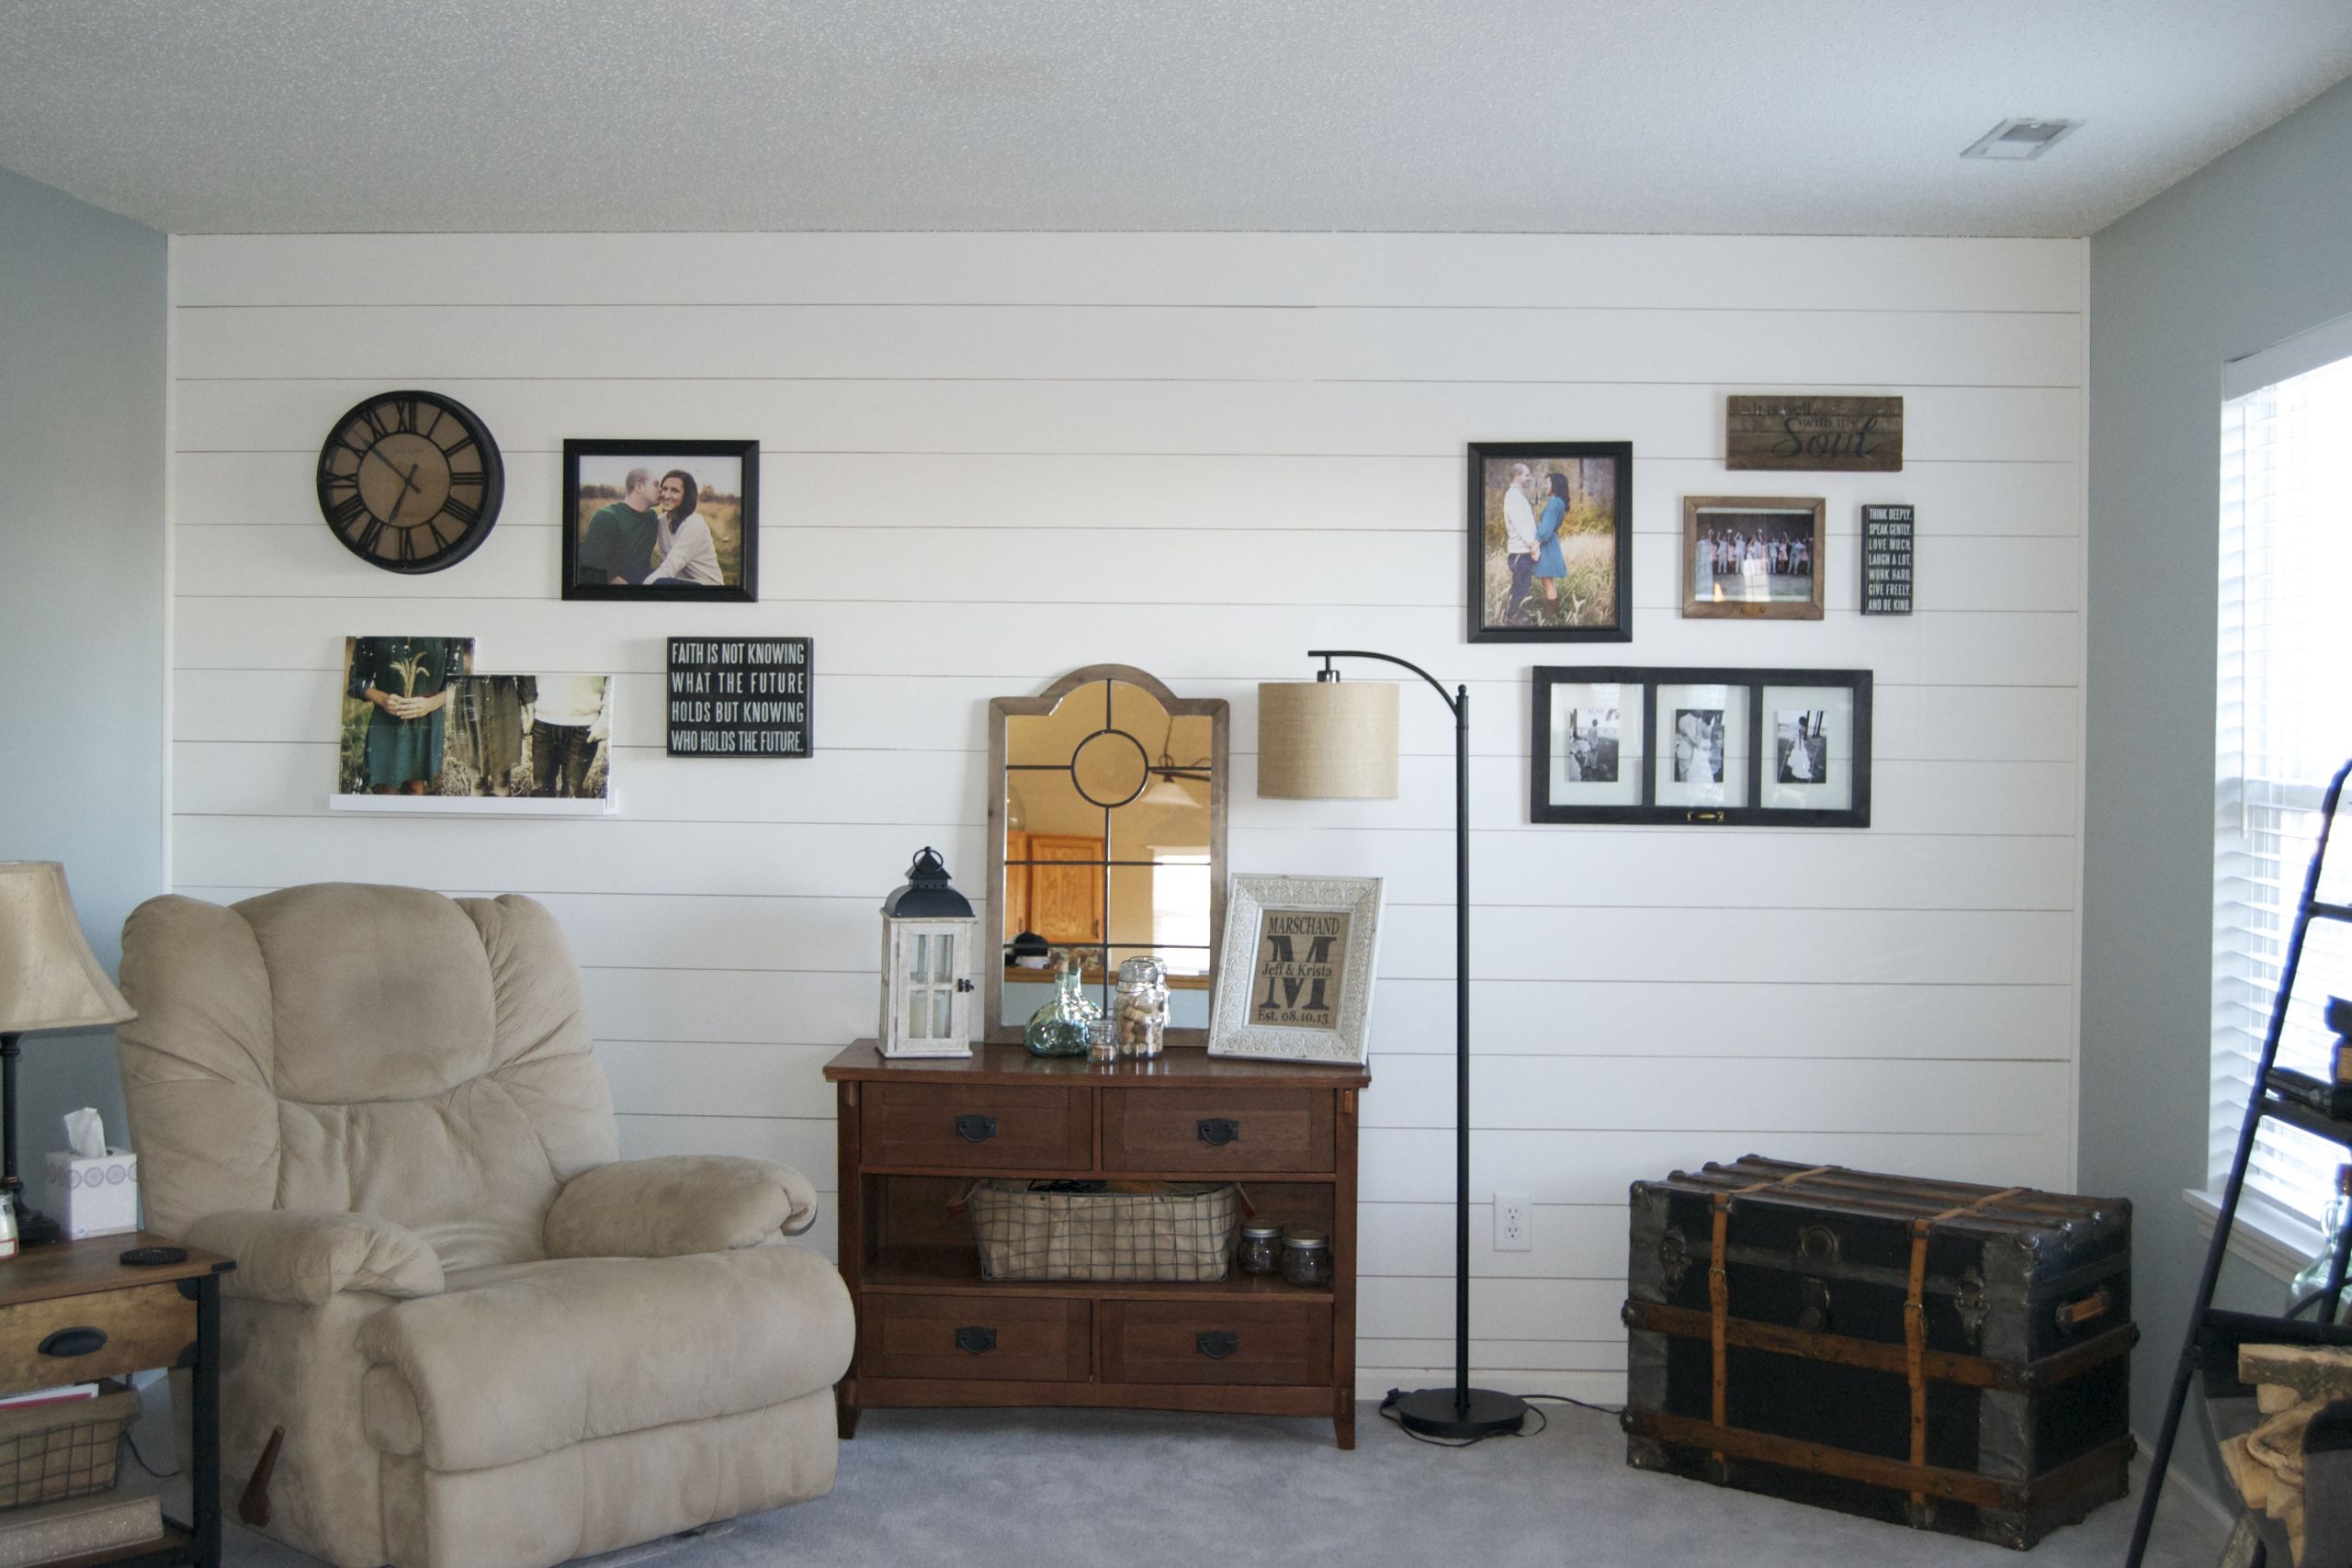
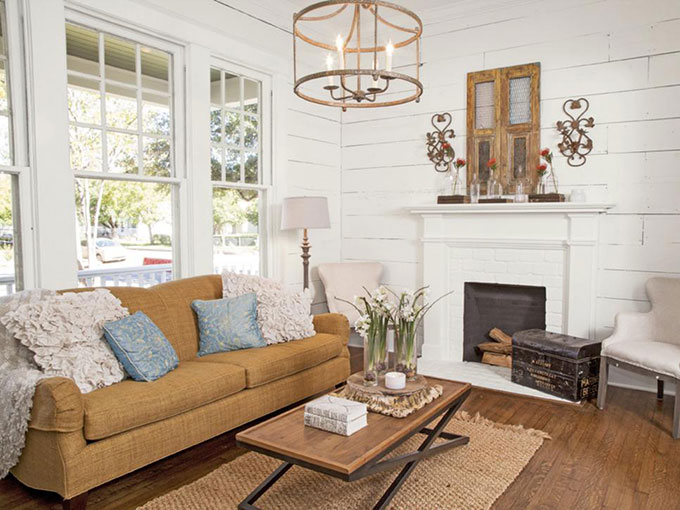
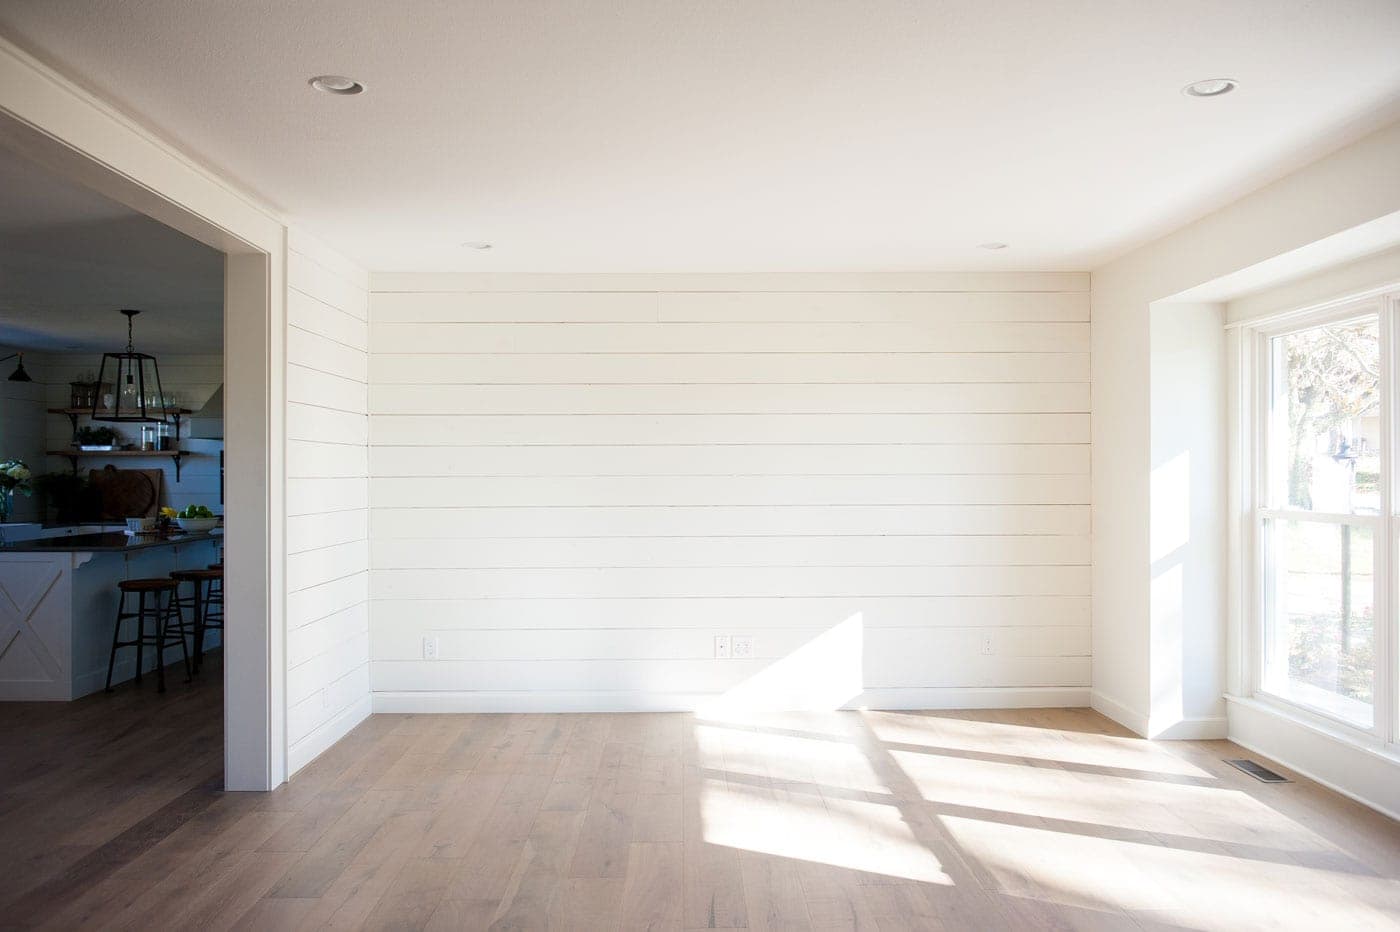
Are you looking to add some rustic charm to your living room without breaking the bank? Look no further than a DIY shiplap wall! This popular design trend has been taking the home decor world by storm, and for good reason. Not only is it affordable and easy to install, but it adds instant character and texture to any space. So roll up your sleeves and get ready to transform your living room with this budget-friendly project! First, let's talk about materials. To create a shiplap wall for under $100, you will need some basic tools such as a saw, level, and hammer. As for materials, you can pick up sheets of plywood at your local home improvement store for around $20 each. You will also need some nails or screws, depending on your preference, to attach the shiplap to the wall. And don't forget to paint or stain the shiplap to match your living room's aesthetic. Once you have all your materials, it's time to measure and cut your shiplap. You will want to measure the width and height of your wall and then cut the shiplap into strips accordingly. It's always a good idea to have a few extra strips on hand, just in case of any mistakes or miscalculations. Now for the fun part - installing the shiplap! Start at the bottom of the wall and work your way up, using a level to make sure each strip is straight. You can choose to nail or screw the shiplap into the wall, just make sure to space the nails/screws evenly along the strip. As you add each new strip, make sure to overlap the previous one to create that classic shiplap look. Once you have completed the installation, it's time to add some finishing touches. Fill in any nail or screw holes with wood filler and then sand the wall to create a smooth surface. Now you can paint or stain the shiplap to your desired color. If you want to add some extra dimension, you can also distress the shiplap with sandpaper or use a whitewash technique. And voila! You now have a beautiful shiplap wall in your living room for under $100. This versatile design element can be used in many different ways, from an accent wall to a full room makeover. So get creative and have fun with it!DIY Shiplap Wall for Under $100


DIY Shiplap Wall for Under $100


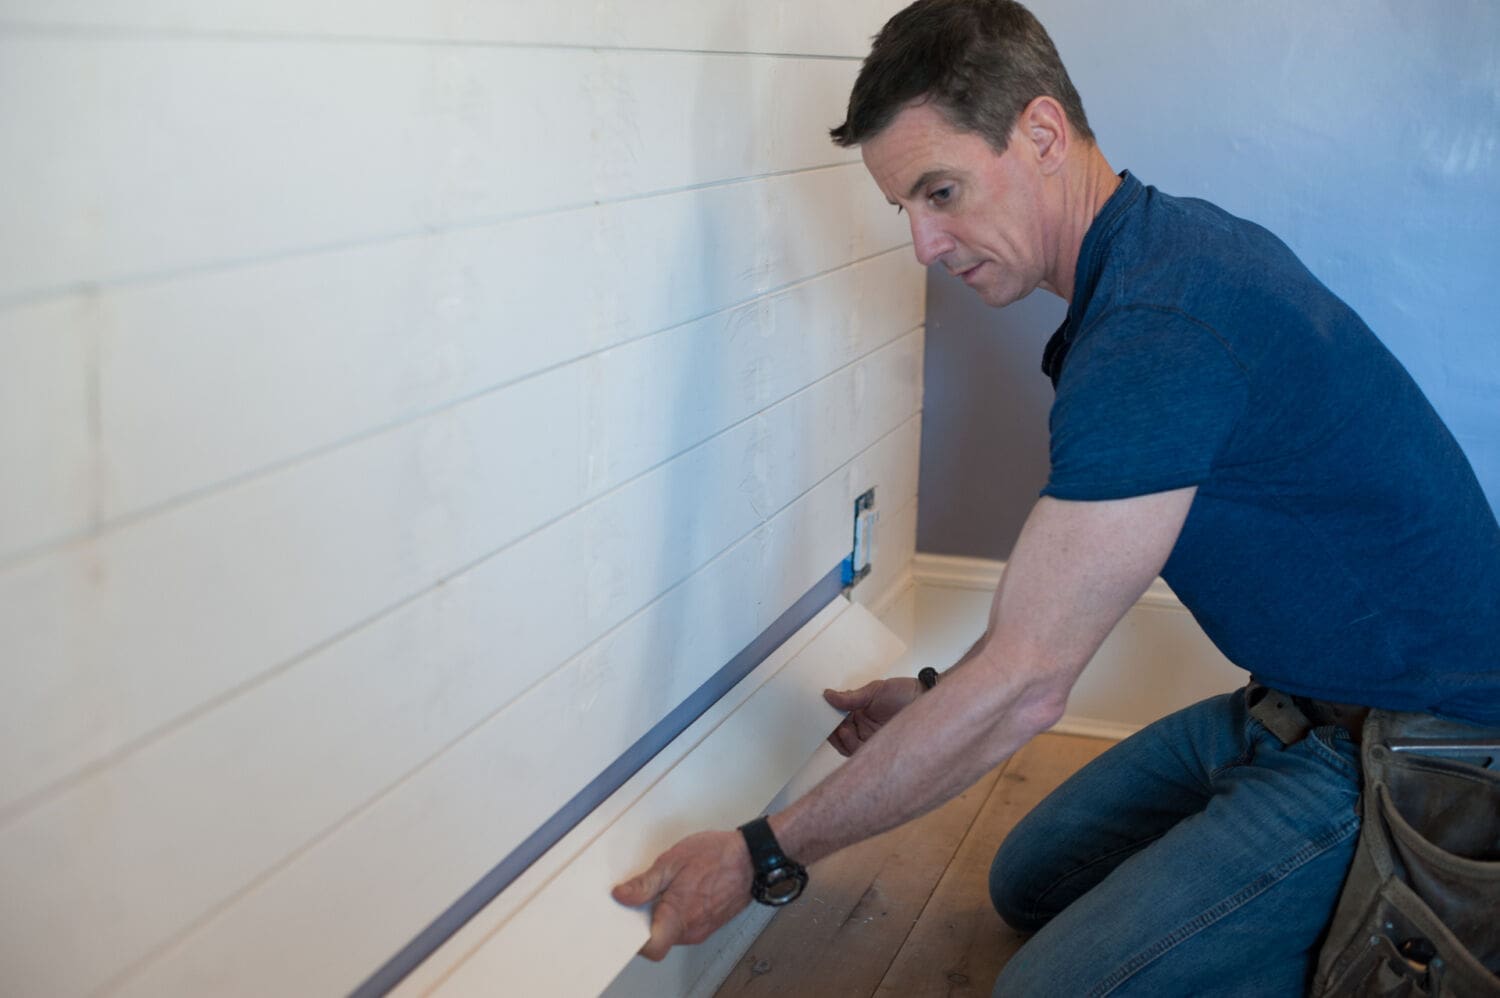
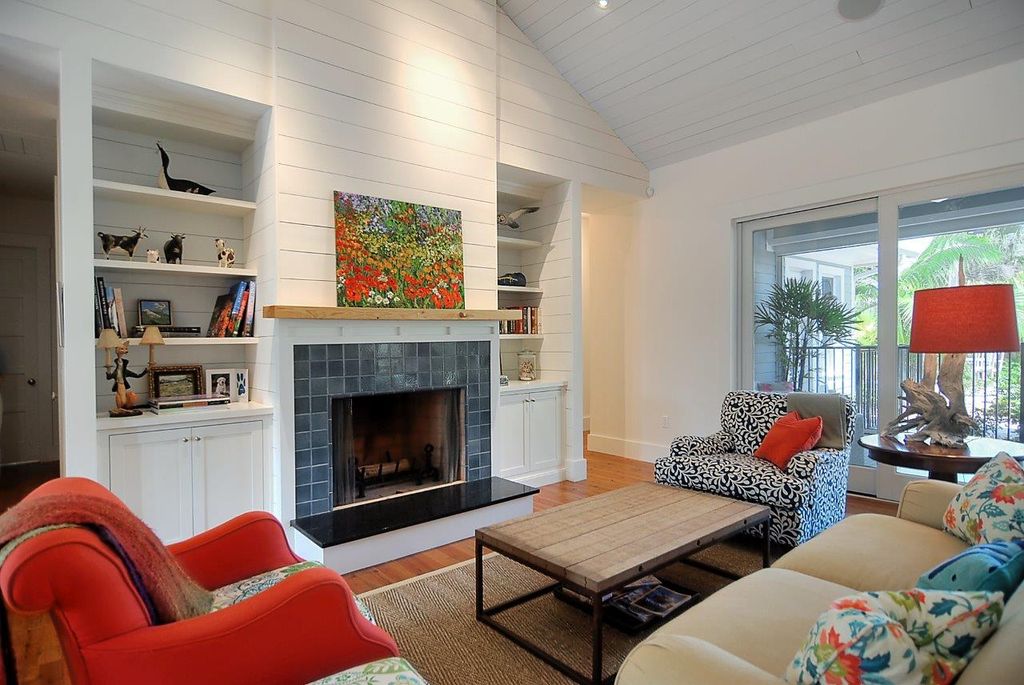
Shiplap has become a popular interior design trend, and for good reason. It adds a touch of rustic charm and texture to any space, including your living room. But how exactly do you install shiplap in this particular room? We've got you covered with a step-by-step guide. The first step is to measure your wall. You will want to measure the width and height of the wall and then calculate how many strips of shiplap you will need. Remember to add a few extra strips, just in case of any mistakes or miscalculations. Next, you will need to prepare the shiplap. Most shiplap comes in long sheets, so you will need to cut them into strips to fit your wall. You can use a saw to make the cuts, and don't forget to sand the edges to create a smooth surface. Now it's time to install the shiplap. Start at the bottom of the wall and work your way up, using a level to make sure each strip is straight. You can choose to nail or screw the shiplap into the wall, just make sure to space the nails/screws evenly along the strip. As you add each new strip, make sure to overlap the previous one to create that classic shiplap look. Once you have completed the installation, it's time to add some finishing touches. Fill in any nail or screw holes with wood filler and then sand the wall to create a smooth surface. Now you can paint or stain the shiplap to your desired color. If you want to add some extra dimension, you can also distress the shiplap with sandpaper or use a whitewash technique. And there you have it - a beautiful shiplap wall in your living room! This versatile design element can be used in many different ways, from an accent wall to a full room makeover. Get creative and have fun with it!How to Install Shiplap in a Living Room


How to Install Shiplap in a Living Room


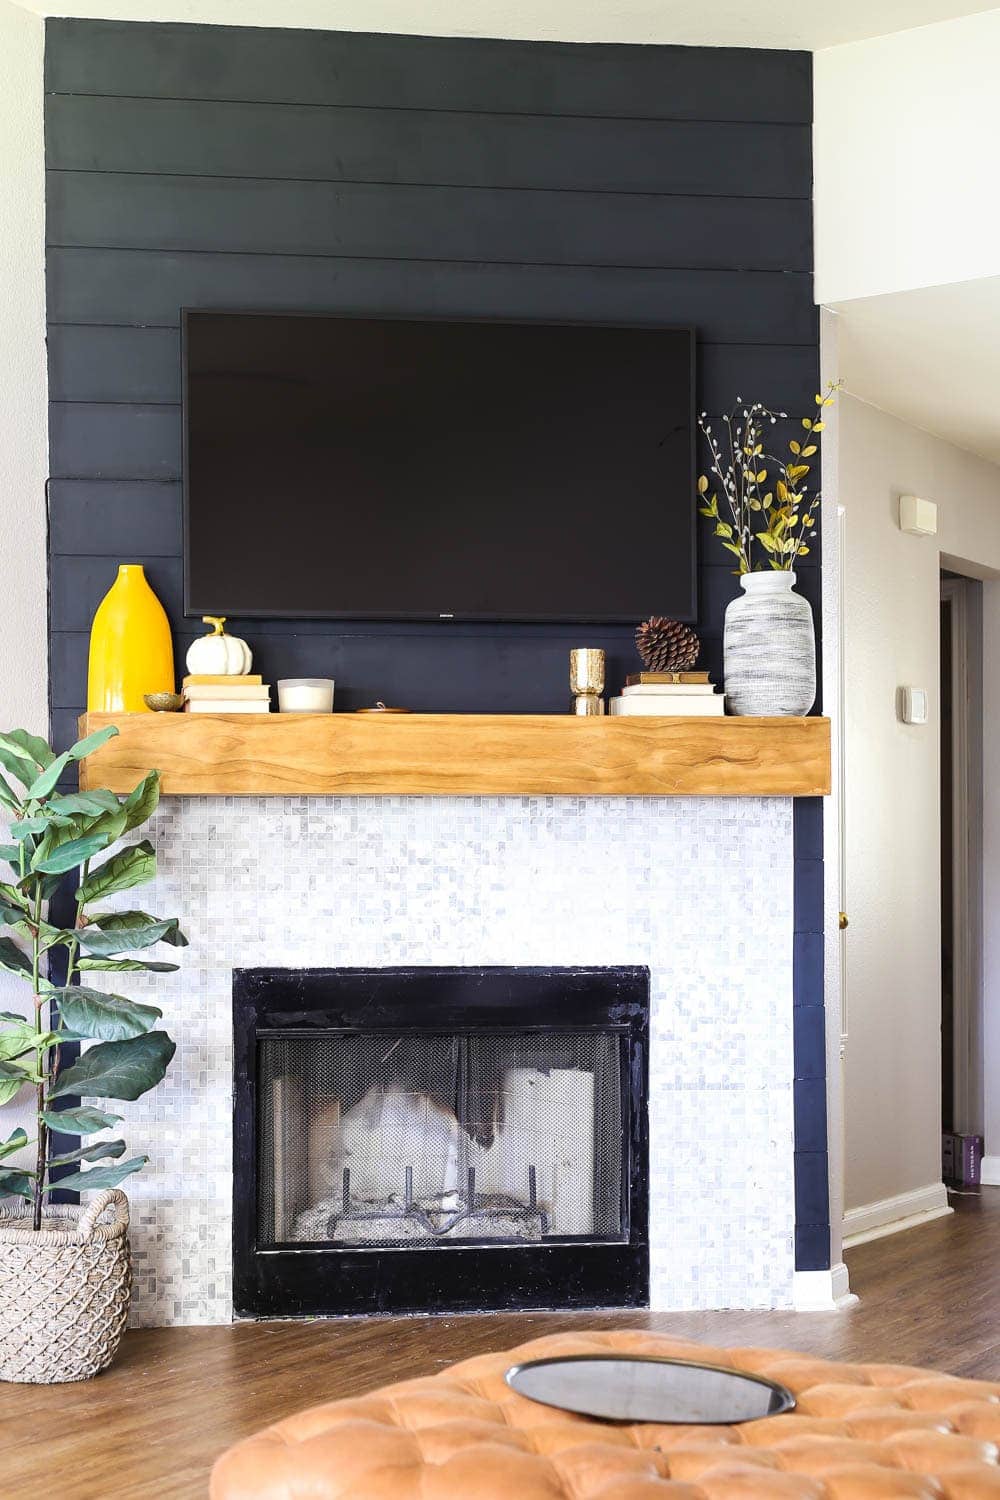
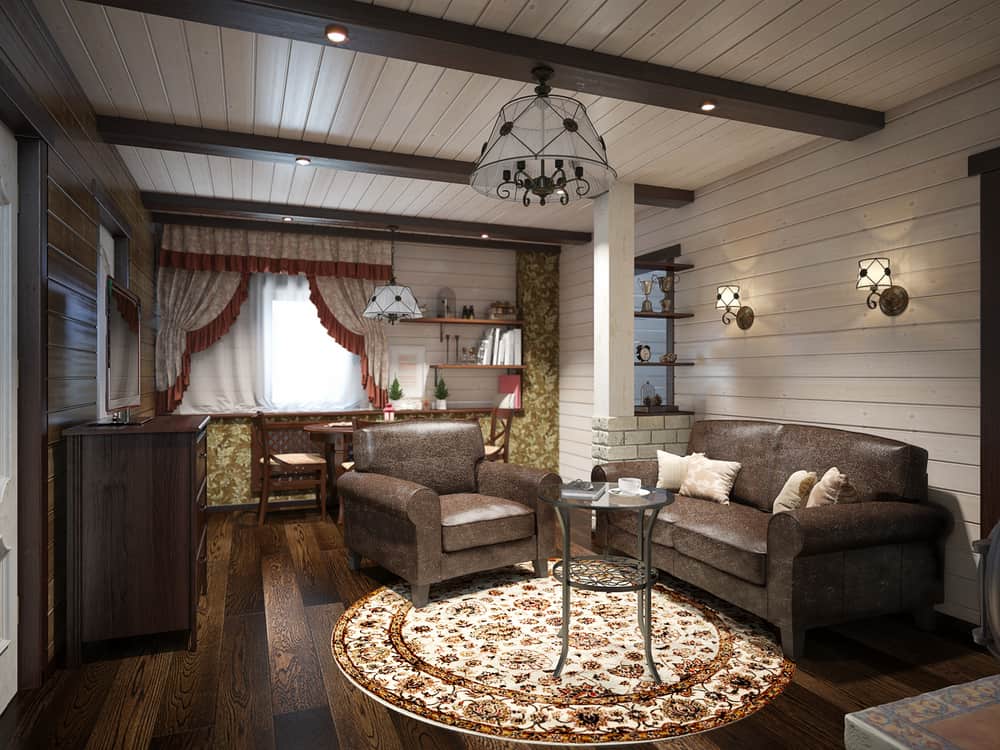
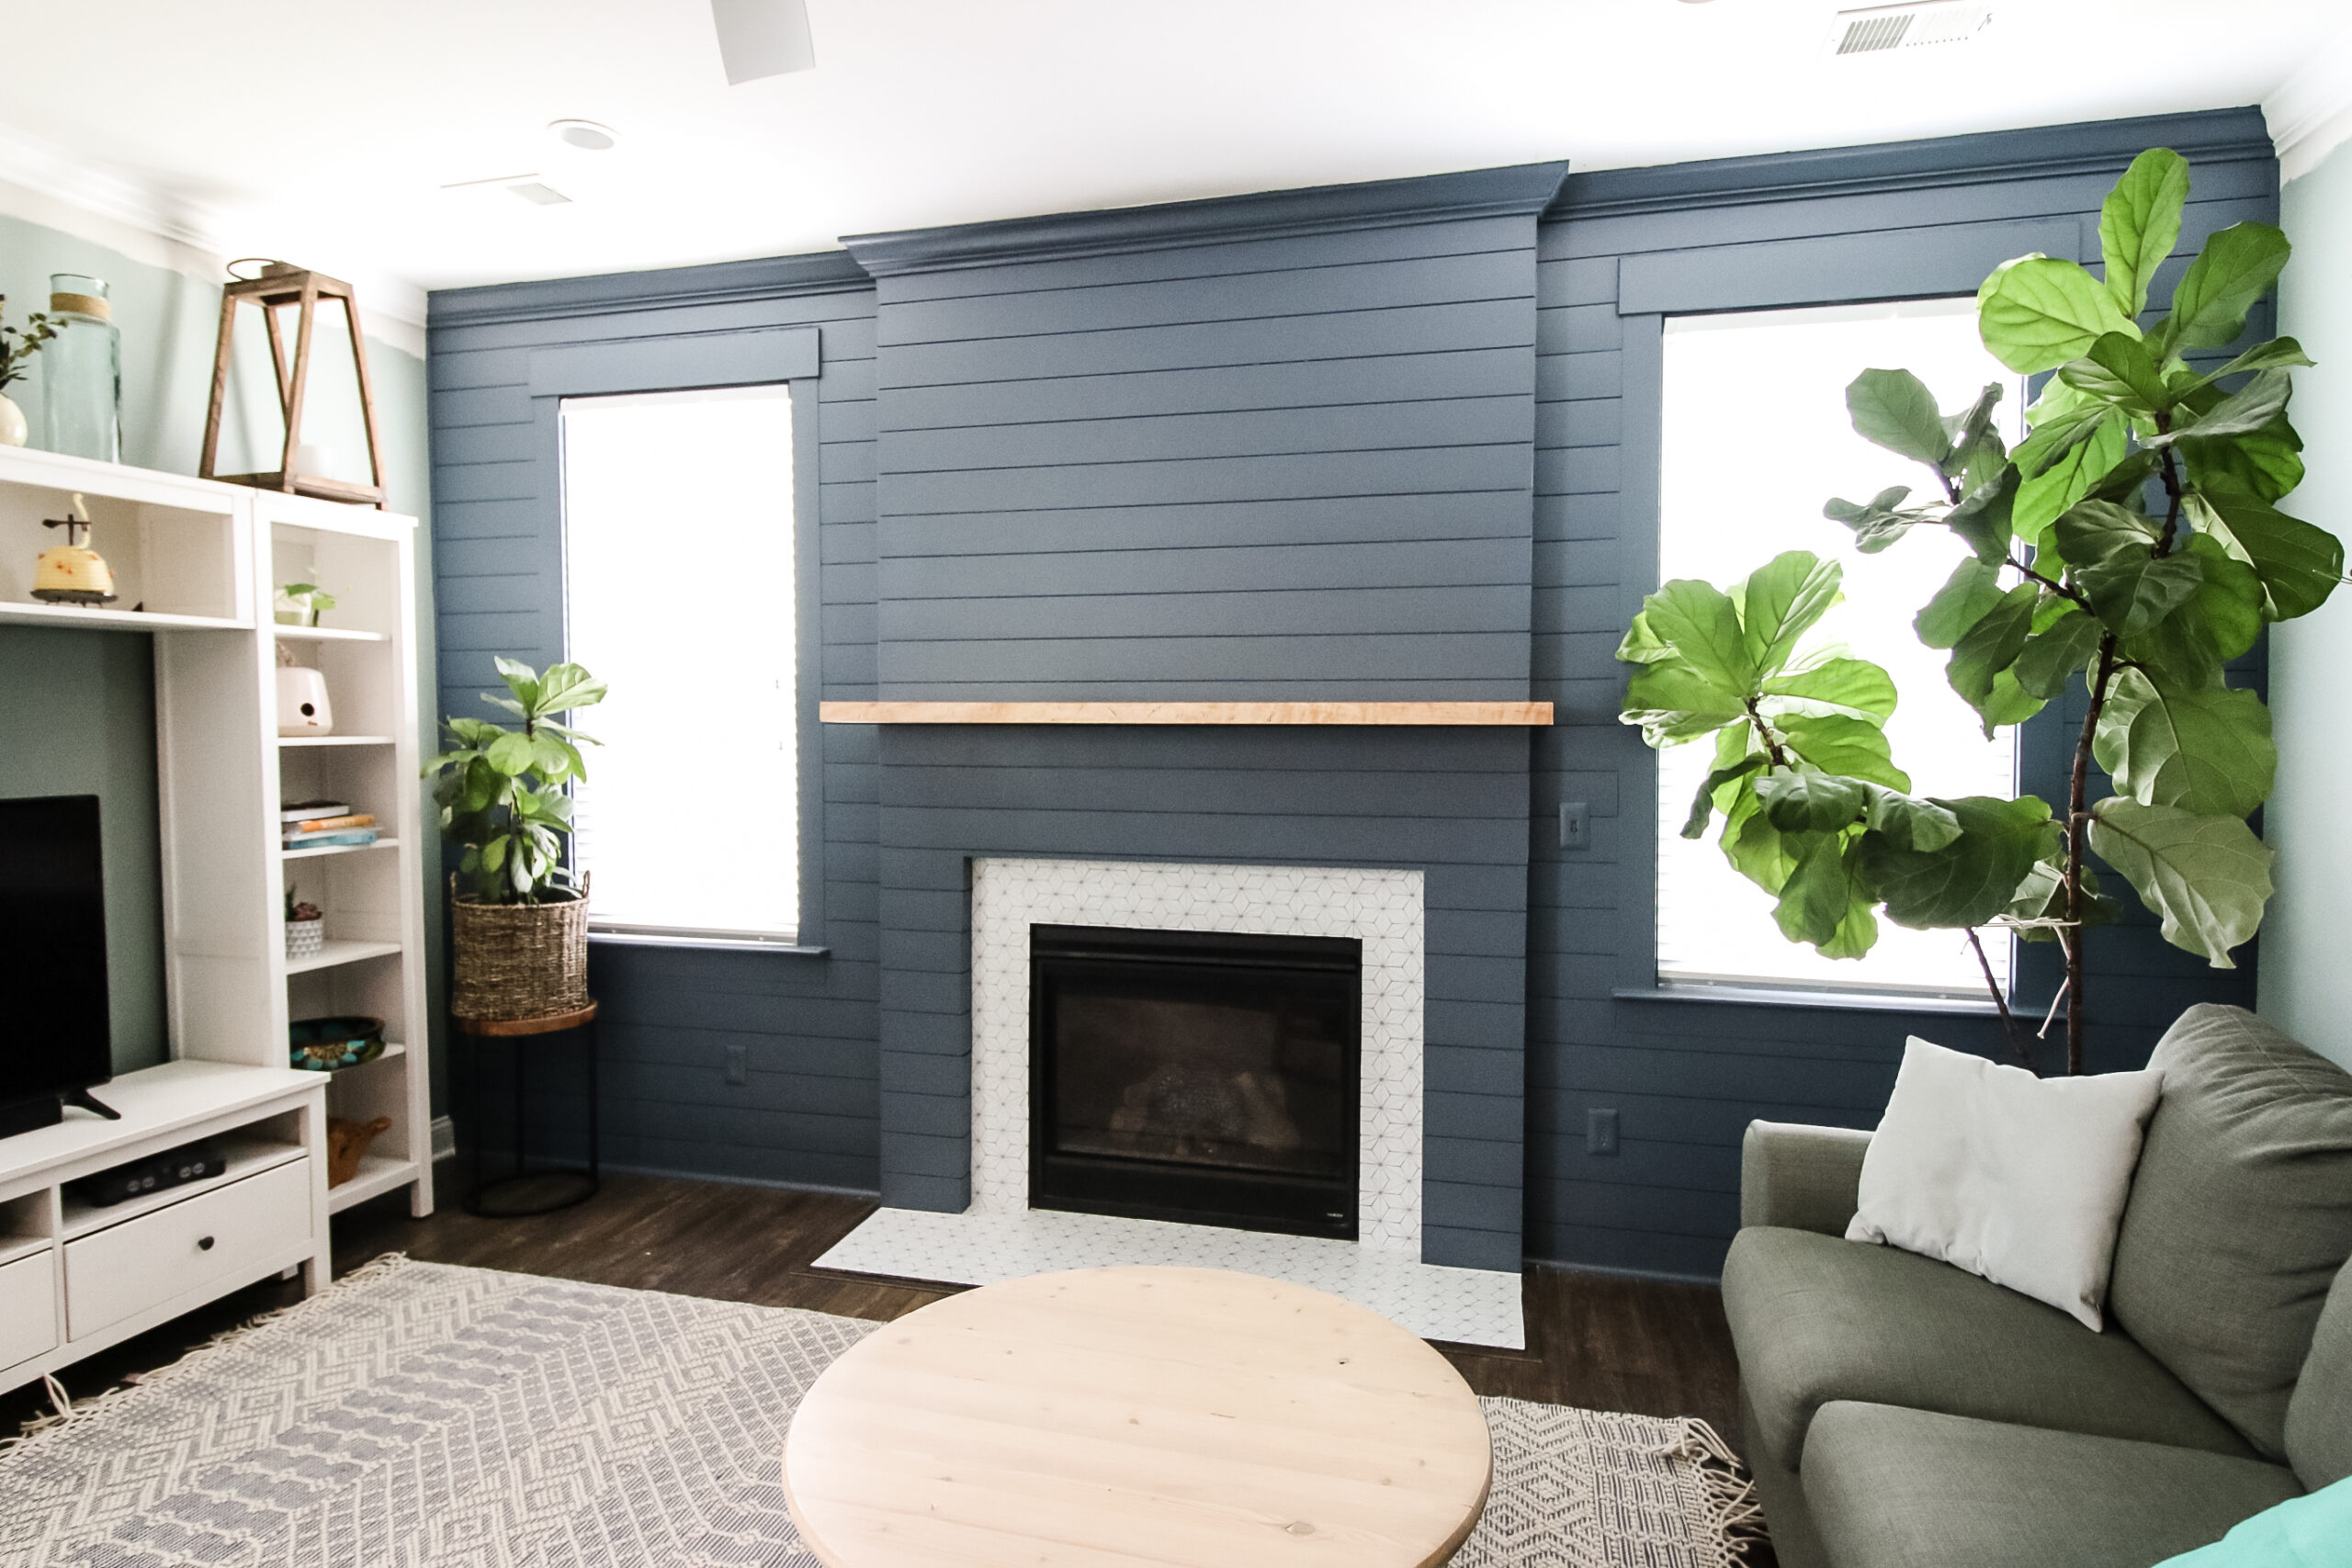
Nothing adds warmth and coziness to a living room quite like a fireplace. And what better way to enhance its charm than with a shiplap fireplace surround? This DIY project is relatively simple and can be completed in just a few steps. The first step is to measure your fireplace. You will need to measure the width and height of the fireplace and then calculate how many strips of shiplap you will need. Remember to add a few extra strips, just in case of any mistakes or miscalculations. Next, you will need to prepare the shiplap. Most shiplap comes in long sheets, so you will need to cut them into strips to fit your fireplace. You can use a saw to make the cuts, and don't forget to sand the edges to create a smooth surface. Now it's time to install the shiplap. Start at the bottom of the fireplace and work your way up, using a level to make sure each strip is straight. You can choose to nail or screw the shiplap into the fireplace, just make sure to space the nails/screws evenly along the strip. As you add each new strip, make sure to overlap the previous one to create that classic shiplap look. Once you have completed the installation, it's time to add some finishing touches. Fill in any nail or screw holes with wood filler and then sand the fireplace to create a smooth surface. Now you can paint or stain the shiplap to your desired color. If you want to add some extra dimension, you can also distress the shiplap with sandpaper or use a whitewash technique. And there you have it - a beautiful shiplap fireplace surround for your living room. This project is a great way to add some character and charm to an otherwise plain fireplace. So gather your tools and get ready to transform your living room with this budget-friendly DIY project!DIY Shiplap Fireplace Surround
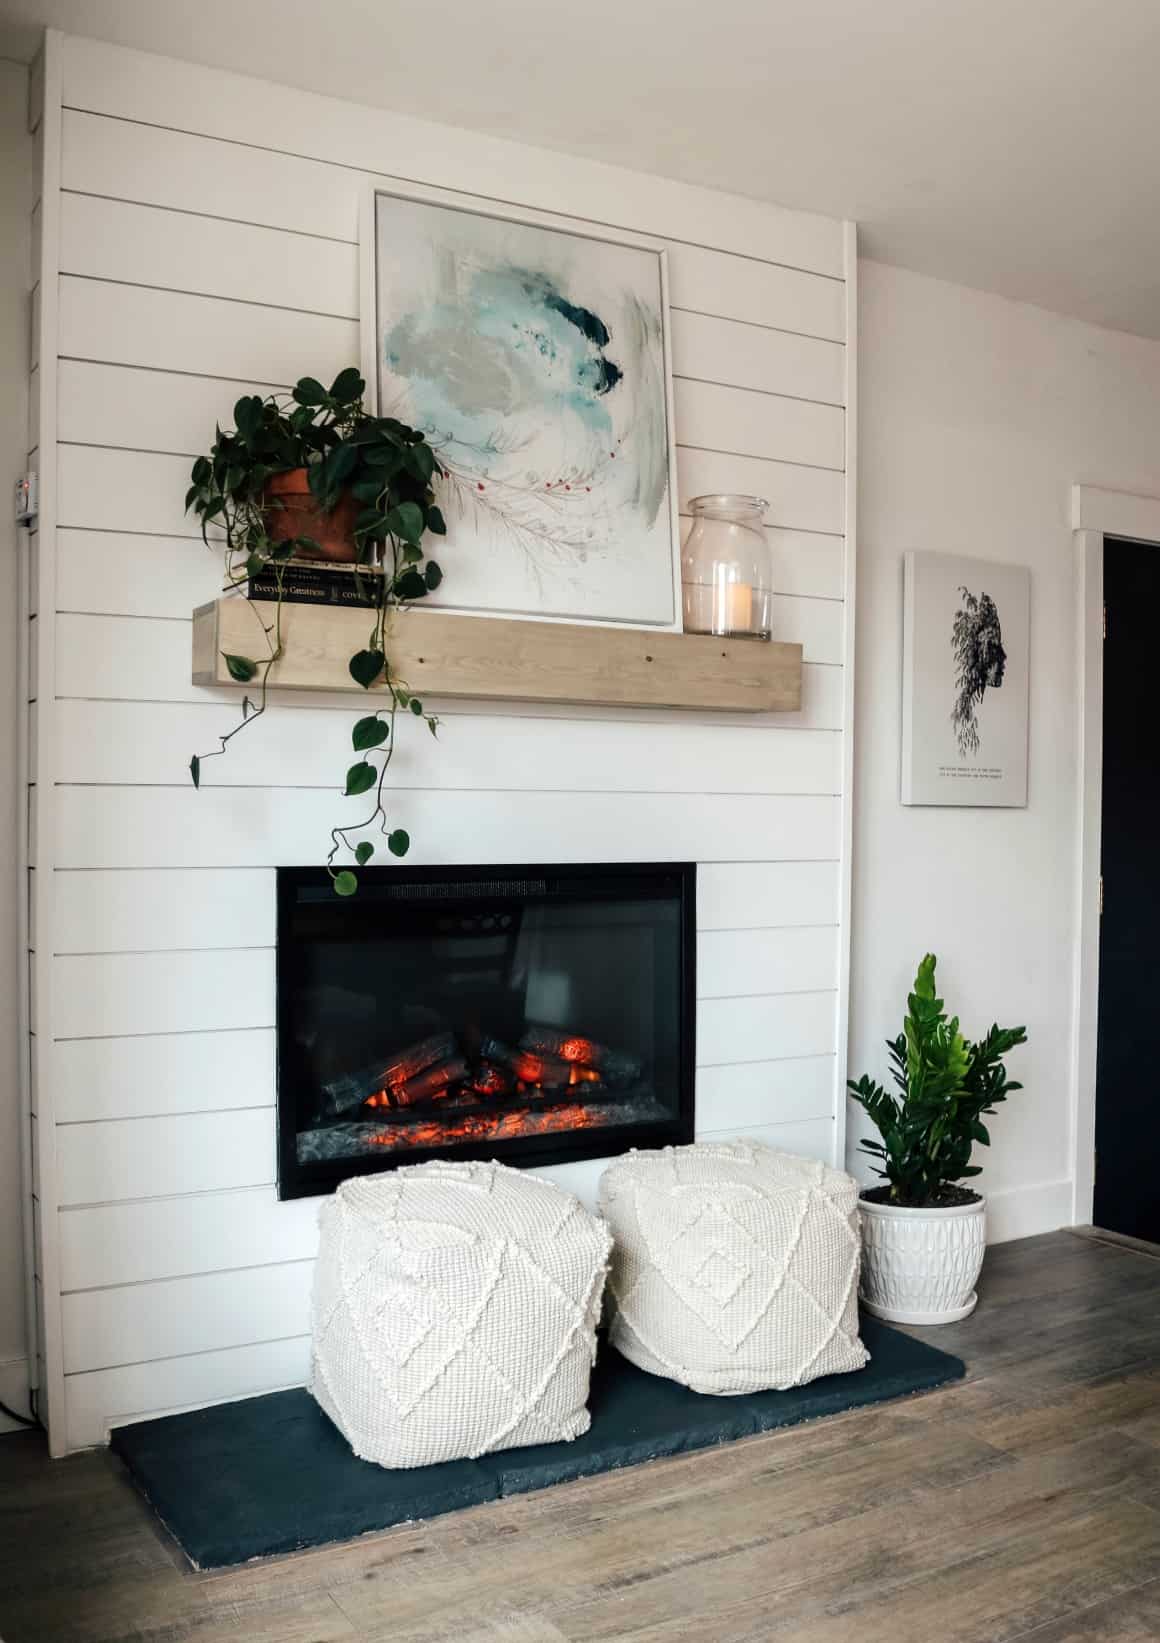


DIY Shiplap Fireplace Surround


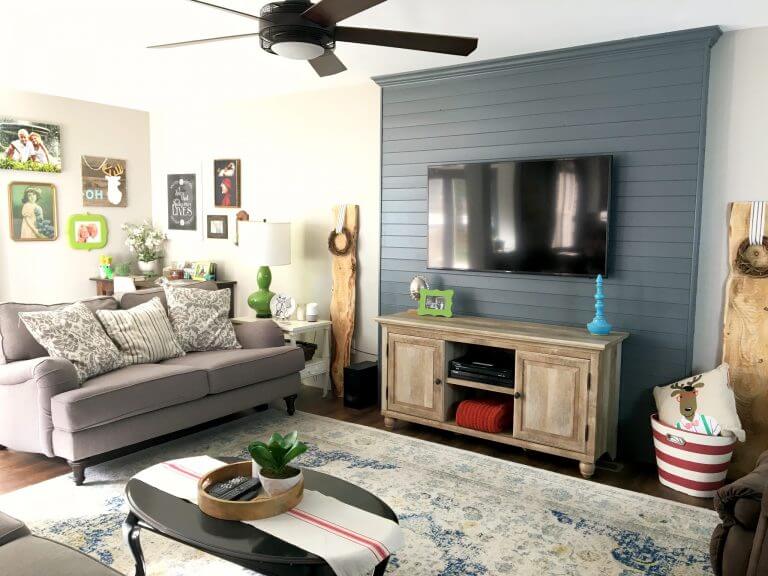
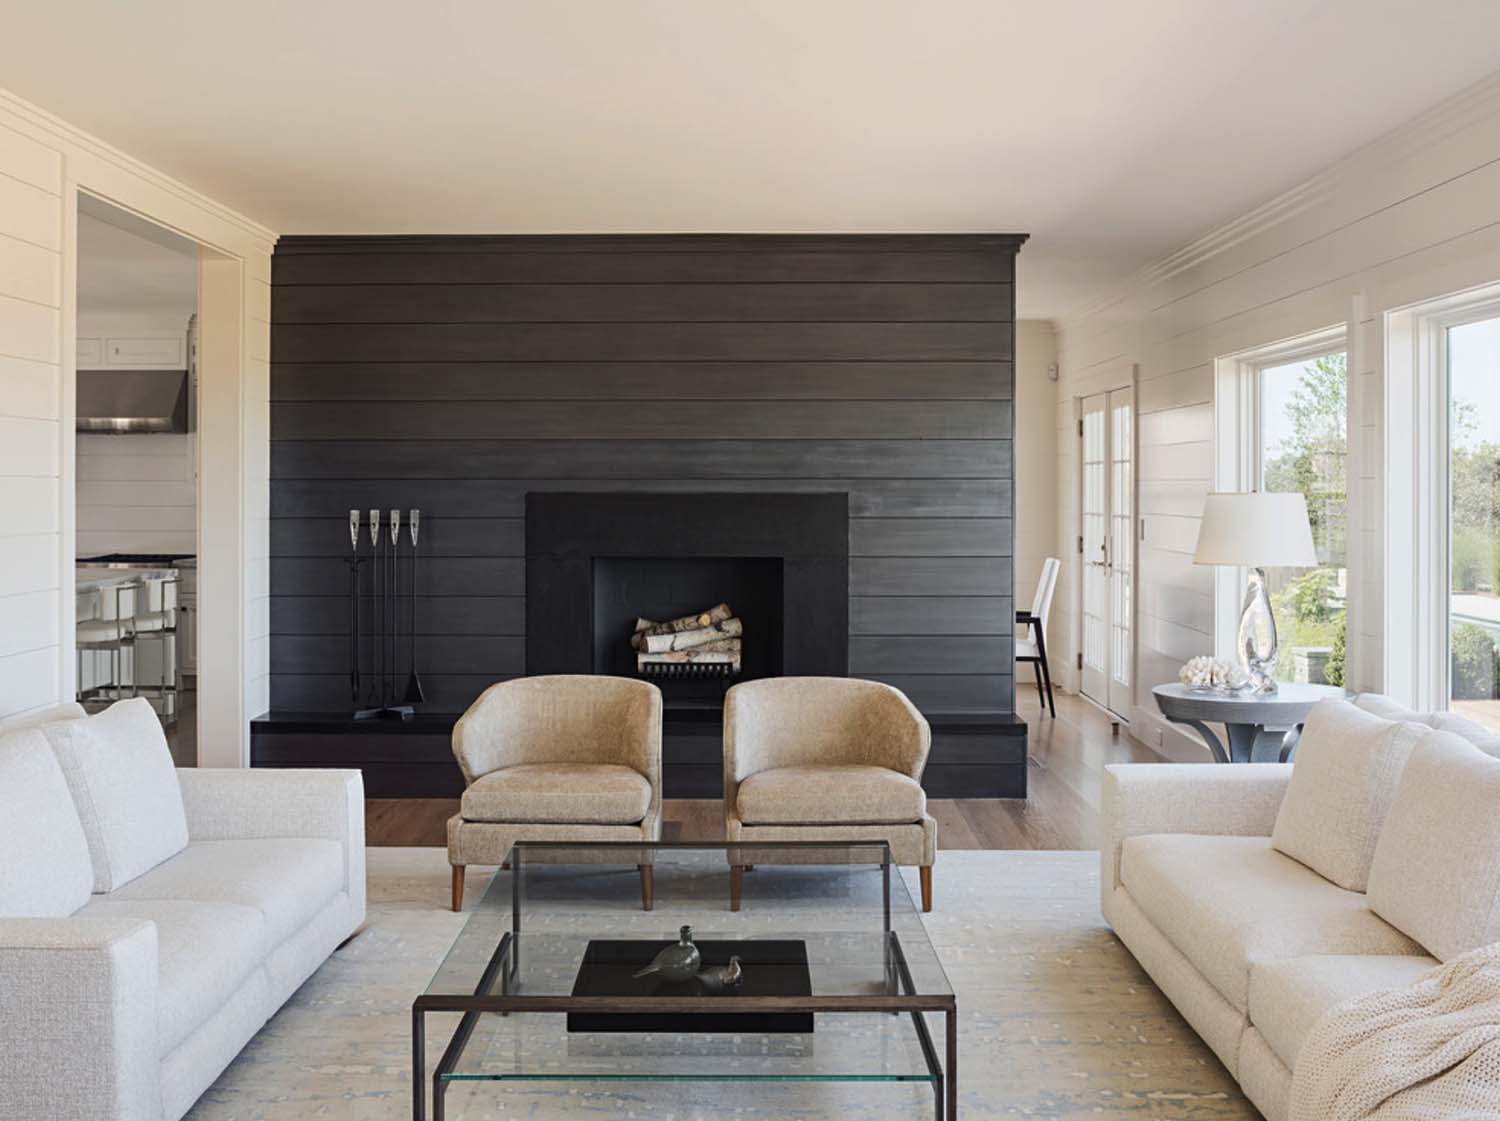
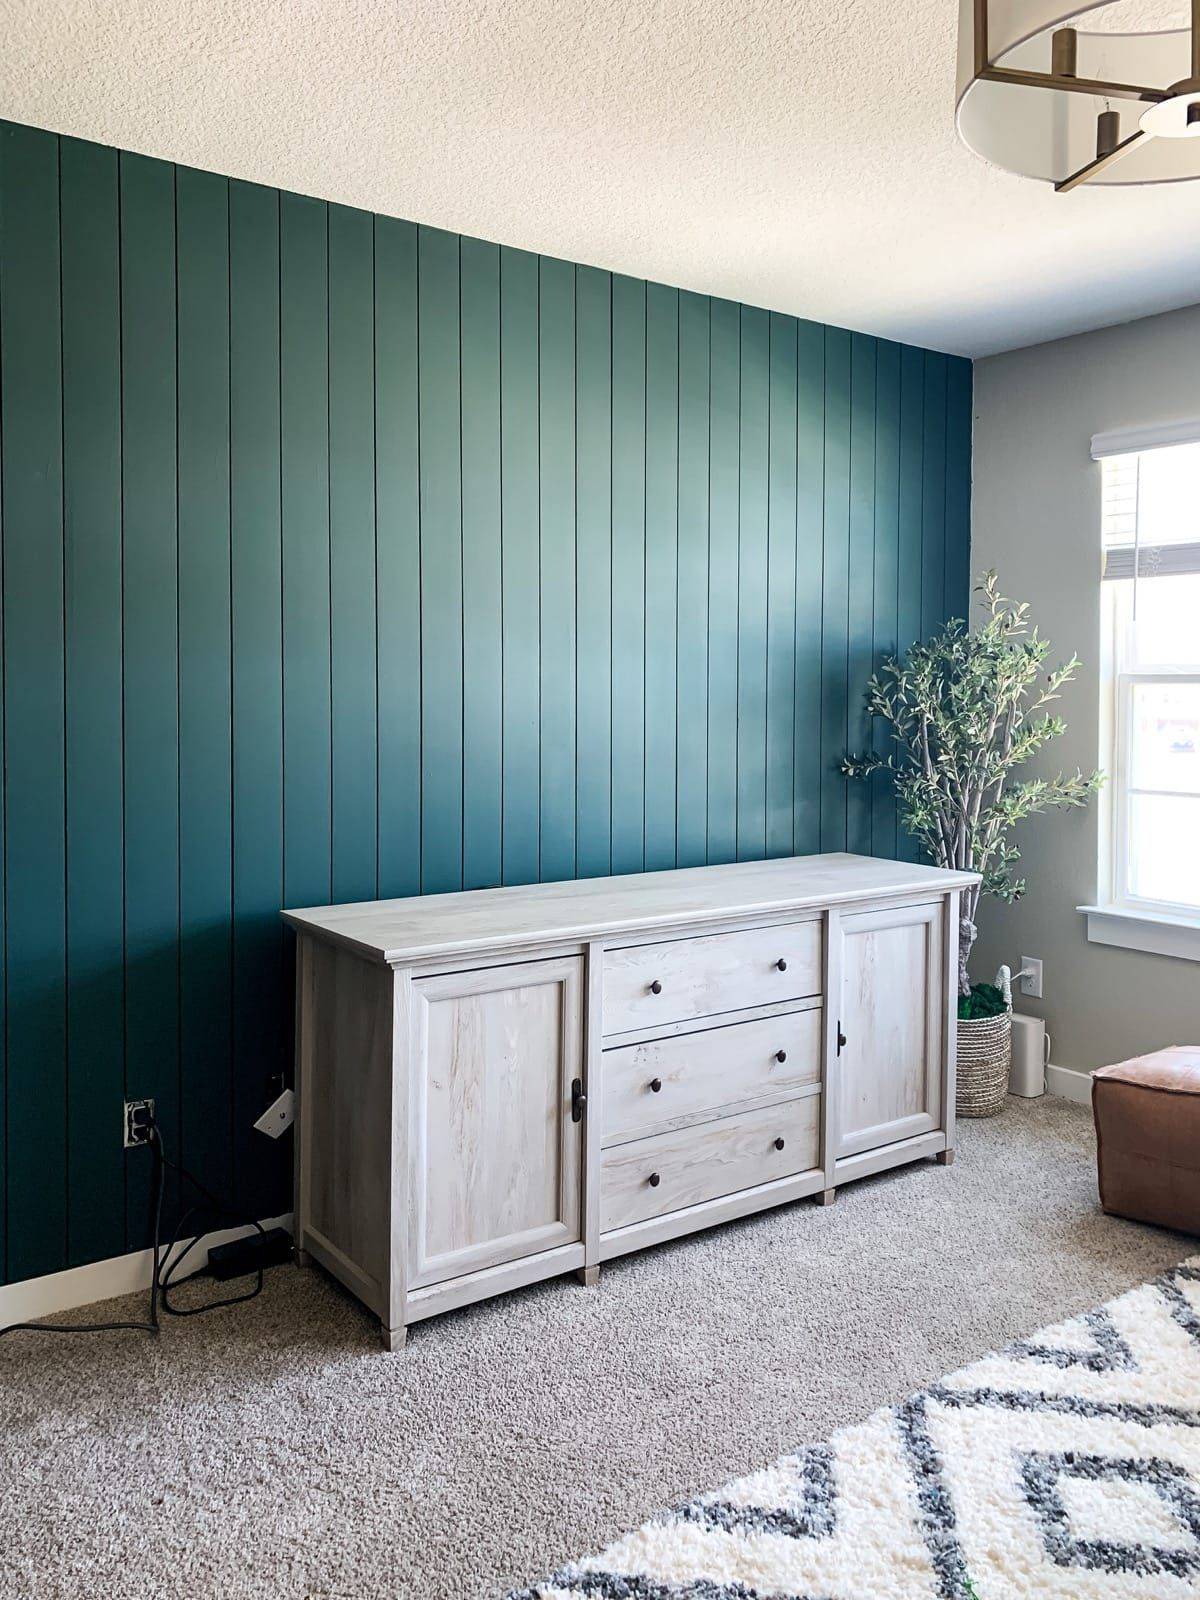
Who says shiplap is only for rustic or farmhouse-style homes? This versatile design element can also be used in more modern spaces, adding a touch of texture and interest to a room. A shiplap accent wall in a modern living room is a perfect example of this design trend. The first step is to choose the right wall for your accent wall. It's best to choose a wall that is the focal point of the room, such as the wall behind the sofa or the wall with the TV. Measure the width and height of the wall and then calculate how many strips of shiplap you will need. Remember to add a few extra strips, just in case of any mistakes or miscalculations. Next, you will need to prepare the shiplap. Most shiplap comes in long sheets, so you will need to cut them into strips to fit your wall. You can use a saw to make the cuts, and don't forget to sand the edges to create a smooth surface. Now it's time to install the shiplap. Start at the bottom of the wall and work your way up, using a level to make sure each strip is straight. You can choose to nail or screw the shiplap into the wall, just make sure to space the nails/screws evenly along the strip. As you add each new strip, make sure to overlap the previous one to create that classic shiplap look. Once you have completed the installation, it's time to add some finishing touches. Fill in any nail or screw holes with wood filler and then sand the wall to create a smooth surface. Now you can paint or stain the shiplap to your desired color. If you want to add some extra dimension, you can also distress the shiplap with sandpaper or use a whitewash technique. And there you have it - a beautiful shiplap accent wall in your modern living room. This design element adds a unique touch to any space, and it's a great way to incorporate shiplap into a more contemporary home. So don't be afraid to try out this trend in your living room!Shiplap Accent Wall in a Modern Living Room


Shiplap Accent Wall in a Modern Living Room
:max_bytes(150000):strip_icc()/shiplap-accent-wall-ideas-5184105-hero-f894c01603da48fd9ef95bb03d8c5ac0.jpg)


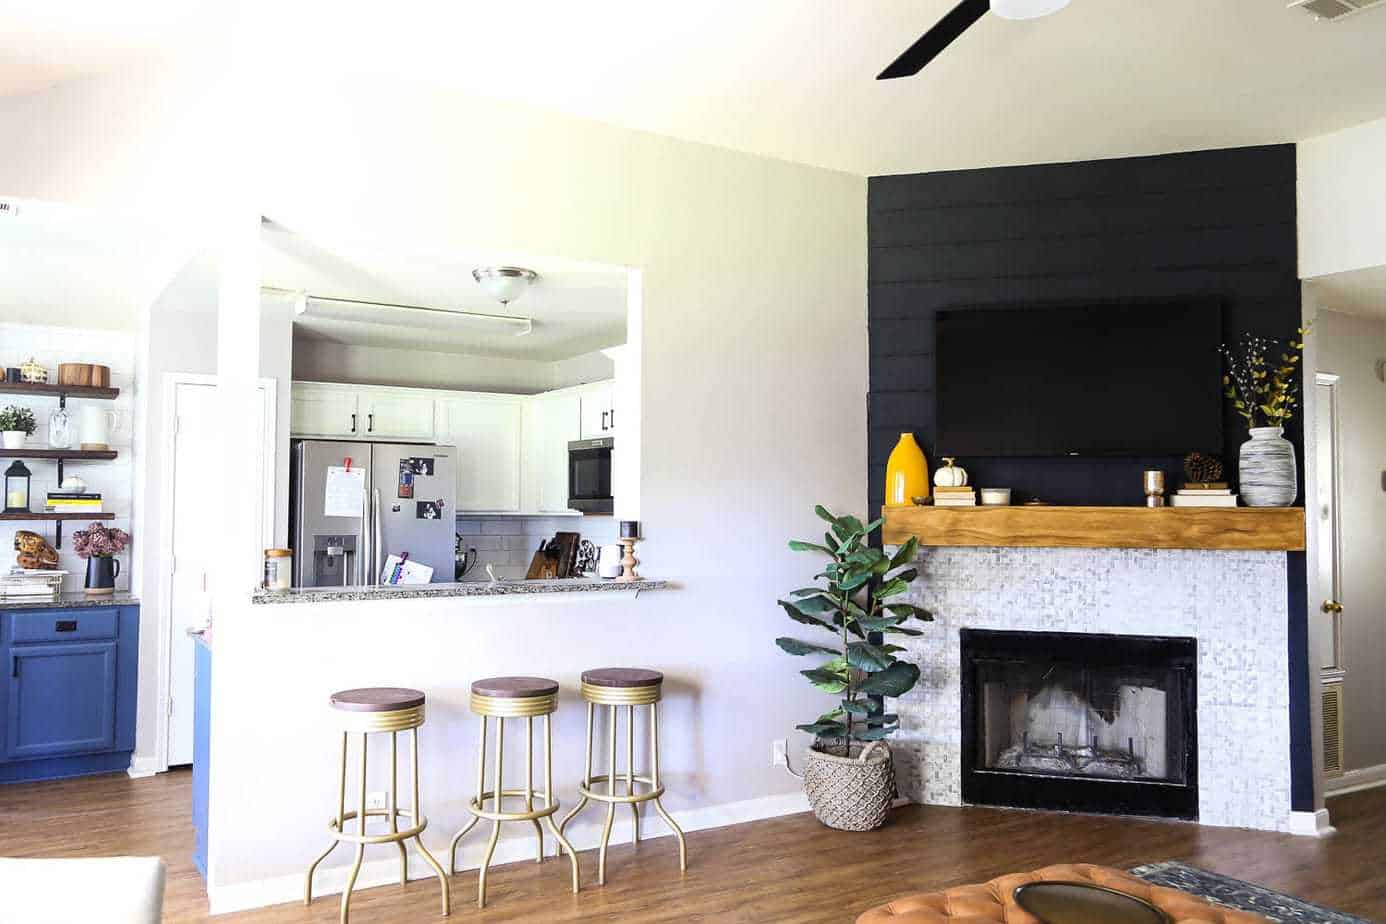
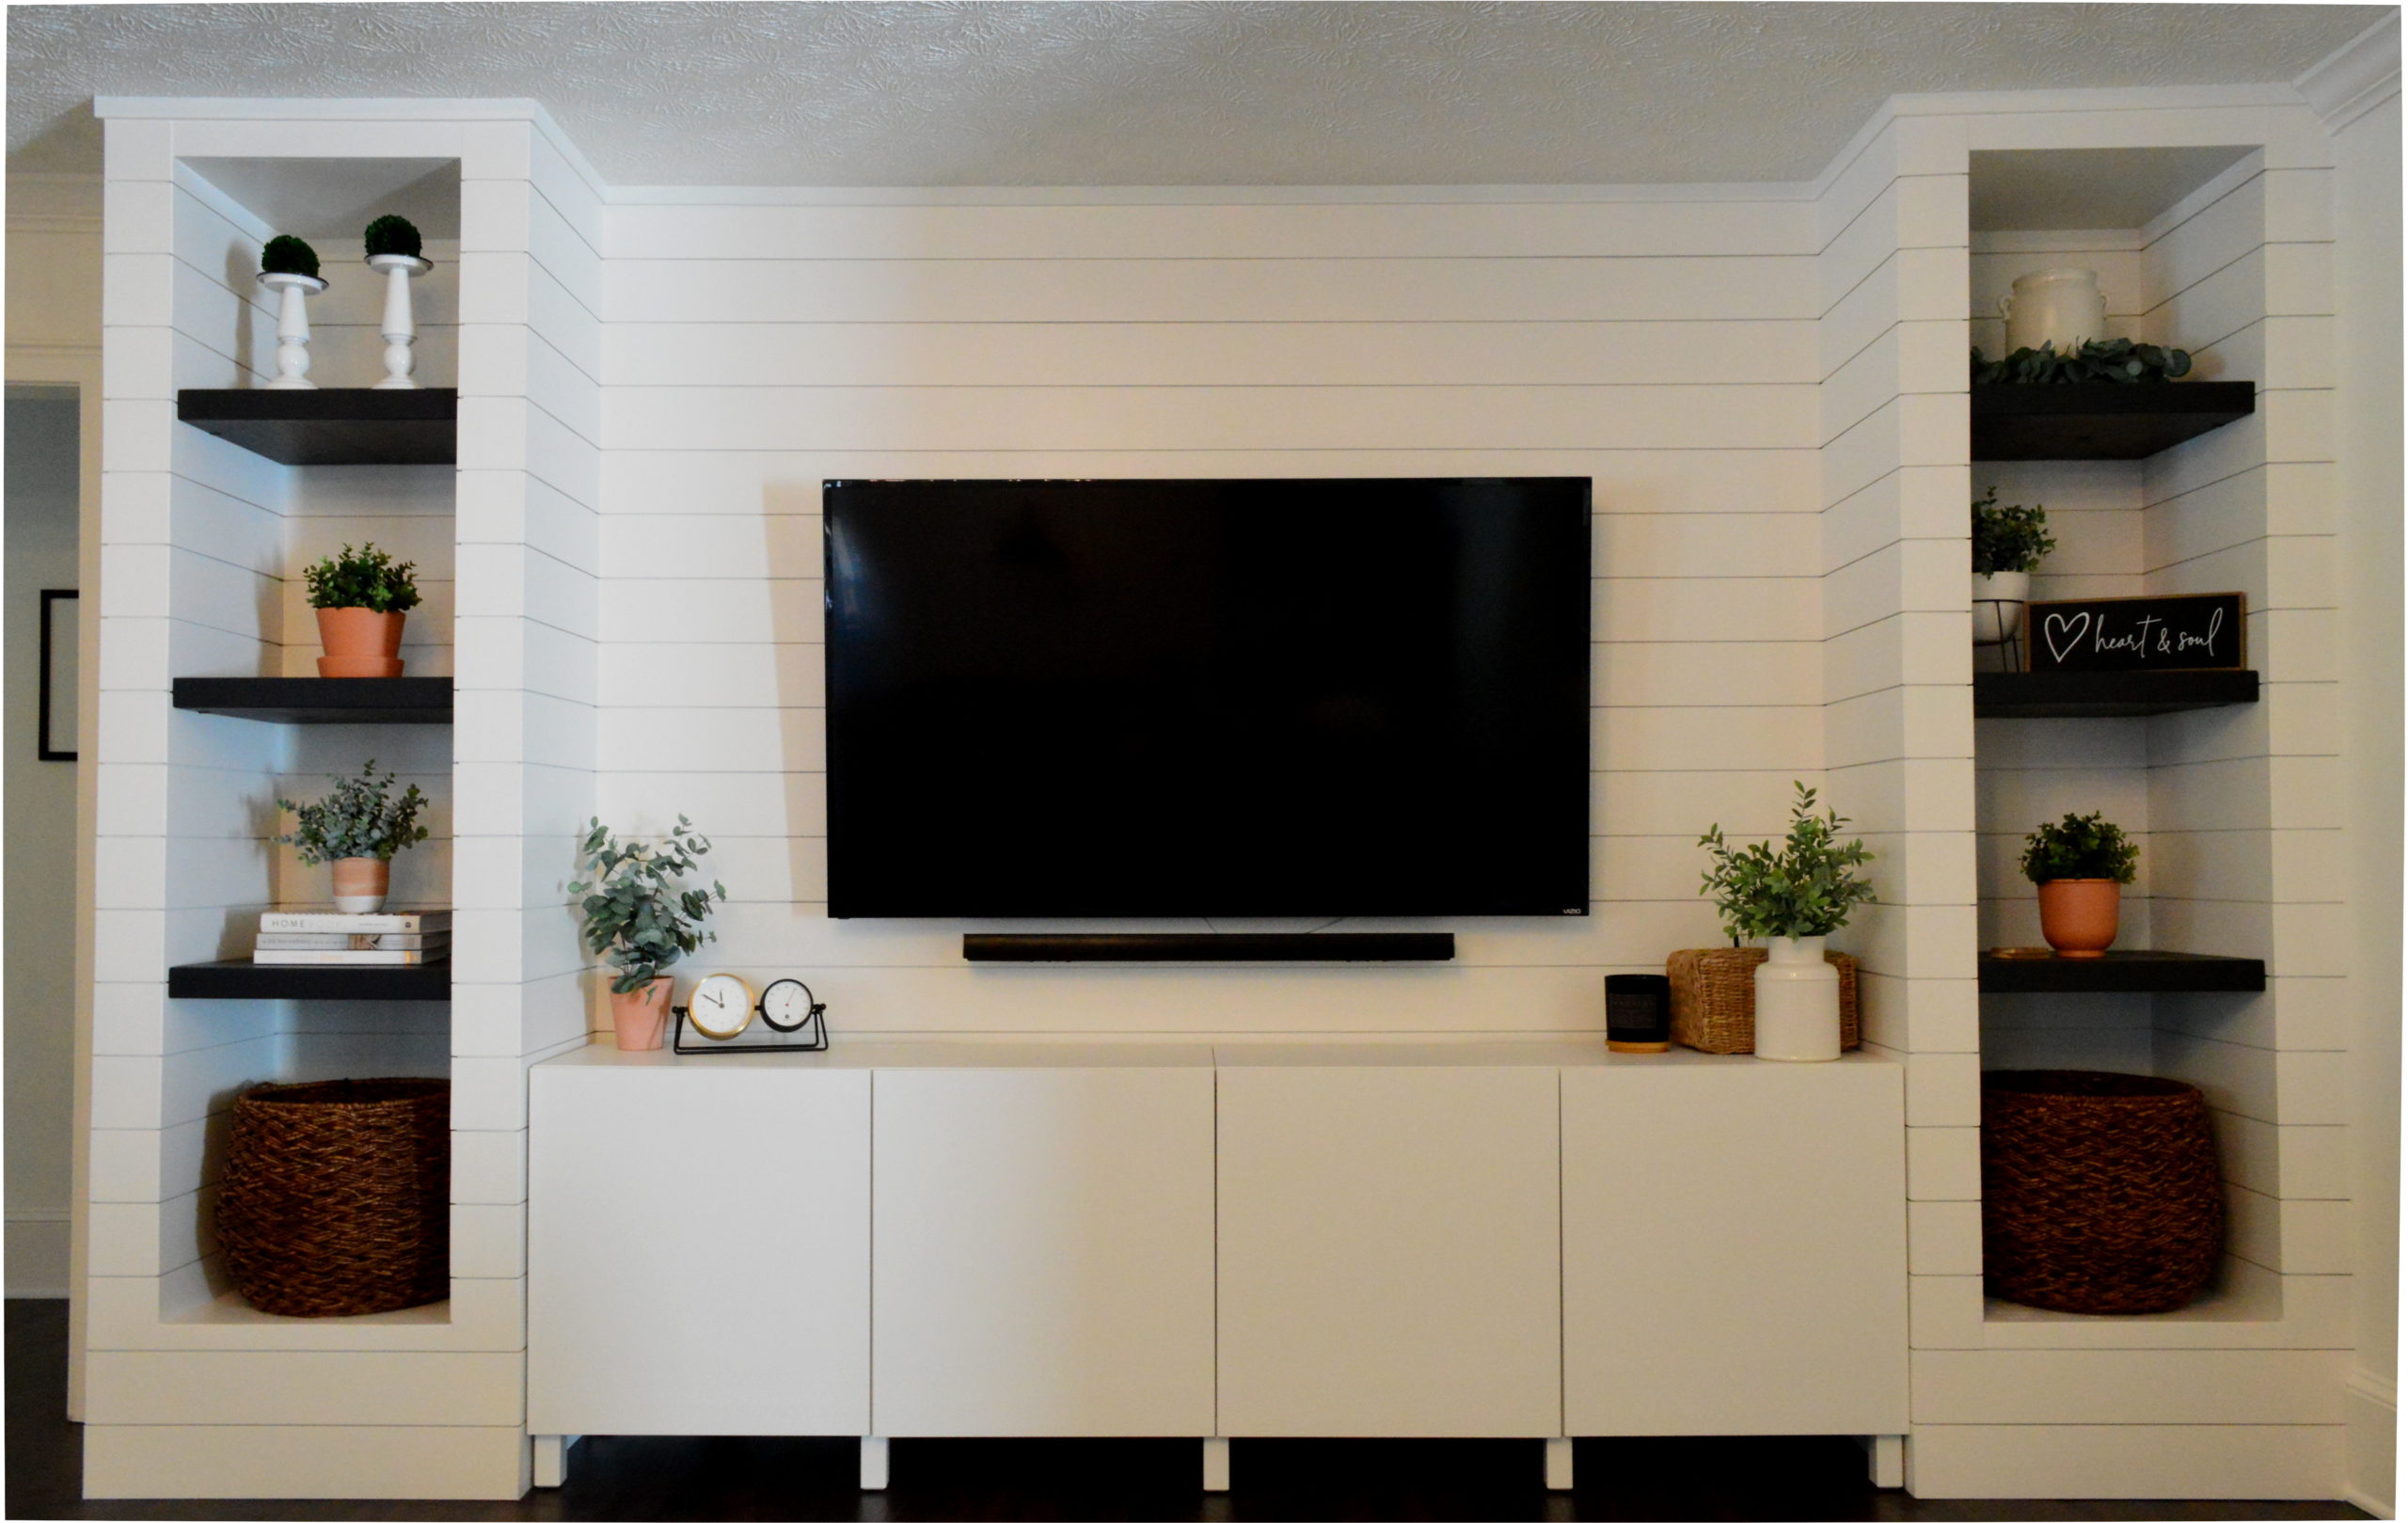
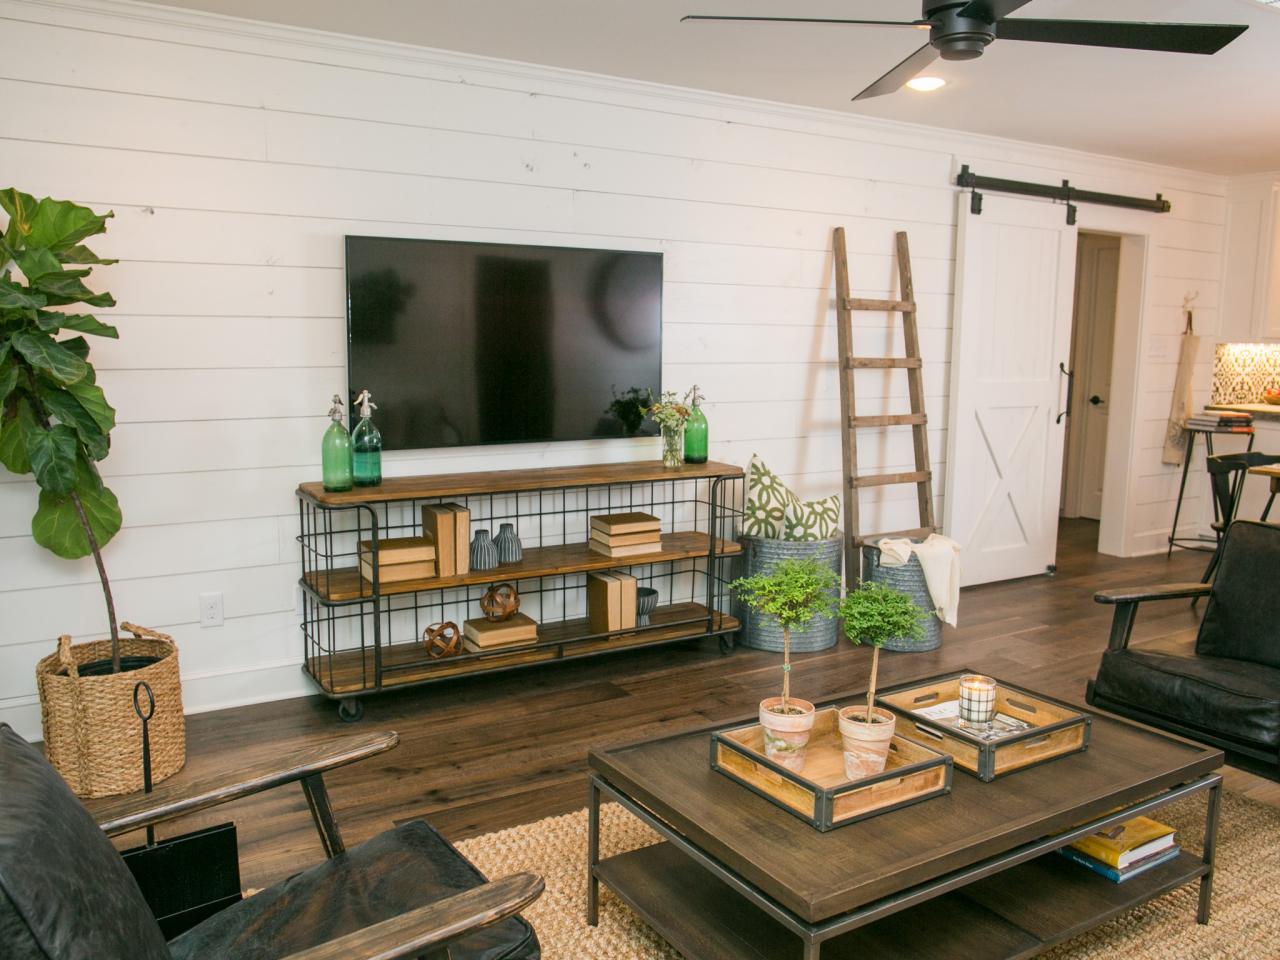
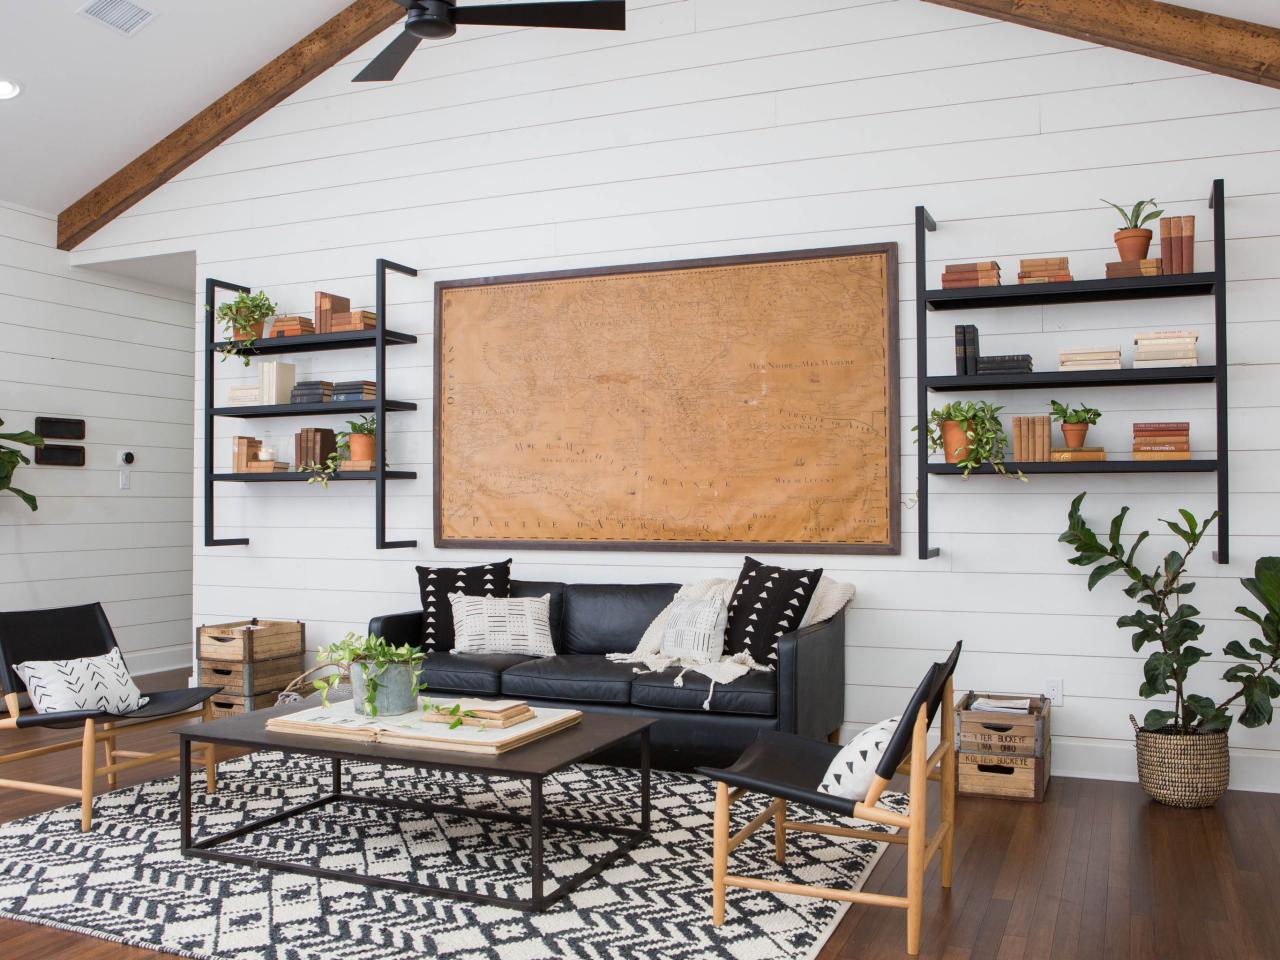
Tired of staring at a plain wall while watching TV? Why not spruce it up with a DIY shiplap TV wall? This project is a great way to add some character and interest to your living room while also providing a stylish backdrop for your TV. The first step is to measure your wall. You will want to measure the width and height of the wall and then calculate how many strips of shiplap you will need. Remember to add a few extra strips, just in case of any mistakes or miscalculations. Next, you will need to prepare the shiplap. Most shiplap comes in long sheets, so you will need to cut them into strips to fit your wall. You can use a saw to make the cuts, and don't forget to sand the edges to create a smooth surface. Now it's time to install the shiplap. Start at the bottom of the wall and work your way up, using a level to make sure each strip is straight. You can choose to nail or screw the shiplap into the wall, just make sure to space the nails/screws evenly along the strip. As you add each new strip, make sure to overlap the previous one to create that classic shiplap look. Once you have completed the installation, it's time to add some finishing touches. Fill in any nail or screw holes with wood filler and then sand the wall to create a smooth surface. Now you can paint or stain the shiplap to your desired color. If you want to add some extra dimension, you can also distress the shiplap with sandpaper or use a whitewash technique. And there you have it - a beautiful shiplap TV wall in your living room. This project not only adds a unique touch to your space but also creates a focal point for your TV. So grab your tools and get ready to upgrade your living room with this budget-friendly DIY project!DIY Shiplap TV Wall


DIY Shiplap TV Wall


Now that you know how to install shiplap in your living room, let's talk about some creative ways to use it. Shiplap is a versatile design element that can be incorporated into your living room in many different ways. Here are a few ideas to get you started. First, consider using shiplap as an accent wall. This is a popular choice for many homeowners, as it adds texture and interest to a space without overpowering it. You can choose to paint or stain the shiplap to match your living room's color scheme, or leave it in its natural wood finish for a more rustic look. If you have a fireplace in your living room, why not add a shiplap fireplace surround? This not only adds character to your fireplace but also creates a cohesive look with your shiplap accent wall. You can choose to paint or stain the shiplap to match your fireplace or create contrast with a different color. Another idea is to use shiplap to create a feature wall for your TV. This can be a simple shiplap backdrop or a more intricate design, such as a herringbone pattern. This is a great way to add some visual interest to your living room and create a focal point for your TV. And finally, don't forget about furniture and decor. You can incorporate shiplap into your living room through a DIY shiplap coffee table or shiplap wall art. These smaller projects are a fun and creative way to add some shiplap to your space without committing to a larger installation. With these shiplap living room ideas, the possibilities are endless. So get creative and have fun incorporating this trendy design element into your home!Shiplap Living Room Ideas


Shiplap Living Room Ideas


While natural wood shiplap is a popular choice for many homeowners, painting it can add a unique touch to your living room. The process of painting shiplap is relatively simple, and with a few tips, you can achieve a professional-looking finish. First, you will need to prepare the shiplap. Sand the surface to create a smooth base for the paint. If you are painting over previously stained or painted shiplap, make sure to sand off any old finish and wipe away any dust or debris. Next, it's time to prime the shiplap. This step is crucial for achieving a smooth and even finish. Use a high-quality primer and apply it with a brush or roller, making sure to get into all the nooks and crannies of the shiplap. Once the primer has dried, it's time to paint. Use a high-quality paint and apply it with a brush or roller, making sure to get into all the grooves of the shiplap. You can choose to paint the shiplap all one color or create a pattern by using multiple colors. After the first coat of paint has dried, you can apply a second coat if needed. Once the final coat has dried, you can add some finishing touches, such as distressing the shiplap with sandpaper or using a whitewash technique to create a more rustic look.How to Paint Shiplap in a Living Room


How to Paint Shiplap in a Living Room


The Charm of Shiplap in Your Living Room

Transform Your Space with DIY Shiplap
 Adding shiplap to your living room is a simple yet effective way to give your space a fresh, modern look. This popular trend has been seen in many home renovation and design shows, and for good reason. Shiplap is a type of wooden board that is commonly used for building ships, but has recently become a popular choice for interior design. Its clean lines and rustic charm make it the perfect addition to any living room.
Shiplap is Versatile
One of the main reasons why shiplap has become so popular is its versatility. It can be used in a variety of ways, making it suitable for any design style. Whether you prefer a farmhouse, coastal, or modern aesthetic, shiplap can be incorporated into your living room to add character and charm.
Easy to Install with DIY Shiplap
Another great aspect of shiplap is that it is relatively easy to install. With some basic tools and a little bit of patience, you can transform your living room in no time. There are many tutorials and guides available online for DIY shiplap, making it accessible for anyone to try.
Cost-Effective Option
DIY shiplap is also a cost-effective option for those on a budget. The materials needed are relatively inexpensive and can be found at most home improvement stores. Additionally, shiplap is a durable material, so once installed, it will last for years to come.
Enhance the Aesthetics of Your Living Room
Shiplap can add texture and depth to your living room walls, making them a focal point of the space. It also creates a sense of warmth and coziness, making it the perfect addition to a living room. You can also paint or stain shiplap to match your existing decor, or leave it natural for a more rustic look.
In conclusion, shiplap is a popular and versatile option for adding character and charm to your living room. With its easy installation, cost-effectiveness, and ability to enhance the aesthetics of your space, it's no wonder why DIY shiplap has become a top choice for many homeowners. So, why not give it a try and see the transformation it can bring to your living room?
Adding shiplap to your living room is a simple yet effective way to give your space a fresh, modern look. This popular trend has been seen in many home renovation and design shows, and for good reason. Shiplap is a type of wooden board that is commonly used for building ships, but has recently become a popular choice for interior design. Its clean lines and rustic charm make it the perfect addition to any living room.
Shiplap is Versatile
One of the main reasons why shiplap has become so popular is its versatility. It can be used in a variety of ways, making it suitable for any design style. Whether you prefer a farmhouse, coastal, or modern aesthetic, shiplap can be incorporated into your living room to add character and charm.
Easy to Install with DIY Shiplap
Another great aspect of shiplap is that it is relatively easy to install. With some basic tools and a little bit of patience, you can transform your living room in no time. There are many tutorials and guides available online for DIY shiplap, making it accessible for anyone to try.
Cost-Effective Option
DIY shiplap is also a cost-effective option for those on a budget. The materials needed are relatively inexpensive and can be found at most home improvement stores. Additionally, shiplap is a durable material, so once installed, it will last for years to come.
Enhance the Aesthetics of Your Living Room
Shiplap can add texture and depth to your living room walls, making them a focal point of the space. It also creates a sense of warmth and coziness, making it the perfect addition to a living room. You can also paint or stain shiplap to match your existing decor, or leave it natural for a more rustic look.
In conclusion, shiplap is a popular and versatile option for adding character and charm to your living room. With its easy installation, cost-effectiveness, and ability to enhance the aesthetics of your space, it's no wonder why DIY shiplap has become a top choice for many homeowners. So, why not give it a try and see the transformation it can bring to your living room?