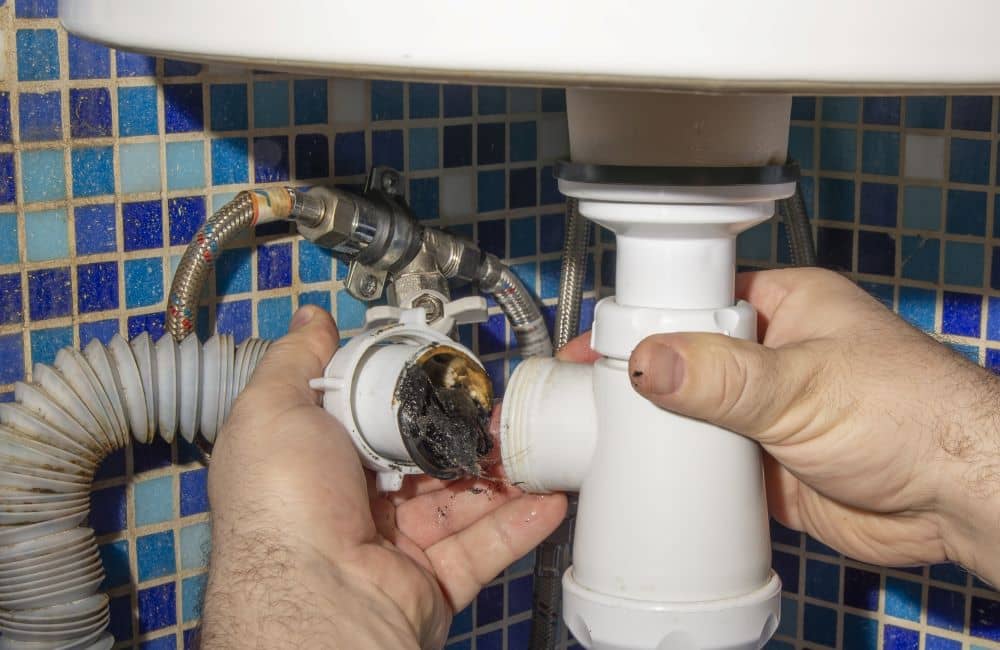
Disassembling a small bathroom sink drain may seem like a daunting task, but with the right tools and techniques, it can be a simple and straightforward process. Whether you are dealing with a clogged drain or simply need to remove the drain for cleaning or replacement, we've got you covered with this step-by-step guide on how to disassemble a small bathroom sink drain.Disassemble small bathroom sink drain


Disassemble small bathroom sink drain


The first step in disassembling a small bathroom sink drain is to gather all the necessary tools. You will need a pair of pliers, a screwdriver, a drain wrench, and a bucket or container to catch any water or debris that may come out of the drain. Next, locate the drain stopper on your sink. This is usually a small metal or plastic piece that you can lift up or pull out to close the drain. Lift the stopper and set it aside.How to disassemble a small bathroom sink drain


How to disassemble a small bathroom sink drain

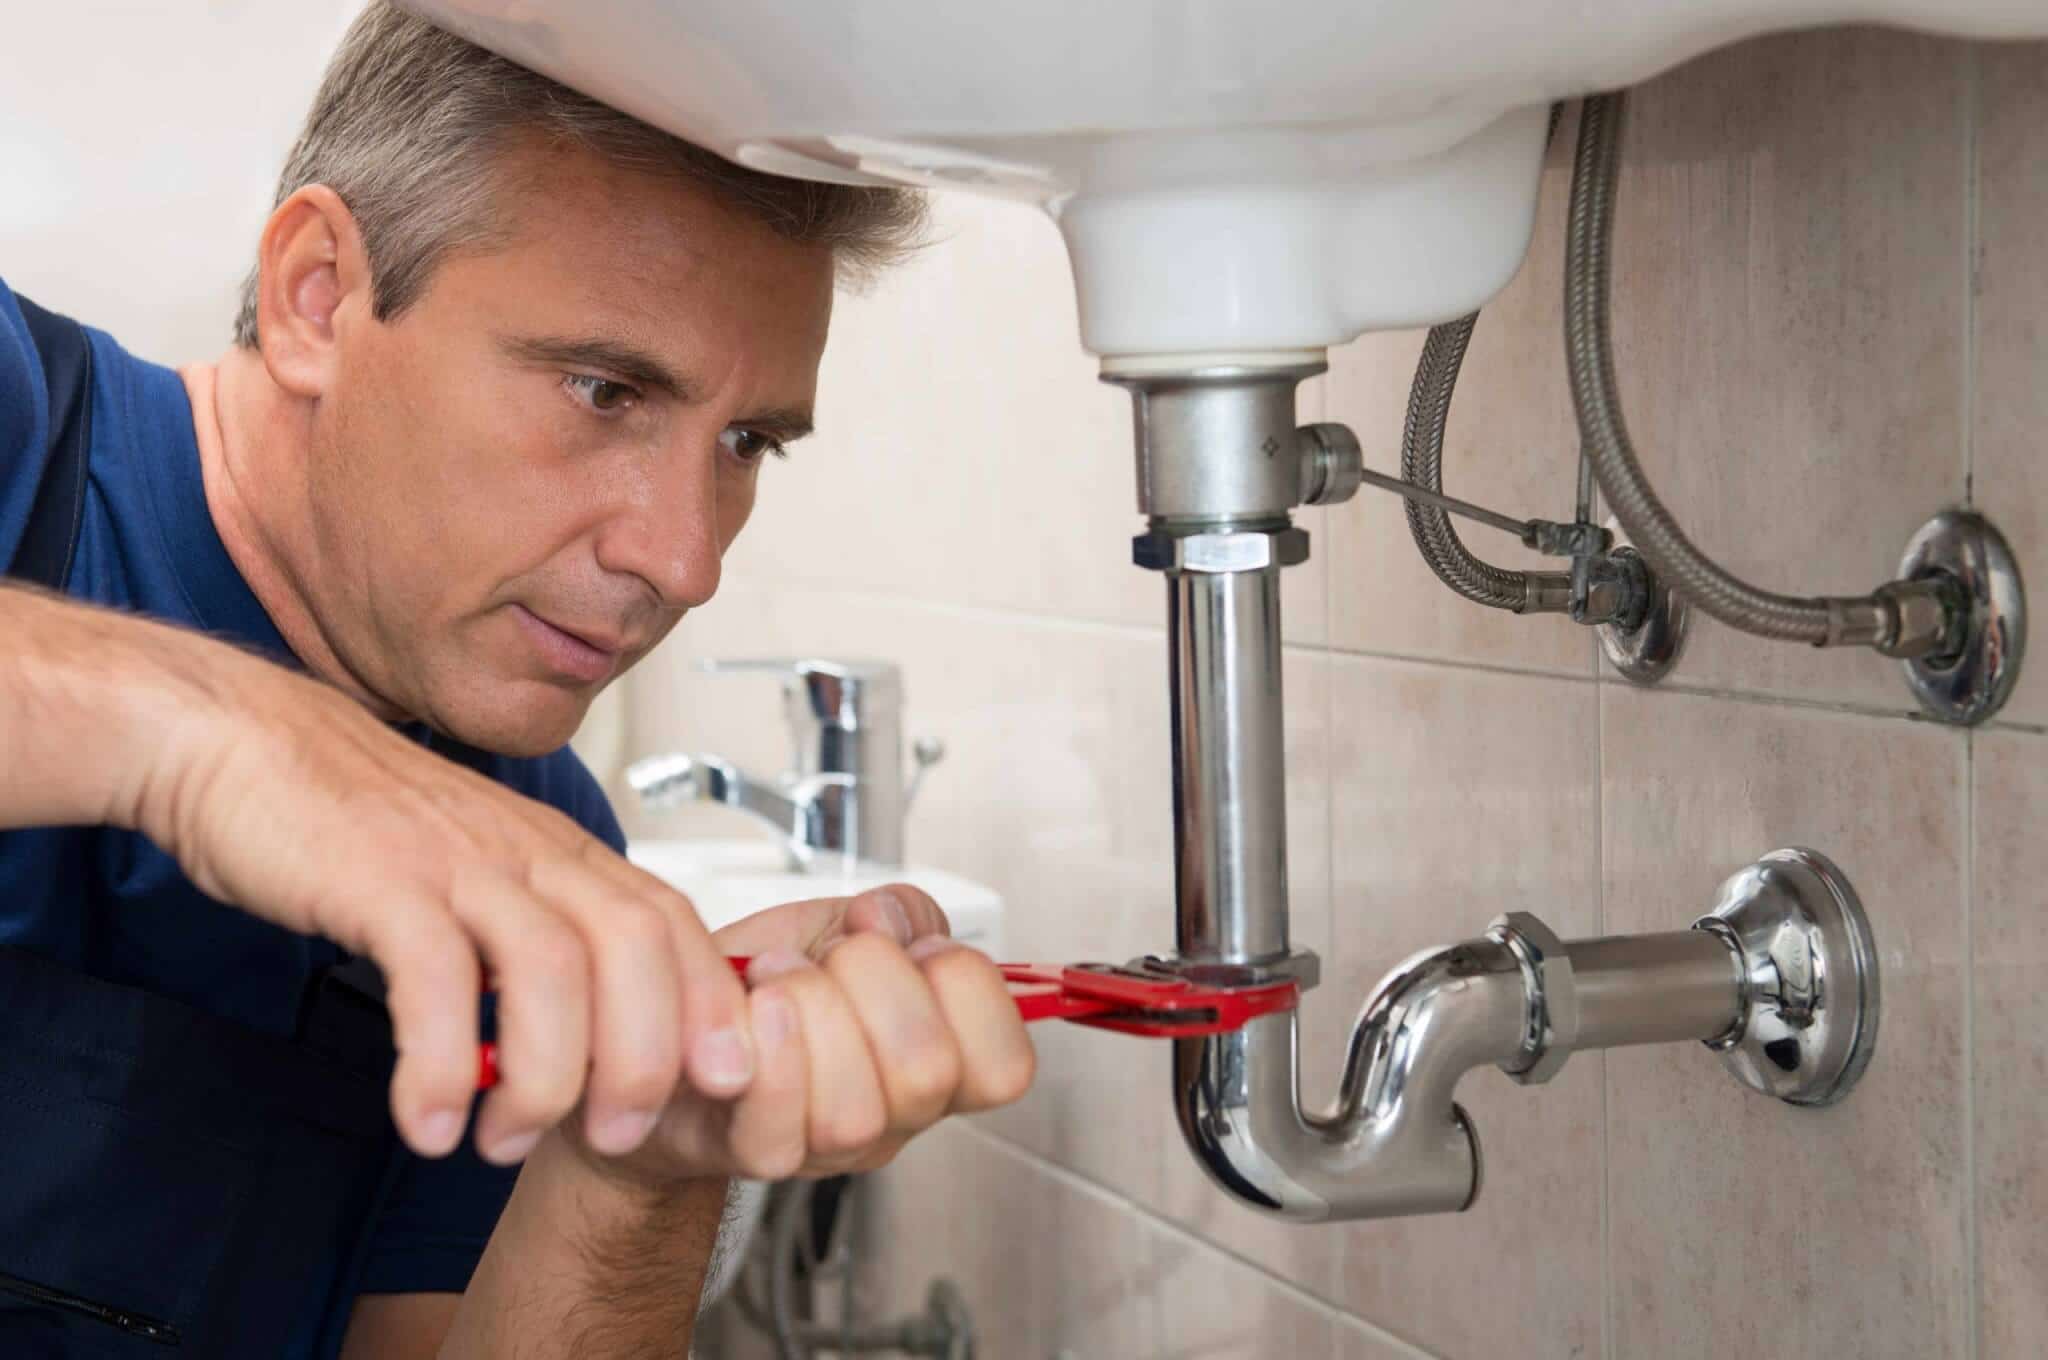
Now that you have your tools and the drain stopper removed, follow these steps to disassemble the small bathroom sink drain: Step 1: Use the pliers to loosen the drain nut that connects the drain pipe to the bottom of the sink. This nut is usually located at the base of the drain, just below the sink. Turn the nut counterclockwise to loosen it. Step 2: Once the nut is loose, use your hands to unscrew it completely and remove it from the drain pipe. Step 3: Use the drain wrench to loosen the drain flange. This is the circular piece that sits on top of the drain pipe and connects to the bottom of the sink. Insert the drain wrench into the drain and turn it counterclockwise to loosen the flange. Step 4: Once the flange is loose, use your hands to unscrew it completely and remove it from the drain pipe. Step 5: Slowly pull the drain pipe out from the bottom of the sink. As you do this, any remaining water or debris will drain out into your container.Step-by-step guide to disassembling a small bathroom sink drain


Step-by-step guide to disassembling a small bathroom sink drain


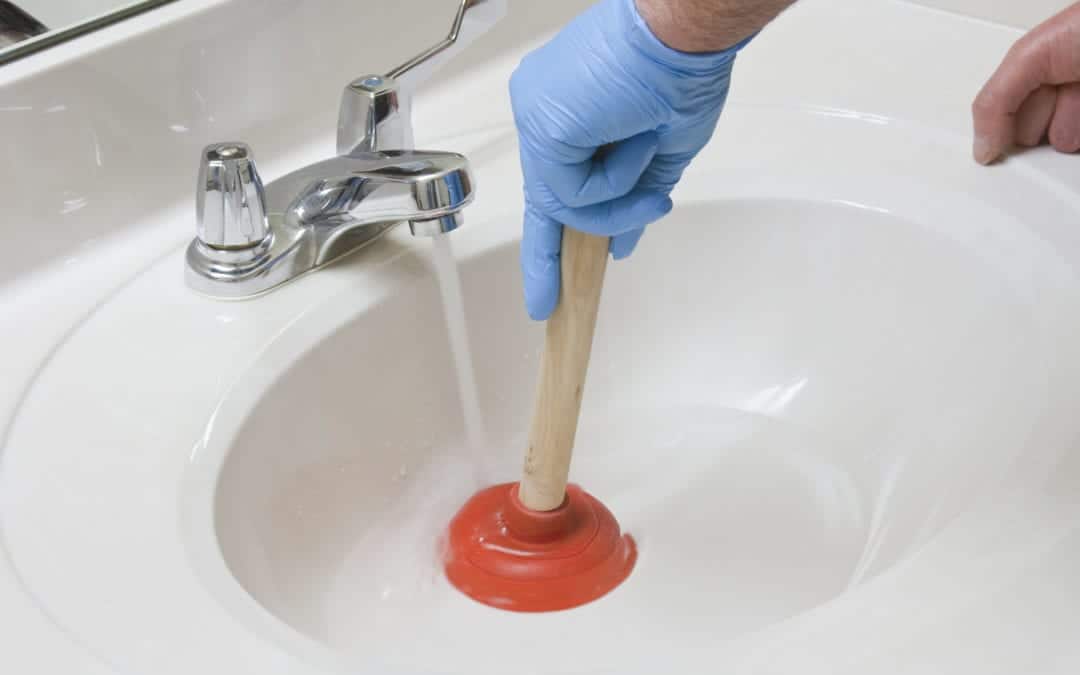
With the drain pipe removed, you can now easily remove any clogs or debris that may be causing a blockage in your sink. Use a plunger or a drain snake to clear out any obstructions. If the clog is too stubborn, you may need to use a chemical drain cleaner or call a professional plumber for assistance.Removing a small bathroom sink drain


Removing a small bathroom sink drain


If your small bathroom sink drain is clogged, you may need to disassemble it to remove the blockage. Follow the same steps as above to disassemble the drain, but pay special attention to any buildup or debris that may be causing the clog. Use a drain snake or a chemical drain cleaner to clear the clog before reassembling the drain.Disassembling a clogged small bathroom sink drain

Disassembling a clogged small bathroom sink drain


As mentioned earlier, the tools you will need to disassemble a small bathroom sink drain include pliers, a screwdriver, a drain wrench, and a container to catch water and debris. It's always a good idea to have these tools on hand before starting the disassembly process.Tools needed to disassemble a small bathroom sink drain


Tools needed to disassemble a small bathroom sink drain


Here are a few additional tips to keep in mind when disassembling a small bathroom sink drain: - Wear gloves to protect your hands from any sharp edges or debris. - Place a towel or rag under the sink to catch any water that may drip out during the disassembly process. - Take pictures or make notes as you disassemble the drain to help you remember how to reassemble it later.Tips for disassembling a small bathroom sink drain

Tips for disassembling a small bathroom sink drain


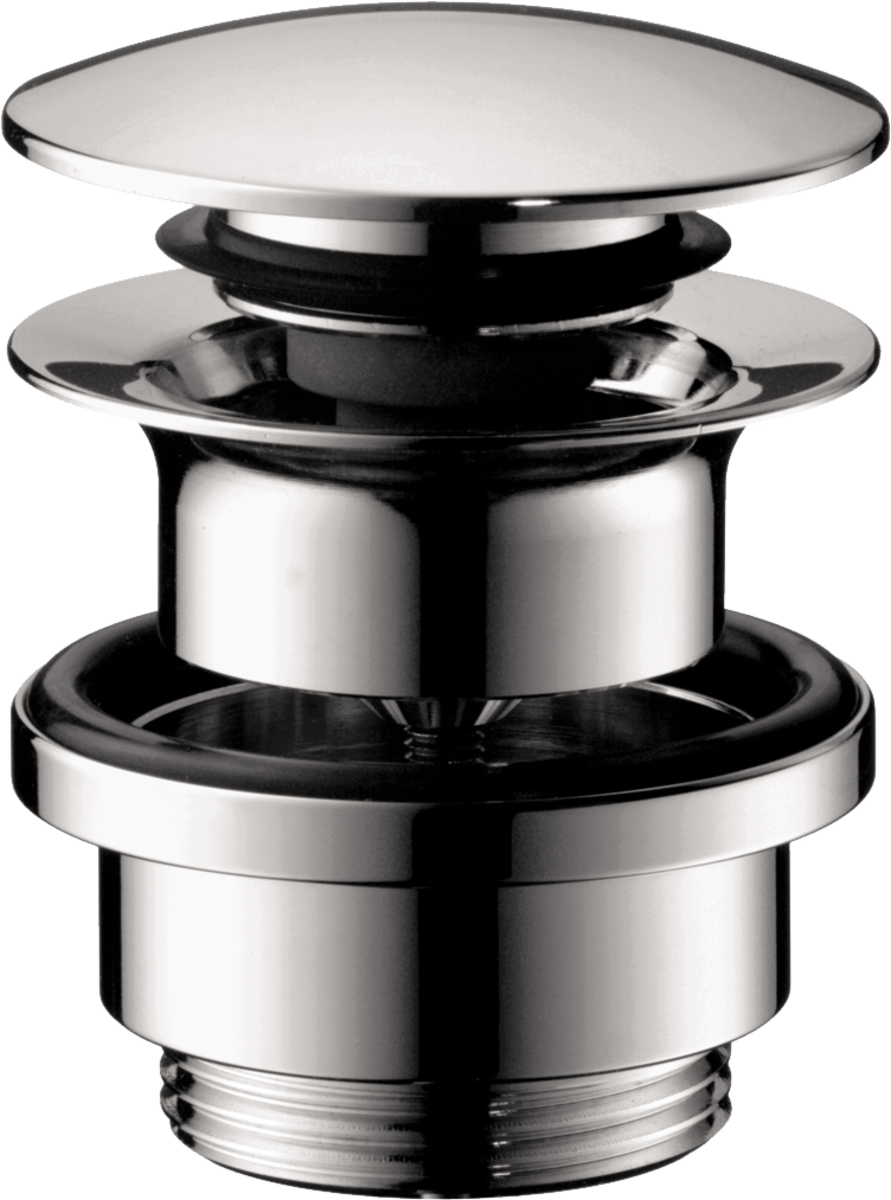
While disassembling a small bathroom sink drain is usually a straightforward process, there are a few common problems that you may encounter: - Stripped or rusted nuts and fittings can make it difficult to loosen or remove parts of the drain. In this case, you may need to use a penetrating oil or call a professional for assistance. - If the drain flange is corroded or damaged, it may need to be replaced. You can find replacement flanges at most hardware or home improvement stores.Common problems when disassembling a small bathroom sink drain


Common problems when disassembling a small bathroom sink drain

Once you have disassembled and cleaned your small bathroom sink drain, you can easily reassemble it by following these steps in reverse order: Step 1: Insert the drain pipe back into the bottom of the sink, making sure it is properly aligned and secure. Step 2: Place the flange onto the drain pipe and hand-tighten the nut to hold it in place. Step 3: Use the drain wrench to tighten the flange and secure it in place. Step 4: Screw the drain nut back onto the drain pipe and tighten it with the pliers. Step 5: Finally, place the drain stopper back into the drain and test to make sure it is functioning properly.How to reassemble a small bathroom sink drain


How to reassemble a small bathroom sink drain

If you are not comfortable or experienced in disassembling a small bathroom sink drain, or if you encounter any issues that you are not able to resolve on your own, it's always best to seek the help of a professional plumber. They have the tools and expertise to quickly and efficiently disassemble and repair your sink drain, ensuring it functions properly and stays clog-free. With the help of this guide, you should now be able to confidently disassemble a small bathroom sink drain and address any issues that may arise. Remember to always take safety precautions and seek professional assistance if needed, and your small bathroom sink drain will be functioning like new in no time.Professional services for disassembling a small bathroom sink drain

Professional services for disassembling a small bathroom sink drain
Why it's Important to Disassemble Your Small Bathroom Sink Drain

Maintaining a Well-Functioning Bathroom
 A small bathroom sink drain may seem like a minor aspect of your bathroom, but it plays a crucial role in keeping your bathroom functioning properly. Over time, hair, soap scum, and other debris can build up in your drain, causing clogs and slowing down the drainage process. If left unattended, this can lead to bigger problems such as leaks and water damage. That's why it's important to regularly disassemble and clean your small bathroom sink drain to keep your bathroom in top working condition.
Preventing Costly Repairs
:max_bytes(150000):strip_icc()/bathroom-sink-drain-installation-2718843-02-61e5ecbee1e949be8d8f45ac4f5a6797.jpg) By regularly disassembling your small bathroom sink drain, you can prevent small issues from turning into costly repairs. When debris builds up in your drain, it can put pressure on the pipes and cause them to crack or even burst. This can result in water damage to your bathroom and possibly even other areas of your home. By taking the time to disassemble and clean your drain, you can avoid these expensive repairs and save yourself a headache in the long run.
By regularly disassembling your small bathroom sink drain, you can prevent small issues from turning into costly repairs. When debris builds up in your drain, it can put pressure on the pipes and cause them to crack or even burst. This can result in water damage to your bathroom and possibly even other areas of your home. By taking the time to disassemble and clean your drain, you can avoid these expensive repairs and save yourself a headache in the long run.
Improving Water Flow and Efficiency
 A clogged drain can also affect the efficiency of your bathroom. When water can't flow freely through the drain, it can cause backups and slow drainage. This not only creates inconvenience but also wastes water. By regularly disassembling your small bathroom sink drain, you can improve water flow and prevent wastage. This will not only make your bathroom more efficient but also help you save money on your water bill.
Ensuring Hygiene and Cleanliness
 A clogged drain can also lead to unpleasant odors and bacteria growth in your bathroom. This can affect the hygiene and cleanliness of your space, making it an unpleasant place to be. By disassembling and cleaning your small bathroom sink drain, you can remove any buildup of bacteria and eliminate any unpleasant odors, ensuring a clean and hygienic bathroom for you and your family.
In Conclusion
 In conclusion, regularly disassembling your small bathroom sink drain is crucial for maintaining a well-functioning bathroom, preventing costly repairs, improving water flow and efficiency, and ensuring hygiene and cleanliness. By taking a few minutes to clean your drain, you can save yourself time and money in the long run, and keep your bathroom in top working condition. So, don't neglect this important task and make it a part of your regular bathroom maintenance routine.


:no_upscale()/cdn.vox-cdn.com/uploads/chorus_asset/file/4098248/local-kitchen-wine-bar-interior.0.jpg)
