How to Remove a Bathroom Sink Plunger Assembly
Is your bathroom sink clogged and in need of a plunger assembly removal? Don't panic! With the right tools and techniques, you can easily remove the plunger assembly and get your sink running smoothly again. Here's a step-by-step guide on how to remove a bathroom sink plunger assembly.


How to Remove a Bathroom Sink Plunger Assembly


/woman-wearing-yellow-washing-up-gloves-to-unblock-sink-using-plunger-close-up-131987463-5887cfc03df78c2ccd92ec9e.jpg)
Removing a Bathroom Sink Plunger Assembly
Before you begin, gather all the necessary tools and materials. You will need a plunger, a wrench, and a bucket to catch any excess water that may spill out. Make sure to also have some old towels or rags on hand to clean up any mess.


Removing a Bathroom Sink Plunger Assembly


Step-by-Step Guide for Removing a Bathroom Sink Plunger Assembly
Step 1: Start by removing the plunger handle. Most handles are held in place by a small screw or clip. Use a wrench to loosen the screw or gently remove the clip to release the handle.
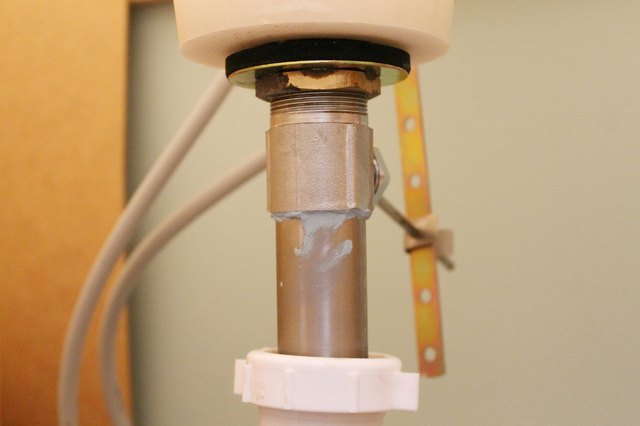
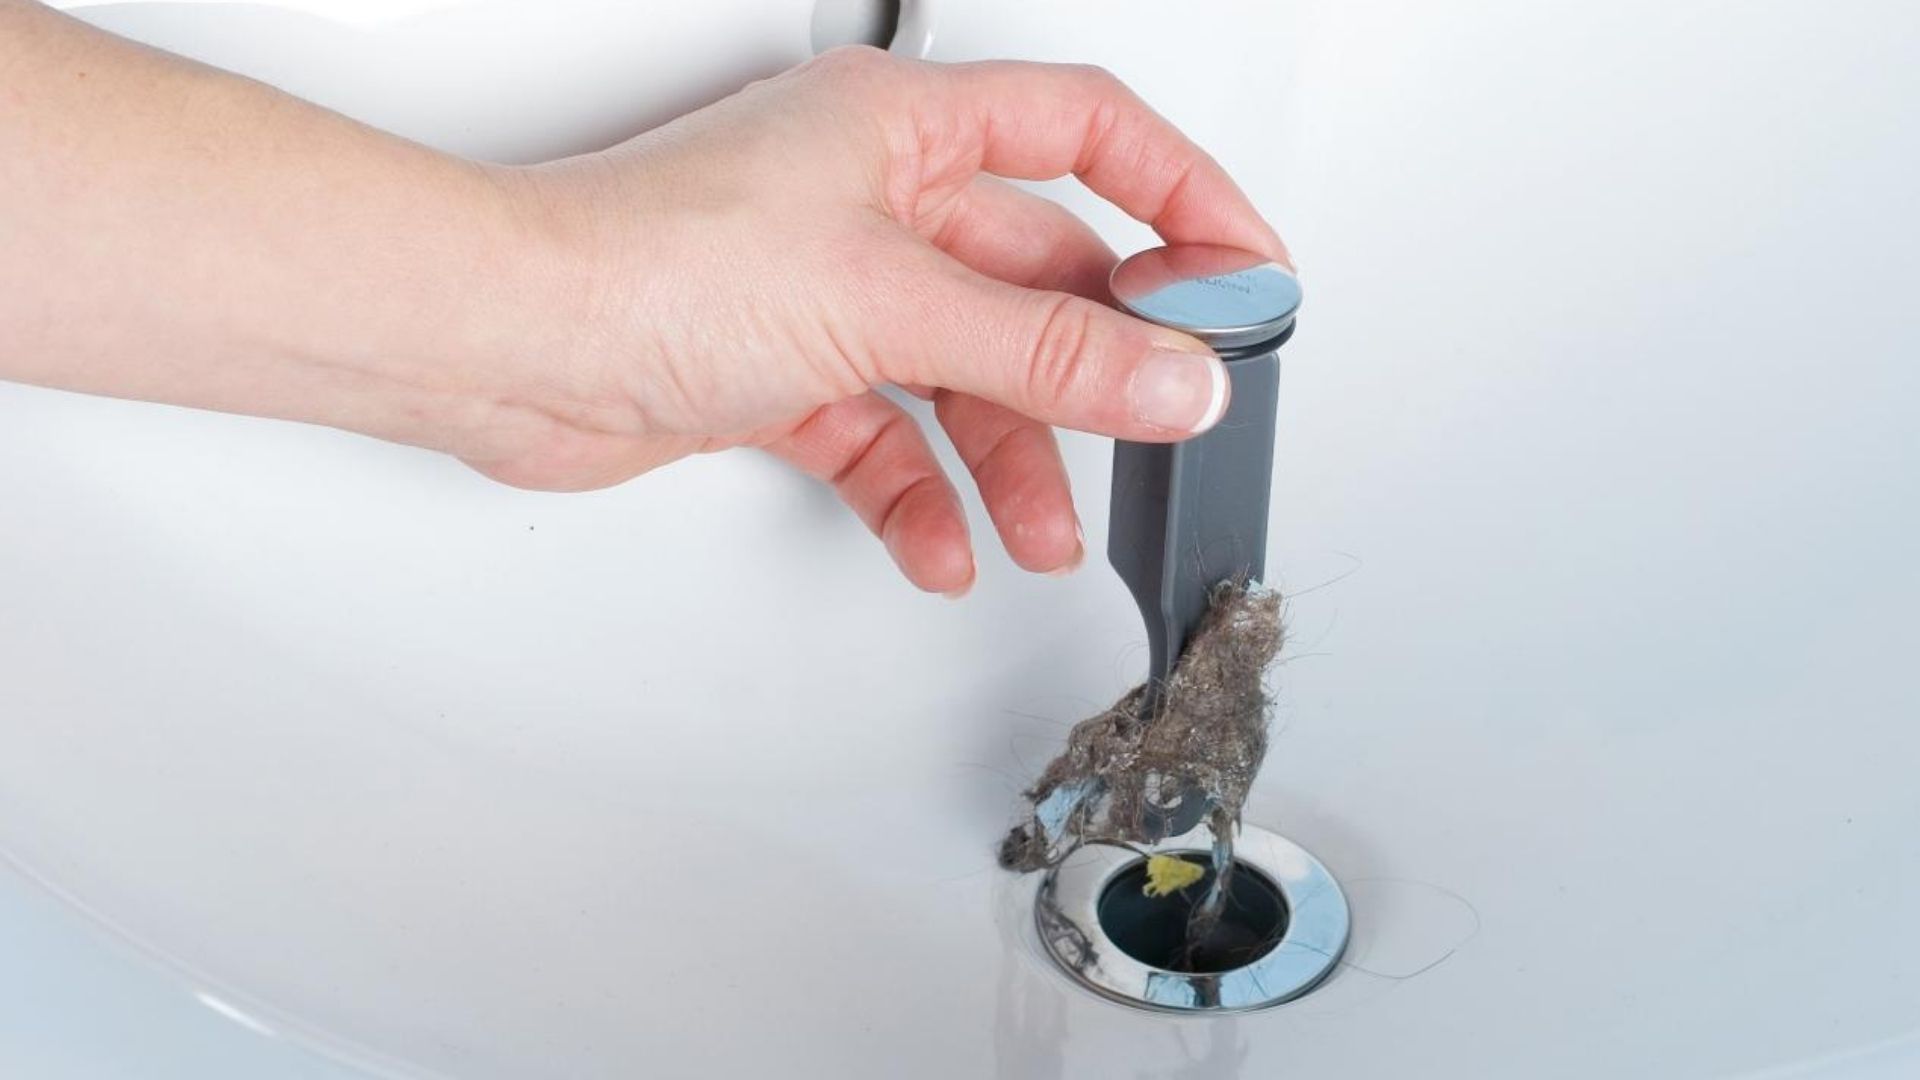
Step 2: Next, locate the plunger assembly itself. It is usually located in the center of the sink, underneath the drain stopper. You may need to remove the drain stopper to access the plunger assembly.
Step 3: Use your wrench to loosen the nut that holds the plunger assembly in place. Turn it counterclockwise to loosen and remove the nut.
Step 4: Once the nut is removed, pull the plunger assembly out of the sink. You may need to wiggle it a bit to loosen it from the drain.
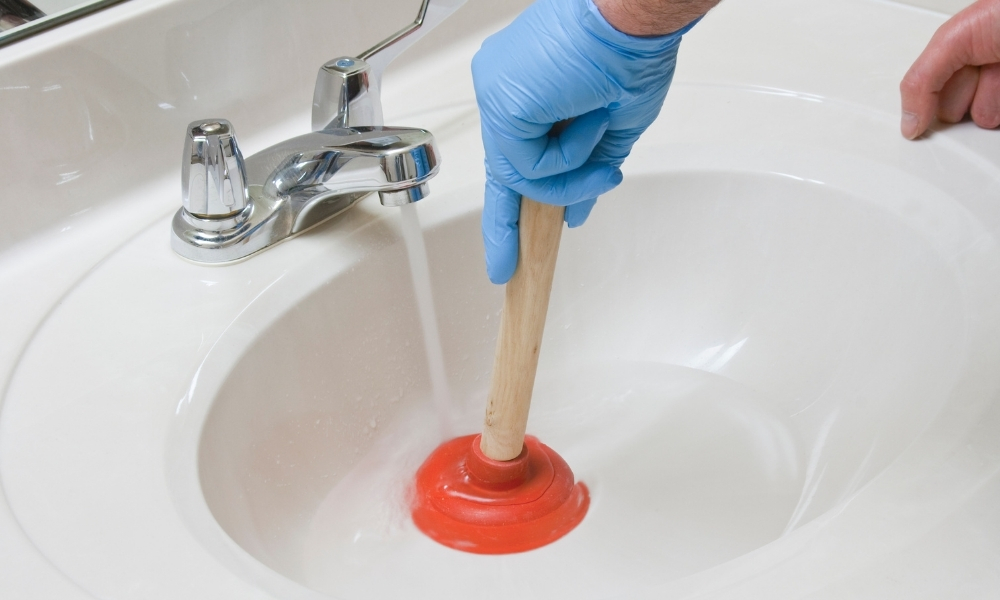
Step 5: Inspect the plunger assembly for any damage or clogs. If there is a clog, you can try using your plunger to dislodge it. If the plunger is damaged, you will need to replace it with a new one.
Step 6: If everything looks good, you can now reassemble the plunger assembly. Insert it back into the sink and secure it with the nut. Make sure it is tight enough to prevent any leaks.
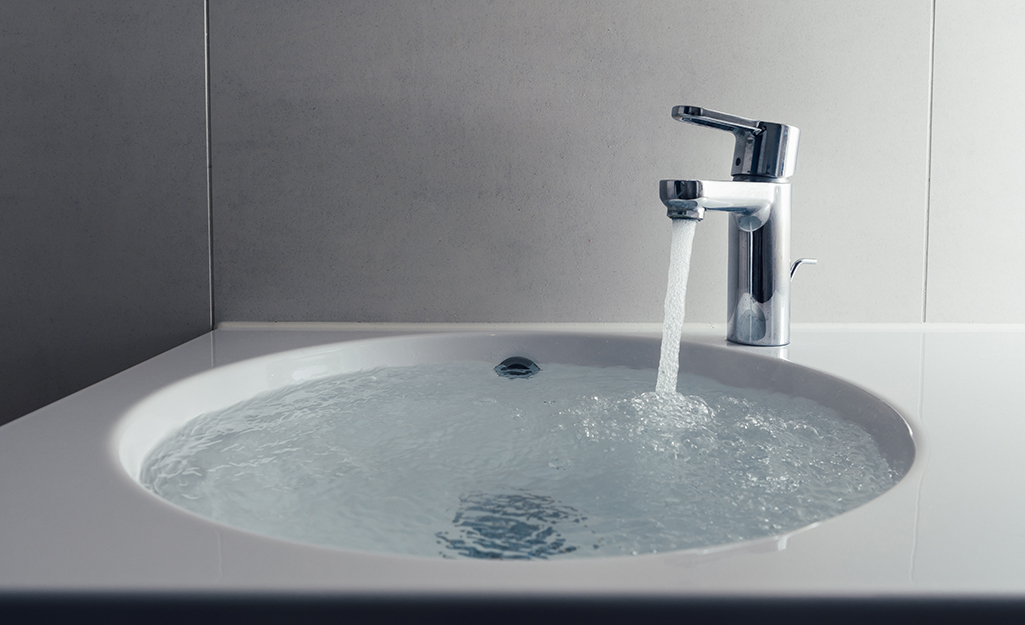
Step 7: Reattach the plunger handle and test it by running water down the sink. If the water drains properly, then your plunger assembly is successfully removed and reinstalled.


Step-by-Step Guide for Removing a Bathroom Sink Plunger Assembly


DIY Bathroom Sink Plunger Assembly Removal
Removing a bathroom sink plunger assembly is a simple task that you can easily do yourself. It only requires a few basic tools and can save you time and money from calling a plumber. So, don't be afraid to tackle this DIY project.


DIY Bathroom Sink Plunger Assembly Removal


Easy Bathroom Sink Plunger Assembly Removal
With the right tools and techniques, removing a bathroom sink plunger assembly can be an easy and quick process. Just follow the steps outlined above, and you'll have your sink running smoothly again in no time.


Easy Bathroom Sink Plunger Assembly Removal

Quick and Simple Bathroom Sink Plunger Assembly Removal
Don't let a clogged sink ruin your day. With a quick and simple plunger assembly removal, you can get your sink back to working order in a matter of minutes. So, don't hesitate to take on this task and save yourself some time and hassle.


Quick and Simple Bathroom Sink Plunger Assembly Removal

Tips for Removing a Bathroom Sink Plunger Assembly
Here are a few tips to keep in mind when removing a bathroom sink plunger assembly:


Tips for Removing a Bathroom Sink Plunger Assembly


Tricks for Removing a Stubborn Bathroom Sink Plunger Assembly
If your plunger assembly is stuck and won't budge, here are a few tricks you can try:


Tricks for Removing a Stubborn Bathroom Sink Plunger Assembly


Common Mistakes to Avoid When Removing a Bathroom Sink Plunger Assembly
When removing a bathroom sink plunger assembly, there are a few common mistakes you should avoid:


Common Mistakes to Avoid When Removing a Bathroom Sink Plunger Assembly


Troubleshooting Bathroom Sink Plunger Assembly Removal
If you encounter any issues during the plunger assembly removal process, don't hesitate to troubleshoot or seek help from a professional plumber. It's always better to be safe than sorry.
Now that you know how to remove a bathroom sink plunger assembly, you can easily tackle this task whenever your sink gets clogged. Remember to always be gentle and use the right tools to avoid any damage. Happy plunging!


Troubleshooting Bathroom Sink Plunger Assembly Removal
Bathroom Sink Plunger Assembly: A Necessary Tool for Every Home

Why Do You Need a Plunger?
 A clogged sink is a common household problem that can lead to frustration and inconvenience. Whether it's caused by hair, food particles, or soap scum, a clogged sink can disrupt your daily routine and even cause damage to your pipes. That's where a
bathroom sink plunger assembly
comes in handy.
A clogged sink is a common household problem that can lead to frustration and inconvenience. Whether it's caused by hair, food particles, or soap scum, a clogged sink can disrupt your daily routine and even cause damage to your pipes. That's where a
bathroom sink plunger assembly
comes in handy.
The Importance of Removing the Plunger Assembly
 When it comes to unclogging a sink, many people reach for chemical drain cleaners. However, these products can be harmful to both your health and the environment. Not to mention, they can be ineffective in removing tough clogs. That's why a
plunger assembly
is a much safer and more efficient alternative.
When it comes to unclogging a sink, many people reach for chemical drain cleaners. However, these products can be harmful to both your health and the environment. Not to mention, they can be ineffective in removing tough clogs. That's why a
plunger assembly
is a much safer and more efficient alternative.
Step-by-Step Guide to Removing the Plunger Assembly
 Removing the
plunger assembly
from your bathroom sink is a relatively simple process. Here's a step-by-step guide to help you out.
Removing the
plunger assembly
from your bathroom sink is a relatively simple process. Here's a step-by-step guide to help you out.
Step 1: Gather Your Tools
Before you begin, make sure you have the necessary tools on hand. These include a pair of pliers, a screwdriver, and a cloth or paper towels.Step 2: Locate the Plunger Assembly
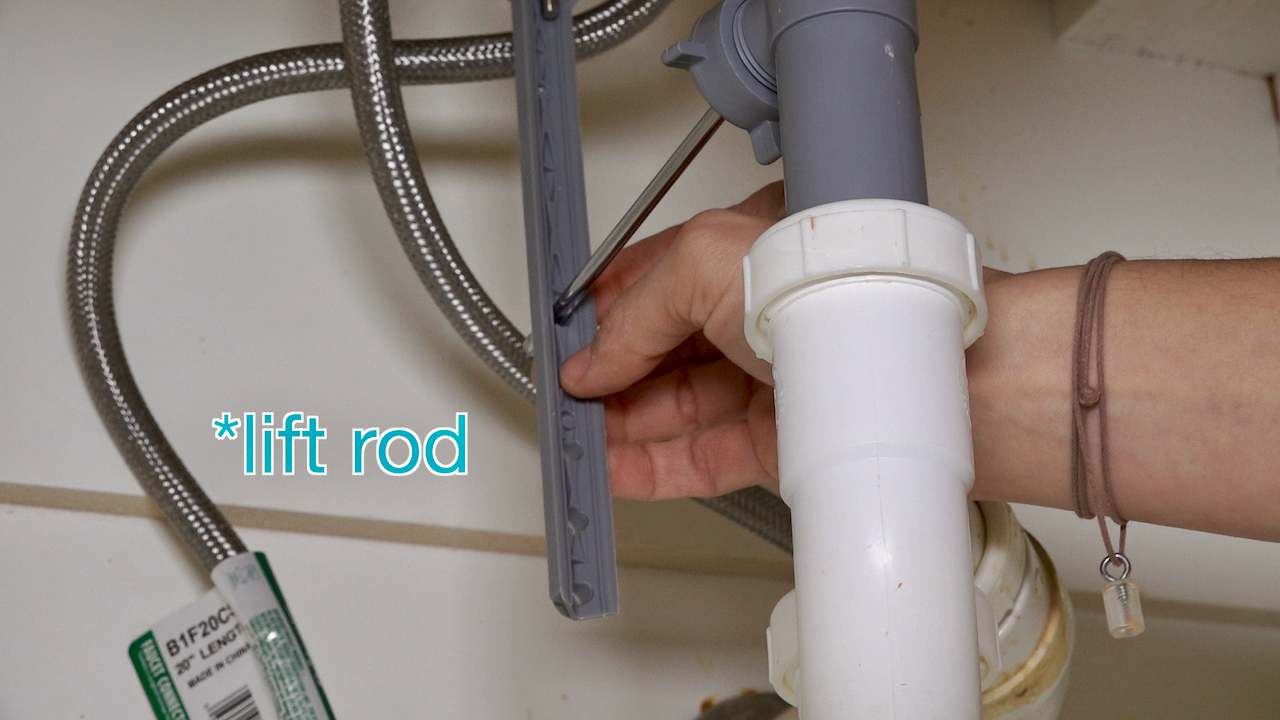
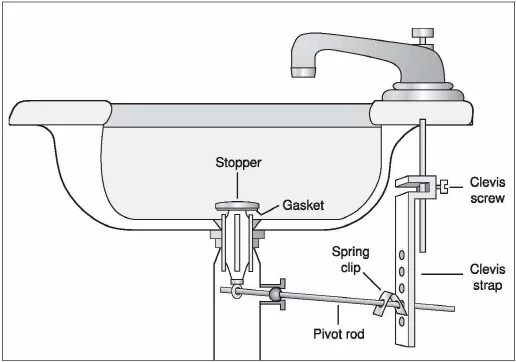
The plunger assembly is typically located underneath the sink, behind the drain stopper. You may need to remove the drain stopper first to access it.Step 3: Unscrew the Nut
Using your pliers, loosen and unscrew the nut that connects the plunger assembly to the sink drain.Step 4: Remove the Plunger Assembly
Once the nut is removed, you can easily pull out the plunger assembly from the drain.Step 5: Clean and Reassemble
Take this opportunity to clean the plunger assembly and the surrounding area. Once everything is clean, reassemble the plunger assembly and replace the drain stopper.Preventing Future Clogs
 Now that you know how to remove the
plunger assembly
from your bathroom sink, you can also take steps to prevent clogs from occurring in the first place. This includes regularly cleaning your sink drain and being mindful of what you put down it.
Now that you know how to remove the
plunger assembly
from your bathroom sink, you can also take steps to prevent clogs from occurring in the first place. This includes regularly cleaning your sink drain and being mindful of what you put down it.
Conclusion
 A
bathroom sink plunger assembly
is an essential tool for every home. It provides a safe and effective way to unclog your sink without the use of harmful chemicals. By following the simple steps outlined in this article, you can easily remove the
plunger assembly
and keep your sink running smoothly.
A
bathroom sink plunger assembly
is an essential tool for every home. It provides a safe and effective way to unclog your sink without the use of harmful chemicals. By following the simple steps outlined in this article, you can easily remove the
plunger assembly
and keep your sink running smoothly.