If you're looking to give your bathroom a fresh new look, one of the easiest and most effective ways to do so is by installing a new sink. However, installing a sink also means installing a sink drain kit, which can seem like a daunting task for those who have never done it before. But fear not, because with the right tools and a little bit of know-how, you can easily install a bathroom sink drain kit on your own.How to Install a Bathroom Sink Drain Kit


How to Install a Bathroom Sink Drain Kit

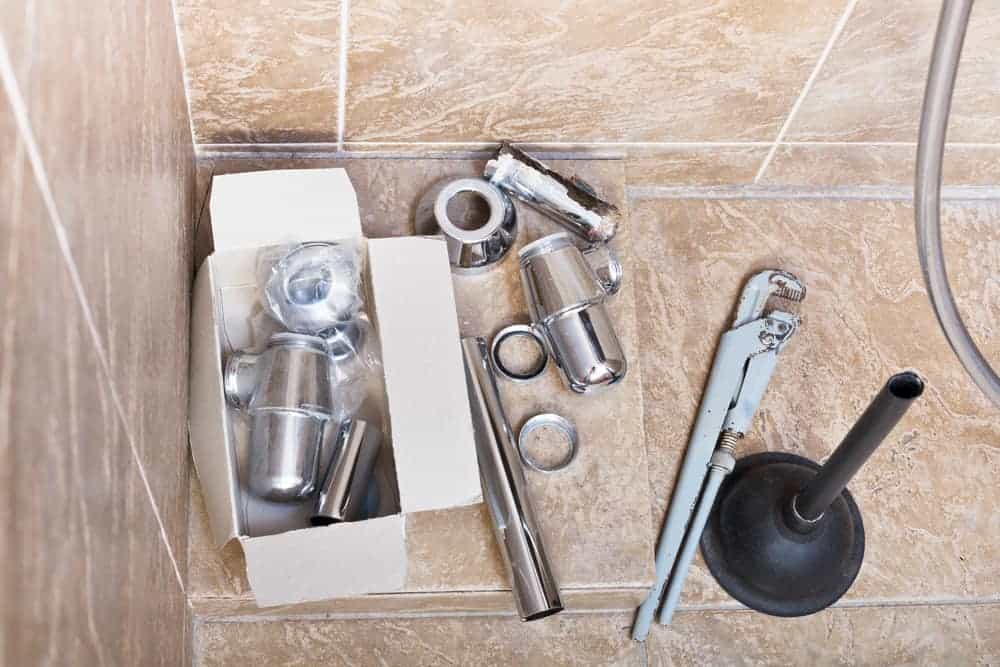
/bathroom-sink-drain-installation-2718843-03-6fee5b9d9f7d475abfe06a95ddb1f695.jpg)


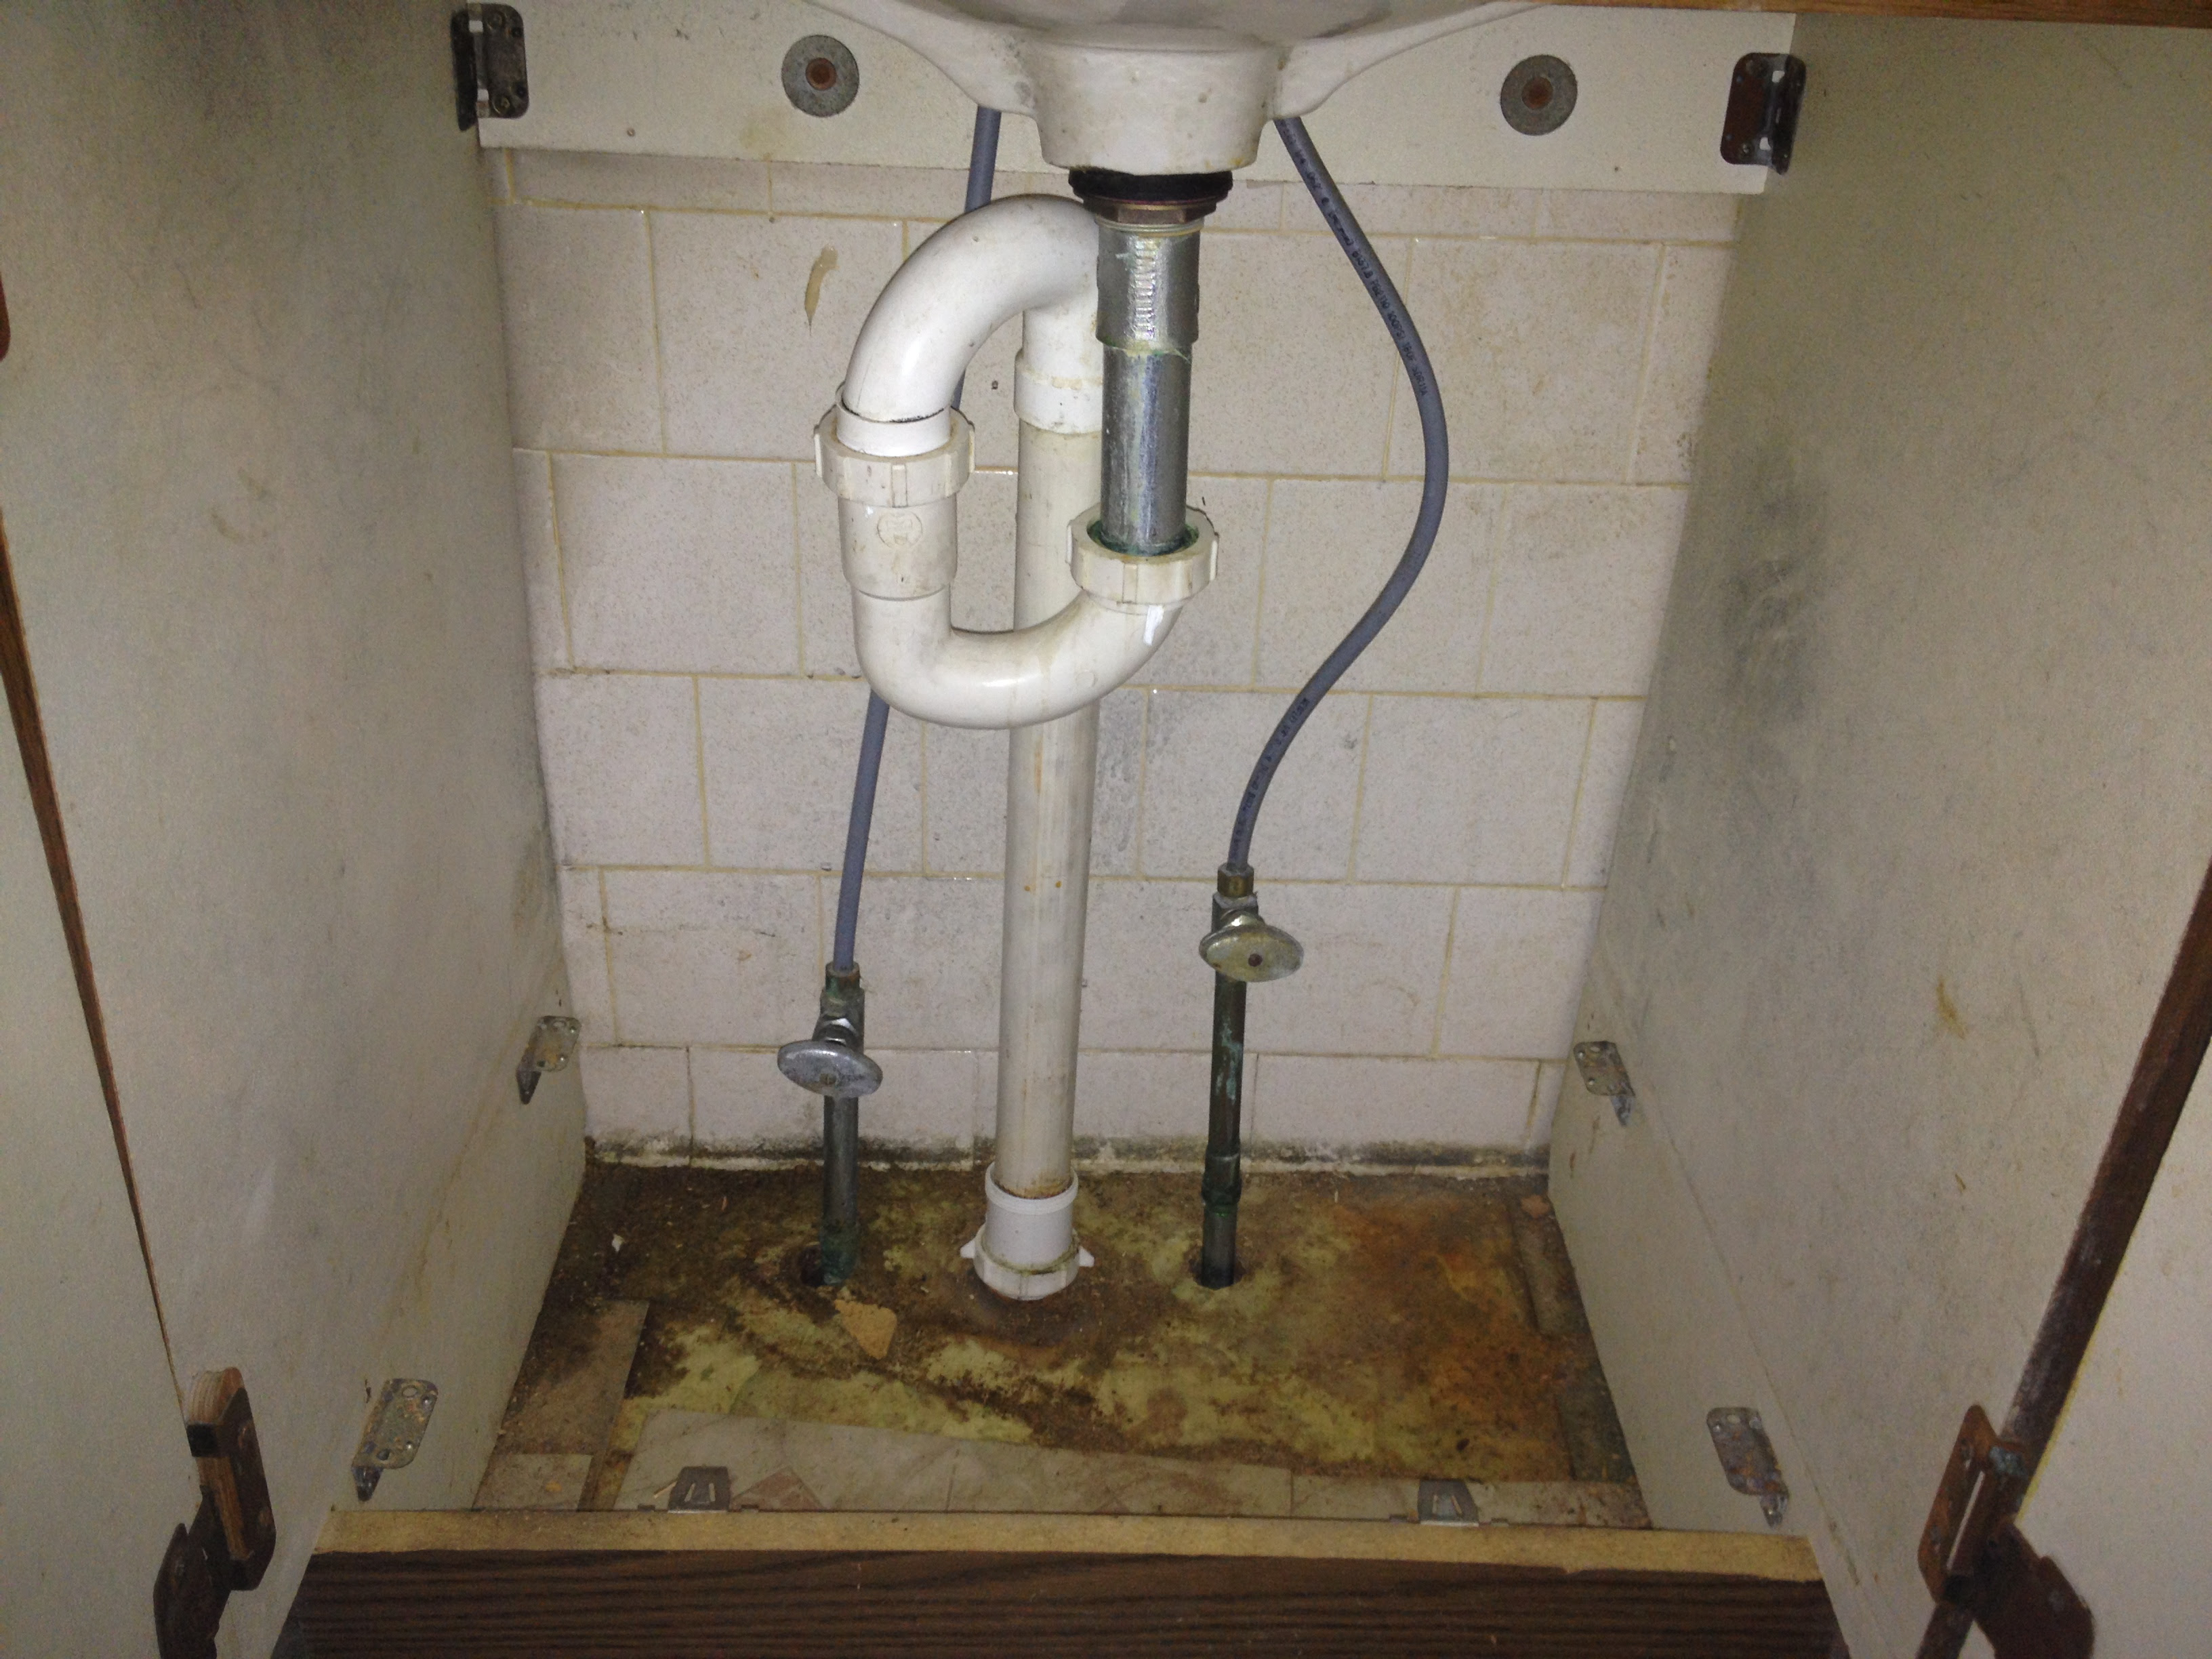
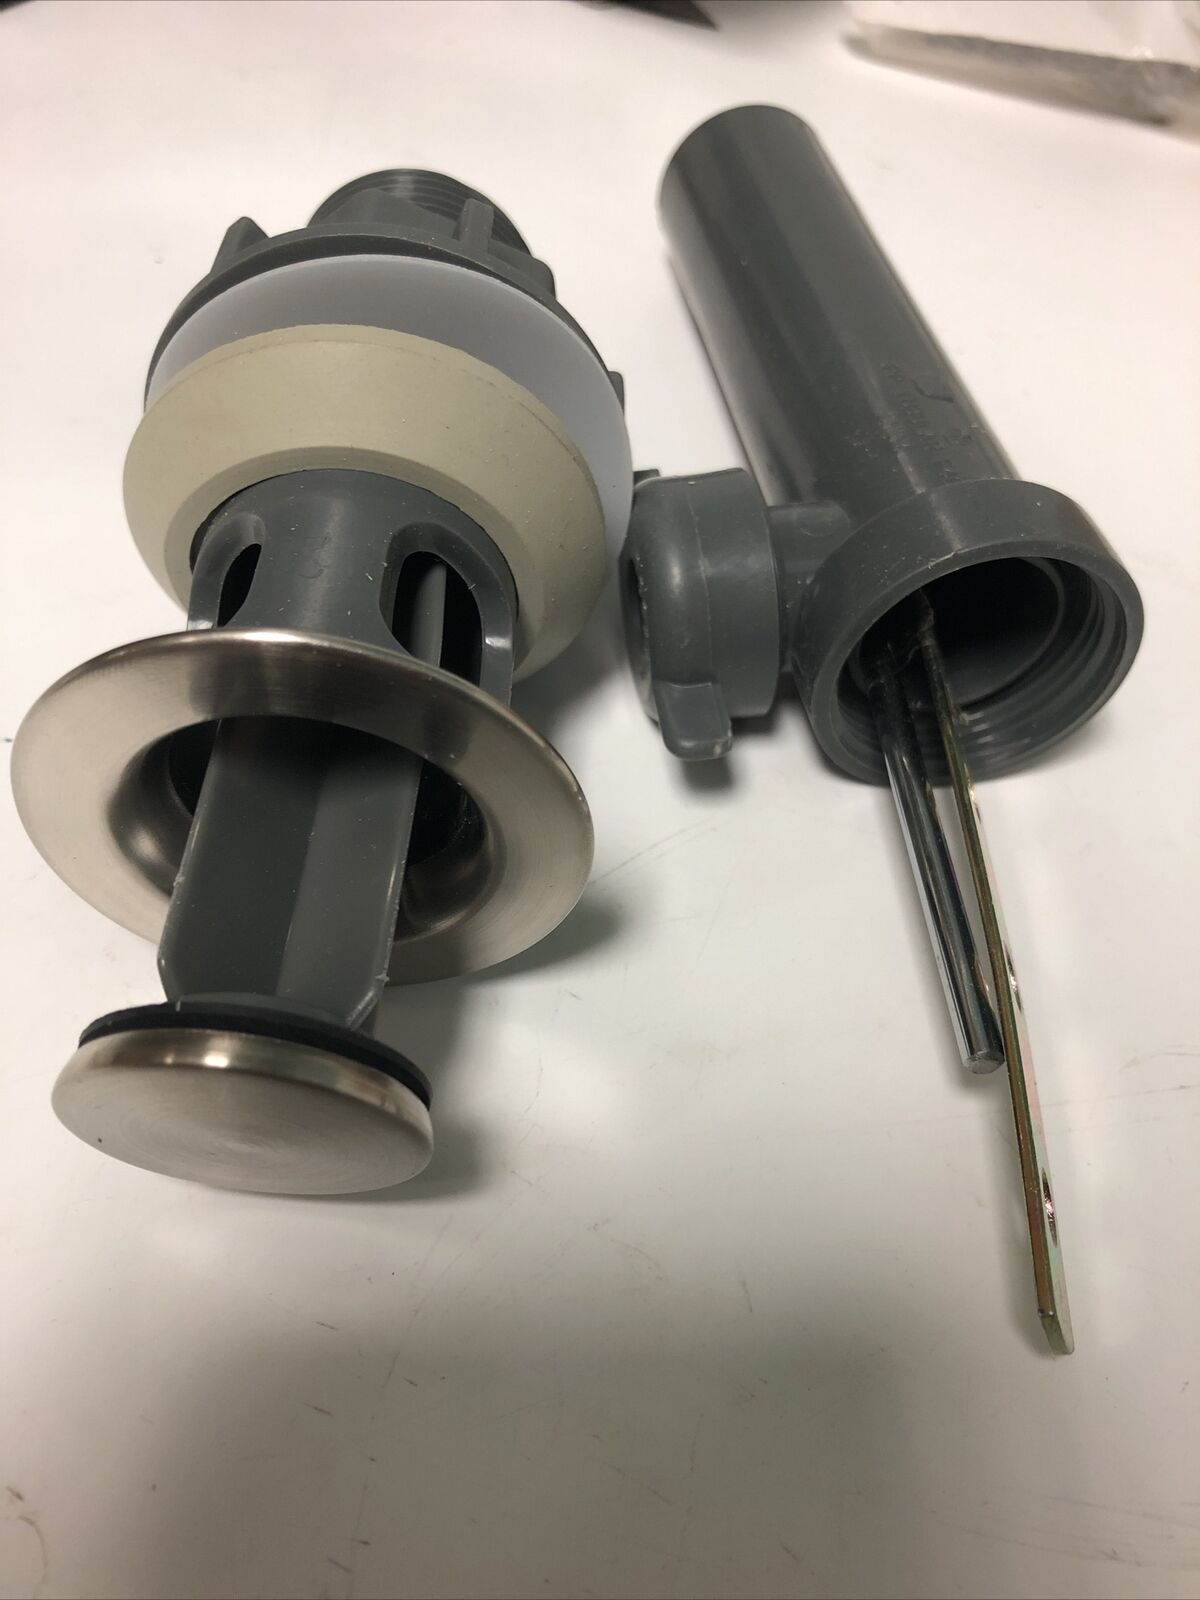
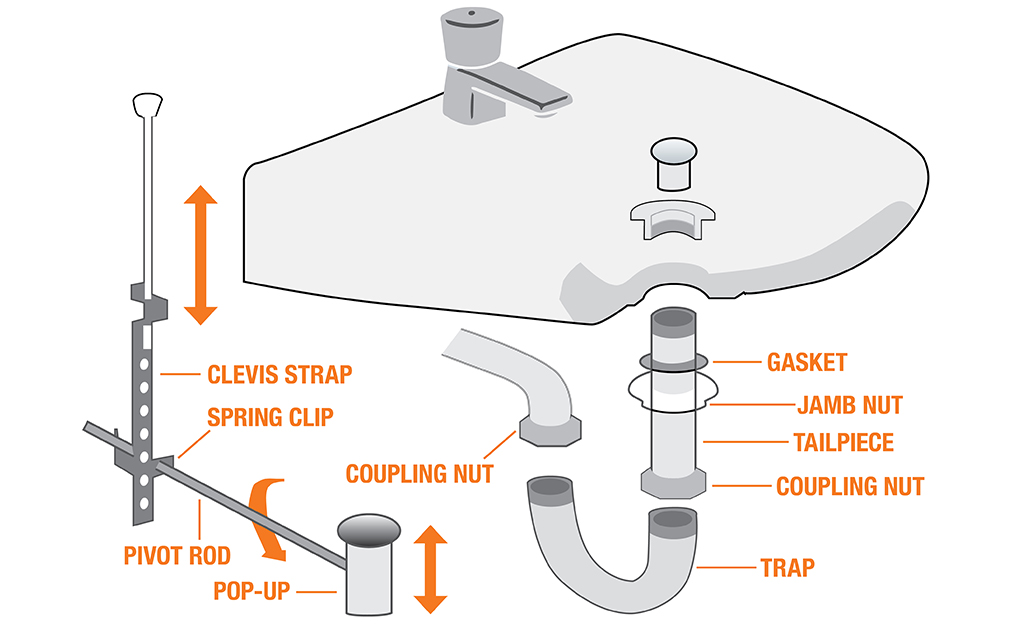
Before diving into the installation process, it's important to understand the different parts of a bathroom sink drain kit. The main components include the drain body, tailpiece, pop-up drain, and the connecting hardware. The drain body is the piece that connects to the sink itself, while the tailpiece connects the drain to the main plumbing. The pop-up drain is the piece that allows you to open and close the drain, and the connecting hardware is used to secure all the pieces together.How to Install a Bathroom Sink Drain


How to Install a Bathroom Sink Drain


Now, let's get into the step-by-step guide for installing a bathroom sink drain kit.Bathroom Sink Drain Kit Installation Guide


Bathroom Sink Drain Kit Installation Guide


Step 1: Start by removing the old drain if you have one. This can usually be done by unscrewing the connecting hardware and pulling the drain out. Step 2: Next, you'll want to clean the area where the new drain will be installed. Use a rag or paper towel to wipe away any debris or residue. Step 3: Apply a thin layer of plumber's putty around the underside of the drain flange. This will help create a watertight seal between the sink and the drain. Step 4: Place the drain flange into the sink hole, making sure it's centered and level. Step 5: From underneath the sink, screw on the drain body and tighten it with pliers. Step 6: Attach the tailpiece to the drain body and secure it with the connecting hardware. Step 7: Install the pop-up drain by placing it through the top of the drain body and screwing it on from below. Step 8: Connect the pop-up drain to the tailpiece with the connecting hardware. Step 9: Test the drain by running water through it and checking for any leaks. If there are any, tighten the connections as needed. Step 10: Once everything is secure and there are no leaks, you're all done!Step-by-Step Guide for Installing a Bathroom Sink Drain Kit


Step-by-Step Guide for Installing a Bathroom Sink Drain Kit


Installing a bathroom sink drain kit is a great DIY project for those looking to save some money and add a personal touch to their bathroom. Plus, with the right tools and this step-by-step guide, it's a relatively simple task that can be completed in just a few hours.DIY Bathroom Sink Drain Kit Installation


DIY Bathroom Sink Drain Kit Installation


Here are a few tips to keep in mind when installing a bathroom sink drain kit: - Make sure you have all the necessary tools and materials before starting the installation process. - Take your time and double check all connections to ensure a proper fit. - Use plumber's putty or silicone sealant to create a watertight seal between the sink and drain. - If you're unsure about any steps, consult a professional for guidance.Bathroom Sink Drain Kit Installation Tips

Bathroom Sink Drain Kit Installation Tips


With the right tools and a little bit of know-how, installing a bathroom sink drain kit can be a quick and easy process. Follow the steps outlined in this guide and you'll have a new sink and drain installed in no time.Quick and Easy Bathroom Sink Drain Kit Installation


Quick and Easy Bathroom Sink Drain Kit Installation


It's important to understand the basics of installing a bathroom sink drain kit before attempting the task. This includes knowing the different components and their purposes, as well as the proper installation techniques.Installing a Bathroom Sink Drain Kit: What You Need to Know

Installing a Bathroom Sink Drain Kit: What You Need to Know


While installing a bathroom sink drain kit may seem straightforward, there are a few common mistakes that can lead to problems down the road. These include not creating a proper seal between the sink and drain, not tightening connections enough, or not properly aligning the drain components.Bathroom Sink Drain Kit Installation: Common Mistakes to Avoid


Bathroom Sink Drain Kit Installation: Common Mistakes to Avoid


If you're still feeling unsure about installing a bathroom sink drain kit on your own, don't hesitate to consult an expert for tips and guidance. They can provide you with valuable advice and ensure that the installation is done correctly. With these tips and a little bit of effort, you can easily install a bathroom sink drain kit and give your bathroom a fresh new look. Remember to take your time and follow the steps carefully to ensure a successful installation. Happy sink installing!Expert Tips for Installing a Bathroom Sink Drain Kit


Expert Tips for Installing a Bathroom Sink Drain Kit

Why a Proper Bathroom Sink Drain Kit Installation is Essential for a Well-Functioning Bathroom

The Importance of a Functional Bathroom Sink
 A bathroom sink is a crucial element in any house design. It is not only a functional necessity, but it also adds to the aesthetic appeal of a bathroom. Whether you are renovating your existing bathroom or building a new one, choosing the right sink and installing it correctly is crucial. One of the most critical aspects of sink installation is the drain kit.
A properly installed bathroom sink drain kit is essential for a well-functioning bathroom.
A bathroom sink is a crucial element in any house design. It is not only a functional necessity, but it also adds to the aesthetic appeal of a bathroom. Whether you are renovating your existing bathroom or building a new one, choosing the right sink and installing it correctly is crucial. One of the most critical aspects of sink installation is the drain kit.
A properly installed bathroom sink drain kit is essential for a well-functioning bathroom.
The Role of a Bathroom Sink Drain Kit
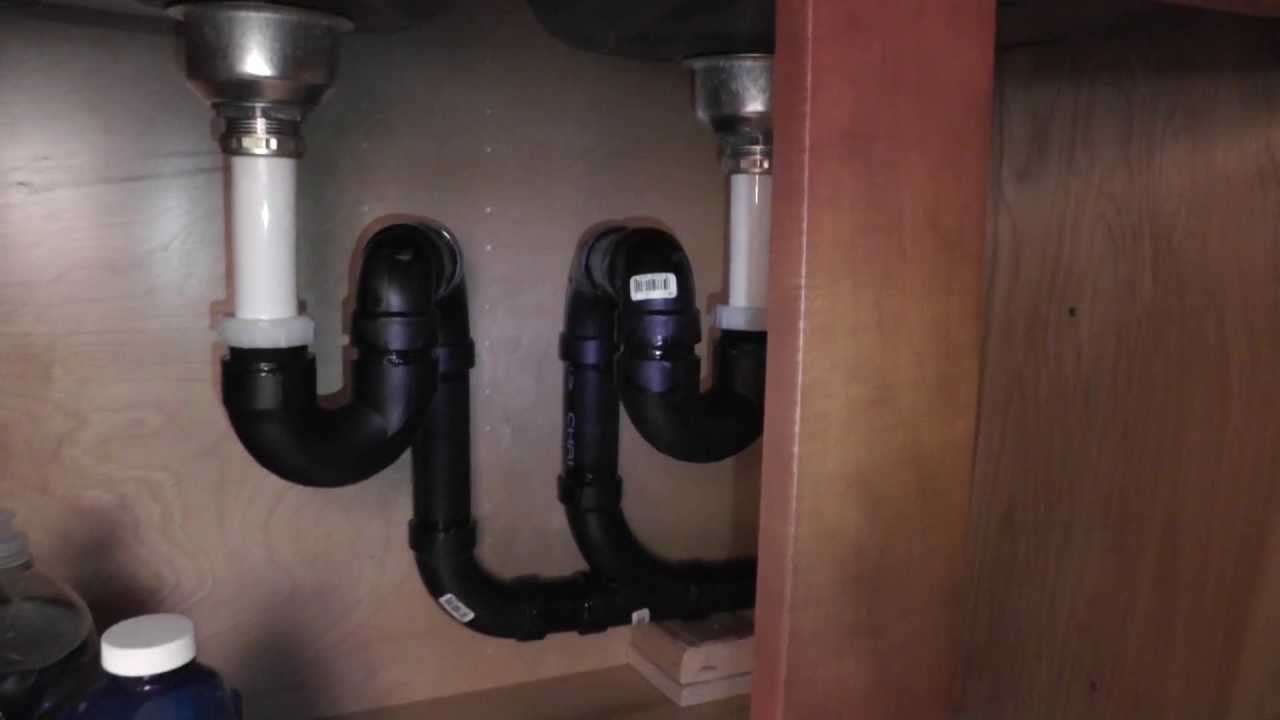
 The bathroom sink drain kit is responsible for draining out all the water from the sink, keeping it clean and hygienic. It is made up of various components, including the drain pipe, tailpiece, trap, and drain assembly. Each of these components plays a vital role in ensuring that the water flows out of the sink smoothly and efficiently.
A well-designed and correctly installed drain kit not only prevents clogs and leaks but also helps maintain the overall hygiene of your bathroom.
The bathroom sink drain kit is responsible for draining out all the water from the sink, keeping it clean and hygienic. It is made up of various components, including the drain pipe, tailpiece, trap, and drain assembly. Each of these components plays a vital role in ensuring that the water flows out of the sink smoothly and efficiently.
A well-designed and correctly installed drain kit not only prevents clogs and leaks but also helps maintain the overall hygiene of your bathroom.
The Benefits of a Professional Installation
 While it may seem like a simple task, installing a bathroom sink drain kit can be a complicated process. It requires careful planning, precise measurements, and proper tools. Hiring a professional plumber for the installation can ensure that the job is done correctly and efficiently. They have the necessary skills and experience to choose the right drain kit for your sink and install it correctly.
Moreover, a professional installation can save you time, money, and the hassle of dealing with potential plumbing issues in the future.
While it may seem like a simple task, installing a bathroom sink drain kit can be a complicated process. It requires careful planning, precise measurements, and proper tools. Hiring a professional plumber for the installation can ensure that the job is done correctly and efficiently. They have the necessary skills and experience to choose the right drain kit for your sink and install it correctly.
Moreover, a professional installation can save you time, money, and the hassle of dealing with potential plumbing issues in the future.
Conclusion
 In conclusion, a
bathroom sink drain kit is an essential component of a well-functioning bathroom
. It not only ensures the proper functioning of your sink but also contributes to the overall cleanliness and hygiene of your bathroom. Whether you are building a new bathroom or renovating an existing one, be sure to invest in a high-quality drain kit and hire a professional for its installation. This will not only enhance the functionality and aesthetics of your bathroom but also save you from potential plumbing problems in the future.
In conclusion, a
bathroom sink drain kit is an essential component of a well-functioning bathroom
. It not only ensures the proper functioning of your sink but also contributes to the overall cleanliness and hygiene of your bathroom. Whether you are building a new bathroom or renovating an existing one, be sure to invest in a high-quality drain kit and hire a professional for its installation. This will not only enhance the functionality and aesthetics of your bathroom but also save you from potential plumbing problems in the future.